Articles
How To Fix A Hole In Wood Floor
Modified: December 7, 2023
Learn how to fix a hole in a wood floor with our informative articles. Get step-by-step instructions and helpful tips for a seamless repair.
(Many of the links in this article redirect to a specific reviewed product. Your purchase of these products through affiliate links helps to generate commission for Storables.com, at no extra cost. Learn more)
Introduction
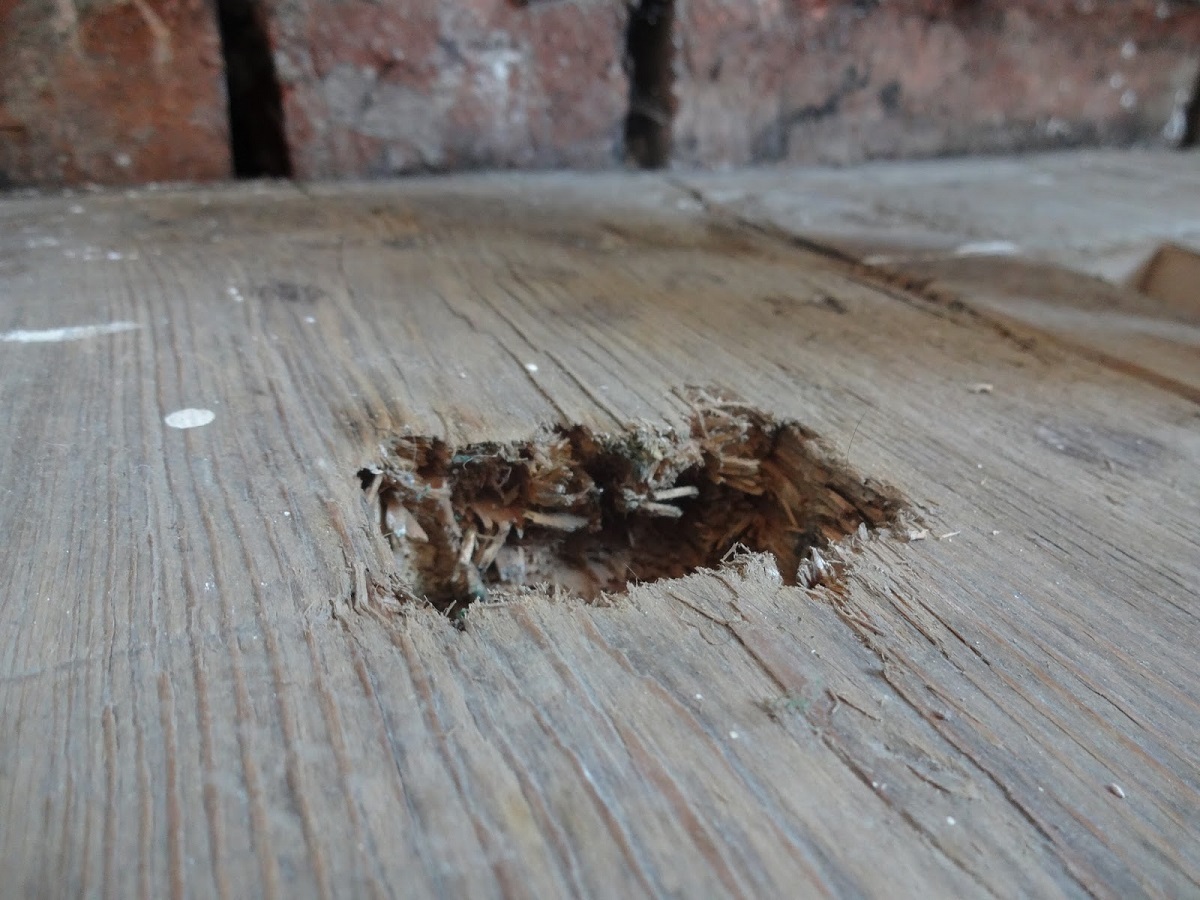
Having a hole in your wood floor can be a major eyesore. Whether it’s due to an accident, wear and tear, or a pesky pet, it’s important to address the issue and fix it as soon as possible. Not only does a hole in the wood floor detract from the overall appearance of a room, but it can also pose a safety hazard if left untreated.
Luckily, repairing a hole in a wood floor is a task that can be successfully completed with a few basic tools and materials. In this article, we will guide you through the step-by-step process of fixing a hole in a wood floor, ensuring that the repair is seamless and blends in seamlessly with the rest of your flooring.
Before we delve into the repair process, it’s essential to gather all the necessary materials to ensure a smooth and efficient repair. Here are the materials you will need:
- Wood filler or epoxy filler
- Putty knife
- Sandpaper (varying grits)
- Clean cloth
- Stain or paint (matching the color of your floor)
- Paintbrush or staining brush
With these materials at hand, let’s dive into the step-by-step process of fixing a hole in a wood floor.
Key Takeaways:
- Easily repair a hole in your wood floor by following simple steps, from preparing the area to staining or painting the patched area. Achieve professional-looking results and restore the beauty of your floor.
- Maintain your repaired wood floor for longevity by establishing a maintenance routine and taking preventive measures. Enjoy a beautifully repaired wood floor that looks and performs its best for years to come.
Read more: How To Fix A Chip In Wood Floor
Materials Needed
Before starting the process of fixing a hole in a wood floor, it’s important to gather all the necessary materials. Here are the materials you will need for this repair:
- Wood filler or epoxy filler: This will be used to fill the hole in the wood floor. Choose a wood filler or epoxy filler that matches the color of your existing floor.
- Putty knife: A putty knife will be used to apply the wood filler or epoxy filler to the hole.
- Sandpaper (varying grits): You will need sandpaper of different grits to smooth and level the filled area.
- Clean cloth: A clean cloth will be used to wipe away any dust or debris during the sanding process.
- Stain or paint: If necessary, you may need a stain or paint that matches the color of your wood floor to apply to the patched area.
- Paintbrush or staining brush: This will be used to apply the stain or paint, if needed.
Having these materials readily available will help ensure a smooth and successful repair process. Before beginning the repair, double-check that you have all the necessary materials on hand.
Step 1: Prepare the Area
Before you start repairing the hole in your wood floor, it’s important to prepare the area to ensure a clean and successful repair. Here are the steps to follow:
- Clean the area: Begin by thoroughly cleaning the area around the hole. Sweep away any dust, dirt, or debris. You can also use a damp cloth to wipe the area clean.
- Secure loose floorboards: Check if there are any loose floorboards around the hole. If you find any, use a hammer and nails to secure them back in place. This will prevent the repaired area from shifting or causing additional damage.
- Clear the surrounding space: Remove any furniture, rugs, or objects that may obstruct your work area. This will give you ample space to maneuver and work comfortably.
By properly preparing the area, you create a clean and safe workspace for the repair process. It also ensures that the repair will blend in seamlessly with the rest of the floor, giving you a professional-looking result.
Step 2: Remove any Splinters or Loose Material
Once you have prepared the area, the next step is to remove any splinters or loose material around the hole in your wood floor. This will ensure a smooth and even surface for the repair. Follow these steps:
- Inspect the hole: Carefully examine the hole in the wood floor. Check for any loose splinters or protruding edges.
- Use a chisel or utility knife: Gently use a chisel or a utility knife to remove any loose splinters or raised edges around the hole. Be cautious not to damage the surrounding floorboards.
- Sand the area: After removing the loose material, use sandpaper to gently sand the edges of the hole. This will help create a smooth surface for the filler to adhere to.
- Clean the area: Once you have removed the splinters and sanded the edges, use a clean cloth to wipe away any dust or debris from the area. This will ensure that the filler adheres properly and provides a seamless repair.
Removing splinters and loose material is crucial to achieving a professional and long-lasting repair. By following these steps, you will create a clean and stable foundation for the next stage of the repair process.
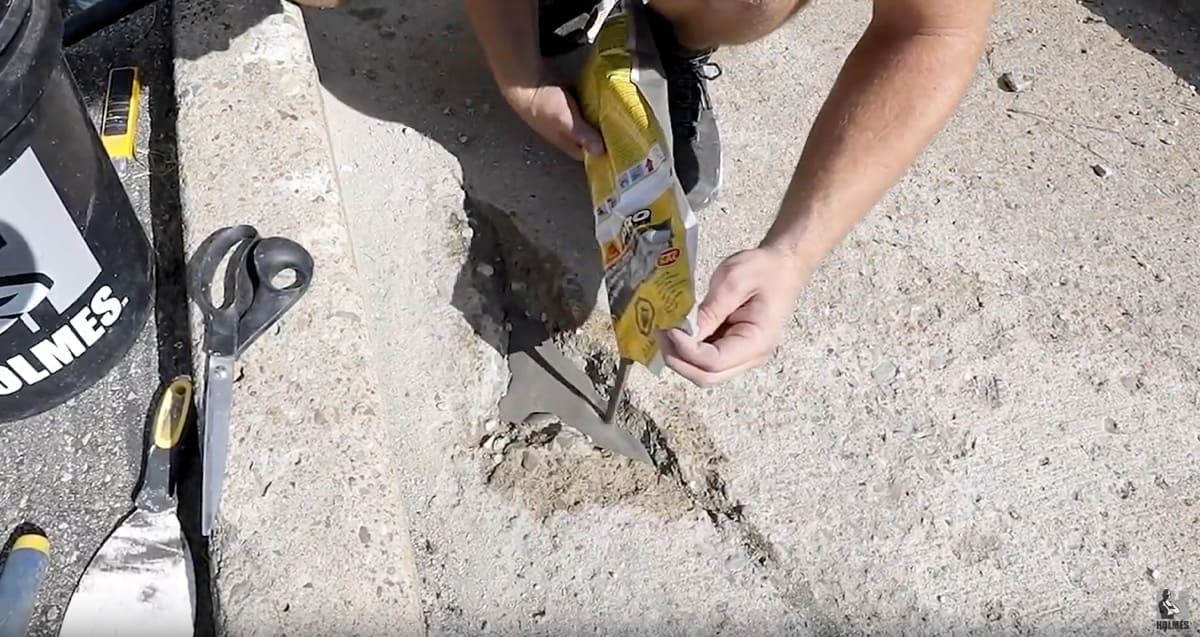
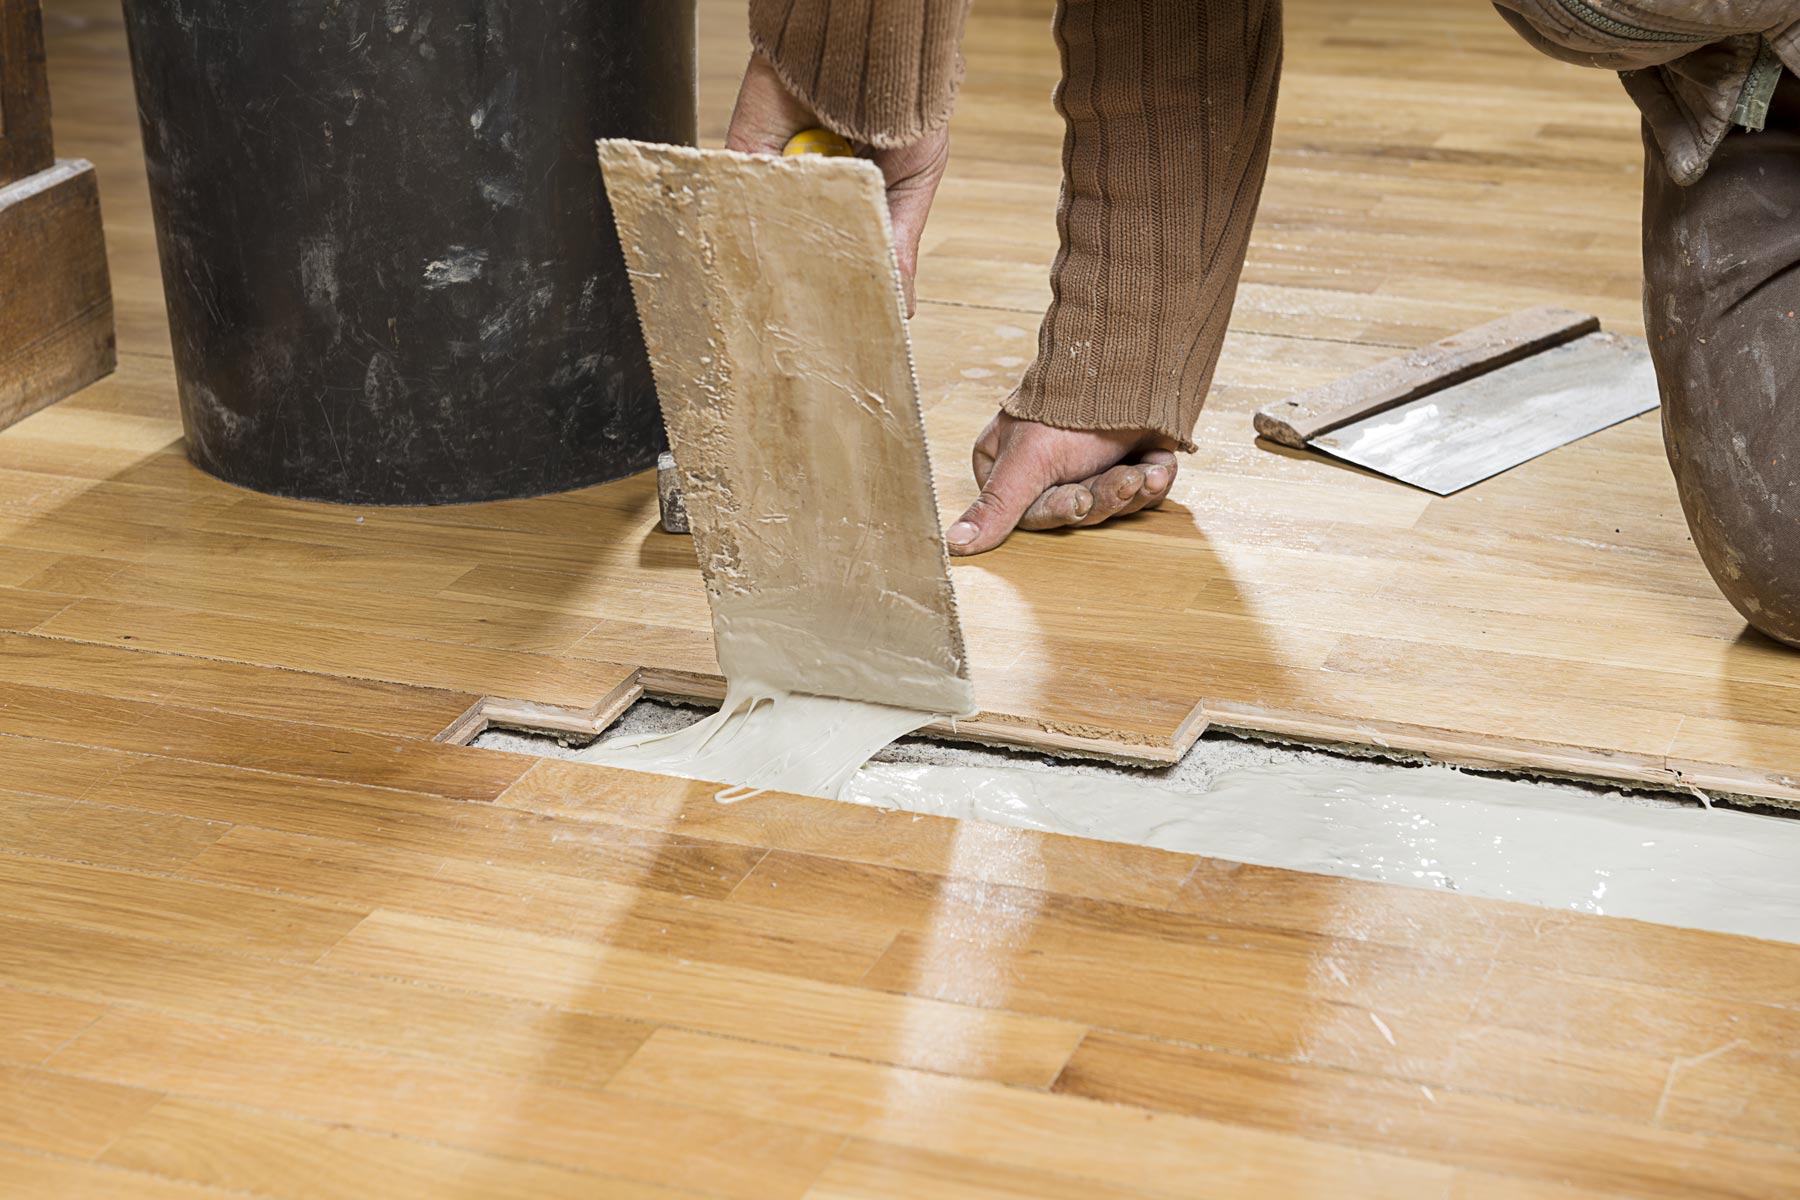
Step 3: Fill the Hole with Wood Filler
Now that you have prepared the area and removed any splinters or loose material, it’s time to fill the hole in your wood floor. Wood filler is an excellent option for this task as it provides a strong and durable repair. Follow these steps:
- Choose the right wood filler: Select a wood filler that matches the color and grain of your wood floor. This will help the repair blend in seamlessly.
- Apply the wood filler: Using a putty knife, carefully apply the wood filler to the hole in your wood floor. Fill the hole completely, ensuring that the filler is level with the surrounding floor surface.
- Smooth the filler: Use the putty knife or a smooth, flat object to smooth the surface of the filler. This will help achieve a flat and even finish.
- Remove excess filler: Remove any excess filler before it dries. This can be done by gently scraping the surface with the putty knife.
Remember to follow the instructions provided by the wood filler manufacturer for the best results. Allow the filler to dry as per the manufacturer’s recommendation before moving on to the next step.
By filling the hole with wood filler, you are effectively restoring the integrity and aesthetic appeal of your wood floor. This step is crucial in achieving a seamless and visually pleasing repair.
Read more: How To Fix Buckled Wood Floor
Step 4: Smooth and Level the Filler
After filling the hole with wood filler, the next step is to smooth and level the filler to create a seamless finish. Follow these steps to achieve a professional-looking repair:
- Sand the filled area: Once the wood filler has dried completely, use sandpaper to gently sand the filled area. Start with a coarse-grit sandpaper and gradually move to finer-grit sandpaper. This will help smooth out any uneven edges or rough surfaces.
- Sand in a circular motion: Sand the filled area in a circular motion to blend the filler with the surrounding wood and create a natural-looking finish. Be careful not to sand too aggressively, as this may damage the surrounding floorboards.
- Check the smoothness: Regularly check the smoothness of the repaired area by running your hand over it. If you feel any rough spots or inconsistencies, continue sanding until the surface feels smooth and level.
- Remove dust: After sanding, use a clean cloth or vacuum to remove any dust or debris from the repaired area. This will ensure a clean surface for the final steps of the repair.
By taking the time to smooth and level the filler, you will achieve a seamless and unnoticeable repair. The key is to be patient and thorough during the sanding process to achieve the best possible result.
Use wood filler to fill in the hole in the wood floor. Apply the filler, let it dry, then sand it smooth. Stain or paint to match the rest of the floor.
Step 5: Sand the Filler
Once the wood filler has dried and you have smoothed and leveled the surface, the next step is to sand the filler to create a seamless finish. Sanding the filler will ensure that it blends in with the surrounding wood floor, giving your repair a professional appearance. Follow these steps:
- Select the appropriate sandpaper: Choose sandpaper with a medium grit, such as 120 or 150, to begin the sanding process. You can use a sanding block or sanding pad to make the task easier.
- Sand in the direction of the grain: Sand the filled area in the direction of the wood grain. This will help the filler blend in more naturally and prevent any noticeable sanding marks.
- Apply even pressure: Apply even pressure while sanding, making sure not to press too hard. The goal is to smooth out the filler without removing too much material from the surrounding wood.
- Switch to a finer grit: After sanding with the medium-grit sandpaper, switch to a finer grit, such as 220, for a smoother finish. Continue sanding in the direction of the grain until the repaired area feels smooth and seamless.
- Clean the area: Use a clean cloth or a vacuum to remove any sanding dust and debris from the repaired area. This will provide a clean surface for the final steps of the repair.
Sanding the filler is an important step in achieving a flawless repair. Take your time and be careful not to oversand, as this can damage the surrounding wood. By following these steps, your repaired area will seamlessly blend in with the rest of the wood floor.
Step 6: Clean the Area
After sanding the filler and achieving a smooth and seamless finish, it’s essential to clean the repaired area to remove any dust or debris. This step ensures that the surface is clean and ready for the final touches of the repair. Follow these steps to clean the area effectively:
- Use a clean cloth or vacuum: Wipe the repaired area with a clean, slightly damp cloth to remove any dust or loose particles. Alternatively, you can use a vacuum with a soft brush attachment to gently suction away any debris.
- Clean surrounding floorboards: While you’re cleaning the repaired area, take the opportunity to clean the surrounding floorboards as well. This will help maintain a consistent appearance throughout the floor.
- Inspect for any remaining imperfections: After cleaning, carefully inspect the repaired area for any remaining imperfections, such as small holes or uneven spots. If you notice any, repeat the necessary steps to address them before proceeding to the final touches.
By thoroughly cleaning the repaired area, you ensure that the final steps of the repair will be successful. A clean surface allows for proper adhesion of stain or paint, resulting in a flawlessly finished repair.
Step 7: Stain or Paint the Patched Area
With the repaired area clean and smooth, it’s time to blend the patched section with the rest of the wood floor. This is done by staining or painting the patched area to match the color and finish of the surrounding floorboards. Follow these steps to stain or paint the patched area:
- Choose the appropriate stain or paint: Select a stain or paint that matches the color and finish of your wood floor. You can test the stain or paint on a small, inconspicuous area first to ensure it matches perfectly.
- Apply the stain or paint: Use a paintbrush or staining brush to carefully apply the stain or paint to the patched area. Apply a thin layer, using even strokes, following the direction of the wood grain.
- Blend with the surrounding floorboards: With a clean cloth or brush, gently blend the stain or paint into the surrounding floorboards. This helps create a seamless transition between the repaired area and the rest of the wood floor.
- Allow drying time: Follow the manufacturer’s instructions for drying time. It’s essential to allow the stain or paint to dry completely before placing any objects or walking on the repaired area.
Staining or painting the patched area is crucial in achieving a visually harmonious repair. Take your time and pay attention to detail to ensure that the color and finish match perfectly with the existing floorboards.
Read more: How To Fix Cupping Wood Floor
Step 8: Final Touches and Maintenance
Now that you have completed the repair and the patched area has been stained or painted to match the rest of the wood floor, it’s time to add the final touches and establish a maintenance routine to prolong the life of your repaired floor. Follow these steps:
- Inspect the repair: Carefully inspect the repaired area to ensure that it blends seamlessly with the surrounding floorboards. Look for any touch-ups that may be needed, such as additional stain or paint to achieve a more consistent appearance.
- Apply a protective finish: To further protect the repaired area and the entire wood floor, consider applying a protective finish. Consult with a flooring specialist or refer to the manufacturer’s instructions for the appropriate finish product and application process.
- Establish a maintenance routine: Regularly clean and maintain your wood floor to prevent future damage and ensure its longevity. This includes sweeping or vacuuming regularly, using a damp mop for routine cleaning, and promptly wiping up spills or accidents.
- Preventive measures: Take preventive measures to avoid further damage to your wood floor. Place doormats at entrances to trap dirt and prevent it from being tracked onto the floor. Use furniture pads or coasters to protect against scratches and dents.
- Monitor and address any new issues: Keep an eye out for any new holes, scratches, or damage to your wood floor. Address these issues promptly to prevent them from becoming major repairs.
By completing these final touches and establishing a maintenance routine, you can enjoy a beautifully repaired wood floor that looks and performs its best for years to come.
Conclusion
Repairing a hole in a wood floor may seem like a daunting task, but with the right materials, tools, and steps, it can be accomplished successfully. By following the step-by-step guide outlined in this article, you can fix a hole in your wood floor and restore its beauty and functionality.
From preparing the area and removing splinters to filling the hole with wood filler, smoothing and leveling the filler, sanding it, and finally staining or painting the patched area, each step plays a crucial role in achieving a seamless repair.
Remember to take your time, pay attention to detail, and follow the instructions provided by the manufacturers of the materials you are using. By doing so, you can achieve professional-looking results and a wood floor that appears as good as new.
Additionally, maintaining your repaired wood floor is essential for its longevity. Regular cleaning, preventive measures, and timely addressing of any new issues will help protect your floor from further damage and keep it looking its best.
Now that you have the knowledge and tools to fix a hole in a wood floor, don’t let that unsightly blemish persist any longer. Take action, follow the steps outlined in this article, and regain the beauty and functionality of your wood floor. Enjoy the satisfaction of a job well done and the pride of knowing you can tackle this repair with confidence.
Frequently Asked Questions about How To Fix A Hole In Wood Floor
Was this page helpful?
At Storables.com, we guarantee accurate and reliable information. Our content, validated by Expert Board Contributors, is crafted following stringent Editorial Policies. We're committed to providing you with well-researched, expert-backed insights for all your informational needs.


0 thoughts on “How To Fix A Hole In Wood Floor”