Home>Pantry Storage>50 Riveting Pull-Out Pantry (Best Guaranteed)
Pantry Storage
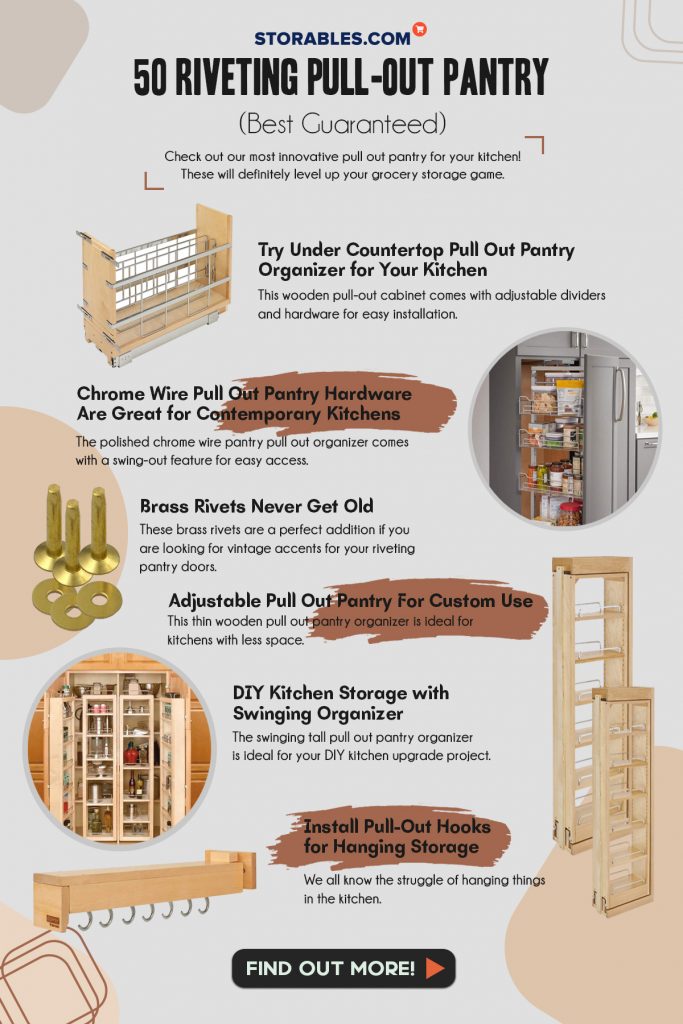
50 Riveting Pull-Out Pantry (Best Guaranteed)
Modified: December 6, 2023
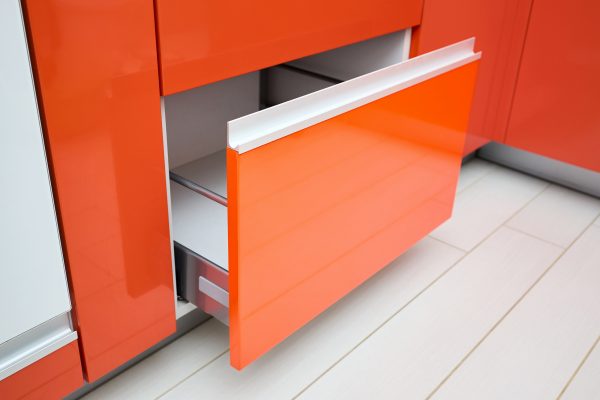
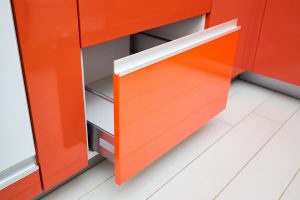
Check out our most innovative pull out pantry for your kitchen! These will definitely level up your grocery storage game.
(Many of the links in this article redirect to a specific reviewed product. Your purchase of these products through affiliate links helps to generate commission for Storables.com, at no extra cost. Learn more)
Do you have a pantry that is full of clutter and looks like it was raided by hungry kids? Nevertheless, it can be so frustrating when your pantry is organized in such a way that it becomes difficult to find what you need. Pantries are functional spaces, but they can also be beautiful. The good news is; we have pulled together over 50 riveting pull out pantry ideas for you! Check them out!
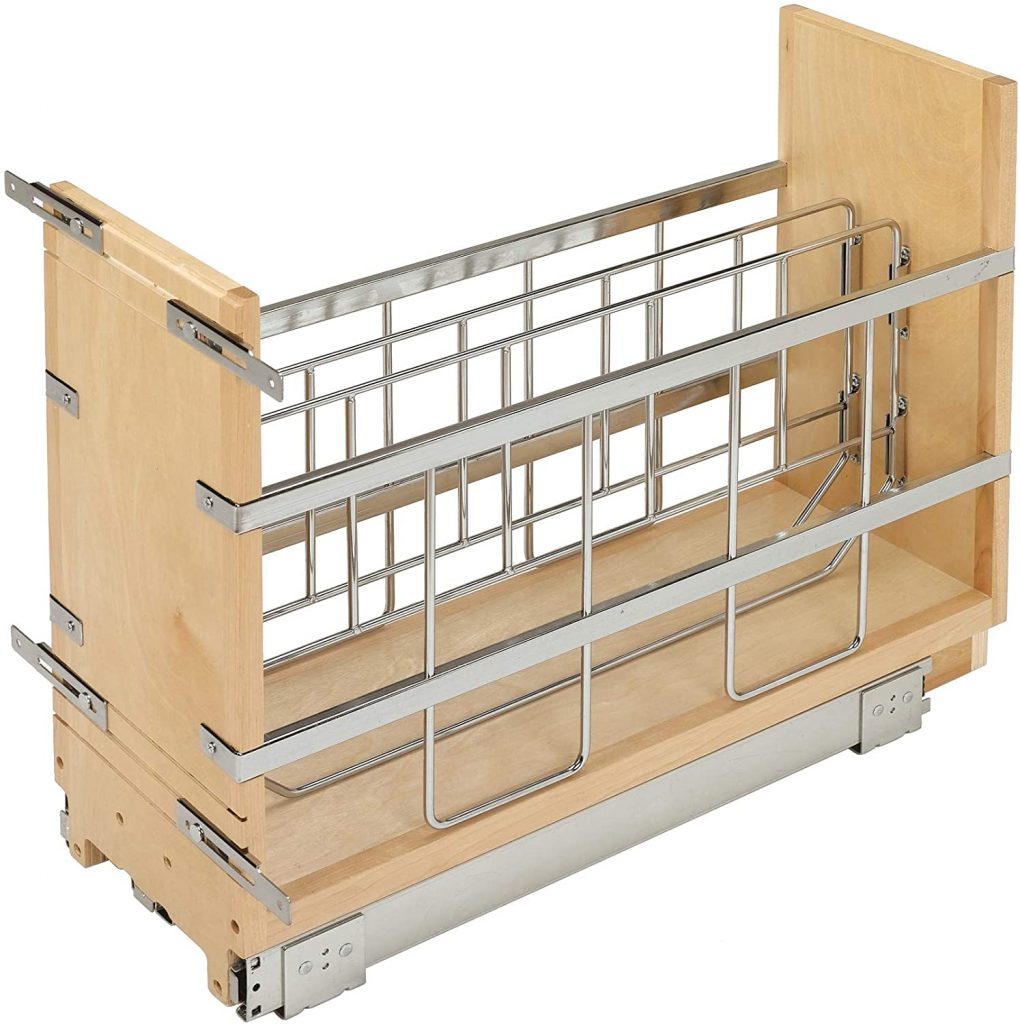
This wooden pull-out cabinet comes with adjustable dividers and hardware for easy installation. You may use this to store cookie sheets, foil, baking sheets, and wraps in an organized manner. Also, you may remove the central racks to maximize the storage space for larger items. The pull-out organizer opens smoothly and can accommodate up to 110 pounds.
Moreover, it will blend in with other kitchen cabinets with its minimal frame face. This organizer will fit perfectly under a full-height cabinet or one above drawers. However, you will need a cabinet to fit in the drawer under the shelf. Ensure that the cabinet has a six-inch opening to fit this pull out pantry organizer. Overall, this minimal storage option will help you get rid of most of the clutter.
Read more: How To Organize A Pull Out Pantry
2. Chrome Wire Pull Out Pantry Hardware Are Great for Contemporary Kitchens
This product has a rating of D.
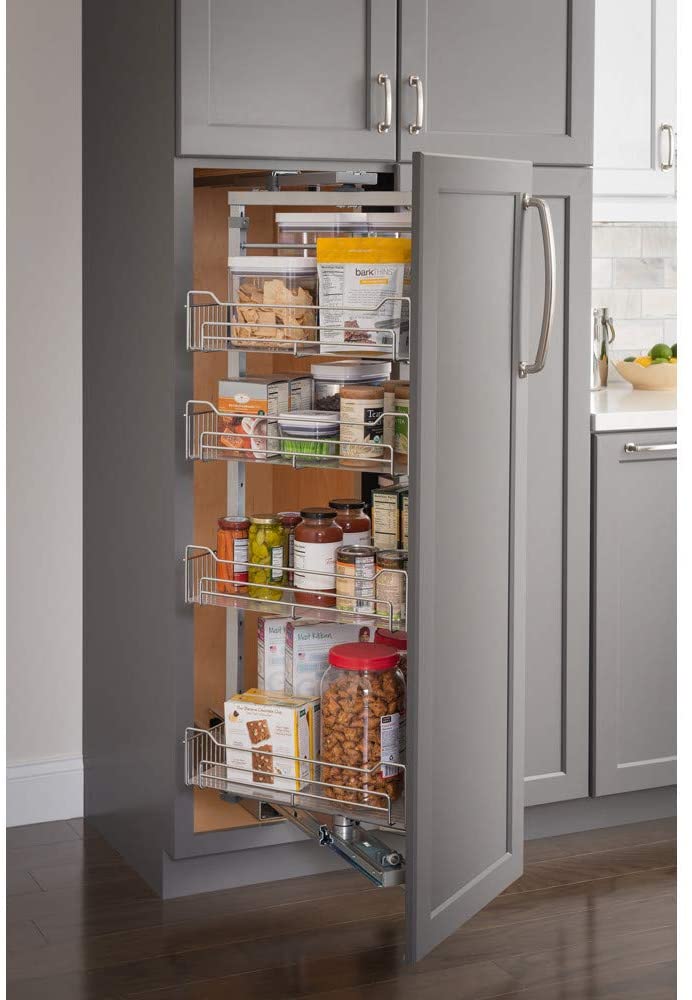
The polished chrome wire pantry pull out organizer comes with a swing-out feature for easy access. In addition, it comes with full ninety degrees rotation feature to maximize the storage area. Moreover, the height is adjustable from 73 inches to 86 inches. The wire construction of this riveting pull out ensures durability and high storage capacity. Besides, it has non-slip acrylic basket liners for convenience.
You can store up to 175 lbs in the five heavy-duty baskets. This is an ideal storage solution for compact kitchens that lack ample cabinets and shelves. The swivel feature of the organizer works smoothly; therefore, you do not need to pull with force even when it is full. You may store the most used items on the top shelf and others on the bottom ones.
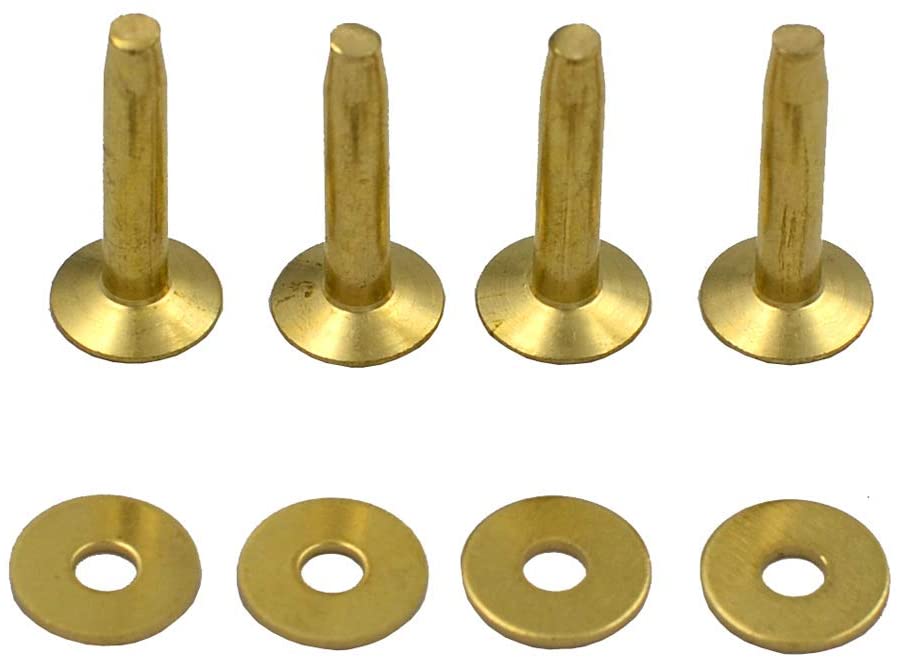
These brass rivets are a perfect addition if you are looking for vintage accents for your riveting pantry doors. The heavy-duty rivets are durable and give a shiny appearance to enhance your modern pantry doors. These brass rivets come in a pack of 50 with size 12 rivets and burr washers. Therefore, this pull out pantry hardware is easy to install even for a DIY upgrade project for your kitchen.
However, you will require some dedicated tools for installing these rivets on your own. The smooth finish of these rivets will ensure your pantry doors look cohesive with the theme of your house. Moreover, you may install these to upgrade other house areas for a blend of vintage and contemporary decor. This minimal upgrade will add an elegant touch to the hardware.
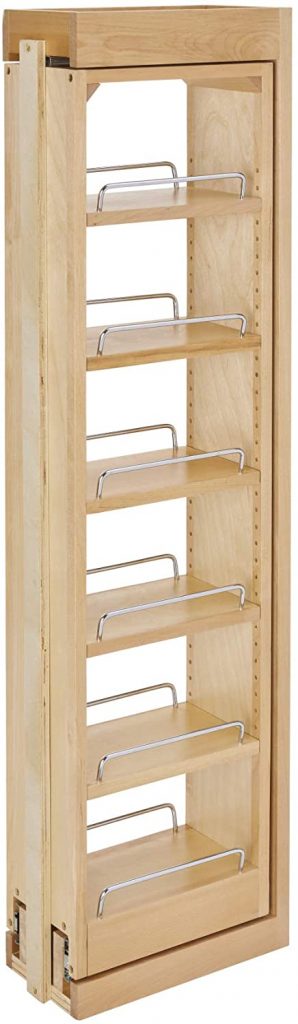
This thin wooden pull out pantry organizer is ideal for kitchens with less space. It comes with different height and width adjustment features to customize it as per your needs. Moreover, the maple wood material of the organizer has a clear coat finish to improve durability. Hence, it will stay the same even after years of use. It can support up to 100 pounds of weight and extends fully with a smooth operation.
This vertical pull out pantry organizer will be ideal for installing in between the kitchen cabinets to maximize the storage space. The installation process is fairly simple as it comes fully assembled. Besides, it comes with all the essential items you may need for installation. These include adjustable shelves, mount brackets, wood filler, and mounting hardware. Moreover, you may add a matching door after the installation so that it matches other cabinets.
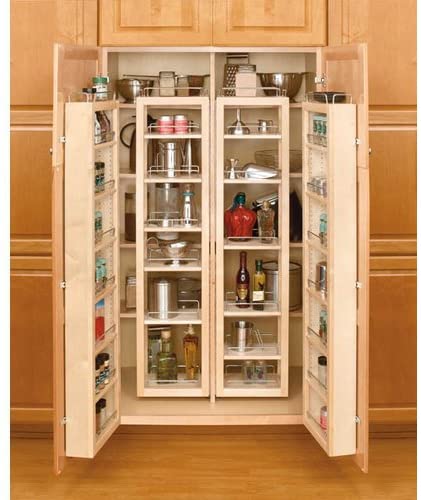
The swinging tall pull out pantry organizer is ideal for your DIY kitchen upgrade project. It is an excellent storage solution if you have a lot of clutter on your kitchen shelves. The twenty-eight organizational shelves will ensure all the items in your pantry have a dedicated space. Moreover, the two swing-out doors with shelves will give you ample storage space along with easy access to each item. The doors are adjustable with smooth piano hinges so that they open with minimal effort.
Besides, the shelves have chrome rails to ensure the items stay in place securely. This organizer can be installed easily in an existing cabinet with similar dimensions. Moreover, you may refer to the pdf guide for installation to save some time. You may add a central wooden piece to add more structure to the unit. The clear UV-Cured shelves will add elegance to any cabinet.
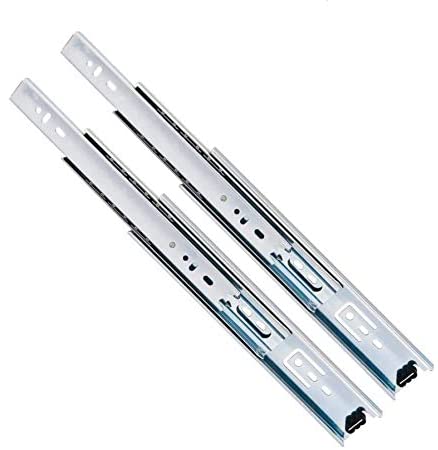
Do you have old drawers that have lost their functionality over the years? These soft closures shelf sliders are ideal for adding a convenient pull-out feature to the shelves and drawers in your kitchen, bathroom, and bedroom. They come in a pack of 10 sliders and are easy to install at home. With a soft closing and opening feature, these sliders will make it easier to access old drawers and shelves. The best part is they can be installed anywhere to maximize the storage options in places such as under the shelves.
They have a strong steel-bearing function that will stay durable throughout use. Apart from this, the shelves and drawers will open without making any annoying sounds. The zinc-plated steel material ensures the whole storage unit works together. You may lubricate the bearings with clear grease for more sliding efficiency after installation. Overall, these are great to upgrade your kitchen without removing too much hardware and storage cabinets to create new space.
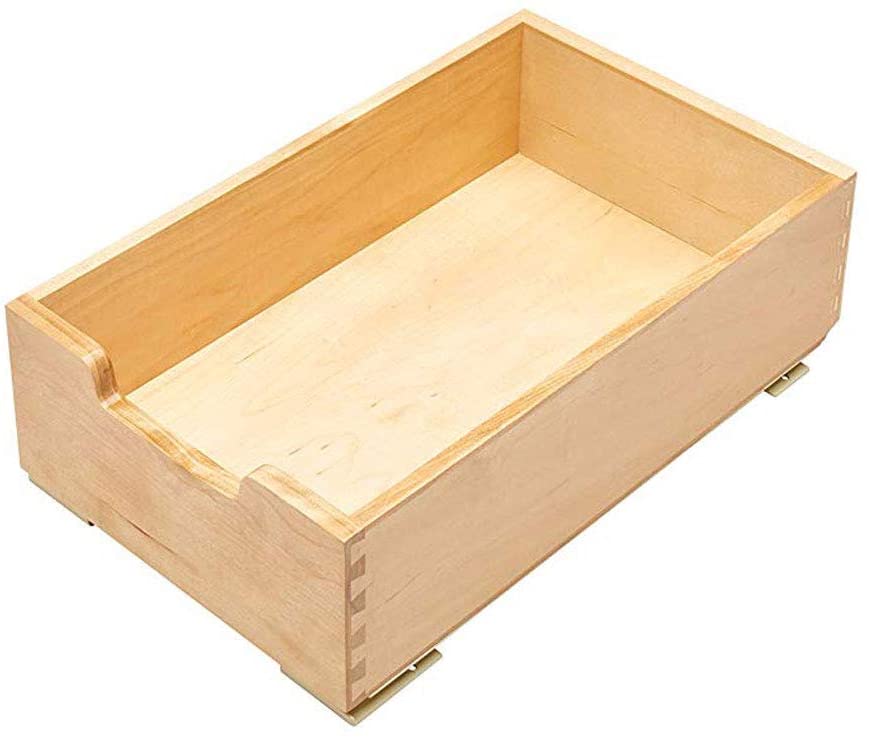
These pull-out pantry organizing drawers are great to add more space to your kitchen pantry. This is a basic wood pull-out drawer that completes an efficient storage solution to your clutter. You may store large appliances, pots, dishes, bottles, cutlery, and cleaning supplies in this 11-inch pull-out drawer. This drawer will make organizing easy and stylish with the dovetail design on the wooden walnut material.
To install this drawer in the cabinet, you just have to use the four screws on the cabinet floor or the shelf. This will take only a few minutes to install with the right tools and provide long-term storage space. The drawer comes with all the mounting hardware that fits perfectly, not to need to struggle with installation. Moreover, the drawer will open with just one minimal slide.
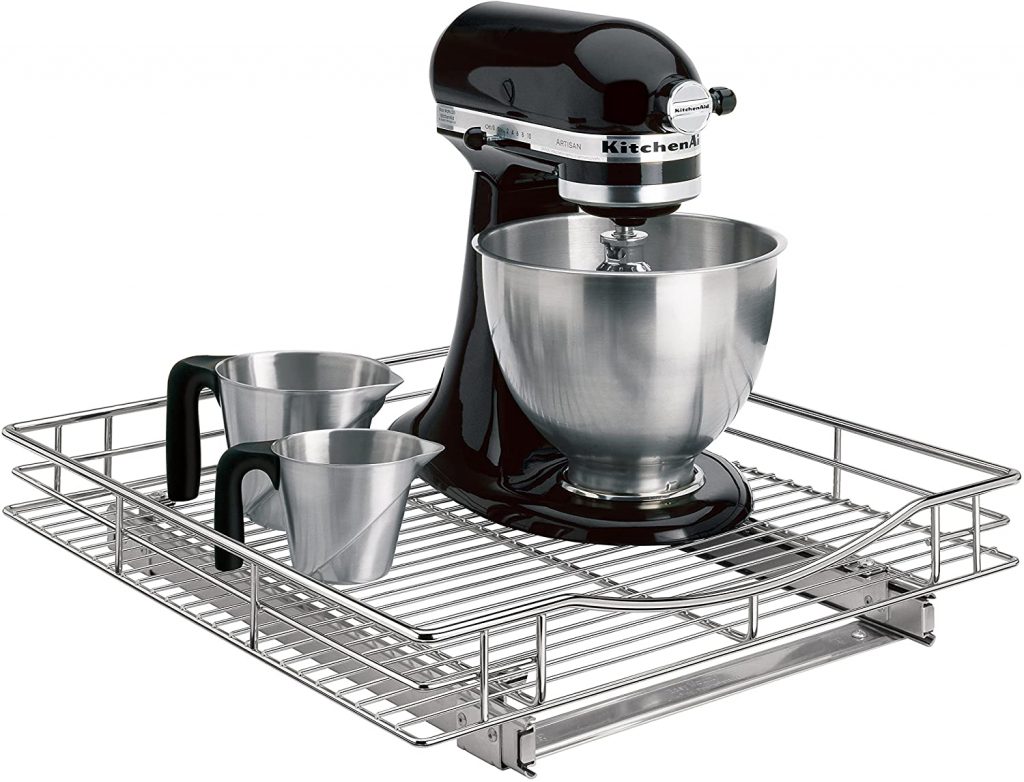
Steel is durable and efficient when it comes to upgrading kitchen cabinets. Moreover, it can withstand the heavyweight of appliances, cutlery, and utensils. Bring the under cabinet pull-out pantry steel slide out to utilize all the storage space. This sliding pull-out shelf has a low profile so that you can install it under the cabinets, sink, and drawers. With the low-profile option, you may easily store large pans, pots, and mixers.
The chrome construction with commercial-quality steel allows you to use these shelves for heavy materials without any fear of damage. Besides, the industrial-grade ball bearing in the system will make sure the shelves slide easily even when used to full capacity. You may set up these pull-out shelves under all cabinets for a hidden space-saver solution.
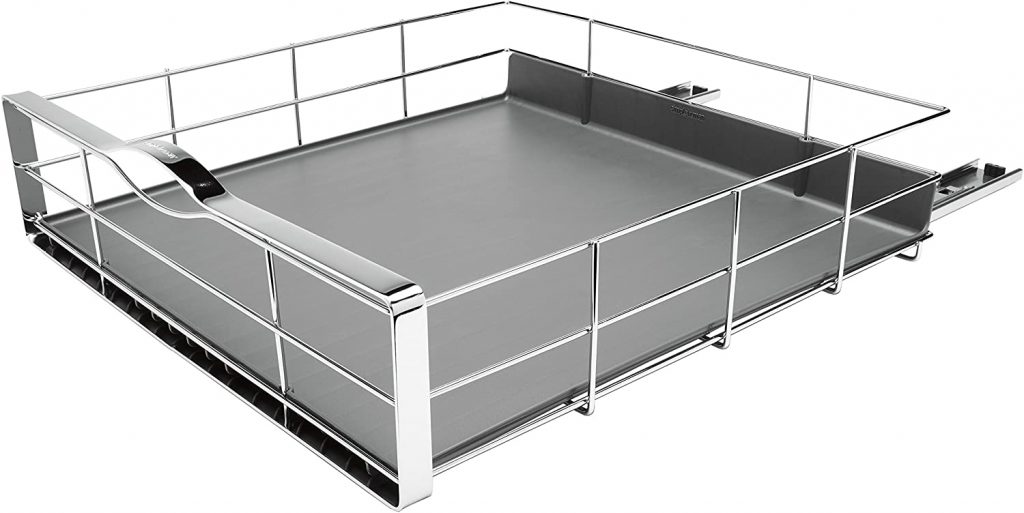
Is your kitchen pantry cluttered even after installing drawers and shelves? This steel pull-out cabinet organizing frame is ideal for adding dedicated storage space to smaller items. Moreover, the pull-out organizer ensures you can reach the corners of your cabinets for optimal use of space. This heavy-duty frame will help you organize more items in a smaller space efficiently. It can hold up to 20 lb with its industrial-grade body.
Besides, it has heavy-duty ball-bearing tracks and a steel handle to make sure you do not have to pull it out forcefully. Apart from this, you can take out the frame when there is too much clutter. Besides, it comes with a removable drip guard to securely lock it in one place. This will be useful in cleaning the cabinet and drawers for better storage functionality. The installation process of the frame is fairly simple as it comes with a pre-assembled one-piece item.
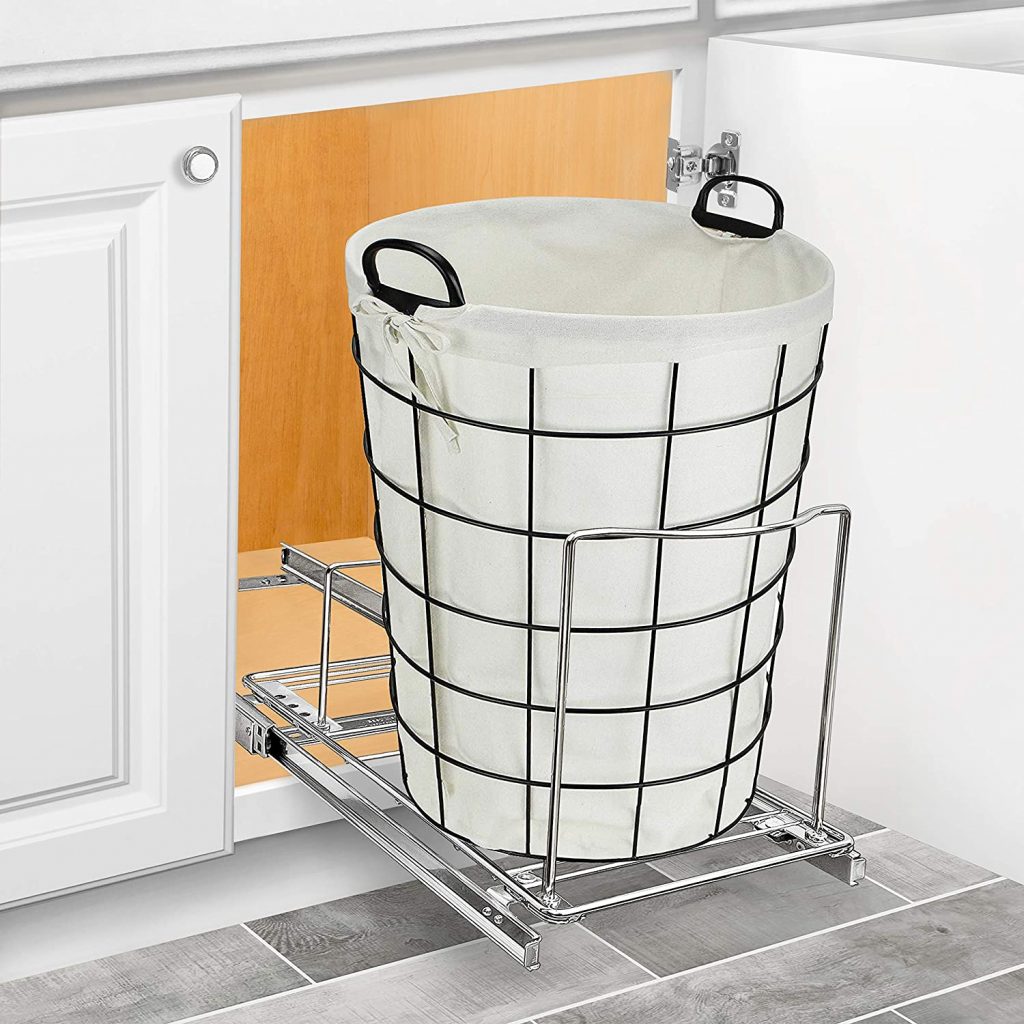
You can keep the wastebasket organized in your kitchen with this under cabinet vertical pull out pantry bin holder. It has a sliding function to have easy access to dispose of waste and take it out when needed. It is easy to install under any cabinet to add a space for your pull out bin. The pull-out bin holder has a universal size to accommodate different shapes and sizes of bins. So, this will not compromise the storage capacity of the disposal.
Moreover, the holder is professionally designed to ensure a smooth rollout function. You will be using this bin holder for years to come with its chrome finish and heavy-duty commercial steel construction. You do not need to have the exact measurements while installation as it has a universal design.
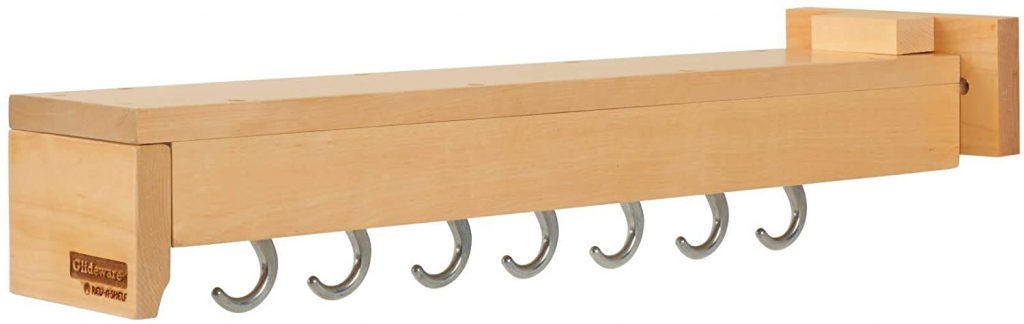
We all know the struggle of hanging things in the kitchen. There are so many items to hang, and it can be a pain to find the perfect spot for everything. A great solution is installing pull-out hooks on your cabinets or pantry door! This way, you can install them where they fit best and create more space in your cupboards! You won’t have to keep searching for that one hook that’s always hiding behind other items.
This product comes with several hooks that are super functional. From the lids of the pans to the large serving spoons, it can accommodate almost anything. It features natural finish wood, and the hooks are made up of high-quality stainless steel. Moreover, the track offers smooth functioning for a long-lasting operation.

What do you do when your wire shelving is missing a liner? Well, it doesn’t really have to be an issue. Wire shelf liners are a great way to keep items from sinking through the wire shelves in your pantry. These are inexpensive and easy to install. Moreover, they come in all sorts of colors and patterns.
Most times, wire liners come with an adhesive backing that simply needs to be pressed against the inside of your pantry shelves for you to restock without worrying about any of your food falling through. This idea will fit perfectly with a tall pull-out pantry as the liners come in different sizes. Moreover, you can easily trim them using a scissor. Fitting the liner in the corner also won’t be an issue since they are pre-cut.
Read more: How To Make A Pull Out Pantry Cabinet
13. Sort and Organize with Pull-out Steel Drawers
This product has a rating of B
For many people, the pantry is a room that is used for storage and rarely seen. But if you’re one of those people who love to cook or entertain at home, then having an organized and tidy space will make your life easier. This is where pull-out steel drawers come to the rescue. Pull-out steel drawers are a great way to keep all your pots, pans, and cooking utensils in one place.
The front of the drawer may be divided into different sections for various types of cutlery or knives that you often use, such as slicing blades, chef’s knives, paring knives, and so on. You may also find anti-slip pads on the bottom of your drawer that prevents it from moving around when you try to reach out for the utensils.

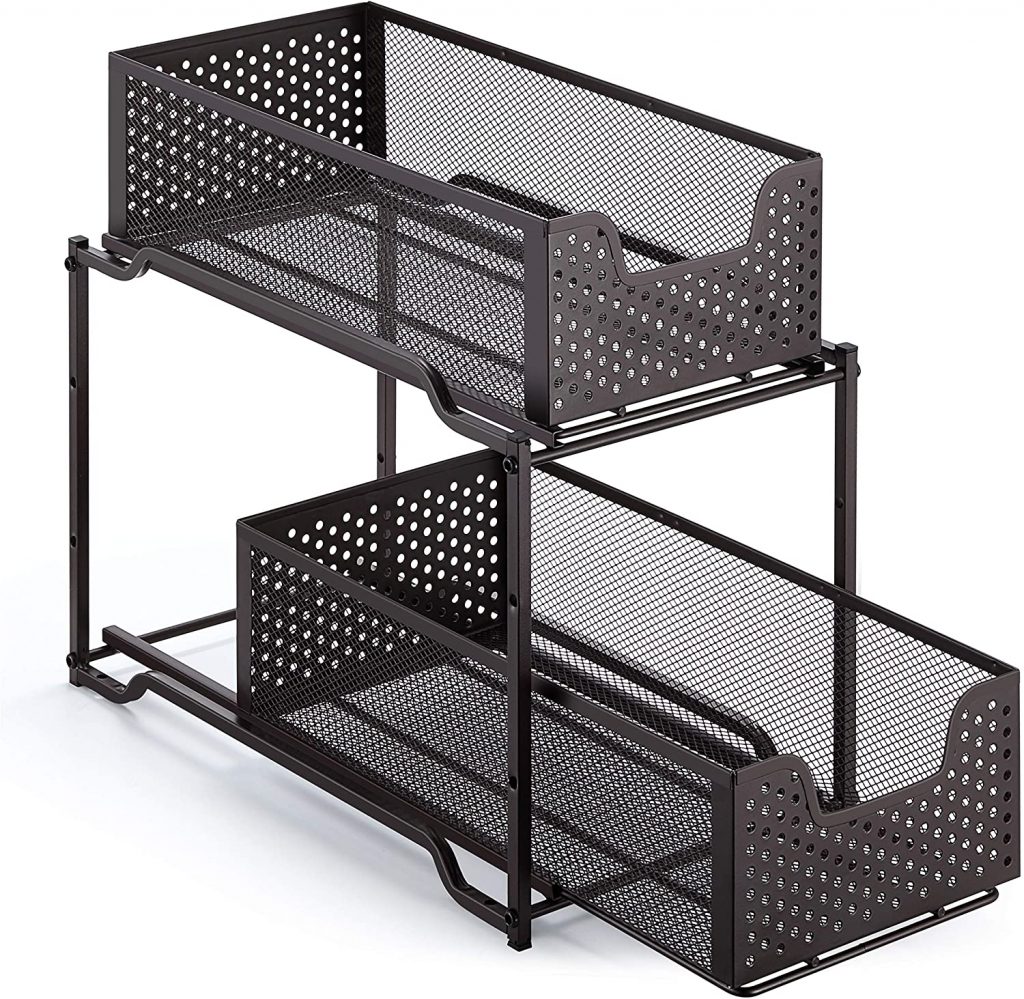
Have you ever thought about which items in your kitchen are taking up the most space? Do you have trouble keeping track of what spices and herbs are where? Well, a great solution is to place small pouches like tea bags and spices in rotating organizers.
These containers can be found at a reasonable price. They’re perfect for storing smaller-sized things that might not fit in larger containers. While looking for a rotating organizer, go for the ones made from wood as they are stronger and last longer. You can even give it a quick clean-up with the help of a damp cloth. Place them on the countertop or inside a cabinet for a clutter-free environment at home. Moreover, you can use them inside your study room or a bedroom and place your tools, pens, and office supplies with ease.
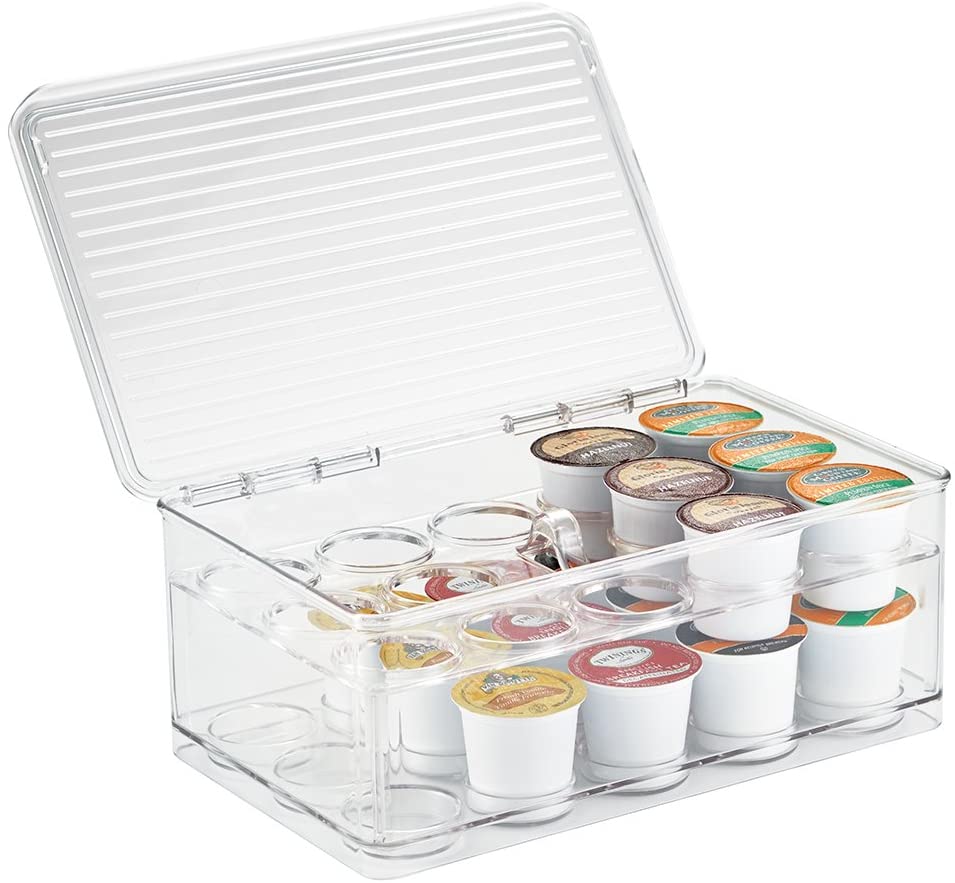
Do you find the coffee pod storage containers on your kitchen counter to be a little too cluttered? If so, then it may be time for you to invest in some space-saving stackable coffee pod storage containers! These nifty contraptions allow you to store up to different flavors of coffee while saving room on your counter. Just pop open the top and pull out whichever flavor of the pod that you’re in the mood for!
These storage containers are also a great way to store away your baking ingredients too. When you’re ready for them, just pull out the container and place it on the countertop or in a cupboard until next time. It’s so easy to reach into these containers when they’re all stacked up together like this.
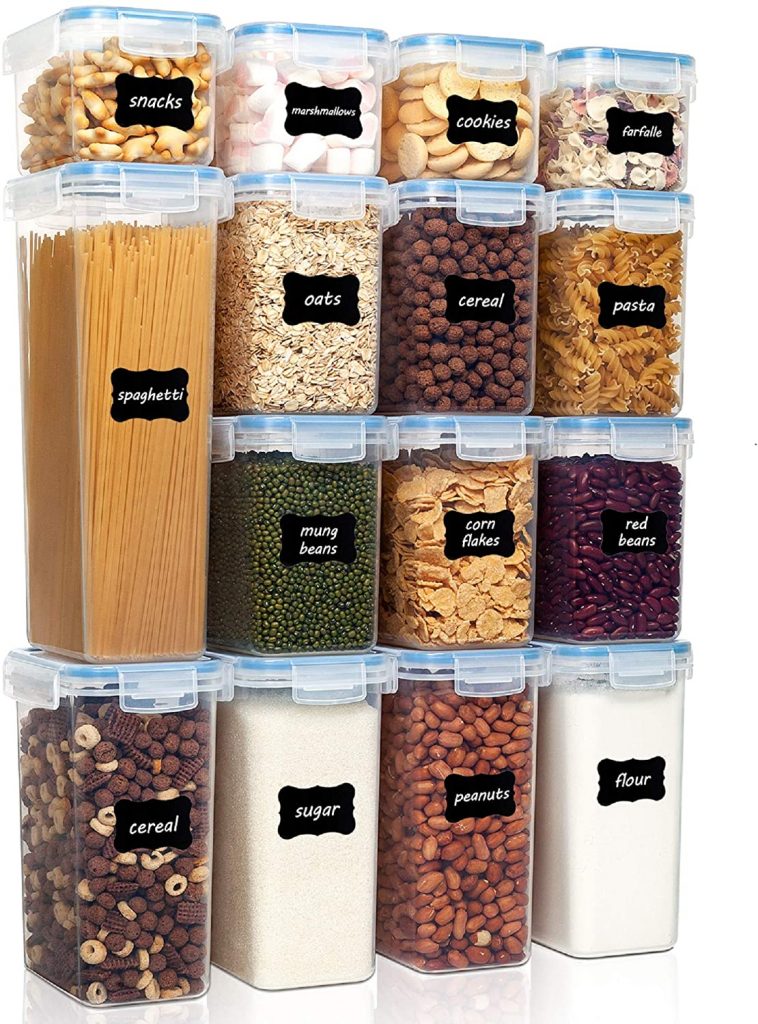
Do you have a pantry that is becoming out of control with boxes and cans stacked up on the shelves? Are your cabinets stuffed to the brim with food containers, leaving no room for serving dishes or bowls?
Introducing airtight food storage containers. These are made from durable, BPA-free plastic and are designed to keep bugs and rodents out. They seal tightly, so there’s no risk of food spilling all over the place – even if you shake them around. With an airtight seal, these can be used in both refrigerators and freezers. These make it easy to organize your kitchen because they stack neatly together without taking up too much space. The airtight containers are also space-saving and save you money on food by helping to keep your produce fresh.
Read more: How To Pull Out Dresser Drawers
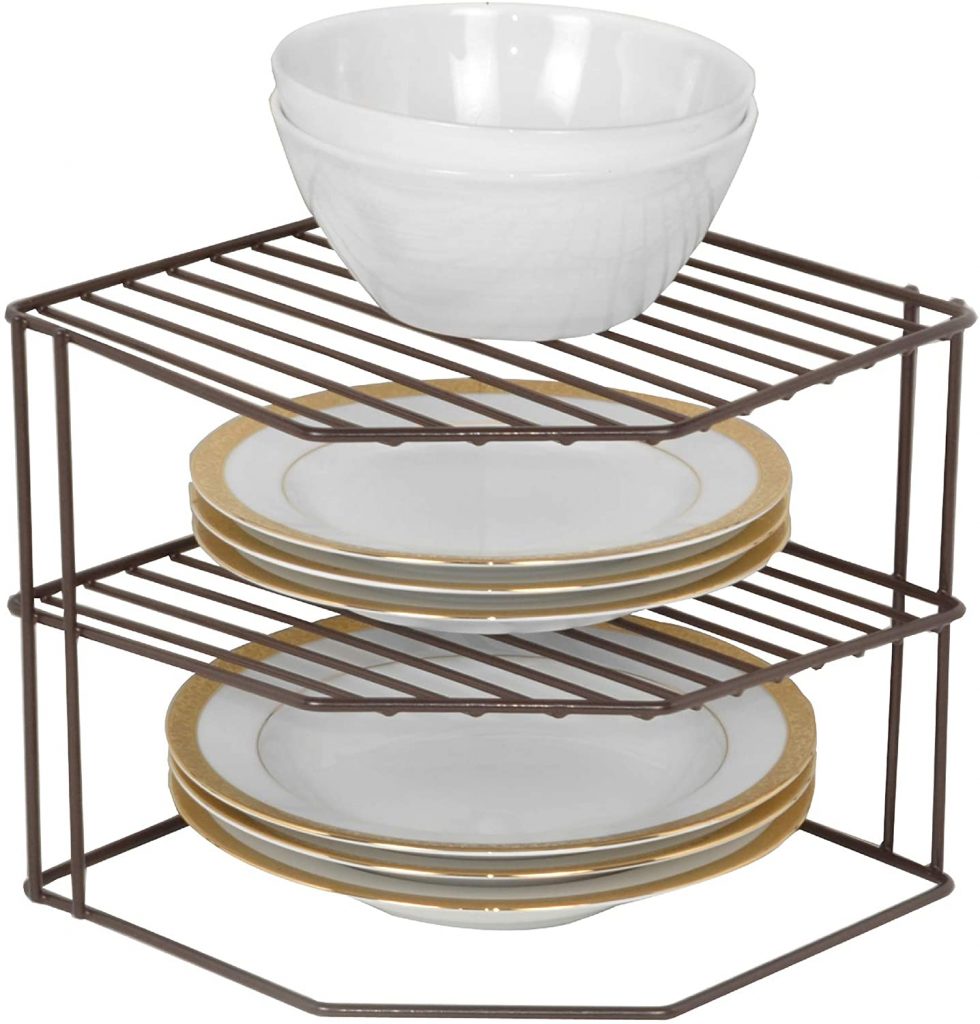
17. Corner Racks Work in the Pantry As Well!
This product has a rating of C.
As a homeowner, you will find it challenging to keep the clutter under control. One of the best ways to resolve this issue is by installing corner shelves. Corner shelves are perfect for small kitchens and pantries because they take up less space than traditional shelving units. In addition, these shelves will come in handy when you need extra storage space for canned goods and other items that don’t fit on regular shelving units! Moreover, you can also try adding corner shelf racks which are much smaller in size but equally functional.
The first step is finding the perfect corner shelves that will fit in your space. You can choose from various materials, including glass or metal shelves, as well as wood ones if you want a rustic touch for your home décor.
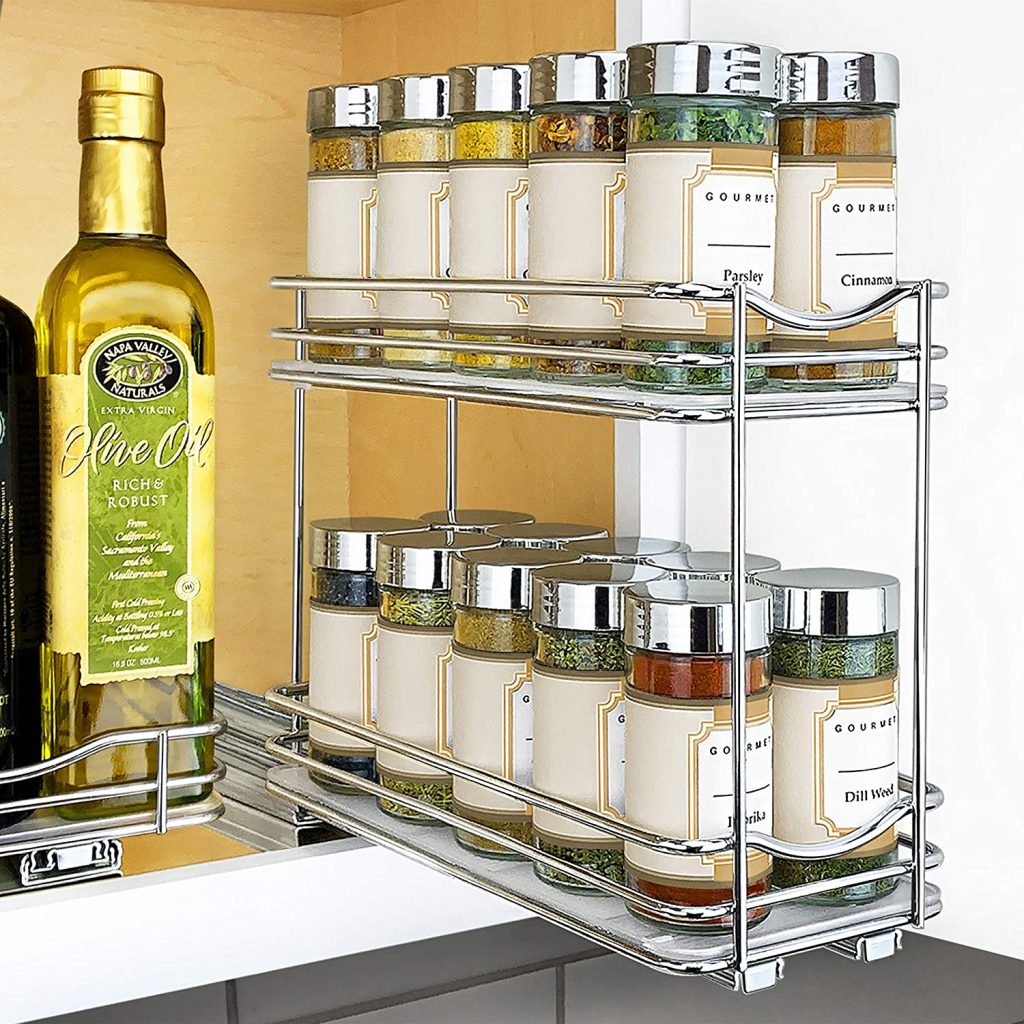
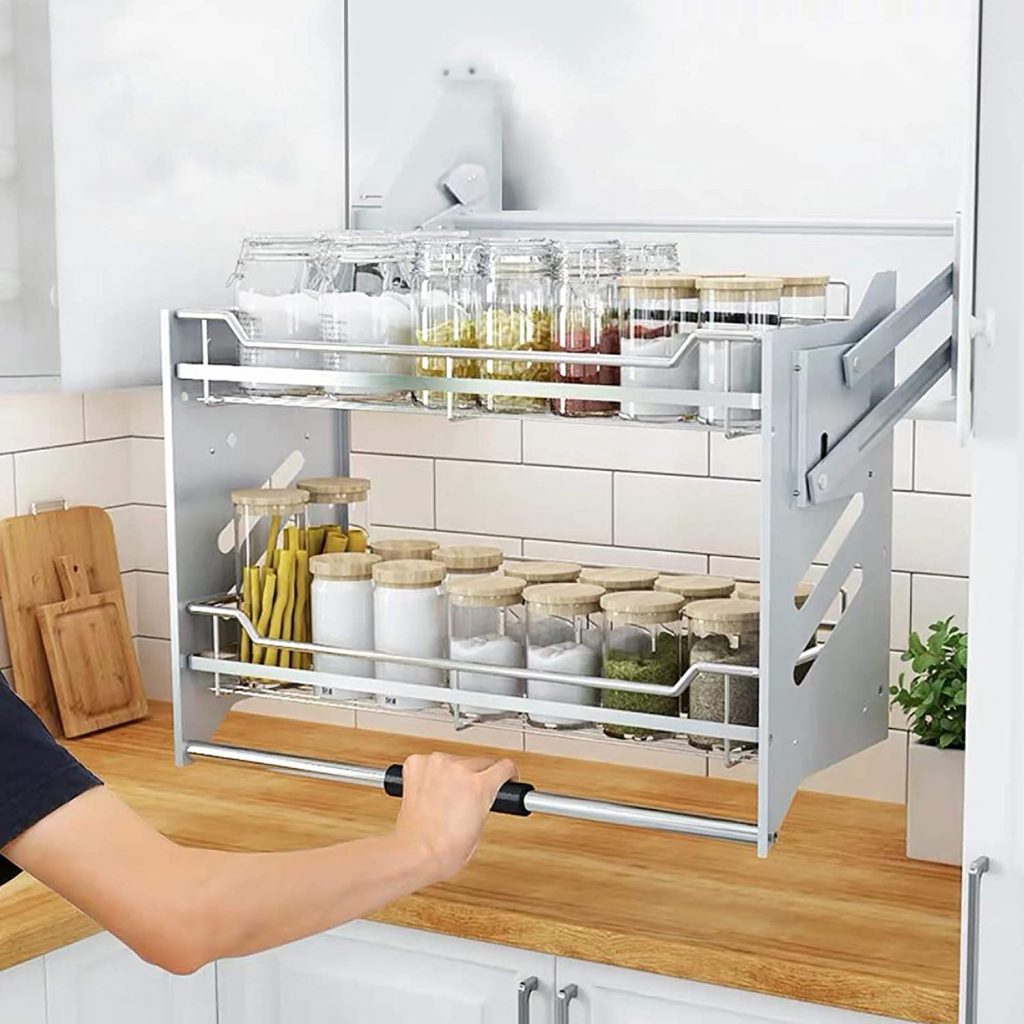
Do you have a pantry that is too small? There are ways to make space feel larger and more functional. One option you may not have considered is a slide-out spice rack as a vertical pull-out pantry rack. These can be purchased or built from scratch and provide a lot of storage in an otherwise limited space. It also saves on countertop space which everyone needs for food prep!
Place condiments and sauces on the slide-out spice rack with room to spare for those bulky items on the shelf underneath. The heavy-duty trays are also perfect for cans of soup or pasta. You can add the unit to cabinets that have a custom height. As a bonus, add clear plastic containers with lids, so you’ll know what’s inside without having to open it!
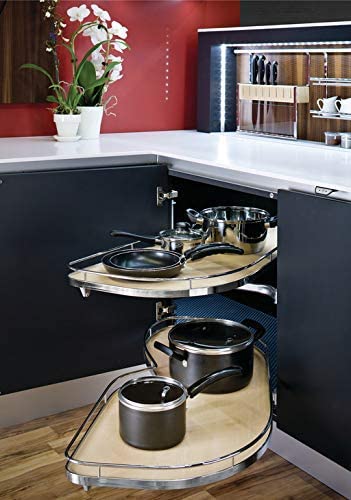
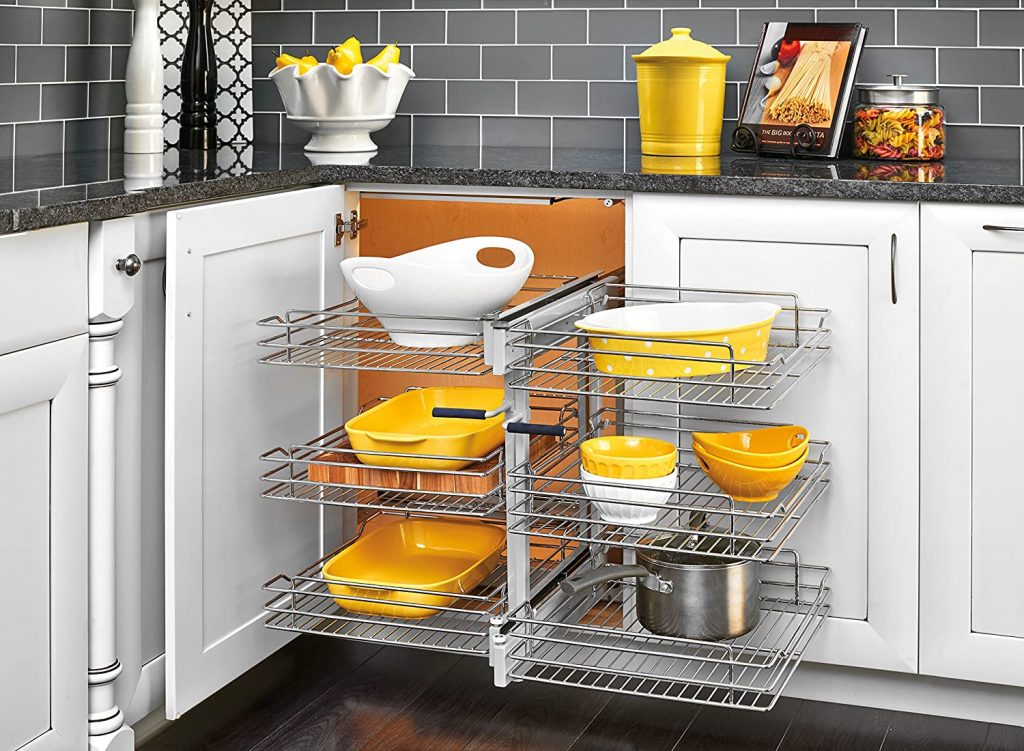
The kitchen is surely the heart of any house. It’s where you cook, eat, and clean up after you are done filling your tummy. However, it can also be a place of chaos when there isn’t enough storage space. In fact, when it comes to the pantries, they are also overflowing with food. We buy more than we need, and the tiny space in there is taken up quickly! Smart shelves can be installed to save space on those pesky blind corners where it’s hard to store anything else.
These smart shelves work as the perfect pull-out pantry organizer and may even feature baskets, so you don’t lose any valuable storage space. Your food will stay fresher this way, too, because items won’t touch each other and attract bugs or rot as quickly.
Pantry space is one of the most valuable areas in any kitchen. With pantries quickly becoming a luxury for kitchens, it’s not uncommon to see some homeowners resort to stacking canned goods on top of each other and cramming them into shelves that are too small. But there’s another option!
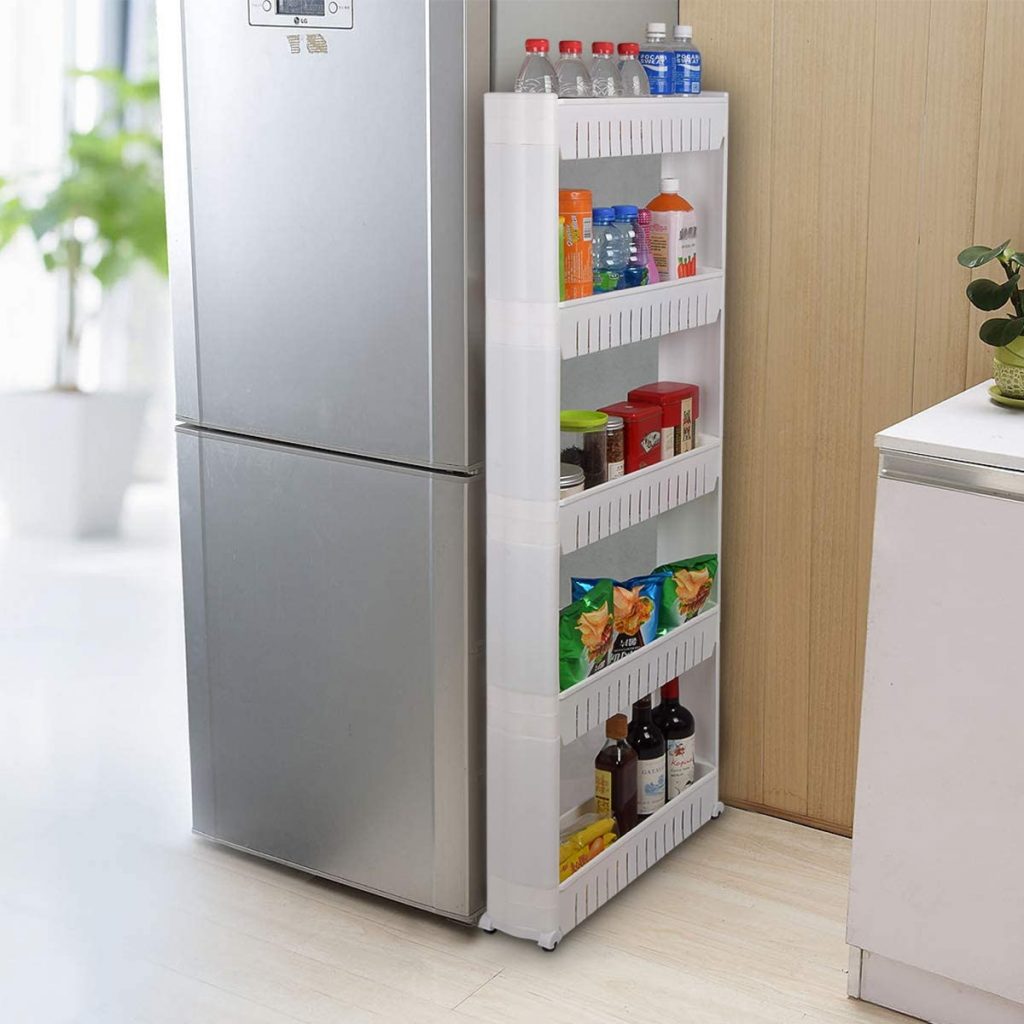
One solution is slim slide-out pantry storage racks with tires. Not only does this vertical pull-out pantry rack make it easy to find what you need, but it also saves space in your kitchen. With its sliding system, there’s no more taking up valuable floor space with bulky shelving systems. These slide-out racks provide an unobtrusive way of storing bulk items while freeing up countertops and cabinets! You can even add it to your closet, bathroom, or study.
Read also: 10 Best Pull Out Faucet for 2025
21. Try Slim Slide Out Pantry Racks That Fit Just Anywhere
This product has a rating of C.
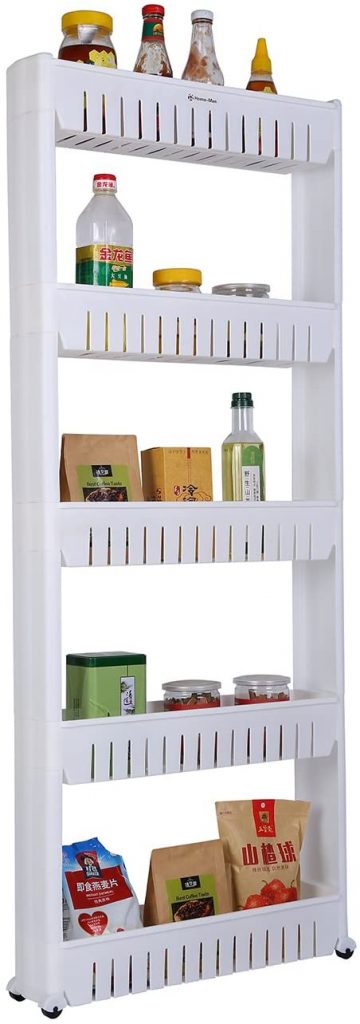
The Slim Slide Out Pantry Storage Rack is the perfect solution for those looking for an inexpensive way to organize their small spaces. These racks provide extra shelf space by sliding out from the wall when needed. In addition, the five-tier rack moves on four wheels and can be used to unload some of the stuff in your pull-out pantry.
If you have a large pantry, these racks can even fit inside and help you sort and arrange your items in a better manner. Moreover, you can slide it out and take it near the cooking counter to grab the ingredients quickly. Also, there are many more similar racks available in different numbers of tiers and dimensions.
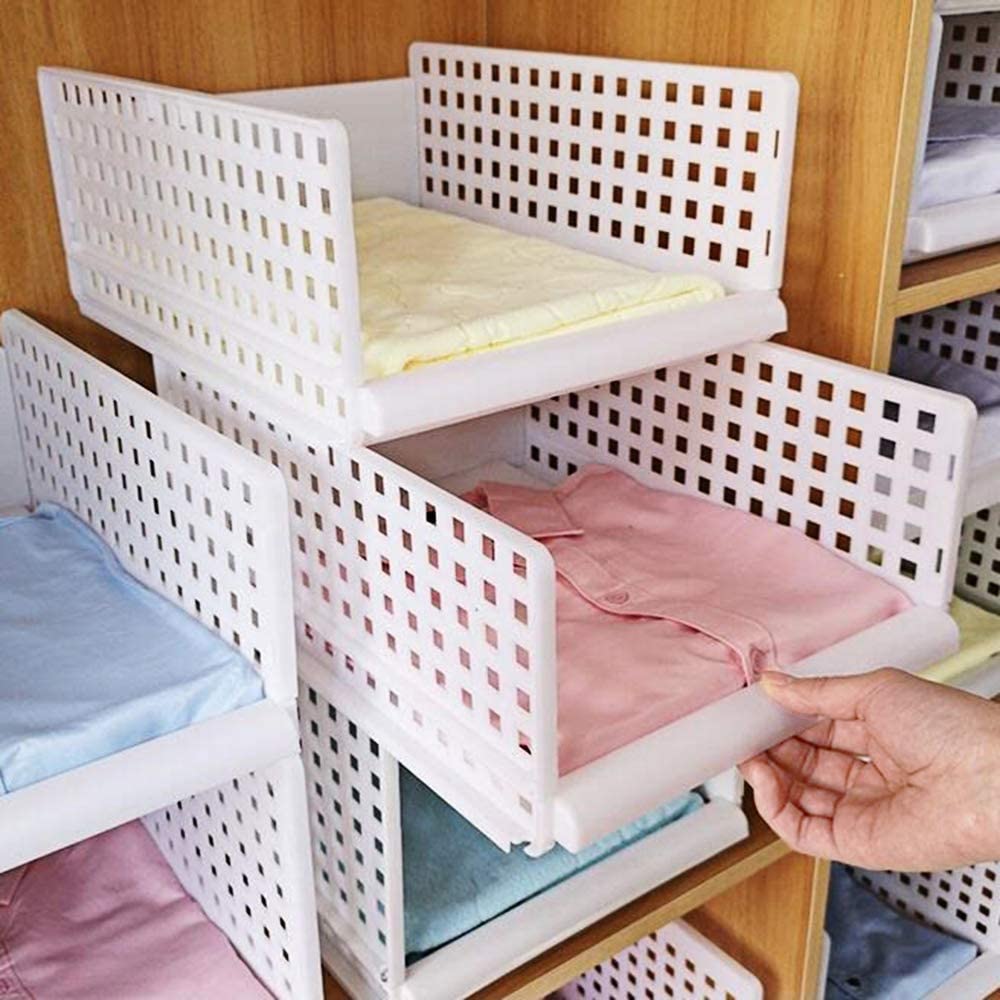
You might not have thought about it, but the shelf organizer in your closet can do the same storage trick in your pantry as in your closet. We often have pantries that have shelves with more than the required height, and we end up with a lot of free space, as the items can only be stacked to a limit. But these organizer shelves are designed to be slid out so you can stack them on top of each other, making your entire pantry tidy and easy to find what you’re looking for without spending hours sorting through the groceries.
So whether you need more space for storing canned goods or want an organized place to store your spices, this additional shelving system has something for everyone! These shelves are super easy to assemble and install, and they can be moved around as needed! They’re absolutely versatile and perfect for small spaces.
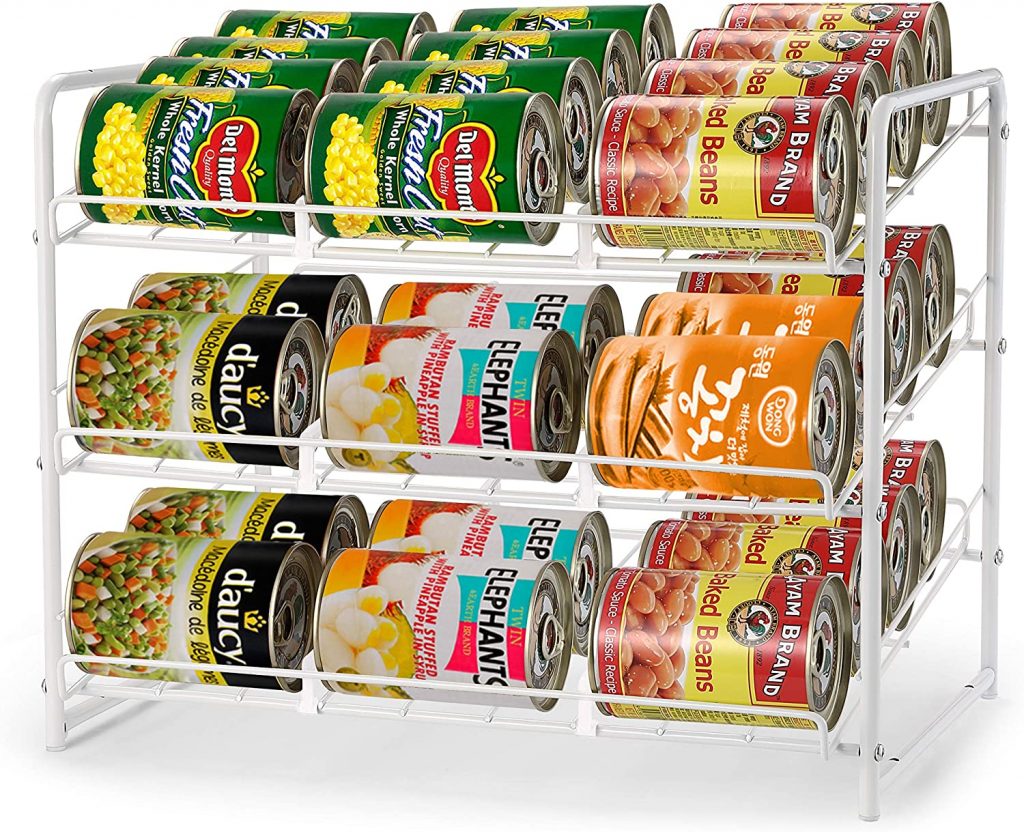
If all the cans are stacked on top of each other, they will topple over when someone tries to pull one out. To avoid this, try laying them in rows instead with the labels facing outwards so that it is easy for everyone in your family to see what’s inside without having to dig through everything first.
Better still, get a mini which can be a great storage solution for your pull-out pantry cabinet. This nifty piece of equipment can store up to 36 cans and includes six adjustable dividers that allow you to organize by size or beverage type to get everything looking neat and tidy! Plenty of more size options are available online! Get these, and there will be no more falling jars of tomato sauce or cans of soup spilling out onto the floor because they were just shoved on a shelf.
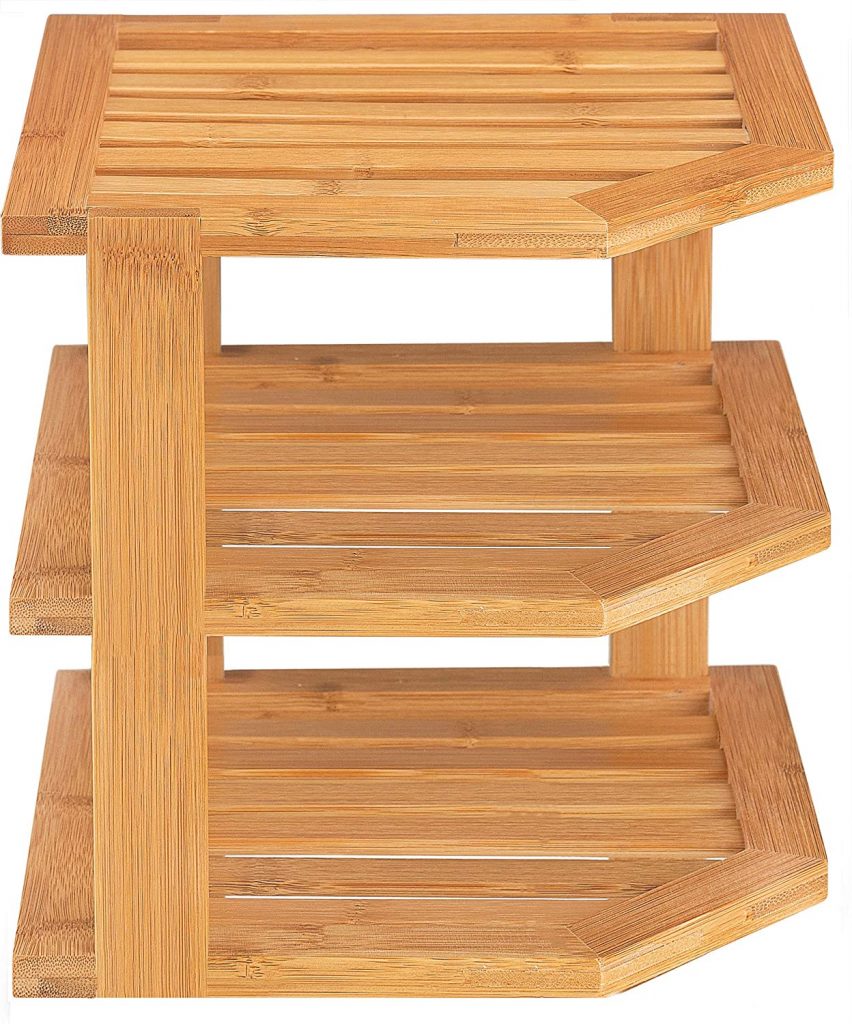
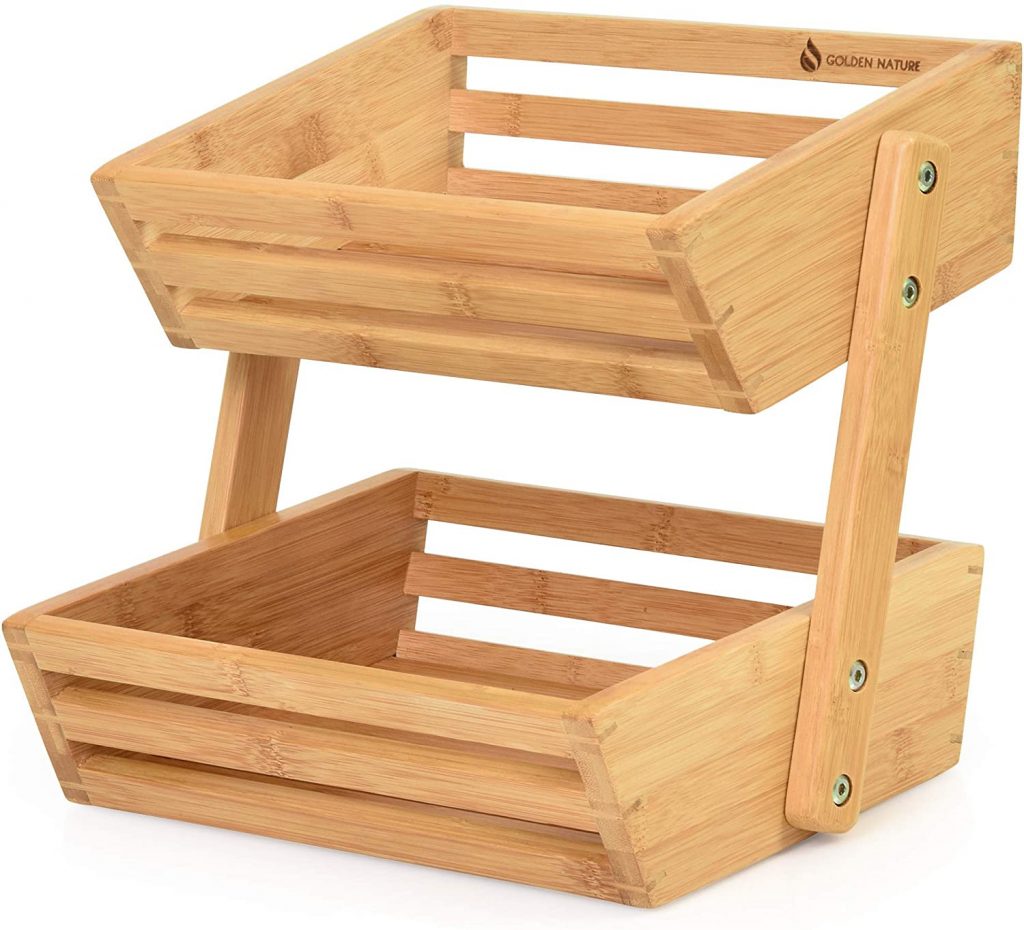
Your tall pull-out pantry might feature the use of natural wood and would need something to complement the ambiance of your kitchen. So how about an equally eco-friendly bamboo corner rack for maximizing the space of your pull-out pantry? Though designed to sit in the corner on a kitchen countertop, they take up minimal room when fitted within the pantry shelf but provide maximum storage.
The bamboo kitchen corner shelf is an attractive piece of furniture that will complement any modern kitchen. The shelves are made from sustainable and healthy organic bamboo, which can be washed with a damp cloth for easy maintenance! The assembly is easy, and you may even use it for groceries on the heavier side.
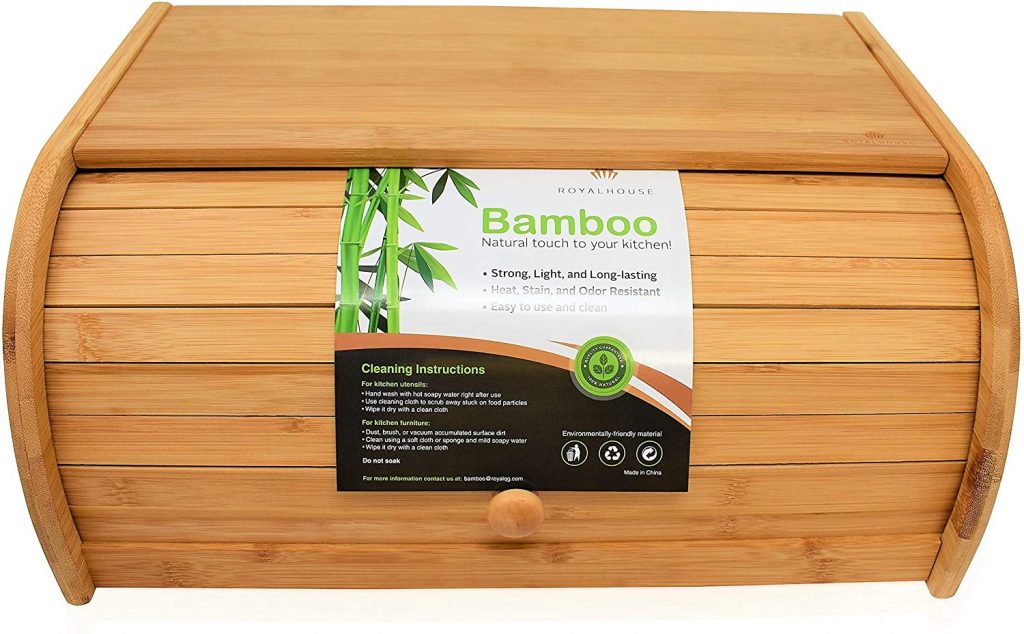
There are times when we open a food pack, not to use it again for weeks. But since the package is open, the food items may have a change in appearance or taste. These bread boxes are specifically designed to keep the bread fresh and squishy for longer. Similarly, if you have a pack of oats, chips, or anything fast perishable that needs to be kept safe from dust as well as moisture, these bread boxes will be more than helpful.
You will merely notice any difference in taste when items are stored in the bread box. Moreover, the natural beauty of bamboo is a perfect fit for your pantry. And while it keeps your food fresh, all you need for its maintenance is to sponge it with mild soapy water and then wipe it dry with a clean cloth.
The corner of the kitchen can be challenging to organize with all the different appliances and items there. This is where our blind corner organizer comes in. It is always a good idea to install these under the counter, pull-out pantry, or on the lower end of a tall pull-out pantry.
These pull-out pantry organizers are a great alternate way to grab all the stuff without having to bend over or lean into the tall pantries. These units slide out completely, and you can quickly grab hard-to-reach items. Therefore these racks are a must in homes with the elderly or spine issues that make bending over uncomfortable.
There are many advantages to a pull-down dish rack system, but the best thing about them is how easy they make it for people with short height. So instead of a pull-out shelf on the upper side of the pantry cabinet, go for a pull-down dish rack — yes, that’s one genius idea!
This pull-down dish rack from Whifea is made of 304 stainless steel and can be mounted within a cabinet (do check for size). It’s very sturdy, stable, and will not rust over time! The air pressure system holds it in place while you’re pulling the cans or food packs out — so there’s no worry about them toppling off if they aren’t put away properly right after using them. Just make sure to get the right size that fits within your pantry.
So if you’ve ever had to awkwardly hunch over and lift a heavy oil container or rice packet from the bottom deck of your pantry, this is a product for you! Just install an appliance lift instead of the lowest shelf on the pull-out pantry cabinet. It will allow you to effortlessly pull out those juice cans from the back without having to stoop down and break the back.
The appliance lifts will raise your groceries in the lowest section and bring them at arm’s reach. It also lowers or raises when you want it. These come in a wide range of sizes so that they can work with any size cabinet. This pull-out pantry hardware has a heavy-duty lifting mechanism that attaches to any customized shelving unit with a maximum weight capacity of up to 60 pounds.
Read more: How To Pull Out Stacked Washer Dryer
29. Get Large Containers for Bulk Storage
This product has a rating of B
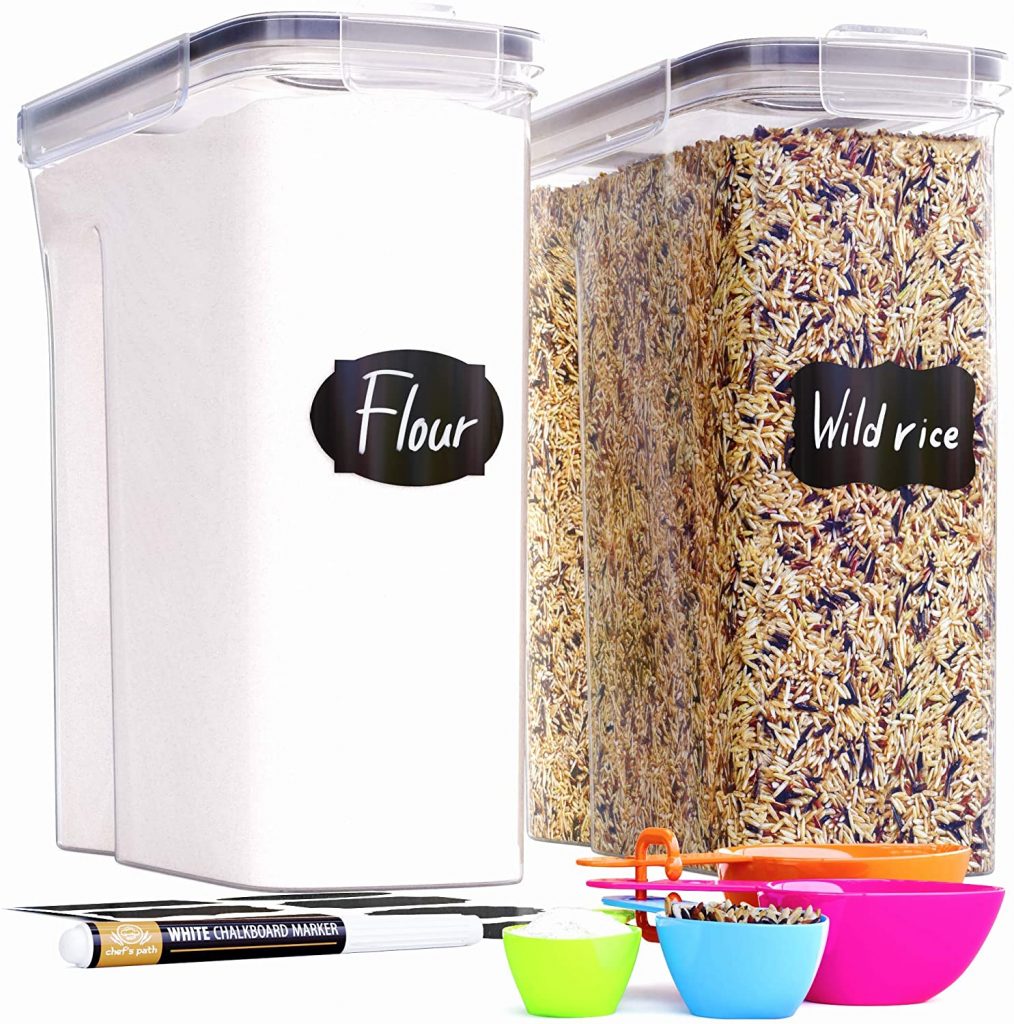
Like many other people, you might tend to buy your rice, sugar, flour, tea, or other grocery items in bulk. But then they keep scattering, falling, or occupying too much space in your pantry. One way to deal with this is to leave out the bottom shelf for storing heavier items on the base of the pantry cabinet frame. Even still, you might need a proper container that can have all the quantities of a single bulk item in place.
That is where large storage containers come into the picture. These food storage containers are perfect for protecting your favorite food for longer and in one place! Most of them come with side-locking lids that ensure maximum freshness and prolonged shelf life, so you’ll never have to worry about stale produce again.
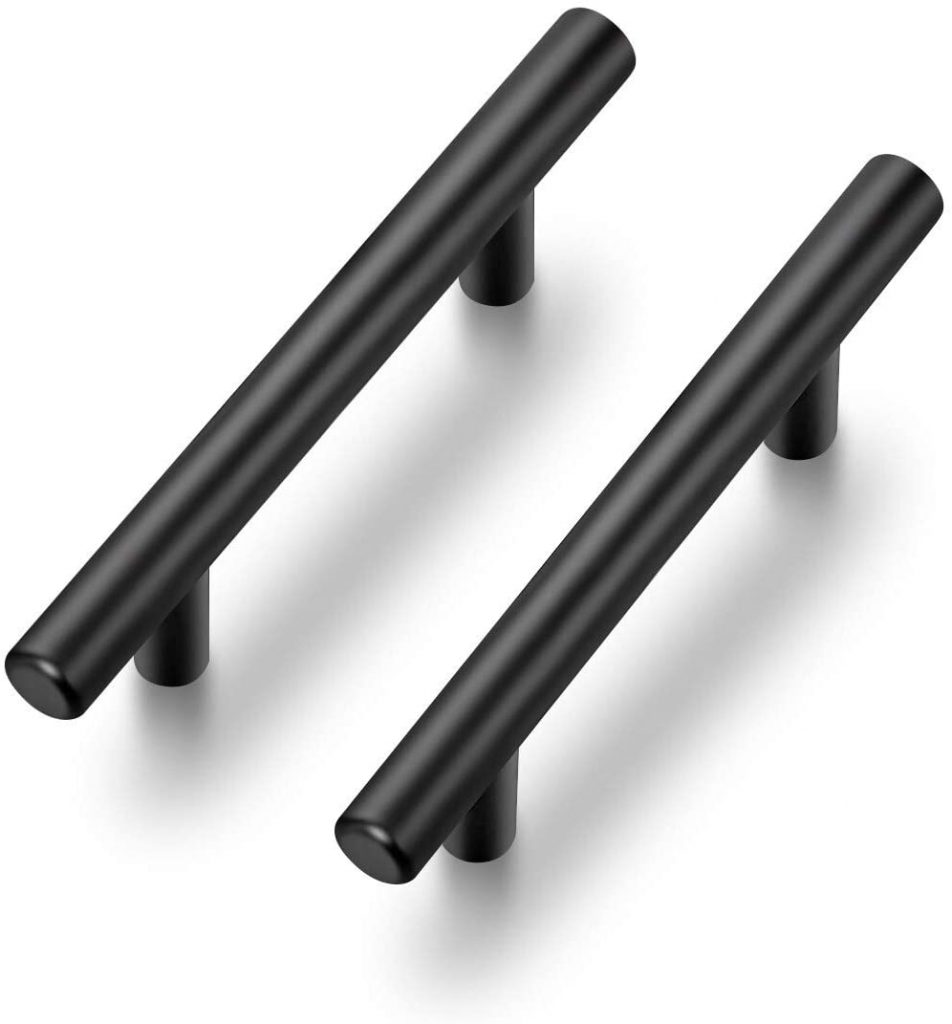
Many people are turning to more efficient and eco-friendly materials for their homes in today’s modern world. And when it comes to pull-out pantry hardware, pulls are not to be missed. Steel kitchen cabinet pulls are a great way to do this as they will last a lifetime while also being environmentally friendly. In addition, they come in many different colors, finishes, sizes, and shapes, which means you can find the perfect one for your space.
These pulls, apart from their matte black finish, are sleek and timeless, complementing each of the different styles in your home with ease: farmhouse, vintage, traditional or transitional. They are also available in brass and steel finish if you want another look.
31. How About a Hidden Door Storage Atop or Behind a Tall Pantry Door?
This product has a rating of A
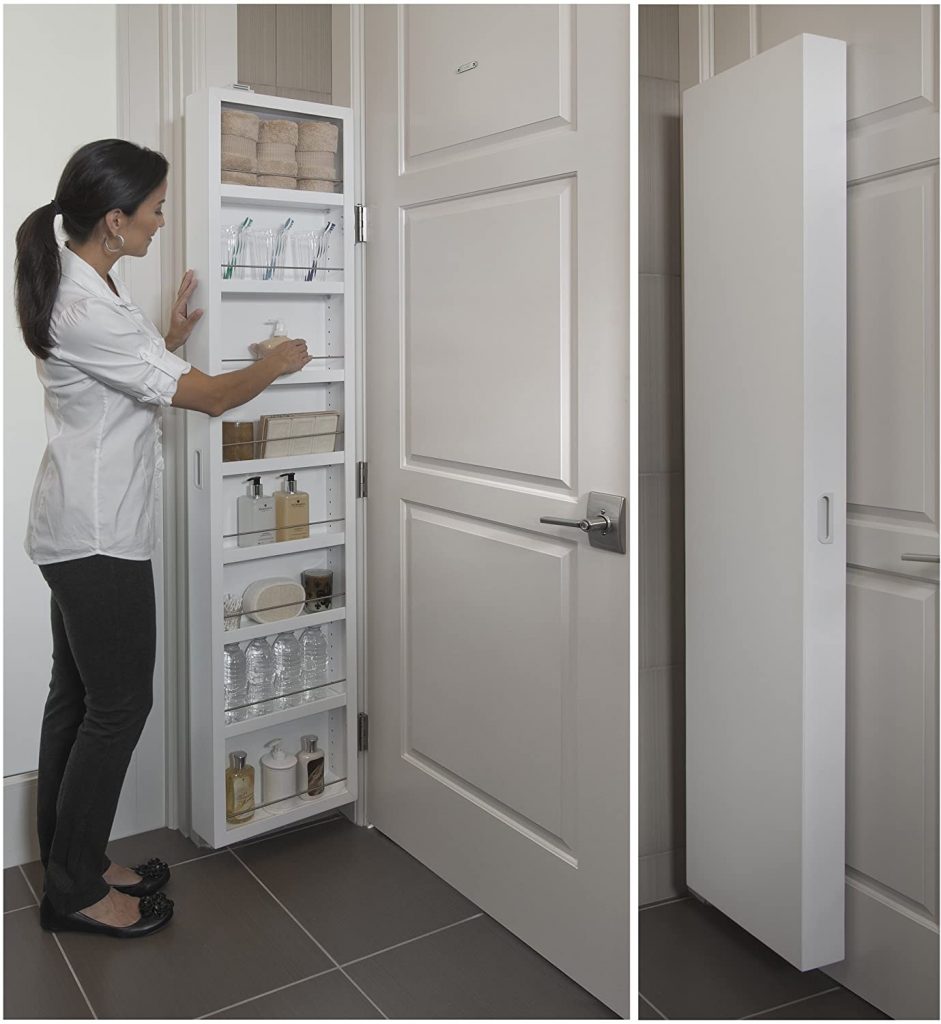
While your pull-out pantry might be short on space, here’s a quick fix solution that can add additional concealed storage space over your pantry door. And don’t go on its size to store as much weight as a standard spice rack. You can use it to store all kinds of spices and perishables that you need more often without having them clutter your kitchen countertop.
The slim yet tall cabinet has adjustable shelves and rods that can be moved vertically to customize the height between any two shelves. Only the middle shelf is fixed. Besides, the rods ensure that the containers do not fall off when you open this storage door. When closed, it conceals all the items, and they stay safe from dust as well.
Baskets can be used to organize and store everything from dishes, pots and pans, cooking utensils, spices, and more. Yet, one not so often spots where we use baskets in the pantry. These are perfect for keeping things like potatoes, cookies, cereals, and other smaller groceries organized. They will make it easier for you when cooking and give the appearance of a fancy chef in your own home, but they also can keep these items from going bad because of excess exposure.
The best part of having baskets in the pantry is that they can be moved around or stacked on top of each other as needed, so you can always find what you need quickly without having piles of stuff everywhere. And of course, you can pick and place them on the counter instead of fussing within the pantry to get what you want.
Read more: How To Install A Pull-Out Trash Can
33. Add Some Pockets to the Pantry Door
This product has a rating of B.
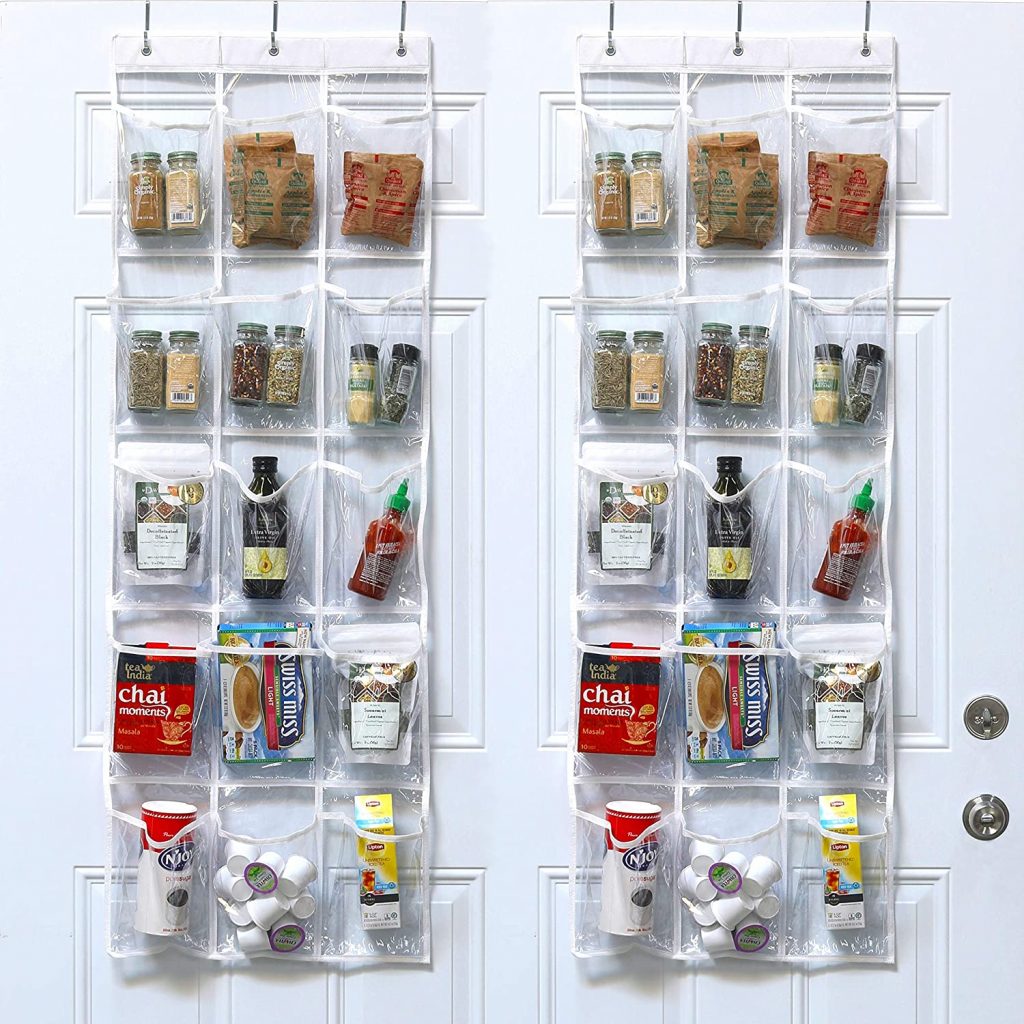
We have seen door hangers in the bedroom and bathroom for storing shoes, ties, accessories, and whatnot. But surprisingly, your kitchen pantry can also accommodate these products. For instance, this clear over-the-door hanger can come in handy to sort and store your tea, condiments, and even a bottle of sauce.
It can be hung on the facade of your tall pull-out pantry cabinet door and comes in a wide range of sizes. The installation is simple, and you will require no hardware for its installation. Additionally, the see-through pockets make it easy to locate and grab an item quickly, even while cooking.
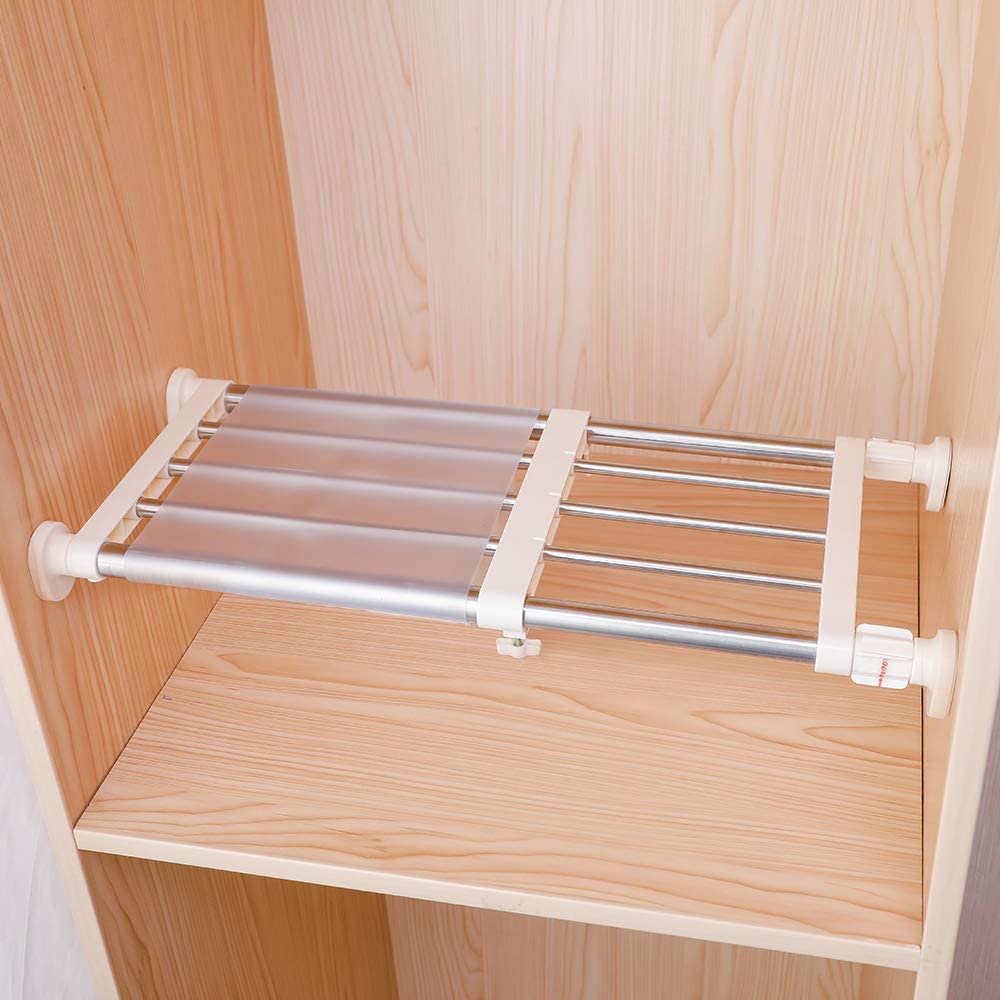
You’ll be surprised to know that you can instantly add a shelf to your pantry as and when you need it, without a single nail or hammer. The shelf is made from stainless steel composite pipe, and the ends have stayed in place thanks to anti-skid rubber ends. Even though the width of this shelf cannot be adjusted, you can always add more than one of these to cover more width on your pantry cabinet (don’t forget to do the math).
The length of the tension shelf can be adjusted to up to half and can fit most cabinets. Additionally, since so many sizes are available, you can buy one as per your requirement. Needless to say, these shelves will give you extra space for storing your food and other grocery packs and can bear a maximum weight load of detergent and oil canisters.
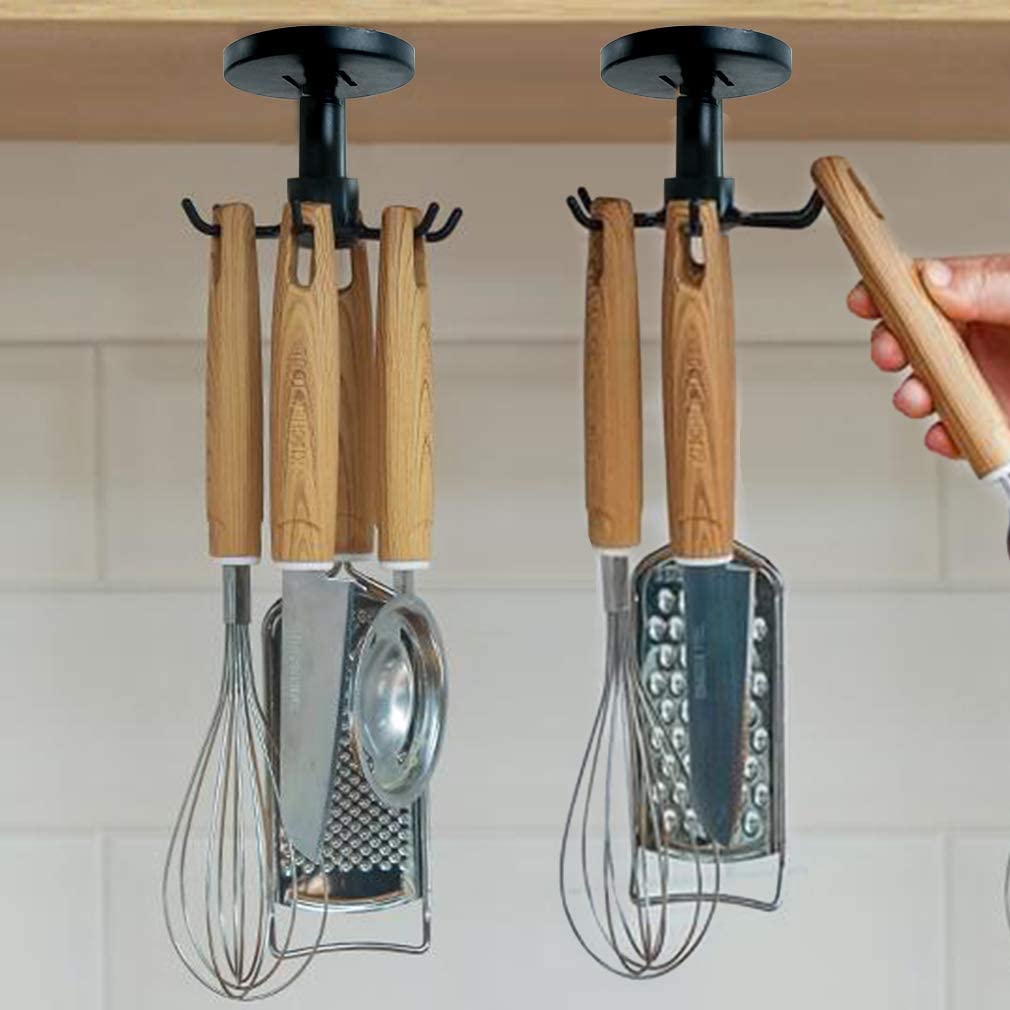
A stick-on under cabinet utensil holder that will hold onto any kind of shelf, metallic or wooden, is an instant fix for the unutilized under-shelf space. While these are designed to hold spoons, spatulas, whisks, and more, grocery packages that come with small hooks on the top can also be hung on them. The weight-bearing capacity is also pretty impressive.
The application hardly takes a minute. All you need to do is uncover the sticky strip and stick it under the shelf. Next, you have to slide the hook into the strip, and it’s ready for use. Did we also mention that the holder can rotate a full 360 degrees to make it more convenient?
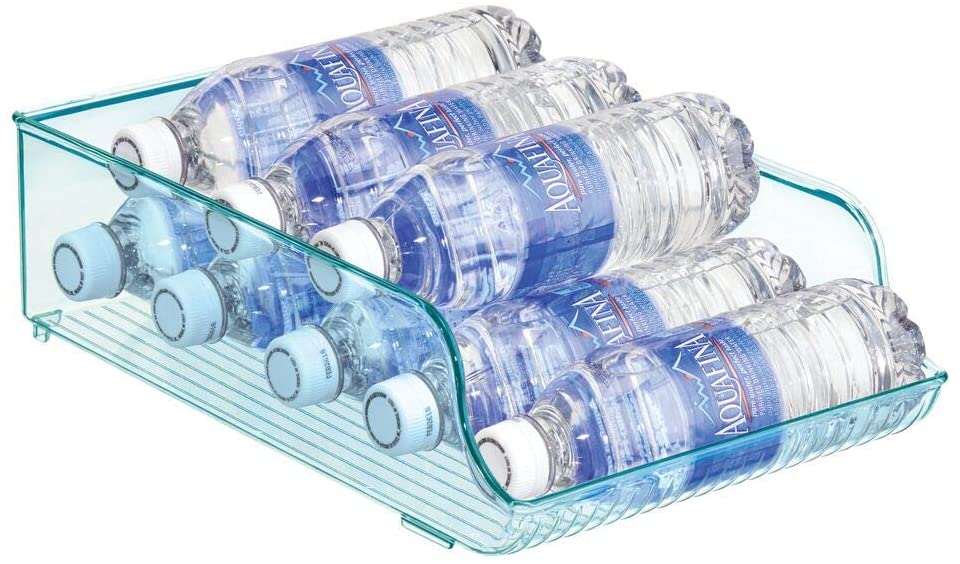
Ever found yourself looking for a water bottle in your kitchen and not being able to find one? Or not finding one in the fridge because there are too many bottles inside? This is where organizing your plastic water bottles comes in handy! No doubt half of your kitchen floor and slab is still littered with plastic bottles.
As a way out, you can use a plastic water bottle organizer tray rack. In fact, it will not only help you keep the kitchen clutter-free but also your refrigerator. As a result, you will have more space to stuff in other jars and food items. Besides, these storage trays are available in various sizes, so pick the one that fits the best in your kitchen.
Read more: What Size Mattress Is A Pull Out Couch
37. Introduce an Expandable Stackable Cabinet Shelf for All Pantry Sizes
This product has a rating of C
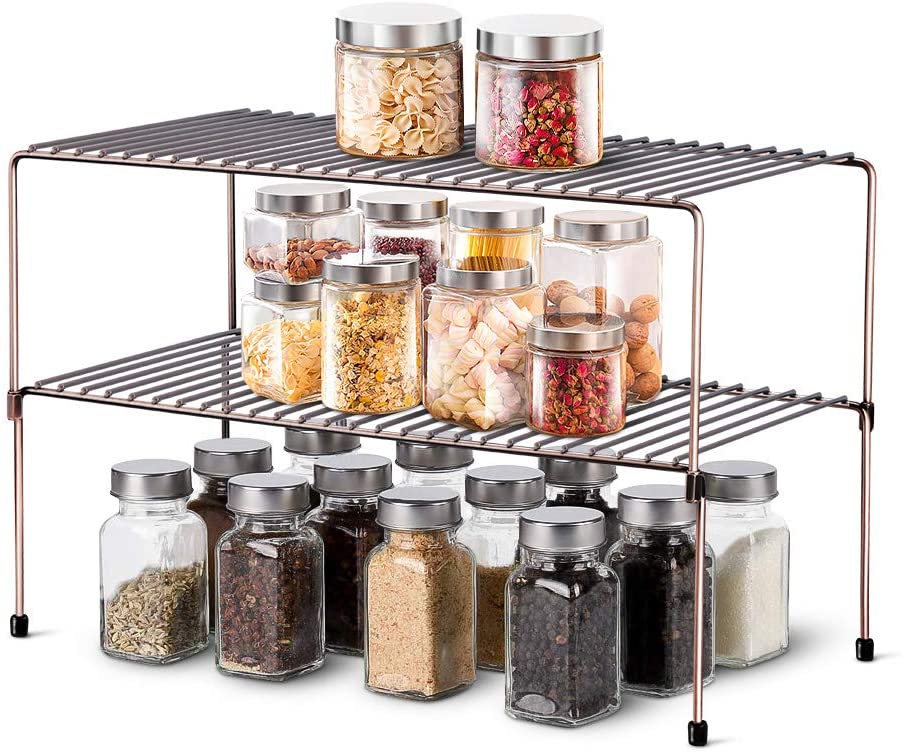
Don’t you feel like no matter how much you try to organize the pantry, there’s still never enough space to hold everything? And as we go through our supplies, more things come in and take up even more space! So the question is, where do we fit them? Well, with an expandable stackable cabinet shelf, there is no more going short on storage space in the kitchen, whether large or small.
Moreover, the expandable stackable cabinet shelf is one of the intelligent pull-out pantry organizers that help maximize your storage space. It can be placed on top of cabinets or under shelves, and it’s not only easy to install but also has a modern design that will make any room look chicer.
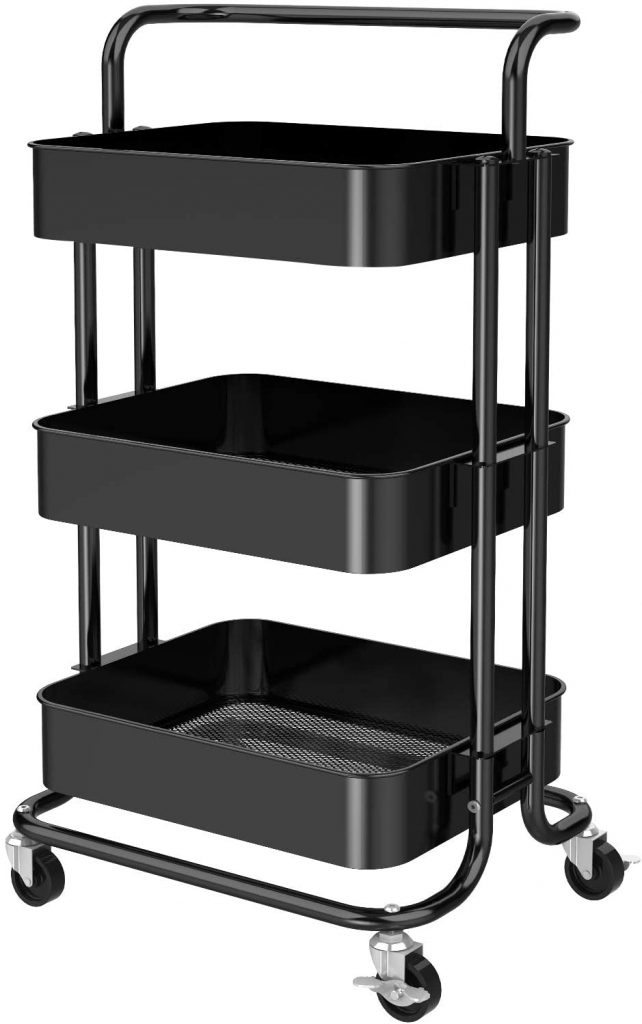
Wish to add more space without shelling much from your pocket? Yes, there’s a way out. The mobile pull-out pantry is an affordable way to add more space to your kitchen. You can set it up as a stand-alone unit with cabinets, shelves, and drawers or install it inside an existing cabinet. Apart from that, the best part is that this product will take up less room than most other pantries because it’s designed like a drawer system that slides out.
But before you get your hands on any product, make sure to measure the available space carefully. Not to mention, it’s always better if you go with too big rather than too small. Lastly, just arrange items on shelves according to size. Tall items at the back, short things along the front! Or however, it suits your pantry.

The straw bins and baskets are a favorite in the playrooms, offices, and closets everywhere and pantries. It is not only for the kids to have fun with, but it can also be good for you! For example, you can stack canned foods by category without lifting a lid to retrieve them or use them as a catch-all place to get napkins or tablecloths out of the way when they’re needed.
This storage system creates deeper space because these shelves tilt down, giving more room on top rather than just taking up floor space as some other shelf systems do. Moreover, you can use these bins to stack your cans by using one bin as a base and then placing another bin on top of it. That way, you’ll be able to store twice as many canned goods without taking up any extra space in your pantry!
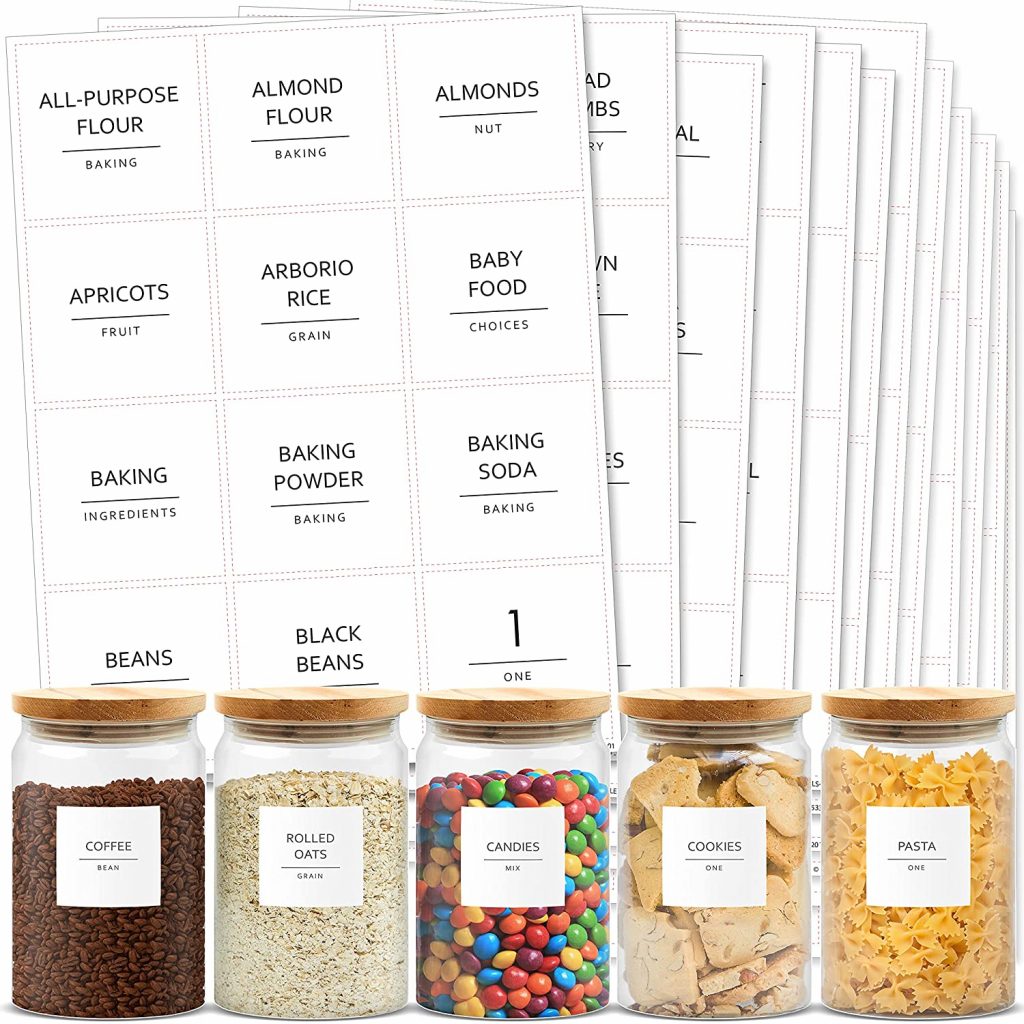
Ever feel like you’re wasting time in the kitchen because you can’t find what you want? It can be difficult to find that one thing in a sea of containers that hold the spices, the pulses, and whatnot! On top of that, those pots and pans crowded around the stovetop are enough to make anyone who spends most of the day in the kitchen feel overwhelmed!
Fortunately, you can make your life easy by labeling all your containers, pots, and pans with a permanent marker or label maker. By doing this, you’ll always know where everything is. In addition, the best part is you’ll save time cooking, cleaning up afterward, and knowing what ingredients are at hand for tomorrow’s dinner. An organized kitchen is every home cook’s dream come true, and yours can come true too if you put pull-out pantry organizer ideas like these to work.
Read more: How To Build A Vertical Pull-out Cabinet
41. Invest Smartly in Clear Containers
This product has a rating of B
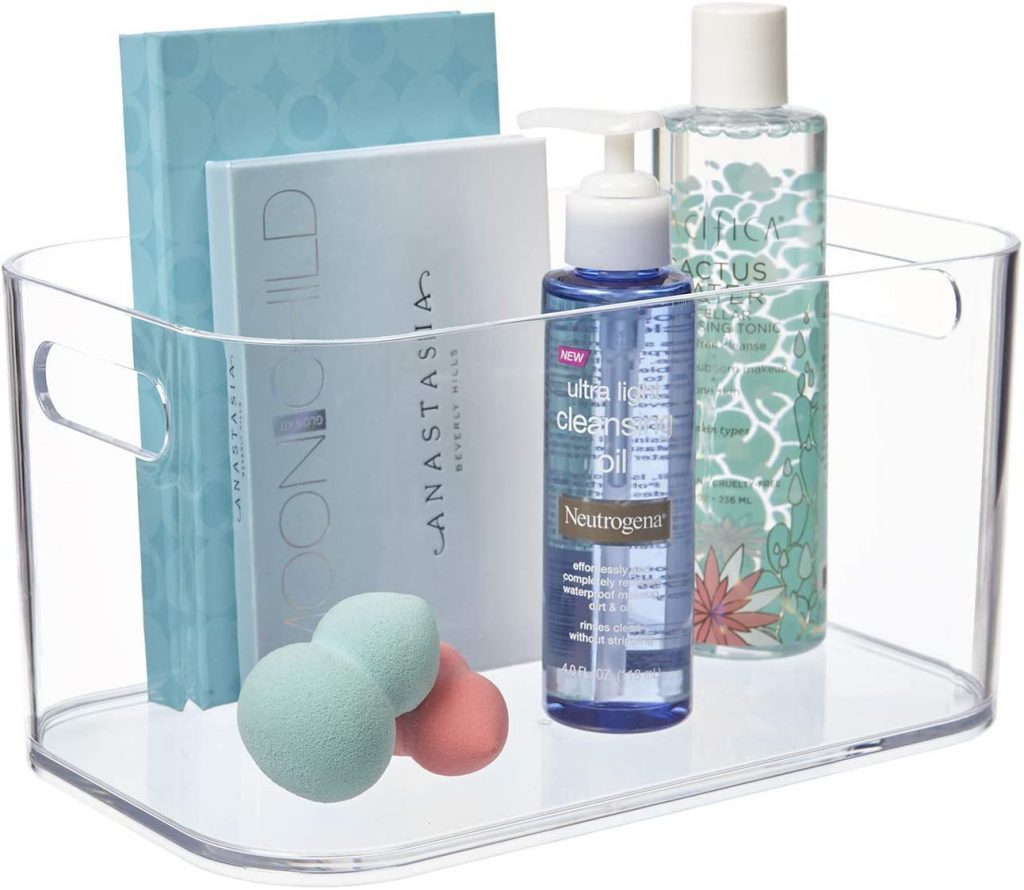
What if I told you it only takes changing out some containers for new ones with clear lids to make the kitchen a more enjoyable space. With clear containers, you can keep a quick inventory of the items you are running out on. The best part is that you can see everything inside of it at once, making it much easier to find what you need in a pinch. Also, if you do not feel like labeling the containers, this is a good way out.
Alternatively, you can have a wide container box to store multiple items like the cutlery stand, table salt and pepper set, tissue box, and many more things. Moreover, they will make your pantry look excellent and organized. So, get ready to become the kitchen queen of your friend’s group.
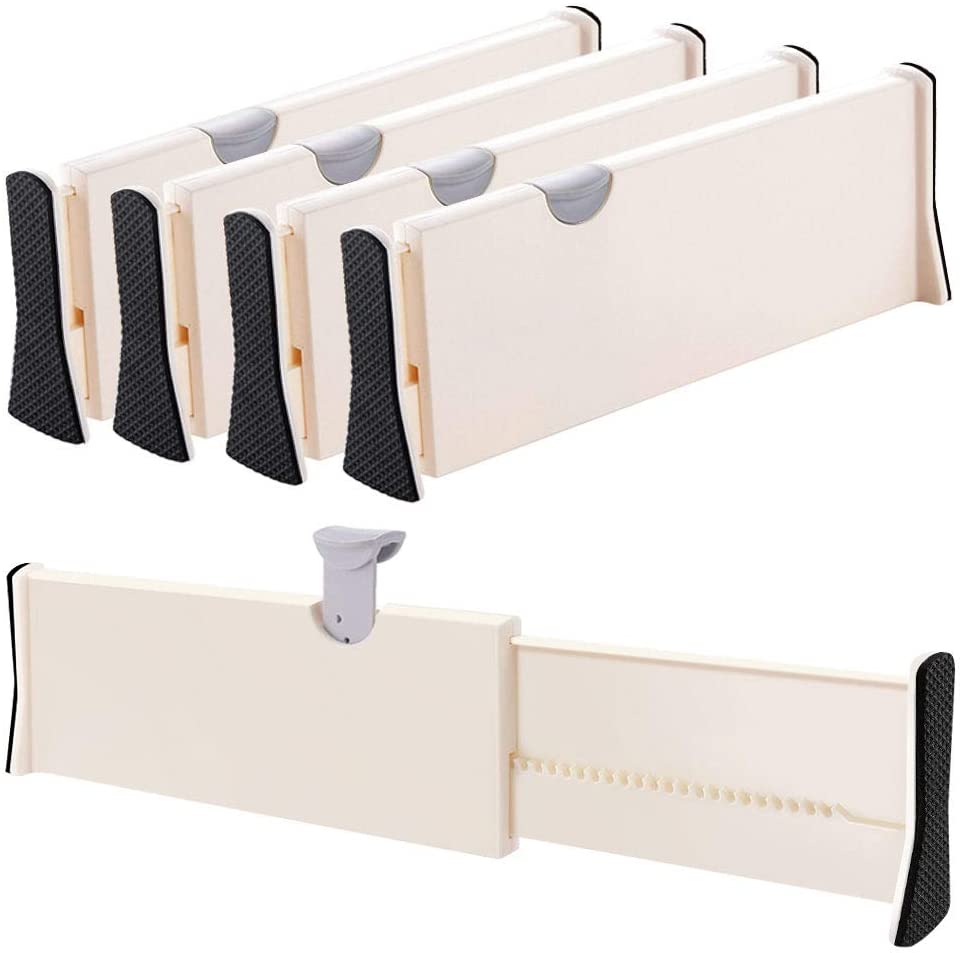
It’s no secret that we all have more things to juggle now than ever before. One way to make life just a little bit easier is by creating some separation within your drawers so that you can find what you’re looking for without having to dig through everything. Moreover, drawer separators come in many shapes and sizes, so they can be customized exactly how you need them.
Besides, this will also help you prevent all your bottles, cans, and other jars from clashing together and breaking. In addition to their usage, these handy items are super easy to install and use. You don’t require any pull-out pantry hardware to fix them inside the drawers. Plus, their spongy body prevents the glass bottles and jars from scratching or cracking.

Need to organize your spices but can’t find any extra cabinet space? If you are looking for a tremendous vertical pull-out pantry solution, over-the-door storage organizers can help. Moreover, it is perfect for storing those small kitchen items that don’t quite fit on the shelves. Also, these come with hooks on one side of the door and shelves on the other for storing things like canned goods and dry foods.
It hangs right over a door or closet rod, taking up little to no floor space while still providing ample storage. You can go for the one that has multiple racks or cabinets so that you get to store most of your belongings. Besides, make sure that you do not buy a hefty one. Since it will hang the entire time and the items might make it heavier, it’s advisable to keep check of your door’s deformity.
Put those walls to use and make the best out of them by turning them into storage space. There are many reasons people love the idea of a sliding cabinet basket on one of the pantry walls. In fact, it’s one of those little things that can really make your life easier, and it’s easy to do! The best part is you don’t have to be an expert carpenter or even know how to use power tools in order to install this handy storage system.
All you need is a few simple supplies, some time, and the willingness to give it a try. If not on the wall, you can also try fixing these under the kitchen sink. This way, too, you are saving and adding a lot of space. Easy to slide and spacious. Indeed, these drawers will add not only function but also a modern touch to the pantry.
Read more: How To Fix Towel Bar Pulled Out Of Wall
45. Separate Perishables and Non-Perishables Using Shelf Dividers
This product has a rating of B
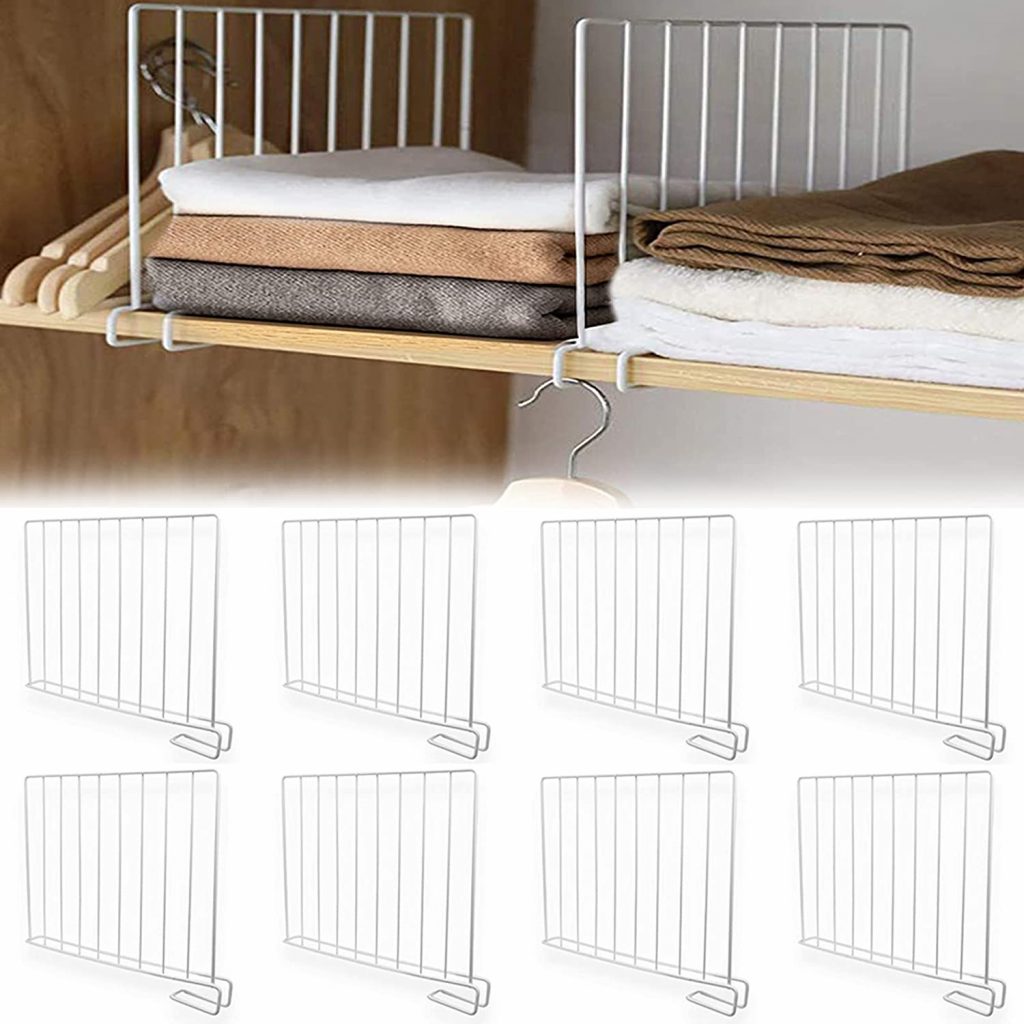
You might be thinking, “why should I use shelf dividers in my kitchen?” Well, let me tell you! Shelf dividers will help keep your pantry organized by separating perishable and non-perishable items. Moreover, you can also create sections for different types of food, such as canned goods or cereal.
On top of that, you can also use these in your fridge as they will be much more organized with shelf dividers. In addition, they’ll allow you to see all the contents at once rather than having to search through a cluttered mess of condiments and sauces. Alternatively, if you wish to DIY your own shelf divider, do it through cardboard. Simply measure out an area on the shelf, cut a piece of cardboard or other material into strips, tape them together, and voila.
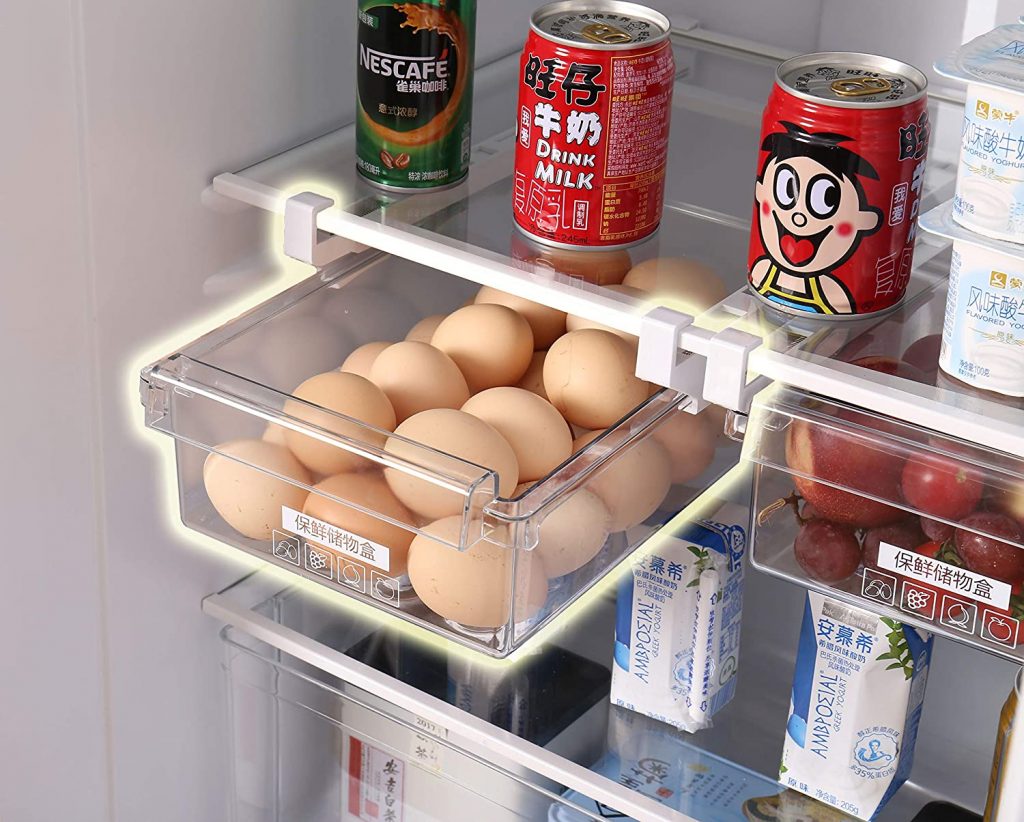
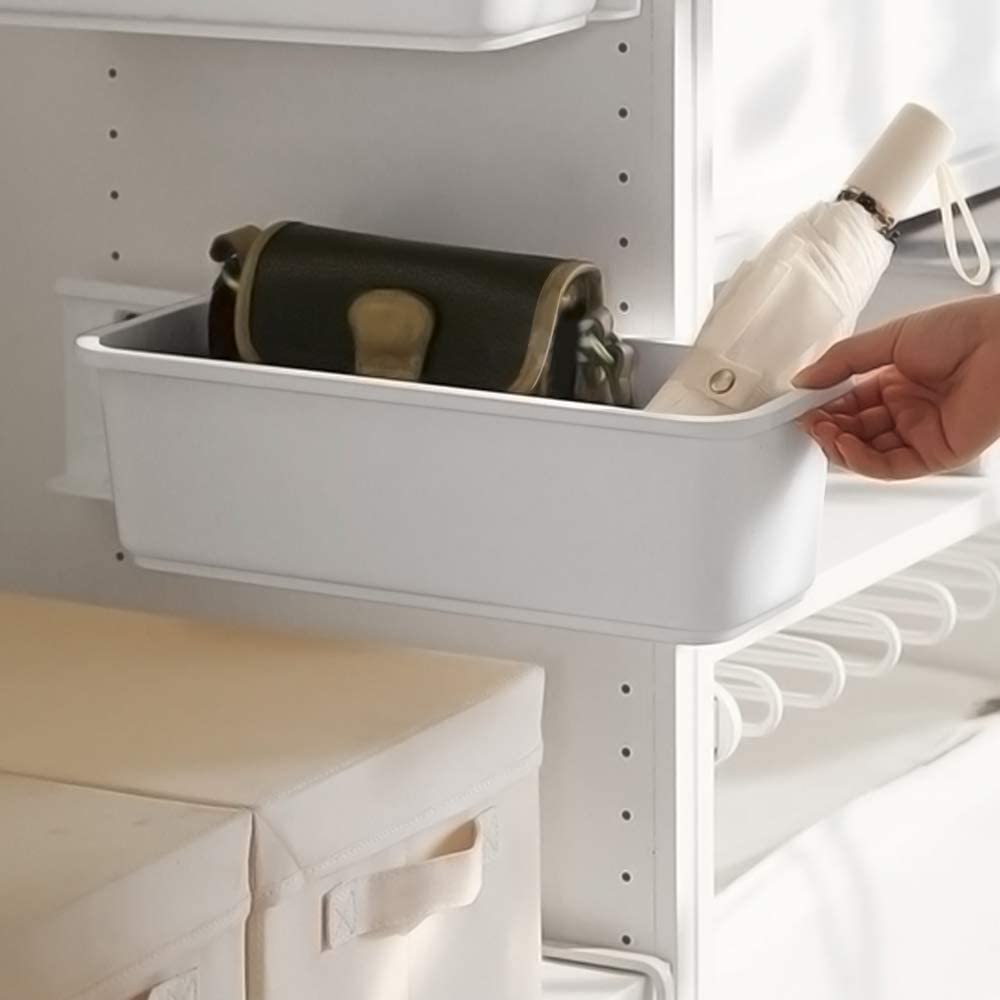
How can you add storage space and make your kitchen more functional by installing refrigerator pull-out bins under the shelves of your pantry? These refrigerators are installed on the backside of a cabinet or wall that is adjacent to your fridge. Installing them in this way will allow you to access items from both refrigerators without having to open up two doors at once.
Moreover, they easily slide in and out on a smooth glide track to prevent the fridge from scratching or staining. However, you will be required to note one thing before buying one is the size of your fridge and the wall. Once you have it, it’s an easy peasy thing to install it—no tools required, installed in seconds.
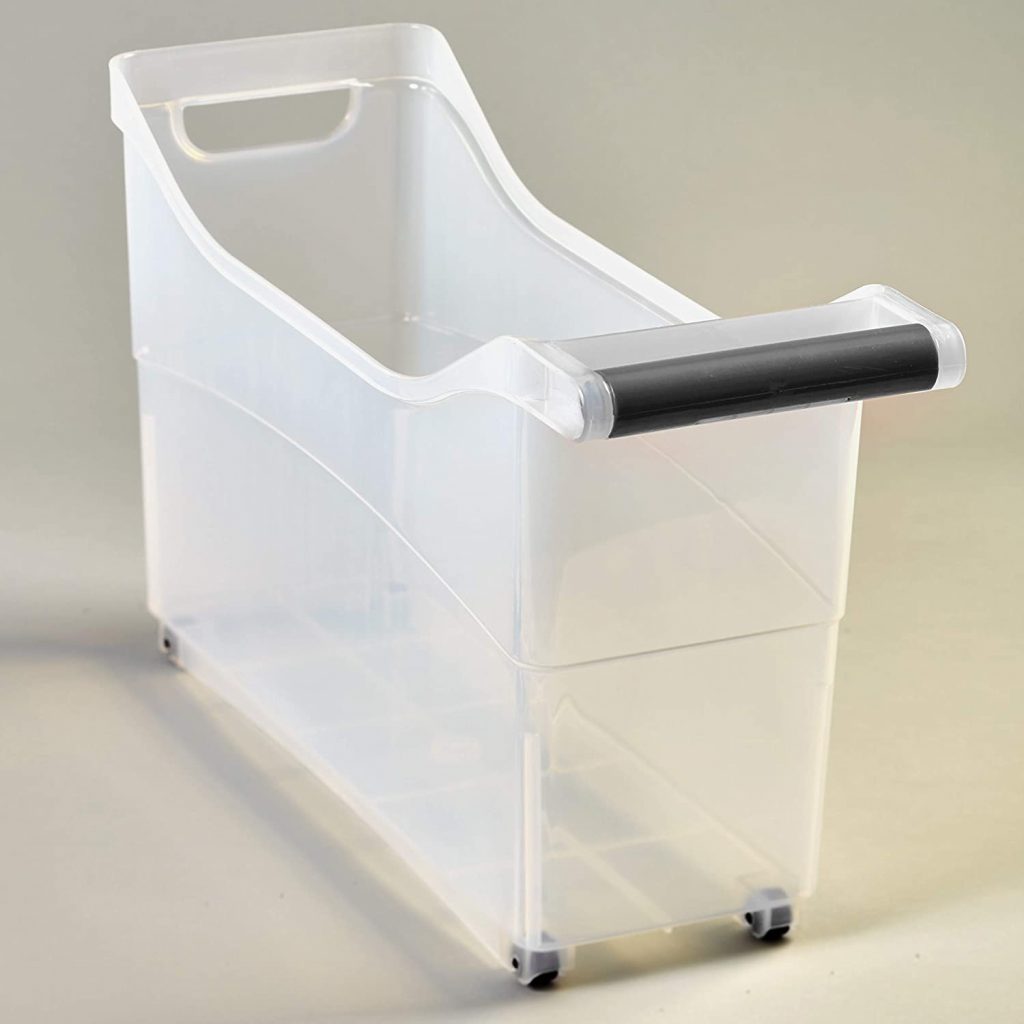
There are many reasons why you may want to consider investing in rolling storage bins for leafy veggies. For instance, these types of containers make it easy to store your produce and keep them fresh longer. Moreover, you can also use them as an alternative to plastic bags that you have to throw away after one use.
The rolling storage bins are great not only because of their function but also because they’re super stylish. They can be used to store anything from produce to clothes and veggies and fruits. Furthermore, they are available in various designs, including the ones that have wheels. These are better as you don’t have to lift them every time to put or take out items from them.
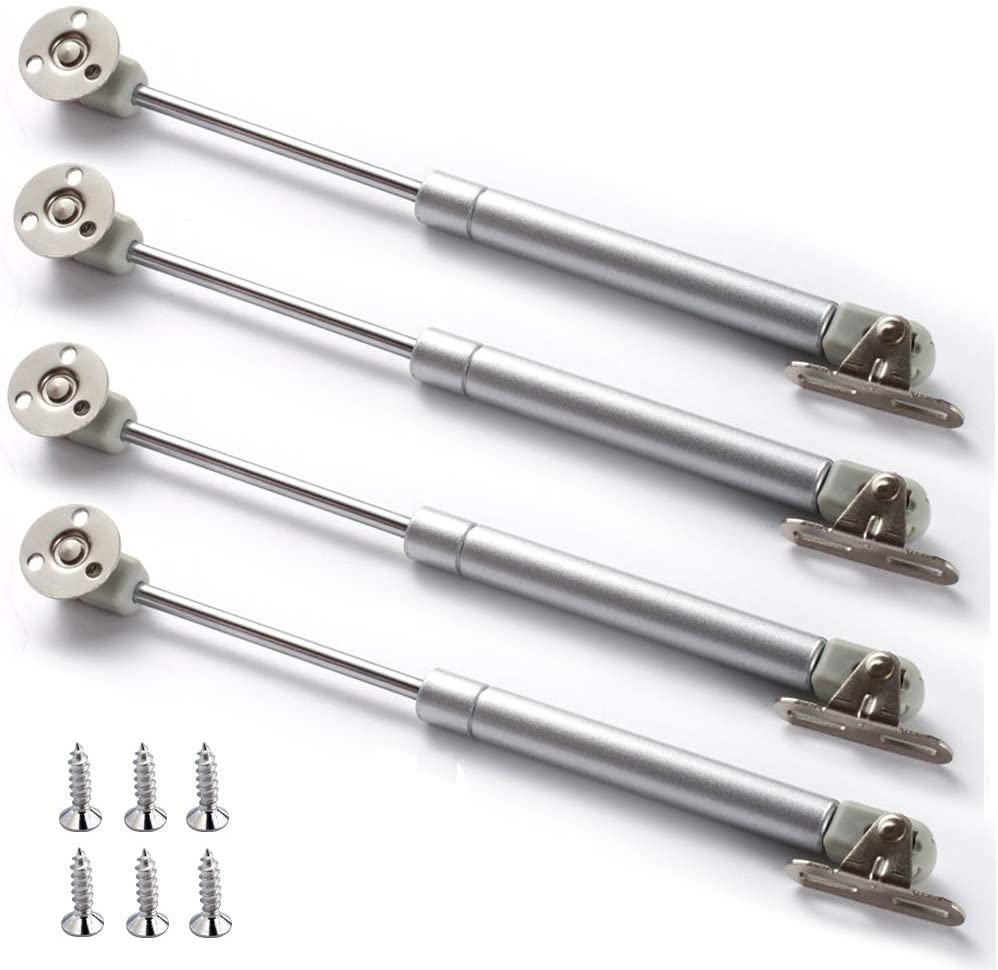
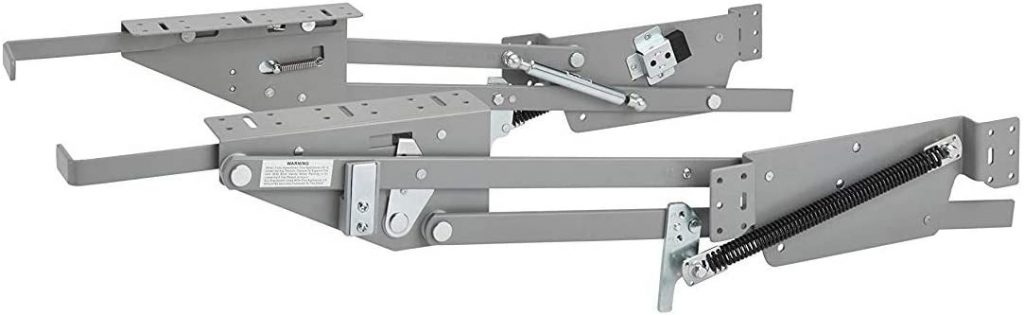
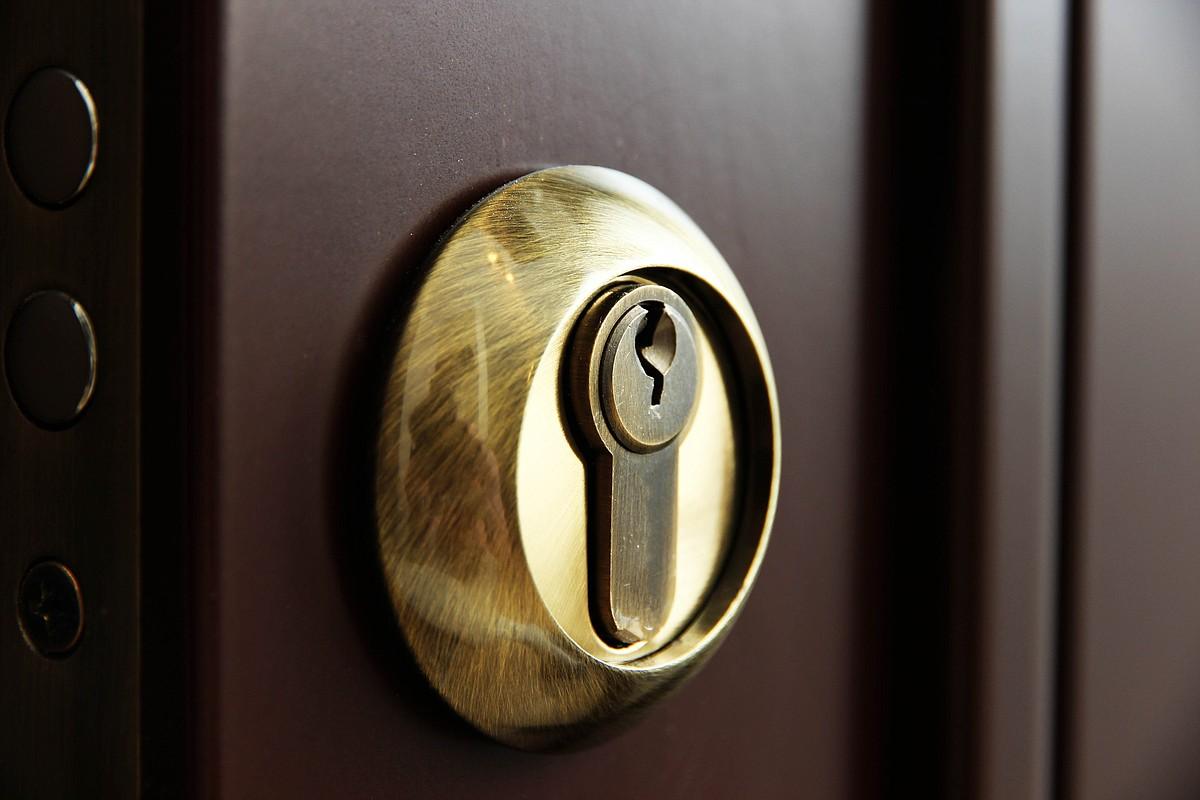
The weight of a heavy door pulls it down, so there are instances where you often have to use two hands in order to keep it up. What if there was a way for the door to stay up on its own? The hydraulic support is an innovative product that provides support for pull-up pantry doors. This means that when you close the door, all of the weight is transferred onto two metal hinges which then go back into place without any need for manual assistance whatsoever.
Due to their automatic expansion, you can fit them into the drawer, kitchen cupboard door, cabinet, and so on. Most cabinets fit with these hydraulic supports. Apart from that, these do not look ugly like some other steel rods installed on the walls.
Read also: 10 Amazing Pull Out Kitchen Faucet for 2025
49. Use Tall Adjustable Rack For Tall Pull Out Pantry
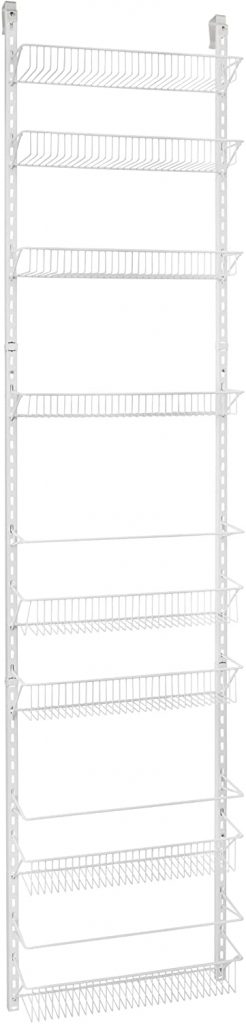
This product has a rating of F
One of the most inexpensive solutions to enhance storage space is by using a tall adjustable rack. The best part of using this is that now all those items are neatly tucked away inside shelves. And on top of that, they will remain out of sight and organized by what they are (such as canned goods, cereals, pasta).
These racks are designed to be installed on the back wall so that you can store more food in less space. This vertical storage system frees up floor space and allows you to see all your goods at once — perfect for those with large families. Since the shelves are adjustable, you can easily customize this rack to fit your needs.
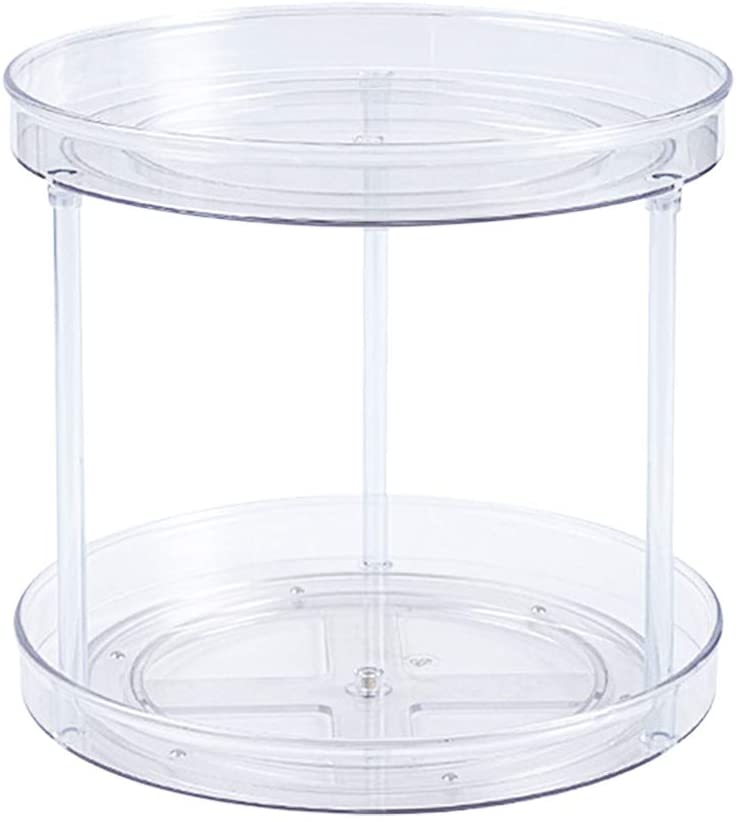
No doubt you remain busy most of the time, and with all the chaos, the one thing that is the most affected is your kitchen. If you’re looking for a way to optimize your pantry storage, introduce a fancy round clear cabinet organizer. Not only does it provide an easy-to-access surface that can hold all your favorite dishes and cookware, but it also helps reduce food waste by eliminating clutter in my cabinets.
Moreover, you will love how you won’t ever have to worry about the spices getting mixed up. You also won’t have to be concerned about having too much sugar on hand anymore because now everything has its own place. As it is clear and transparent, everything will be right in front of your eyes whenever you need it.
Many people think that the kitchen is just for cooking and eating, but it’s also a place to store things. So we shared some innovative concepts that can be applied to a tall pull-out pantry to pull-out pantry organizer so that your grocery storage shall no longer be a headache.
If you are running out of space in your cupboards or pantry, try pulling out some of these ideas we shared with you. You will be able to see everything you have and find what you need faster.
Was this page helpful?
At Storables.com, we guarantee accurate and reliable information. Our content, validated by Expert Board Contributors, is crafted following stringent Editorial Policies. We're committed to providing you with well-researched, expert-backed insights for all your informational needs.

0 thoughts on “50 Riveting Pull-Out Pantry (Best Guaranteed)”