Home>Articles>How Often Should You Change The Water Pump On An Outboard Motor
Articles
How Often Should You Change The Water Pump On An Outboard Motor
Modified: February 22, 2024
Discover expert articles on how often you should change the water pump on an outboard motor. Find all the essential information you need for optimal maintenance and performance.
(Many of the links in this article redirect to a specific reviewed product. Your purchase of these products through affiliate links helps to generate commission for Storables.com, at no extra cost. Learn more)
Introduction
Welcome to our comprehensive guide on how often you should change the water pump on an outboard motor. The water pump is a critical component in ensuring that your outboard motor is functioning optimally. It helps to cool down the engine by pumping water into the system, preventing it from overheating and causing potential damage.
Understanding the importance of the water pump and knowing when it needs to be replaced is essential for maintaining the performance and longevity of your outboard motor. In this article, we will dive into the signs that indicate a water pump replacement is necessary, factors to consider when determining the timing of replacement, and provide step-by-step instructions on how to change the water pump.
Whether you use your outboard motor for recreational purposes or rely on it for professional activities, such as fishing or water sports, regularly checking and replacing the water pump is crucial for avoiding costly repairs and keeping your motor running smoothly. So, let’s delve into the details and ensure that you have the knowledge to take care of your outboard motor’s water pump!
Key Takeaways:
- Regularly inspect and replace the water pump in your outboard motor to prevent overheating, low water flow, and excessive noise, ensuring optimal performance and avoiding costly repairs.
- Consider factors such as manufacturer recommendations, age, usage, and environmental conditions when determining the timing of water pump replacement, and follow maintenance tips to keep your outboard motor’s water pump in excellent condition.
Understanding the Water Pump in an Outboard Motor
The water pump in an outboard motor plays a vital role in keeping the engine cool and preventing overheating. It is responsible for circulating water through the cooling system to dissipate the heat generated by the engine’s internal combustion process.
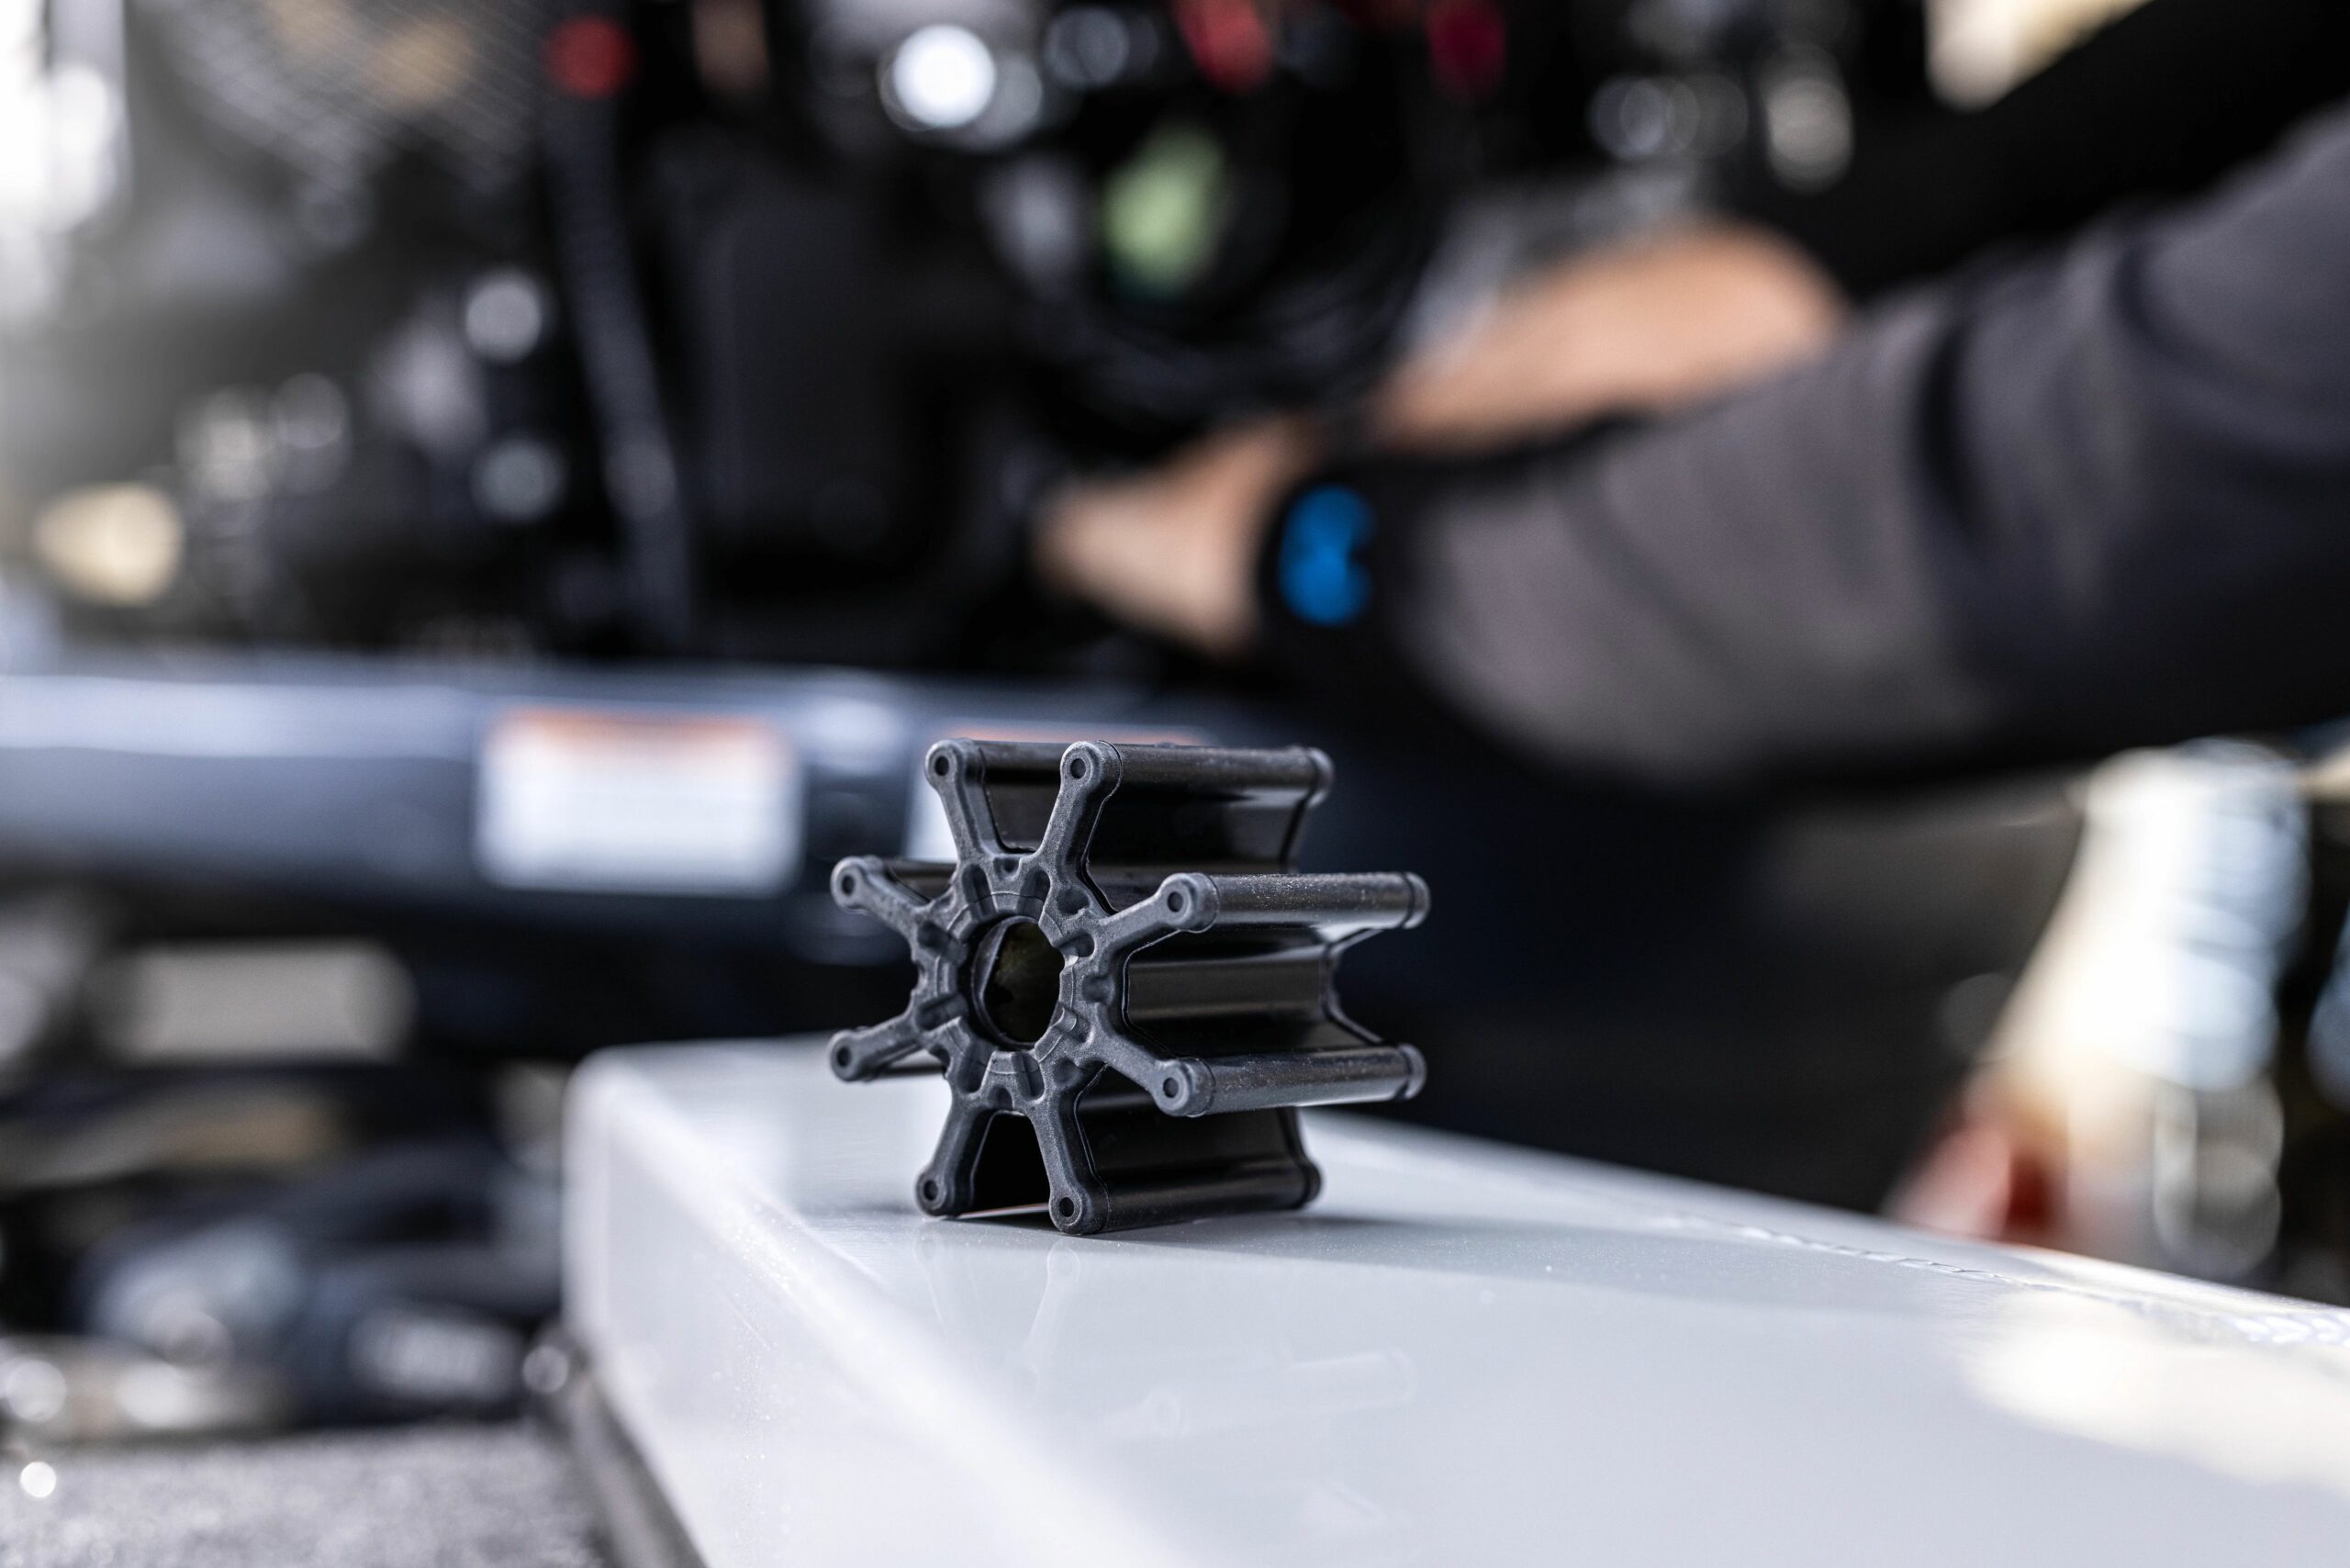
The water pump consists of several key components, including the impeller, housing, and gaskets. The impeller is a rubber or plastic blade that rotates when the motor is running, drawing water from the surrounding environment and pushing it through the cooling system. The housing encloses the impeller and ensures a tight seal to prevent water leakage. Gaskets are used to seal the connections between the various components to maintain water flow.
As the impeller spins, it creates a low-pressure zone that draws water into the pump. The water is then forced through the cooling passages and channels within the motor, absorbing heat and carrying it away. By continuously circulating water, the pump helps regulate the engine’s temperature, preventing it from reaching dangerous levels.
Over time, the water pump may wear out due to normal use and exposure to harsh environmental conditions. The impeller can become brittle, the housing may develop cracks, and the gaskets can deteriorate. These factors can lead to decreased water flow and compromised cooling efficiency.
Regularly inspecting the water pump and its components is crucial to ensure optimal performance. Look for any signs of damage, wear, or leakage. Additionally, pay close attention to the impeller’s condition as it is the most critical part of the water pump. If it appears worn, cracked, or damaged, it is a clear sign that the water pump needs to be replaced.
Now that we have a better understanding of the water pump’s role in an outboard motor, let’s explore the signs that indicate a water pump replacement is necessary in the next section.
Signs that the Water Pump Needs to be Changed
Recognizing the signs that indicate a water pump replacement is necessary can save you from potential engine damage and costly repairs. Here are some telltale signs that your outboard motor’s water pump needs to be changed:
- Overheating: If your motor is consistently running hotter than usual or reaching high temperatures, it could be an indication that the water pump is not functioning properly. The lack of sufficient water flow can lead to inadequate cooling, causing the engine to overheat.
- Low Water Flow: Check for a weak or reduced water flow from the tell-tale or pee stream. The tell-tale is a small hole or outlet located on the side of the motor’s lower unit. If the water flow is weak or intermittent, it suggests that the impeller is not pumping water efficiently, indicating a potential problem with the water pump.
- Excessive Noise: Unusual noises coming from the water pump area, such as grinding, rattling, or squealing sounds, can be an indication of a worn-out impeller. A damaged impeller cannot properly circulate water, leading to increased friction and noise.
- Leakage: If you notice water dripping or leaking from the water pump area, it indicates a faulty seal or gasket. These components are crucial for maintaining a tight seal and preventing water from escaping the system. A leaking water pump can result in reduced water flow and potential engine damage if left unaddressed.
- Consistent Overheating Alarms: Most outboard motors are equipped with temperature sensors and alarms that alert you to overheating issues. If your motor frequently triggers these alarms, even after verifying that there are no other underlying causes, it is a strong indication that the water pump needs replacement.
These signs are clear indicators that it is time to change or repair your outboard motor’s water pump. Ignoring these warning signs can lead to severe engine damage due to overheating, resulting in costly repairs and downtime.
Next, let’s discuss the factors to consider when determining the timing of water pump replacement for your outboard motor.
Factors to Consider for Water Pump Replacement
When it comes to deciding the timing for water pump replacement in an outboard motor, several factors need to be considered. While there is no fixed schedule for replacement, evaluating these factors will help you determine the appropriate time to change the water pump:
- Manufacturer Recommendations: Check the owner’s manual or consult the manufacturer’s guidelines for recommended maintenance intervals. Some manufacturers provide specific recommendations on when to inspect or replace the water pump based on hours of operation or duration of use.
- Age and Usage: Consider the age of your outboard motor and how frequently it is used. Motors that are older or subjected to heavy or continuous usage may require more frequent water pump replacements. If you are unsure, it is a good idea to inspect the water pump regularly and consult with a professional.
- Environmental Conditions: Evaluate the conditions in which you operate your outboard motor. If you frequently navigate in shallow, debris-filled waters or experience significant exposure to sand, mud, or other contaminants, it can accelerate the wear and tear on the water pump. In such cases, more frequent inspections and replacements may be necessary.
- Visual Inspection: Regularly inspect the water pump for any signs of damage, wear, or leakage. If you notice any issues with the impeller, housing, or gaskets, it is a clear indication that a replacement is needed, regardless of other factors.
- Performance and Maintenance Records: Keep track of the performance of your outboard motor and maintenance records, including any previous water pump replacements. This information can help you identify patterns or trends and make informed decisions about when to change the water pump.
By considering these factors, you can develop a better understanding of when the water pump in your outboard motor should be replaced. It is important to remember that early detection and proactive replacement can prevent potential damage to the engine and ensure optimal performance.
In the next section, we will discuss the frequency of water pump replacement based on usage to provide you with a more specific guideline.
It is recommended to change the water pump on an outboard motor every 2-3 years or after every 200 hours of use to ensure proper cooling and prevent damage to the engine. Regular maintenance is key to keeping your outboard motor running smoothly.
Frequency of Water Pump Replacement Based on Usage
The frequency of water pump replacement for an outboard motor can vary depending on the usage and operational hours. While there is no one-size-fits-all answer, here are some general guidelines to consider:
- Recreational Use: If you use your outboard motor for recreational purposes, such as leisure boating or occasional fishing trips, it is generally recommended to inspect the water pump annually and replace it every 2-3 years, even if there are no apparent issues. This timeframe helps ensure that the water pump remains in optimal condition and reduces the risk of unexpected failures.
- Commercial or Professional Use: For those who rely on their outboard motor extensively for commercial activities, such as fishing charters or water sports, the water pump may require more frequent inspections and replacements. It is advisable to check the pump every 100-200 operating hours and replace it every 1-2 years, depending on wear and tear observed during inspections.
- Extreme Conditions: If you often operate your outboard motor in harsh or challenging conditions, such as saltwater environments or areas with high debris, the water pump may deteriorate faster. In such cases, more frequent inspections and replacements may be necessary. Consider inspecting the water pump every 50-100 operating hours and replacing it every 6-12 months, depending on the level of wear and tear.
It is important to remember that these guidelines are general recommendations and should be used as a starting point. Factors such as manufacturer recommendations, visual inspection, and maintenance records should also be considered when determining the frequency of water pump replacement.
Keep in mind that regular maintenance and proactive replacement are key to optimizing the performance and longevity of your outboard motor’s water pump. By staying attentive to the signs of wear and using these frequency guidelines as a reference, you can ensure that your water pump is in good working condition and minimize the risk of unexpected failures.
Now that we have discussed the factors to consider and frequency guidelines, let’s move on to the practical aspects of changing the water pump on an outboard motor.
Read more: How Often Should You Change Mattress
Steps to Change the Water Pump on an Outboard Motor
Changing the water pump on an outboard motor may seem like a complex task, but with the right tools and a systematic approach, it can be done successfully. Here are the steps to follow:
- Gather the Necessary Tools and Parts: Before starting, make sure you have all the required tools, including a socket set, screwdrivers, pliers, and a replacement water pump kit that includes a new impeller, housing, and gaskets.
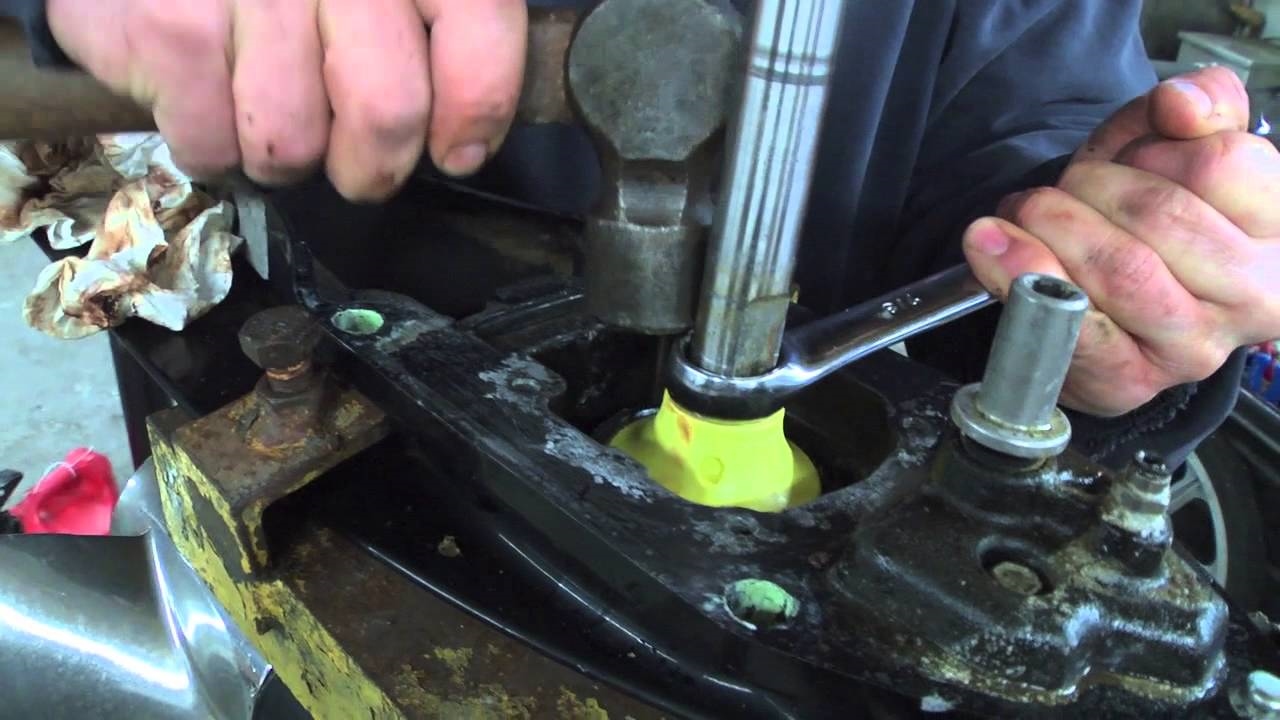
- Prepare the Motor: Disconnect the battery to prevent any accidental starting. Tilt the motor up and secure it using an appropriate support system to access the lower unit.
- Remove the Lower Unit: Use a socket set to remove the bolts securing the lower unit to the upper unit. Carefully disconnect any electrical or plumbing connections, and slide the lower unit down and away from the upper unit.
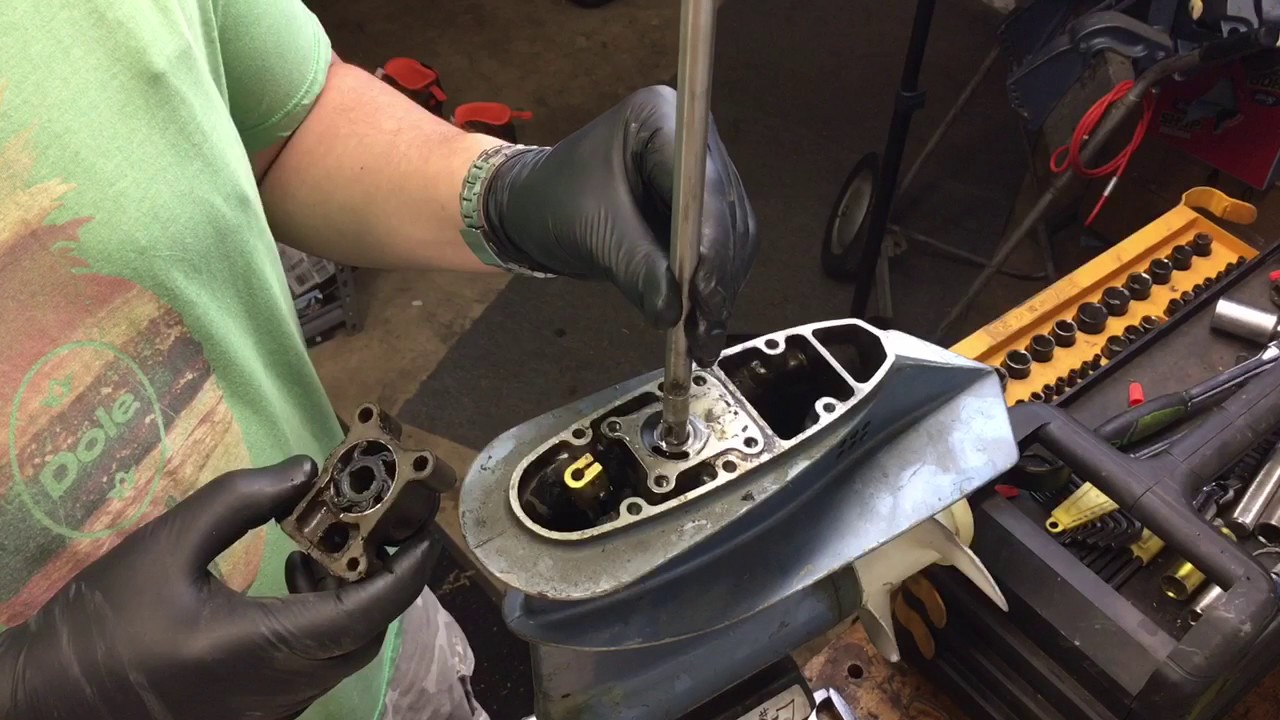
- Access the Water Pump: Locate the water pump housing, which is typically located near the top of the lower unit. Remove the bolts or screws that secure the housing in place and carefully detach it from the lower unit.
- Remove the Old Components: Take out the old impeller from the housing, checking for any signs of damage or wear. Inspect the housing and gaskets as well, replacing them if necessary.
- Install the New Components: Lubricate the new impeller with a water-resistant lubricant and carefully place it into the housing, ensuring the blades are facing in the correct direction. Replace any worn gaskets and securely fasten the housing back onto the lower unit.
- Reassemble the Lower Unit: Align the splines on the driveshaft and the bottom of the powerhead, then raise the lower unit back into position. Reconnect any electrical or plumbing connections and use the socket set to tighten the bolts securing the lower unit to the upper unit.
- Perform a Test Run: Once everything is reassembled, lower the motor into the water and start it up. Check for proper water flow from the tell-tale or pee stream. Monitor the motor’s temperature to ensure that it remains within a normal range.
Please note that these steps are a general guide, and it is recommended to consult your specific outboard motor’s manual or seek professional assistance if you are unfamiliar with performing maintenance tasks.
Now that you know the steps involved in changing the water pump, let’s move on to some maintenance tips to keep your outboard motor’s water pump in excellent condition.
Tips for Maintaining the Water Pump
Maintaining the water pump in your outboard motor is essential for optimal performance and longevity. By following these tips, you can ensure that your water pump stays in excellent condition:
- Regular Inspection: Make it a habit to visually inspect the water pump and its components regularly. Look for any signs of damage, wear, or leakage. Pay close attention to the impeller’s condition, as it is the most critical part of the water pump.
- Flush the Cooling System: After every use in saltwater or contaminated environments, it is crucial to flush out the cooling system with freshwater. This helps remove debris, sand, salt, or other contaminants that can potentially damage the water pump and other components.
- Use Quality Lubricant: When installing a new impeller or servicing the water pump, use a high-quality water-resistant lubricant. This helps reduce friction and extends the life of the impeller.
- Replace Impeller and Gaskets: It is recommended to replace the impeller and gaskets during each water pump replacement. Even if they appear to be in good condition, worn or damaged impellers and gaskets can lead to reduced water flow and compromised cooling efficiency.
- Follow Manufacturer’s Guidelines: Refer to the outboard motor’s owner’s manual and follow the manufacturer’s recommended maintenance procedures. These guidelines may include specific instructions on when to inspect or replace the water pump based on usage or operating hours.
- Professional Servicing: If you are unsure or uncomfortable performing maintenance tasks on your water pump, it is best to seek professional assistance. They have the expertise and knowledge to properly diagnose any issues and ensure that the water pump is in optimal working condition.
By following these maintenance tips, you can prolong the life of your outboard motor’s water pump and minimize the risk of unexpected failures. Regular inspection, flushing the cooling system, using quality lubricant, and adhering to manufacturer’s guidelines are key to keeping your water pump in excellent working order.
With proper maintenance and timely replacements, your water pump will continue to ensure that your outboard motor stays cool and performs at its best.
Now, let’s summarize everything we have covered in this article.
Conclusion
Taking care of the water pump in your outboard motor is crucial for maintaining its performance and preventing costly repairs. By understanding the role of the water pump and recognizing the signs that indicate a replacement is needed, you can stay ahead of potential issues and ensure that the engine remains cool and protected.
Factors such as manufacturer recommendations, age, usage, environmental conditions, and visual inspections should be considered when determining the timing of water pump replacement. Additionally, following a regular maintenance routine and properly servicing the water pump will help extend its lifespan.
If you notice signs of overheating, low water flow, excessive noise, leakage, or consistent overheating alarms, it is time to change your water pump. Proactively replacing the water pump based on recommendations and guidelines is essential for avoiding any unexpected failures and engine damage.
Remember to follow the recommended steps when changing the water pump, and never hesitate to seek professional assistance if needed. Regular inspections, flushing after saltwater use, using quality lubricant, and adhering to manufacturer’s guidelines will help keep your water pump in excellent condition.
By taking the time to maintain and care for your water pump, you can ensure that your outboard motor performs optimally, lasts longer, and provides you with an enjoyable and reliable boating experience for years to come.
Thank you for reading our comprehensive guide on how often you need to change the water pump on an outboard motor. We hope this article has provided you with valuable insights and information to help you keep your water pump in excellent shape!
Frequently Asked Questions about How Often Should You Change The Water Pump On An Outboard Motor
Was this page helpful?
At Storables.com, we guarantee accurate and reliable information. Our content, validated by Expert Board Contributors, is crafted following stringent Editorial Policies. We're committed to providing you with well-researched, expert-backed insights for all your informational needs.


0 thoughts on “How Often Should You Change The Water Pump On An Outboard Motor”