Articles
How To Separate Light And Fan Switch
Modified: January 6, 2024
Learn how to separate the light and fan switches in your home with these helpful articles. Discover step-by-step instructions and expert tips for a successful DIY project.
(Many of the links in this article redirect to a specific reviewed product. Your purchase of these products through affiliate links helps to generate commission for Storables.com, at no extra cost. Learn more)
Introduction
Welcome to this guide on how to separate a light and fan switch. If you have a combined switch for your ceiling fan and light fixture and would like to have separate switches for each, you’ve come to the right place. Having separate switches not only allows you to control the fan and light independently but also adds convenience and flexibility to your everyday life.
This project may seem daunting if you’re not familiar with electrical work, but fear not! With proper safety precautions, the right tools, and a little bit of patience, you can successfully separate the switches and enjoy the benefits of individual control.
Before we get started, it’s important to note that electrical work should be done by a qualified professional. If you’re unsure about your abilities or feel uncomfortable working with electricity, it’s always best to hire a licensed electrician. Safety should always be your top priority when working with electricity, so please proceed with caution and follow all safety guidelines.
In this guide, we will walk you through the step-by-step process of separating a light and fan switch. We’ll cover everything from turning off the power to reattaching the switch cover plate. By the end of this guide, you’ll have the knowledge and confidence to tackle this project on your own.
Now, let’s gather the necessary tools and materials before we begin!
Key Takeaways:
- Safety First!
When separating a light and fan switch, prioritize safety by turning off the power, wearing protective gear, and using insulated tools. Always double-check your work and seek professional help if unsure. - Independent Control and Convenience
By separating the switches, you gain the flexibility to control your light and fan independently, enhancing comfort and functionality in your living space. Enjoy the newfound convenience of separate switches!
Read more: How To Wire A Ceiling Fan To A Light Switch
Safety Precautions
Before you start working on separating the light and fan switch, it’s essential to prioritize your safety. Electricity can be dangerous, so it’s critical to take the necessary precautions. Here are some safety guidelines to keep in mind:
- Turn off the Power: Before you begin any electrical work, make sure to turn off the power to the circuit you’ll be working on. Locate your electrical panel and switch off the circuit breaker corresponding to the area where you’ll be working. Use a voltage tester to double-check that the power is indeed off before proceeding.
- Wear Protective Gear: Protect yourself by wearing safety goggles and work gloves. These will help shield your eyes from any debris or sparks and keep your hands protected while handling electrical components.
- Use Insulated Tools: When working with electrical connections, ensure you use insulated tools. This will help prevent accidental electrical shock by minimizing the risk of coming into contact with live wires or circuits.
- Avoid Moisture and Damp Areas: Make sure your work area is dry and free from any moisture. Water conducts electricity, so working in damp conditions increases the risk of electrical shock.
- Work in a Well-Lit Area: Adequate lighting is crucial for visibility and accuracy when working on electrical connections. Ensure your work area is well-lit to avoid any mishaps or mistakes.
- Don’t Touch Bare Wires: Never touch or handle bare wires. Always work with insulated wires and connectors to avoid electrical shock.
- Seek Professional Help if Needed: If you’re unsure about any step or uncomfortable working with electricity, it’s always best to seek professional help. Hiring a licensed electrician ensures the job is done safely and correctly.
Remember, your safety should always be the top priority when working with electricity. Take the necessary precautions, double-check your work, and if in doubt, seek the help of a professional. Now that we’ve covered the safety precautions, let’s move on to the tools and materials you’ll need for this project.
Necessary Tools and Materials
Before you begin separating the light and fan switch, make sure you have the following tools and materials on hand:
Tools:
- Screwdriver (flathead and/or Phillips)
- Needle-nose pliers
- Wire stripper
- Voltage tester
Materials:
- New separate switches for the light and fan
- Wire nuts
- Electrical tape
The screwdriver is essential for removing the switch cover plate and any screws securing the existing switch in place. Depending on the type of screws used, you may need either a flathead or Phillips screwdriver.
Needle-nose pliers come in handy when working with electrical wires. They allow you to grip and manipulate the wires easily, making it easier to connect or disconnect them as needed.
A wire stripper is used to remove the insulation from the wires, exposing the bare part that needs to be connected to the switch. This tool ensures a clean and proper connection between the wires and the switches.
A voltage tester is a crucial tool for ensuring the power is off before you begin working on the switches. It helps you identify if any wires are still live, preventing potential electrical hazards.
In addition to the tools, you’ll need separate switches for the light and fan. These switches should match the existing style and specifications. It’s important to purchase switches that are compatible with your electrical system to ensure proper functionality.
Wire nuts are used to securely connect the wires together. They provide a safe and reliable connection, preventing any loose or exposed wires that could lead to electrical hazards.
Lastly, electrical tape is used to insulate and protect any exposed wires. It adds an extra layer of safety, preventing any accidental contact with live wires.
Now that you have all the necessary tools and materials, let’s move on to the step-by-step process of separating the light and fan switch.
Read more: How To Replace Ceiling Fan Light Switch
Step 1: Turn off the Power
The first and most crucial step in separating the light and fan switch is to turn off the power to the circuit you’ll be working on. This ensures your safety by preventing any electrical shocks or accidents while working with the wires.
To turn off the power, follow these steps:
- Locate your electrical panel in your home.
- Open the panel door to reveal the circuit breakers.
- Look for the circuit breaker corresponding to the area where your light and fan switch is located. It may be labeled as “ceiling fan” or “lights and fan.”
- Flip the switch of the circuit breaker to the “off” position.
- For additional safety and peace of mind, use a voltage tester to confirm that there is no power running through the wires. Place the voltage tester on the wires and check for any active electrical current. If the voltage tester doesn’t detect any power, you can proceed safely.
It’s important to double-check that the power is off before proceeding with any work. This ensures that you won’t accidentally come into contact with live wires and guarantees a safe working environment.
Remember, if you’re unsure about turning off the power or working with the electrical panel, it’s always best to consult a professional electrician. Safety should always be your top priority when working with electricity.
Once you’ve confirmed that the power is off, you can move on to the next step: removing the switch cover plate.
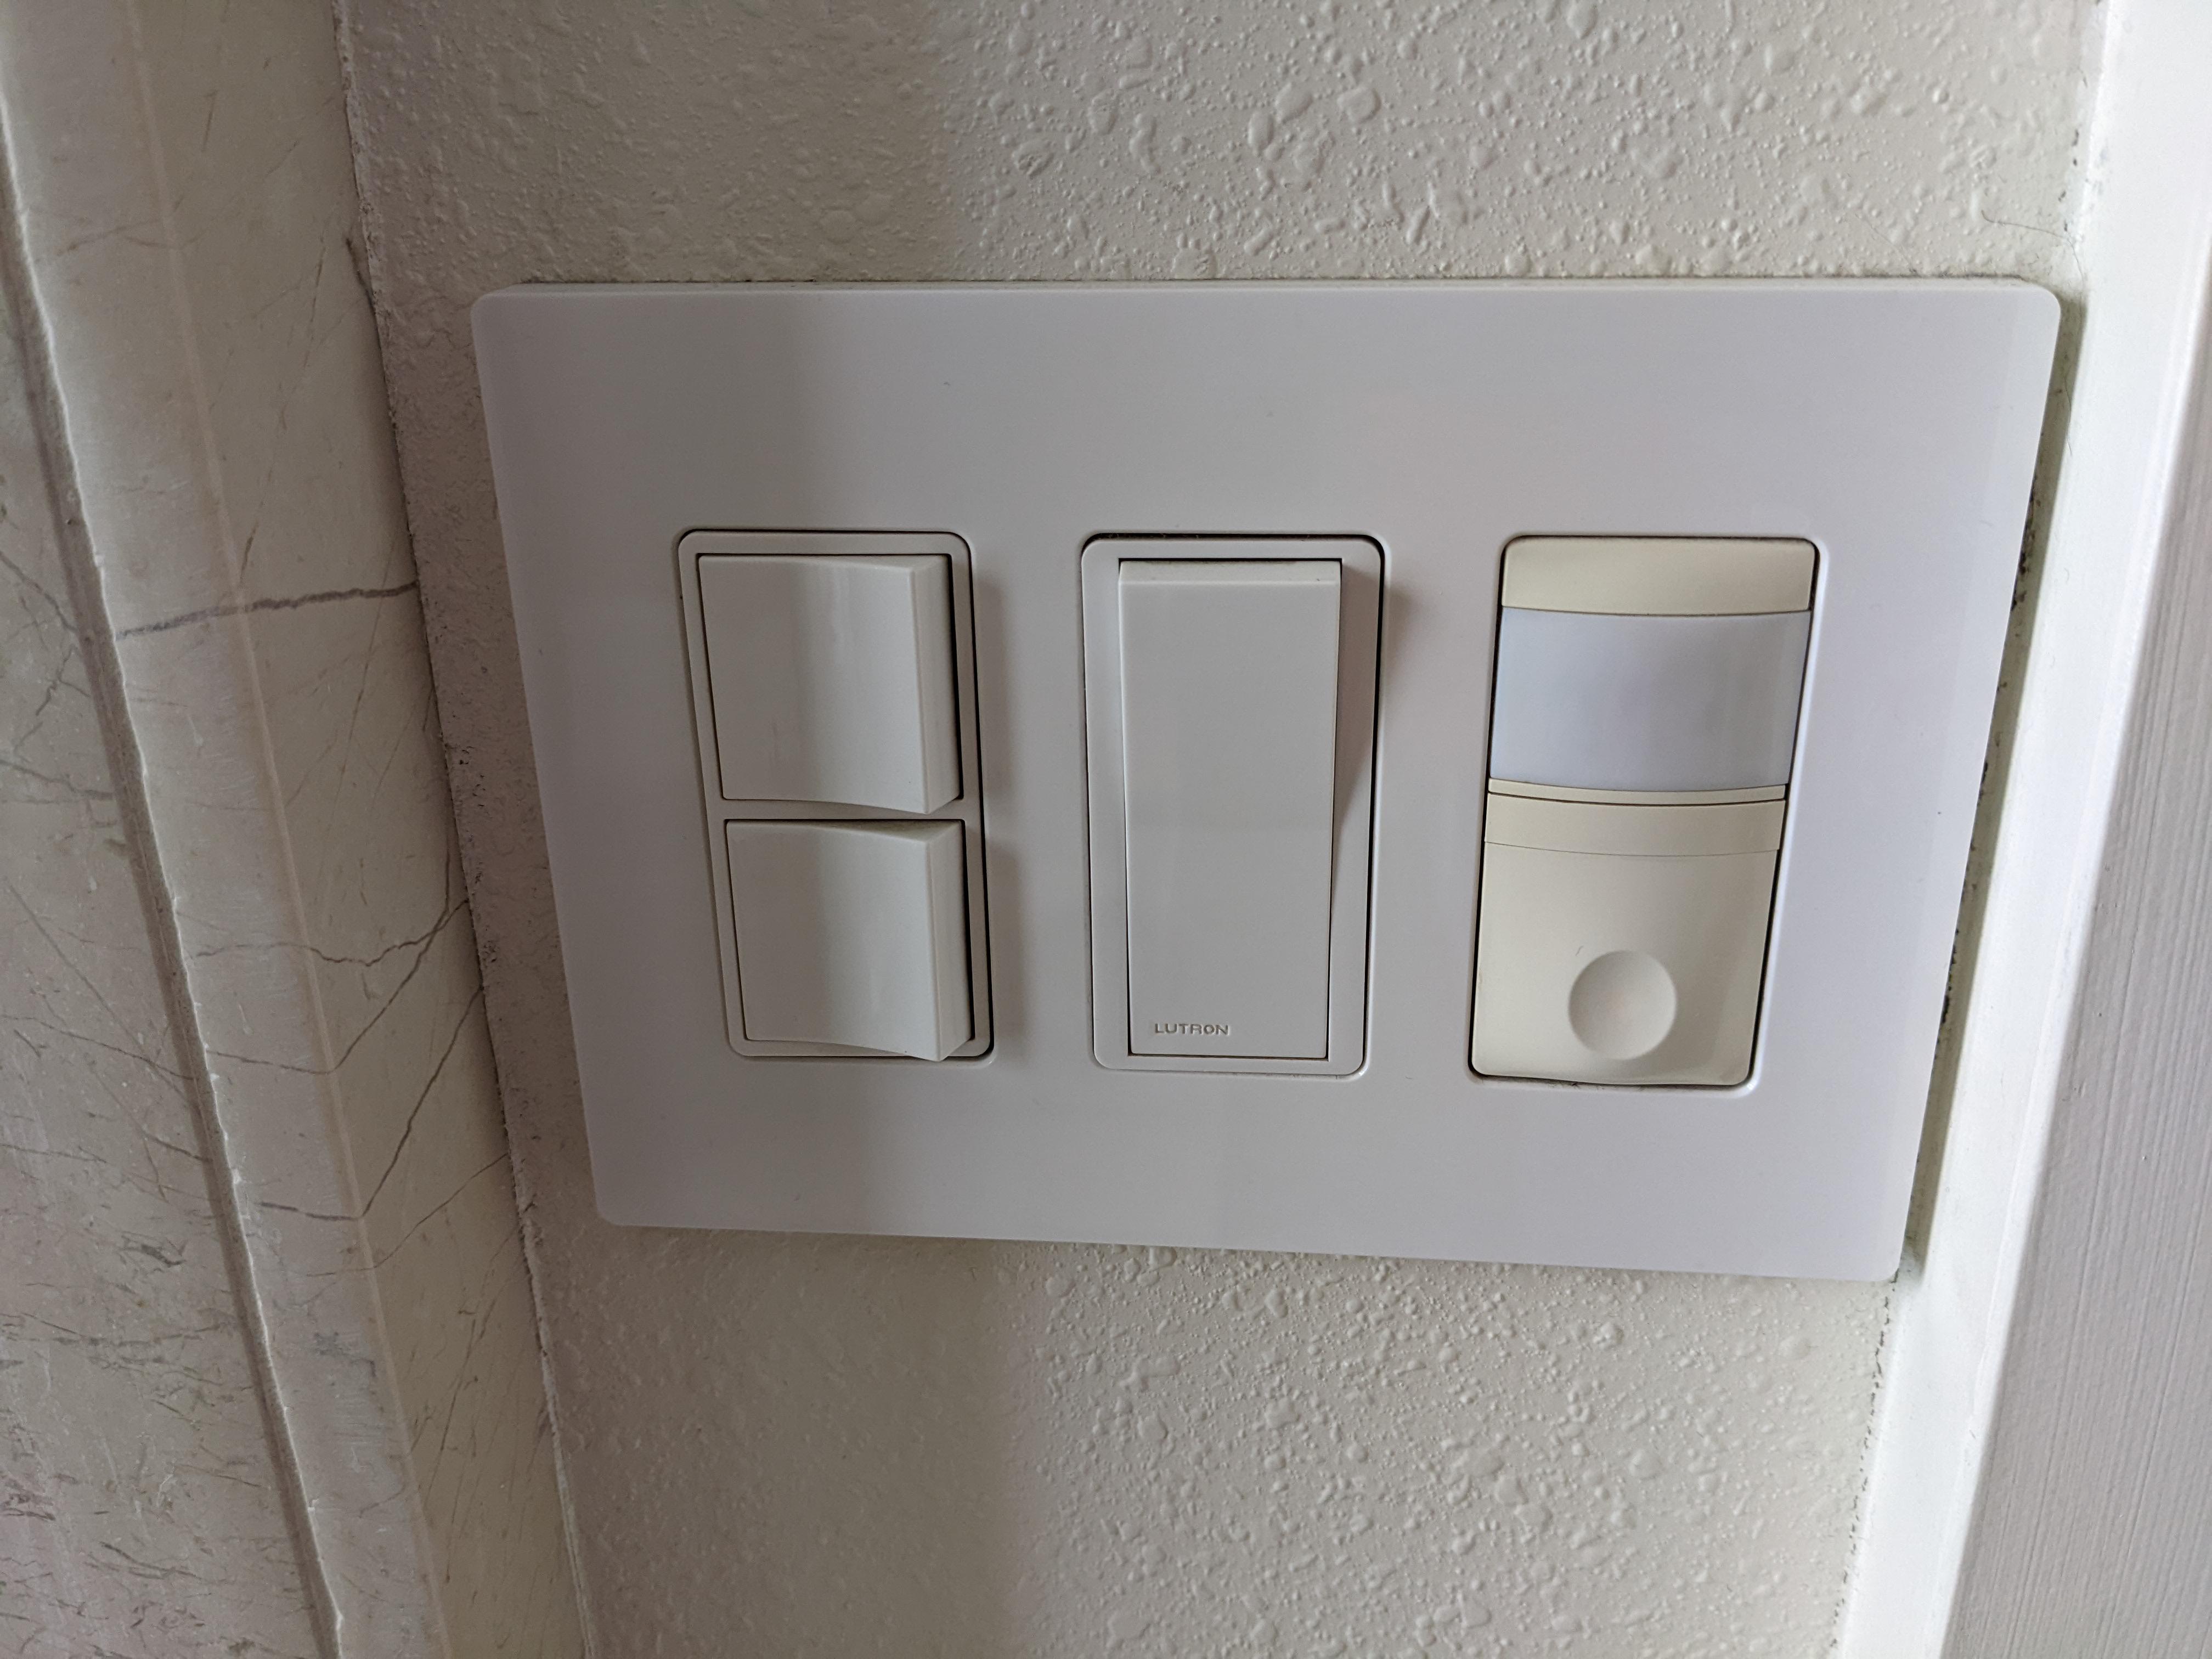
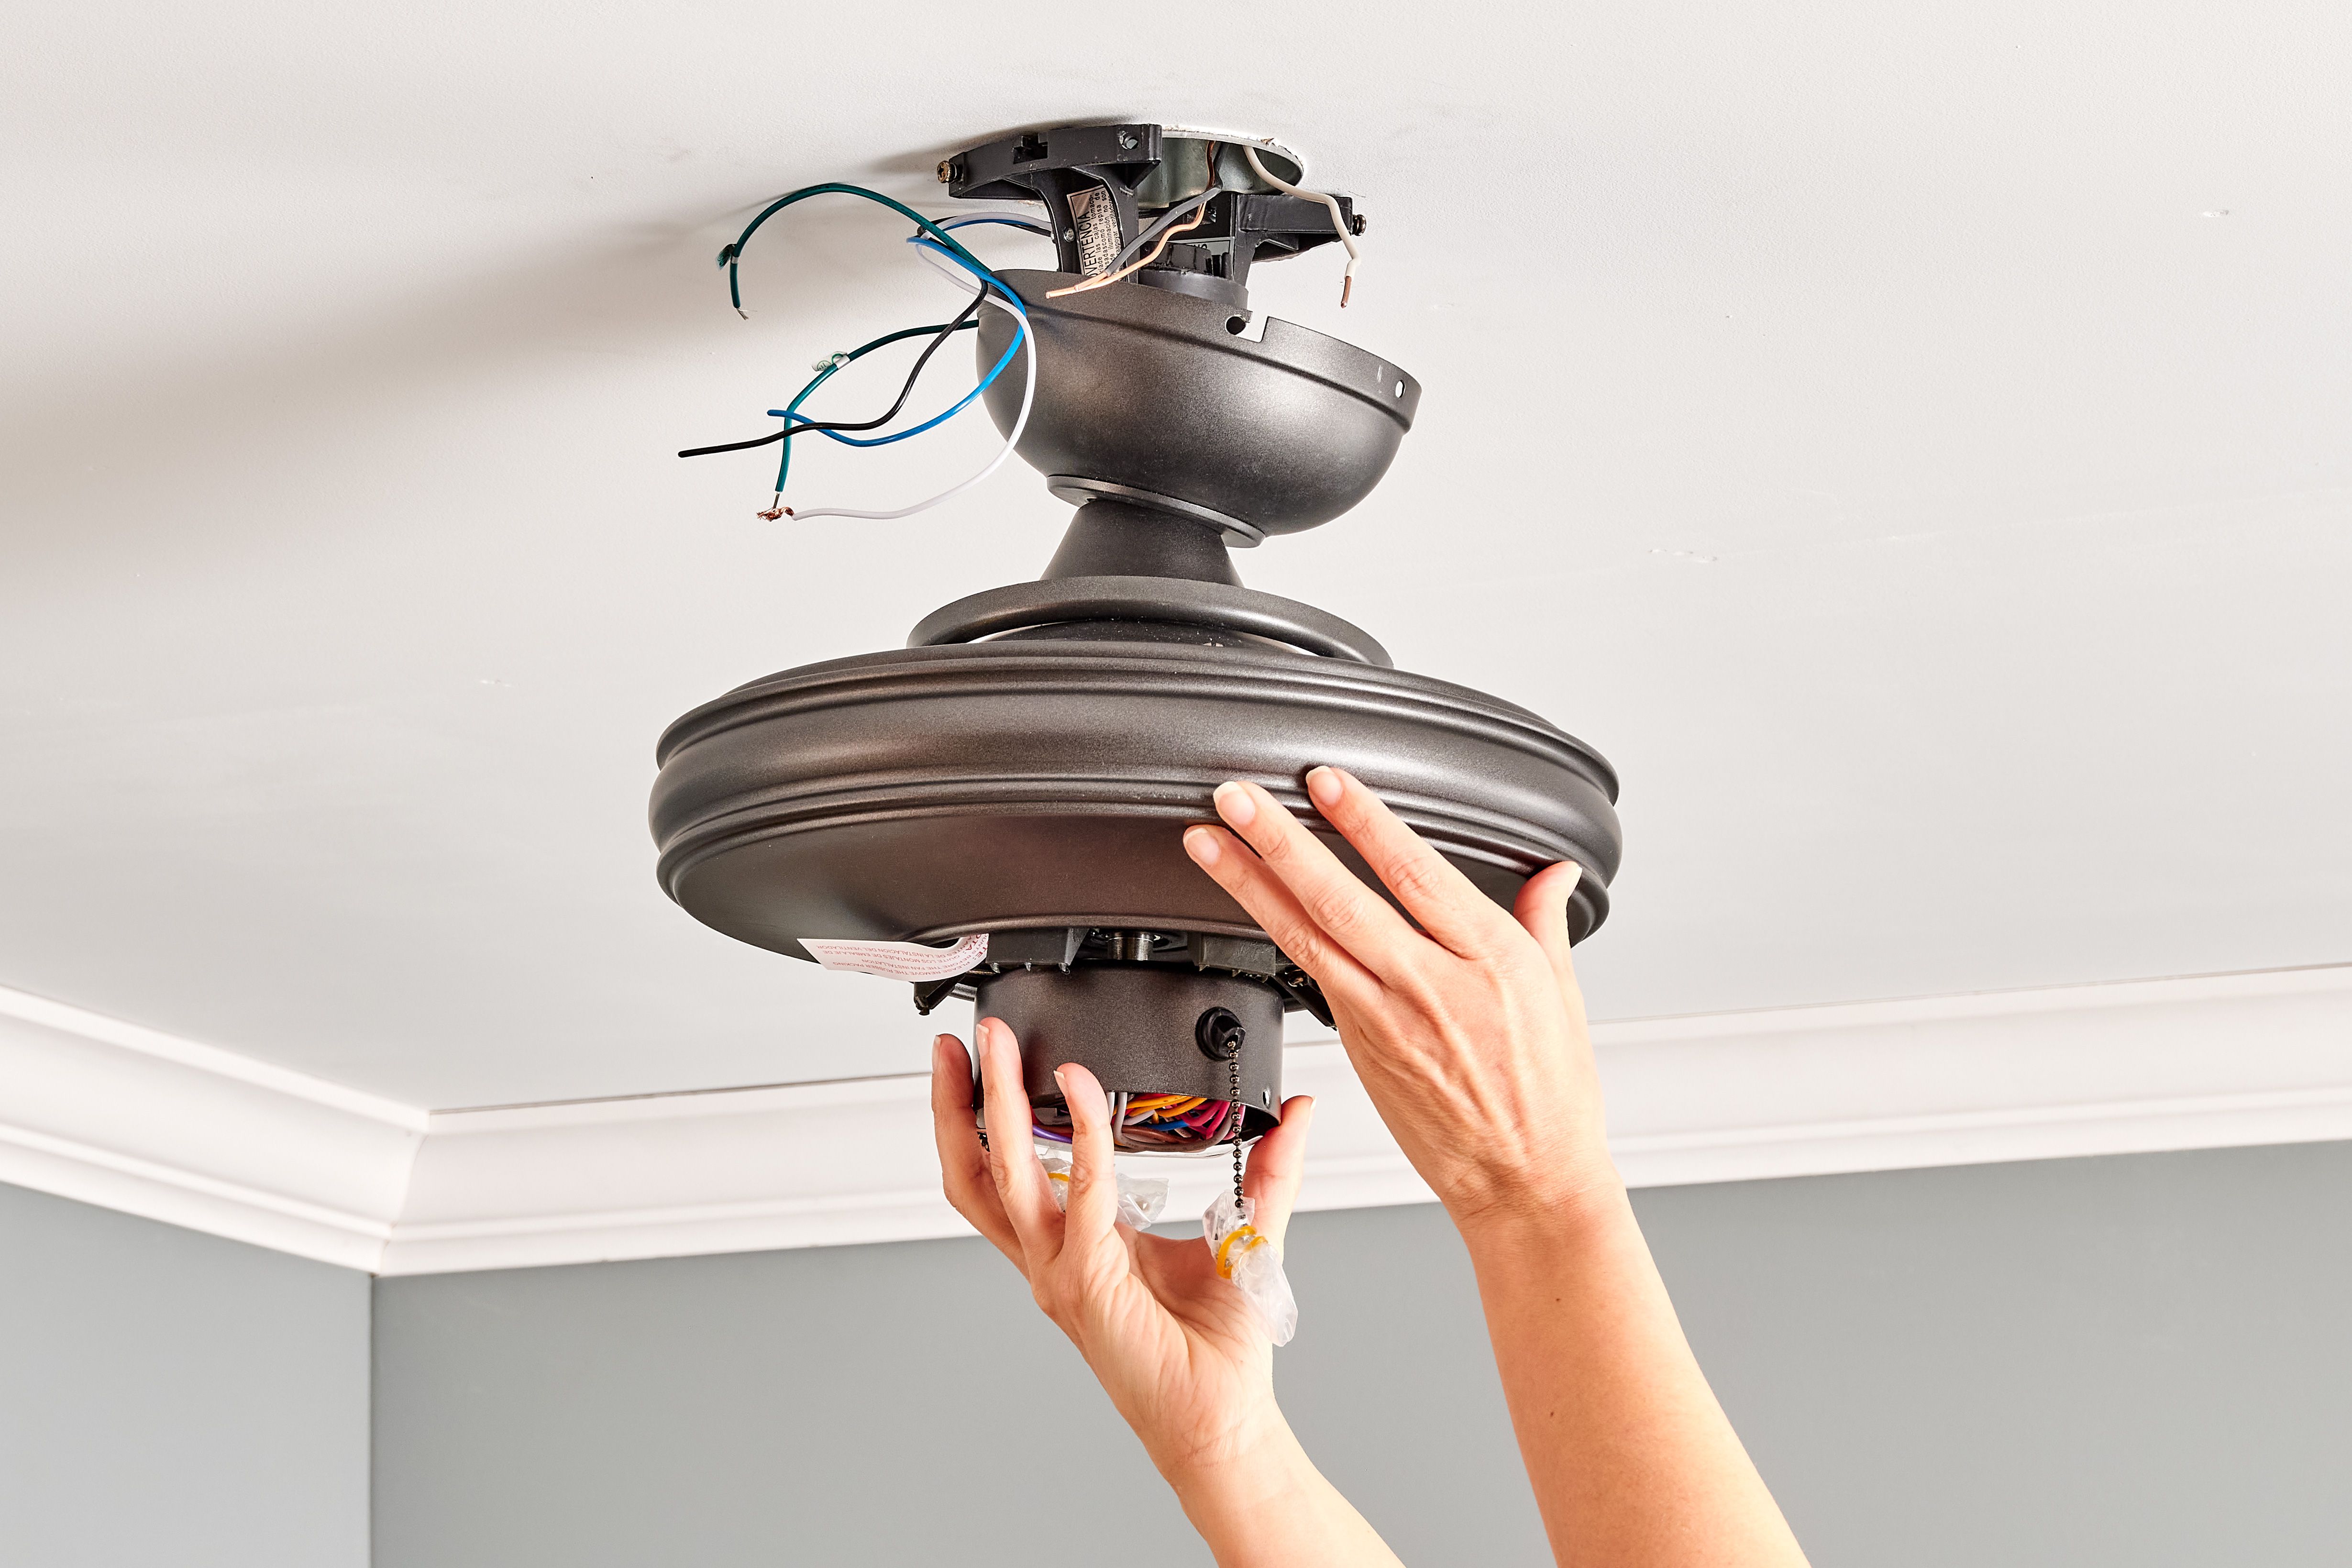
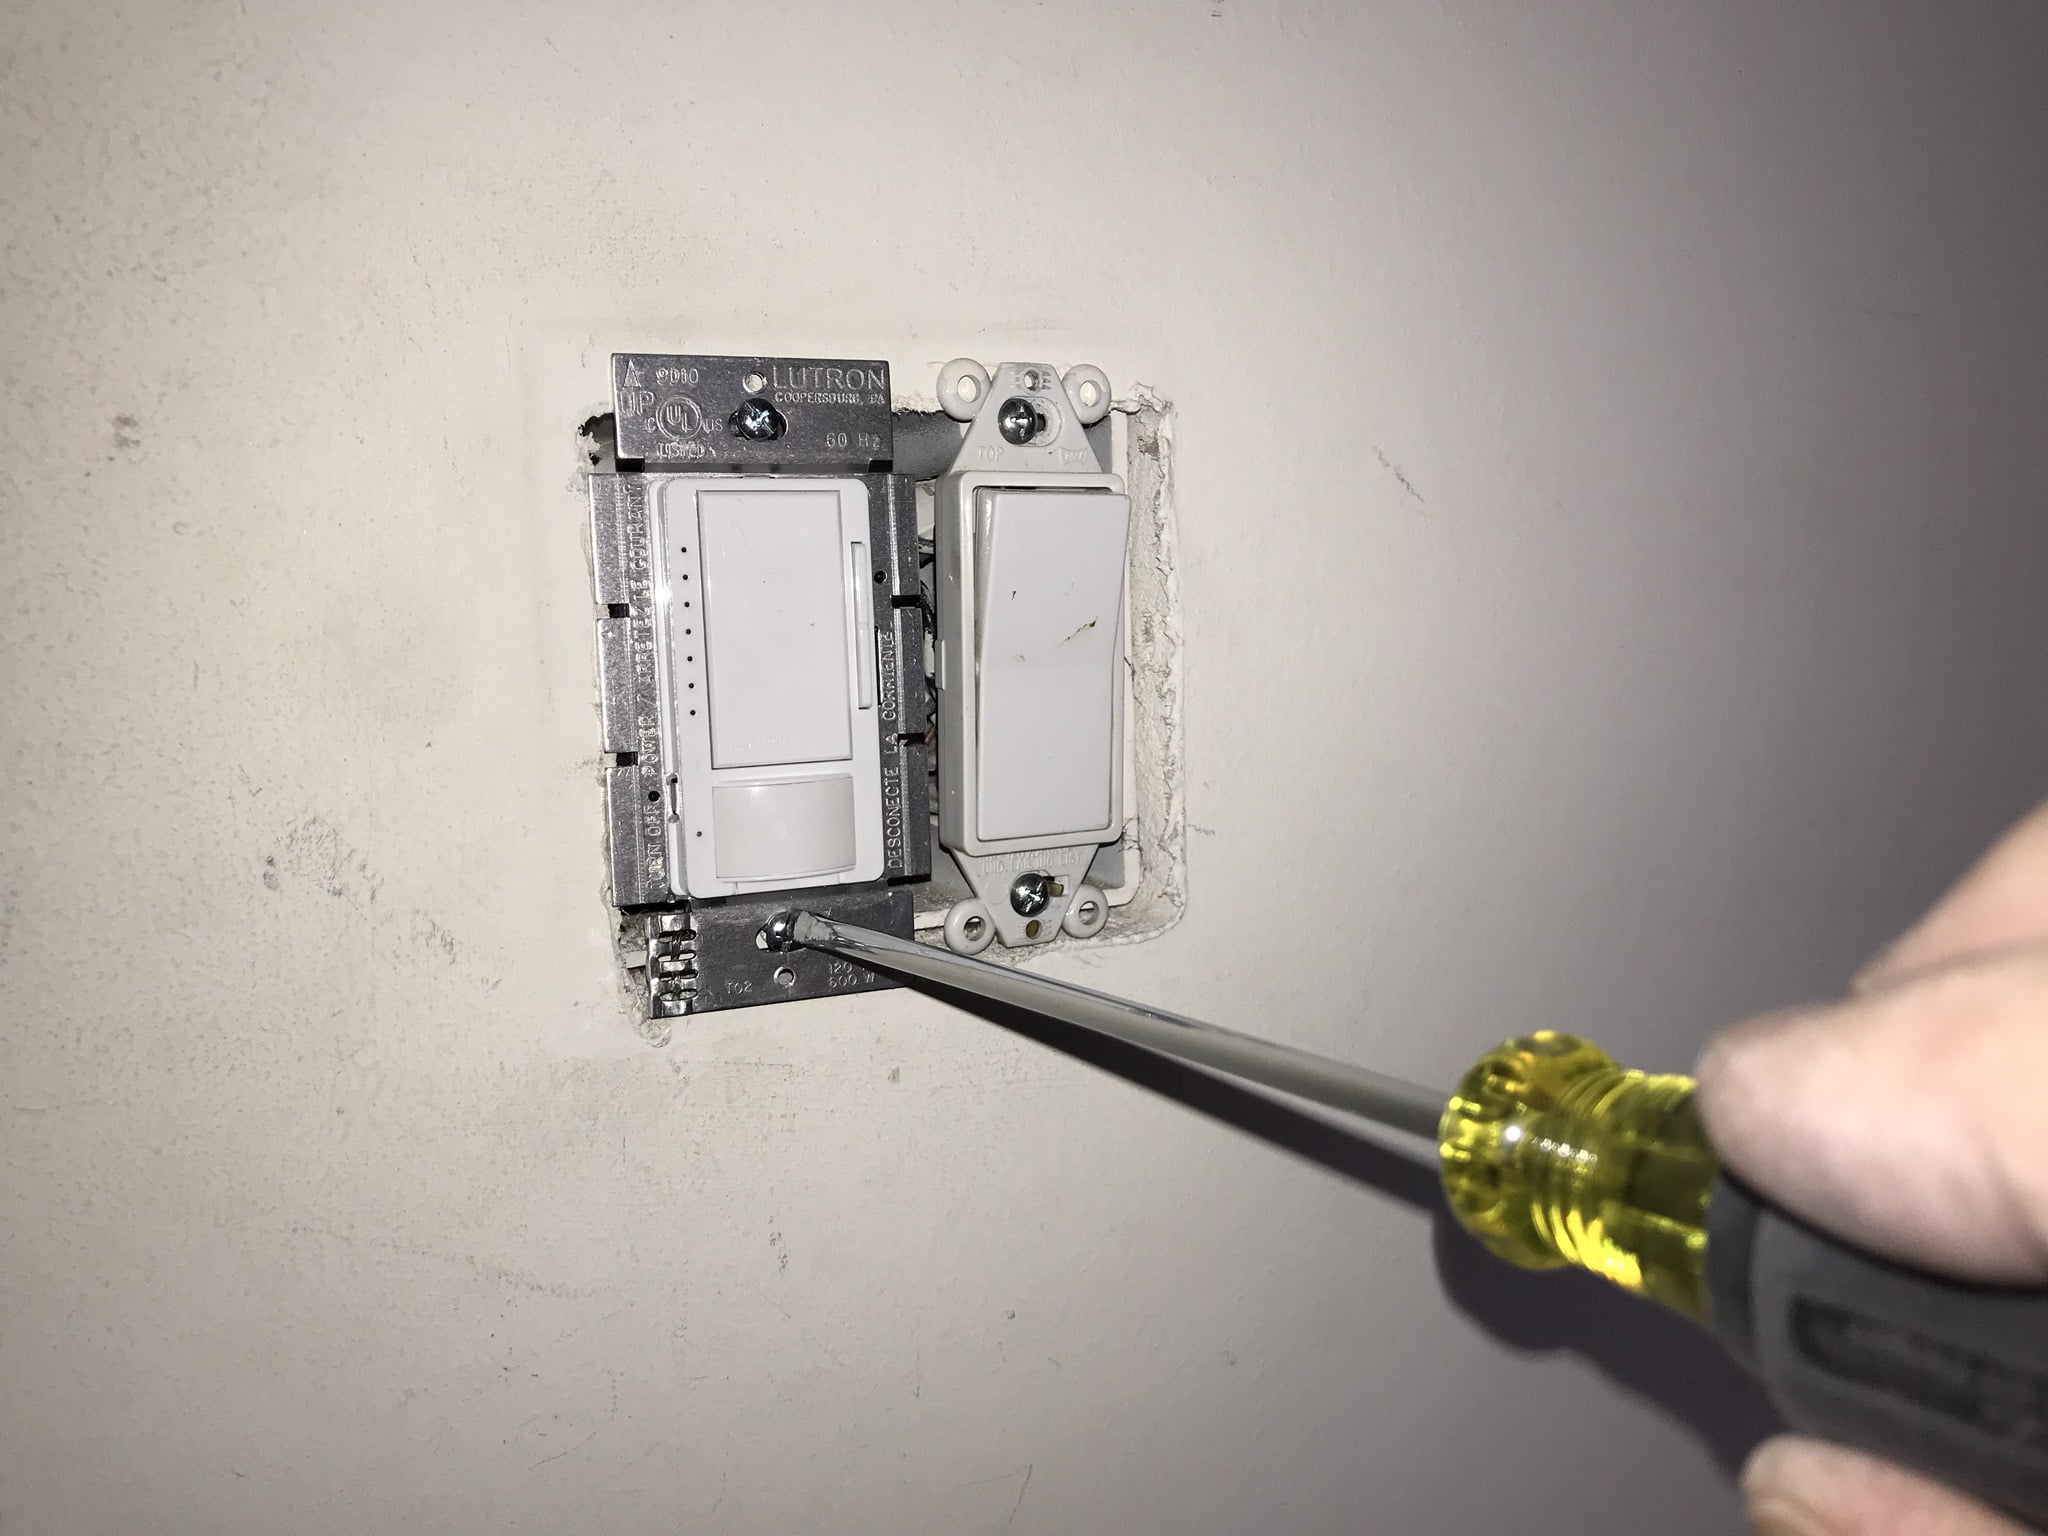
Step 2: Remove the Switch Cover Plate
Now that the power is safely turned off, you can proceed with removing the switch cover plate. The cover plate is the visible part of the switch that conceals the electrical components behind it.
To remove the switch cover plate, follow these steps:
- Use a screwdriver (either flathead or Phillips, depending on the screws) to unscrew the screws securing the switch cover plate to the wall.
- Set aside the screws in a secure location to prevent them from getting lost.
- Gently pull the switch cover plate away from the wall, being careful not to damage the surrounding area.
Once you’ve removed the switch cover plate, you’ll have access to the existing switch and wiring behind it. Take a moment to examine the wiring and familiarize yourself with how the switch is currently connected. This will help you understand the next steps involved in separating the light and fan switch.
It’s worth mentioning that the wiring setup may vary depending on the specific installation. Therefore, it’s a good idea to take a picture or make note of the current wiring connections before proceeding. This will serve as a reference later on when you’re installing the separate switches.
With the switch cover plate removed and the existing switch exposed, you’re ready to move on to the next step: identifying the wiring connections.
Step 3: Identify the Wiring Connections
After removing the switch cover plate, it’s time to identify the wiring connections behind the existing switch. Understanding the current wiring setup is essential for properly separating the light and fan switch.
To identify the wiring connections, follow these steps:
- Observe the wires connected to the existing switch. Typically, you will see a set of black wires, white wires, and a ground wire.
- The black wires are the “hot” wires that carry the electrical current. In a combined switch setup, one black wire will be connected to the switch’s top terminal, while the other black wire will be connected to the bottom terminal.
- The white wires are the “neutral” wires and provide the return path for the electrical current. In most cases, they are connected together with a wire nut and not directly to the switch.
- The ground wire is typically a bare copper or green wire and is connected to a grounding screw or terminal on the switch. It provides a safe path for electrical discharge in case of a fault.
- Take note of which black wire is connected to the top terminal (which controls the light) and which black wire is connected to the bottom terminal (which controls the fan). This will help you in separating the switches.
It’s important to proceed with caution when working with live wires. Even though the power is turned off, you should still treat the wires as if they were live until you have completed the separation process.
Once you have identified the wiring connections, you are ready to move on to the next step: separating the light and fan switch wires.
Step 4: Separate the Light and Fan Switch Wires
Now that you have identified the wiring connections, it’s time to separate the light and fan switch wires. By doing this, you will ensure that each switch controls its respective function independently.
To separate the light and fan switch wires, follow these steps:
- Start by disconnecting the black wire connected to the top terminal (which controls the light) from the existing switch. Use a screwdriver to loosen the screw holding the wire in place and carefully remove the wire.
- Next, disconnect the black wire connected to the bottom terminal (which controls the fan) in the same manner. Loosen the screw, remove the wire, and set it aside.
- If there are any other wires connected to the switch, such as additional black or white wires, leave them intact as they may be part of a larger electrical circuit.
- After disconnecting the wires connected to the existing switch, you should be left with two loose black wires.
- Using wire nuts, connect each black wire to a separate black wire from your new switches. Make sure the connections are secure and the wires are tightly twisted together.
Keep in mind that the specific wiring setup may vary depending on your installation, so refer to the manufacturer’s instructions for your specific switches if needed.
Separating the light and fan switch wires allows you to control each function independently. With this step complete, you’re ready to proceed to the next step: installing separate switches for the light and fan.
When separating a light and fan switch, make sure to turn off the power at the circuit breaker before starting. Use a voltage tester to ensure the power is off before disconnecting any wires.
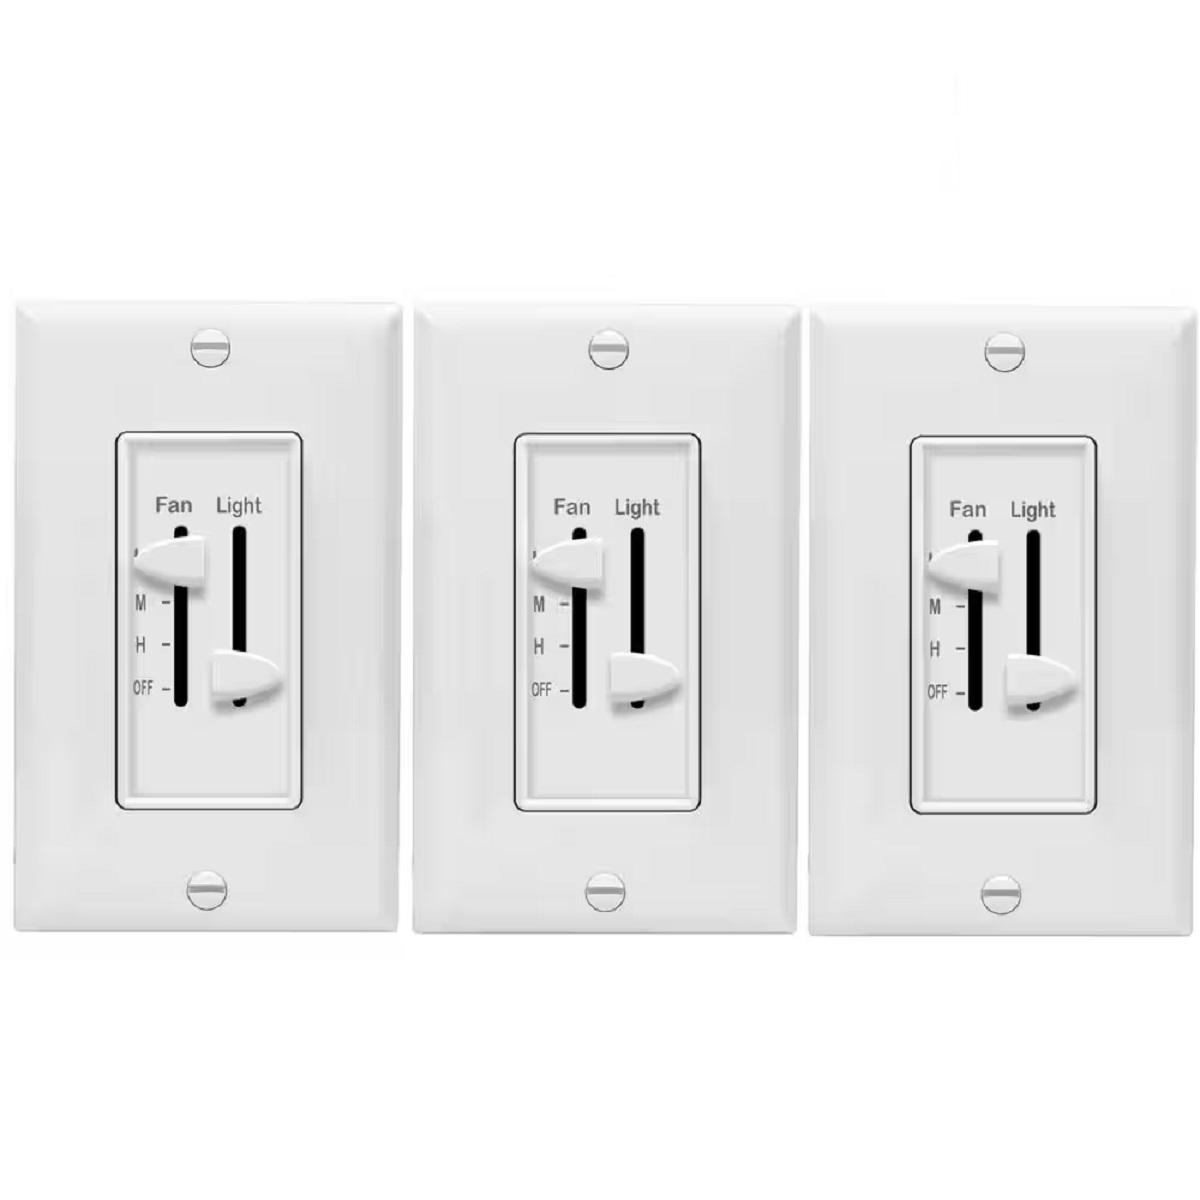
Step 5: Install Separate Switches
Now that the light and fan switch wires have been separated, it’s time to install separate switches for each function. This will allow you to control the light and fan independently, providing convenience and flexibility.
To install separate switches, follow these steps:
- Start by connecting the black wire from the light switch to the black wire from the light fixture. Use a wire nut to securely connect the two wires. This will ensure that the new light switch controls the light fixture.
- Next, connect the black wire from the fan switch to the black wire connected to the fan motor. Again, use a wire nut to make a secure connection. This will ensure that the new fan switch controls the fan motor.
- Double-check that all connections are tight and properly insulated. This will help prevent any loose or exposed wires that could pose a safety hazard.
- Once the connections are secure, carefully tuck the wires inside the electrical box and mount the separate switches onto their respective positions in the switch box.
- Tighten the screws on each switch to secure them in place, ensuring they are aligned properly and flush with the switch plate.
It’s essential to follow the manufacturer’s instructions for your specific switches during the installation process. These instructions will provide further guidance and ensure proper functionality for your switches.
Now that you have installed separate switches for the light and fan functions, you are ready to test the wiring to ensure everything is functioning correctly.
Step 6: Test the Wiring
After installing the separate switches, it’s important to test the wiring to ensure that everything is functioning correctly. Properly testing the wiring will help you identify any potential issues and ensure that the light and fan switches are working independently as intended.
To test the wiring, follow these steps:
- First, make sure the power to the circuit is turned back on at the electrical panel.
- Turn on the light switch and verify that the light fixture turns on and off as expected. This confirms that the wiring for the light switch is functioning properly.
- Next, turn on the fan switch and check if the fan motor starts running. Test the different fan speeds, if applicable, to ensure proper functionality.
- If both the light and fan are responding as expected, congratulations! You have successfully separated the light and fan switch wiring.
- If there are any issues or the switches are not functioning correctly, double-check the wiring connections. Ensure that all wires are properly connected with wire nuts and that there are no loose or exposed wires.
- Additionally, it’s a good idea to use a voltage tester to confirm that there is no power leakage or any other electrical issues.
It’s important to be thorough in testing the wiring to ensure the safety and proper functionality of the separate switches. Don’t rush and take the time to check and recheck all connections.
If you encounter any difficulties or are unsure about any step of the testing process, it’s recommended to seek professional assistance from a licensed electrician for further inspection and troubleshooting.
Once you have confirmed that the wiring is functioning correctly, you are ready to move on to the final step: reattaching the switch cover plate.
Step 7: Reattach the Switch Cover Plate
With the separate switches successfully installed and the wiring tested, it’s time to reattach the switch cover plate. The switch cover plate not only provides a neat and finished appearance but also acts as a protective barrier for the switches and wiring behind it.
To reattach the switch cover plate, follow these steps:
- Take the switch cover plate that you removed earlier and align it with the switch box on the wall.
- Insert the screws into the holes on the plate and use a screwdriver to tighten them securely into place. Make sure not to overtighten, as this can damage the plate or the wall.
- Ensure that the plate is flush against the wall and sits evenly over the switches.
Once the switch cover plate is reattached, give it a gentle tug to ensure that it is stable and firmly in place.
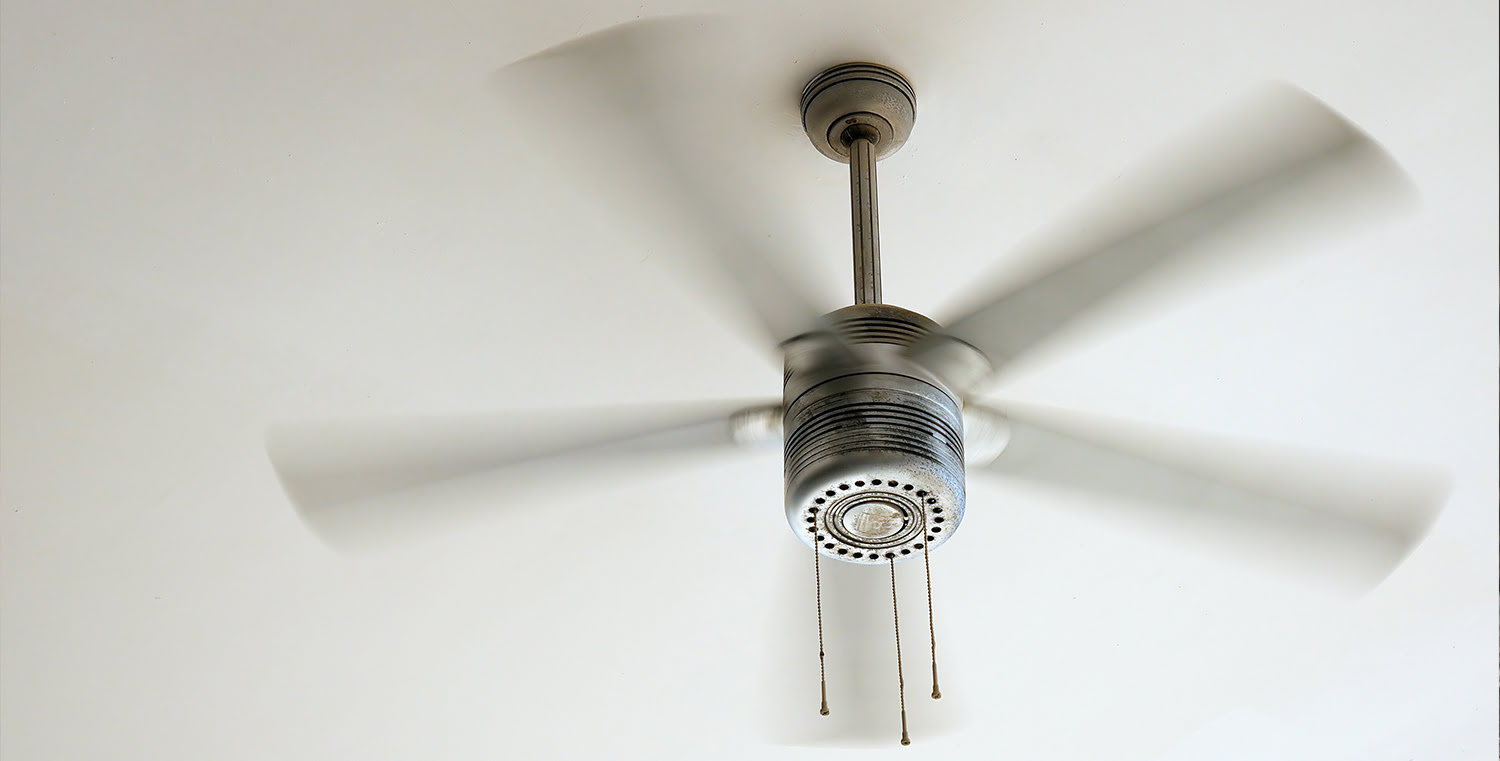
Take a moment to step back and admire your work. You have successfully separated the light and fan switch, allowing for independent control of both functions. This additional level of convenience will enhance your everyday life.
Remember, if you encounter any issues or notice any abnormalities after reattaching the switch cover plate, it’s important to double-check the wiring connections or seek professional help for further inspection and troubleshooting.
Congratulations! You have completed the process of separating the light and fan switch. Enjoy the newfound control and flexibility of your lighting and fan systems.
Thank you for following this step-by-step guide. Stay safe and enjoy your newly installed separate switches!
Conclusion
Congratulations on successfully separating the light and fan switch! You have learned how to tackle this electrical project and achieved the convenience and control of having separate switches for your light fixture and ceiling fan.
Throughout this guide, you have followed each step carefully, ensuring your safety by turning off the power, wearing protective gear, and handling the electrical components with caution. By identifying the wiring connections and separating the switch wires, you have accomplished the task of providing independent control for both the light and fan.
Remember, safety should always be the top priority when working with electricity. If you ever feel uncertain or uncomfortable with any step of the process, it’s best to consult a professional electrician to ensure proper installation and avoid any potential hazards.
By installing separate switches, you have added convenience and flexibility to your living space. You can now adjust the lighting and fan settings independently, providing optimal comfort and functionality to suit your needs.
Always make sure to test the wiring thoroughly to verify the proper functioning of the switches. Double-check all connections and use a voltage tester to ensure there are no electrical issues or power leakage.
With the switch cover plate securely reattached, your project is complete. The switches and wiring are now concealed, providing a finished and aesthetically pleasing appearance. Take a step back and admire your work!
Thank you for following this comprehensive guide on how to separate a light and fan switch. We hope this has been a helpful resource, providing you with the knowledge and confidence to undertake this electrical project. Enjoy the convenience and control of your newly installed separate switches!
Ready to take your DIY skills further? If running power to outbuildings puzzles you, our guide on how to run overhead electrical wire to a garage walks you through each critical step. For those looking to enhance indoor ambiance, learning how to replace a ceiling fan light switch can be incredibly handy. And if you're curious about the latest in home comfort, don’t miss our review of amazing ceiling fan switches for 2024—you’ll find the perfect upgrade for your needs!
Frequently Asked Questions about How To Separate Light And Fan Switch
Was this page helpful?
At Storables.com, we guarantee accurate and reliable information. Our content, validated by Expert Board Contributors, is crafted following stringent Editorial Policies. We're committed to providing you with well-researched, expert-backed insights for all your informational needs.


0 thoughts on “How To Separate Light And Fan Switch”