Articles
How To Strip Wood Furniture
Modified: October 20, 2024
Learn how to easily strip wood furniture and breathe new life into your pieces. Our step-by-step guide covers everything you need to know for a successful furniture stripping project. Revive your furniture today!
(Many of the links in this article redirect to a specific reviewed product. Your purchase of these products through affiliate links helps to generate commission for Storables.com, at no extra cost. Learn more)
Introduction
Welcome to the world of furniture refinishing! If you have an old piece of wood furniture that has seen better days or you want to give a fresh look to a piece you’ve had for years, stripping the old finish and applying a new one can breathe new life into your furniture. Whether it’s an antique heirloom or a thrift store find, stripping the wood furniture allows you to reveal its natural beauty and customize its look to suit your style.
Before you dive into the process of stripping wood furniture, it’s important to gather all the necessary supplies and prepare your work area. Taking the time to properly prepare will ensure that you have a smooth and successful refinishing experience.
Key Takeaways:
- Revive old wood furniture by stripping the old finish, sanding, and applying a fresh coat of paint or stain. Personalize the piece with new hardware and final touches for a stunning, customized look.
- Prepare a well-ventilated work area, gather supplies, and follow product instructions for a successful wood furniture refinishing project. Embrace creativity, attention to detail, and pride in your work for professional-looking results.
Read more: How To Disinfect Wood Furniture
Supplies Needed
Here’s a list of the supplies you’ll need to strip and refinish your wood furniture:
- Paint Stripper or Stripping Gel
- Paint Scraper or Putty Knife
- Sandpaper (various grits)
- Sanding Block or Electric Sander
- Wood Conditioner
- Stain or Paint (depending on your desired finish)
- Brushes, Rollers, or Spray Gun
- Lint-free Cloths
- Protective Gloves
- Protective Eyewear
- Drop Cloths or Plastic Sheets
Gather all these supplies before you begin, as it will save you time and ensure you have everything you need on hand.
Key Takeaways:
- Revive old wood furniture by stripping the old finish, sanding, and applying a fresh coat of paint or stain. Personalize the piece with new hardware and final touches for a stunning, customized look.
- Prepare a well-ventilated work area, gather supplies, and follow product instructions for a successful wood furniture refinishing project. Embrace creativity, attention to detail, and pride in your work for professional-looking results.
Read more: How To Disinfect Wood Furniture
Supplies Needed
Here’s a list of the supplies you’ll need to strip and refinish your wood furniture:
- Paint Stripper or Stripping Gel: This is the primary product you’ll use to remove the old finish from your furniture. There are various types of paint strippers available, so choose one that is suitable for the type of finish you’re dealing with. Follow the instructions on the product label for best results.
- Paint Scraper or Putty Knife: These tools will help you scrape away the old finish after applying the paint stripper. Use them with caution to avoid damaging the wood surfaces.
- Sandpaper (various grits): Sandpaper is essential for smoothing out the wood surface and removing any remaining finish or imperfections. Start with a coarse grit and gradually move to finer grits for a smooth finish.
- Sanding Block or Electric Sander: A sanding block provides stability and control while sanding. If you have a large piece of furniture or prefer more efficiency, an electric sander can speed up the process.
- Wood Conditioner: After stripping and sanding, a wood conditioner can be applied to help the new finish adhere evenly and prevent blotchiness. It also enhances the natural beauty of the wood.
- Stain or Paint (depending on your desired finish): Choose a stain if you want to highlight the natural beauty of the wood, or opt for paint if you prefer a solid color or a different look. Consider the style and decor of the room where the furniture will be placed.
- Brushes, Rollers, or Spray Gun: The method of application will depend on the type of finish you choose. Brushes and rollers work well for stains and paints, while a spray gun provides a smooth and even application.
- Lint-free Cloths: These are useful for wiping away excess stain or paint and for applying wood conditioner or sealer. Ensure they are lint-free to avoid leaving fibers on your furniture.
- Protective Gloves: Protect your hands from chemical products and wear gloves while handling paint strippers, stains, or paints.
- Protective Eyewear: Safety goggles or glasses will shield your eyes from any debris or chemical splashes during the stripping and sanding process.
- Drop Cloths or Plastic Sheets: Cover your work area with drop cloths or plastic sheets to protect surfaces from drips and spills.
Having these supplies readily available will make the furniture refinishing process smoother and more efficient. Make sure to use them safely and follow all product instructions for the best results.
Preparing the Work Area
Before you embark on the journey of stripping and refinishing your wood furniture, it’s important to prepare your work area properly. This will help you work efficiently and minimize any potential mess or damage. Here are some steps to follow when preparing your work area:
- Clean the furniture: Start by cleaning the piece of furniture to remove any dust, dirt, or debris. Use a mild soap and water solution or a wood-cleaning product to gently wipe down the surfaces. Allow the furniture to dry completely before moving on to the next step.
- Choose a well-ventilated area: Since you’ll be working with chemical products like paint strippers and stains, it’s crucial to work in a well-ventilated space. Open windows, use fans, or work outdoors if possible. Adequate ventilation will help minimize fumes and ensure your safety.
- Protect the surrounding area: Cover the floor, nearby furniture, and any other items in the vicinity with drop cloths or plastic sheets. This will protect them from any drips, spills, or dust during the refinishing process.
- Gather your tools: Ensure all your stripping and refinishing tools are within reach. This will save you time and prevent unnecessary interruptions during the process. Set up a designated workspace for your tools, such as a table or cart, so that you can easily access them as needed.
- Read and follow product instructions: Familiarize yourself with the instructions for the paint stripper, stain, or paint you’ll be using. Each product may have specific application techniques and safety precautions. Following the instructions carefully will ensure a successful outcome.
By taking the time to prepare your work area, you’ll create a conducive environment for refinishing your wood furniture. This will help you work efficiently and achieve the desired results with minimal mess or complications. Remember to prioritize safety by working in a well-ventilated space and using the appropriate protective gear.
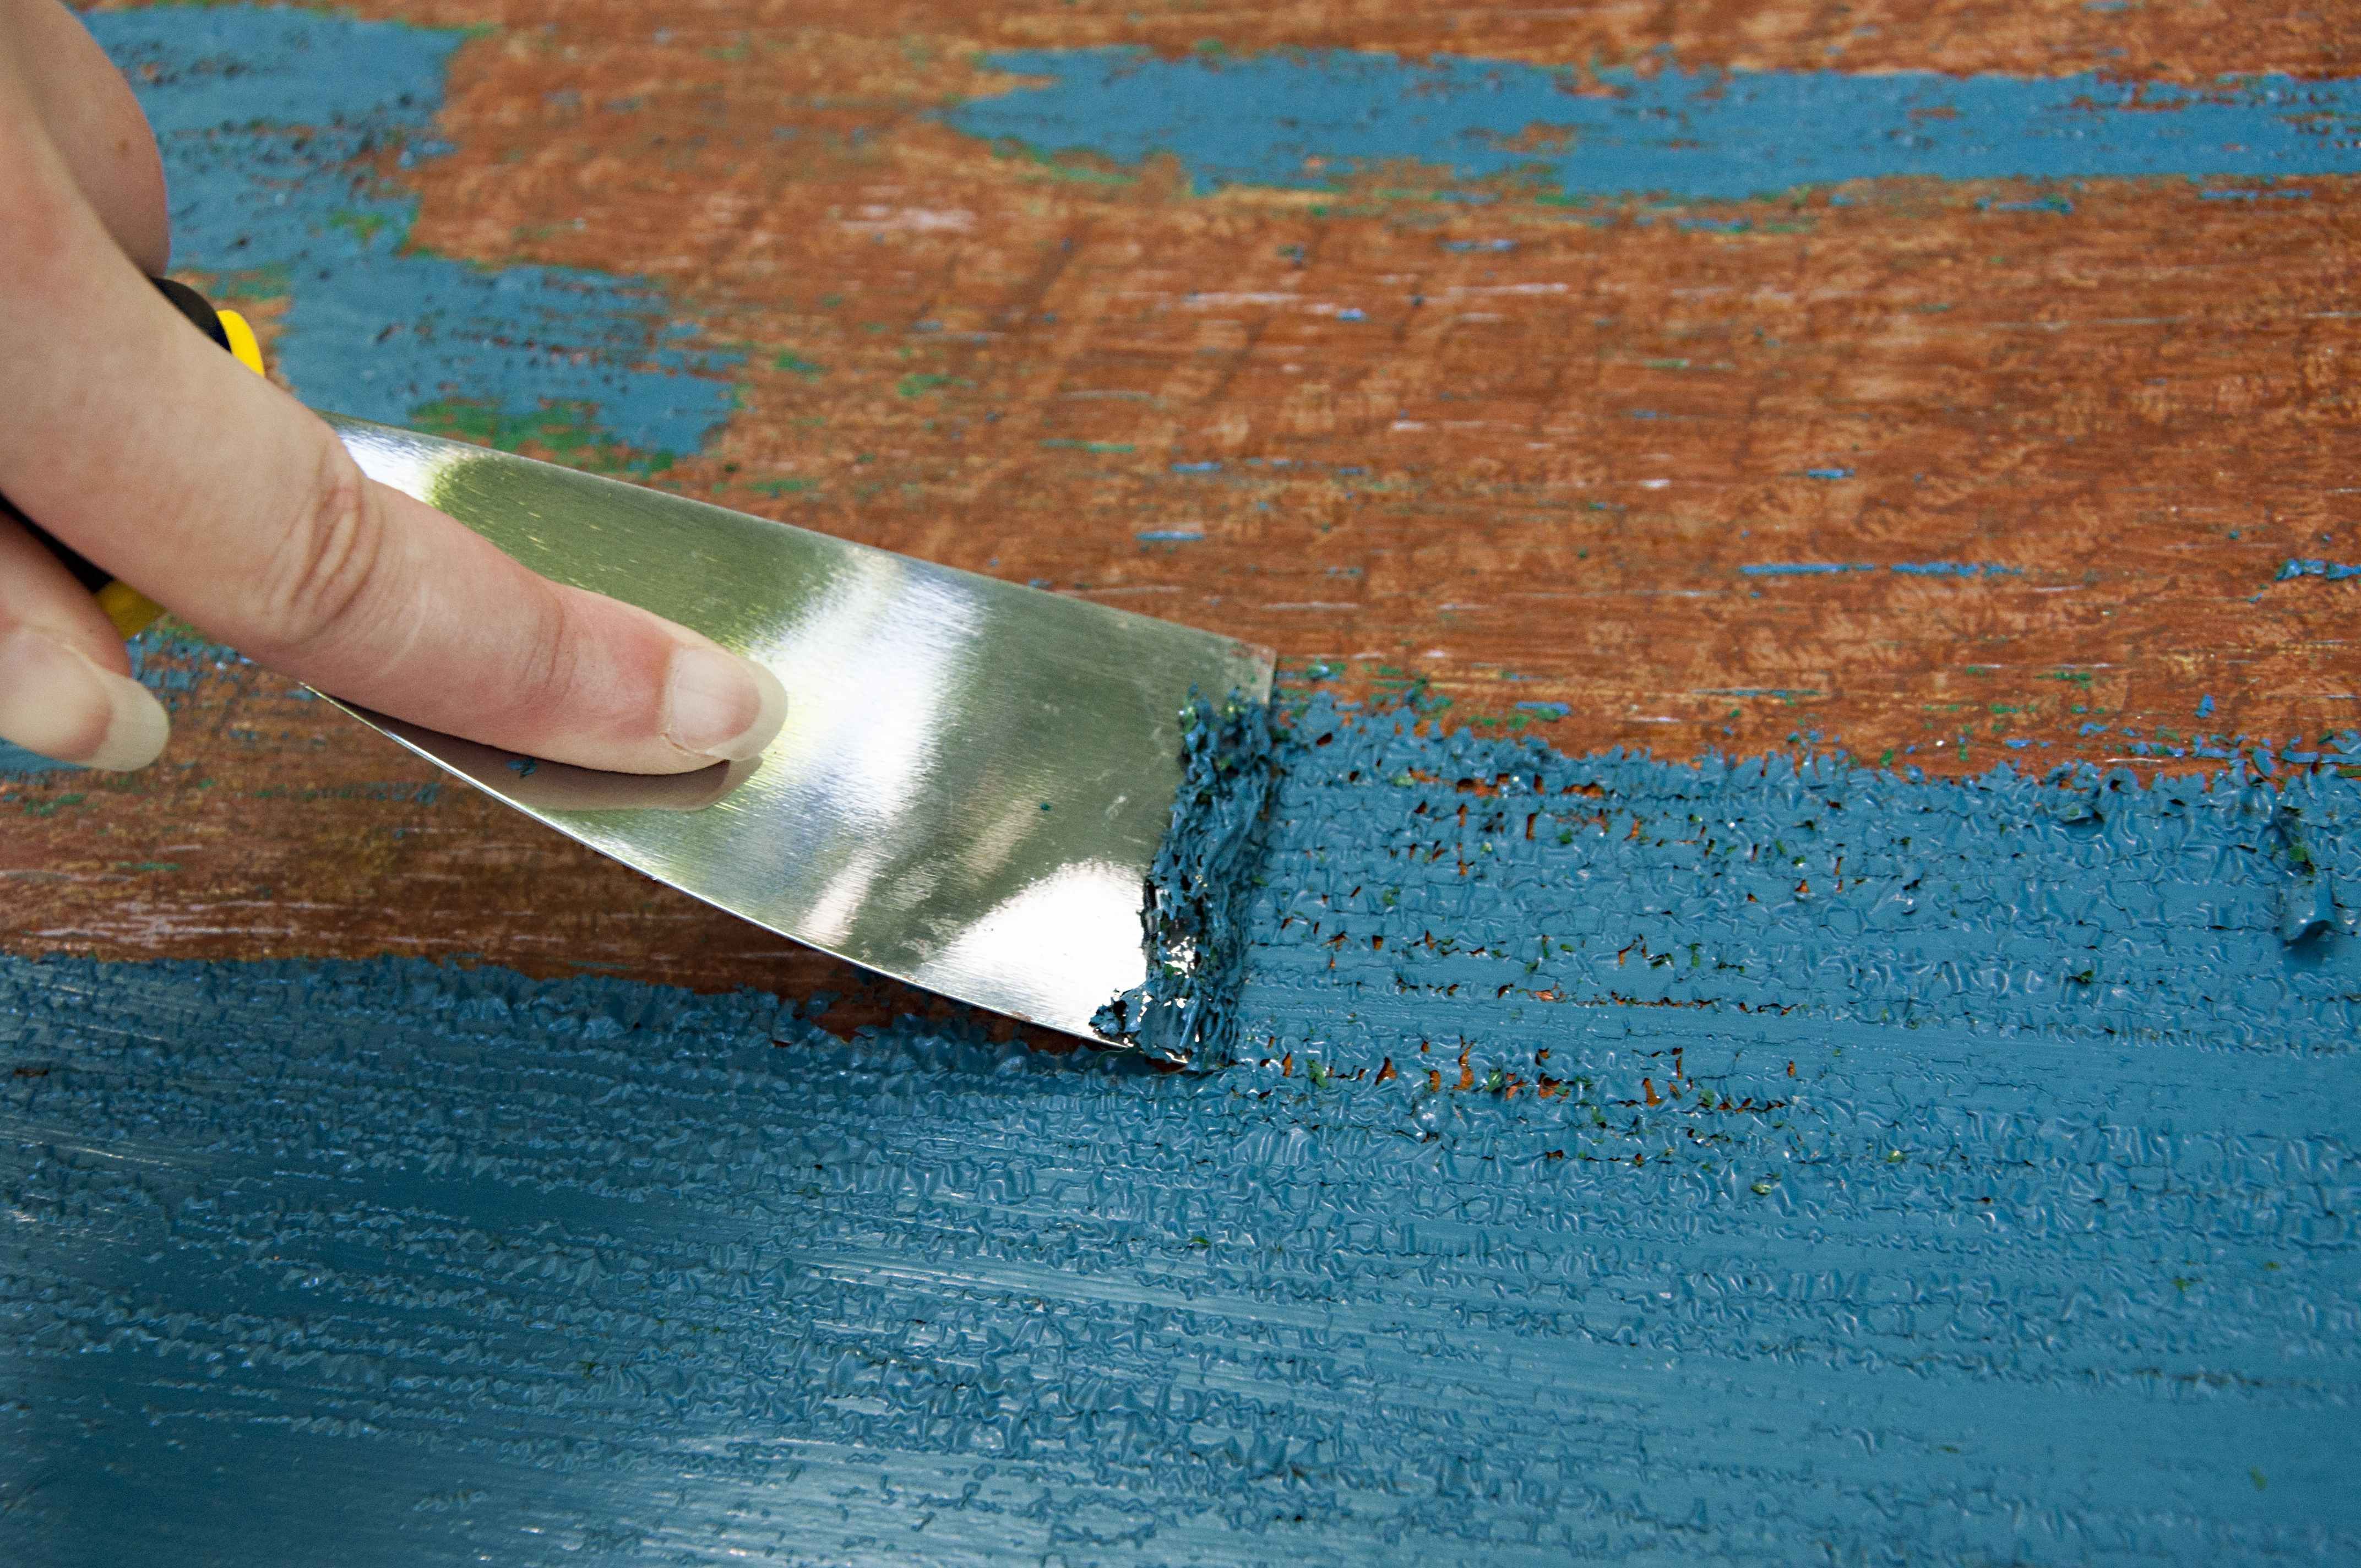
Removing the Old Finish
Once you have prepared your work area, it’s time to start removing the old finish from your wood furniture. This step is crucial in order to create a clean surface for the new finish to adhere to. Follow these steps to effectively remove the old finish:
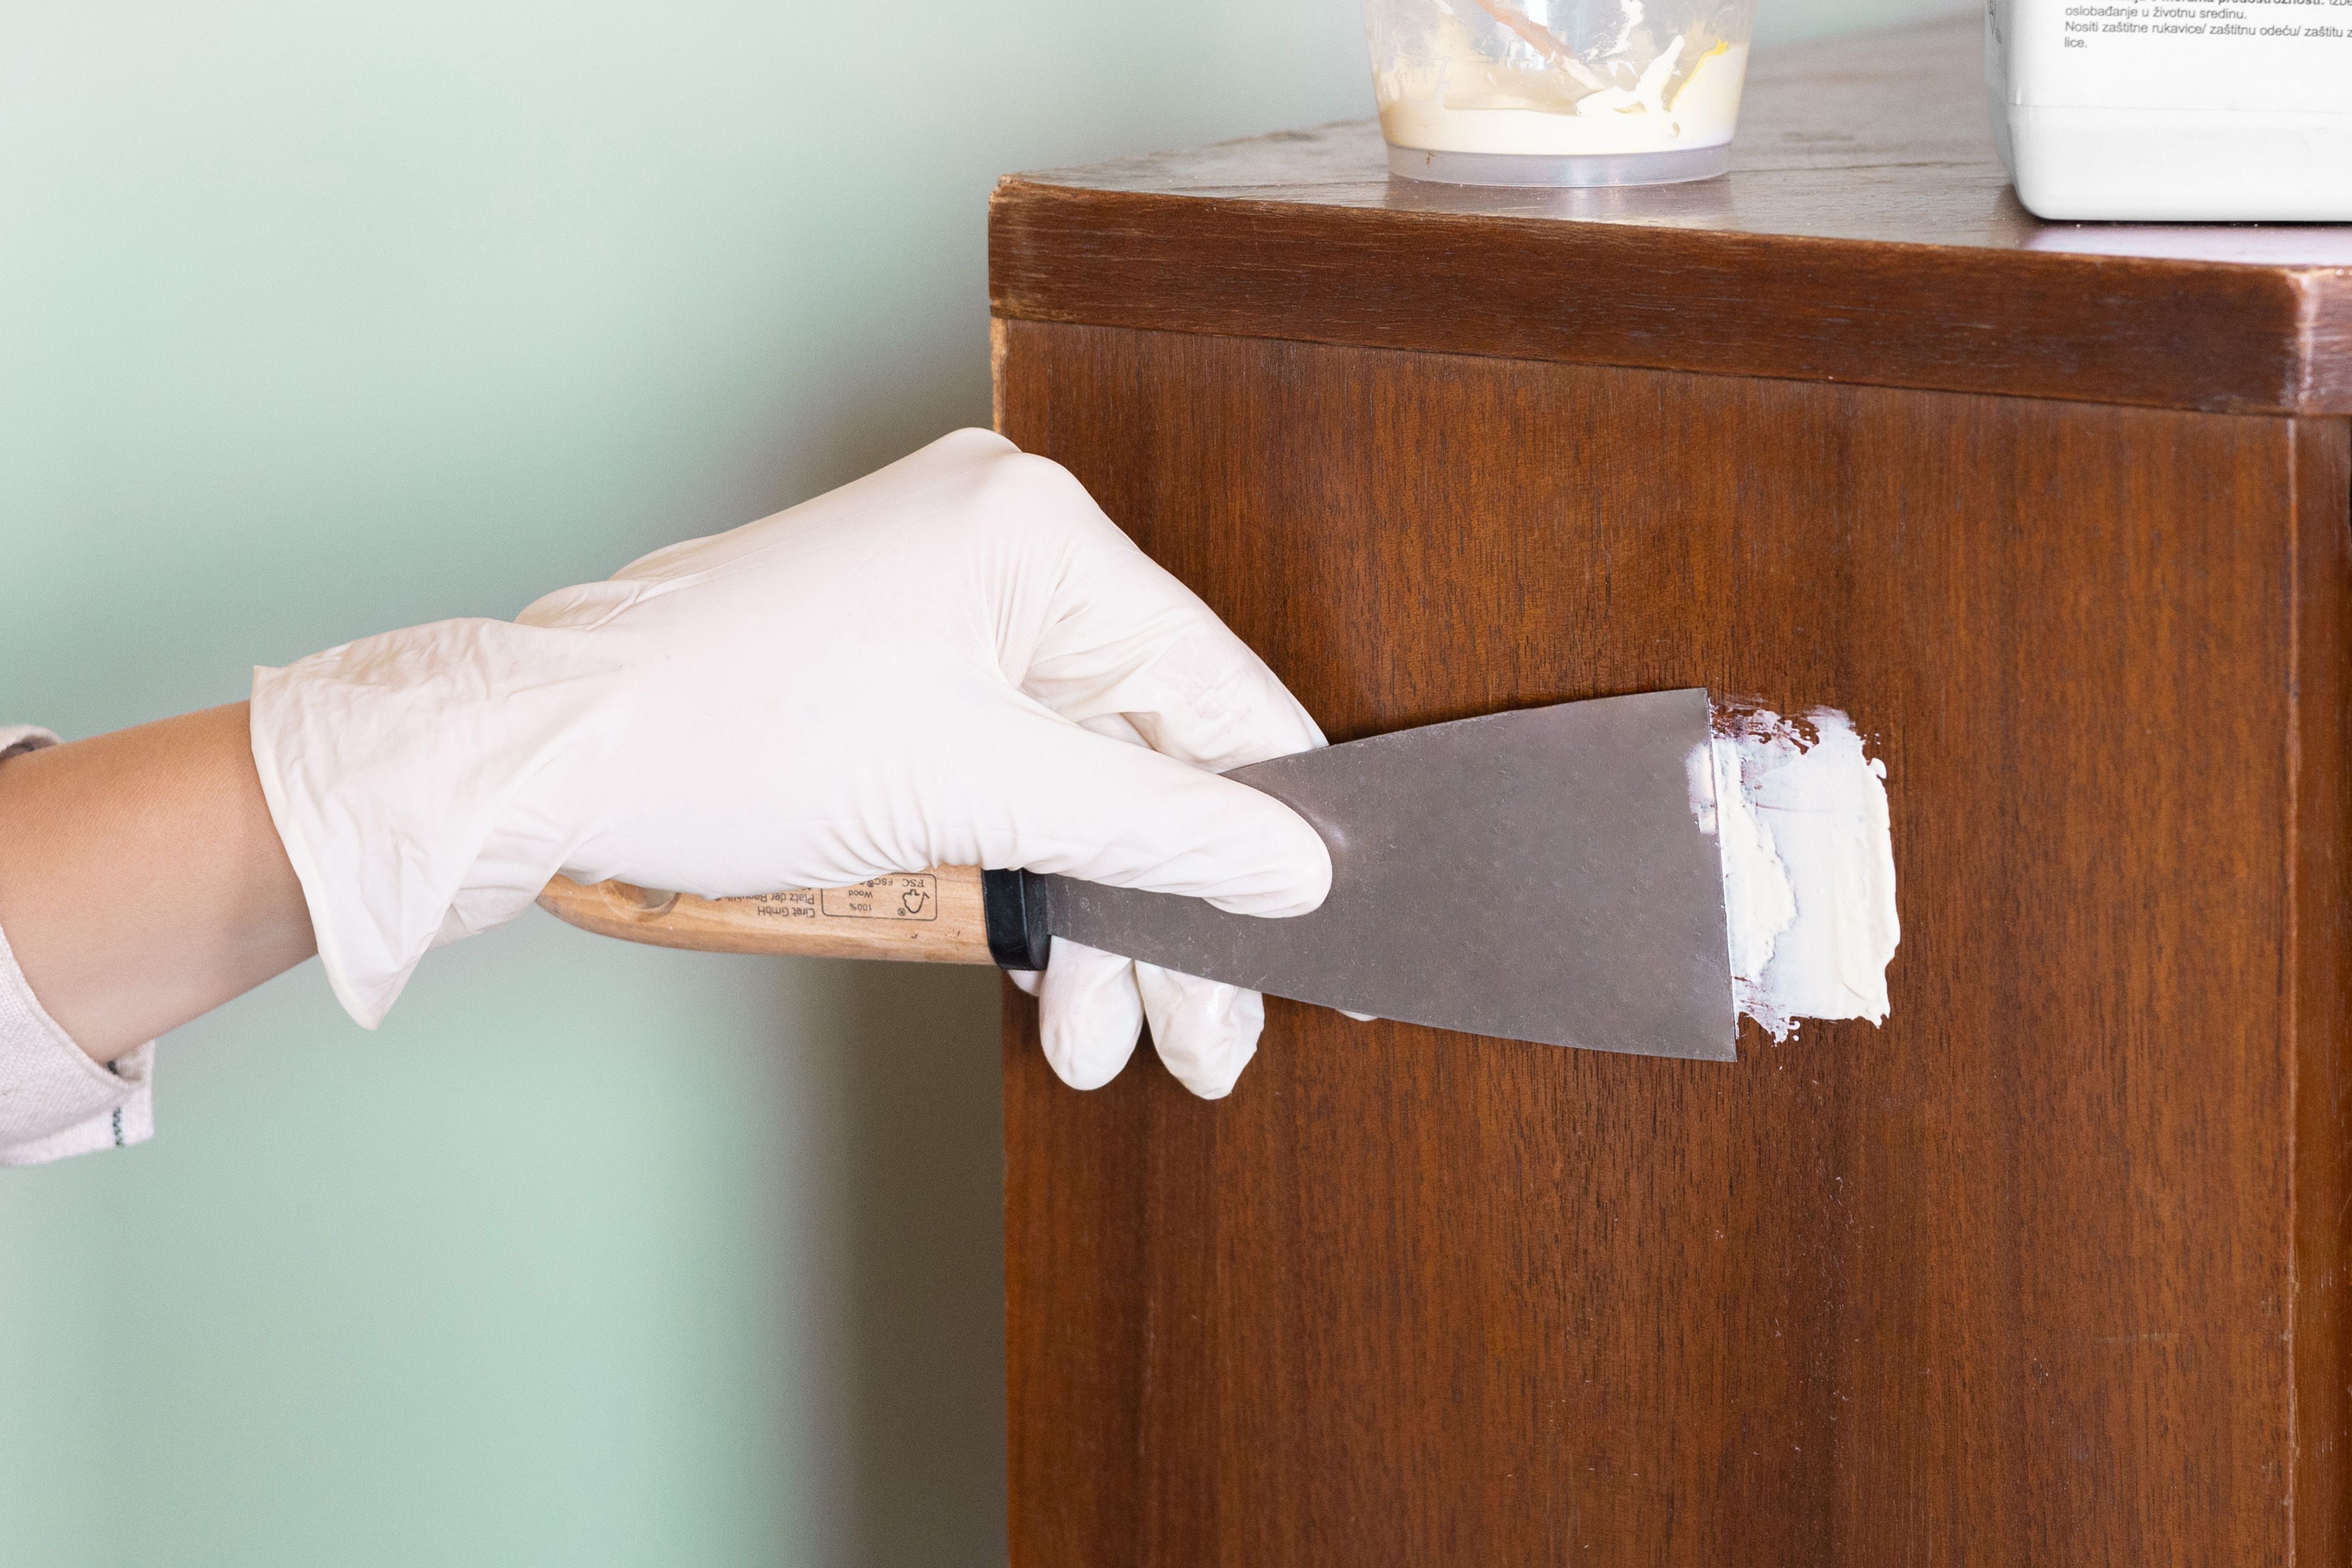
- Apply the paint stripper: Wearing protective gloves and eyewear, apply the paint stripper or stripping gel to the surface of the furniture. Use a brush or a cloth to ensure even coverage. Let the stripper sit for the recommended amount of time specified on the product label. This will loosen the old finish and make it easier to remove.
- Scrape off the old finish: After the paint stripper has had time to work, use a paint scraper or putty knife to gently scrape away the old finish. Start at one end of the furniture and work your way across, following the wood grain. Be careful not to dig into the wood or apply too much pressure, as this can damage the surface.
- Repeat if necessary: For stubborn or multiple layers of finish, you may need to repeat the stripping process. Apply a second coat of paint stripper and allow it to sit for the recommended time. Then, scrape off the softened finish once again. Repeat as needed until the old finish is completely removed.
- Clean the surface: Once the old finish has been successfully scraped off, use a clean cloth or brush dipped in mineral spirits to wipe down the surface. This will help remove any residue or remaining traces of the paint stripper. Allow the wood to dry completely before moving on to the next step.
Removing the old finish can be a time-consuming process, especially if the furniture has multiple layers or intricate details. Take your time and be patient. It’s better to spend a little more time ensuring a thorough removal rather than rushing through and leaving traces of the old finish behind.
Remember to work in a well-ventilated area and follow the safety precautions outlined on the paint stripper product label. By properly removing the old finish, you are setting the stage for a beautifully refinished piece of wood furniture.
Before stripping wood furniture, test the stripping agent in a small, inconspicuous area to ensure it won’t damage the wood. Always work in a well-ventilated area and wear protective gloves and eyewear.
Read more: How To Lighten Wood Furniture
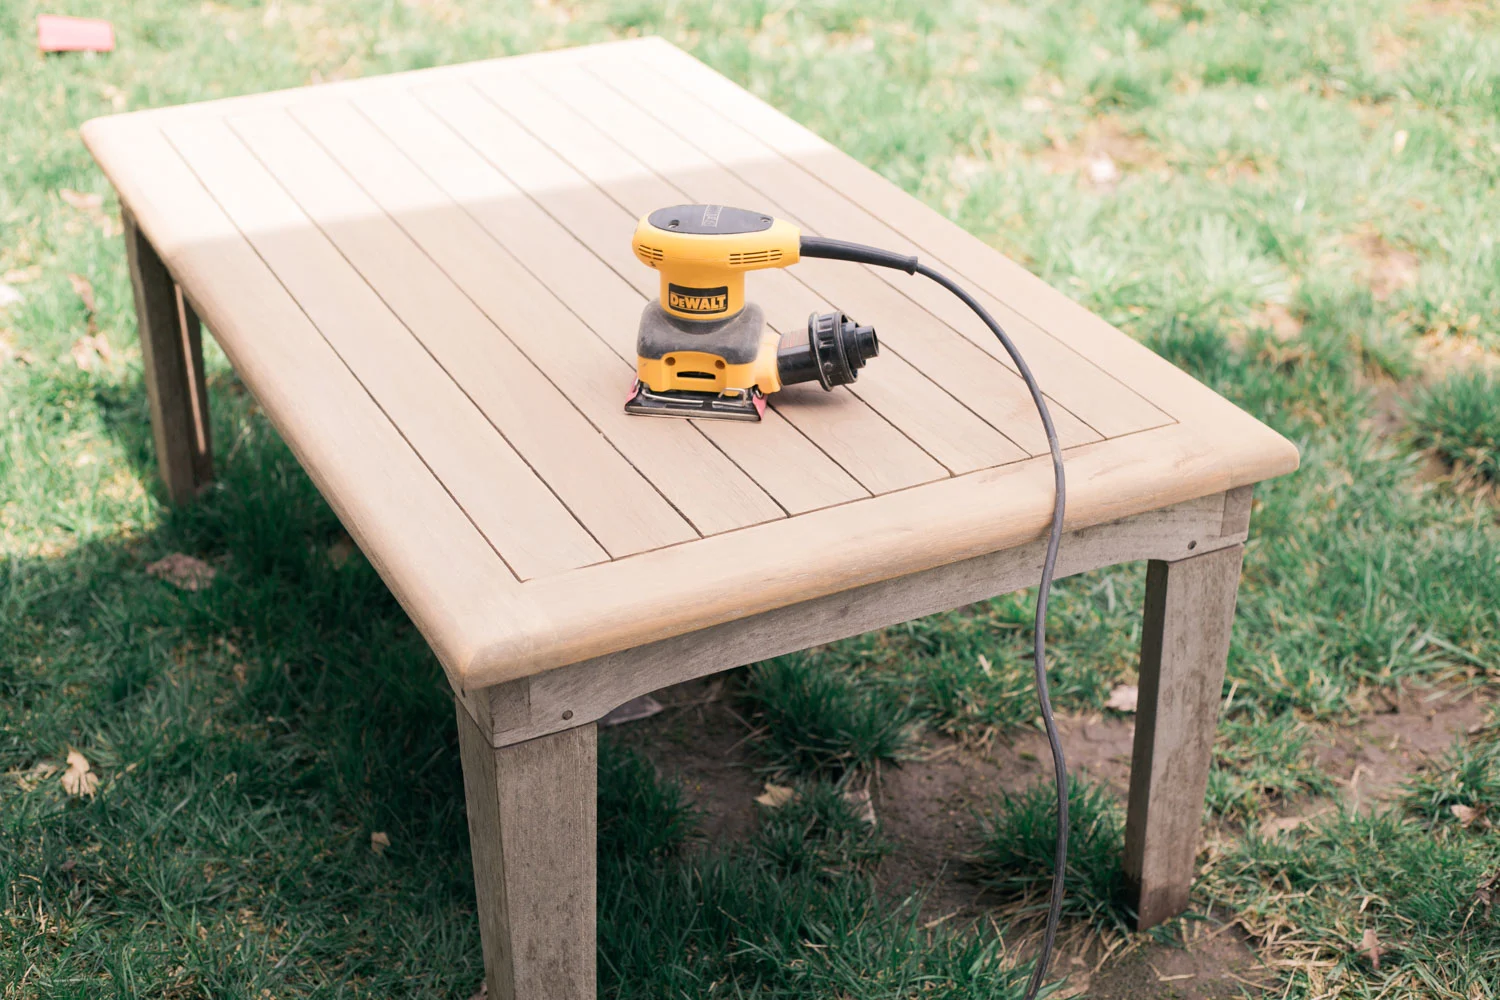
Sanding the Surface
After removing the old finish, it’s time to sand the surface of your wood furniture. Sanding is essential for smoothing out any imperfections, leveling the wood, and preparing it for the new finish. Follow these steps to effectively sand the surface:
- Start with coarse grit sandpaper: Begin sanding with a coarse grit sandpaper (around 80 or 100) to remove any remaining traces of the old finish, smooth out rough areas, and address any dents or scratches. Use a sanding block or an electric sander for larger surfaces to maintain an even pressure.
- Move to finer grit sandpaper: Once you’ve achieved a smooth surface with the coarse grit sandpaper, switch to a finer grit sandpaper (around 120 to 150). This will help refine the surface, remove any remaining sanding marks, and prepare the wood for the new finish. Continue sanding, following the wood grain, until the surface feels smooth to the touch.
- Address hard-to-reach areas: For intricate or hard-to-reach areas, such as carvings or corners, use sandpaper wrapped around a small piece of wood or a sanding sponge. This will allow you to reach into those nooks and crannies and ensure that the entire surface receives proper sanding.
- Remove sanding dust: Once you’ve completed sanding, use a clean, damp cloth to wipe away any sanding dust. This will help you see the wood’s true condition and ensure a clean surface for the new finish. Allow the wood to dry completely before proceeding.
While sanding, it’s important to be mindful of the wood’s natural grain and to apply even pressure. Avoid sanding too aggressively, as it can damage the wood or create uneven surfaces. Take your time and be thorough, paying attention to the details and maintaining consistency throughout the entire piece.
If you’re using an electric sander, always follow the manufacturer’s instructions and use the appropriate sandpaper attachment for the task. This will ensure safe and efficient sanding.
By properly sanding the surface, you’re preparing the wood for the new finish and ensuring a smooth and professional-looking result. This step is crucial in achieving a refined and polished final appearance for your refinished wood furniture.
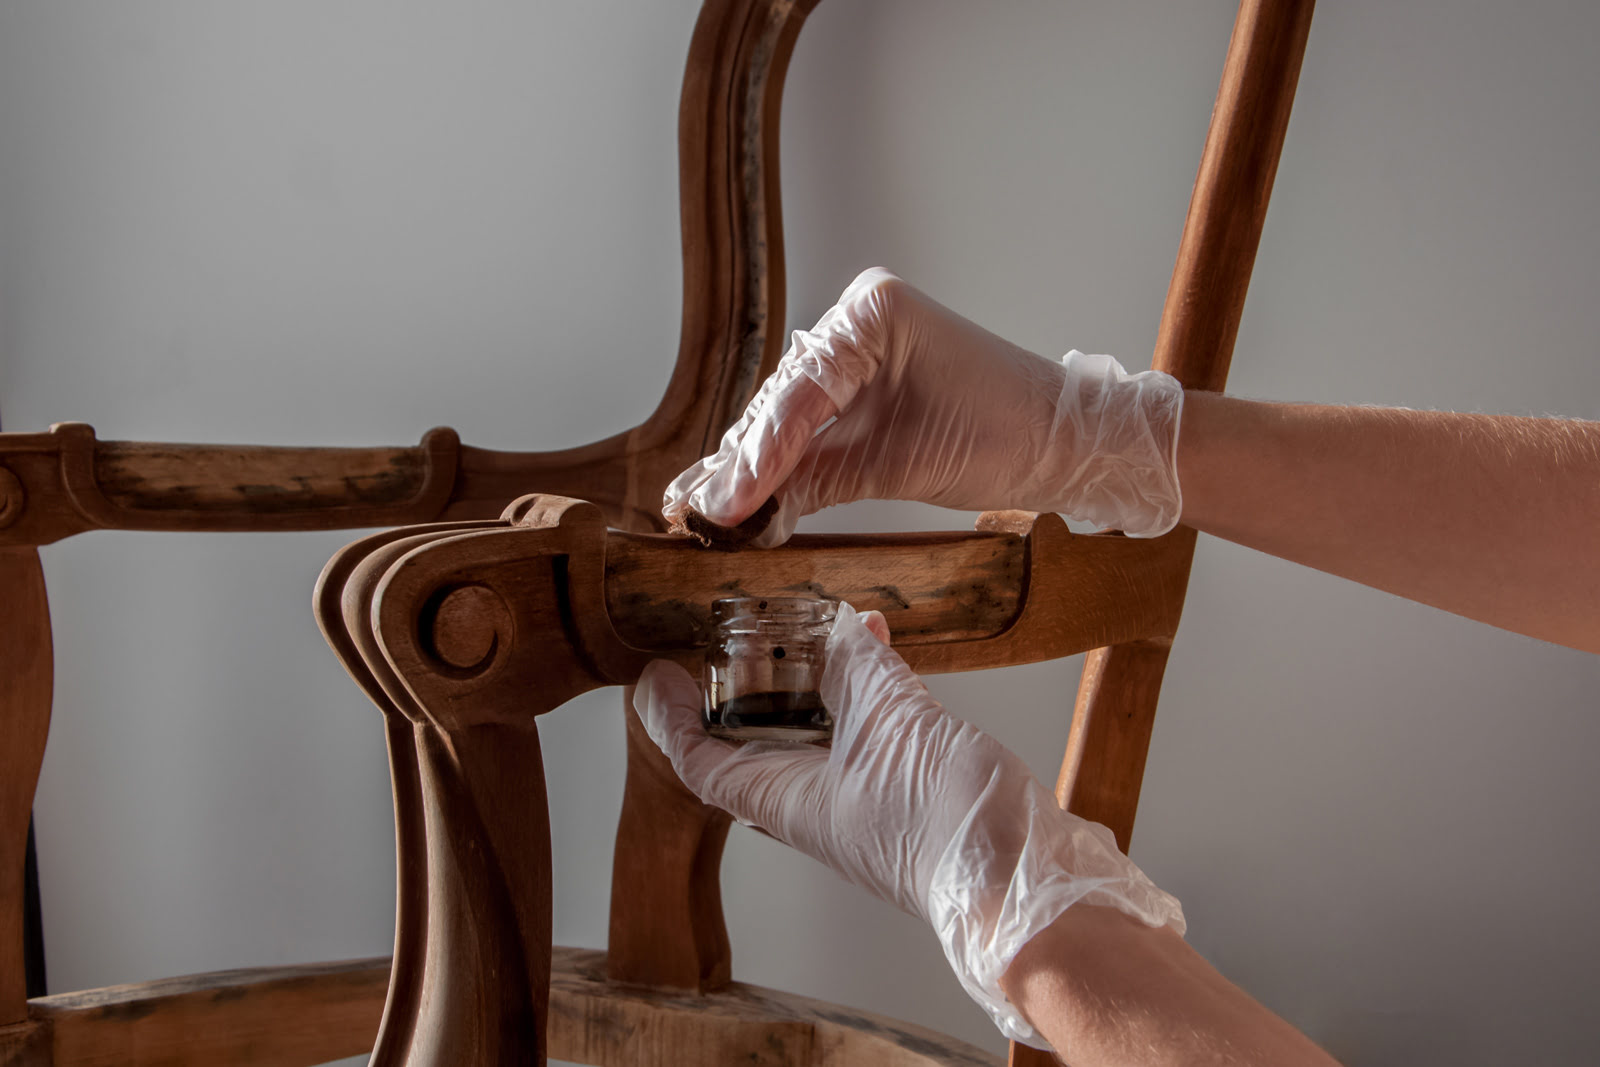
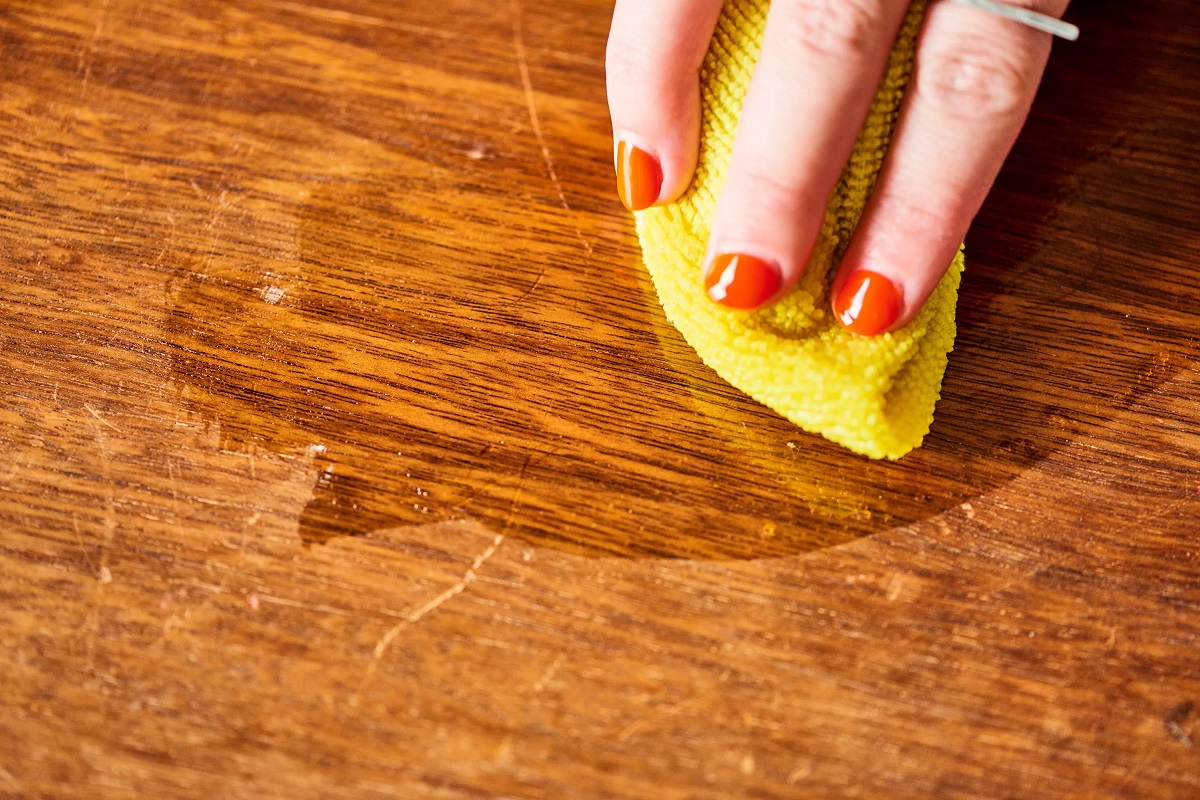
Cleaning and Prepping the Wood
Once you have finished sanding the surface of your wood furniture, it’s important to clean and properly prep the wood before applying the new finish. This step ensures that the surface is free of any dust, oils, or residue, allowing the new finish to adhere properly and create a smooth and beautiful result. Follow these steps to effectively clean and prep the wood:
- Remove sanding dust: Use a clean, dry cloth or a soft-bristle brush to remove any remaining sanding dust from the surface of the furniture. Pay close attention to the nooks and crannies, ensuring that all areas are thoroughly dusted.
- Clean with a mild solution: Prepare a mild solution of warm water and a gentle wood-cleaning product or mild dish soap. Dampen a cloth with the solution and gently wipe down the entire surface of the furniture. This will remove any dirt, oils, or residues that may have accumulated during the sanding process.
- Rinse and dry: After you’ve cleaned the wood, rinse the cloth with clean water and go over the furniture again to remove any soapy residue. Then, use a dry cloth to pat the wood dry. Make sure the surface is completely dry before moving on to the next step.
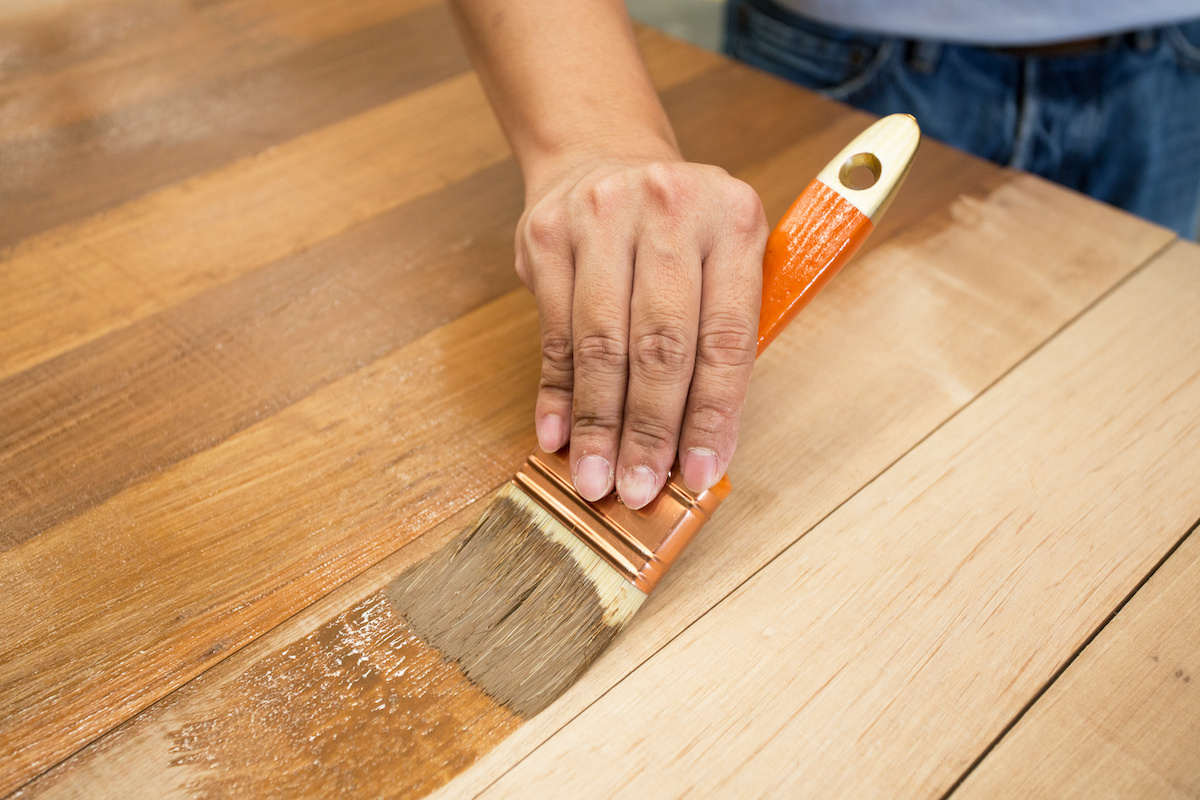
- Apply wood conditioner (optional): If you’re planning to use a stain or if the wood you’re working with is prone to blotchiness, applying a wood conditioner can help create a more even finish. Follow the instructions on the wood conditioner product and apply it evenly across the entire surface of the furniture. Allow the conditioner to penetrate the wood as recommended.
Properly cleaning and prepping the wood before applying the new finish is crucial in ensuring a successful and long-lasting result. It removes any debris or contaminants and provides a clean and receptive surface for the new finish to bond with.
Take your time during this step and pay attention to detail. It’s important to thoroughly clean and prepare the wood, as any remaining dust, dirt, or residue can affect the final appearance and durability of the new finish.
By following these steps, you’ll be one step closer to transforming your wood furniture into a stunning piece that reflects your personal style and enhances your living space.
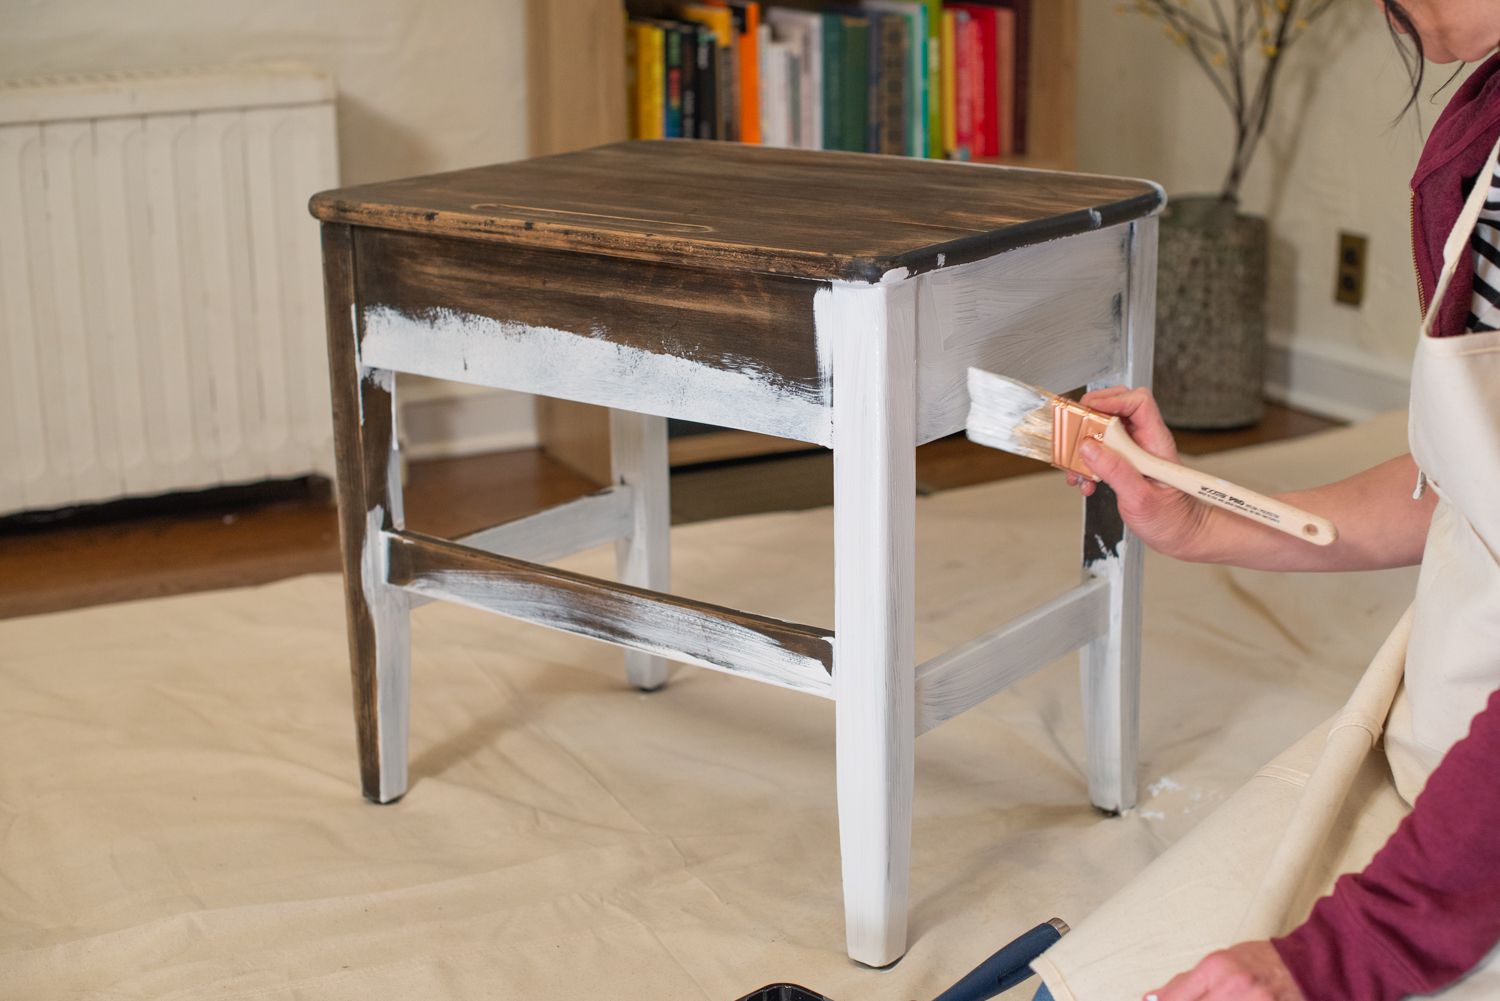
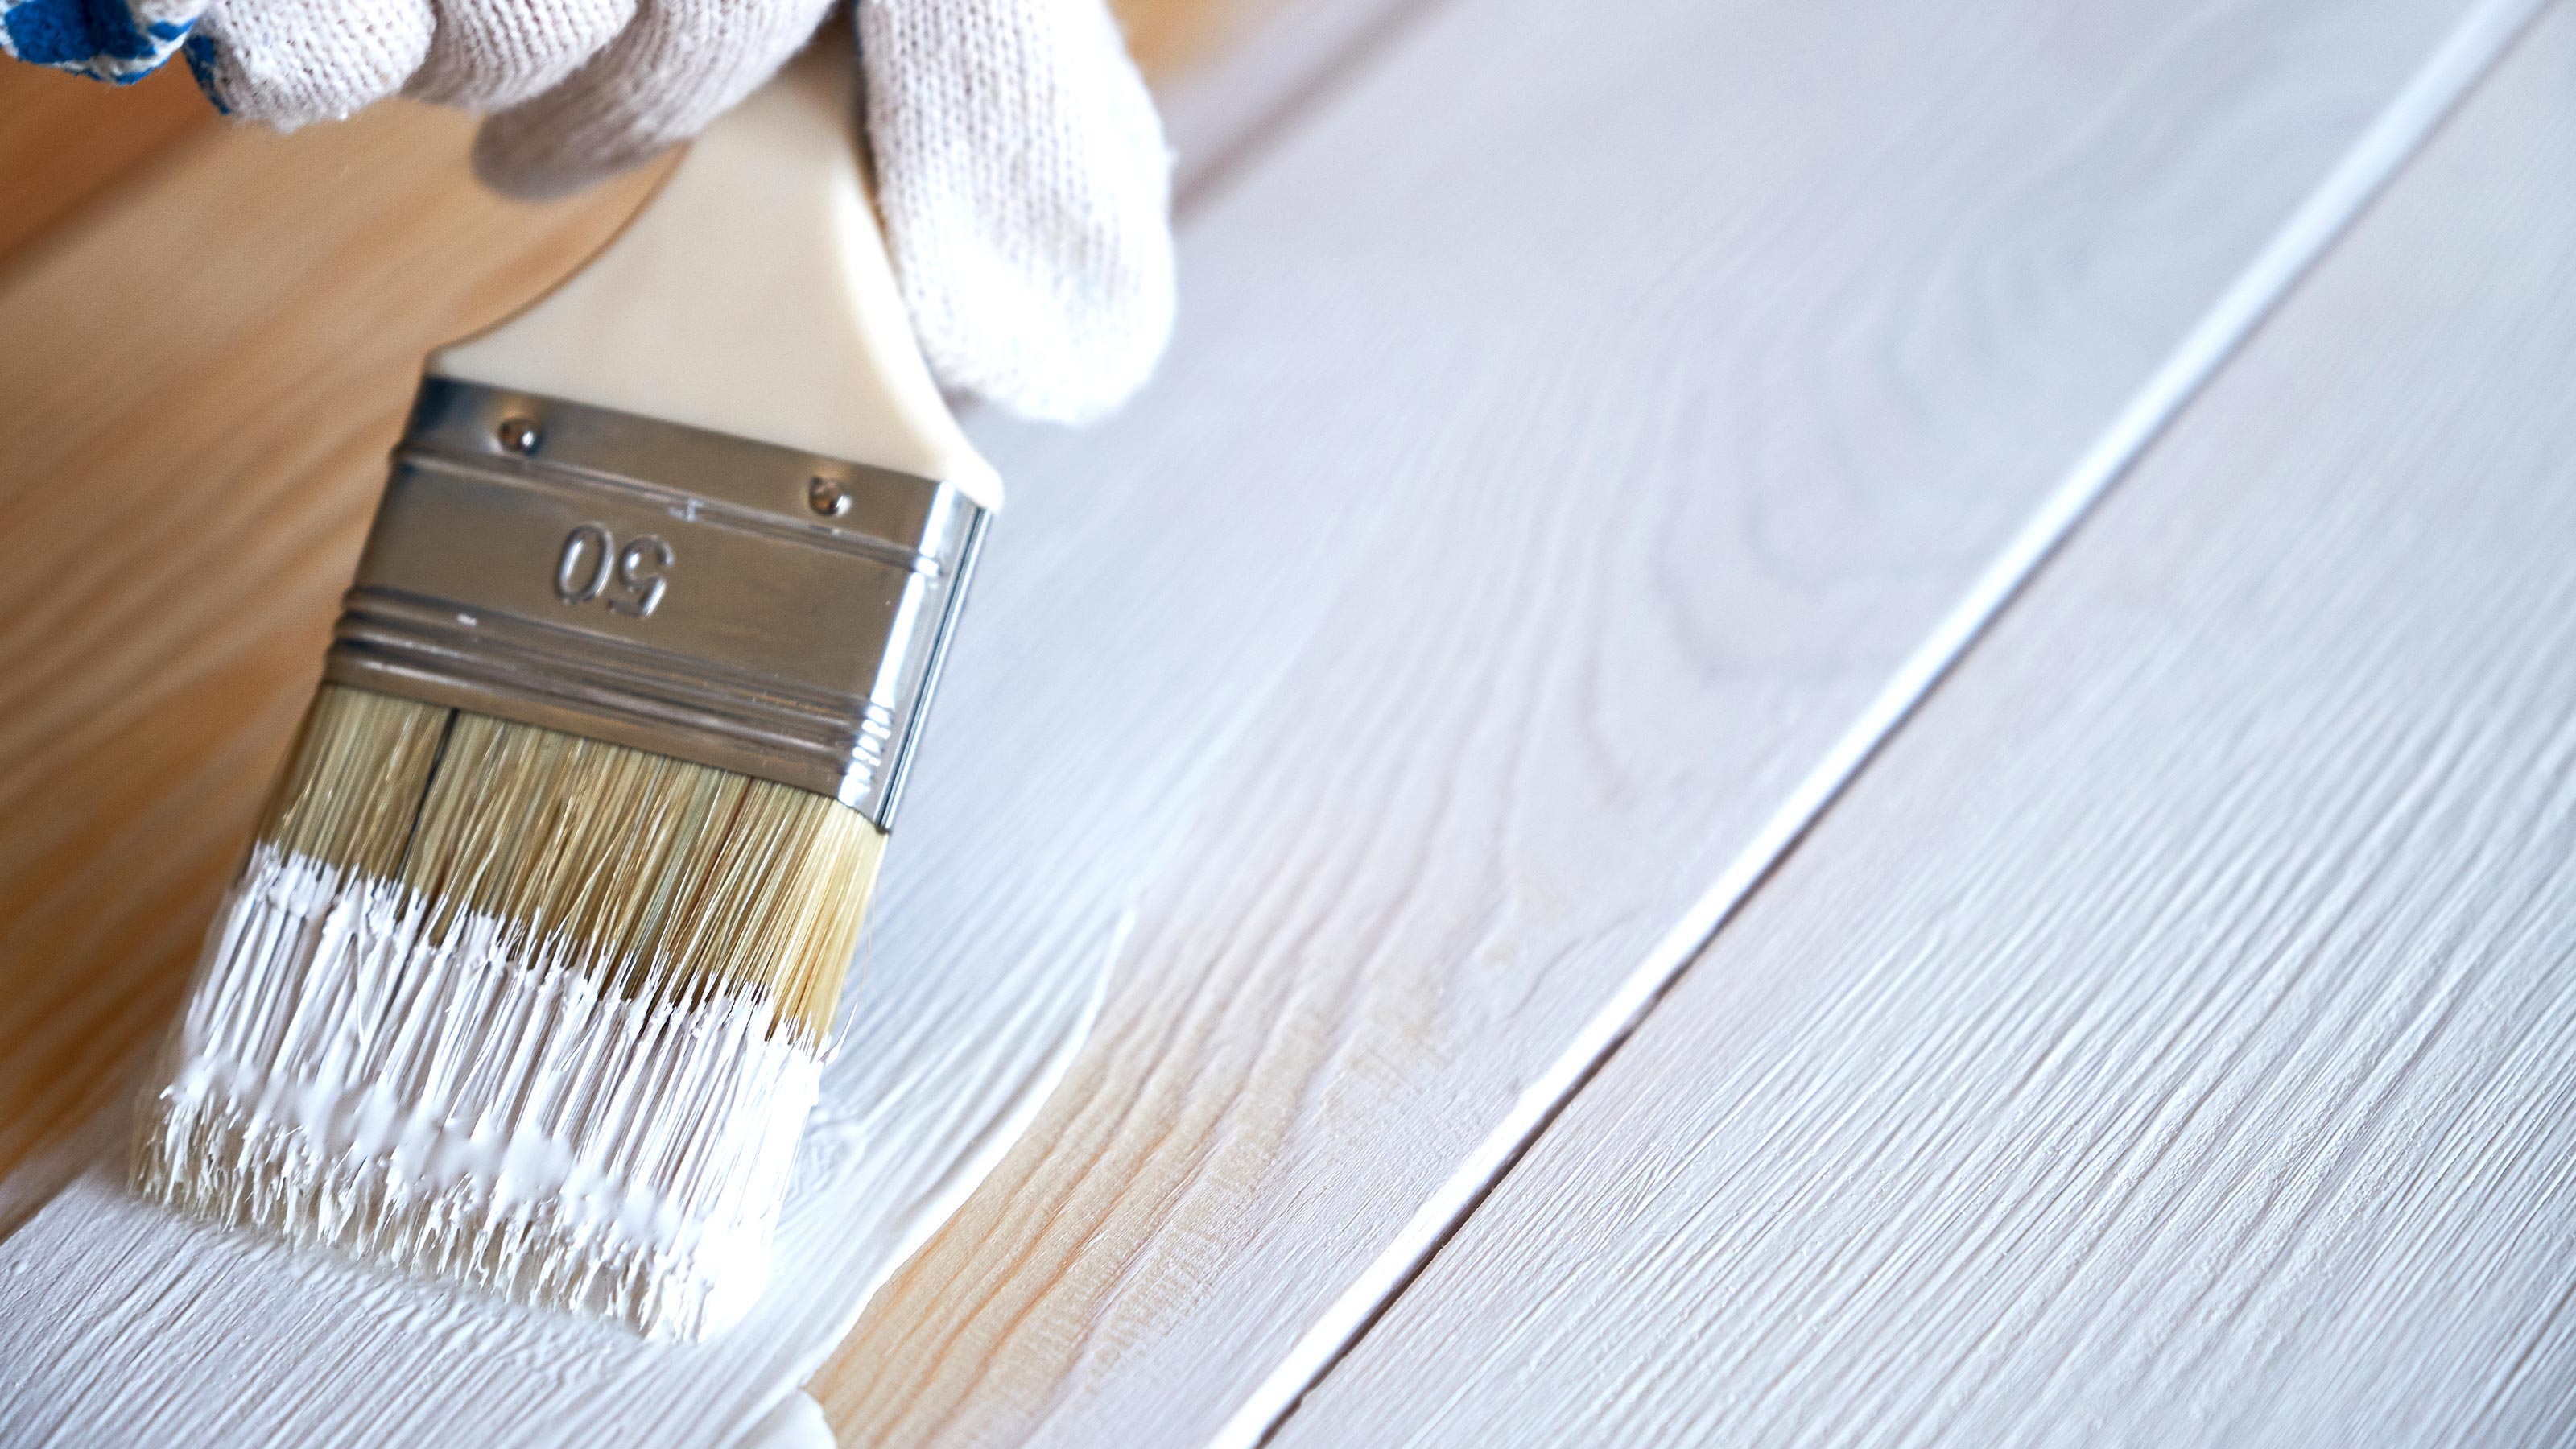
Applying New Finish
Now that you’ve cleaned and prepped the wood, it’s time to apply the new finish to your furniture. The choice of finish, whether it’s a stain or paint, will depend on your desired look and the style you want to achieve. Follow these steps to effectively apply the new finish:
- Stir or shake the finish: If you’re using a stain or paint, make sure to thoroughly stir or shake the product before applying it. This will ensure a consistent color and texture.
- Apply the finish: Use a brush, roller, or spray gun to apply the new finish to the wood surface. Start with broad, even strokes, following the wood grain for a uniform application. Work in small sections, moving across the furniture to maintain a wet edge and prevent overlap marks.
- Remove excess finish: After applying the finish, use a clean, lint-free cloth to gently wipe off any excess product. This will help achieve a smooth and even finish, and prevent any pooling or drips.
- Allow to dry and cure: Follow the drying and curing instructions provided by the manufacturer. Proper drying time is essential to ensure that the finish fully adheres and hardens. Avoid touching or placing any objects on the furniture until the finish is completely dry.
- Apply additional coats (optional): Depending on the desired look and the type of finish you’re using, you may need to apply multiple coats. If necessary, lightly sand the surface between each coat to achieve a smooth finish and help subsequent coats adhere properly.
- Protect the finish: Once the final coat has dried and cured, consider applying a protective topcoat or sealer to enhance the durability and longevity of the finish. This will help protect the wood and make it more resistant to scratches and spills.
When applying the new finish, take your time and work in a well-ventilated area. Follow the manufacturer’s instructions for the specific product you’re using, as different finishes may have different application techniques or drying times. Ensure that each coat is applied evenly for a professional-looking finish.
Remember to clean your brushes, rollers, or spray gun according to the manufacturer’s instructions. Properly maintaining your tools will ensure they are ready for future projects and prevent any build-up of dried finish.
By following these steps and applying the new finish with care, you’ll achieve a beautifully refinished wood furniture piece that adds charm and character to your space.
Final Touches
Now that you’ve applied the new finish to your wood furniture, it’s time to add the final touches that will truly bring out the beauty of your piece. Here are some final steps you can take to add those finishing touches:
- Inspect and touch up: Once the finish is fully dry, inspect the furniture for any areas that may need touch-ups or additional attention. Look for any uneven spots, drips, or imperfections and address them accordingly. Touch up the finish using a small brush or applicator, blending it in with the surrounding area.
- Polish and wax: If desired, you can further enhance the shine and protection of the finish by applying a furniture polish or wax. Follow the instructions on the product and use a soft cloth to apply it in circular motions. This will give your furniture a beautiful luster and help protect the finish from daily wear and tear.
- Replace hardware: Consider updating or replacing any worn or outdated hardware on your furniture. New handles, knobs, hinges, or decorative hardware can instantly transform the look of your piece and give it a fresh and updated appearance.
- Buff and shine: Use a clean, soft cloth to gently buff and shine the entire surface of your refinished furniture. This will help bring out the natural beauty of the wood and give it a polished and inviting look.
- Arrange and style: Once your furniture is fully refinished, it’s time to arrange and style it in your space. Think about the function and placement of the piece and incorporate it into your existing décor. Add accessories, such as lamps, vases, or decorative items, to showcase the beauty of your refinished furniture and create a cohesive and inviting atmosphere.
The final touches are your opportunity to add your personal flair and make the furniture truly shine. Take the time to pay attention to the details and ensure that every aspect of the piece is in line with your vision and style.
By completing these final steps, your wood furniture will be transformed into a stunning focal point, reflecting your own unique taste and creating a welcoming ambiance in your home.
Read more: How To Identify Wood Furniture
Conclusion
Refinishing wood furniture is a rewarding and creative process that allows you to breathe new life into old or worn-out pieces. By following the steps outlined in this guide, you can strip away the old finish, sand the surface, apply a fresh coat of paint or stain, and add those final touches that truly make your furniture shine.
Throughout the refinishing process, it’s important to gather all the necessary supplies, create a well-ventilated work area, and follow the instructions provided with the products you’re using. Taking the time to properly prepare and execute each step will ensure a successful outcome.
Remember to embrace your creative side and infuse your personal style into the project. The choice of finish, the color or shade, and the hardware can all be customized to suit your vision and complement your existing décor.
Furthermore, pay attention to detail and take pride in your work. Sanding the surface thoroughly, applying the new finish evenly, and adding those final touches will help you achieve professional-looking results that you’ll be proud to showcase in your home.
With each piece of furniture you refinish, you not only create a beautiful and unique item but also contribute to sustainability by extending the lifespan of existing pieces. It’s a wonderful way to reinvigorate your space while reducing waste.
So, whether you’re giving new life to a family heirloom or bringing new character to a thrift store find, refinishing wood furniture allows you to tap into your creativity and transform ordinary pieces into extraordinary works of art. Follow this guide, trust your instincts, and enjoy the satisfaction of reviving and customizing your wood furniture.
Frequently Asked Questions about How To Strip Wood Furniture
Was this page helpful?
At Storables.com, we guarantee accurate and reliable information. Our content, validated by Expert Board Contributors, is crafted following stringent Editorial Policies. We're committed to providing you with well-researched, expert-backed insights for all your informational needs.


0 thoughts on “How To Strip Wood Furniture”