Articles
How To Tuckpoint Chimney
Modified: August 27, 2024
Learn the step-by-step process of tuckpointing chimneys with our informative articles. Improve your DIY skills and maintain the durability of your chimney.
(Many of the links in this article redirect to a specific reviewed product. Your purchase of these products through affiliate links helps to generate commission for Storables.com, at no extra cost. Learn more)
Introduction
Welcome to our comprehensive guide on how to tuckpoint a chimney. Over time, chimneys can suffer from deterioration and damage due to exposure to the elements. Tuckpointing, also known as repointing, is the process of removing old, damaged mortar and replacing it with fresh mortar. This not only improves the aesthetic appeal of the chimney but also reinforces its structural integrity.
Tuckpointing may seem like a daunting task, but with the right tools, materials, and step-by-step instructions, you can successfully restore your chimney and extend its lifespan. In this article, we will take you through the process of tuckpointing a chimney, from preparing the surface to applying new mortar and giving it the finishing touches.
Before we dive into the details, it’s essential to understand the concept of tuckpointing and its importance. The mortar between the bricks or stones of a chimney plays a critical role in providing stability and weather resistance. Over time, due to exposure to moisture and temperature fluctuations, the mortar can deteriorate and crumble. This not only compromises the structural integrity of the chimney but also allows water to seep in and cause further damage.
Tuckpointing involves removing the damaged mortar and replacing it with fresh mortar that matches the color and texture of the original. The process requires precision, patience, and attention to detail to ensure a seamless and attractive finish. By following the steps outlined in this guide, you can tackle tuckpointing with confidence and restore your chimney to its former glory.
Before you begin, gather all the necessary tools and materials to ensure a smooth and efficient tuckpointing process. Additionally, it’s vital to prioritize safety by wearing protective gear, such as safety glasses, gloves, and a dust mask, to protect yourself from potential hazards.
Now, let’s dive into the step-by-step guide on how to tuckpoint a chimney and bring it back to its original state.
Key Takeaways:
- Tuckpointing is a meticulous process that involves careful preparation, mortar removal, mixing, and application. Following safety precautions and maintaining the chimney will ensure a successful and long-lasting repair.
- By understanding the importance of tuckpointing and following the step-by-step guide, you can restore your chimney’s structural integrity and enhance its visual appeal. Prioritizing safety and regular maintenance are crucial for a well-maintained chimney.
Read more: How Much Does It Cost To Tuckpoint A Chimney
Understanding Tuckpointing
Tuckpointing is a masonry technique used to repair and restore the mortar joints between bricks or stones in a chimney. The process involves removing deteriorated mortar and replacing it with new mortar, ensuring the structural integrity of the chimney while enhancing its aesthetic appeal.
The primary purpose of tuckpointing is to replace damaged mortar that has become weak or cracked over time. Mortar plays a crucial role in bonding the stones or bricks together, providing stability and preventing water penetration. When mortar deteriorates, it not only compromises the strength of the chimney but also allows water to seep into the masonry, leading to further damage and potential structural issues.
Tuckpointing is essential for maintaining the overall condition of your chimney. By addressing mortar deterioration at an early stage, you can prevent more significant problems from occurring, such as chimney leaning, brick or stone displacement, or even collapsing of the chimney structure.
Additionally, tuckpointing is an opportunity to restore the appearance of your chimney. Over time, the mortar can become discolored or mismatched due to weathering or previous repairs. By carefully selecting the right color and texture for the new mortar, you can achieve a seamless blend with the existing masonry, revitalizing the chimney’s visual appeal.
It’s important to note that tuckpointing requires skill and precision to ensure a successful outcome. In order to achieve a seamless finish, it’s crucial to select the correct mortar mix and tools appropriate for the job. Understanding the different types of mortar and their compatibility with your chimney’s masonry is essential for a long-lasting tuckpointing repair.
Traditional lime-based mortar, which consists of lime, sand, and water, was commonly used in older chimneys. This type of mortar is relatively soft and allows for flexibility, which is essential for masonry subjected to temperature fluctuations. However, modern cement-based mortars have become more prevalent due to their enhanced strength and durability.
When selecting a mortar mix, it’s crucial to consider the composition and characteristics of the existing mortar. The new mortar should closely match the original mortar in terms of color, texture, and consistency. This ensures a cohesive appearance while maintaining the integrity of the chimney.
By understanding the purpose and importance of tuckpointing, you can recognize the signs of deteriorated mortar and take proactive steps to address the issue. Regular inspection and maintenance of your chimney will help identify any areas in need of tuckpointing, preventing further damage and preserving the longevity of your chimney.
Tools and Materials Needed
Before you embark on the tuckpointing process, it’s essential to gather all the necessary tools and materials. Having the right equipment at hand will make the job more efficient and ensure a successful outcome. Here are the tools and materials you’ll need for tuckpointing a chimney:
Tools:
- Tuckpointing trowel: This specialized tool has a narrow, pointed blade on one end and a flat blade on the other. It is designed specifically for applying and shaping mortar in tight spaces.
- Brick jointer: This tool is used to create a concave shape in the mortar joints, providing a better seal and improving the overall appearance of the chimney.
- Hammer and cold chisel: These tools are used for removing old mortar from the joints. The chisel is used to chip away the deteriorated mortar, while the hammer provides the necessary force.
- Wire brush: A wire brush with stiff bristles is used to clean the chimney’s masonry, removing any loose debris or residue before applying new mortar.
- Masonry brush: This brush is used to wet the mortar joints with water before applying new mortar. It helps improve the bond between the old and new mortar.
- Joint raker: A joint raker with interchangeable blades of different widths is useful for removing old mortar from larger joints.
- Mortar board: This flat board provides a surface for mixing the mortar. It should be large enough to hold an adequate amount of mortar for your project.
- Mixing paddle: A mixing paddle attachment for a power drill is ideal for efficiently mixing the mortar.
- Safety gear: Don’t forget to wear goggles, gloves, and a dust mask to protect yourself from debris, dust, and potential hazards.
Materials:
- Mortar mix: Select a mortar mix that matches the composition and color of the existing mortar. It can be either lime-based or cement-based, depending on the specific requirements of your chimney.
- Sand: The sand used in the mortar mix should be clean and free of impurities. Different types of sand, such as masonry sand or builder’s sand, can be used depending on the desired consistency of the mortar.
- Water: You’ll need water for mixing the mortar to the right consistency. Use clean water for best results.
- Plastic sheet or tarp: Place a plastic sheet or tarp on the ground to catch any falling debris or mortar during the tuckpointing process.
By ensuring you have all the necessary tools and materials ready before starting the tuckpointing project, you’ll be well-prepared to tackle each step. This will help make your tuckpointing experience smoother and more successful, providing a restored and improved chimney in the end.
Read more: How To Decorate Chimney
Step-by-Step Guide to Tuckpointing a Chimney
Tuckpointing a chimney requires careful attention to detail and a systematic approach. Follow these step-by-step instructions to ensure a successful tuckpointing project:
Step 1: Preparing the Chimney
Start by assessing the overall condition of the chimney. Inspect for any loose or damaged bricks or stones that may need repair or replacement. Clear the area around the chimney and protect nearby surfaces with plastic sheets or tarps to prevent any damage or mess.
Step 2: Removing Old Mortar
Using a hammer and cold chisel, carefully chip away the old, deteriorated mortar from between the bricks or stones. Be cautious not to damage the masonry units as you remove the mortar. If necessary, a joint raker can be used for larger joints to speed up the process. Remove the mortar to a depth of about ¼ to ½ inch, ensuring a clean joint.
Step 3: Mixing New Mortar
Follow the manufacturer’s instructions on the mortar mix bag to create the appropriate mortar consistency. Use a mortar board and a mixing paddle attached to a power drill for efficient and consistent mixing. Add water gradually, mixing until you achieve a workable consistency that holds its shape but is not too dry or too watery.
Read more: How To Rebuild A Chimney
Step 4: Applying New Mortar
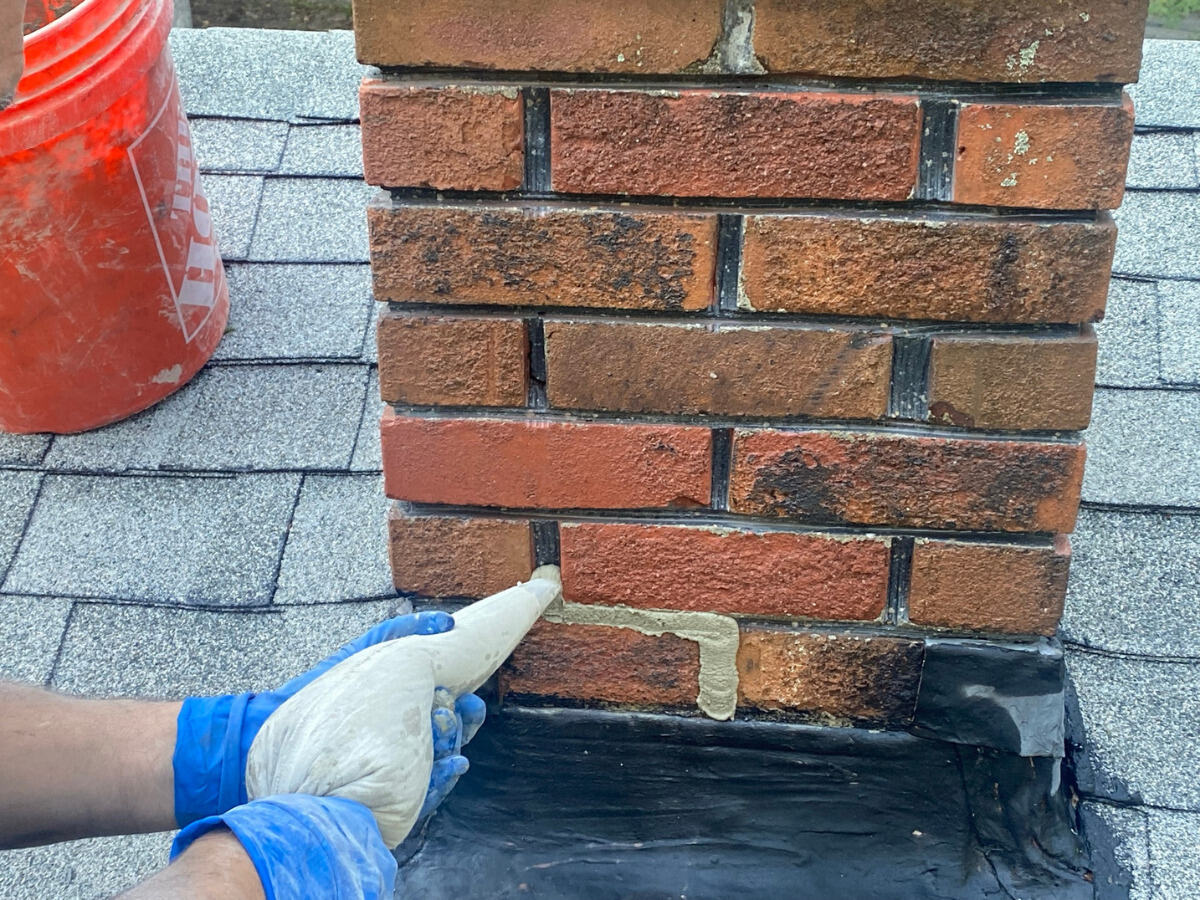
Wet the cleaned mortar joints with a masonry brush and water before applying new mortar. This helps improve adhesion between the old and new mortar. Load the tuckpointing trowel with mortar and gently press it into the joint, ensuring it fills the entire depth. Use the tuckpointing trowel and brick jointer to shape and profile the mortar to match the surrounding masonry.
Step 5: Finishing Touches
Once you have completed tuckpointing a section of the chimney, use a wire brush to gently brush away any excess mortar on the masonry surface. This will create a clean and neat finish. Allow the mortar to set for a period specified by the manufacturer, typically around 24 to 48 hours. Avoid exposing the newly tuckpointed chimney to excessive moisture during this curing time.
Repeat the above steps for each section of the chimney, working methodically and paying attention to detail. Continuously clean your tools and remove any excess mortar as you progress to avoid interference with the next application.
Remember, tuckpointing is a meticulous process that requires patience and precision. Take breaks as needed, and ensure you maintain a consistent mortar color and profile throughout the project. Once you have completed all the tuckpointing work, step back and admire your professionally restored chimney.
By following this step-by-step guide, you can successfully tuckpoint your chimney, reinforcing its structure and enhancing its visual appeal.
Preparing the Chimney
Before you begin the tuckpointing process, it’s crucial to properly prepare the chimney to ensure a smooth and successful repair. Preparing the chimney involves a series of steps to assess its condition and create a suitable workspace. Follow these steps to effectively prepare your chimney for tuckpointing:
Step 1: Assess the Chimney’s Condition
Start by examining the overall condition of the chimney. Look for any signs of damage, such as loose or cracked bricks or stones, crumbling mortar, or areas that require repair or replacement. Take note of any areas that may require extra attention during the tuckpointing process.
Read more: How To Make A Cardboard Chimney
Step 2: Clear the Surrounding Area
Ensure that the area surrounding the chimney is clear of any obstacles or debris. Remove any furniture, plants, or other items that could be damaged during the tuckpointing process. Clearing the area will provide you with ample space to work and minimize the risk of accidents or damage to nearby objects.
Step 3: Protect Surfaces
Place plastic sheets or tarps on the ground and cover any adjacent surfaces, such as the roof or siding, to protect them from falling debris or mortar during the tuckpointing process. This will also make the cleanup process easier once the tuckpointing work is complete.
Step 4: Safety Gear
Put on the necessary safety gear to protect yourself during the tuckpointing process. Wear safety glasses to shield your eyes from debris, gloves to protect your hands, and a dust mask to prevent inhalation of dust and particles. Safety should always be a top priority.
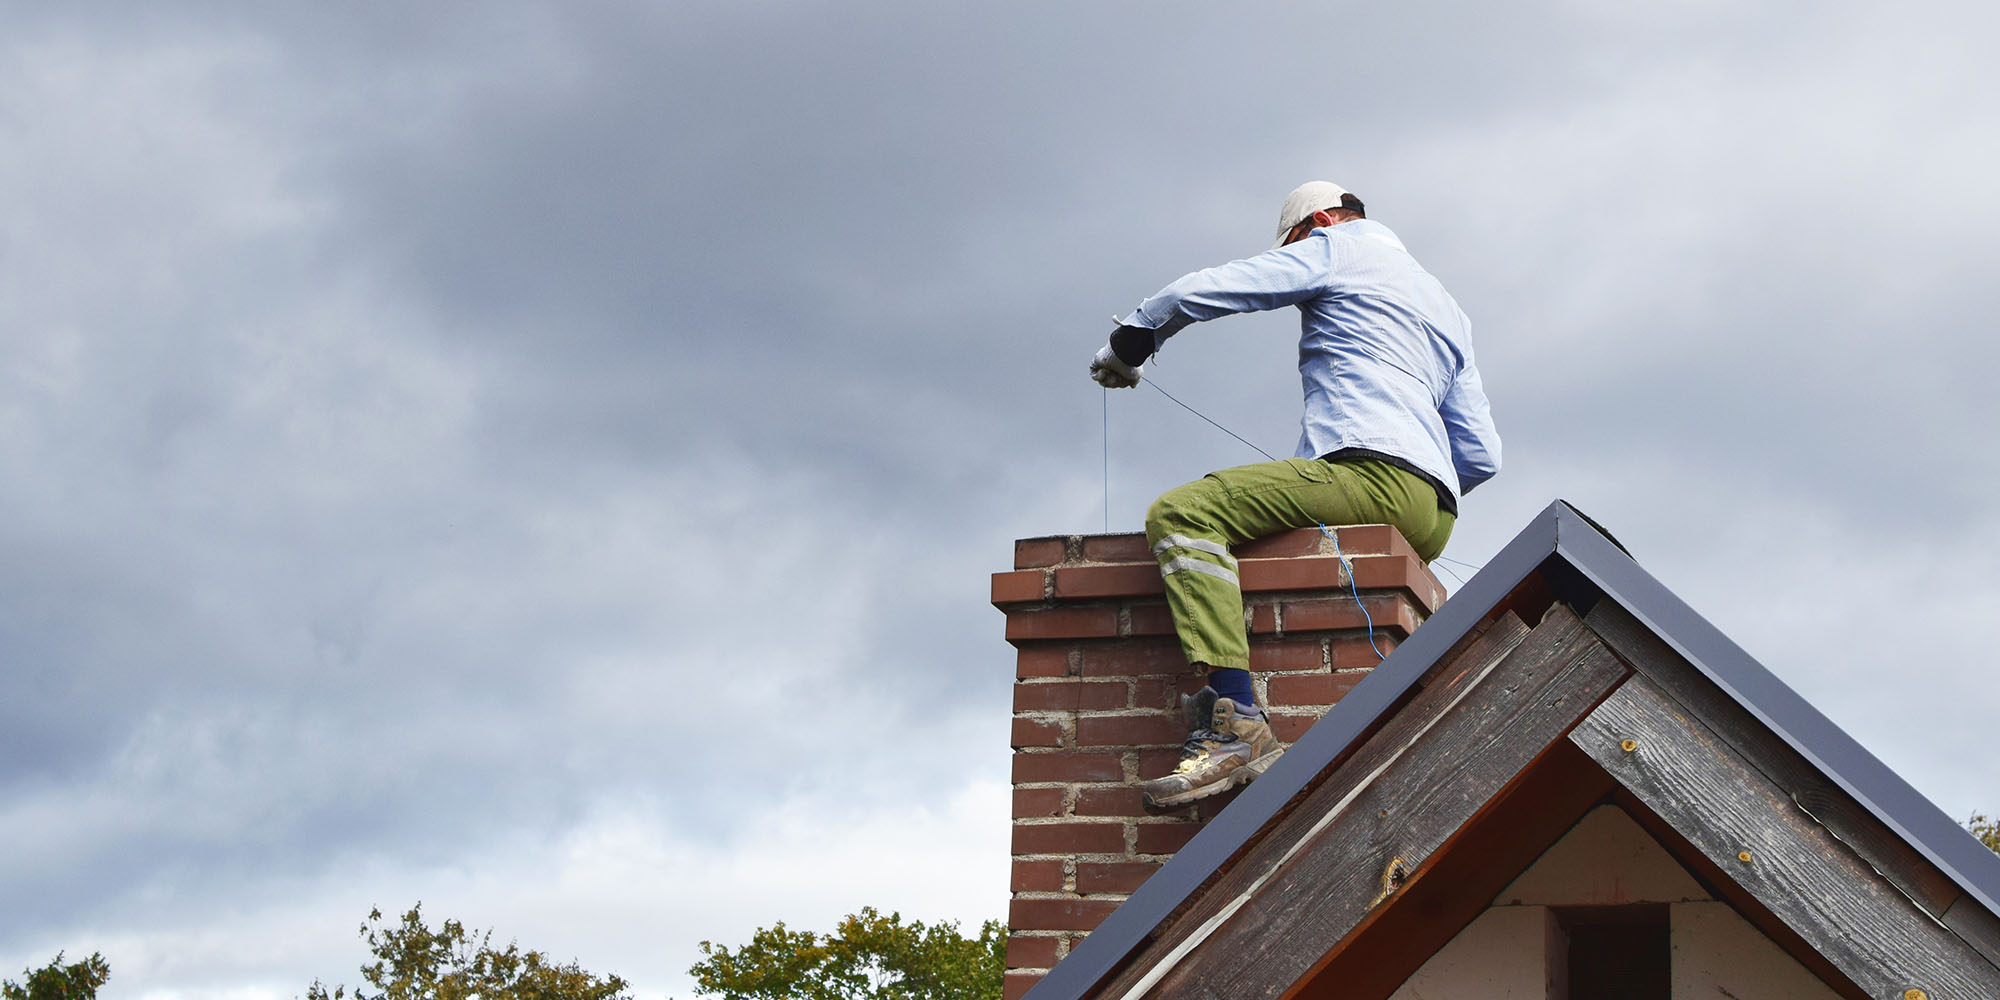
Step 5: Secure Ladders and Scaffolding
If you need to use a ladder or scaffolding to access higher areas of the chimney, ensure they are secure and stable. Make sure the ladder is on a firm surface and the scaffolding is properly assembled and level. This will provide a safe and stable platform to work from.
Read more: How To Test The Draw On A Chimney
Step 6: Clean the Chimney
Using a wire brush, gently clean the chimney’s masonry surface to remove any loose debris, dirt, or old mortar. This will help ensure better adhesion of the new mortar and a cleaner overall finish. Pay close attention to the mortar joints, as they need to be free of loose and crumbling mortar for proper tuckpointing.
By thoroughly preparing your chimney before starting the tuckpointing process, you set the stage for a smoother and more efficient repair. Taking the time to assess the chimney’s condition, clear the area, protect surfaces, wear safety gear, and clean the chimney will help you achieve the best results.
Remember, proper preparation is key to a successful tuckpointing project, so take the necessary steps to create an optimal workspace before moving on to the actual repair process.
Removing Old Mortar
Removing the old mortar is a crucial step in the tuckpointing process. Proper removal ensures that the new mortar will bond securely and create a strong foundation for the repaired chimney. Here’s a step-by-step guide on how to remove old mortar effectively:
Step 1: Assess the Mortar Joints
Begin by examining the mortar joints between the bricks or stones of the chimney. Look for areas where the mortar is deteriorated, cracked, or crumbling. These are the sections that will require removal and replacement.
Step 2: Gather the Appropriate Tools
Equip yourself with a hammer and a cold chisel. These tools will be instrumental in chipping away the old mortar. Ensure that you have a firm grip on both tools and that they are in good working condition.
Read more: How To Know If Chimney Is Safe
Step 3: Protect the Surrounding Area
Before you start removing the old mortar, take precautions to protect nearby surfaces. Use plastic sheets or tarps to cover any items, such as plants or furniture, that could be damaged by falling debris.
Step 4: Begin Removing the Old Mortar
Place the cold chisel on the mortar joint you want to remove. Using a hammer, strike the chisel firmly to break up the old mortar. Be careful not to chip or damage the bricks or stones while doing so. Start at one end of the chimney and work your way across, focusing on one joint at a time.
Step 5: Gradually Remove the Mortar
Continue chipping away at the old mortar along the length of the joint, working carefully and patiently. Aim to remove the mortar to a depth of about ¼ to ½ inch while ensuring the joint remains clean and free of loose debris.
Step 6: Use a Joint Raker for Larger Joints
If you encounter larger mortar joints, it may be more efficient to use a joint raker. This tool allows you to remove larger sections of mortar quickly. Select a joint raker blade that matches the width of the joint and insert it into the joint. Move the tool back and forth to scrape out the old mortar.
Read more: How Much Is It To Remove A Chimney
Step 7: Clean the Joint
Once you have removed the old mortar, take a wire brush and gently clean the mortar joint to remove any remaining debris. This will ensure a clean surface for the new mortar to adhere to.
Repeat the process for each damaged mortar joint. Take breaks as needed and avoid rushing the removal process. It’s important to remove the old mortar thoroughly to create a stable foundation for the new mortar.
By following these steps and taking your time to remove the old mortar carefully, you will be well-prepared for the next step in the tuckpointing process: mixing and applying the new mortar.
Mixing New Mortar
Mixing new mortar is a crucial step in the tuckpointing process. The right mortar consistency and composition are essential for a successful repair. Here’s a step-by-step guide on how to mix new mortar:
Step 1: Select the Right Mortar Mix
Start by selecting the appropriate mortar mix for your tuckpointing project. Consider factors such as the type of masonry, weather conditions, and the existing mortar composition. You can choose between lime-based mortar or cement-based mortar, depending on the specific requirements of your chimney.
Step 2: Gather the Necessary Tools and Materials
Before mixing the mortar, gather all the required tools and materials. You will need a mortar board, a mixing paddle attachment for a power drill, water, the chosen mortar mix, and a bucket for mixing.
Read more: How To Use A Chimney Flue
Step 3: Follow the Manufacturer’s Instructions
Read and follow the manufacturer’s instructions on the bag of mortar mix. The instructions will provide specific guidelines for the water-to-mix ratio and mixing time. Adhere to these instructions to ensure the best results.
Step 4: Pour the Mortar Mix onto the Mortar Board
Empty the required amount of mortar mix onto the mortar board. Create a small well in the center of the pile of mortar mix. This well will be used to gradually add water to the mix.
Step 5: Gradually Add Water
Using a bucket or a measuring jug, slowly pour water into the well in the mortar mix. Be cautious not to add too much water at once, as this can result in a mortar mix that is too wet. Instead, add water in small increments and mix continuously to achieve the desired consistency.
Step 6: Mix the Mortar
Attach the mixing paddle to a power drill and insert it into the mortar mix. Begin mixing at a low speed to avoid splashing or spilling the mix. Gradually increase the speed to ensure thorough mixing. Continue mixing until the mortar reaches a smooth, homogeneous consistency without any lumps or dry pockets.
Read more: How To Inspect A Chimney
Step 7: Check the Mortar Consistency
Check the consistency of the mixed mortar by taking a small amount on the trowel and turning it upside down. The mortar should hold its shape and not slide off the trowel. If the mortar is too dry, add small amounts of water and remix until the desired consistency is achieved.
Step 8: Test the Mortar Adhesion
To ensure proper adhesion, take a small amount of the mixed mortar and press it between your fingers. The mortar should stick together without crumbling or feeling excessively sticky. This will ensure that the mortar will bond securely to the existing masonry when applied.
By carefully following these steps and paying close attention to the mortar mix consistency, you can ensure that your new mortar is properly mixed and ready for application. A well-mixed mortar is essential for a successful tuckpointing project.
Applying New Mortar
Applying new mortar is a critical step in the tuckpointing process. By properly applying the new mortar, you can ensure a strong and aesthetically pleasing repair. Here’s a step-by-step guide on how to apply new mortar:
Step 1: Wet the Mortar Joints
Before applying new mortar, wet the mortar joints of the chimney with a masonry brush and water. This step improves the adhesion between the old and new mortar and prevents excessive drying of the new mortar.
Read more: How To Turn On A Gas Chimney
Step 2: Load the Tuckpointing Trowel
Take the tuckpointing trowel and load it with a small amount of mortar. Hold the trowel at a slight angle and press the mortar into the joint. Apply enough pressure to ensure the mortar completely fills the joint without leaving any voids.
Step 3: Press the Mortar into the Joint
Using the trowel, press the mortar firmly into the joint. Ensure that the mortar fully bonds with the masonry units, creating a strong connection. Work in small sections, focusing on one area at a time before moving on to the next.
Step 4: Shape and Profile the Mortar
Once the mortar is pressed into the joint, use the tuckpointing trowel to shape and profile it. Feather the edges of the mortar to blend it in with the surrounding masonry, ensuring a seamless finish. Create a slight concave shape in the joint using a brick jointer. This helps create a better seal and enhances the overall appearance of the chimney.
Step 5: Remove Excess Mortar
As you work, continuously check for any excess mortar on the masonry surface. Use a wire brush or the edge of the trowel to gently remove any mortar that overflows onto the surface. This will help create a clean and neat finish.
Read more: How To Install Chimney Damper
Step 6: Work in Small Sections
It is best to work in small sections to ensure that the mortar remains workable. Apply mortar to one section, shape and profile it, and move on to the next. Avoid applying too much mortar at once, as it can become dry and difficult to shape.
Step 7: Maintain Consistent Mortar Color
Throughout the tuckpointing process, ensure that the color of the new mortar closely matches the existing mortar. This consistency in color helps maintain the overall appearance and unity of the chimney’s masonry.
Step 8: Take Breaks as Needed
Tuckpointing can be a time-consuming process. Remember to take breaks as necessary to prevent fatigue. Working with a fresh mind and a steady hand will result in better mortar application and a more satisfactory outcome.
By following these steps and taking your time to apply the new mortar carefully, you will achieve a professionally repaired chimney. The proper application of mortar ensures a strong bond and a visually pleasing finish.
Finishing Touches
Once you have applied the new mortar to your chimney, it’s time to focus on the finishing touches. These final steps will ensure that your tuckpointing project is complete and that your chimney looks its best. Here’s a step-by-step guide to the finishing touches:
Read more: How To Increase Draft In Chimney
Step 1: Brush Away Excess Mortar
Using a wire brush, gently brush away any excess mortar that may have accumulated on the masonry surface. This will help create a clean and polished appearance, revealing the true beauty of the chimney brick or stone.
Step 2: Smooth and Shape the Mortar
Inspect the newly applied mortar joints. Use the tuckpointing trowel or a jointing tool to smooth and shape the mortar to match the existing mortar lines. Pay attention to the profile and alignment of the mortar joints, ensuring they blend seamlessly with the surrounding masonry.
Step 3: Curing Time
Allow the newly applied mortar to cure for the amount of time specified by the manufacturer. This typically ranges from 24 to 48 hours. During this time, avoid exposing the chimney to excessive moisture or extreme temperature fluctuations, as this can disrupt the curing process.
Step 4: Protect the Repaired Area
After the mortar has cured, protect the repaired area from potential damage. Avoid applying any excessive force, such as leaning ladders or placing heavy objects, against the newly tuckpointed chimney. Taking precautions will help maintain the integrity and longevity of the repair.
Read more: How To Stucco A Chimney
Step 5: Inspect the Finished Chimney
Take a step back and thoroughly inspect your finished chimney. Check for any imperfections or areas that may require further touch-ups. This is your opportunity to make any necessary adjustments to ensure a high-quality finish.
Step 6: Maintain the Chimney
Regular maintenance is key to preserving the longevity of your tuckpointed chimney. Keep an eye out for any signs of deterioration or damage and address them promptly. It’s also important to schedule regular chimney inspections and cleanings to ensure its proper functioning.
By completing these finishing touches, you can be confident that your tuckpointing project is complete and that your chimney is restored both structurally and aesthetically. Taking the time to thoroughly inspect and maintain your chimney will help prolong its lifespan and maintain its beauty.
Congratulations on completing your tuckpointing project! You can now enjoy a well-maintained chimney that not only enhances the curb appeal of your home but also provides the necessary strength and protection for years to come.
Safety Precautions
When undertaking a tuckpointing project, it’s essential to prioritize safety to protect yourself and others. Handling tools, working at heights, and dealing with mortar can pose certain risks. Follow these safety precautions to ensure a safe tuckpointing experience:
1. Wear Protective Gear
Always wear the appropriate protective gear to shield yourself from potential hazards. This includes safety glasses or goggles to protect your eyes from debris, gloves to protect your hands, and a dust mask to prevent inhalation of dust and particles. Additionally, wear long-sleeved clothing and durable footwear for added protection.
Read more: How To Cut Chimney Flue Tile
2. Use Sturdy Ladders or Scaffolding
If you need to work at heights, use sturdy and stable ladders or scaffolding. Ensure that they are set up on a level surface and that they are securely positioned. Do not exceed the ladder’s weight capacity and always maintain three points of contact while climbing or working on a ladder.
3. Practice Tool Safety
Handle tools with care and follow the manufacturer’s instructions for proper usage. Inspect tools before use to ensure they are in good condition and free from defects. Use the tools for their intended purpose and avoid using damaged or malfunctioning tools.
4. Watch Your Footing
Pay attention to your footing and the surface you are working on. Be cautious of potential tripping hazards and uneven ground. Clear away debris and keep the work area clean to prevent slips, trips, and falls.
5. Be Mindful of Falling Debris
Ensure that the area around the chimney is clear of people and objects that could be struck by falling debris or mortar. Before starting the tuckpointing project, protect nearby surfaces and cover any items that may be at risk of getting damaged.
Read more: How To Use Chimney Charcoal Starter
6. Work in Proper Lighting
Ensure that the work area is well-lit and visibility is good. Working in dim or poor lighting conditions can increase the risk of accidents and errors. Consider using additional lighting or portable work lights to improve visibility.
7. Take Breaks and Hydrate
Tuckpointing can be physically demanding work. Take regular breaks to rest and hydrate. Working while fatigued can lead to accidents and reduced productivity. Stay hydrated by drinking plenty of water, especially on hot days.
8. Follow Proper Lifting Techniques
When lifting heavy objects, use proper lifting techniques. Bend your knees, keep your back straight, and use the strength of your legs to lift. Avoid twisting or jerking motions while lifting, as this can lead to strain or injury.
By following these safety precautions, you can minimize the risk of accidents and injuries during tuckpointing work. Remember, safety should always be the top priority to ensure a successful and incident-free project.
Conclusion
Congratulations on completing your tuckpointing project! By following the step-by-step guide and implementing the necessary safety measures, you have successfully restored your chimney’s structural integrity and enhanced its visual appeal. Tuckpointing not only prolongs the lifespan of your chimney but also protects it from further damage caused by weathering and deterioration.
Throughout this comprehensive guide, we have covered the fundamentals of tuckpointing, including understanding the process, gathering the necessary tools and materials, and executing each step with precision. We emphasized the importance of careful preparation, removing old mortar, mixing new mortar, and applying it correctly to achieve a strong and seamless finish.
Remember to maintain your chimney regularly to prevent future issues. Routine inspections and timely repairs will help you identify any potential problems and address them promptly. Additionally, regular cleanings will ensure proper ventilation, reduce the risk of chimney fires, and prolong the chimney’s lifespan.
We cannot stress enough the significance of safety during any home improvement project. Always wear protective gear, secure ladders or scaffolding, and practice caution while handling tools. Following safety precautions will help ensure that both you and your surroundings remain safe throughout the tuckpointing process.
Whether you tackled this project on your own or enlisted the help of professionals, the effort put into tuckpointing will undoubtedly pay off. Your chimney now not only stands as a sturdy and functional part of your home but also adds to its overall aesthetic appeal.
We hope this guide has provided you with valuable insights, tips, and techniques to successfully tuckpoint your chimney. Take pride in your accomplishment and enjoy the benefits of a well-maintained and restored chimney for years to come.
Remember, if you have any doubts or face challenges during the process, it’s always wise to consult with a professional mason or chimney specialist. They can provide expertise, guidance, and assistance to ensure the best possible outcome for your tuckpointing project.
Thank you for joining us on this tuckpointing journey. We wish you continued success in all your future home improvement endeavors.
Frequently Asked Questions about How To Tuckpoint Chimney
Was this page helpful?
At Storables.com, we guarantee accurate and reliable information. Our content, validated by Expert Board Contributors, is crafted following stringent Editorial Policies. We're committed to providing you with well-researched, expert-backed insights for all your informational needs.
0 thoughts on “How To Tuckpoint Chimney”