Articles
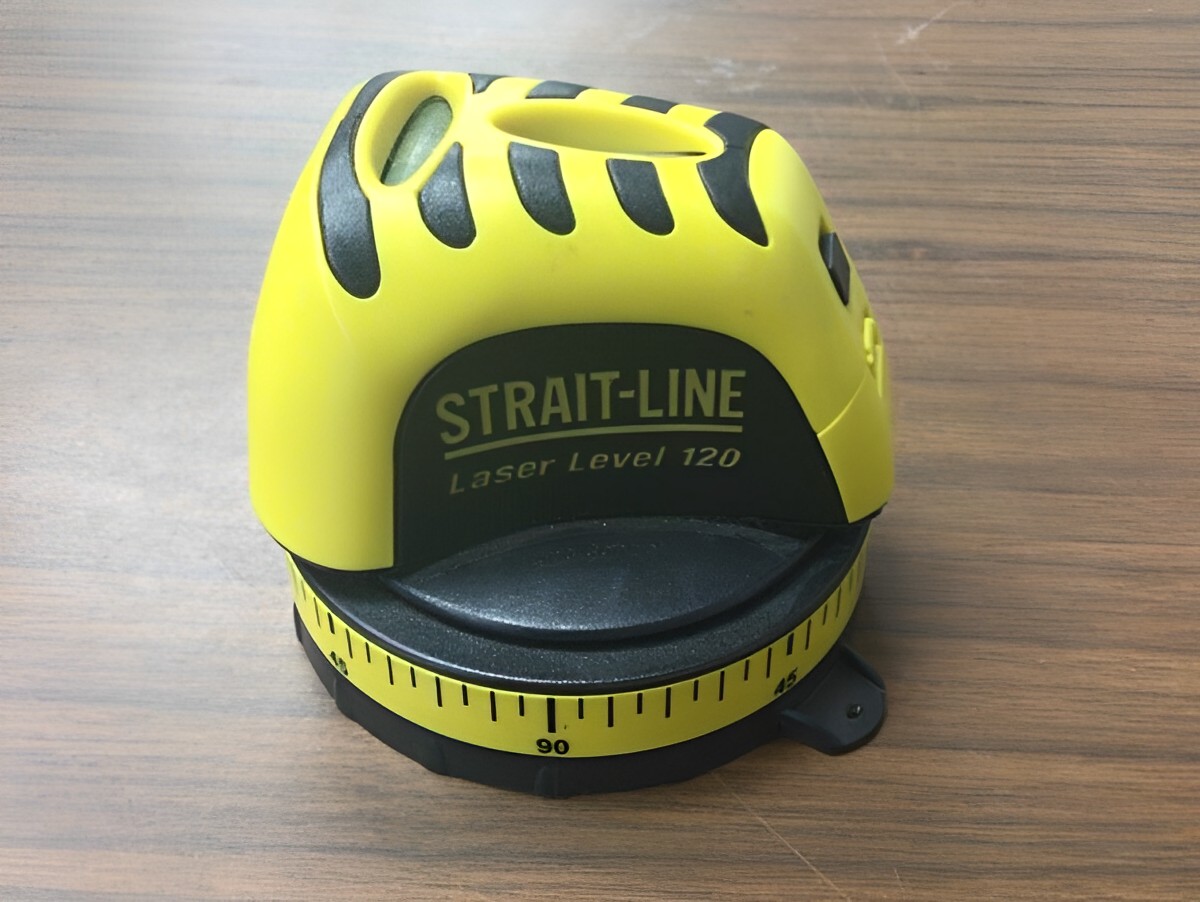
How To Use A Strait-Line Laser Level 120
Modified: October 27, 2024
Discover helpful articles on how to effectively utilize a straight line laser level 120 for precise and accurate measurements. Enhance your DIY projects with our expert tips and techniques.
(Many of the links in this article redirect to a specific reviewed product. Your purchase of these products through affiliate links helps to generate commission for Storables.com, at no extra cost. Learn more)
Introduction
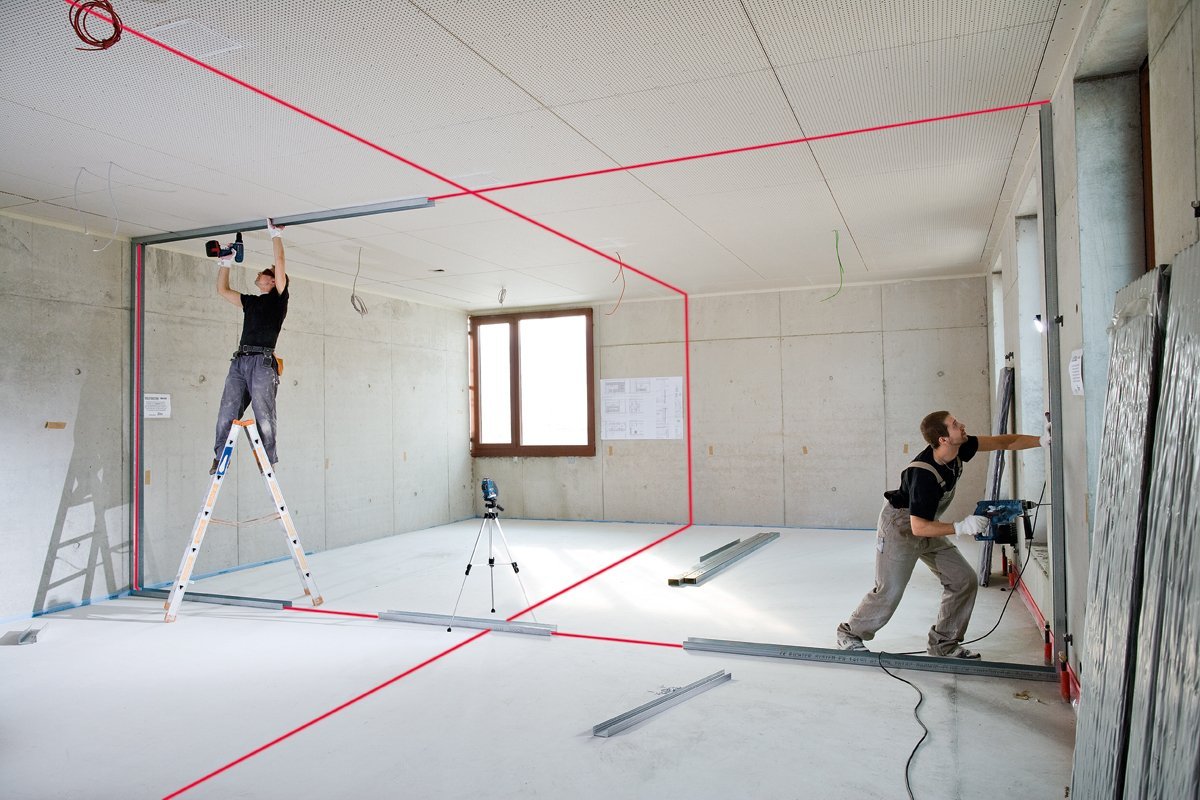
Welcome to the world of construction and home improvement! If you’re looking to level surfaces accurately and efficiently, a straight line laser level is an essential tool to have in your arsenal. Specifically, the Straight Line Laser Level 120 is a versatile and user-friendly option that can make your projects a breeze.
In this article, we will guide you through everything you need to know about using a Straight Line Laser Level 120 effectively. Whether you’re a seasoned professional or a DIY enthusiast, we’ll cover the basics, tips, and best practices to ensure you get the most out of this valuable tool.
But first, let’s understand what a straight line laser level is and why it’s a must-have tool for any construction or renovation project.
Key Takeaways:
- The Straight Line Laser Level 120 is a versatile and user-friendly tool that simplifies construction and home improvement projects by projecting highly visible, level lines over long distances. Its self-leveling technology and additional features make it a must-have for professionals and DIY enthusiasts alike.
- Proper preparation, setup, adjustment, and maintenance are crucial for maximizing the effectiveness and longevity of the Straight Line Laser Level 120. Following best practices, troubleshooting common issues, and prioritizing safety ensure accurate and professional results in various applications.
Read more: How To Repair A Strait-Line Laser Level
Understanding the Straight Line Laser Level 120
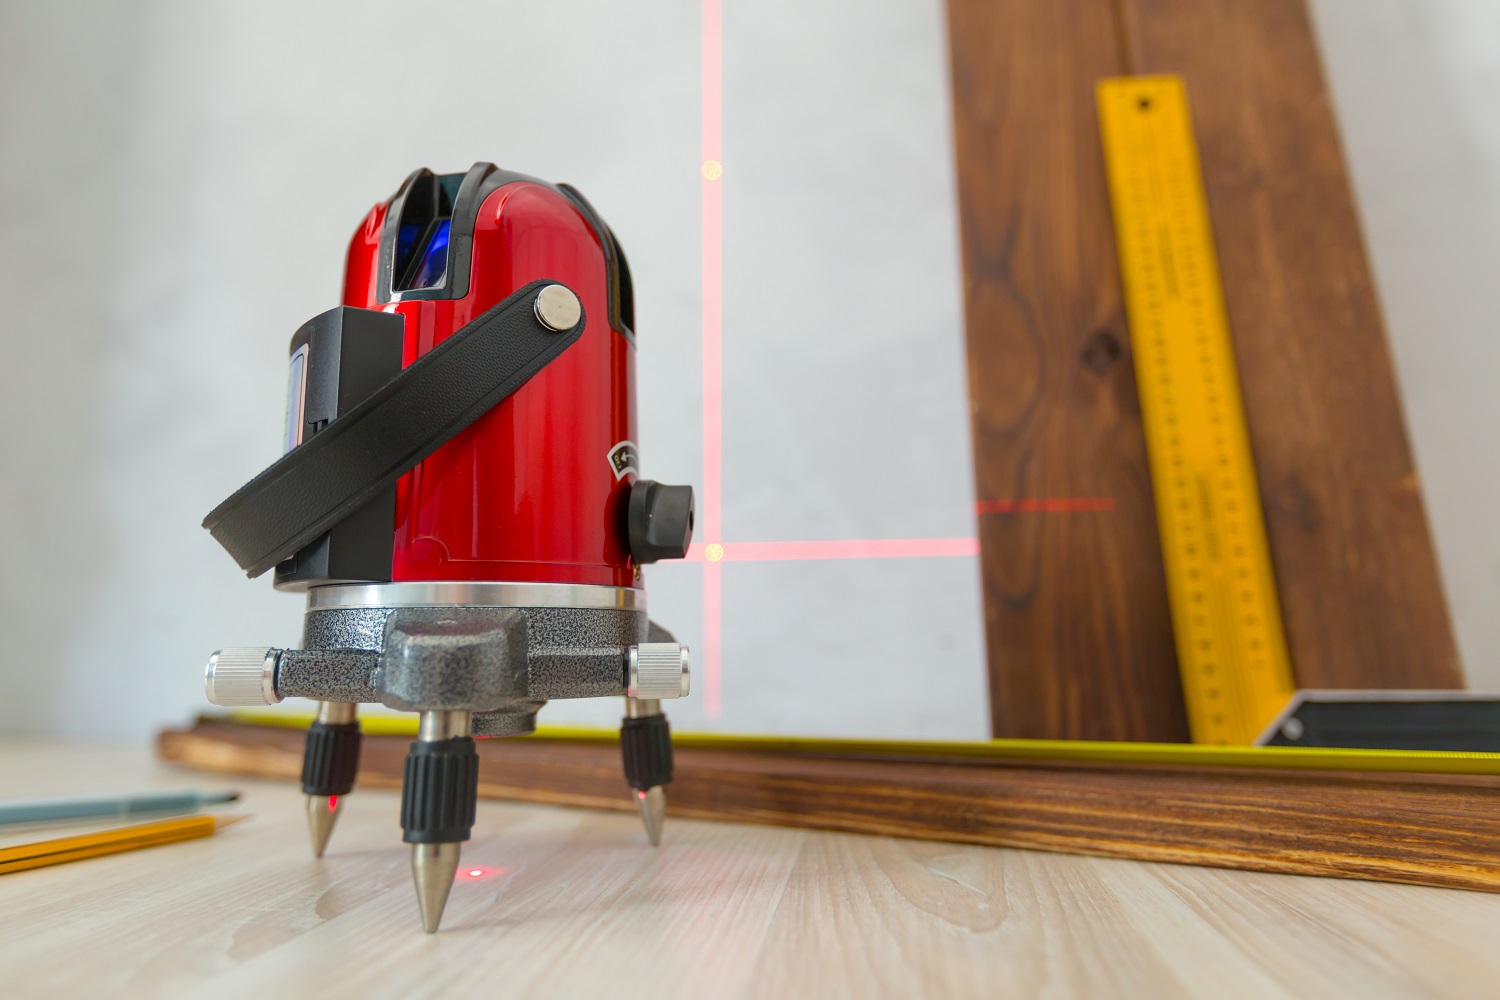
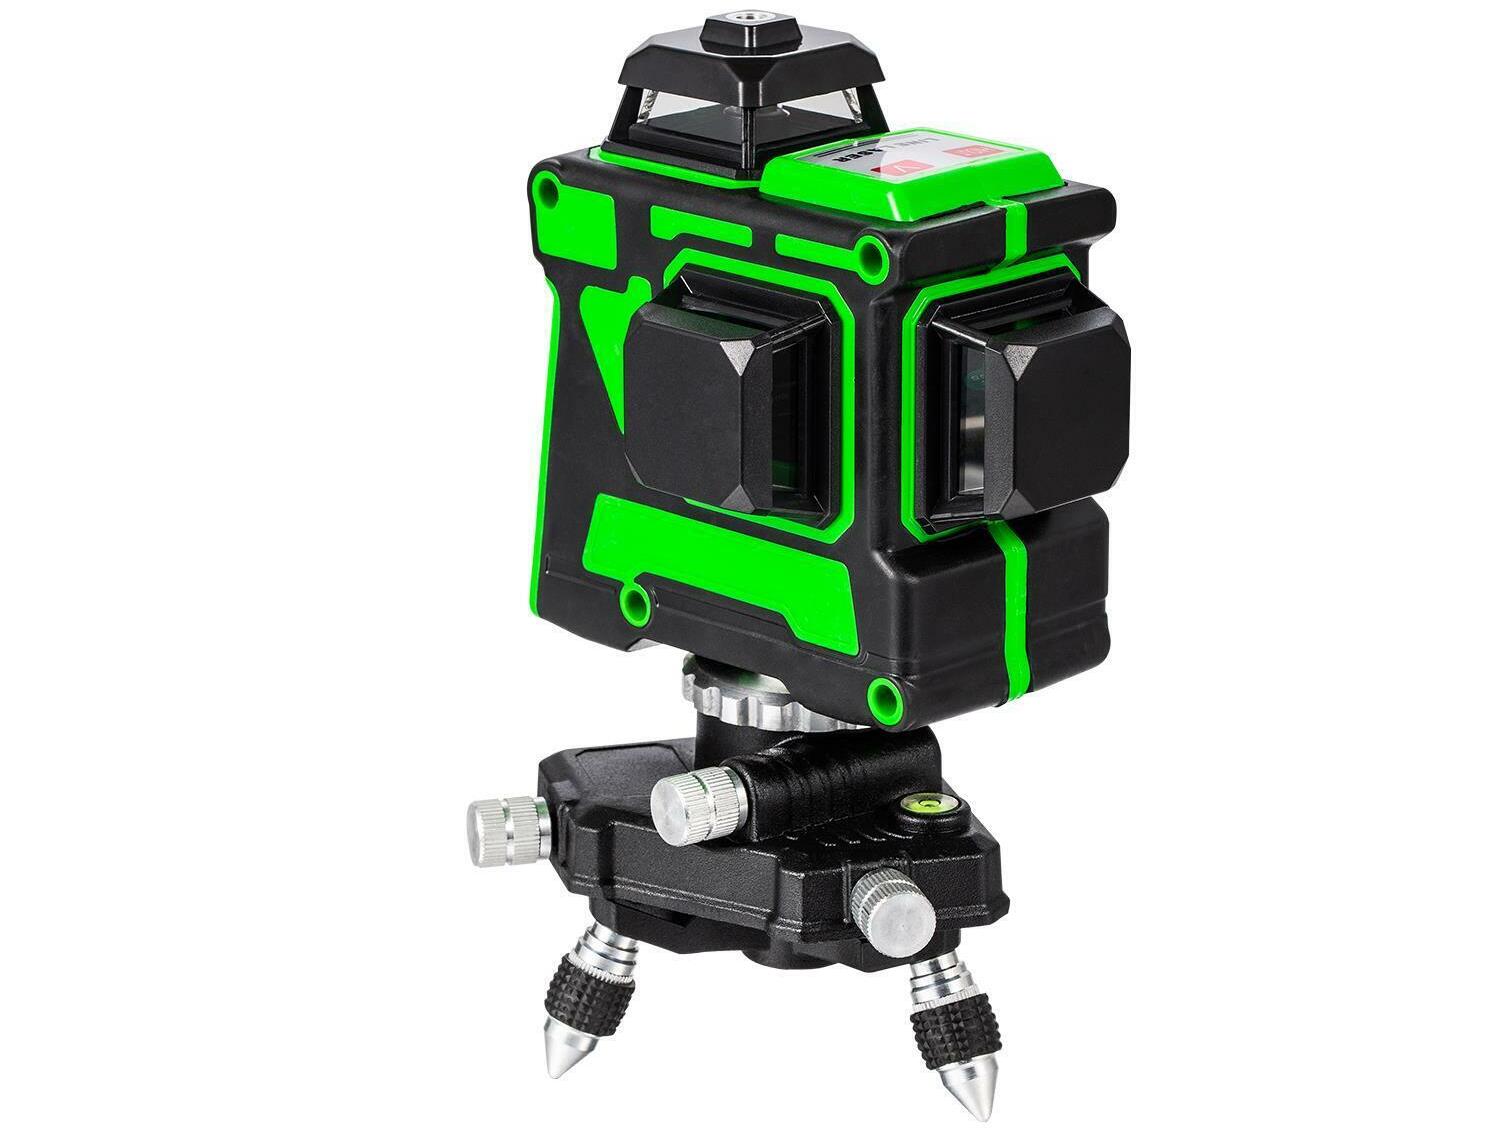
The Straight Line Laser Level 120 is a precision tool used to create level lines and angles over a long distance. It utilizes laser technology to project a straight, highly visible line on a surface, making it easy to align and level objects with precision.
One of the key features of the Straight Line Laser Level 120 is its accuracy and range. It can typically project lines up to 120 feet, which makes it suitable for a wide range of applications, such as installing tiles, cabinets, shelves, or even hanging pictures.
This laser level employs self-leveling technology, which means that it automatically adjusts its position to ensure the projected line is perfectly level. This eliminates the need for manual adjustments and saves time and effort.
Additionally, the Straight Line Laser Level 120 often comes with additional features like a pulse mode for outdoor use, a dual-axis leveling system for vertical and horizontal alignment, and adjustable line thickness options.
It’s important to note that the laser emitted by the Straight Line Laser Level 120 is a Class II laser, which means it is safe for direct exposure to the human eye. However, it’s always recommended to use proper eye protection to avoid any unnecessary risk.
Now that we have a general understanding of the Straight Line Laser Level 120, let’s move on to the next section, where we’ll discuss how to prepare for its use.
Preparing for Use
Before jumping into using your Straight Line Laser Level 120, it’s important to take a few preparatory steps to ensure optimal performance and accuracy. Here’s what you need to do:
- Read the Instruction Manual: Familiarize yourself with the specific features, functions, and safety guidelines outlined in the instruction manual provided by the manufacturer. This will ensure that you have a comprehensive understanding of how to use the laser level effectively.
- Check the Batteries: The Straight Line Laser Level 120 is typically battery-powered. Before starting, make sure the batteries are fully charged or replace them with fresh ones. This will ensure uninterrupted operation during your project.
- Inspect the Laser Level: Thoroughly examine the device for any visible damages or signs of wear and tear. Ensure that all buttons, switches, and components are in proper working condition. If you notice any issues, contact the manufacturer for assistance or consider getting it repaired.
- Prepare the Surface: Clean the surface where you will be using the laser level. Remove any dust, debris, or obstructions that might interfere with the laser projection. A clean, smooth surface will provide better accuracy and visibility.
- Secure the Tripod: If you are using a tripod to mount the laser level, make sure it is set up securely on a stable surface. Adjust the tripod legs to the desired height and lock them in place. A stable platform will prevent the laser level from shaking or moving during operation.
- Gather Additional Tools: Depending on your project requirements, gather any additional tools or accessories that may be needed. This could include a measuring tape, pencil, tape, or mounting brackets. Having everything prepared beforehand will save time and help streamline your workflow.
By following these preparation steps, you’ll be ready to set up and use your Straight Line Laser Level 120 with confidence. In the next section, we will discuss the process of setting up the laser level.
Setting Up the Straight Line Laser Level 120
Once you have completed the preparation phase, it’s time to set up your Straight Line Laser Level 120. Follow these steps for a successful setup:
- Choose a Suitable Location: Select a location for your laser level that offers a clear line of sight to your desired work area. Ensure that there are no obstacles blocking the laser beam’s path.
- Attach the Laser Level to a Tripod: If your laser level comes with a tripod mount, attach it securely to the tripod. Ensure that the laser level sits firmly and doesn’t wobble when mounted.
- Place the Laser Level on a Level Surface: If you’re not using a tripod, ensure that the surface on which you place the laser level is level. Uneven surfaces can impact the accuracy of the laser projection.
- Activate the Self-Leveling Feature: Most Straight Line Laser Level 120 models have a self-leveling function. Activate this feature, and the laser level will automatically level itself. Wait for the leveling process to complete before proceeding.
- Adjust the Laser Leveling Angle: If necessary, adjust the laser leveling angle manually to align the projected line with your desired reference point or surface. Use the fine adjustment controls provided on the laser level to make precise adjustments.
- Test the Laser Projection: Once you have set up the laser level, test the projection by turning on the laser. Verify that the line is straight, clear, and easily visible on the surface you’re working on. Make any necessary adjustments before proceeding with your project.
By following these steps, you will have your Straight Line Laser Level 120 set up and ready to use. In the next section, we will delve into how to adjust the laser level for optimal performance.
Adjusting the Laser Level
To achieve accurate and precise results, it’s essential to properly adjust the Straight Line Laser Level 120. Here’s how to do it:
- Vertical Adjustment: If you need to project a vertical line, adjust the laser level vertically until the line is aligned with your reference point. Use the vertical adjustment knob or buttons provided on the laser level to make the necessary changes.
- Horizontal Adjustment: For horizontal lines, adjust the laser level horizontally until the line is parallel to your desired reference line or surface. Use the horizontal adjustment knob or buttons to achieve the desired alignment.
- Fine-Tuning: If the projected line needs minor adjustments, use the fine-tuning controls to make precise changes. These controls allow you to refine the alignment of the laser level and ensure accurate positioning.
- Locking the Adjustments: Once you have achieved the desired alignment, lock the adjustments to secure the laser level in place. This will prevent any accidental movement or changes during your project.
- Verifying the Alignment: Before proceeding with your project, double-check the alignment of the projected line. Measure it against a known reference point or use a level to ensure that it is perfectly aligned and leveled.
It’s important to note that different models of Straight Line Laser Level 120 may have slightly different adjustment mechanisms. Refer to the instruction manual provided by the manufacturer for specific instructions on adjusting your laser level.
By taking the time to adjust the laser level properly, you’ll ensure accurate and precise measurements throughout your project. In the next section, we will explore how to use the Straight Line Laser Level 120 effectively.
When using a straight line laser level, make sure to secure the level on a stable surface and adjust the height and angle to align with your desired reference point for accurate results.
Read more: How To Use Strait-Line X3 Laser Level
Using the Straight Line Laser Level 120
Now that you have set up and adjusted your Straight Line Laser Level 120, it’s time to get to work! Here are some tips for using the laser level effectively:
- Aligning Objects: Use the projected line as a reference to align objects such as tiles, cabinets, or shelves. Position the object so that it aligns with the laser line, ensuring a straight and level installation.
- Marking Points: If you need to mark specific points along the projected line, use a pencil or marker to make marks directly on the surface. This will help you accurately place and install objects in the desired locations.
- Extending the Line: If you need to extend the length of the laser line, you can use a laser detector or receiver. Attach the receiver to a compatible rod or stand, and it will detect the laser beam’s path and extend the line beyond the laser level’s maximum range.
- Outdoor Use: If you’re working outdoors or in a bright environment, activate the pulse mode on your laser level. This mode enhances the laser’s visibility, making it easier to see the projected line even in challenging lighting conditions.
- Work in Sections: If your project involves a large area, consider working in smaller sections. Move the laser level to each section, ensuring that the projected line aligns consistently across the entire space.
- Check Frequently: Periodically check the alignment and accuracy of the laser level throughout your project. As you work, vibrations or accidental movements can cause the laser level to shift slightly. Regular checks will help maintain precise measurements.
Remember, the Straight Line Laser Level 120 is a tool to assist you in achieving accurate and precise results. It’s important to use it in conjunction with other measuring tools and techniques to ensure the best possible outcome for your project.
In the next section, we will share some tips and best practices to maximize your experience with the Straight Line Laser Level 120.
Tips and Best Practices
To make the most out of your Straight Line Laser Level 120 and ensure optimal results, consider the following tips and best practices:
- Choose the Right Line Thickness: Some laser levels offer the option to adjust the thickness of the projected line. Select a line thickness that suits your project’s requirements. A thicker line may be more visible in bright environments, while a thinner line provides more precision for precise alignment.
- Use a Target Plate: If you’re working in a particularly bright or distant area, consider using a target plate. The target plate reflects the laser’s beam, making it easier to see and ensuring accuracy even in challenging conditions.
- Double-Check Measurements: While the Straight Line Laser Level 120 provides accurate leveling, always double-check measurements and alignments with other measuring tools. This helps to minimize errors and ensures accurate results.
- Keep the Laser Level Clean: Wipe the laser level clean after each use, especially the laser lens and detector window. Dust or debris on these surfaces can interfere with the laser projection and affect accuracy.
- Store Properly: When not in use, store the laser level in a cool, dry place, preferably in its protective case. This protects the device from dust, moisture, and potential damage, extending its lifespan.
- Read the User Manual: Familiarize yourself with all the features, functions, and safety guidelines provided by the manufacturer. Understanding the capabilities and limitations of your laser level will help you use it more effectively and avoid potential risks.
- Calibrate Regularly: Over time, the accuracy of the laser level may slightly diminish. Check the manufacturer’s recommendations for calibration frequency and ensure that your laser level is accurately aligned for precise measurements.
By following these tips and best practices, you will enhance your overall experience with the Straight Line Laser Level 120 and achieve professional-level results in your projects.
In the next section, we will cover some maintenance and care tips to keep your laser level in top condition.
Maintenance and Care
To ensure the longevity and optimal performance of your Straight Line Laser Level 120, it’s essential to follow proper maintenance and care practices. Here are some tips to keep in mind:
- Clean Regularly: Wipe down the laser level after each use, removing any dirt, dust, or debris. Use a soft, lint-free cloth and gentle cleaning solutions when necessary. Avoid using abrasive materials that could scratch or damage the device.
- Protect from Moisture: Keep your laser level away from moisture and liquids. Exposure to water can damage the internal components and affect the accuracy of the laser projection.
- Store Properly: When not in use, store the laser level in a dry, protected environment. Use the provided case or a designated storage box to protect it from dust, impacts, and potential accidents.
- Avoid Extreme Temperatures: Do not expose your laser level to extreme temperatures. High heat or freezing cold can negatively impact the device’s performance and battery life. Store it in a temperature-controlled environment when not in use.
- Handle with Care: Treat your laser level with care to prevent accidental drops or impacts. Avoid placing heavy objects on top of it or subjecting it to unnecessary stress.
- Battery Maintenance: If your laser level uses rechargeable batteries, follow the manufacturer’s instructions for proper charging and maintenance. Avoid overcharging or completely draining the batteries, as this can reduce their lifespan.
- Regular Calibration: Schedule regular calibration sessions as recommended by the manufacturer or based on your usage patterns. Calibration ensures that your laser level maintains its accuracy and provides reliable measurements.
- Service and Repairs: If you encounter any issues with your Straight Line Laser Level 120, contact the manufacturer or a certified service center. Attempting to repair the device yourself may void the warranty and lead to further damage.
By following these maintenance and care tips, you can extend the lifespan of your Straight Line Laser Level 120 and continue to enjoy accurate and reliable performance in your projects.
In the final section, we will address some common troubleshooting issues and provide solutions.
Troubleshooting Common Issues
Despite the reliable performance of the Straight Line Laser Level 120, you may encounter some common issues during its use. Here are a few troubleshooting tips to help you address these problems:
- Weak or Dim Laser Projection: If the laser projection appears weak or dim, first check the battery level. Ensure that the batteries are fully charged or replace them with fresh ones. Additionally, clean the laser lens and detector window to remove any dirt or debris that may be obstructing the laser’s path.
- Inaccurate Alignments: If the projected line is consistently misaligned or inaccurate, check the levelness of the surface where the laser level is placed. Uneven or sloping surfaces can affect the laser’s alignment. Adjust the leveling bubble or use shims to ensure a level position. It’s also crucial to verify that the laser level is properly calibrated.
- Interference from Ambient Light: In bright or sunlit environments, ambient light can make it challenging to see the laser projection clearly. Activate the pulse mode on your laser level, if available, as it enhances the visibility of the laser line in such conditions.
- Difficulty Detecting the Laser Line: If you are using a laser detector or receiver and having trouble detecting the laser line, check the receiver’s position and alignment. Ensure that it is properly attached and aligned with the laser level’s projection. Adjust the detector’s settings as per the manufacturer’s instructions.
- Continuous Self-Leveling: If the laser level continues to self-level and doesn’t stop, check for any disturbances or movements in the environment. Vibrations, gusts of wind, or other external factors can trigger the self-leveling mechanism. Place the laser level in a stable position, away from any potential disturbances.
- Battery Life Issues: If you notice reduced battery life or erratic behavior, check the batteries’ condition and connection. Ensure that they are properly installed and in good condition. If the issue persists, consider using high-quality batteries or contact the manufacturer for further assistance.
If you are unable to resolve the issue using these troubleshooting tips, consult the manufacturer’s user manual or contact their customer support for additional guidance and support.
Remember to always prioritize your safety and follow proper guidelines when operating the Straight Line Laser Level 120 or performing any troubleshooting steps.
With proper troubleshooting and maintenance, you can overcome common issues and continue to use your Straight Line Laser Level 120 with confidence and efficiency.
Concluding our guide, we hope you now have a comprehensive understanding of how to use and maintain the Straight Line Laser Level 120. By following the instructions, tips, and best practices outlined in this article, you’ll be well-equipped to tackle your construction and renovation projects with accuracy and precision. Happy leveling!
Read also: 12 Best Strait-Line Laser Level for 2025
Conclusion
The Straight Line Laser Level 120 is a valuable tool that can greatly simplify your construction and home improvement projects. With its ability to project straight, level lines over long distances, it provides accuracy, convenience, and efficiency. By understanding how to use, set up, adjust, and care for your laser level, you can achieve professional-level results in your projects.
Through this article, we have covered the essential aspects of using the Straight Line Laser Level 120, including understanding its functionality, preparing for use, setting it up, adjusting the laser level, and effectively using it for various applications. We have also provided tips and best practices for maximizing your experience and troubleshooting common issues that may arise.
Remember to always prioritize safety when using the laser level and follow the manufacturer’s instructions and guidelines. Regular maintenance and calibration will help ensure the longevity and optimal performance of your laser level.
Whether you’re a seasoned professional or a DIY enthusiast, the Straight Line Laser Level 120 will become an indispensable tool in your toolbox. Its precision, versatility, and user-friendly design will make leveling surfaces a breeze, allowing you to achieve accurate and professional results in your projects.
So, equip yourself with the Straight Line Laser Level 120 and embark on your construction and renovation endeavors with confidence. Enjoy the convenience and precision it brings to your work, and level surfaces with ease!
Thank you for joining us on this journey to explore the Straight Line Laser Level 120. We hope this article has provided you with the knowledge and insights necessary to make the most of this remarkable tool. Happy leveling!
Frequently Asked Questions about How To Use A Strait-Line Laser Level 120
Was this page helpful?
At Storables.com, we guarantee accurate and reliable information. Our content, validated by Expert Board Contributors, is crafted following stringent Editorial Policies. We're committed to providing you with well-researched, expert-backed insights for all your informational needs.


0 thoughts on “How To Use A Strait-Line Laser Level 120”