Articles
How To Use Strait-Line X3 Laser Level
Modified: October 28, 2024
Learn how to use the Strait-Line X3 Laser Level with these helpful articles. Discover tips and tricks for accurate leveling and precise measurements.
(Many of the links in this article redirect to a specific reviewed product. Your purchase of these products through affiliate links helps to generate commission for Storables.com, at no extra cost. Learn more)
Introduction
Welcome to this comprehensive guide on how to use the Strait-Line X3 Laser Level! Whether you’re a DIY enthusiast or a professional contractor, having a reliable and precise laser level can greatly simplify your projects. The Strait-Line X3 Laser Level is a popular choice due to its accuracy, durability, and user-friendly features.
In this article, we will provide you with a step-by-step guide on how to use the Strait-Line X3 Laser Level effectively. We’ll cover everything from preparing the level for use to troubleshooting common issues. So, let’s dive in and discover how this remarkable tool can revolutionize your leveling tasks!
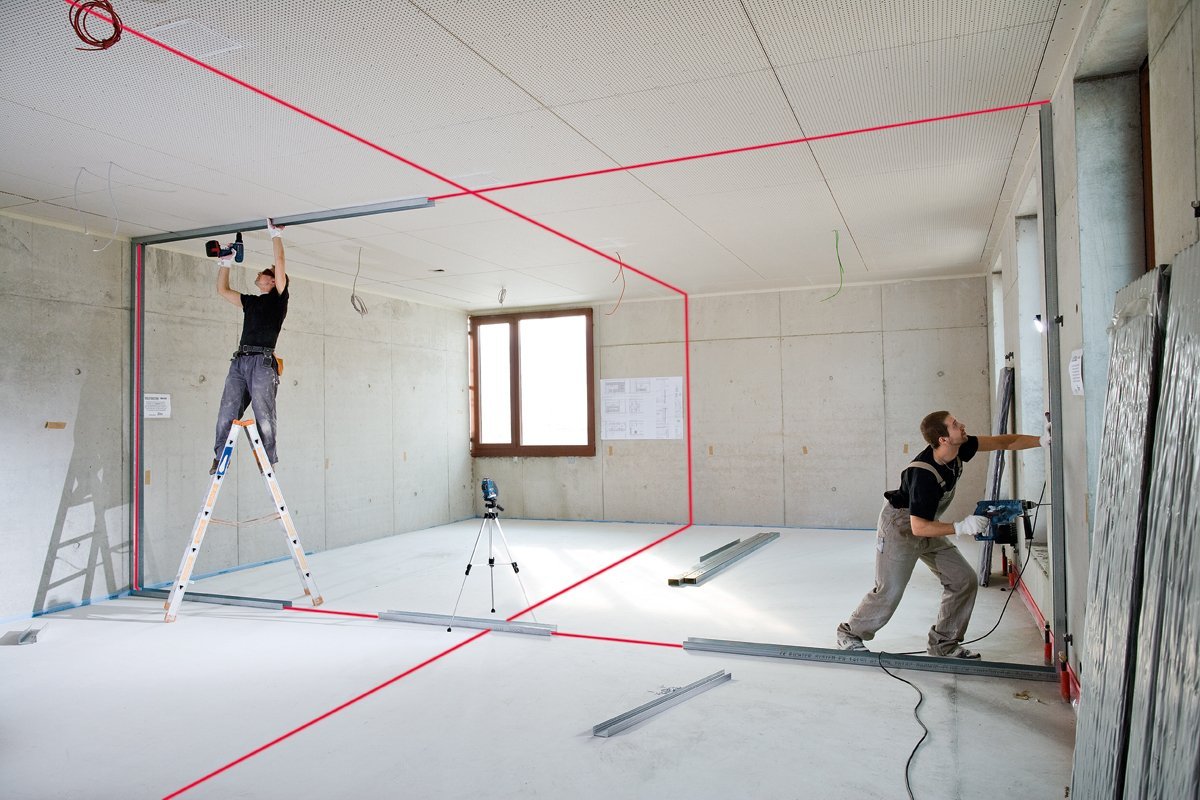
Before we get started, it’s essential to understand the importance of using a laser level. Unlike traditional bubble levels, laser levels offer superior precision and speed. They project a straight, level line on surfaces, allowing for precise measurements and alignment.
The Strait-Line X3 Laser Level is equipped with advanced features that enable you to tackle a wide range of projects with ease. Whether you’re hanging pictures on the wall, installing shelves, or aligning tiles, this laser level will ensure impeccable results.
Now that you have a brief overview let’s explore the step-by-step instructions on how to use the Strait-Line X3 Laser Level. By the end of this guide, you’ll have the confidence to tackle any leveling project with precision and professionalism.
Key Takeaways:
- The Strait-Line X3 Laser Level simplifies leveling tasks with its self-leveling capability, durable construction, and bright laser projection, making it an invaluable tool for both professionals and DIY enthusiasts.
- Proper preparation, adjustment, and setup are crucial for effectively using the X3 Laser Level, along with following additional tips, troubleshooting common issues, and referring to the user manual for specific guidance.
Read more: How To Use A Strait-Line Laser Level 120
Overview of the Strait-Line X3 Laser Level
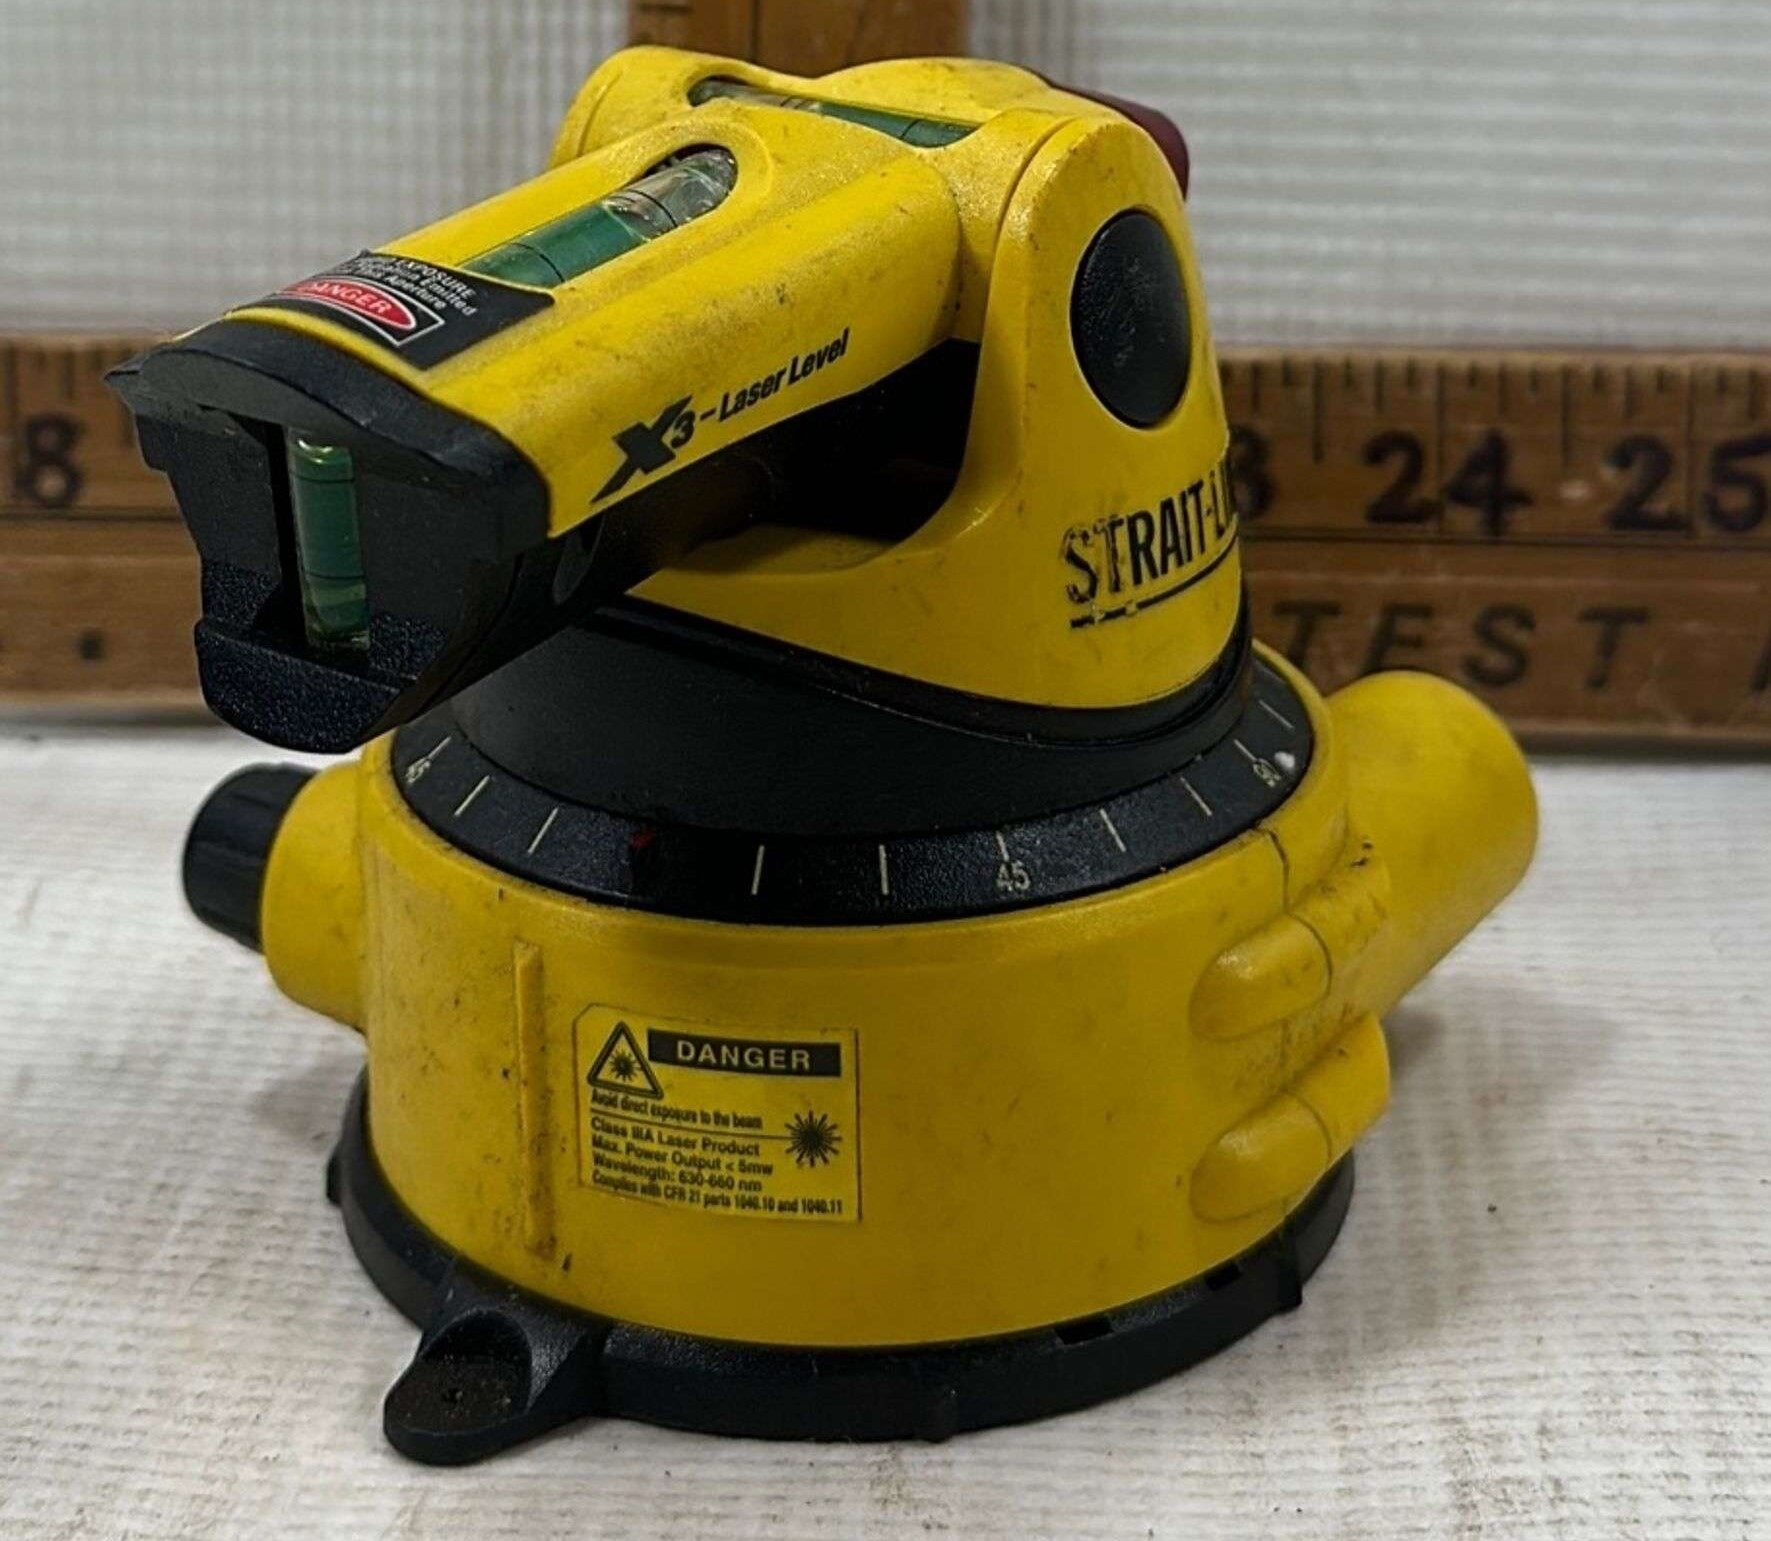
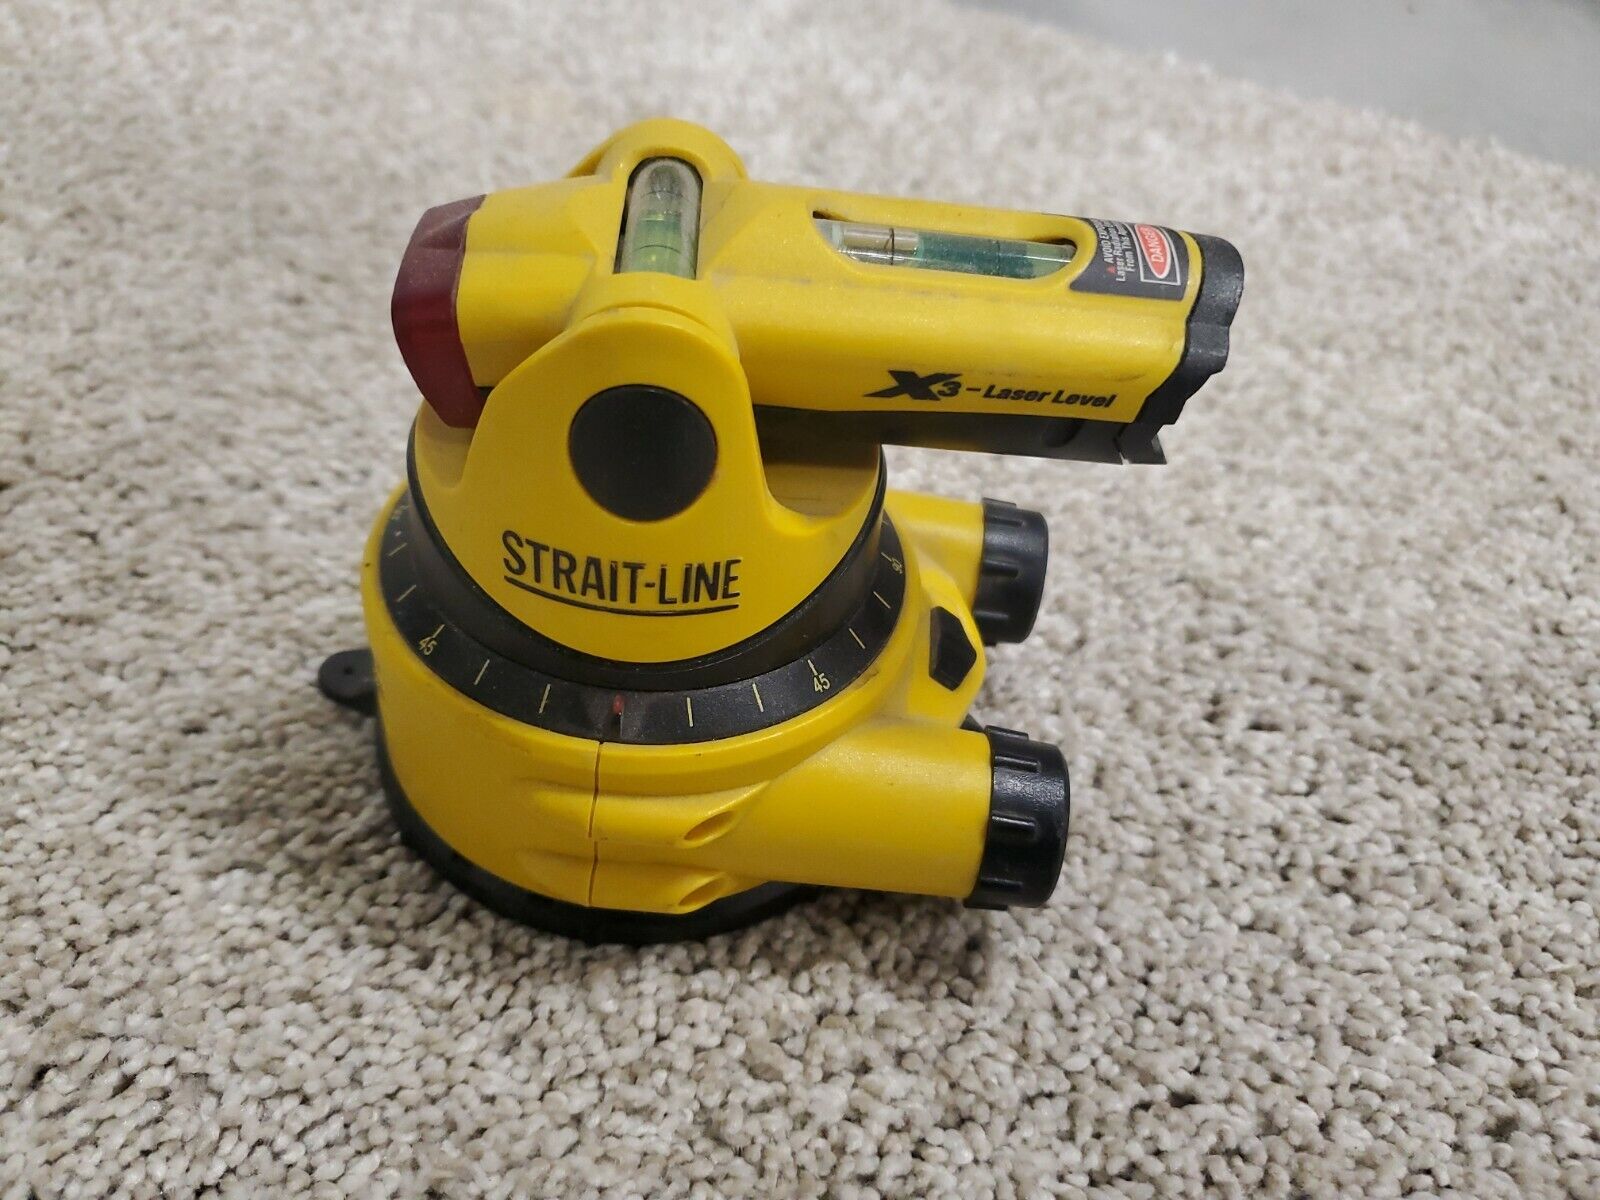
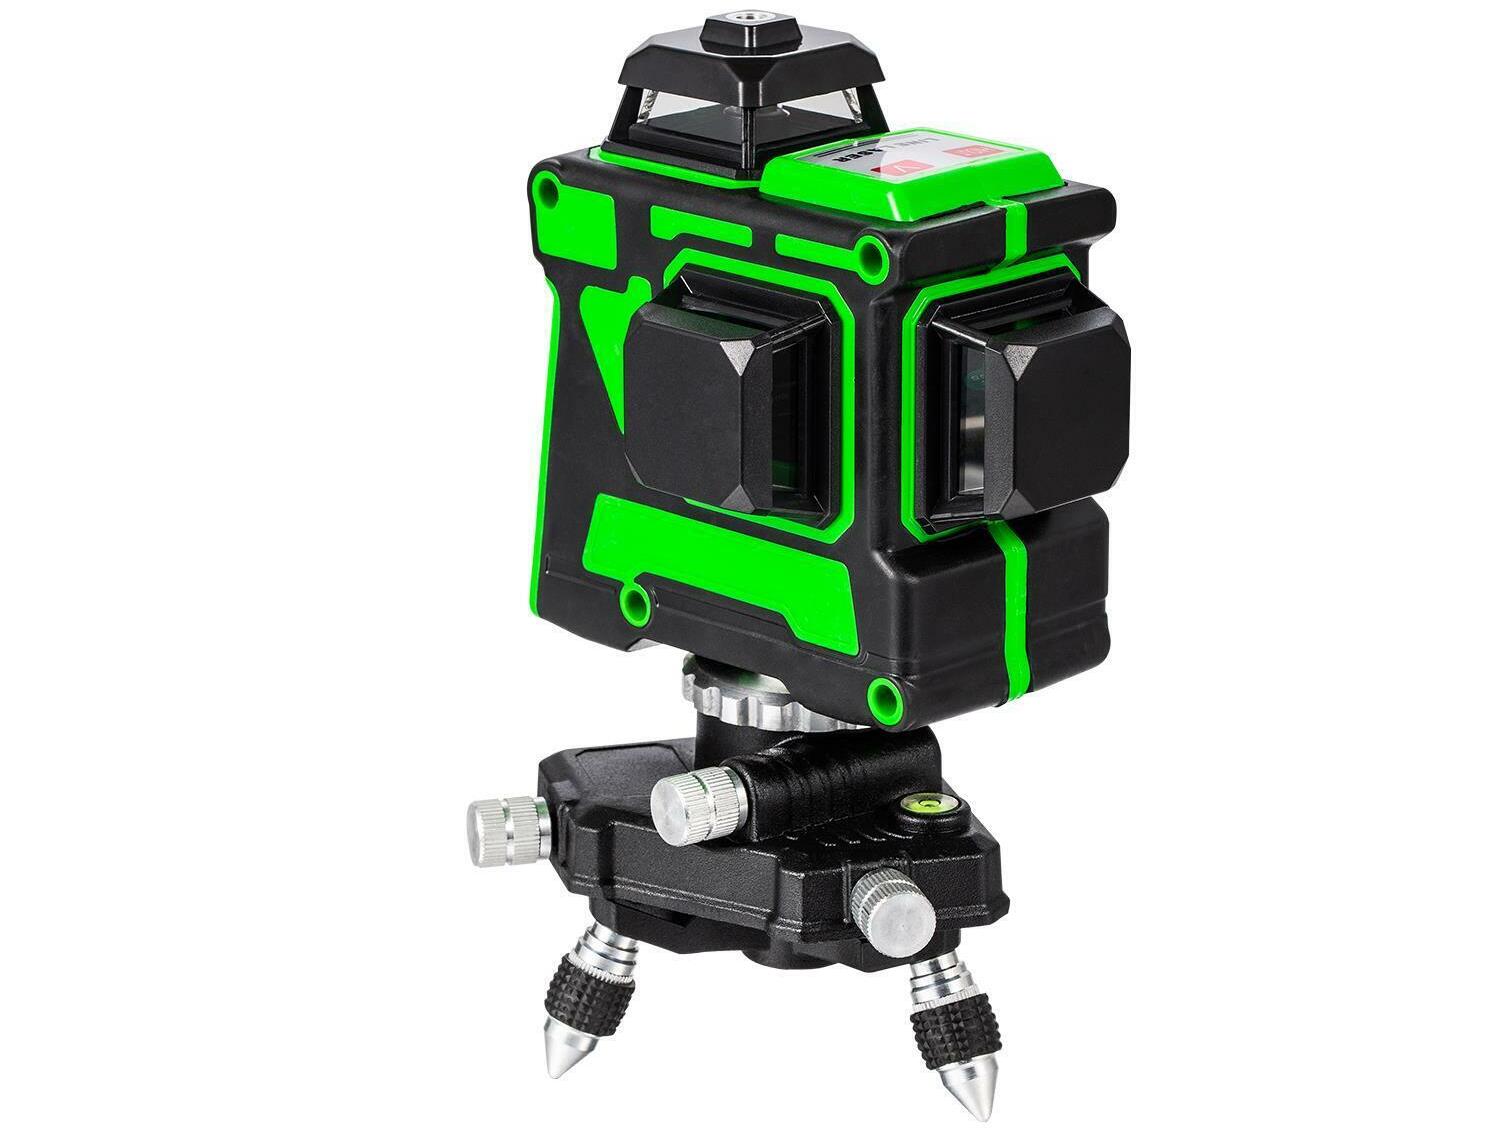
The Strait-Line X3 Laser Level is a highly versatile and accurate tool that simplifies leveling tasks. Equipped with advanced laser technology, it provides a bright and visible laser line that makes alignment and measurements a breeze. Here’s an overview of the key features and functions of the Strait-Line X3 Laser Level:
- Laser Projection: The X3 Laser Level projects a horizontal laser line with a maximum range of 30 feet. This laser line is highly visible, even in bright lighting conditions, making it easy to see and work with.
- Self-Leveling: One of the standout features of the X3 Laser Level is its self-leveling capability. It automatically adjusts the laser line to be perfectly level, eliminating the need for manual adjustments and ensuring accurate results.
- Manual Mode: In addition to the self-leveling mode, the X3 Laser Level also has a manual mode. This allows you to tilt the level to project laser lines at different angles, making it useful for tasks such as installing stair railings or creating sloped surfaces.
- Magnetic Base: The X3 Laser Level is equipped with a strong magnetic base, enabling you to easily attach it to metal surfaces for hands-free operation. This feature is especially handy when working on ceilings or other overhead surfaces.
- Indoor and Outdoor Use: The X3 Laser Level is designed to be used both indoors and outdoors. Its bright laser projection ensures visibility in various lighting conditions, making it suitable for a wide range of projects.
- Durable Construction: The X3 Laser Level is built to withstand the demands of construction and DIY projects. It is constructed with durable materials that can withstand rough handling and accidental drops.
- Battery Life: The X3 Laser Level runs on standard AA batteries, which provide long-lasting power. This ensures that you can complete your leveling tasks without interruptions.
- Compact and Portable: With its compact size and lightweight design, the X3 Laser Level is easy to carry and transport to different job sites. It also comes with a protective case for added convenience and protection.
With its impressive features and reliable performance, the Strait-Line X3 Laser Level is a valuable tool for both professionals and DIY enthusiasts. Now that you have an overview of its capabilities, let’s move on to the next section, where we’ll discuss how to prepare the level for use.
Preparing the Level for Use
Before you start using the Strait-Line X3 Laser Level, it’s essential to ensure that it is properly prepared for use. Follow these steps to get the level ready:
- Check the Batteries: Open the battery compartment and check if the batteries are inserted correctly. Make sure that the batteries have enough charge to power the laser level. Replace them if necessary.
- Inspect the Laser Level: Look for any signs of damage or wear on the level itself. Check the laser projection window to make sure it is clean and free from any obstructions. If you notice any issues, contact the manufacturer for assistance.
- Calibrate the Level (If Needed): Some laser levels may require calibration before use. Check the user manual of the Strait-Line X3 Laser Level to see if calibration is necessary. If calibration is required, follow the instructions provided to ensure accurate measurements.
- Attach the Accessories (Optional): Depending on your project requirements, you may need to attach specific accessories to the laser level. These accessories can include a laser target, tripod, or mounting bracket. Follow the instructions provided with the accessories to attach them securely.
- Adjust the Laser Line (If Needed): The X3 Laser Level has a built-in mechanism that automatically levels the laser line. However, if you need to adjust the laser line manually, make sure to refer to the user manual for instructions on how to do so. This may involve using the manual mode or making slight adjustments to the level’s position.
- Test the Laser Projection: Before beginning your actual project, it’s important to test the laser projection of the level. Position the level on a stable surface or mount it securely on a tripod. Turn on the laser level and ensure that the laser line is clearly visible and level. If you encounter any issues with the laser projection, refer to the troubleshooting section of the user manual or contact customer support for assistance.
By following these steps, you can ensure that the Strait-Line X3 Laser Level is properly prepared for use. Taking the time to check the batteries, inspect the level, and calibrate if necessary will result in accurate measurements and a smooth leveling process. Once the level is ready, you can proceed to setting it up for your specific project, which we’ll discuss in the next section.
Adjusting the Level
Adjusting the Strait-Line X3 Laser Level is an important step to ensure accurate and precise leveling. Here are the steps to adjust the level:
- Place the level on a stable surface or attach it securely to a tripod.
- Turn on the laser level and allow it to self-level. The self-leveling mechanism will ensure that the laser line is perfectly horizontal.
- If necessary, use the manual mode to tilt the level and project a laser line at a specific angle. This is useful for tasks that require sloped or angled alignments.
- To adjust the level manually, locate the adjustment knobs on the sides of the level. These knobs allow you to fine-tune the position of the laser line.
- Use a bubble level or a reliable reference surface to determine if the laser line is perfectly level. Adjust the knobs as needed until the laser line aligns with the bubble or reference point.
- Repeat the manual adjustment process as required to ensure precise alignment for your specific project.
It’s important to note that the X3 Laser Level is designed to be highly accurate, but minor adjustments may still be necessary depending on the specific requirements of your project. Taking the time to adjust the level properly will result in precise measurements and a level line that can be relied upon for your tasks.
Remember to refer to the user manual for your specific model of the X3 Laser Level for detailed instructions on adjusting the level. The manual will provide specific guidance and illustrations to assist you in the process.
Now that you’ve adjusted the level to your desired specifications, let’s move on to the next section, where we’ll discuss how to set up the X3 Laser Level for your project.
Setting Up the Level
Setting up the Strait-Line X3 Laser Level correctly is crucial to ensure optimal functionality and accuracy. Follow these steps to set up the level for your project:
- Choose a suitable location: Select a stable surface or attach the level securely to a tripod. Ensure that the surface is level and free from any obstructions that could interfere with the laser projection.
- Position the level: Place the X3 Laser Level on the selected surface or mount it on the tripod. Make sure that it is firmly positioned to prevent any movement during use.
- Ensure the laser projection is facing the desired direction: Position the level so that the laser projection is facing the area where you need to project the level line. This could be a wall, floor, or any other surface.
- Adjust the level’s height: If necessary, adjust the height of the level by extending the tripod legs or using an adjustable mounting bracket. Ensure that the laser line is projected at the desired height for your project.
- Activate the laser projection: Turn on the X3 Laser Level and activate the laser projection. The laser line should be visible and straight. Take note of the laser range specified for your specific model to ensure proper distance coverage.
- Double-check the level: Use a bubble level or a reliable reference surface to confirm that the laser line is perfectly level. Make any necessary adjustments to the level using the manual adjustment knobs.
- Secure the level: Once you have confirmed the accuracy of the laser projection, secure the level in place to prevent any movement or disturbance during your project.
It’s essential to follow these steps carefully to ensure that the Strait-Line X3 Laser Level is set up correctly and ready for use. By positioning the level accurately and verifying the level line’s horizontal alignment, you can ensure precise measurements and successful project outcomes.
Now that you have set up the level, it’s time to move on to the next section, where we’ll explore how to effectively use the X3 Laser Level for your leveling tasks.
When using the Strait-Line X3 Laser Level, make sure to calibrate it on a stable surface before each use to ensure accurate and precise leveling.
Read more: How To Repair A Strait-Line Laser Level
Using the Level
Using the Strait-Line X3 Laser Level is a straightforward process that allows you to achieve accurate and precise leveling. Follow these steps to effectively use the level for your projects:
- Ensure the level is properly set up: Refer to the previous section on setting up the level to ensure that it is positioned correctly and the laser line is projected at the desired height and direction.
- Identify your leveling task: Determine the specific task you need to accomplish, such as hanging pictures, aligning shelves, or installing tiles.
- Align the laser line: Align the laser line with the surface or reference point where you want to create a level line. This can be done by rotating the level or adjusting its position as needed.
- Make precise measurements: Use a measuring tape or ruler to mark the desired locations on the surface based on the projected laser line. This will ensure accurate placement of objects or alignment of surfaces.
- Secure objects or make adjustments: Use the laser line as a guide to hang pictures, install shelves, or align other objects. Make any necessary adjustments to ensure that they are level and in the desired position.
- Re-check the level periodically: As you progress with your project, periodically re-check the level line to ensure that it remains straight and level. This will help maintain accuracy throughout the task.
- Complete your project: Continue using the X3 Laser Level as a guide until you’ve completed your leveling task. Take your time and make any necessary adjustments along the way to achieve the desired results.
It’s important to keep in mind that the X3 Laser Level is a tool that enhances accuracy and efficiency in your leveling tasks. However, it’s always good practice to double-check measurements and use common sense to ensure the level line aligns with your project requirements.
Now that you have a good understanding of how to use the X3 Laser Level, let’s move on to the next section, where we’ll provide some additional tips and recommendations to make the most out of this remarkable tool.
Additional Tips and Recommendations
To maximize your experience with the Strait-Line X3 Laser Level and achieve optimal results, consider the following tips and recommendations:
- Use a laser target for longer distances: When working with longer distances or in outdoor environments with poor visibility, use a laser target to enhance the visibility of the laser line.
- Secure the laser level for stability: Depending on your project, it may be beneficial to mount the X3 Laser Level on a stable surface or use a sturdy tripod to minimize vibrations and ensure accurate leveling.
- Take advantage of the gridlines: Some models of the X3 Laser Level come with additional gridlines, which can be useful for tasks that require vertical alignment or creating specific patterns on surfaces.
- Invest in a laser detector: If you frequently work in bright outdoor environments or need to extend the range of the laser level, consider investing in a compatible laser detector. This accessory can greatly enhance the functionality of the X3 Laser Level.
- Follow safety protocols: When using the X3 Laser Level, remember to wear appropriate safety gear, such as safety glasses, particularly when working with reflective surfaces or in environments where airborne debris may be present.
- Keep the level clean and protected: Regularly clean the laser projection window and ensure that the level is stored in its protective case when not in use. This will help maintain its accuracy and prolong its lifespan.
- Refer to the user manual: For specific details and instructions regarding your model of the X3 Laser Level, always refer to the user manual provided by the manufacturer. It will provide detailed guidance on using and maintaining the level.
By following these tips and recommendations, you can optimize your use of the Strait-Line X3 Laser Level and achieve precise and professional leveling results. Remember, practice makes perfect, so don’t hesitate to experiment and familiarize yourself with the level’s features to master its capabilities.
Now that you’re equipped with these additional tips and recommendations, you’re well on your way to becoming a proficient user of the X3 Laser Level. In the next section, we’ll address some common issues and provide troubleshooting guidance to help you overcome any challenges you may encounter.
Troubleshooting Common Issues
While the Strait-Line X3 Laser Level is known for its reliability, there may be times when you encounter some common issues. Here are some troubleshooting tips to help you resolve these problems:
- Issue: Weak or faint laser projection:
Solution: Check the batteries and ensure they are properly inserted and have sufficient charge. If the batteries are low, replace them with fresh ones. Additionally, clean the laser projection window using a soft, lint-free cloth to remove any dirt or debris that may be obstructing the laser. - Issue: Inaccurate leveling:
Solution: Ensure that the level is set up on a stable surface and the self-leveling mechanism has enough time to properly adjust the laser line. If the level is still not accurate, check for any damage or obstructions on the level itself. Reset the calibration if necessary, following the instructions in the user manual. - Issue: Laser line not visible in bright conditions:
Solution: If you’re working in bright outdoor environments, consider using a laser target to enhance the visibility of the laser line. Adjust the brightness settings on the level, if available, to increase the visibility of the laser line in bright lighting conditions. - Issue: Laser line not projected at the desired height or angle:
Solution: Ensure that the level is properly positioned and adjusted according to the specific requirements of your project. Double-check the manual adjustment knobs and make fine adjustments until the laser line aligns with the desired height or angle. - Issue: Level not turning on or experiencing intermittent operation:
Solution: Check the batteries to ensure they are correctly inserted and have sufficient charge. Clean the battery contacts in the level and the battery compartment to ensure a good connection. If the issue persists, contact customer support for further assistance.
Remember to refer to the user manual for your Strait-Line X3 Laser Level model for specific troubleshooting guidance and contact customer support if you encounter persistent issues that cannot be resolved with these general troubleshooting tips.
By following these troubleshooting recommendations, you can quickly resolve common issues and continue using your X3 Laser Level effectively. Now, let’s move on to the concluding section of this guide.
Conclusion
Congratulations! You have reached the end of this comprehensive guide on how to use the Strait-Line X3 Laser Level. By now, you should feel confident in your ability to prepare, adjust, set up, and effectively use this remarkable tool for all your leveling tasks.
The Strait-Line X3 Laser Level offers precision, convenience, and versatility, making it an invaluable tool for both professional contractors and DIY enthusiasts. With its self-leveling capability, durable construction, and bright laser projection, it simplifies the process of creating level lines, ensuring precise measurements and accurate alignments.
Throughout this guide, we covered all the necessary steps to effectively use the X3 Laser Level. We started with an introduction to the level and its key features, followed by instructions on preparing, adjusting, setting up, and using it for your projects. We also provided additional tips and recommendations to optimize your experience, as well as troubleshooting advice for common issues you may encounter.
Remember to always refer to the user manual provided by the manufacturer for your specific model of the X3 Laser Level. The manual will provide detailed instructions and illustrations tailored to your particular level, ensuring successful and safe usage.
Now that you have a solid understanding of the Strait-Line X3 Laser Level and how to utilize it effectively, it’s time to put your knowledge into practice. Start tackling those leveling projects with confidence and precision, and enjoy the ease and efficiency that the X3 Laser Level brings to your work.
Thank you for reading this guide, and we hope it has been a valuable resource in helping you become proficient in using the Strait-Line X3 Laser Level. Happy leveling!
Frequently Asked Questions about How To Use Strait-Line X3 Laser Level
Was this page helpful?
At Storables.com, we guarantee accurate and reliable information. Our content, validated by Expert Board Contributors, is crafted following stringent Editorial Policies. We're committed to providing you with well-researched, expert-backed insights for all your informational needs.


0 thoughts on “How To Use Strait-Line X3 Laser Level”