Articles
How To Use Whynter Ice Cream Maker
Modified: October 20, 2024
Learn how to use the Whynter ice cream maker with our helpful articles. Find step-by-step instructions and tips for making delicious homemade ice cream.
(Many of the links in this article redirect to a specific reviewed product. Your purchase of these products through affiliate links helps to generate commission for Storables.com, at no extra cost. Learn more)
Introduction
Welcome to the wonderful world of homemade ice cream! There’s nothing quite like the satisfaction of creating your own creamy, flavorful frozen dessert from scratch. And with the Whynter Ice Cream Maker, you have all the tools you need to elevate your ice cream game to a whole new level.
Made with precision and innovation, the Whynter Ice Cream Maker offers both convenience and versatility. Whether you’re craving classic vanilla, indulgent chocolate, or adventurous flavors like strawberry basil or lavender honey, this machine has got you covered. It’s perfect for family gatherings, dinner parties, or simply treating yourself to a delightful frozen treat whenever the mood strikes.
In this article, we’ll take you step by step through the process of using the Whynter Ice Cream Maker. From unboxing and setup to churning and storing, we’ll guide you through each stage to help you achieve ice cream perfection.
But before we dive into the details, let’s take a moment to appreciate the benefits of making your own ice cream. First and foremost, you have complete control over the ingredients. You can choose the highest-quality dairy, customize the sweetness to your liking, and add a variety of mix-ins, from fresh fruit to chocolate chunks to cookie dough.
Furthermore, making ice cream at home allows you to experiment with flavors and get creative with your combinations. You can let your imagination run wild and come up with unique and delicious blends that you won’t find in any store-bought tub. Plus, it’s a great way to involve the whole family in a fun and tasty activity.
With the Whynter Ice Cream Maker, the process is incredibly easy and straightforward. Even if you’re a beginner, you’ll be able to whip up a batch of incredible ice cream in no time. So let’s get started on this delectable journey and unlock the full potential of your Whynter Ice Cream Maker!
Key Takeaways:
- Elevate your ice cream game with the Whynter Ice Cream Maker, offering convenience, versatility, and the ability to create unique flavors that you won’t find in store-bought tubs. Unleash your creativity and indulge in delightful homemade frozen treats.
- Master the art of homemade ice cream with the Whynter Ice Cream Maker. From unboxing to churning and storing, this machine makes the process easy and enjoyable, allowing you to experiment with flavors and create creamy, customized delights.
Read more: How To Use The Kitchenaid Ice Cream Maker
Step 1: Unboxing the Whynter Ice Cream Maker
Congratulations on your new Whynter Ice Cream Maker! The first step in using this fantastic machine is unboxing and getting familiar with its components. Let’s dive right in!
Start by carefully removing the Whynter Ice Cream Maker from its packaging. Make sure to keep all the accessories and instruction manuals together for easy reference. Take a moment to appreciate the sleek design and sturdy build of the machine.
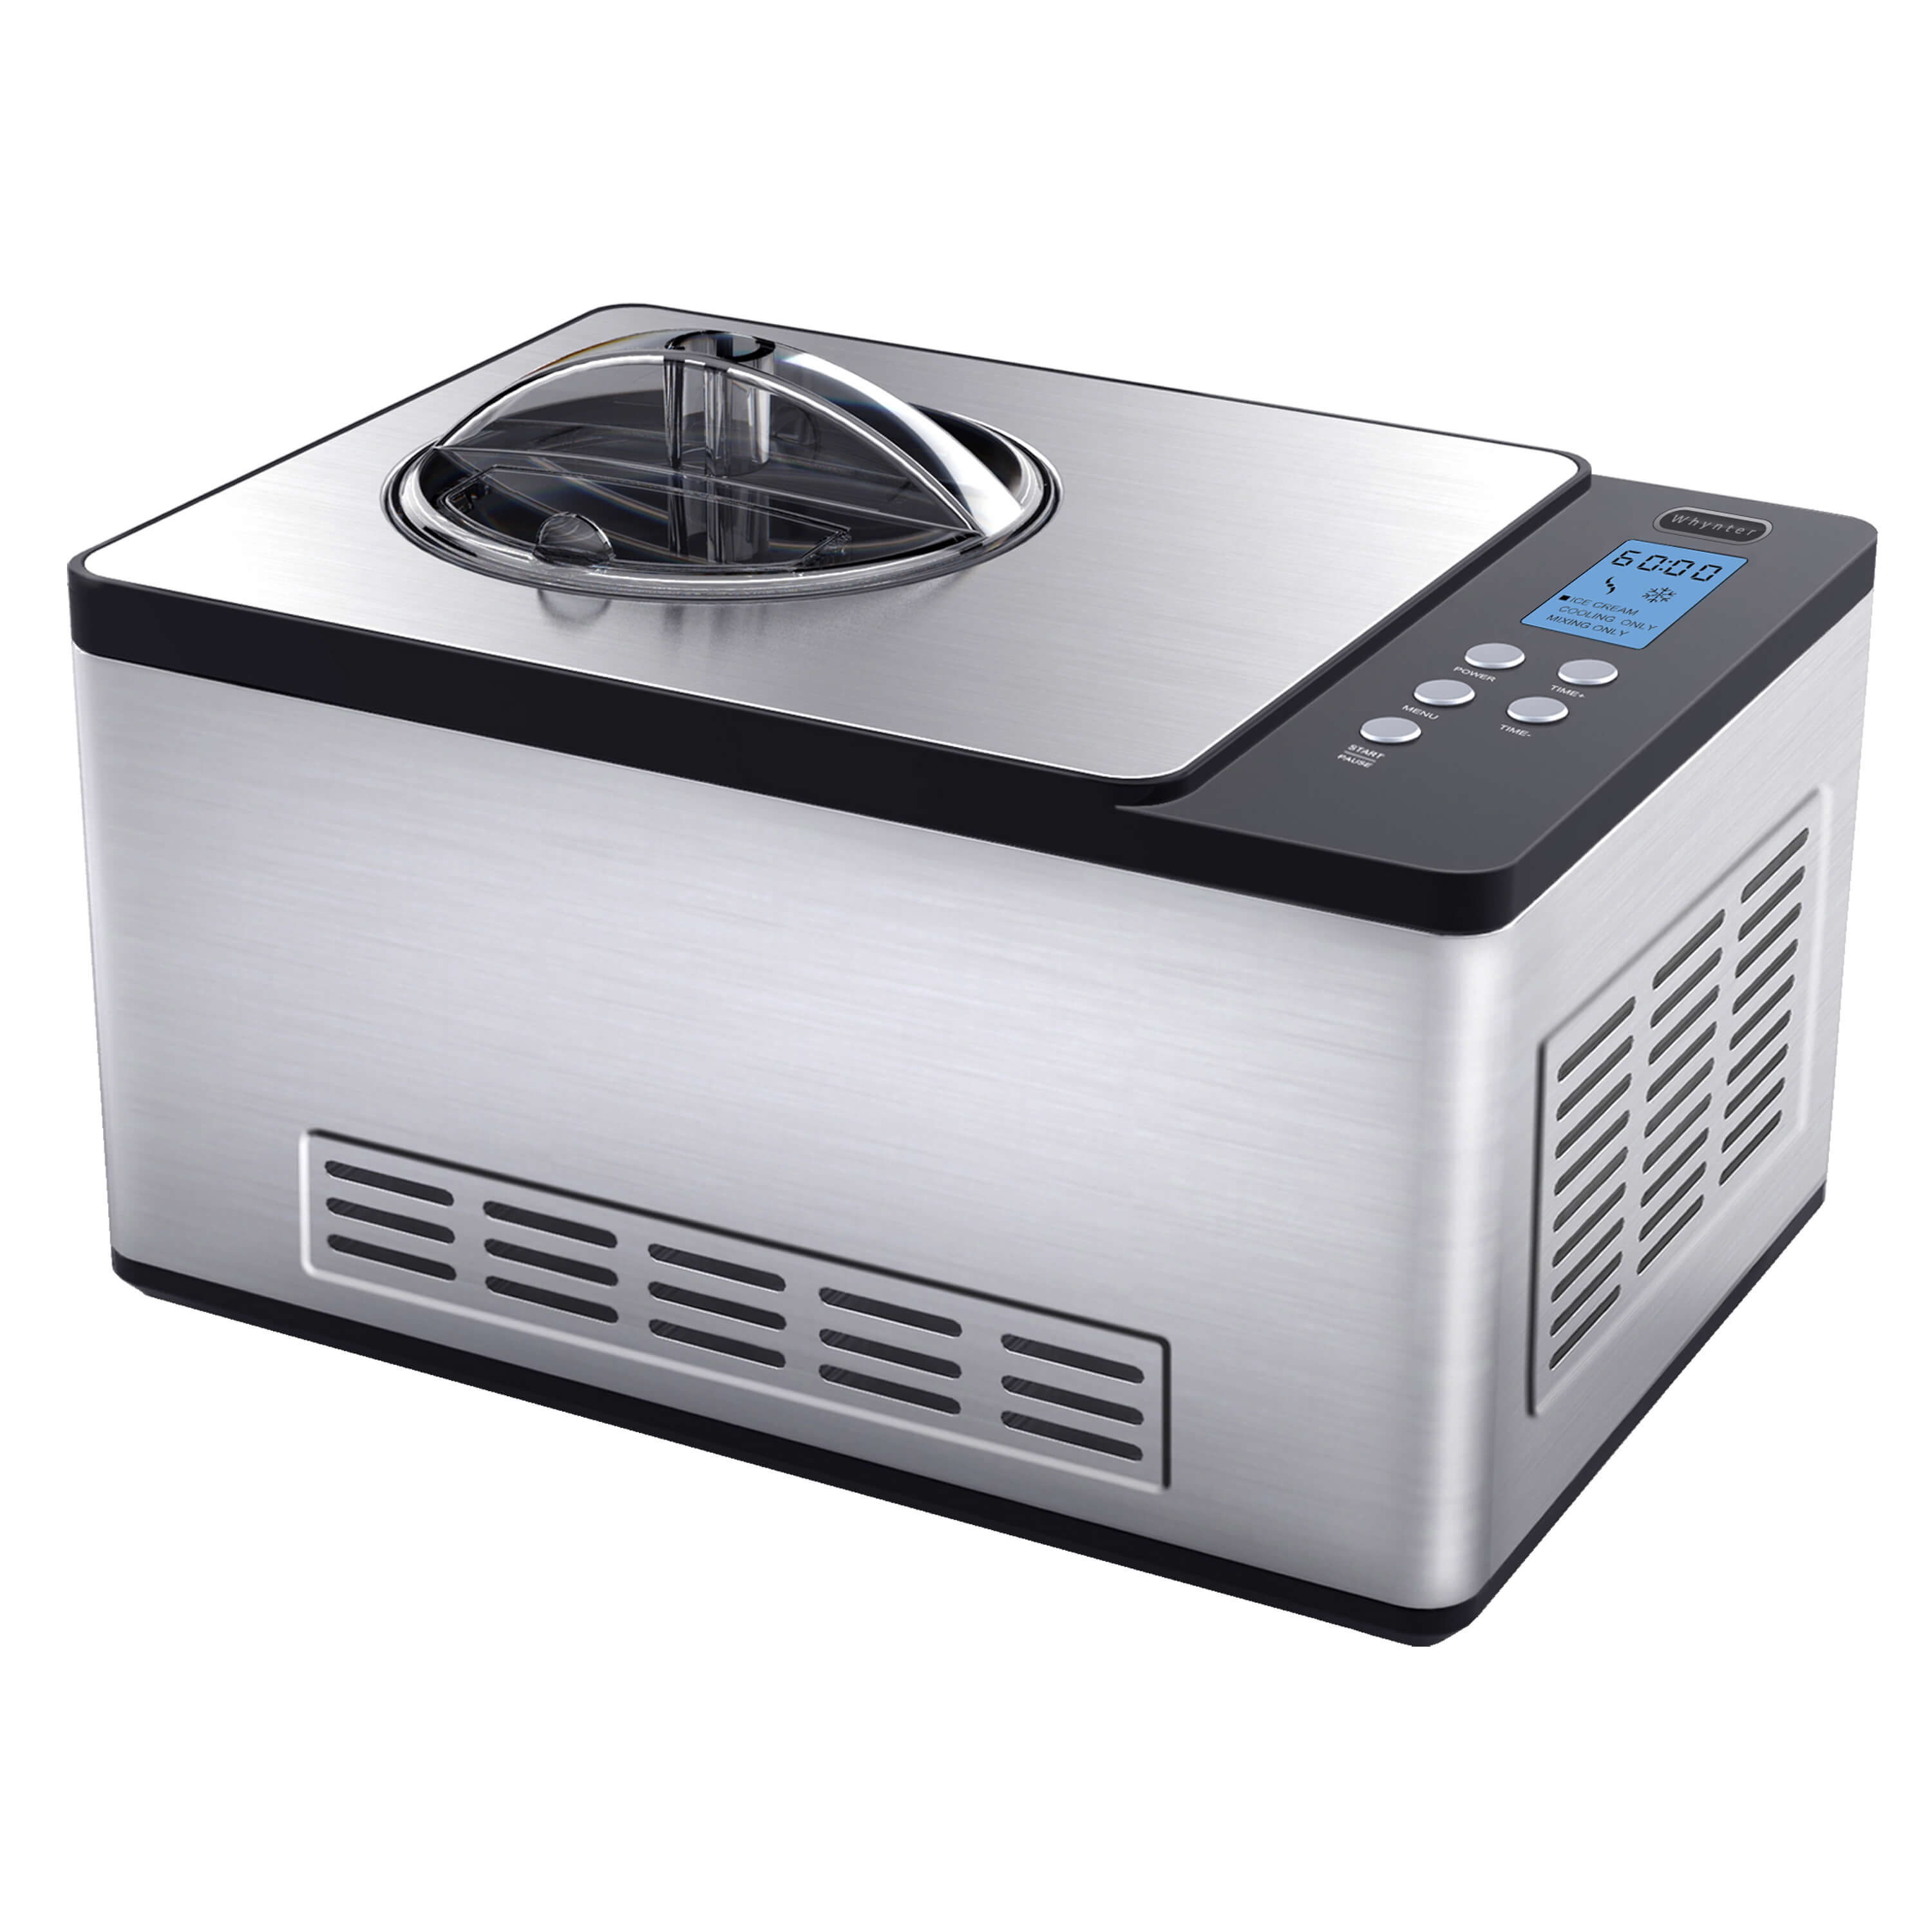
Next, familiarize yourself with the different parts of the ice cream maker. The main unit consists of a freezer bowl, mixing paddle, and lid. The freezer bowl is the crucial component that holds the ice cream mixture and freezes it as the machine churns. The mixing paddle is responsible for evenly blending the ingredients and creating that smooth and creamy texture we all love. And the lid helps keep the ice cream mixture secure while it churns.
Inspect the freezer bowl for any signs of damage or cracks. It’s essential to ensure that the freezer bowl is in perfect condition for optimal results. If you notice any defects, contact customer support for assistance.
Once you’ve checked the freezer bowl, it’s time to wash all the components with warm soapy water. This step is necessary to remove any manufacturing residues and ensure that your ice cream is safe and clean.
After washing, give the components a thorough rinse to remove all the soap residue. Then, gently dry them with a clean cloth or air-dry them before reassembling the ice cream maker.
Now that you have unboxed and familiarized yourself with the Whynter Ice Cream Maker, you’re ready to move on to the next step: preparing the machine for use. Stay tuned for the next section, where we will guide you through the setup process, so you can start creating your own delicious homemade ice cream!
Step 2: Preparing the Ice Cream Maker
Now that you’ve unboxed the Whynter Ice Cream Maker, it’s time to prepare the machine for the ice cream-making process. This step is crucial to ensure optimal performance and delicious results. Let’s get started!
The first thing you’ll need to do is find a suitable location for your ice cream maker. Choose a level surface that is sturdy and can support the weight of the machine. Avoid placing it near any direct sources of heat, such as stovetops or ovens, as this can interfere with the freezing process.
Next, ensure that the freezer bowl is completely dry before placing it back into the main unit. Any residual moisture can hinder the freezing process and result in ice cream with a less desirable consistency. Double-check that the bowl is securely fitted into the machine.
Before pouring your ice cream mixture into the freezer bowl, it’s important to pre-freeze the bowl. Ideally, the freezer bowl should be frozen for a minimum of 24 hours before using the machine. This will ensure that the bowl is cold enough to freeze the mixture effectively.
While the freezer bowl is pre-freezing, take this opportunity to gather all your ingredients and prepare your ice cream base. Follow your favorite recipe or create your own, keeping in mind the specific recommendations for ice cream maker usage.
Once your ice cream base is ready and the freezer bowl is adequately frozen, it’s time to assemble the ice cream maker. Place the mixing paddle securely onto the center pin of the freezer bowl and ensure that it spins freely without any obstructions.
Now, carefully pour your prepared ice cream base into the freezer bowl, making sure not to overfill it. Leave some space at the top for the mixture to expand as it churns. Attach the lid onto the machine, ensuring a tight fit to prevent any leaks or spills during the churning process.
With the ice cream maker fully assembled and your ice cream base in place, you’re now ready to move on to the next exciting step: making the ice cream base. Stay tuned for the next section, where we’ll explore different recipes and techniques to create the perfect ice cream base using your Whynter Ice Cream Maker!
Step 3: Making the Ice Cream Base
Now that you have prepared the Whynter Ice Cream Maker and assembled all the necessary components, it’s time to create the delicious ice cream base. The ice cream base serves as the foundation for your frozen masterpiece, providing the flavor and richness that will make your homemade ice cream truly unforgettable.
There are countless ice cream base recipes available, each offering its own unique flavors and textures. You can choose to go with a classic vanilla, a rich chocolate, or get creative with flavors like strawberry, mint chocolate chip, or cookies and cream. The possibilities are endless!
When selecting a recipe, ensure that it is specifically designed for use with an ice cream maker like the Whynter model you have. Ice cream maker recipes are often formulated to achieve the perfect balance of ingredients, taking into account the freezing and churning process.
Once you’ve chosen your recipe, gather all the necessary ingredients. Typical ice cream base ingredients include dairy such as milk, cream, and sugar. You may also need egg yolks, sweeteners like honey or maple syrup, and flavorings such as vanilla extract or cocoa powder.
Follow your recipe instructions carefully, measuring each ingredient precisely. This is especially important when it comes to the proportions of dairy and sweeteners, as they can significantly impact the consistency and sweetness of your final product.
In a large mixing bowl, combine the ingredients according to your recipe. Whisk or stir vigorously to ensure that everything is well incorporated. The goal is to create a smooth and homogeneous mixture that will freeze evenly in the ice cream maker.
Once your ice cream base is mixed, cover the bowl and place it in the refrigerator to chill. This step allows the flavors to meld together and ensures that the mixture is thoroughly cooled before churning.
Chilling times may vary depending on your recipe, but a general guideline is to refrigerate the ice cream base for at least 2–4 hours, or overnight for the best results. Cooling the base will also help it freeze more quickly and efficiently once it’s in the ice cream maker.
Remember to give your chilled ice cream base a final stir before proceeding to the next step. This will ensure that any settled ingredients are evenly distributed throughout the mixture.
Now that you have prepared the ice cream base, it’s time to move on to the exciting part—churning it into a luscious frozen treat! Stay tuned for the next section, where we’ll guide you through the process of chilling the ice cream base and getting it ready for the Whynter Ice Cream Maker.
Step 4: Chilling the Ice Cream Base
Now that you have prepared the delicious ice cream base, it’s time to chill it before transferring it to the Whynter Ice Cream Maker. Chilling the base is an important step that allows the flavors to meld together and ensures that the mixture is properly cooled for optimal freezing and churning.
Start by removing the ice cream base from the refrigerator. Give it a good stir to ensure that all the ingredients are well combined. This step is essential to ensure that any settled ingredients are evenly distributed throughout the mixture.
Next, cover the bowl containing the ice cream base with plastic wrap or a lid. This helps prevent any unwanted flavors or odors from entering the mixture and helps maintain its freshness.
Place the covered ice cream base back in the refrigerator to chill. The chilling time may vary depending on the recipe, but it is typically recommended to refrigerate it for at least 2-4 hours or overnight.
Chilling the ice cream base is important for several reasons. First and foremost, it allows the flavors to develop and meld together, resulting in a more harmonious and delicious final product. It also helps the base mixture cool down to the optimal temperature for freezing in the ice cream maker.
Additionally, chilling the base ensures that the mixture freezes more quickly and evenly in the Whynter Ice Cream Maker. A properly chilled base will help create a smoother and creamier texture, with fewer ice crystals forming during the freezing process.
During the chilling time, you can take this opportunity to clean up your workspace and prepare any additional ingredients or mix-ins you plan to add to your ice cream. Whether it’s chopped nuts, chocolate chunks, or swirls of caramel, having everything ready and easily accessible will streamline the ice cream-making process.
Once your ice cream base has been adequately chilled, it’s time to move on to the next step: adding flavors and mix-ins. Stay tuned for the next section, where we’ll explore different flavor variations and techniques to customize your homemade ice cream using the Whynter Ice Cream Maker.
When using the Whynter Ice Cream Maker, make sure to pre-freeze the mixing bowl for at least 24 hours before use. This will ensure that the ice cream mixture freezes properly and results in a creamy texture.
Step 5: Adding Flavors and Mix-ins
Now that your ice cream base has been properly chilled, it’s time to take your homemade creation to the next level by adding flavors and mix-ins. This step allows you to infuse your ice cream with delicious variations, textures, and surprises that will delight your taste buds.
Start by considering what flavors you’d like to incorporate into your ice cream. Whether it’s classic favorites like chocolate chips or fresh fruit, or more adventurous options like swirls of caramel or cookie dough, the choice is yours.
If you’re going for a single flavor, you can simply add your chosen extract (e.g., vanilla, almond, or mint) or other flavorings directly to the chilled ice cream base. Start with a small amount and add more to taste. Remember to mix well to ensure the flavors are evenly distributed throughout the base.
If you prefer a more complex flavor profile or want to experiment with combinations, consider adding mix-ins. Mix-ins are additional ingredients that are added to the ice cream base during the churning process, resulting in delightful bursts of flavor and added texture.
Popular mix-ins include chocolate chips, crushed cookies, chopped nuts, fresh fruit, candy pieces, or even swirls of caramel or fudge. Incorporate these mix-ins by adding them to the machine during the last few minutes of churning, according to your recipe’s instructions.
Remember to choose mix-ins that complement the ice cream base and enhance its overall flavor. For example, if you’re making a strawberry ice cream base, adding fresh sliced strawberries or swirls of strawberry sauce would be a fantastic choice.
Before adding mix-ins, it’s essential to inspect them for any contaminants or inconsistencies. Ensure that the mix-ins are clean, fresh, and safe for consumption. If using homemade additions like cookie dough, make sure it has been properly cooked or baked.
When adding mix-ins, be careful not to overwhelm the ice cream base with too many or overly large pieces. It’s best to chop or crush larger mix-ins into smaller, bite-sized pieces that will evenly distribute throughout the ice cream.
Once you’ve added your chosen flavors and mix-ins to the ice cream base, secure the lid on the Whynter Ice Cream Maker and proceed to the next step: assembling and operating the ice cream maker. Stay tuned for the next section, where we’ll guide you through the process of setting up and using the Whynter Ice Cream Maker to churn your delicious homemade ice cream.
Step 6: Assembling and Operating the Ice Cream Maker
Now that you’ve prepared your ice cream base with all the desired flavors and mix-ins, it’s time to assemble and operate the Whynter Ice Cream Maker. This step will guide you through the process of setting up the machine and churning your delicious homemade ice cream to perfection.
Start by placing the freezer bowl, which should be thoroughly chilled, back into the main unit of the ice cream maker. Ensure that it fits snugly and securely in place.
Next, attach the mixing paddle to the center pin inside the freezer bowl. Ensure that it is properly aligned and spins freely without any obstructions.
Now, carefully pour your prepared ice cream base, with all the added flavors and mix-ins, into the freezer bowl. Be mindful not to overfill it, as the mixture will expand as it churns. Leave some space at the top to allow for proper churning and freezing.
Once the ice cream base is in the freezer bowl, secure the lid tightly on top of the machine. This will prevent any spills or leaks during the churning process.
With the machine assembled, it’s time to move on to the exciting part—operating the Whynter Ice Cream Maker. Plug in the machine and turn it on, following the specific instructions provided in the user manual.
Most ice cream makers, including the Whynter model, have a simple control panel with options to start and stop the churning process. Some models may also have adjustable settings to control the speed and consistency of the churn.
Once you’ve turned on the ice cream maker, the mixing paddle will start churning the ice cream base. The freezing process will begin, transforming the mixture into a smooth and creamy frozen delight.
The churning time may vary depending on the specific machine and recipe instructions. Typically, it takes around 20-30 minutes for the ice cream to reach the desired consistency. However, it’s crucial to note that different recipes and mix-ins may affect the overall churning time.
During the churning process, it’s normal for the mixture to increase in volume and thicken. This is a sign that the ice cream is forming and freezing properly. You may need to periodically check on the consistency of the ice cream and adjust the churning time accordingly.
While the ice cream churns, take the time to savor the delightful aroma that fills your kitchen. The anticipation of enjoying your homemade ice cream is almost as exciting as the process itself!
Once the churning process is complete, turn off the ice cream maker and carefully remove the lid. You will be greeted with a creamy and delicious homemade ice cream that’s ready to be enjoyed.
Next, you’ll need to transfer the ice cream to a separate container for further freezing and storage. We’ll cover this in detail in the next step. Be sure to taste a spoonful of your freshly churned ice cream as a reward for your efforts.
With Step 6 complete, you are just one step away from indulging in your homemade ice cream masterpiece. Stay tuned for Step 7, where we’ll guide you through the process of monitoring the ice cream’s progress and ensuring it reaches the perfect consistency. Get ready to delight your taste buds!
Step 7: Monitoring the Ice Cream’s Progress
Now that you have successfully operated the Whynter Ice Cream Maker and allowed your ice cream to churn, it’s time to move on to the next step: monitoring the ice cream’s progress. This step is crucial to ensure that your homemade treat reaches the perfect consistency and texture.
As the ice cream churns, it will gradually thicken and freeze, transforming into a creamy and delightful frozen dessert. During this process, it’s essential to keep an eye on the ice cream’s progress to ensure that it doesn’t overfreeze or become too soft.
The churning time may vary depending on factors such as the recipe, desired consistency, and the room temperature. It typically takes around 20-30 minutes, but it’s important to note that different recipes and mix-ins may affect the overall churning time.
As the ice cream churns, you will notice the mixture increase in volume and become thicker. This is an indication that the freezing process is working correctly. You may also notice the sides of the freezer bowl frosting over, which is normal.
To monitor the ice cream’s progress, carefully lift the lid of the Whynter Ice Cream Maker without interrupting the churning process. Take a look at the consistency of the ice cream. It should have a thick, creamy, and smooth texture as it churns.
If the ice cream appears too soft or runny, it may need more time to freeze. Simply close the lid and allow the machine to continue churning for a few more minutes until the desired consistency is reached.
On the other hand, if the ice cream appears excessively firm or has formed large ice crystals, it may be overfrozen. In this case, it’s important to stop the churning process to prevent the ice cream from becoming too hard. You can transfer the partially frozen ice cream to a separate container and place it in the freezer to firm up.
Remember, it’s essential to strike the right balance between achieving a smooth and creamy texture and ensuring the ice cream is fully frozen. This will result in the most enjoyable and delectable ice cream experience.
You may also want to taste a small sample of the ice cream during the process to check if the flavors are well balanced. Remember, the ice cream’s taste will deepen and meld as it continues to freeze and mature.
Once the ice cream has reached your desired consistency, turn off the machine and remove the lid. Your homemade ice cream is now ready for the final step: removing and storing it properly. We’ll cover this in detail in the next step, so get ready to savor your delicious creation!
Step 8: Removing and Storing the Ice Cream
Congratulations! You have reached the final step in the process of using the Whynter Ice Cream Maker: removing and storing your homemade ice cream. This step ensures that your delicious creation remains in optimal condition and is ready to be enjoyed whenever you desire.
After the ice cream has reached the desired consistency, it’s important to turn off the machine and carefully remove the lid. You will be greeted with beautiful, creamy ice cream just waiting to be savored.
Using a spatula or ice cream scoop, gently scrape the frozen mixture from the sides and bottom of the freezer bowl. Transfer the ice cream into a separate container that is suitable for storing frozen desserts.
Choose a container that is airtight and freezer-safe. It’s best to use a container with a lid to prevent freezer burn and to maintain the ice cream’s freshness and flavor. You can also use a lidded ice cream tub or airtight plastic container.
As you transfer the ice cream into the storage container, be mindful of any remaining mix-ins or flavorings that may have settled at the bottom of the freezer bowl. Scrape these along with the ice cream, ensuring that they are evenly distributed throughout.
Smooth out the surface of the ice cream in the container with a spatula or the back of a spoon to create an even and visually appealing appearance.
Once the ice cream is securely stored, place the lid tightly on the container. Make sure it is sealed properly to prevent any air from entering and causing freezer burn. Label the lid or container with the flavor and date of preparation to keep track of your homemade creations.
Now, it’s time to transfer the ice cream container to the freezer. Place it in a flat and level area of the freezer where it won’t be disturbed. Avoid stacking heavy items on top of the ice cream container, as this can cause pressure and affect the texture.
Allow the ice cream to freeze for at least 2-4 hours or until it reaches your desired firmness. Freezing times may vary depending on factors such as the temperature of your freezer and the specific recipe used.
When ready to serve, remove the ice cream container from the freezer and let it sit at room temperature for a few minutes to soften slightly. This will make it easier to scoop and enjoy. Serve in bowls, cones, or any desired serving vessel and savor the delicious results of your homemade ice cream.
Remember to return any remaining ice cream to the freezer promptly after serving to maintain its quality and prevent it from melting.
With Step 8 complete, you have successfully removed and stored your decadent ice cream. Now, all that’s left to do is indulge in your delicious creation and enjoy the fruits of your labor. Share it with loved ones, bask in the satisfaction of creating something wonderful, and celebrate your newfound ice cream-making skills!
Read more: How To Use Ninja Ice Cream Maker
Conclusion
Congratulations on your journey into the world of homemade ice cream using the Whynter Ice Cream Maker! With the knowledge and techniques you’ve learned, you can now create delicious, creamy, and customized frozen treats in the comfort of your own home.
Throughout this guide, we’ve covered each step of the ice cream-making process, from unboxing the machine to preparing the ice cream base, adding flavors and mix-ins, and finally, removing and storing the finished product.
By unboxing the Whynter Ice Cream Maker, you took the first step in turning your kitchen into an ice cream parlor. You familiarized yourself with the components and ensured they were in perfect condition for optimal performance.
Next, you prepared the ice cream maker by chilling the freezer bowl and assembling the machine. You mixed together the ingredients to create the perfect ice cream base, carefully adding flavors and mix-ins to make it uniquely yours.
As you operated the Whynter Ice Cream Maker, you monitored the progress of the ice cream, ensuring it churned to the right consistency and texture. With each passing minute, your anticipation grew, and your taste buds danced in anticipation of the final result.
Finally, you removed the freshly churned ice cream from the machine and stored it properly. By transferring it to a suitable container and placing it in the freezer, you ensured its longevity and preserved its deliciousness until the time came to savor every spoonful.
Creating homemade ice cream allows you to unleash your creativity and experiment with a vast range of flavors, mix-ins, and techniques. The Whynter Ice Cream Maker provides the perfect canvas to bring your ice cream dreams to life.
From classic favorites to inventive and daring creations, you have the power to craft frozen delights that will impress both your family and friends. With practice and experimentation, you’ll discover your signature recipes and develop the skills to whip up exquisite frozen desserts on demand.
So grab your Whynter Ice Cream Maker, let your imagination soar, and churn your way to ice cream bliss. Get ready to enjoy the delightful tastes and textures that only homemade ice cream can deliver. Your culinary adventures await!
Frequently Asked Questions about How To Use Whynter Ice Cream Maker
Was this page helpful?
At Storables.com, we guarantee accurate and reliable information. Our content, validated by Expert Board Contributors, is crafted following stringent Editorial Policies. We're committed to providing you with well-researched, expert-backed insights for all your informational needs.


0 thoughts on “How To Use Whynter Ice Cream Maker”