Articles
How To Use The Nostalgia Ice Cream Maker
Modified: August 17, 2024
Learn how to use the Nostalgia Ice Cream Maker with our informative articles. Discover tips, recipes, and more for the perfect homemade ice cream.
(Many of the links in this article redirect to a specific reviewed product. Your purchase of these products through affiliate links helps to generate commission for Storables.com, at no extra cost. Learn more)
Introduction
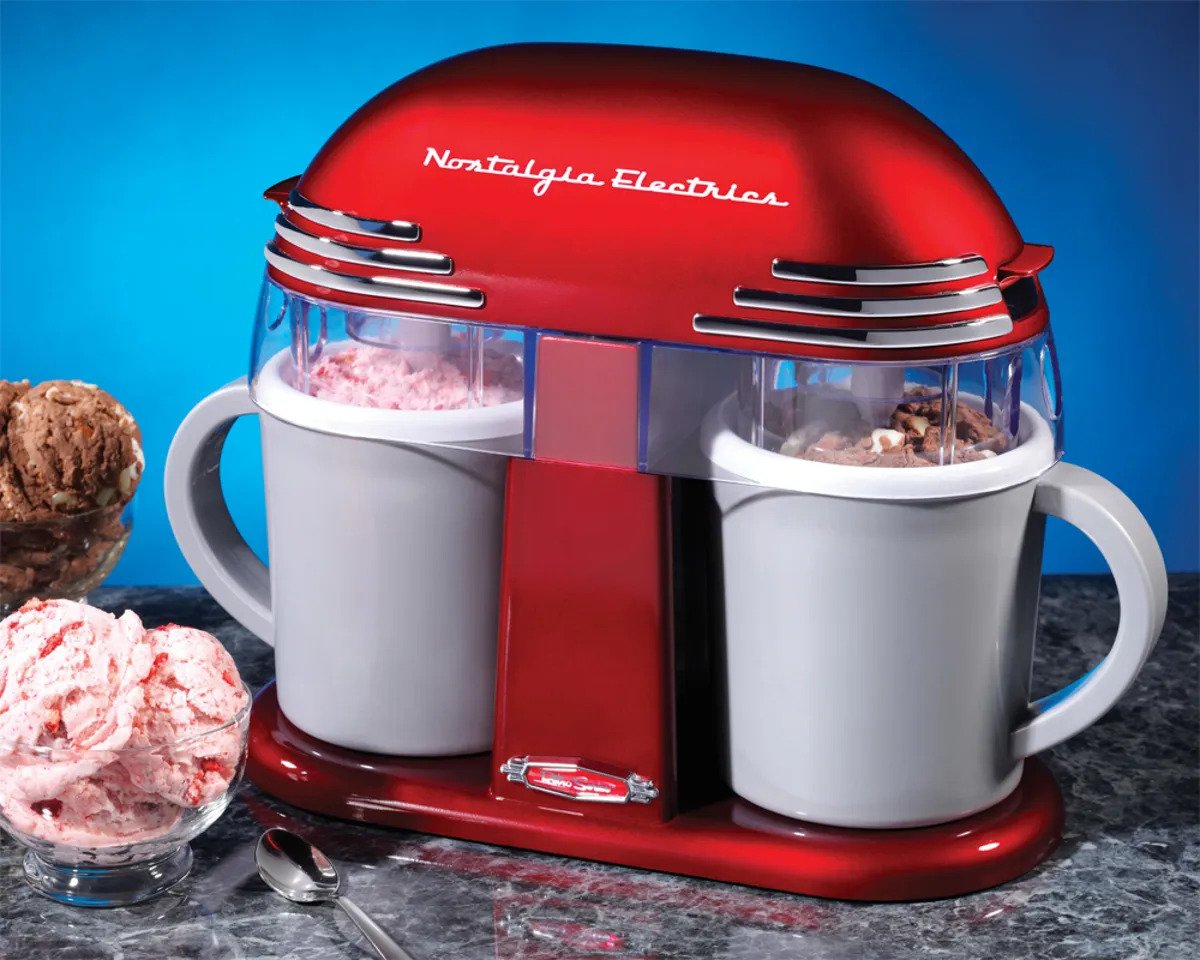
Welcome to the delightful world of homemade ice cream! Nothing compares to the creamy, flavorful goodness of a scoop of ice cream made right in the comfort of your own kitchen. And with the help of the Nostalgia Ice Cream Maker, creating your own frozen treats has never been easier.
The Nostalgia Ice Cream Maker is a popular choice for ice cream enthusiasts of all levels. Whether you’re a beginner looking to experiment with different flavors or a seasoned pro wanting to take your ice cream game to the next level, this machine is the perfect tool for the job.
In this article, we will walk you through the process of using the Nostalgia Ice Cream Maker, from unboxing to serving up a delicious batch of homemade ice cream. Get ready to impress your friends and family with your culinary skills!
Before we dive into the details, let’s take a quick look at what makes the Nostalgia Ice Cream Maker stand out:
Key Takeaways:
- Unleash Your Creativity with the Nostalgia Ice Cream Maker
From classic flavors to unique creations, this user-friendly machine lets you experiment with a variety of mix-ins and flavors, making homemade ice cream a delightful and customizable experience. - Enjoy Seamless Operation and Delicious Results
With proper assembly, ingredient preparation, and freezing techniques, the Nostalgia Ice Cream Maker ensures a smooth ice cream-making process and delivers exceptional, creamy delights for all to enjoy.
Features of the Nostalgia Ice Cream Maker:
- Easy-to-use design: The Nostalgia Ice Cream Maker features a user-friendly design that makes it simple for beginners to get started.
- Large capacity: With its generous capacity, you can make up to 4 quarts of delicious ice cream at a time. Perfect for parties or large families!
- Powerful motor: The powerful motor ensures thorough churning for smooth and creamy ice cream every time.
- Customizable options: The Nostalgia Ice Cream Maker allows you to personalize your ice cream by adding mix-ins and flavors to suit your taste preferences.
- Compact and easy to store: When not in use, the Nostalgia Ice Cream Maker can be easily stored in your kitchen cabinet or pantry.
Now that you know what makes the Nostalgia Ice Cream Maker so special, let’s dive into the details of how to use it. Get ready for a fun and delicious ice cream-making adventure!
Getting Started
Before you start creating your own ice cream masterpieces with the Nostalgia Ice Cream Maker, there are a few things you need to do to prepare. Follow these simple steps to ensure a smooth and successful ice cream-making experience:
1. Read the User Manual:
Start by familiarizing yourself with the Nostalgia Ice Cream Maker’s user manual. This will provide you with important instructions on how to assemble the machine, use the different settings, and clean it properly. It’s crucial to understand the machine’s functionality before you get started.
2. Plan Ahead:
Decide on the flavors you want to make and gather all the necessary ingredients. You may need to buy fresh fruits, nuts, chocolates, or any other mix-ins to create your delicious ice cream flavors. Planning ahead will save you time and ensure you have everything you need on hand.
Read more: How To Use The Kitchenaid Ice Cream Maker
3. Chill the Canister:
The Nostalgia Ice Cream Maker’s canister needs to be thoroughly chilled before you can use it. Place it in the freezer for at least 12 hours prior to making your ice cream. This step is essential to ensure the mixture freezes properly during the churning process.
4. Clear Space:
Clear a space on your kitchen counter or table where you can easily assemble and operate the Nostalgia Ice Cream Maker. Make sure there is enough room for the machine, the ingredients, and any additional tools or containers you may need.
5. Get Ready to Chill:
Ice cream making can be a time-consuming process, so it’s important to plan for the chilling time. Make sure your schedule allows for at least 4-6 hours of freezing time for the finished ice cream. It’s best to start the process in the morning or the day before you plan to serve the ice cream.
With these simple steps, you’re now ready to unbox your Nostalgia Ice Cream Maker and start creating your own frozen delicacies. In the next section, we’ll guide you through the unboxing process and help you assemble the machine for use.
Unboxing the Nostalgia Ice Cream Maker
Unboxing a new appliance is always an exciting experience, especially when it’s the Nostalgia Ice Cream Maker. Follow these steps to unbox your new machine and get ready for a delightful ice cream-making adventure:
Read more: How To Use Ninja Ice Cream Maker
1. Gather Your Supplies:
Before you start unboxing, make sure you have all the necessary supplies handy. You’ll need a pair of scissors or a box cutter to open the packaging, a clean surface to work on, and a garbage bag or recycling bin to dispose of the packaging materials.
2. Open the Box:
Carefully cut the tape or seals on the box to open it. Remove any packing material, such as foam or bubble wrap, and set it aside for disposal. Take a moment to appreciate the sleek design and quality construction of your new Nostalgia Ice Cream Maker.
3. Check the Contents:
Inside the box, you’ll find several components of the Nostalgia Ice Cream Maker. These may include the main unit, the canister, a paddle or dasher, a lid, and an instruction manual. Take a moment to ensure that all the components are present and in good condition.
4. Remove the Packaging:
Remove any plastic or protective covering from the individual components of the Nostalgia Ice Cream Maker. Inspect each piece for any signs of damage or defect. If you notice any issues, contact the manufacturer for assistance.
Read more: How To Use Whynter Ice Cream Maker
5. Clean the Components:
Wash the canister, paddle, and lid with warm soapy water to remove any dust or residue from the packaging. Rinse them thoroughly and dry them completely before assembling the machine. This step ensures that your ice cream is made in a clean and hygienic environment.
6. Dispose of Packaging Materials:
Properly dispose of all packaging materials by recycling or discarding them. Keeping a clean and clutter-free workspace will make the assembly process much more enjoyable.
By following these simple steps, you’ve successfully unboxed your Nostalgia Ice Cream Maker and prepared it for assembly. In the next section, we’ll guide you through the process of assembling the machine and getting it ready for ice cream making.
Assembling the Ice Cream Maker
Now that you’ve unboxed your Nostalgia Ice Cream Maker and prepared the components, it’s time to assemble the machine. Follow these steps to ensure a seamless and hassle-free assembly process:
1. Place the Base:
Start by placing the base of the Nostalgia Ice Cream Maker on your clean and stable surface. Make sure the surface is level and sturdy to prevent any accidents during the ice cream making process.
Read more: How To Use Koji Ice Cream Maker
2. Insert the Canister:
Take the chilled canister and place it in the center of the base. It should fit snugly into the designated slot. Ensure that the canister is securely in place before moving on to the next step.
3. Attach the Paddle:
Take the paddle or dasher that came with the Nostalgia Ice Cream Maker and attach it to the motor shaft inside the canister. The paddle should fit securely onto the shaft and rotate freely. Ensure that the paddle is properly aligned and centered.
4. Secure the Lid:
Take the lid of the Nostalgia Ice Cream Maker and place it on top of the canister. Make sure it fits snugly and securely. The lid is designed to keep the mixture contained and prevent any messes during the churning process.
5. Connect the Power:
Locate the power cord of the Nostalgia Ice Cream Maker and connect it to a power outlet. Ensure that the outlet is in good condition and can handle the power requirements of the machine. It’s important to follow all safety guidelines and precautions provided in the user manual.
Read more: How To Use An Ice Cream Maker
6. Test the Motor:
Before adding your ice cream mixture, turn on the Nostalgia Ice Cream Maker and let it run for a few seconds. This will ensure that the motor is functioning properly and that the paddle is rotating smoothly. If you notice any issues, refer to the troubleshooting section of the user manual or contact customer support.
With these simple steps, you’ve successfully assembled your Nostalgia Ice Cream Maker. In the next section, we’ll guide you through the process of preparing the ingredients for your homemade ice cream.
Preparing the Ingredients
Now that you have assembled your Nostalgia Ice Cream Maker, it’s time to gather and prepare the ingredients for your homemade ice cream. The quality and freshness of your ingredients will greatly impact the taste and texture of the final product. Follow these steps to ensure you have everything you need:
1. Choose Your Base:
The base of your ice cream is typically a combination of milk, cream, and sugar. The ratio of these ingredients will depend on your desired level of richness and sweetness. For a classic ice cream base, a common ratio is 2 parts cream to 1 part milk with sugar to taste.
2. Flavors and Mix-Ins:
Decide on the flavors and mix-ins you want to incorporate into your ice cream. You can get creative and experiment with various fruits, chocolates, nuts, cookies, or whatever else your taste buds desire. Consider adding extracts like vanilla or mint for an extra flavor boost. Make sure all your mix-ins are chopped or prepared according to your preference.
Read more: How To Use An Old Fashioned Ice Cream Maker
3. Prepare the Mixture:
In a bowl, combine your base ingredients (milk, cream, and sugar) and whisk until the sugar is completely dissolved. If you’re using extracts or other liquid flavorings, add them to the mixture as well. Taste the mixture and adjust the sweetness to your liking.
4. Chill the Mixture:
Place the mixture in the refrigerator for at least 1-2 hours to chill. This step allows the flavors to meld together and ensures that the mixture is properly cold before it goes into the ice cream maker.
5. Prepare Additional Toppings:
If you plan to serve your ice cream with additional toppings, such as chocolate sauce, caramel, or whipped cream, make sure to prepare them ahead of time. This will save you time and allow you to focus on the churning and freezing process.
By following these steps, you have prepared the base and mix-ins for your homemade ice cream. In the next section, we’ll guide you through the process of adding mix-ins and flavors to the Nostalgia Ice Cream Maker.
Adding Mix-Ins and Flavors
One of the joys of homemade ice cream is the ability to customize it with your favorite mix-ins and flavors. The Nostalgia Ice Cream Maker allows you to get creative and experiment with a wide range of delicious additions. Here’s how you can add mix-ins and flavors to your ice cream:
Read more: How To Use Hamilton Beach Ice Cream Maker
1. Pre-Chill Your Mix-Ins:
If you’re using mix-ins like chocolate chips, nuts, or cookies, it’s best to pre-chill them before adding them to the ice cream maker. This helps to prevent them from melting too quickly and ensures they are evenly distributed throughout the ice cream. Simply place your mix-ins in the freezer for about 15-30 minutes prior to using them.
2. Start the Churning Process:
Once your ice cream base mixture is chilled, it’s time to start the churning process in the Nostalgia Ice Cream Maker. Pour the mixture into the canister, ensuring that it doesn’t exceed the maximum fill line indicated on the machine. Start the machine and let it churn for a few minutes until the mixture starts to thicken.
3. Add the Mix-Ins:
When the ice cream mixture reaches a soft-serve consistency, you can begin adding your pre-chilled mix-ins. Open the lid of the Nostalgia Ice Cream Maker and carefully sprinkle or fold in your mix-ins. This can include anything from chocolate chips and crushed cookies to fruit chunks or caramel swirls. Be creative and add as much or as little as you prefer.
4. Continue Churning:
Once the mix-ins are added, close the lid of the Nostalgia Ice Cream Maker and continue churning. The machine will incorporate the mix-ins evenly throughout the ice cream as it continues to freeze and thicken.
Read more: How To Use Zoku Ice Cream Maker
5. Monitor Texture:
Keep an eye on the texture of the ice cream as it churns. The Nostalgia Ice Cream Maker typically takes 20-30 minutes to reach a firm, scoopable consistency. However, the exact time may vary depending on the recipe and the temperature of your ingredients.
6. Adjust Flavors if Desired:
If you want to add additional flavors, such as extracts or sauces, you can do so during the last few minutes of churning. Add them gradually and taste test along the way to ensure the flavors are to your liking.
By following these steps, you can easily incorporate mix-ins and flavors into your homemade ice cream using the Nostalgia Ice Cream Maker. In the next section, we’ll guide you through the freezing process to help you achieve perfect ice cream consistency.
Freezing the Ice Cream
After the churning process in the Nostalgia Ice Cream Maker, it’s important to properly freeze the ice cream to achieve the desired consistency. Follow these steps to ensure your homemade ice cream freezes to perfection:
1. Prepare Freezing Containers:
Have your freezing containers ready before you transfer the ice cream from the Nostalgia Ice Cream Maker. Choose airtight containers that are freezer-safe and appropriate in size for the amount of ice cream you have churned. This could be a lidded container, a loaf pan, or individual serving dishes.
Read more: How To Make Ice Cream In Ice Cream Machine
2. Transfer the Ice Cream:
Gently scoop or pour the churned ice cream from the canister into your chosen freezing containers. Use a silicone spatula or a spoon to ensure you get all the goodness out. Smooth the top of the ice cream to create an even surface.
3. Cover and Seal:
Place a layer of plastic wrap or parchment paper directly on the surface of the ice cream to prevent ice crystals from forming. Then, cover the container with its lid or tightly wrap it with aluminum foil. This helps to maintain the freshness and flavor of your ice cream.
4. Place in Freezer:
Carefully place the containers of ice cream in the freezer. Make sure they are on a stable surface and not overcrowded. Keep in mind that the ice cream will expand slightly as it freezes, so leave some space at the top of the container to allow for expansion.
5. Freeze for Several Hours:
Allow the ice cream to freeze for at least 4-6 hours, or overnight if possible. The exact freezing time will depend on the temperature of your freezer and the size of your containers. It’s important to let the ice cream harden and reach a scoopable consistency before serving.
Read more: Who Invented The Ice Cream Machine
6. Enjoy!
Once the ice cream is fully frozen, remove it from the freezer and let it sit at room temperature for a few minutes to soften slightly. Scoop into bowls or cones and indulge in your homemade frozen delight. You can also add additional toppings or sauces to enhance the flavor.
By following these steps, you will be able to properly freeze your homemade ice cream and achieve a delightful, creamy texture. In the next section, we’ll guide you through the process of churning the ice cream in the Nostalgia Ice Cream Maker.
Churning the Ice Cream
Now that your ice cream mixture is ready in the Nostalgia Ice Cream Maker, it’s time to start the churning process. Proper churning helps to incorporate air into the mixture, creating a light and creamy texture. Follow these steps to churn your ice cream to perfection:
1. Start the Machine:
Ensure that the canister, paddle, and lid are properly assembled in the Nostalgia Ice Cream Maker. Plug in the machine and turn it on to start the churning process. The paddle will begin to rotate, gently mixing and freezing the ice cream mixture.
2. Monitor the Churning:
Keep an eye on the ice cream as it churns. You’ll notice the mixture thickening gradually as more air is incorporated. The churning time can vary depending on the recipe and the desired consistency, but it typically takes 20-30 minutes for the ice cream to reach a firm, scoopable texture.
3. Scrape the Sides:
Periodically, use a silicone spatula or a spoon to scrape down the sides of the canister. This helps to incorporate any ice cream that may be sticking to the edges, ensuring an even freeze and consistent texture throughout.
4. Avoid Overchurning:
While it’s important to churn the ice cream long enough to achieve a creamy texture, be cautious not to overchurn. Overchurning can result in a dense and icy texture. Keep a close eye on the ice cream and stop the churning process once it reaches your desired consistency.
5. Check for Doneness:
To check if the ice cream is done churning, lift the lid of the Nostalgia Ice Cream Maker and take a look at the texture. It should be thick and creamy, with a soft-serve consistency. You can also do a quick taste test to ensure the sweetness and flavors are to your liking.
6. Turn Off the Machine:
Once you’re satisfied with the texture and taste of the ice cream, turn off the Nostalgia Ice Cream Maker and unplug it from the power source. Be careful not to touch the paddle or any other moving parts of the machine.
By following these steps, you will be able to successfully churn your ice cream in the Nostalgia Ice Cream Maker. In the next section, we’ll guide you through the cleaning and maintenance of the machine to ensure its longevity and optimal performance.
Read more: How To Use Rival Ice Cream Maker
Cleaning and Maintenance
Proper cleaning and maintenance of your Nostalgia Ice Cream Maker are important to ensure its longevity and optimal performance. Follow these steps to keep your machine in great shape:
1. Unplug and Disassemble:
Before cleaning, always unplug the Nostalgia Ice Cream Maker and allow it to cool down. Disassemble the machine by removing the canister, paddle, and lid. This will make the cleaning process easier and more thorough.
2. Wash the Components:
Wash the canister, paddle, and lid with warm soapy water. Use a non-abrasive sponge or cloth to remove any residue or ice cream build-up. Rinse them thoroughly under running water to ensure all soap is removed. Avoid immersing the main unit in water, as it contains electrical components.
3. Dry Components Completely:
After washing, dry all the components thoroughly before storing. Use a clean towel or allow them to air dry. Ensuring the components are completely dry helps prevent the growth of mold or mildew.
Read more: How To Use A Hand Crank Ice Cream Maker
4. Clean the Main Unit:
Use a damp cloth to wipe down the main unit of the Nostalgia Ice Cream Maker. Wipe away any spills or drips and remove any ice cream residue. Be careful not to expose the electrical parts to excess moisture.
5. Store Properly:
Once all the components are dry, reassemble the Nostalgia Ice Cream Maker and store it in a clean and dry environment. Keep the machine in a location where it won’t be subjected to extreme temperatures, moisture, or direct sunlight. Follow the manufacturer’s instructions regarding storage recommendations.
6. Regular Maintenance:
Regularly inspect your Nostalgia Ice Cream Maker for any signs of wear or damage. Check the power cord and plug for any frays or cuts. If you notice any issues, contact the manufacturer for assistance.
By following these cleaning and maintenance steps, you’ll ensure that your Nostalgia Ice Cream Maker remains in great condition and ready to churn delicious ice cream for years to come. In the next section, we’ll provide some helpful tips and troubleshooting techniques to enhance your ice cream-making experience.
Tips and Troubleshooting
Creating homemade ice cream with the Nostalgia Ice Cream Maker can be a fun and rewarding experience. To make the most out of your ice cream-making adventures, here are some helpful tips and troubleshooting techniques:
Read more: How To Clean Taylor Ice Cream Machine
Tips:
- Chill the Ingredients: Before making ice cream, ensure that your ingredients, especially the dairy products, are properly chilled. This helps to achieve a smoother texture and quicker freezing time.
- Experiment with Flavors: Don’t be afraid to get creative with flavors and mix-ins. Try adding various fruits, candies, or spices to create unique and delicious ice cream combinations.
- Use High-Quality Ingredients: Using high-quality ingredients, such as fresh fruits and premium chocolates, will greatly enhance the taste and overall quality of your homemade ice cream.
- Prevent Ice Crystal Formation: To prevent ice crystals from forming in your ice cream, make sure to wrap the container tightly with plastic wrap or place it in an airtight freezer bag before freezing.
- Allow for Flavor Infusion: If you’re adding flavors like vanilla extract or mint, let them steep in your base mixture for a few minutes before chilling. This allows the flavors to infuse and develop more fully.
- Taste and Adjust: Taste your ice cream mixture before churning and freeze. This allows you to adjust the sweetness or flavors if needed, ensuring a perfect result.
- Pre-Chill Mix-Ins: Pre-chilling any mix-ins, such as chocolate chips or nuts, helps to prevent them from melting during the churning process and ensures even distribution.
- Freeze Properly: When freezing the ice cream, make sure the temperature of your freezer is set to the optimal level (usually around -18°C or 0°F) to achieve the best texture.
Troubleshooting:
1. Ice Cream Doesn’t Freeze: If the ice cream isn’t freezing properly during the churning process, make sure the canister has been adequately chilled in the freezer for the recommended time. Additionally, check if the mixture is too warm, as it needs to be properly chilled before churning.
2. Ice Cream is Too Hard: If the ice cream turns out too hard, it could be due to overchurning or freezing for too long. Keep a close eye on the churning time and freezing time to achieve the desired consistency.
3. Ice Cream is Too Soft or Runny: If the ice cream is too soft or runny, it might not have been churned long enough or the freezer temperature is too high. Increase the churning time or adjust the freezer temperature to achieve a firmer texture.
4. Motor Stops During Churning: If the motor stops during the churning process, check if the ice cream mixture is too thick or overloaded. The machine may have a safety feature that automatically shuts off the motor to prevent damage. If this happens, remove some of the mixture and restart the churning process.
5. Excessive Ice Cream Buildup: If you notice excessive ice cream buildup on the sides of the canister or the paddle, stop the machine and scrape down the sides to incorporate the mixture more evenly. This will help prevent uneven freezing and ensure a consistent texture.
By following these tips and troubleshooting techniques, you’ll have a better understanding of how to create delicious homemade ice cream using the Nostalgia Ice Cream Maker. Now it’s time to indulge in your frozen creations and enjoy the sweet rewards of your efforts!
Conclusion
Congratulations! You have now gained a comprehensive understanding of how to use the Nostalgia Ice Cream Maker to create homemade ice cream that will wow your friends and family. With its user-friendly design and customizable options, this machine allows you to unleash your creativity and experiment with a variety of flavors and mix-ins.
By following the steps outlined in this guide, you’ll be well-equipped to unbox and assemble your Nostalgia Ice Cream Maker, prepare the ingredients, add mix-ins and flavors, and properly freeze and churn your ice cream to a delectable consistency. Remember to take the time to read the user manual and follow the manufacturer’s instructions to ensure seamless operation.
As you embark on your ice cream-making journey, don’t be afraid to get creative and try new flavor combinations. From classic vanilla and chocolate to unique creations like caramel pretzel swirl or mixed berry delight, the possibilities are endless. By using high-quality ingredients, chilling them properly, and anticipating flavor infusion, you’ll achieve exceptional results that rival the ice cream shops.
Remember to also maintain and clean your Nostalgia Ice Cream Maker to keep it in optimal condition for future use. By following the recommended cleaning and maintenance steps, you’ll be able to enjoy many delicious batches of homemade ice cream for years to come.
Whether you’re making ice cream for special occasions, gatherings, or simply treating yourself to a sweet indulgence, the Nostalgia Ice Cream Maker will be your trusted companion. So gather your ingredients, unleash your creativity, and let the Nostalgia Ice Cream Maker take you on a journey of icy delights.
Now it’s time to dive in and create your own frozen masterpieces. Get ready to savor every creamy spoonful and revel in the joy of homemade ice cream. So gather your loved ones, fire up the Nostalgia Ice Cream Maker, and let the ice cream party begin!
Frequently Asked Questions about How To Use The Nostalgia Ice Cream Maker
Was this page helpful?
At Storables.com, we guarantee accurate and reliable information. Our content, validated by Expert Board Contributors, is crafted following stringent Editorial Policies. We're committed to providing you with well-researched, expert-backed insights for all your informational needs.
0 thoughts on “How To Use The Nostalgia Ice Cream Maker”