Articles
How To Use Hamilton Beach Ice Cream Maker
Modified: August 24, 2024
Learn how to make delicious homemade ice cream with the Hamilton Beach Ice Cream Maker. Follow our step-by-step articles for the best results.
(Many of the links in this article redirect to a specific reviewed product. Your purchase of these products through affiliate links helps to generate commission for Storables.com, at no extra cost. Learn more)
Introduction
Welcome to the world of homemade ice cream! There’s nothing quite like the creamy, indulgent goodness of a freshly made batch of ice cream, and with the help of the Hamilton Beach Ice Cream Maker, you can enjoy this frozen treat anytime you want. Whether you’re a novice or an experienced ice cream maker, this article will guide you through the process of using the Hamilton Beach Ice Cream Maker to create delicious and customized ice cream flavors.
There’s something magical about making your own ice cream. It allows you to experiment with different flavors, textures, and mix-ins, giving you the freedom to create desserts that cater to your taste buds. With the Hamilton Beach Ice Cream Maker, you can bring your ice cream visions to life with ease.
Before we dive into the details of using the Hamilton Beach Ice Cream Maker, let’s take a moment to understand why choosing the right ice cream maker is important. Selecting the right machine will ensure that you achieve the perfect consistency and texture in your ice cream, making each scoop a delight to savor.
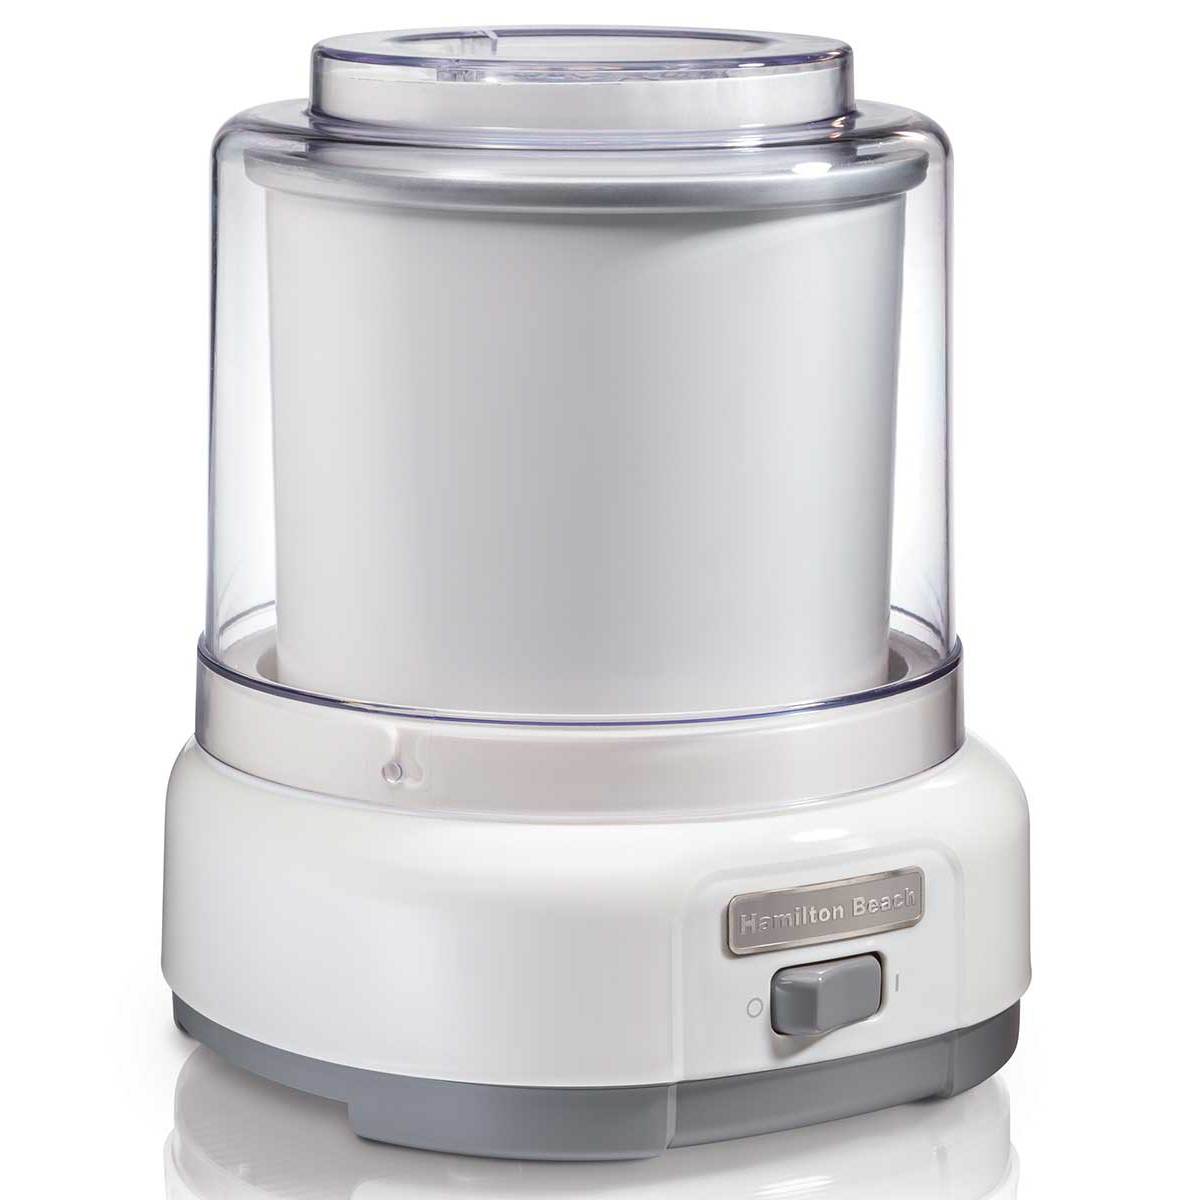
The Hamilton Beach Ice Cream Maker is a popular choice among ice cream enthusiasts for a variety of reasons. It offers simplicity, efficiency, and affordability, making it an ideal option for both beginners and experienced users. With its user-friendly design and powerful motor, the Hamilton Beach Ice Cream Maker takes the hassle out of homemade ice cream, allowing you to focus on the creative process of concocting your favorite flavors.
In the next sections, we will walk you through the step-by-step process of using the Hamilton Beach Ice Cream Maker, from preparing the machine to serving and storing your delicious creations. So get ready to embark on a delectable journey filled with delightful flavors and sweet satisfaction!
Key Takeaways:
- Indulge in the Joy of Homemade Ice Cream
Unleash your creativity with the Hamilton Beach Ice Cream Maker to craft personalized flavors and textures, and savor the satisfaction of enjoying your own delectable frozen creations. - Master the Art of Ice Cream Making
With the Hamilton Beach Ice Cream Maker, you can effortlessly create creamy, dreamy ice cream at home, perfecting your skills and delighting in the endless possibilities of unique flavors and mix-ins.
Read also: 12 Best Hamilton Beach Ice Maker for 2025
Choosing the Right Ice Cream Maker
When it comes to making homemade ice cream, having the right ice cream maker can make all the difference. There are numerous options available on the market, but the Hamilton Beach Ice Cream Maker stands out for its performance, affordability, and ease of use.
Before purchasing an ice cream maker, there are a few factors to consider. First and foremost, you need to decide between a manual or electric ice cream maker. Manual models require manual churning, while electric models do the work for you. The Hamilton Beach Ice Cream Maker is an electric model, making it effortless to churn your favorite frozen treats.
Another important consideration is the capacity of the ice cream maker. The Hamilton Beach Ice Cream Maker has a generous capacity, allowing you to make up to 4 quarts of ice cream, perfect for large gatherings or indulging in multiple flavors.
One of the standout features of the Hamilton Beach Ice Cream Maker is the ease of use. It features a simple design with a convenient on/off switch and a clear lid that allows you to monitor the churning process. Additionally, the machine comes with a handy recipe booklet that provides inspiration for a variety of ice cream flavors.
Another factor to keep in mind when choosing an ice cream maker is the freezing time. Some machines require pre-freezing the bowl for a certain period of time before you can start churning your ice cream. However, the Hamilton Beach Ice Cream Maker eliminates the need for pre-freezing. It uses a powerful motor and a built-in freezer that ensures quick and efficient freezing of your ice cream mixture.
Cost is also an important consideration for many aspiring ice cream makers. The Hamilton Beach Ice Cream Maker is an affordable option compared to other high-end models on the market. It provides excellent value for money without compromising on quality or performance.
Ultimately, the decision of which ice cream maker to choose depends on your personal preferences and requirements. However, the Hamilton Beach Ice Cream Maker offers a compelling combination of ease of use, capacity, and affordability that makes it a top choice for ice cream enthusiasts.
Now that you have a better understanding of what to look for in an ice cream maker, the next step is to get your Hamilton Beach Ice Cream Maker ready for ice cream-making adventures. In the following sections, we will guide you through the necessary steps to prepare your machine and gather all the ingredients and equipment you need to create delectable ice cream flavors.
Preparing the Ice Cream Maker
Before you begin making your homemade ice cream with the Hamilton Beach Ice Cream Maker, it’s crucial to properly prepare the machine to ensure optimal results. Here’s a step-by-step guide to prepare your ice cream maker:
- Clean the Machine: Before using the ice cream maker for the first time, make sure to clean all the removable parts, such as the freezer bowl and mixing paddle, with warm soapy water. Rinse them thoroughly and dry them completely.
- Freeze the Freezer Bowl: To freeze the freezer bowl, place it in the coldest part of your freezer. It’s essential to allow enough time for the bowl to freeze completely. Generally, it’s recommended to freeze the bowl for at least 8-12 hours or overnight to ensure optimal freezing of your ice cream mixture.
- Assemble the Machine: Once the freezer bowl is fully frozen, it’s time to assemble the ice cream maker. Place the freezing bowl onto the motor base, ensuring that it locks into place securely. Then, insert the mixing paddle into the bowl, making sure it fits snugly. Finally, place the clear lid on top.
- Position the Ice Cream Maker: Find a sturdy and level surface in your kitchen to position the ice cream maker. Make sure there is enough clearance around the machine for proper ventilation and airflow.
- Double-Check the Machine: Take a moment to double-check that all the components are properly assembled and securely in place. This will help prevent any mishaps or leaks during the freezing and churning process.
Once you have completed these steps, your Hamilton Beach Ice Cream Maker will be ready for action. It’s important to note that the freezing bowl needs to be fully frozen before you can start making ice cream. Plan your ice cream-making adventures accordingly to ensure that the freezer bowl has ample time to freeze.
Now that your ice cream maker is prepared, it’s time to gather all the necessary ingredients and equipment to create a creamy and delicious ice cream base. The next section will guide you through the process of selecting the right ingredients and equipment for your homemade ice cream.
Gathering Ingredients and Equipment
When it comes to making homemade ice cream, having the right ingredients and equipment is key to achieving the perfect balance of flavor and texture. Here’s a guide to help you gather everything you need:
Ingredients:
The beauty of homemade ice cream is that you can customize the flavors according to your preferences. However, there are a few staple ingredients that are commonly used in most ice cream recipes:
- Milk: Whole milk is typically used as the base for ice cream, but you can also use low-fat or non-dairy alternatives like almond milk or coconut milk.
- Heavy Cream: Heavy cream adds richness and creaminess to the ice cream. It’s recommended to use at least 35% fat content cream for the best results.
- Sugar: Sugar sweetens the ice cream base. You can use granulated sugar, brown sugar, or a combination of both, depending on your preference.
- Eggs: Some ice cream recipes call for eggs, specifically egg yolks, to add a custard-like consistency and richness to the ice cream.
- Flavorings: This is where you can get creative! Add your favorite extracts, such as vanilla, chocolate, or fruit flavors, to enhance the overall taste of the ice cream.
- Mix-Ins: Chunks of chocolate, nuts, fruit, or cookies can be added to the ice cream base to create unique flavor combinations and add extra texture.
Read more: How To Use The Kitchenaid Ice Cream Maker
Equipment:
In addition to the ingredients, you will also need the following equipment to make ice cream with your Hamilton Beach Ice Cream Maker:
- Hamilton Beach Ice Cream Maker: Of course, you already have this fantastic machine! Make sure it is clean and assembled as per the instructions provided in the previous section.
- Freezer-Safe Container: Once the ice cream is ready, you will need a container to store it in. Choose a container that is freezer-safe and has a tight-fitting lid to prevent ice crystals from forming.
- Measuring Cups and Spoons: Accurate measurements are crucial in ice cream making. Use measuring cups and spoons to ensure you add the right amount of ingredients.
- Mixing Bowl and Whisk: Depending on your recipe, you may need a separate mixing bowl and whisk to combine the ingredients before pouring them into the ice cream maker.
- Spatula: A spatula will come in handy to scrape down the sides of your mixing bowl and ensure all the ingredients are well incorporated.
- Ice Cream Scoop: Finally, you’ll need an ice cream scoop to serve up perfect scoops of your homemade ice cream.
With all the ingredients and equipment gathered, you’re well on your way to creating delicious ice cream flavors using your Hamilton Beach Ice Cream Maker. In the next section, we will dive into the process of making the ice cream base and getting it ready for churning and freezing.
Making the Ice Cream Base
Now that you have all the necessary ingredients and equipment ready, it’s time to create the ice cream base. The base serves as the foundation of your ice cream and determines its flavor and texture. Here’s a step-by-step guide on how to make the perfect ice cream base:
1. Measure the Ingredients:
Start by measuring the required amount of milk, heavy cream, sugar, and any additional flavorings according to your chosen recipe. Accurate measurements are important to ensure the right balance of sweetness and creaminess in your ice cream.
2. Combine the Ingredients:
In a mixing bowl, whisk together the milk, heavy cream, and sugar until the sugar is completely dissolved. If you’re using any flavorings or extracts, add them to the mixture and continue whisking until well combined.
Read more: How To Use Ninja Ice Cream Maker
3. Optional: Prepare the Egg Custard Base:
If your recipe calls for an egg custard base, you will need to temper the egg yolks. In a separate bowl, whisk the egg yolks until smooth. Gradually pour a small amount of the warm milk mixture into the egg yolks, whisking constantly. This process ensures that the eggs are slowly brought up to temperature without scrambling them. Once tempered, pour the egg mixture back into the remaining milk mixture and continue whisking.
4. Cook the Mixture (If Required):
If your recipe calls for cooking the ice cream base, transfer the mixture to a saucepan. Heat the mixture over medium-low heat, stirring constantly, until it thickens slightly and coats the back of a spoon. Be careful not to let the mixture boil, as it can curdle and affect the texture of the ice cream.
5. Chill the Ice Cream Base:
Once the mixture is fully combined and cooked (if required), cover the bowl with plastic wrap, ensuring it touches the surface of the mixture to prevent a skin from forming. Refrigerate the mixture for a minimum of 4 hours or preferably overnight. Chilling the base thoroughly allows the flavors to meld and the mixture to fully cool, resulting in a smoother ice cream texture.
6. Ready for Churning:
After the ice cream base has been chilled, it’s ready to be poured into the Hamilton Beach Ice Cream Maker for churning. Remove the freezer bowl from the freezer and assemble it onto the motor base. Turn on the machine and pour the chilled ice cream base into the freezer bowl through the opening on the lid.
Now that your ice cream base is in the machine, it’s time to churn and freeze it into creamy perfection. In the following section, we will guide you through the process of churning and freezing the ice cream using the Hamilton Beach Ice Cream Maker.
Read more: How To Use Whynter Ice Cream Maker
Churning and Freezing the Ice Cream
Now comes the exciting part – churning and freezing the ice cream using your Hamilton Beach Ice Cream Maker. This process involves the transformation of the liquid ice cream base into a creamy frozen treat. Here’s a step-by-step guide on how to churn and freeze your ice cream:
1. Assemble the Ice Cream Maker:
Ensure that the Hamilton Beach Ice Cream Maker is properly assembled and the freezer bowl is securely locked into place on the motor base. Double-check that the mixing paddle is inserted correctly and the clear lid is placed on top.
2. Start the Machine:
Turn on the ice cream maker using the on/off switch. The machine will begin churning the ice cream base and freezing it simultaneously.
3. Churning Time:
The churning time can vary depending on the recipe and desired consistency. It typically takes around 20-40 minutes for the ice cream to reach a soft-serve consistency. However, it’s important to follow the specific instructions provided in your recipe.
Read more: How To Use Koji Ice Cream Maker
4. Monitor the Churning Process:
Throughout the churning process, periodically check on the ice cream’s consistency. You can do this by lifting the clear lid and using a spatula or spoon to scrape down the sides of the freezer bowl. This helps incorporate any ice crystals and ensures even freezing.
5. Desired Consistency:
When the ice cream reaches your desired consistency, it’s time to stop the machine. The ice cream should be thick, smooth, and resemble soft-serve ice cream. It will continue to firm up during the freezing process.
6. Transfer and Freeze:
Once the churning is complete, promptly transfer the churned ice cream into a freezer-safe container using a spatula or ice cream scoop. Ensure that the container is sealed tightly to prevent any ice crystals from forming. Place the container in the freezer and allow the ice cream to freeze for at least 4-6 hours or until it reaches a firm and scoopable texture.
Now that your ice cream is chilling in the freezer and getting ready to be devoured, you can take a moment to get creative with mix-ins and flavors. In the next section, we will explore different mix-ins and flavors you can add to elevate your homemade ice cream.
Adding Mix-Ins and Flavors
Now that you have successfully churned and frozen your ice cream using the Hamilton Beach Ice Cream Maker, it’s time to take it to the next level by adding mix-ins and flavors. This step allows you to create unique and personalized ice cream creations. Here’s a guide on how to add mix-ins and flavors to your homemade ice cream:
Read more: How To Use An Ice Cream Maker
1. Choose Your Mix-Ins:
Start by selecting your favorite mix-ins to add texture and flavor to your ice cream. Some popular choices include chocolate chips, crushed cookies, nuts, fruit pieces, caramel swirls, or even chunks of candy bars. Get creative and experiment with different combinations to find your perfect mix!
2. Prepare the Mix-Ins:
If your mix-ins require preparation, such as chopping nuts or melting chocolate, make sure to do this beforehand. Having your mix-ins ready will streamline the process when it comes time to add them to your ice cream.
3. Soften the Ice Cream:
Before adding the mix-ins, remove the ice cream from the freezer and let it sit at room temperature for a few minutes to soften slightly. This will make it easier to incorporate the mix-ins evenly without causing the ice cream to melt too much.
4. Add the Mix-Ins:
Once the ice cream has softened, add your desired mix-ins to the churned ice cream. Sprinkle them evenly over the mixture and use a spatula or spoon to gently fold them in. Be careful not to overmix, as you want to maintain the integrity of the mix-ins within the ice cream.
Read more: How To Use An Old Fashioned Ice Cream Maker
5. Return to the Freezer:
After incorporating the mix-ins, transfer the ice cream back into the freezer container. Smooth it out with a spatula, ensuring that the mix-ins are distributed evenly throughout the ice cream. Seal the container tightly, and return it to the freezer for a few more hours to allow the flavors to meld and the ice cream to fully freeze.
Adding mix-ins and flavors to your homemade ice cream is a fun and creative process that allows you to tailor your desserts to your liking. Once your ice cream has fully frozen, it’s time to serve and savor the fruits of your labor. In the next section, we will explore serving suggestions and tips for storing your homemade ice cream.
Serving and Storing the Ice Cream
Congratulations on successfully making your homemade ice cream using the Hamilton Beach Ice Cream Maker! Now it’s time to enjoy the fruits of your labor by serving and savoring your delicious frozen creation. Here are some serving suggestions and tips for storing your homemade ice cream:
Serving Suggestions:
When it comes to serving your homemade ice cream, let your creativity shine. Here are a few ideas to make your ice cream experience even more enjoyable:
- Scoop into Bowls or Cones: Use an ice cream scoop to portion out your ice cream into bowls or onto cones. This classic method is perfect for a no-frills ice cream treat.
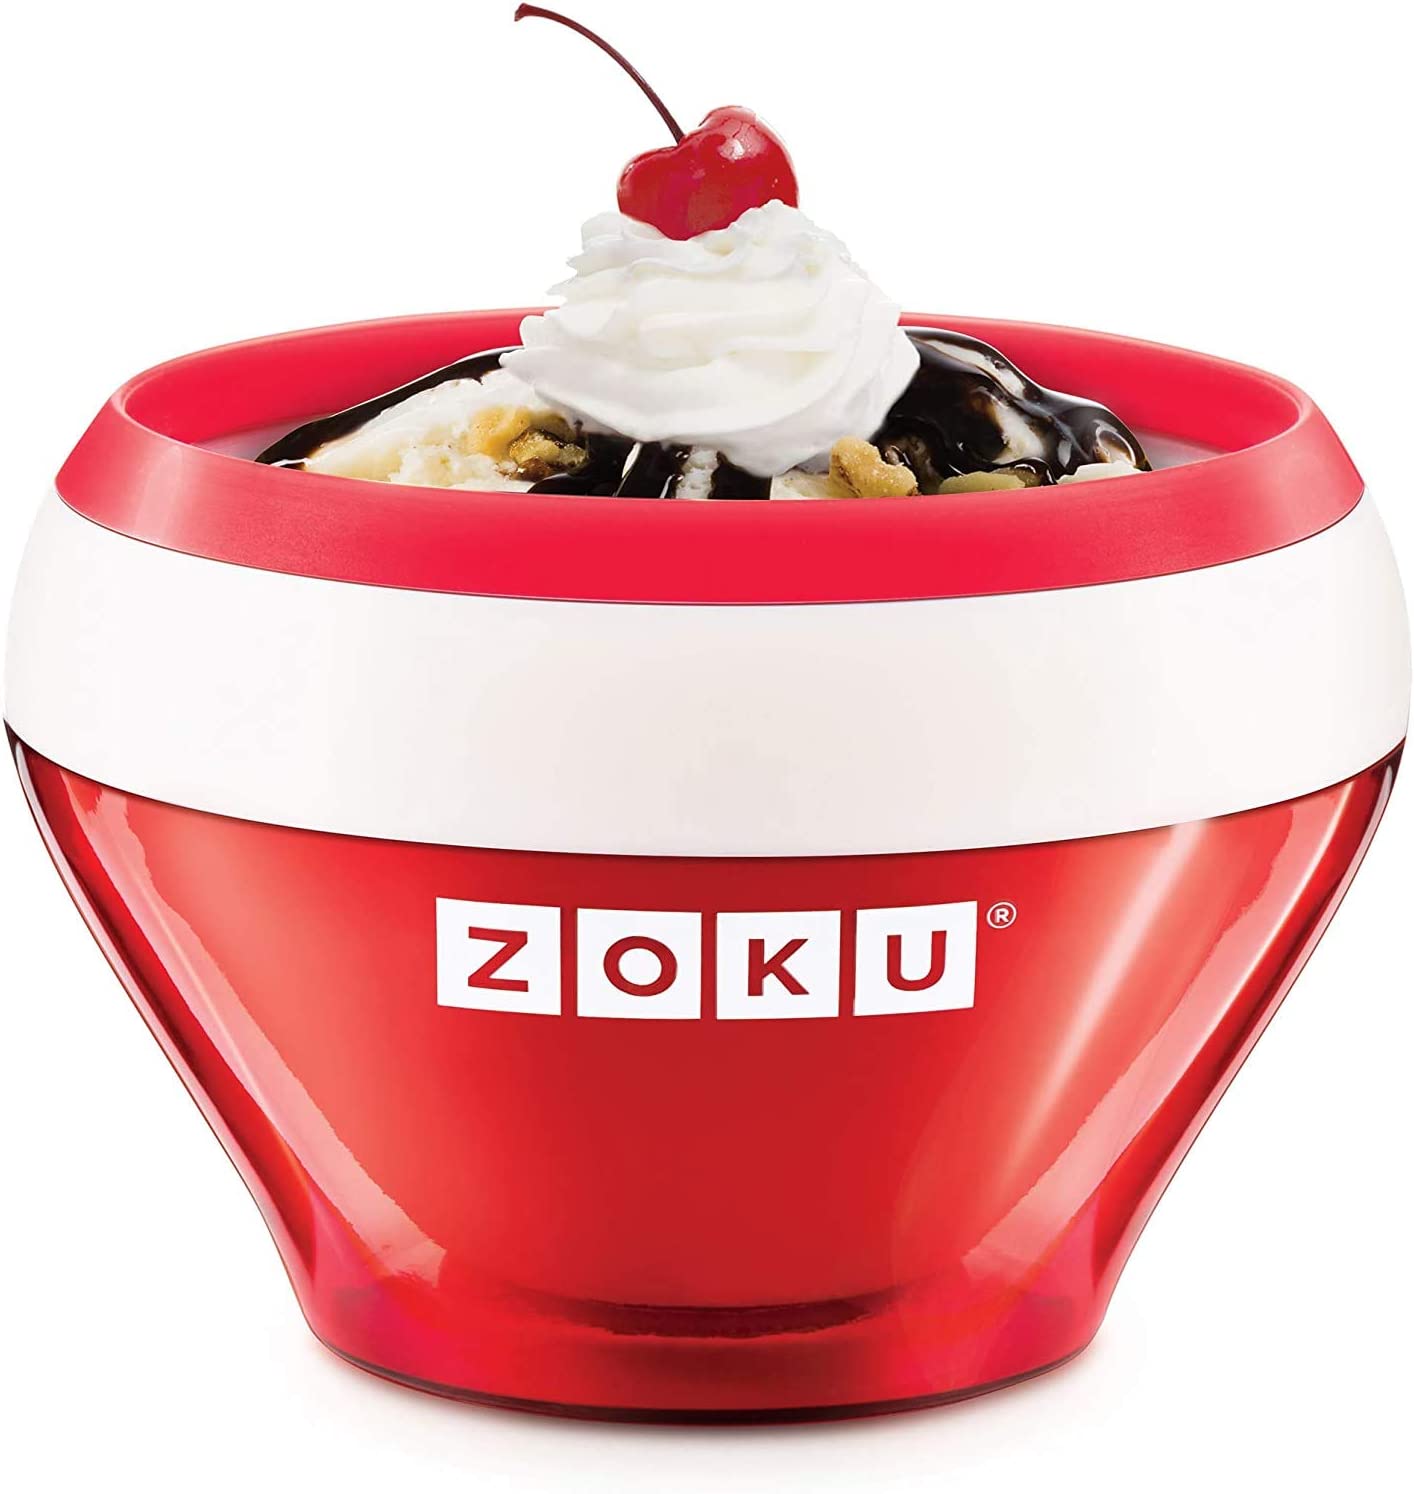
- Create an Ice Cream Sundae: Turn your ice cream into a decadent sundae by adding your favorite toppings, such as chocolate syrup, whipped cream, nuts, sprinkles, or a cherry on top.
- Make Ice Cream Sandwiches: Sandwich your ice cream between two cookies or wafers to create a delightful frozen treat.
- Blend into Milkshakes: Take your ice cream to the next level by blending it into a creamy milkshake. Simply combine your ice cream with milk and any desired flavorings in a blender until smooth and frothy.
- Experiment with Ice Cream Floats: Combine your ice cream with a fizzy soda for a refreshing and bubbly ice cream float.
Storing Tips:
To maintain the quality and freshness of your homemade ice cream, it’s important to store it properly. Here are some tips for storing your ice cream:
- Use an Airtight Container: Transfer the fully frozen ice cream into an airtight container with a tight-fitting lid. This helps prevent the formation of ice crystals and keeps the ice cream fresh for longer.
- Store in the Freezer: Place the container of ice cream in the coldest part of your freezer to ensure optimal freezing and preservation. Avoid storing the ice cream in the freezer door, as the temperature may fluctuate more frequently.
- Label and Date the Container: To keep track of the different flavors and ensure you consume the ice cream within its peak freshness, label the container with the flavor and date of preparation.
- Consume Within a Few Weeks: While homemade ice cream can be stored for longer periods, it’s best enjoyed within a few weeks to maintain its quality and taste.
- Allow Time to Soften: If the ice cream becomes too hard in the freezer, let it sit at room temperature for a few minutes to soften before serving.
With these serving suggestions and storing tips in mind, you can now enjoy your homemade ice cream whenever the craving strikes. Whether you choose to savor it on its own or dress it up with various toppings, your homemade ice cream is sure to delight your taste buds. In the next section, we’ll provide some troubleshooting tips to address common issues that may arise during the ice cream-making process.
Read more: How To Use A Hamilton Beach Blender
Troubleshooting Tips
While making homemade ice cream can be a delightful experience, it’s not uncommon to encounter a few challenges along the way. Here are some troubleshooting tips to help address common issues that may arise during the ice cream-making process:
Ice Cream Is Too Soft or Melts Quickly:
- Ensure that the freezer bowl is fully frozen before starting the churning process. The bowl should be frozen for a minimum of 8-12 hours, or as recommended in your specific ice cream maker’s instructions.
- Ensure that the ice cream base is thoroughly chilled before churning. Refrigerate it for at least 4 hours or preferably overnight to ensure it’s properly cold.
- Avoid adding warm mix-ins or flavors to the churned ice cream, as they can cause the ice cream to melt faster. Make sure any mix-ins are fully chilled before folding them into the ice cream.
- Churn the ice cream for the recommended amount of time. Over-churning can incorporate too much air and result in a soft texture.
- Store the fully frozen ice cream in the coldest part of your freezer to help maintain its consistency.
Ice Crystals Formed in the Ice Cream:
- Ensure that the ice cream base is well-mixed and no clumps of ingredients remain before chilling and churning. Properly dissolving the sugar and incorporating other ingredients helps prevent the formation of ice crystals.
- Avoid introducing excess air into the ice cream by minimizing the time spent stirring or adding mix-ins during the churning process.
- Store the ice cream in an airtight container to prevent exposure to air, which can contribute to ice crystal formation.
- When serving the ice cream, allow it to slightly soften at room temperature for a few minutes before scooping. This can help reduce the presence of ice crystals.
Ice Cream is Too Firm or Hard:
- If the ice cream is too firm or hard, it may have been over-frozen. Follow the recommended freezing time provided in your specific ice cream maker’s instructions, and avoid leaving it in the freezer for an extended period.
- Allow the ice cream to soften at room temperature for a few minutes before serving to achieve a smoother texture.
Read more: How To Use The Nostalgia Ice Cream Maker
Ice Cream Has a Grainy Texture:
- Ensure that the sugar and other ingredients are fully dissolved in the ice cream base before chilling and churning. Undissolved sugar can result in a grainy texture.
- When cooking the ice cream base, make sure to heat it gently and avoid boiling, as this can lead to a grainy consistency.
- When adding mix-ins, use ingredients that are properly prepared and finely chopped to ensure they blend smoothly into the ice cream.
- Strain the ice cream base before chilling and churning to remove any lumps or clumps that could contribute to a grainy texture.
By following these troubleshooting tips, you can address common issues and improve your homemade ice cream-making process. Don’t be discouraged if you encounter a challenge along the way – with a little practice and experimentation, you’ll soon be churning out perfectly creamy and delicious ice cream with your trusty Hamilton Beach Ice Cream Maker.
Now it’s time to put your newfound knowledge and skills into action. Gather your ingredients, fire up your Hamilton Beach Ice Cream Maker, and let your creativity shine with unique flavors and mix-ins. Enjoy the satisfaction and joy of indulging in your own homemade ice cream creations!
Conclusion
Congratulations! You’ve reached the end of this comprehensive guide on using the Hamilton Beach Ice Cream Maker to create delicious homemade ice cream. We hope this article has provided you with the knowledge and confidence to embark on your ice cream-making journey and indulge in the delightful flavors that await you.
The Hamilton Beach Ice Cream Maker offers a user-friendly and efficient way to make your favorite frozen treats right at home. With its powerful motor, simple assembly, and generous capacity, it makes the process of creating homemade ice cream a breeze. From classic flavors like vanilla and chocolate to unique combinations with mix-ins and flavors, the possibilities are endless.
Remember to choose high-quality ingredients, accurately measure your ingredients, and properly prepare your ice cream base before churning. Pay attention to the churning and freezing times to achieve the desired consistency and texture. And don’t forget to have fun and experiment with different flavors, mix-ins, and serving suggestions to make your ice cream truly your own.
Should you encounter any challenges along the way, refer back to our troubleshooting tips to address common issues and perfect your ice cream-making skills. With practice and a little creativity, you’ll be well on your way to creating silky-smooth, creamy, and irresistible ice cream right in your own kitchen.
So, what are you waiting for? Grab your Hamilton Beach Ice Cream Maker, gather your ingredients, and let your imagination run wild. Enjoy the sweet rewards of your homemade ice cream, and share the joy with family and friends. Happy ice cream-making!
Frequently Asked Questions about How To Use Hamilton Beach Ice Cream Maker
Was this page helpful?
At Storables.com, we guarantee accurate and reliable information. Our content, validated by Expert Board Contributors, is crafted following stringent Editorial Policies. We're committed to providing you with well-researched, expert-backed insights for all your informational needs.


0 thoughts on “How To Use Hamilton Beach Ice Cream Maker”