Articles
How To Use Koji Ice Cream Maker
Modified: January 5, 2024
Learn how to use the Koji Ice Cream Maker with our comprehensive articles. Master the art of making delicious homemade ice cream.
(Many of the links in this article redirect to a specific reviewed product. Your purchase of these products through affiliate links helps to generate commission for Storables.com, at no extra cost. Learn more)
Introduction
Welcome to the wonderful world of homemade ice cream! If you’re a true ice cream lover, then you know there’s nothing quite like indulging in a scoop of creamy, delicious ice cream on a hot summer day (or any day, really!). While store-bought ice cream is convenient, there’s something special about making your own batch of ice cream from scratch.
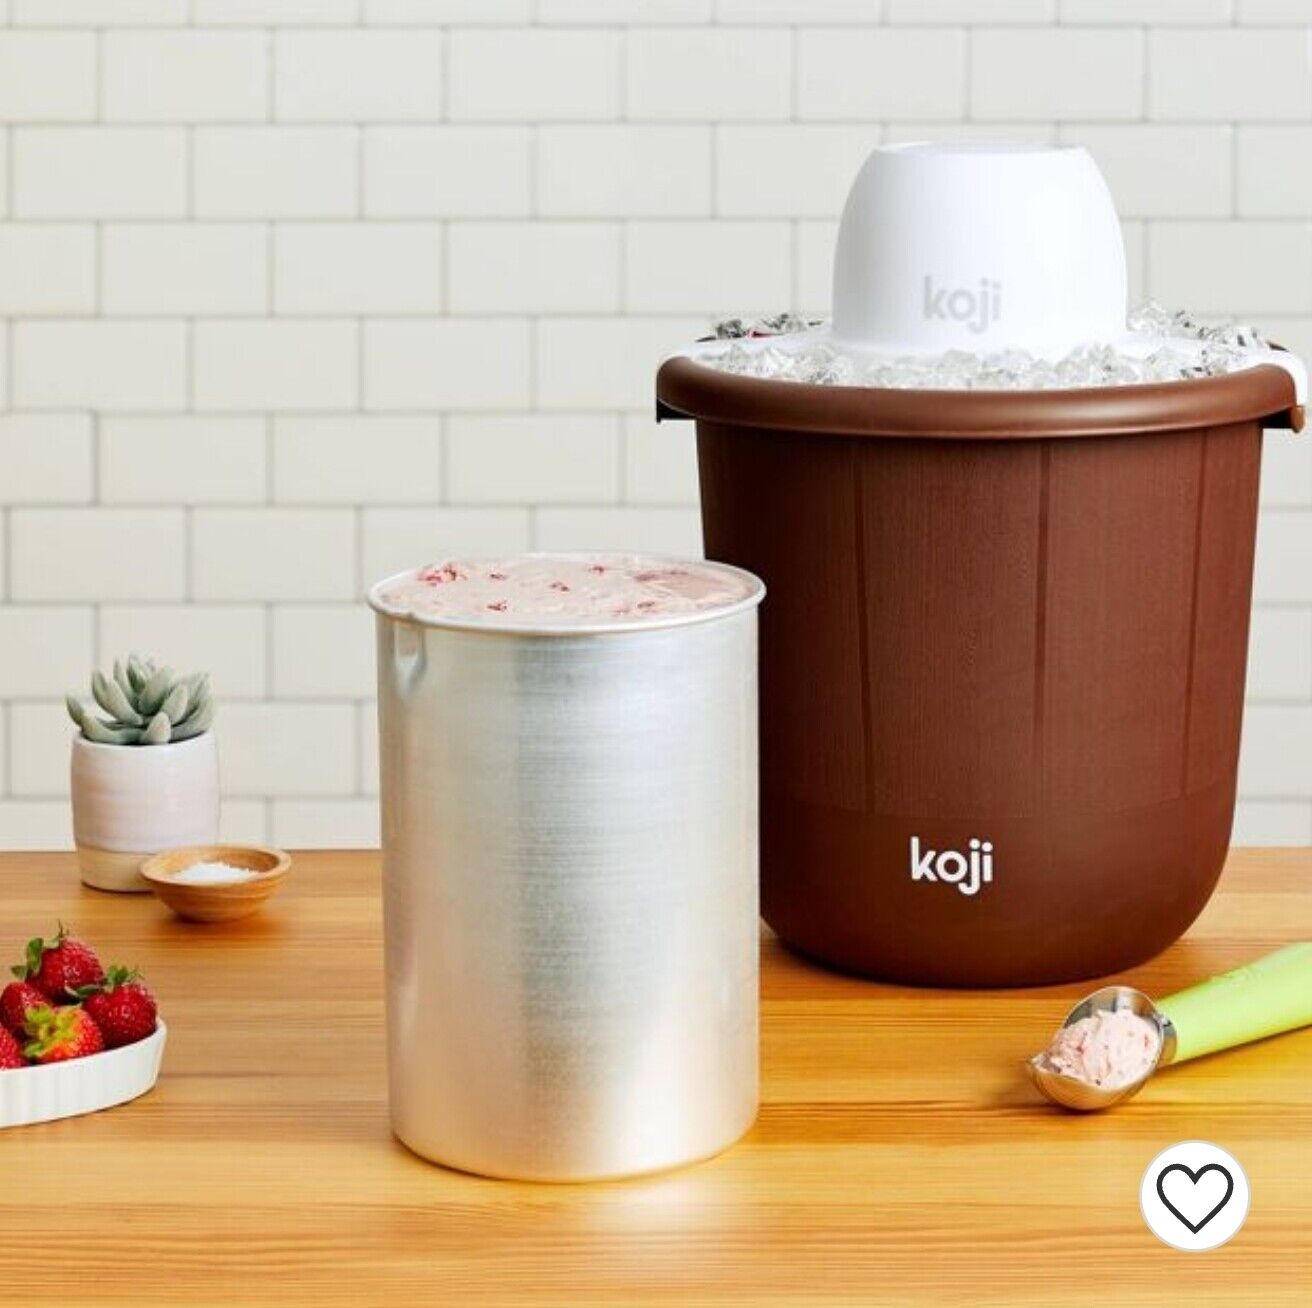
Enter the Koji Ice Cream Maker – your ticket to homemade ice cream perfection. This innovative machine allows you to create your favorite frozen treats right in the comfort of your own kitchen. With its user-friendly design and versatile features, the Koji Ice Cream Maker is a must-have for any ice cream enthusiast.
In this article, we’ll take you through the ins and outs of using the Koji Ice Cream Maker. From getting started and preparing your ingredients to making delicious ice cream and adding creative toppings, we’ll cover it all. So, strap on your apron and get ready to embark on a tasty ice cream-making journey!
Before we dive into the step-by-step process of using the Koji Ice Cream Maker, let’s first explore what comes in the box and how to set up your ice cream maker.
Key Takeaways:
- Unleash Your Creativity: The Koji Ice Cream Maker is your ticket to crafting delicious homemade ice cream with endless flavor combinations and mix-ins. Get ready to indulge in a world of frozen delights right in your own kitchen!
- Troubleshooting Tips: Overcome common challenges with ease using our expert tips for ensuring your Koji Ice Cream Maker produces perfect batches of creamy, smooth ice cream every time. Enjoy a hassle-free ice cream-making experience!
Read more: How To Use The Kitchenaid Ice Cream Maker
Getting Started
Before you can start churning out delicious ice cream, you’ll need to unbox your Koji Ice Cream Maker and familiarize yourself with its components. Here’s a step-by-step guide to get you started:
1. Unboxing the Koji Ice Cream Maker:
Start by carefully removing the Koji Ice Cream Maker from its packaging. Check for any visible damage or missing components. It’s always a good idea to read the user manual that comes with the product for any specific instructions or safety precautions.
2. Understanding the components:
The Koji Ice Cream Maker consists of several key components that work together to create creamy ice cream. These may include:
- The main unit: This is the base of the ice cream maker that houses the motor and controls.
- The freezing bowl: This is the removable bowl that you’ll need to pre-freeze before making ice cream.
- The paddle: This is the mixing paddle that churns the ice cream mixture to the desired consistency.
- The lid: This covers the freezing bowl and prevents any ice crystals from forming during the churning process.
Take a moment to familiarize yourself with these components and understand how they fit together. Ensure that all the components are clean and dry before setting up the ice cream maker.
3. Setting up the ice cream maker:
Now that you have a good grasp of the components, it’s time to set up the Koji Ice Cream Maker for use:
- Place the freezing bowl in the freezer for the recommended amount of time, as specified in the user manual. This step is crucial as the frozen bowl is essential for proper ice cream making.
- Once the bowl is frozen, remove it from the freezer and insert the mixing paddle into the bowl. Ensure that the paddle is securely fitted to avoid any mishaps during the churning process.
- Place the freezing bowl with the paddle securely attached onto the main unit of the Koji Ice Cream Maker.
- Finally, carefully place the lid on top of the freezing bowl. Ensure that it is properly aligned and securely fitted.
Congratulations! You have successfully unboxed the Koji Ice Cream Maker, understood its components, and set it up for use. Now you’re ready to move on to the next step: preparing the ingredients for your homemade ice cream.
Preparing the Ingredients
When it comes to making ice cream with the Koji Ice Cream Maker, the key to delicious and flavorful creations lies in choosing the right ingredients. Here’s how to prepare your ingredients for a mouthwatering batch of homemade ice cream:
1. Choosing the base ingredients:
The base ingredients form the foundation of your ice cream and give it its creamy texture. The most common base ingredients include:
- Heavy cream: This provides richness and creaminess to the ice cream.
- Whole milk: It helps to create a smooth and creamy texture.
- Sugar: Sweetens the ice cream and balances out the flavors.
- Eggs: Optional, but adding eggs gives the ice cream a custard-like consistency and enhances the richness.
Experiment with different ratios of these ingredients to achieve the desired level of creaminess and sweetness in your ice cream. You can also try using alternative milk options like almond milk or coconut milk for a dairy-free version.
2. Adding flavors and mix-ins:
Once you have your base ingredients ready, it’s time to unleash your creativity and add flavors and mix-ins to make your ice cream truly unique. Consider these options:
- Extracts and essences: Vanilla extract, almond extract, or mint extract can add a burst of flavor to your ice cream.
- Fruits: Fresh or frozen fruits like strawberries, blueberries, or peaches can be blended and added to the base for a fruity twist.
- Nuts and chocolates: Chopped nuts, such as almonds or pistachios, and chocolate chips or chunks can add a delightful crunch to your ice cream.
- Cookies and candies: Crushed cookies, like Oreos or graham crackers, and candies, such as M&M’s or caramel swirls, can provide a burst of sweetness and texture.
Feel free to mix and match different flavors and mix-ins to create your own signature ice cream flavors. The possibilities are endless!
Now that you have your ingredients ready, it’s time to move on to the exciting part – making the ice cream using the Koji Ice Cream Maker!
Making Ice Cream
Now that you have your ingredients prepared, it’s time to dive into the process of making ice cream with the Koji Ice Cream Maker. Follow these steps to create a creamy and delectable batch of homemade ice cream:
1. Assembling the ice cream maker:
Before you begin, ensure that the freezing bowl has been properly frozen as per the manufacturer’s instructions. Take the freezing bowl out of the freezer and assemble it onto the main unit of the Koji Ice Cream Maker. Attach the mixing paddle securely onto the freezing bowl and place the lid on top.
2. Pouring in the ingredients:
Start by pouring your prepared ice cream mixture into the freezing bowl of the Koji Ice Cream Maker. Do not exceed the maximum fill line indicated on the bowl to prevent any overflow during the churning process. Make sure the lid is securely closed before proceeding to the next step.
3. Churning the ice cream:
Turn on the Koji Ice Cream Maker and set it to the desired churning speed, as suggested in the user manual or your recipe. The mixing paddle inside the freezing bowl will start rotating to incorporate air and freeze the mixture simultaneously. The churning time may vary depending on your recipe and desired consistency, but typically it takes around 20-30 minutes.
4. Monitoring the freezing process:
While the ice cream is churning, it’s important to periodically check on its progress. Peek through the transparent lid to observe the texture and consistency of the mixture. You should notice the transformation from a liquid to a thicker, creamy consistency as the freezing process takes place.
Make sure not to open the lid too frequently, as it may disrupt the freezing process and result in a softer ice cream texture. However, if you want to add mix-ins like nuts or candies, carefully add them during the last few minutes of churning.
Once the desired consistency is achieved, turn off the machine and remove the freezing bowl from the Koji Ice Cream Maker. You’ll be delighted to find a batch of homemade ice cream ready to be enjoyed!
Now that you have successfully made your own ice cream, let’s move on to the fun part – adding toppings and garnishes to elevate its taste and presentation.
When using a Koji ice cream maker, make sure to freeze the inner bowl for at least 24 hours before using it. This will ensure that your ice cream mixture freezes properly and results in a creamy texture.
Adding Toppings and Garnishes
No ice cream experience is complete without the perfect toppings and garnishes. They add an extra dimension of flavor, texture, and visual appeal to your homemade ice cream. Let’s explore some fantastic options to take your frozen treat to the next level:
1. Suggested toppings and garnishes:
– Hot fudge or caramel sauce: Drizzle a generous amount of warm fudge or caramel sauce over your ice cream to add a rich and gooey element.
– Fresh fruits: Top your ice cream with sliced strawberries, bananas, or raspberries to add a burst of freshness and natural sweetness.
– Whipped cream: A dollop of whipped cream is a classic choice that adds a light and airy texture to your ice cream.
– Sprinkles: Colorful sprinkles instantly add a playful touch and a crunchy texture to your ice cream.
– Nuts: Chop up some almonds, pecans, or walnuts and sprinkle them on top for a delightful crunch.
– Chocolate shavings: Use a grater or vegetable peeler to create delicate chocolate shavings that melt in your mouth.
2. Creative ice cream ideas:
– Sundae bar: Set up a build-your-own-sundae bar with various toppings and let everyone customize their ice cream creations.
– Cookie sandwich: Sandwich a scoop of ice cream between two freshly baked cookies for a delectable ice cream sandwich.
– Affogato: Pour a shot of hot espresso or strong coffee over a scoop of vanilla ice cream for a rich and indulgent treat.
– Ice cream floats: Combine your favorite soda or flavored sparkling water with a scoop of ice cream for a fizzy and refreshing beverage.
– S’mores ice cream: Mix in graham cracker pieces, chocolate chunks, and toasted marshmallows to recreate the classic campfire treat in ice cream form.
Feel free to let your imagination run wild and experiment with different combinations of toppings and garnishes. The possibilities are endless, allowing you to create truly unique and mouthwatering ice cream creations.
Now that we’ve covered toppings and garnishes, it’s important to know how to properly clean and maintain your Koji Ice Cream Maker for long-lasting enjoyment. Let’s explore that in the next section.
Read more: How To Use Ninja Ice Cream Maker
Cleaning and Maintenance
To ensure the longevity and optimal performance of your Koji Ice Cream Maker, proper cleaning and maintenance are essential. Follow these steps to keep your ice cream maker in top shape after every use:
1. Disassembling the ice cream maker:
Before cleaning, make sure to unplug the machine and allow it to cool down. Start by removing the lid from the freezing bowl. Then, carefully remove the freezing bowl from the main unit. Gently detach the mixing paddle from the bowl. Disassembling the ice cream maker makes it easier to clean each component thoroughly.
2. Cleaning the components:
Wash each component in warm soapy water using a mild detergent. Use a soft sponge or cloth to scrub away any residue or ice cream remnants. Pay extra attention to the freezing bowl, ensuring that it’s completely clean and free of any sticky spots. Rinse each component thoroughly with water to remove any soap residue.
3. Storing the ice cream maker properly:
Once cleaned and dried, store the Koji Ice Cream Maker in a cool and dry place. It’s recommended to keep the freezing bowl stored in the freezer so that it’s always ready for use. If you have limited space, make sure to protect the components from any potential damage or dust by covering them or placing them in an appropriate storage container.
Remember to check the manufacturer’s instructions or user manual for any specific cleaning recommendations or precautions for your specific model of the Koji Ice Cream Maker.
By following these simple cleaning and maintenance steps, you can ensure that your Koji Ice Cream Maker remains in excellent condition, ready to churn out delicious ice cream whenever your heart desires.
Now that you know how to keep your ice cream maker clean, let’s address some common troubleshooting issues you may encounter along the way.
Troubleshooting
While using the Koji Ice Cream Maker can be a delightful experience, you may encounter a few common issues along the way. Don’t worry – we’ve got you covered with some troubleshooting tips to help you overcome these challenges:
1. Issue: Ice cream mixture not freezing:
Solution: Ensure that the freezing bowl is properly frozen before use. Make sure to follow the recommended freezing time, as specified in the user manual. If the mixture is not freezing, check that the freezing bowl is securely attached to the main unit and that the lid is closed tightly. Additionally, double-check that the ice cream mixture is well-chilled before pouring it into the freezing bowl.
2. Issue: Ice cream mixture taking too long to freeze:
Solution: If the churning process seems to be taking longer than expected, check the ambient temperature of your kitchen. Higher temperatures can affect the freezing time. It’s also important to use the recommended ratios of ingredients, as excessive amounts of sugar or fat can slow down the freezing process. If necessary, consider placing the freezing bowl in the freezer for a longer period or adjusting the churning speed as per the instructions provided.
3. Issue: Ice cream texture too soft or icy:
Solution: If your ice cream turns out too soft or icy, it may be due to over-churning or under-churning. Follow the recommended churning time provided in your recipe or the user manual. Avoid opening the lid frequently during the churning process, as this can result in a softer texture. If the ice cream becomes too soft, transfer it to a lidded container and place it in the freezer for additional firming.
4. Issue: Motor or components not functioning:
Solution: If the motor or components are not functioning, double-check that the Koji Ice Cream Maker is properly plugged in and that the power source is working. Ensure that all the components are securely assembled and that the lid is closed tightly. If the issue persists, refer to the user manual for troubleshooting steps or contact the manufacturer for further assistance.
If you encounter any other issues or concerns with your Koji Ice Cream Maker, it’s always a good idea to consult the user manual or reach out to customer support for guidance. Troubleshooting is part of the learning process, and with time, you’ll become a pro at creating perfect batches of homemade ice cream.
Now that you have the troubleshooting tips in your arsenal, you’re equipped to overcome any challenges that may arise. Enjoy your ice cream making adventures with the Koji Ice Cream Maker!
With the knowledge of using the Koji Ice Cream Maker from start to finish, you can now confidently embark on your journey to creating delicious homemade ice cream. Whether you’re a novice or an ice cream aficionado, the Koji Ice Cream Maker is a fantastic tool to unleash your creativity and indulge in frozen delights.
So, grab your favorite ingredients, experiment with flavors, and have fun crafting your own unique ice cream creations. Happy churning!
Conclusion
Congratulations! You’ve reached the end of our guide on how to use the Koji Ice Cream Maker. We hope this article has provided you with valuable insights and inspiration to create delicious homemade ice cream right in your own kitchen.
By unboxing the Koji Ice Cream Maker and familiarizing yourself with its components, you’ve taken the first step towards your ice cream-making adventure. From choosing the perfect base ingredients to adding flavors and mix-ins, you’ve learned how to craft your own unique ice cream flavors.
With the step-by-step instructions on assembling the ice cream maker, pouring in the ingredients, churning the ice cream, and monitoring the freezing process, you now have the know-how to create perfectly creamy and smooth ice cream every time.
We’ve also provided suggestions for mouthwatering toppings and garnishes to elevate your ice cream game. From classic choices like whipped cream and hot fudge to more adventurous options like fresh fruits and cookies, the possibilities for personalizing your ice cream creations are endless.
Additionally, we covered the importance of proper cleaning and maintenance to keep your Koji Ice Cream Maker in optimal condition. By following the recommended steps, you can ensure that your machine lasts and continues to churn out delightful frozen treats for years to come.
If you run into any issues along the way, our troubleshooting tips are here to assist you. From dealing with a mixture that won’t freeze to achieving the desired texture, we’ve got you covered with solutions to common dilemmas.
Now armed with this knowledge, it’s time to unleash your creativity and enjoy the process of making your own homemade ice cream. Whether you prefer classic flavors or experimental combinations, the Koji Ice Cream Maker allows you to turn your culinary dreams into reality.
So, what are you waiting for? Let your taste buds guide you, experiment with different ingredients, and have fun on your ice cream-making journey. Get ready to indulge in the sweet satisfaction of homemade ice cream that will delight both your family and friends!
Frequently Asked Questions about How To Use Koji Ice Cream Maker
Was this page helpful?
At Storables.com, we guarantee accurate and reliable information. Our content, validated by Expert Board Contributors, is crafted following stringent Editorial Policies. We're committed to providing you with well-researched, expert-backed insights for all your informational needs.


0 thoughts on “How To Use Koji Ice Cream Maker”