Articles
How To Replace The Faucet On My Kegerator
Modified: August 26, 2024
Learn how to replace the faucet on your kegerator with our step-by-step articles. Upgrade your home bar experience today!
(Many of the links in this article redirect to a specific reviewed product. Your purchase of these products through affiliate links helps to generate commission for Storables.com, at no extra cost. Learn more)
Introduction
Having a kegerator in your home is a great way to enjoy a refreshing cold beer whenever you want. However, over time, the faucet on your kegerator may start to wear out or become clogged, affecting the taste and quality of the beer. In such cases, it is necessary to replace the faucet to ensure that you continue to have a reliable and efficient dispensing system.
In this article, we will guide you through the step-by-step process of replacing the faucet on your kegerator. Whether you are a DIY enthusiast or a beer lover looking to maintain your kegerator, this guide will provide you with the necessary knowledge and instructions to successfully replace the faucet.
Before we dive into the process, it is essential to gather the tools and supplies you will need. This will ensure that you have everything on hand to complete the task smoothly and efficiently.
Key Takeaways:
- Keep your kegerator in top condition by replacing the faucet with the right tools and proper installation. Enjoy a perfectly poured beer with a clean and efficient dispensing system.
- Regular maintenance and care are essential for a long-lasting and high-performing kegerator. Follow the steps to ensure optimal functionality and enjoy the convenience of having a kegerator at home.
Read more: How To Replace Sink Faucet
Step 1: Gathering the necessary tools and supplies
Before you begin replacing the faucet on your kegerator, it is important to gather all the necessary tools and supplies. This will ensure that you have everything you need to complete the task without any interruptions. Here is a list of the tools and supplies you’ll need:
- Adjustable wrench
- Allen wrench set
- Teflon tape
- New faucet
- Bucket or towel
- Cleaning solution (optional)
An adjustable wrench is essential for removing and installing the faucet. Make sure to choose one that fits the size of the nut on your kegerator. An Allen wrench set may also be required to disassemble certain parts of the faucet.
Teflon tape is a crucial component for creating a watertight seal. It is used to wrap around the threads of the keg faucet to prevent any leaks. You can find Teflon tape at your local hardware store or online.
It’s important to have a new faucet ready for installation. Make sure to purchase a faucet that is compatible with your kegerator model.
A bucket or towel will come in handy to catch any beer or water that may drip during the faucet replacement process. This will help keep the area clean and prevent any damage to your floor or countertop.
Lastly, if you find that your kegerator faucet is dirty or clogged, it may be beneficial to have a cleaning solution on hand to thoroughly clean the faucet and remove any build-up.
Now that you have all the necessary tools and supplies, you are ready to move on to the next step: turning off and disconnecting the kegerator.
Step 2: Turning off and disconnecting the kegerator
Before you begin replacing the faucet on your kegerator, it is important to turn off and disconnect the unit from its power source. This will ensure your safety during the process and prevent any accidental spills or damage to the kegerator. Follow these steps to turn off and disconnect your kegerator:
- Locate the power switch or control panel on your kegerator. It is usually located on the front or side of the unit.
- Switch off the power by either pressing the power button or turning the control knob to the “Off” position.
- Unplug the kegerator from the electrical outlet.
- If your kegerator has a CO2 tank, locate the CO2 regulator and turn it counterclockwise to shut off the gas supply.
- Once the power is off and the gas supply is shut off, allow the kegerator to sit for a few minutes to ensure that all pressure is released.
Disconnecting the kegerator from the power source and shutting off the gas supply is essential to ensure your safety and prevent any potential leaks or accidents. It is important to allow the kegerator to depressurize to avoid any mishaps during the faucet replacement process.
Now that your kegerator is safely turned off and disconnected, you can move on to the next step: removing the old faucet from the kegerator.
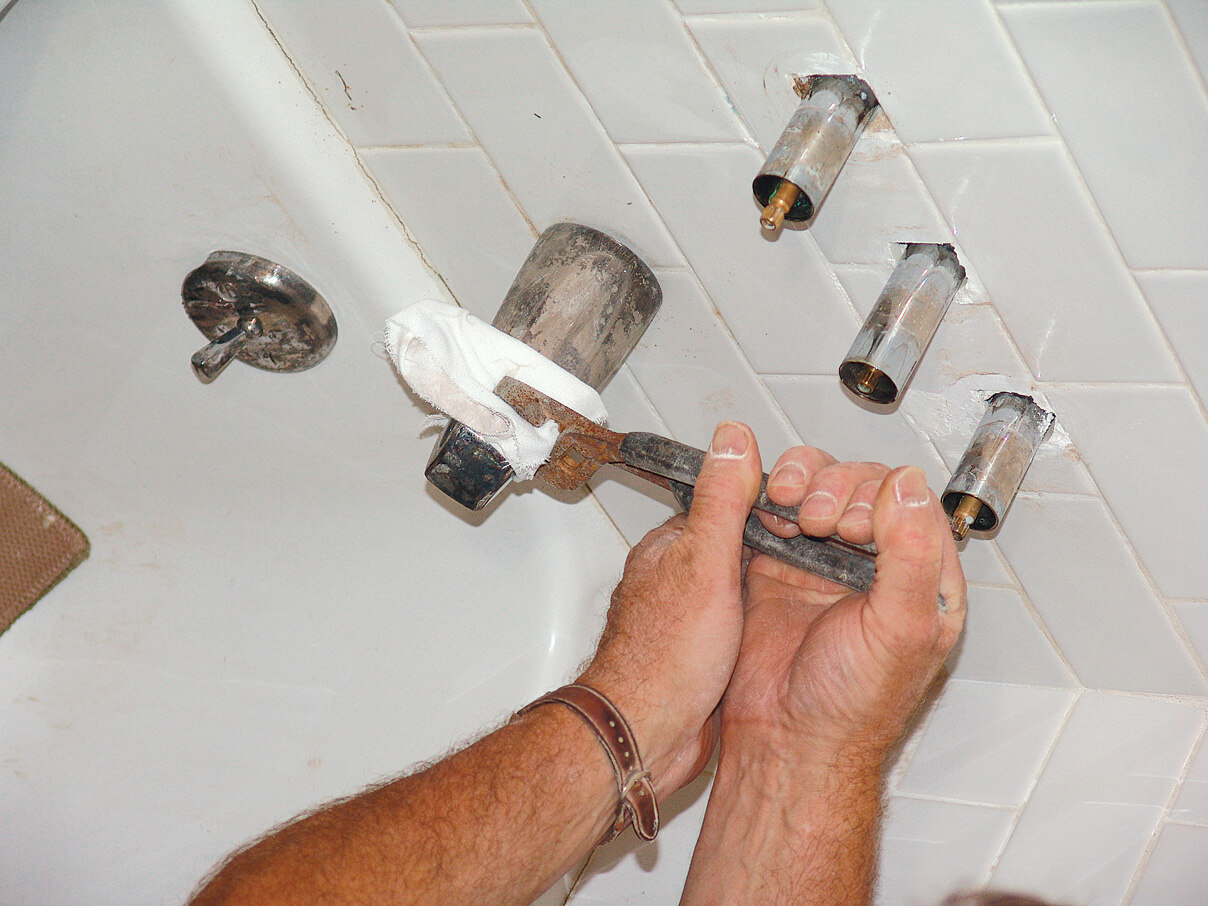
Step 3: Removing the old faucet
With your kegerator powered off and disconnected, it’s time to remove the old faucet. Follow these steps to remove the old faucet from your kegerator:
- Locate the nut that secures the faucet to the kegerator. This nut is usually found on the inside of the kegerator, where the beer line connects to the faucet.
- Using an adjustable wrench, grip the nut firmly and turn it counterclockwise to loosen it. Be careful not to apply too much force, as you don’t want to damage the kegerator or the faucet.
- Continue to unscrew the nut until it is completely removed. Set the nut aside in a safe place, as you may need it for installing the new faucet later on.
- Once the nut is removed, gently pull the old faucet out of the kegerator. It may require a bit of wiggling to loosen it from the beer line.
- Inspect the area where the old faucet was attached for any signs of dirt or residue. If necessary, use a cleaning solution and a soft cloth to clean the area before proceeding to the next step.
Removing the old faucet is a straightforward process, but it is important to handle it with care to avoid any damage to your kegerator. Take your time and be gentle when removing the old faucet to ensure a smooth transition to the next step.
With the old faucet removed, you’re now ready to clean the area around the faucet and prepare it for the installation of the new faucet.
Step 4: Cleaning the area around the faucet
After removing the old faucet from your kegerator, it’s important to clean the area thoroughly before installing the new faucet. This will ensure a clean and sanitary environment for your beer dispensing system. Here’s how you can clean the area around the faucet:
- Prepare a cleaning solution by mixing warm water and mild dish soap in a bowl or bucket. You can also use a specialized cleaning solution designed for kegerator maintenance.
- Moisten a soft cloth or sponge with the cleaning solution.
- Gently scrub the area around the faucet, including the inside and outside surfaces. Pay attention to any crevices or hard-to-reach areas.
- Rinse the area with clean water to remove any soap residue.
- Use a clean, dry cloth to thoroughly dry the area. Make sure there is no moisture left before proceeding to the next step.
Cleaning the area around the faucet is an important step to maintain hygiene and prevent any potential contamination of your beer. By removing any dirt, residue, or buildup, you ensure a clean and fresh dispensing system for your kegerator.
Now that the area around the faucet is clean and dry, you’re ready to move on to the next step: installing the new faucet.
Before replacing the faucet on your kegerator, make sure to turn off the CO2 and release any pressure in the keg. This will prevent any accidents or spills during the replacement process.
Read more: How To Replace The Swivel Nuts On Kegerator
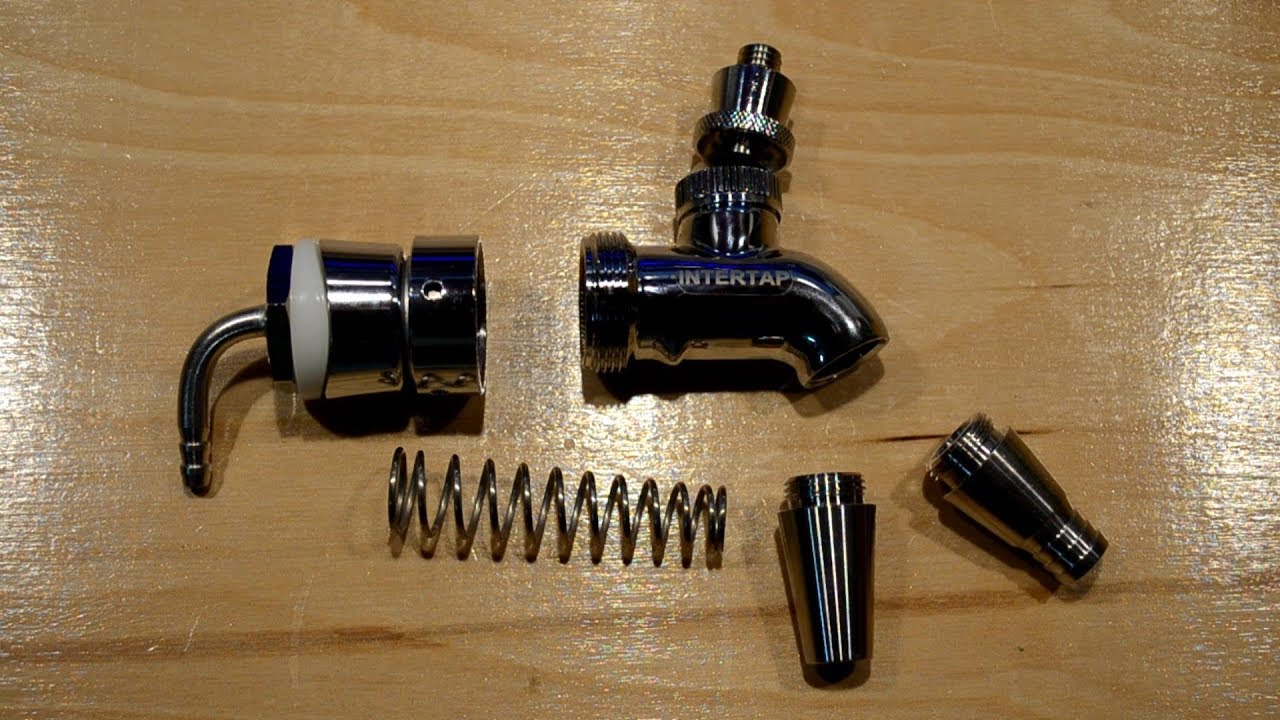
Step 5: Installing the new faucet
Now that you have cleaned the area around the faucet, it’s time to install the new faucet onto your kegerator. Follow these steps to ensure a proper installation:
- Take the new faucet and inspect it for any defects or damage. Ensure that all the necessary components, such as the coupling nut and gasket, are included.
- If your new faucet requires any assembly, follow the manufacturer’s instructions to properly assemble it before installing.
- Place the gasket onto the shank, aligning it so that it sits snugly against the kegerator wall.
- Insert the shank of the new faucet through the hole where the old faucet was removed.
- From the inside of the kegerator, thread the coupling nut onto the shank of the new faucet. Use your fingers to tighten it initially.
- Take the adjustable wrench and securely tighten the coupling nut by turning it clockwise. Be careful not to overtighten, as this may cause damage to the faucet or the kegerator.
- Ensure that the faucet is in the desired position, facing outward for easy pouring.
Proper installation of the new faucet is crucial to ensure a leak-free and efficient beer dispensing system. Take your time during this step to ensure that all components are properly aligned and securely tightened.
With the new faucet successfully installed, you’re now ready to move on to the next step: reconnecting the kegerator.
Step 6: Reconnecting the kegerator
With the new faucet now installed on your kegerator, it’s time to reconnect the unit and prepare it for use. Follow these steps to properly reconnect your kegerator:
- If you had disconnected the CO2 gas supply, locate the CO2 regulator and turn it clockwise to reopen the gas supply. Ensure that the gas flow is at an appropriate level for your kegerator model.
- Double-check that the power switch or control panel on your kegerator is in the “Off” position.
- Plug the kegerator back into the electrical outlet.
- Switch on the power by pressing the power button or turning the control knob to the desired setting.
- Allow the kegerator to cool down and stabilize for a few minutes before testing the new faucet.
Reconnecting the kegerator is a straightforward process, ensuring that you have reestablished the necessary power and gas supply. It’s essential to allow the kegerator to cool down after being unplugged to prevent any damage to the compressor and ensure optimal functionality.
After reconnecting the kegerator, you’re ready to move on to the next step: testing the new faucet.
Step 7: Testing the new faucet
With the kegerator reconnected and the new faucet installed, it’s time to test it out and ensure that everything is working properly. Follow these steps to test the new faucet:
- Ensure that the kegerator is properly cooled down and stabilized.
- Place a glass or pitcher under the faucet to catch the beer.
- Open the faucet by pulling on the tap handle or lever. Allow the beer to flow into the glass.
- Observe the flow rate and ensure that there are no leaks or drips from the faucet or any other connections.
- Close the faucet by pushing the tap handle or lever back into its original position.
- Check the glass of beer for any unusual tastes, odors, or appearances. It should be clear, properly carbonated, and without any off-flavors.
If everything checks out and the new faucet is functioning properly, congratulations! You have successfully replaced the faucet on your kegerator. The testing process is essential to ensure that the new faucet is dispensing beer correctly and without any issues.
However, if you notice any leaks, drips, or irregularities in the beer, you may need to double-check the installation and make any necessary adjustments or fixes. It’s always better to address any issues promptly to maintain the quality and efficiency of your kegerator.
Now that you have tested the new faucet and confirmed its functionality, you’re ready to move on to the final step: proper maintenance and care.
Step 8: Proper maintenance and care
Now that you have successfully replaced the faucet on your kegerator, it is crucial to establish a routine maintenance and care schedule to ensure optimal performance and longevity. Follow these tips for proper maintenance and care:
- Regularly clean the faucet and beer lines to prevent any build-up or contamination. Use a cleaning solution recommended for kegerator maintenance and follow the manufacturer’s instructions.
- Inspect the faucet and beer lines for any signs of wear, leaks, or damage. Replace any components that show signs of deterioration to maintain a reliable and efficient dispensing system.
- Monitor the temperature and pressure settings of your kegerator to ensure that they are appropriate for the type of beer you are dispensing. Improper temperature or pressure can affect the taste and quality of the beer.
- Check and replace the Teflon tape on the faucet threads periodically to maintain a watertight seal and prevent any leaks.
- Keep the kegerator’s exterior clean by wiping it down regularly with a damp cloth. This will help maintain its appearance and prevent any build-up of dirt or grime.
- Inspect and clean the drip tray regularly to prevent any bacteria or mold growth. Remove any liquid or residue and sanitize the tray as needed.
- Monitor the carbon dioxide (CO2) levels in your kegerator to ensure proper carbonation. Adjust the CO2 regulator as necessary to maintain the desired level of carbonation for your beer.
- Follow the manufacturer’s guidelines for routine maintenance and service of your specific kegerator model. This may include tasks such as cleaning the condenser coils, replacing any worn-out gaskets, or lubricating moving parts.
Maintaining and caring for your kegerator is essential to ensure its longevity and to enjoy a consistently great-tasting beer. By following these tips and establishing a regular maintenance schedule, you can maximize the lifespan and performance of your kegerator.
With proper maintenance and care, you can continue to enjoy the convenience of having a kegerator in your home and ensure that your beer is always served in the best possible condition.
Congratulations on successfully replacing the faucet on your kegerator and taking the necessary steps to maintain and care for your beer dispensing system!
Remember to always refer to your kegerator’s manual for specific instructions and guidelines for maintenance and care.
Enjoy your perfectly poured beers from your freshly installed faucet!
Read more: How To Replace A Roman Tub Faucet
Conclusion
Replacing the faucet on your kegerator is a simple yet essential task to ensure the continued enjoyment of cold, refreshing beer in the comfort of your own home. By following the steps outlined in this guide, you can successfully replace the faucet and maintain the optimal performance of your kegerator.
From gathering the necessary tools and supplies to turning off and disconnecting the kegerator, removing the old faucet, cleaning the area, installing the new faucet, and reconnecting the kegerator, each step plays a crucial role in the process. Testing the new faucet and establishing a routine maintenance and care schedule are also important to maintain functionality and freshness of the beer.
Remember to take your time, handle the components with care, and ensure proper installation to avoid any leaks or issues. Regular maintenance and care of your kegerator will help prolong its lifespan and keep your beer pouring smoothly for years to come.
So, whether you’re a DIY enthusiast or a beer connoisseur looking to maintain your kegerator, this guide has provided you with the knowledge and instructions needed to replace the faucet with confidence.
With a new faucet in place, you can now relax and savor the experience of pouring a perfect pint of beer from your kegerator. Cheers!
Frequently Asked Questions about How To Replace The Faucet On My Kegerator
Was this page helpful?
At Storables.com, we guarantee accurate and reliable information. Our content, validated by Expert Board Contributors, is crafted following stringent Editorial Policies. We're committed to providing you with well-researched, expert-backed insights for all your informational needs.


0 thoughts on “How To Replace The Faucet On My Kegerator”