Home>Interior Design>How To Lay Bathroom Floor Tiles For A Professional Finish
Interior Design
How To Lay Bathroom Floor Tiles For A Professional Finish
Modified: August 26, 2024
Learn how to lay bathroom floor tiles like a pro with our step-by-step guide. Achieve a flawless interior design with our expert tips and techniques.
(Many of the links in this article redirect to a specific reviewed product. Your purchase of these products through affiliate links helps to generate commission for Storables.com, at no extra cost. Learn more)
Introduction
When it comes to designing a beautiful and functional bathroom, one element that can make a significant impact is the flooring. Bathroom floor tiles not only add style and aesthetics to the space but also provide durability and water resistance.
Laying bathroom floor tiles may seem like a daunting task, but with the right knowledge and step-by-step guidance, you can achieve a professional finish without the need to hire a professional. In this article, we will take you through the process of laying bathroom floor tiles, from preparing the surface to applying grout and sealing the tiles.
Before you begin, it’s important to note that there are various types of tiles available in the market, including ceramic, porcelain, natural stone, and vinyl. Each has its own unique characteristics and maintenance requirements, so it’s crucial to choose the right type of tile for your bathroom based on your style preferences, budget, and practicality.
Now, let’s dive into the step-by-step process of laying bathroom floor tiles to achieve that professional look and feel you desire.
Key Takeaways:
- Achieve a professional bathroom floor tile installation by following step-by-step guidelines, from surface preparation to grout application. Prioritize safety, precision, and attention to detail for a stunning, long-lasting result.
- Selecting the right tiles, planning the layout, and applying mortar and grout are essential for a successful bathroom floor tile installation. Embrace the process, enjoy the transformation, and maintain the beauty of your newly tiled space.
Read more: How To Lay Out Floor Tile
Step 1: Preparing the Surface
Before you start laying bathroom floor tiles, it’s crucial to prepare the surface properly to ensure a smooth and long-lasting installation. Here are the key steps to follow:
- Clean the floor: Remove any existing flooring material, such as carpet or vinyl, and thoroughly clean the surface. Ensure there are no debris, dust, or grease left behind. You can use a broom, vacuum cleaner, and mop to achieve a clean and dry surface.
- Inspect for damage: Carefully examine the subfloor for any signs of damage, such as cracks, unevenness, or water damage. Address any issues before proceeding with the installation. Patch up any cracks or holes using a suitable filler, and sand down any uneven surfaces for a level foundation.
- Address moisture concerns: Bathrooms are prone to moisture, so it’s essential to take measures to prevent water damage. If your bathroom floor has a wood subfloor, it’s recommended to install a waterproofing membrane to create a moisture barrier. This will help protect the tiles from water seeping through and causing damage.
By taking the time to properly prepare the surface, you are setting the foundation for a successful tile installation. It ensures that the tiles adhere properly and provide a solid and stable surface for years to come.
Step 2: Planning and Measuring
Proper planning and accurate measurements are crucial for a successful bathroom floor tile installation. Here are the key steps to follow:
- Draw a layout: Start by drawing a layout of your bathroom floor on a piece of graph paper. Make sure to include any obstacles such as toilets, sinks, or cabinets. This layout will serve as your guide when determining the tile placement.
- Determine the tile orientation: Decide on the orientation of the tiles, whether you want a traditional straight lay or a diagonal pattern. This is a personal preference and can greatly affect the overall look of the bathroom.
- Measure the area: Use a measuring tape to measure the length and width of the bathroom floor. Multiply these measurements to get the total square footage. It’s advisable to add an additional 10% to account for wastage and cuts.
- Calculate the number of tiles: Refer to the packaging or manufacturer’s guidelines to determine the coverage area of one tile. Divide the total square footage of the floor by the coverage area of the tile to determine the number of tiles needed.
- Account for cuts: Consider any cuts or adjustments that may be needed around edges, corners, or obstacles. It’s advisable to purchase extra tiles to account for these cuts and have some spares for future repairs if needed.
- Choose the tile layout: Based on your layout drawing and tile orientation preference, determine the starting point for your tile installation. This is usually in the center of the room or along a prominent focal point like a vanity or bathtub. Mark this point using a chalk line.
By taking the time to carefully plan and measure your bathroom floor, you can minimize tile wastage and ensure a visually pleasing layout. It also helps you determine the right starting point and creates a roadmap for your tile installation process.
Step 3: Choosing and Purchasing Tiles
Choosing the right tiles for your bathroom floor is a crucial step in achieving the desired look and functionality. Here’s what you need to consider when selecting and purchasing tiles:
- Material: There are several types of tiles available for bathroom floors, including ceramic, porcelain, natural stone, and vinyl. Each material has its own unique characteristics in terms of durability, maintenance, and aesthetics. Consider factors such as water resistance, slip resistance, and ease of cleaning when choosing the tile material.
- Style and Design: Consider the overall design and style of your bathroom when selecting tiles. Do you prefer a classic, modern, or rustic look? Choose tiles that complement the existing elements in the space, such as the color of walls, cabinets, or fixtures.
- Size and Shape: Tiles come in a variety of sizes and shapes. Larger tiles can make a small bathroom look more spacious, while smaller mosaic tiles can add visual interest and texture. Consider the size of the bathroom and the desired aesthetic when selecting the tile size and shape.
- Color and Pattern: The color and pattern of the tiles can greatly impact the overall look of your bathroom. Light-colored tiles can make a small bathroom feel brighter and more open, while darker tiles can create a dramatic and cozy ambiance. Consider the color scheme of the bathroom when choosing the tile color and pattern.
- Price and Budget: Set a budget for your tile purchase and consider the price range of available options. It’s important to find a balance between quality and affordability. Shop around and compare prices from different suppliers to find the best deal.
- Texture and Slip Resistance: Bathrooms can be slippery, so it’s important to choose tiles with a textured surface or a certain degree of slip resistance. This will ensure safety and minimize the risk of accidents, especially in wet areas like the shower or bathtub.
Once you have chosen the right tiles for your bathroom floor, measure the square footage of the area to determine the quantity needed. Purchase tiles from a reputable supplier and make sure to order extra tiles to account for cuts and future repairs.
By considering these factors and taking your time to select the right tiles, you can ensure a beautiful and functional bathroom floor that will stand the test of time.
Step 4: Gathering the Tools and Materials
Before you can begin the tile installation process, it’s important to gather all the necessary tools and materials. Having everything organized and ready to go will make the process smoother and more efficient. Here’s a list of essential tools and materials you’ll need:
- Tiles: Purchase the required quantity of tiles based on your measurements, taking into account extra tiles for cuts and future repairs.
- Tile adhesive or mortar: Choose a high-quality adhesive or mortar suitable for the type of tile you’re using and the substrate of your bathroom floor.
- Tile spacers: These small plastic pieces help ensure even spacing between tiles and create a professional-looking finish.
- Notched trowel: Use a notched trowel to spread the adhesive or mortar evenly on the floor.
- Tile cutter or wet saw: Depending on the type of tile you’re using, you’ll need either a tile cutter for straight cuts or a wet saw for more intricate cuts and curves.
- Grout: Choose a grout color that complements your tiles and is suitable for the size of the grout joints.
- Grout float: This tool is used to apply grout and ensure it is spread evenly between the tiles.
- Sponge or grout haze remover: A sponge is essential for cleaning excess grout from the tiles during the grouting process. You can also use grout haze remover to remove any stubborn grout residue.
- Tile sealer: If you’re using natural stone tiles, it’s recommended to apply a tile sealer to protect the surface and enhance its longevity.
- Safety equipment: Always prioritize safety when working with tools and materials. Wear safety goggles, gloves, and knee pads to protect yourself during the installation process.
It’s also a good idea to have a bucket, mixing paddle, measuring tape, level, pencil, and rags on hand for various tasks and clean-up.
By gathering all the necessary tools and materials beforehand, you’ll be well-prepared and ready to tackle the tile installation process with ease. This ensures a smooth workflow and allows you to focus on achieving a professional finish for your bathroom floor.
Read more: How To Lay Tile On Concrete Floor
Step 5: Mixing the Mortar
Before you can lay the tiles on your bathroom floor, you’ll need to mix the mortar or tile adhesive. The mortar acts as the bonding agent between the tiles and the subfloor, ensuring a strong and durable installation. Follow these steps to mix the mortar:
- Read the instructions: Start by carefully reading the instructions on the packaging of the mortar or tile adhesive. Different products may have specific mixing ratios or guidelines that you need to follow.
- Prepare the mixing area: Find a clean and spacious area where you can mix the mortar. Use a large bucket or a mixing tray to contain the materials.
- Add the mortar powder: Measure the required amount of mortar powder according to the instructions. Slowly pour it into the mixing container.
- Add water: Gradually add water to the mixing container while stirring the mortar mixture. It’s best to add water in small increments to prevent the mixture from becoming too runny or too thick. Follow the instructions for the correct water-to-powder ratio.
- Mix thoroughly: Use a mixing paddle or a drill with a mixing attachment to blend the mortar mixture. Mix until the consistency is smooth and free of lumps. Avoid overmixing, as it can affect the adhesive properties of the mortar.
- Allow the mortar to “slake”: After mixing, allow the mortar to “slake” for a few minutes. This means letting it sit undisturbed to allow the chemicals in the mixture to activate and ensure optimal adhesion.
- Check the consistency: Before using the mortar, check its consistency. It should have a thick, creamy texture that can hold its shape but still spread easily with a trowel.
It’s important to mix the mortar according to the manufacturer’s instructions. Using the proper ratio of water to mortar powder will ensure optimal adhesive properties and a successful tile installation.
Remember to mix only the amount of mortar that you can use within the specified pot life of the product. Avoid mixing large batches at once to prevent the mortar from drying out or losing its adhesive properties.
By properly mixing the mortar, you’ll have a strong and reliable adhesive to secure the tiles to the bathroom floor, ensuring a professional and long-lasting installation.
Before laying bathroom floor tiles, ensure the subfloor is clean, level, and dry. Use a quality waterproof adhesive and grout to prevent water damage. And always start tiling from the center of the room for a professional finish.
Step 6: Applying the Mortar
Now that you have mixed the mortar, it’s time to apply it to the prepared surface of your bathroom floor. Follow these steps to ensure an even and successful application:
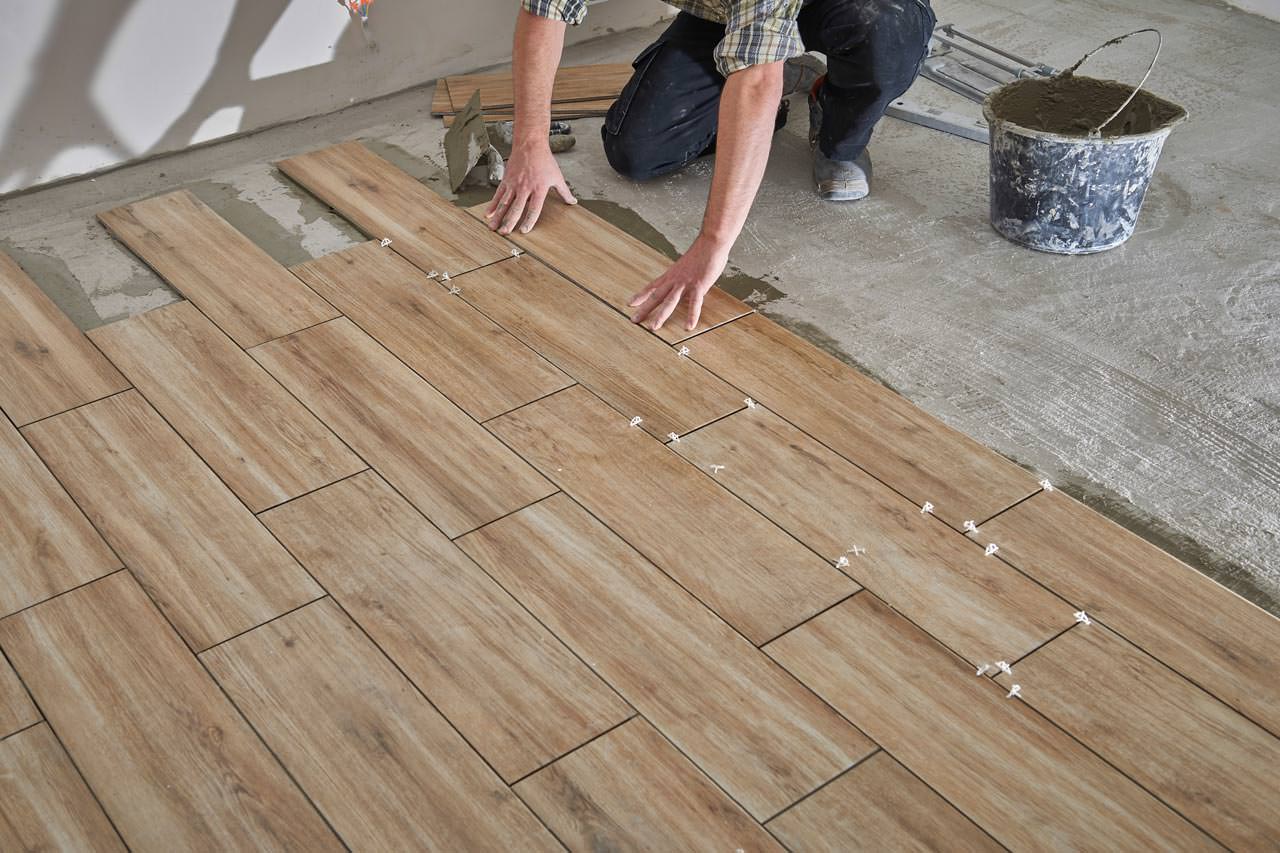
- Start in a corner: Begin at the corner of the room or at the marked starting point. Apply a small amount of mortar to the floor using the notched trowel. Hold the trowel at a 45-degree angle and spread the mortar evenly, covering an area that you can tile within 10-15 minutes.
- Create ridges: Once the mortar is applied, use the notched side of the trowel to comb through the mortar in one direction. This will create ridges that help with the tile adhesion.
- Work in sections: Divide the floor into manageable sections and continue spreading and combing the mortar in one direction. Avoid applying mortar over a large area at once, as it can dry out before you have a chance to lay the tiles.
- Keep the ridges consistent: As you work, make sure to maintain a consistent depth and size of the ridges. This ensures an even layer of mortar and proper tile adhesion.
- Adjust as needed: If you find that the mortar begins to dry out or loses its adhesive properties, scrape off the old mortar and reapply a fresh layer. It’s essential to work with fresh mortar to ensure a strong bond.
During the mortar application process, it’s important to work efficiently and consistently. Remember to only apply mortar to an area that you can tile within 10-15 minutes to prevent it from drying out. If necessary, have a helper who can assist in applying the mortar while you lay the tiles.
It’s also crucial to maintain a level and even layer of mortar. Avoid applying excessive mortar that may squeeze up between the tiles or cause uneven heights. If necessary, use a level or straight edge to ensure a uniform layer.
By properly applying the mortar, you’re creating a strong and reliable base for the tiles to adhere to, ensuring a professional and long-lasting bathroom floor installation.
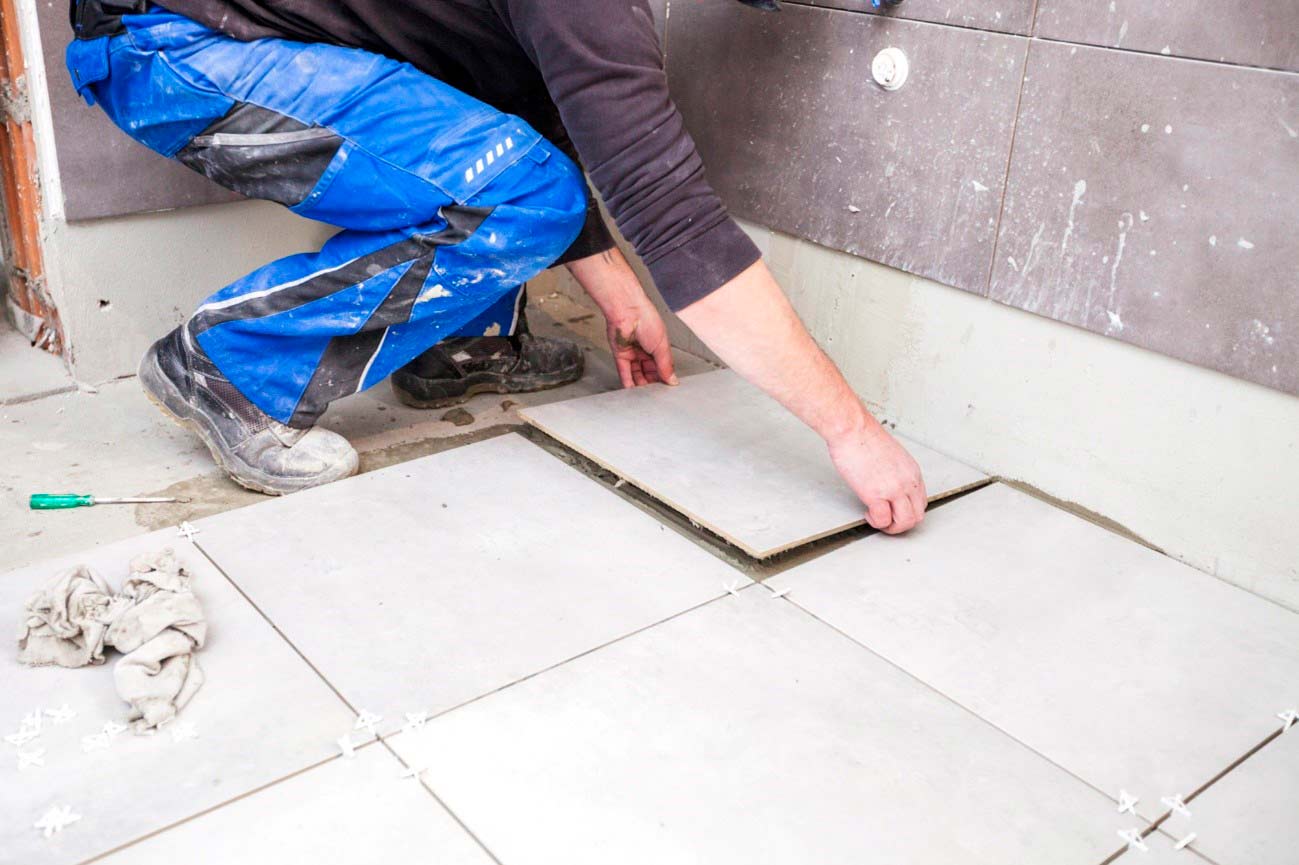
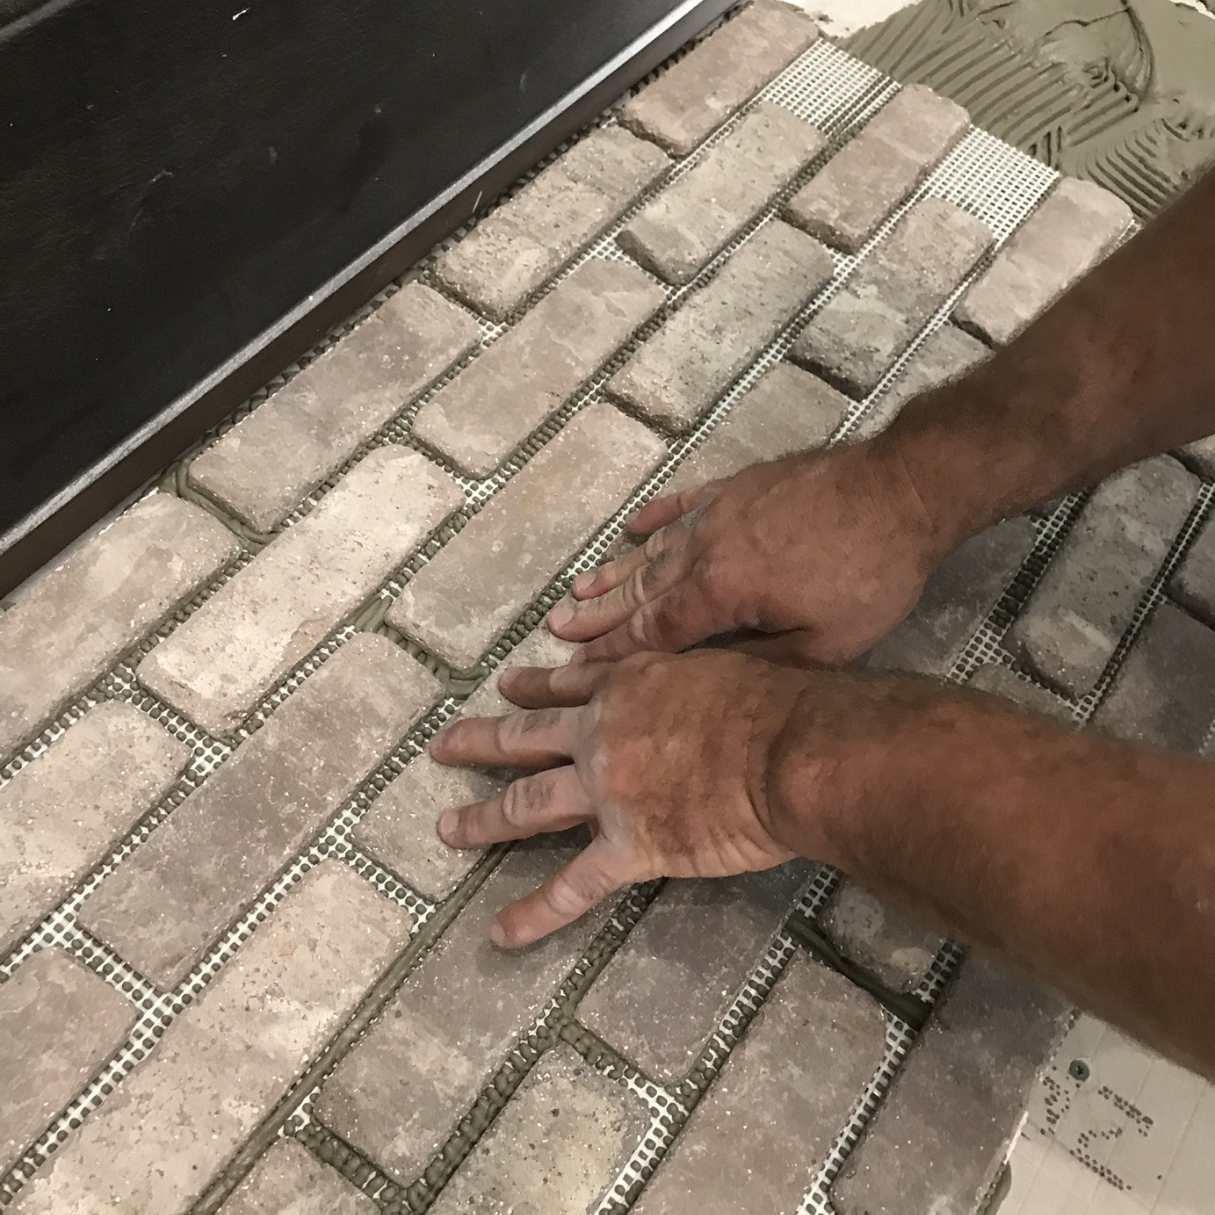
Step 7: Laying the Tiles
With the mortar applied and ready, it’s time to lay the tiles onto your bathroom floor. Follow these steps to ensure a proper and professional tile installation:
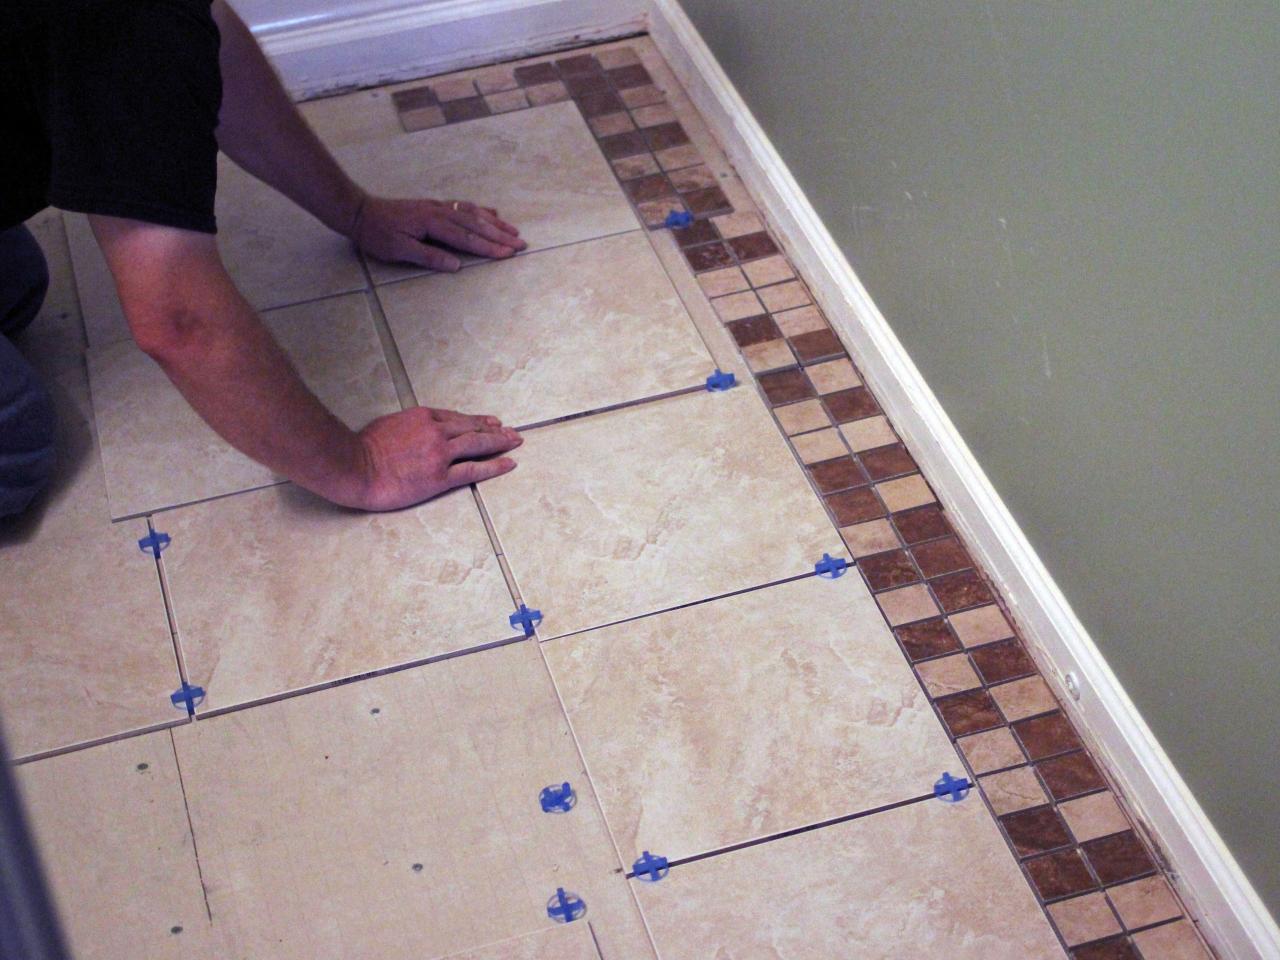
- Start at the marked starting point: Begin at the marked starting point or at the corner of the room. Place the first tile onto the mortar, pressing it firmly into place.
- Use tile spacers: Insert tile spacers between each tile to ensure even spacing and consistent grout lines. The size of the spacers will depend on your preference, typically ranging from 1/8 to 1/4 inch.
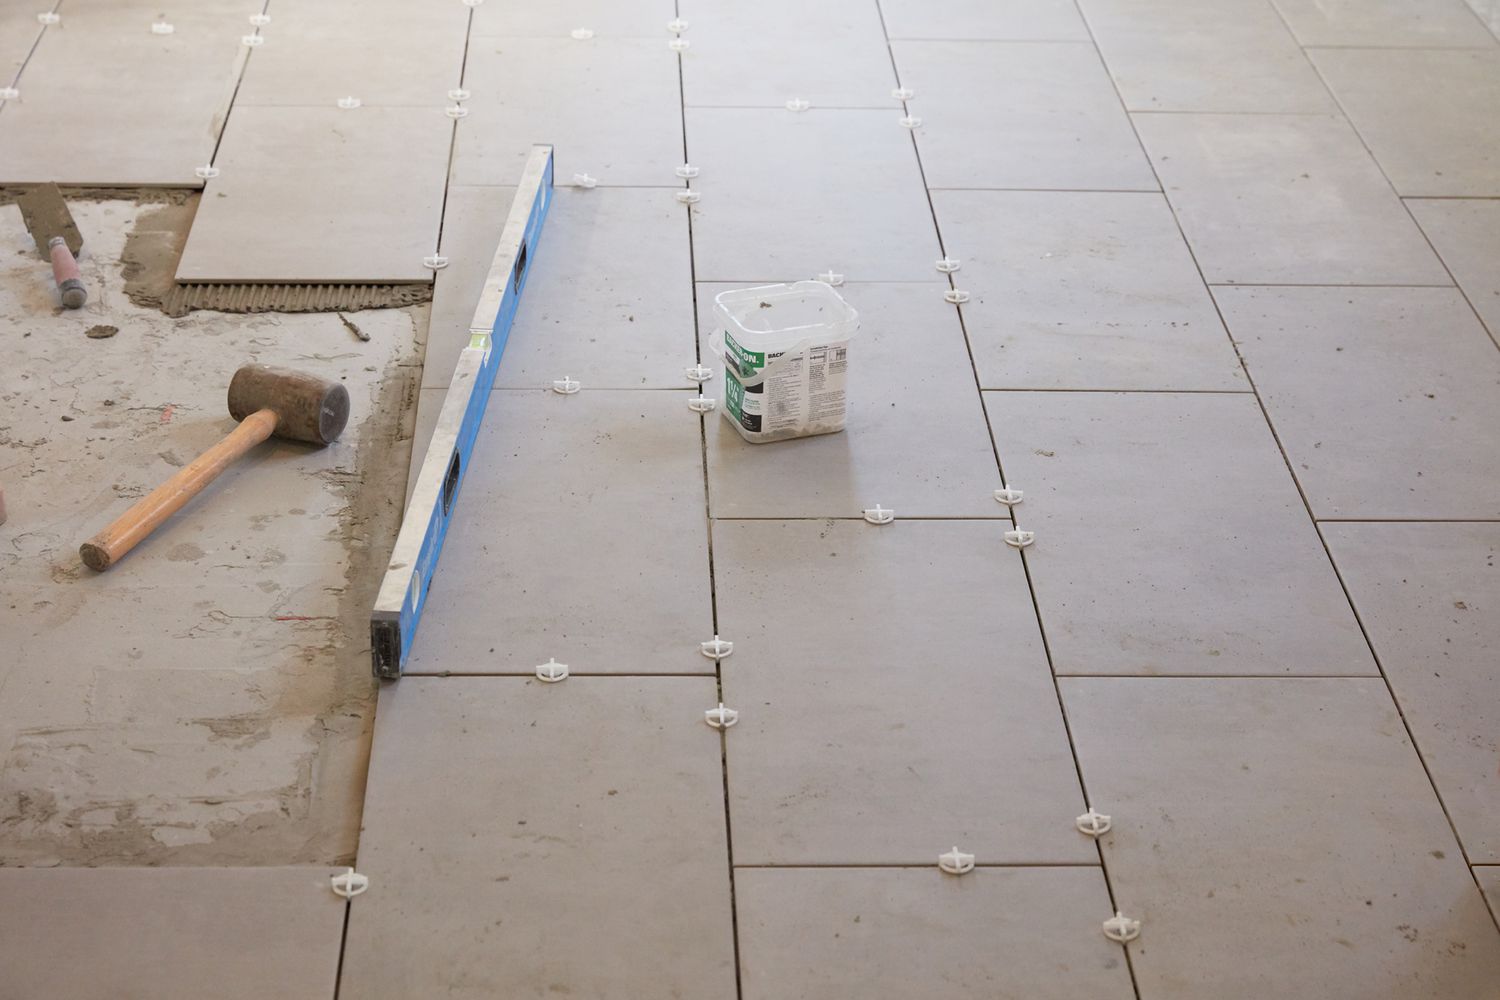
- Continue laying tiles: Lay the subsequent tiles next to the first tile, following the layout pattern you planned earlier. Press each tile firmly into the mortar and adjust as needed to ensure level placement. Use a level or straight edge to check for evenness.
- Check for alignment: Periodically check the alignment of the tiles as you work. Make sure they are straight and properly aligned with the surrounding tiles.
- Trim tiles if necessary: At the edges of the room or around obstacles, you may need to trim tiles to fit. Use a tile cutter or wet saw to carefully cut the tiles to the desired size and shape. Always wear safety goggles and follow the manufacturer’s instructions when using cutting tools.
- Continue the process: Repeat the process of applying mortar and laying tiles section by section until the entire bathroom floor is covered. Work in manageable sections to ensure consistency and avoid the mortar drying out.
- Clean excess mortar: As you lay each tile, use a damp sponge or cloth to immediately clean any excess mortar that may squeeze up between the tiles. This will prevent it from drying and becoming difficult to remove later.
Remember to work carefully and pay attention to detail as you lay the tiles. Take your time and make adjustments as needed to ensure a smooth and level installation.
By properly laying the tiles, you’ll achieve a visually pleasing and professional-looking bathroom floor that enhances the overall aesthetic of the room.
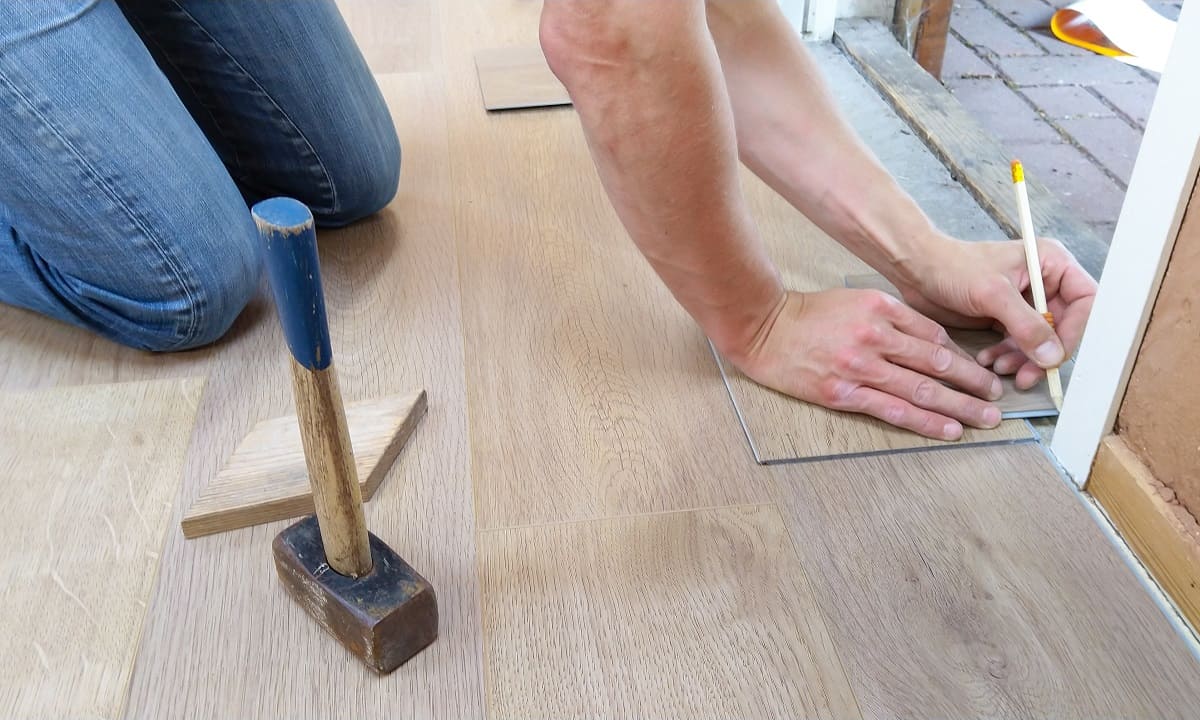
Step 8: Cutting Tiles to Fit
During the tile installation process, you may encounter areas where the tiles need to be cut to fit around edges, corners, or obstacles. Follow these steps to accurately cut tiles and ensure a seamless and professional finish:
- Measure the space: Use a measuring tape to carefully measure the area where the tile needs to be cut. Take precise measurements to ensure an accurate fit.
- Transfer the measurements: Transfer the measurements onto the tile using a pencil or marker. Make sure to account for any necessary spacing or grout lines.
- Use a tile cutter: For straight cuts, a tile cutter is the most commonly used tool. Align the tile along the cutting line on the cutter, apply pressure, and then score the tile using the cutting wheel. Once scored, use the handle to snap the tile along the scored line.
- Wet saw for intricate cuts: For more intricate cuts or curves, a wet saw is the most effective tool. This tool uses a circular blade that is cooled with water. It allows for precise and clean cuts in various shapes or angles.
- Safety precautions: When using any cutting tool, it’s crucial to prioritize safety. Wear safety goggles, gloves, and other protective gear. Follow the manufacturer’s instructions and take your time to ensure accuracy and prevent accidents.
- Test the fit: After cutting the tile, test the fit in the designated space. Make any additional adjustments if needed to achieve a proper fit. Remember to leave space for grout lines.
- Smooth the edges: Use a tile file or a piece of sandpaper to smooth the cut edges of the tile. This helps ensure a cleaner and more finished appearance.
It’s important to take your time and work with precision when cutting tiles to fit. Double-check measurements and test the fit before permanently installing the tile. Remember that precision and accuracy are key to achieving a seamless and professional finish.
By properly cutting and fitting the tiles, you’ll ensure a cohesive and visually appealing bathroom floor that enhances the overall aesthetics of the space.
Read more: How To Lay Mosaic Floor Tile
Step 9: Applying Grout
After the tiles are laid and set in place, it’s time to apply grout to fill the gaps between the tiles. Follow these steps to achieve a clean and professional grouting job:
- Choose the right grout: Select a grout color that complements your tiles and fits the style you’re aiming for. Ensure that the grout is suitable for the width of your grout lines.
- Mix the grout: Follow the instructions on the grout packaging to mix the grout to the right consistency. Typically, you’ll need to add water slowly to the grout powder, stirring continuously until it forms a thick but workable paste.
- Apply the grout: Use a rubber grout float or a grout trowel to apply the grout onto the tile surface. Hold the float at a 45-degree angle and spread the grout diagonally across the tiles, making sure to fill the gaps completely.
- Remove excess grout: Hold the grout float at a steeper angle and carefully scrape off any excess grout from the tile surface. Use a diagonal motion to avoid pulling out the grout from the gaps.
- Clean the tiles: After a short period of drying, use a slightly damp sponge to gently wipe away any grout haze or residue from the tile surface. Rinse and wring out the sponge regularly to ensure a clean finish.
- Final clean-up: Wait for the grout to cure according to the manufacturer’s instructions. Once cured, buff the tiles with a clean, dry cloth to remove any remaining haze or residue.
During the grouting process, it’s important to work efficiently but carefully. Avoid letting the grout dry on the tile surface for too long, as it can become difficult to remove. Regularly clean your tools and change the water in your cleaning bucket to prevent spreading grout residue.
By applying the grout correctly, you’ll achieve a neat and professional finish that enhances the overall aesthetics of your bathroom floor. The grout not only fills the gaps between the tiles but also provides stability and protection against moisture.
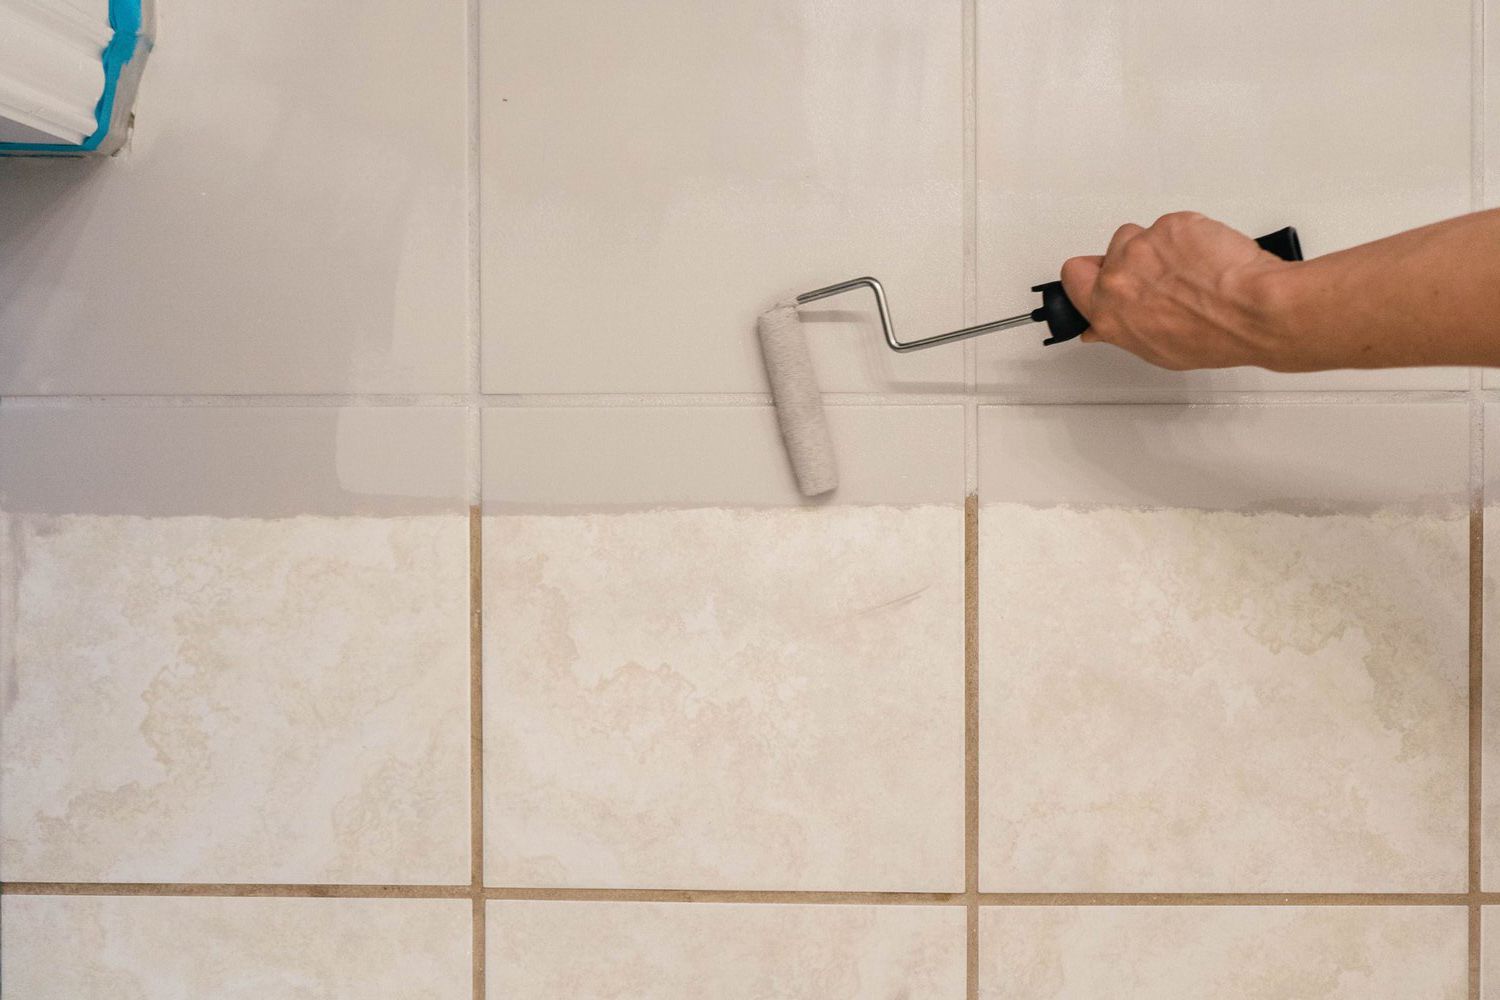
Step 10: Cleaning and Sealing the Tiles
Once the grout has fully cured, it’s important to clean the tile surface and apply a sealer to protect and maintain the quality of the tiles. Follow these steps to ensure a thorough cleaning and effective tile sealing:
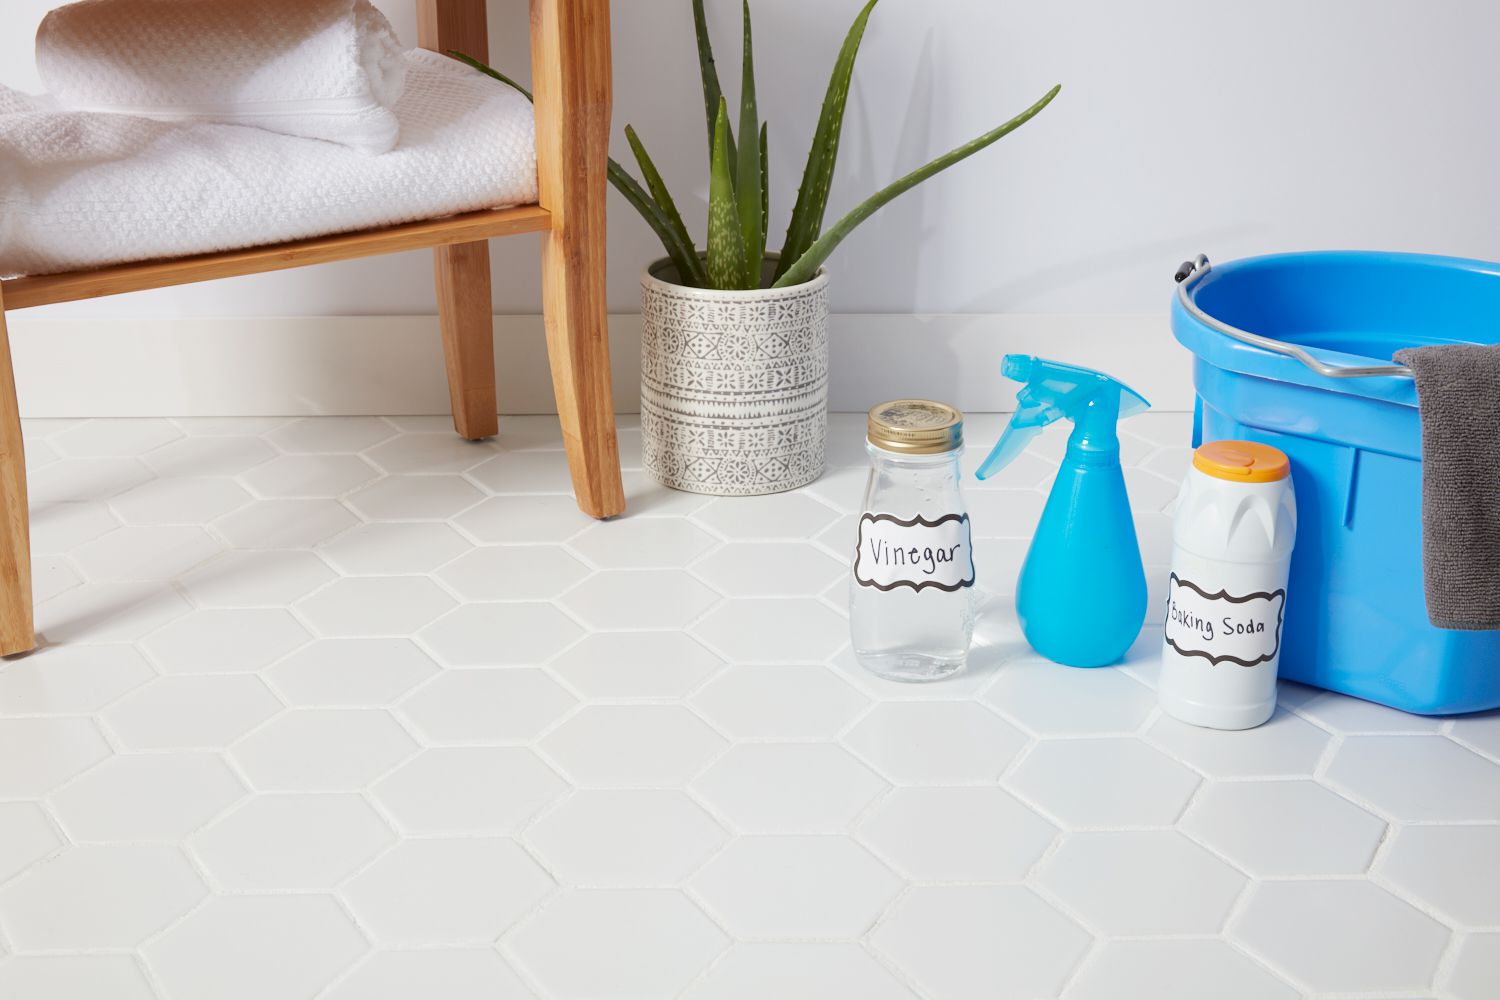
- Clean the tiles: Use a mild tile cleaner or a mixture of warm water and vinegar to clean the tile surface. Gently scrub the tiles with a soft brush or sponge to remove any remaining grout haze, dirt, or residue. Rinse the tiles thoroughly with clean water and allow them to dry completely.
- Apply the sealer: Choose a suitable tile sealer based on the type of tiles you have. Read and follow the manufacturer’s instructions carefully. Use a sponge, brush, or applicator recommended for the specific sealer type. Apply the sealer evenly across the entire tile surface, working in small sections.
- Allow the sealer to penetrate: Let the sealer penetrate the tiles for the recommended amount of time. This allows it to bond with the tile material and create a protective barrier against stains and moisture.
- Wipe off excess sealer: After the appropriate waiting time, use a clean and dry cloth to gently wipe off any excess sealer from the tile surface. Be thorough but cautious to avoid disturbing the sealer in the grout lines.
- Protect the tiles: Avoid walking on the newly sealed tiles for the recommended curing time specified by the sealer manufacturer. This ensures that the sealer fully cures and provides maximum protection for your tiles.
Regular maintenance and cleaning of the sealed tiles will help prolong their lifespan and keep them looking their best. Follow the manufacturer’s guidelines for recommended cleaning products and techniques to ensure the longevity and appearance of your bathroom floor tiles.
By cleaning and sealing your tiles, you’ll not only protect them from stains, spills, and moisture but also enhance the overall durability and beauty of your bathroom floor.
Conclusion
Congratulations! You have successfully completed the process of laying bathroom floor tiles to achieve a professional finish. By following the step-by-step guidelines outlined in this article, you have transformed your bathroom into a beautiful and functional space.
From preparing the surface and planning the layout to choosing and purchasing the right tiles, every step was crucial in ensuring a successful tile installation. By properly mixing and applying the mortar, laying the tiles with precision, and grouting and sealing the surface, you have created a long-lasting and visually appealing bathroom floor.
Remember, attention to detail is key throughout the entire process. Taking accurate measurements, properly cutting tiles to fit, and meticulously applying grout and sealer all contribute to achieving a professional finish. It’s important to prioritize safety by wearing protective gear and following manufacturer instructions when working with tools and materials.
Now that your bathroom floor is complete, take a moment to admire your hard work. Enjoy the beauty and functionality that the new tiles bring to your space. Regular maintenance and cleaning will help preserve the quality and lifespan of your tiles, ensuring they stay looking their best for years to come.
Whether you tackled this project on your own or with the help of a friend or family member, you can take pride in the transformation you’ve accomplished. Your well-laid bathroom floor not only adds value to your home but also showcases your creativity and DIY skills.
Thank you for joining us in this journey of laying bathroom floor tiles. We hope the information provided in this article has been helpful and inspired you to embark on more home improvement projects. Now, go ahead and enjoy your beautifully tiled bathroom floor!
Now that you've mastered laying bathroom tiles, why not turn your attention to another exciting home upgrade? Our next guide focuses on selecting top-quality hardwood floors that can transform any room from ordinary to stunning. Whether renovating for style or durability, find out which options stand out in the realm of home improvement. Get ready to give your space a spectacular makeover with insights only a few clicks away!
Frequently Asked Questions about How To Lay Bathroom Floor Tiles For A Professional Finish
Was this page helpful?
At Storables.com, we guarantee accurate and reliable information. Our content, validated by Expert Board Contributors, is crafted following stringent Editorial Policies. We're committed to providing you with well-researched, expert-backed insights for all your informational needs.


0 thoughts on “How To Lay Bathroom Floor Tiles For A Professional Finish”