Articles
How To Put Tile On Stairs
Modified: October 22, 2024
Learn how to put tile on stairs with our comprehensive articles. Step-by-step guide and expert tips for a beautiful and durable staircase transformation.
(Many of the links in this article redirect to a specific reviewed product. Your purchase of these products through affiliate links helps to generate commission for Storables.com, at no extra cost. Learn more)
Introduction
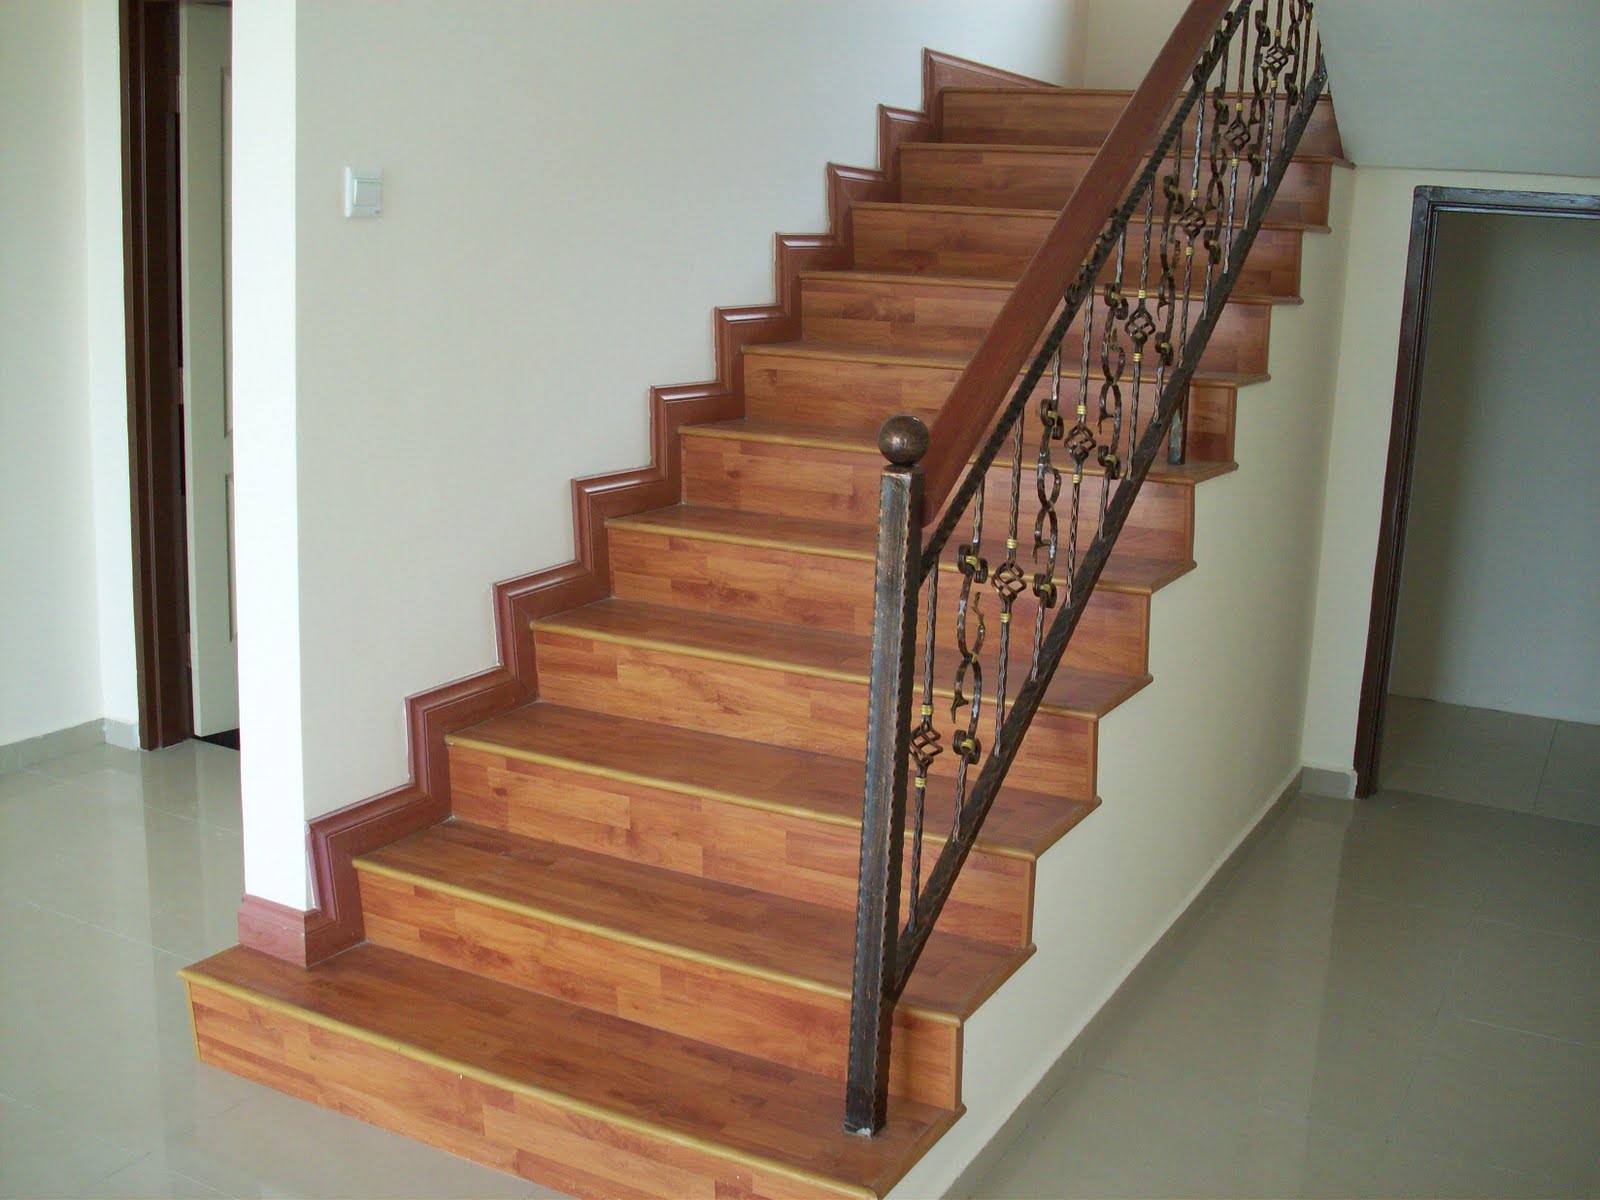
When it comes to home improvement projects, renovating your stairs can have a significant impact on the overall aesthetic of your space. Adding tile to your stairs can provide a sleek and modern look, as well as durability and easy maintenance. Whether you’re looking to update the outdated carpet on your stairs or simply want to enhance the appearance of your staircase, this guide will walk you through the step-by-step process of putting tile on stairs.
Tile flooring offers numerous advantages over traditional materials like carpet or hardwood. Tiles are not only resistant to stains, scratches, and wear, but they also come in a wide variety of colors, patterns, and textures, allowing you to customize your staircase to match your unique style and the overall design of your home. Additionally, tiled stairs are easier to clean, making them an excellent choice for high-traffic areas.
Before you embark on this project, it’s crucial to gather all the necessary materials and tools you’ll need. This will ensure a smooth and efficient installation process, making the job easier for you. Measure the size of your stairs carefully, as accurate measurements are essential for purchasing the right amount of tile and other supplies.
Once you have all the materials ready, you’ll need to prepare the stairs by removing any existing flooring, such as carpet or hardwood, and cleaning the surface thoroughly. Proper surface preparation is crucial for the tile to adhere correctly and ensure a long-lasting installation.
Next, you’ll apply thinset mortar, which acts as the adhesive for the tiles. This step requires precision and attention to detail to ensure a level surface. As you lay the tiles, remember to consider the design and pattern you want to achieve. Cutting tiles to fit the edges and corners may be necessary, so make sure you have the right tools for the job.
After the tiles are laid, it’s time to apply grout. Grout not only fills the gaps between the tiles but also adds stability and protects against moisture. Select a grout color that complements your tiles and enhances the overall appearance.
Finally, once the grout has dried, you’ll need to clean the tiles, removing any excess grout or residue. A thorough cleaning will leave your newly tiled stairs looking pristine and ready to be admired.
With the step-by-step guide provided in this article, you’ll be well-equipped to take on the project of putting tile on stairs and transform your staircase into a stunning focal point in your home. Follow each step carefully, and don’t hesitate to seek professional assistance if you feel unsure about any aspect of the installation process. Let’s dive in and create a beautiful tiled staircase that will leave a lasting impression on all who enter your home.
Key Takeaways:
- Transform your staircase with durable and stylish tile installation. From gathering materials to cleaning and finishing, this step-by-step guide ensures a stunning and long-lasting result.
- Elevate your home with a sleek and modern staircase. Follow the detailed process, prioritize safety, and enjoy the beauty and functionality of your newly tiled stairs.
Read more: How To Put Tile On Floor
Step 1: Gather Materials
Gathering all the necessary materials and tools before you start your tile installation project will save you time and ensure you have everything you need to complete the job. Here are the materials you’ll need:
– Tiles: Choose the type, size, and style of tiles that suit your staircase and personal preference. Consider the durability of the tile material and its suitability for high-traffic areas like stairs.
– Thinset Mortar: This is the adhesive that will hold the tiles in place. Select a mortar suitable for your tiles and the surface they will be applied to.
– Grout: This is used to fill the gaps between the tiles and provide stability. Choose a grout color that complements your tiles and desired aesthetic.
– Notched Trowel: A trowel with notches will allow you to spread the thinset mortar evenly on the surface.
– Tile Spacers: These small plastic pieces are used to maintain consistent spacing between tiles.
– Tile Cutter or Wet Saw: Depending on the material and size of the tiles, you may need a tile cutter or wet saw to cut tiles to fit the edges and corners of your stairs.
– Grout Float: This tool is used to apply and spread the grout on the surface of the tiles.
– Sponge or Cloth: You’ll need a sponge or cloth to clean the tiles and remove any excess grout during the installation process.
– Level: A level will ensure that your stairs are properly aligned and the tiles are laid flat.
– Safety Equipment: Don’t forget to prioritize safety by wearing goggles, a mask, and gloves during the installation process.
It’s essential to have all the necessary materials on hand before you start working on your staircase. This will prevent disruptions and delays and allow you to complete the installation seamlessly. Make a checklist of all the required materials and check them off as you gather them to ensure you haven’t missed anything.
In addition to the materials listed above, it’s also important to have appropriate protective coverings for your stairs and surrounding areas. This will prevent any damage or mess during the tile installation process. Consider using drop cloths or plastic sheeting to protect surfaces from debris and spills.
Once you have gathered all the materials and tools, you’ll be ready to move on to the next step: measuring and preparing the stairs for tile installation.
Step 2: Measure and Prepare the Stairs
Accurate measurements are crucial when it comes to installing tile on your stairs. Before you begin the installation process, take the time to measure your stairs thoroughly and prepare them for tile installation. Follow these steps to ensure a precise and successful project:
1. Measure the Width and Length: Use a measuring tape to measure the width and length of each step. Record these measurements, ensuring accuracy down to the nearest fraction of an inch.
2. Measure the Risers: Measure the height of each riser, which is the vertical part of the step between each tread. Again, record these measurements accurately.
3. Calculate the Number of Tiles Needed: Use the measurements of the steps to determine how many tiles you will need. Take into account the tile size, the desired spacing between tiles, and any additional tiles required for cutting and fitting. It’s always a good idea to purchase some extra tiles to account for any potential breakages or mistakes.
4. Prepare the Surface: Before installing the tiles, it’s essential to prepare the surface of your stairs. Start by cleaning the stairs thoroughly, removing any debris, dust, or existing adhesive. Ensure that the surface is smooth and level, as any imperfections may affect the placement and adherence of the tiles.
5. Fill in Cracks or Holes: If you notice any cracks or holes on the stairs, fill them in with a patching compound or an appropriate filler. Smooth the surface with a putty knife or sander to create a uniform and even base for the tiles.
6. Prime the Surface: Depending on the type of stairs you have, consider applying a primer to the surface before applying the thinset mortar. This will promote better adhesion and improve the durability of the tile installation.
Properly measuring and preparing your stairs is crucial to ensure a successful tile installation. Taking the necessary time and care in this step will result in a smooth and aesthetically pleasing finish. With your stairs measured and prepared, you’re now ready to move on to the next step of the process: removing any old flooring (if applicable).
Step 3: Remove Old Flooring (if applicable)
If your stairs already have existing flooring, such as carpet or hardwood, it’s important to remove it before you can proceed with the tile installation. Here are the steps to follow to remove old flooring from your stairs:
1. Clear the Area: Remove any furniture, rugs, or obstructions from the stairs to create a clear workspace. This will make the process of removing the old flooring easier and safer.
2. Start with the Top Step: Begin at the top step and work your way down. This will prevent debris and dust from falling onto completed steps.
3. Remove Carpet: If your stairs have carpeting, start by cutting the carpet into manageable sections using a utility knife. Carefully pull back each section of carpet, exposing the underlying padding and tack strips. Use pliers to remove the tacks and staples holding the carpet in place. Dispose of the carpet and padding properly.
4. Remove Carpet Adhesive: After removing the carpet, you may find adhesive residue on the stairs. To remove the adhesive, use a scraper or putty knife to scrape it off gently. Be cautious not to damage the surface of the stairs in the process. If the adhesive proves difficult to remove, you can use a commercial adhesive remover or consult a professional for further assistance.
5. Remove Hardwood or Laminate Flooring: If your stairs have hardwood or laminate flooring, you will need to remove each individual plank. Start by locating the nails or staples holding the planks in place. Use a pry bar or flooring removal tool to carefully pry up each plank, working from the bottom to the top. Be mindful of any stair nosing or trim that may need to be removed as well.
6. Clean the Surface: Once all the old flooring has been removed, clean the surface of the stairs to remove any remaining debris or adhesive residue. Sweep or vacuum the stairs, and wipe down the surface with a damp cloth or mop. Allow the stairs to dry completely before proceeding to the next step.
By following these steps, you’ll be able to remove old flooring from your stairs, clearing the way for the installation of the new tile. Remember to always exercise caution when removing flooring, and if you encounter any difficulties or uncertainties, it’s best to consult a professional for guidance and assistance.
Step 4: Prepare the Surface
Preparing the surface of your stairs is a crucial step in ensuring a successful tile installation. Proper surface preparation will help the tiles adhere correctly and create a stable base for the new flooring. Follow these steps to prepare the surface before laying the tiles:
1. Clean the Stairs: Remove any dust, debris, or loose particles from the stairs using a broom or vacuum cleaner. Ensure that the surface is free from any obstacles or obstructions that may interfere with the tile installation process.
2. Repair any Damage: Inspect the stairs for any damage, such as cracks or chips. Use a suitable repair compound to fill in any imperfections. Smooth the repaired areas with a putty knife or sandpaper to create a level and even surface.
3. Sand the Surface: If the stairs have a glossy or uneven finish, you may need to sand the surface to promote better adhesion. Use sandpaper or a sanding block to roughen up the surface slightly. This will allow the thinset mortar to bond more effectively with the stairs.
4. Remove Dust: After sanding, be sure to remove any dust or residue from the surface. Use a damp cloth or sponge to wipe down the stairs and eliminate any debris. Allow the surface to dry completely before proceeding to the next step.
5. Apply a Primer (if necessary): Depending on the material of your stairs and the type of tile you’re installing, you may consider applying a primer. A primer can help improve the bond between the stairs and the thinset mortar, ensuring a more durable and long-lasting installation. Follow the manufacturer’s instructions when applying the primer, and allow it to dry completely before moving forward.
Properly preparing the surface of your stairs is key to a successful tile installation. Taking the time to clean, repair, and priming the surface will create a solid foundation for the tiles and contribute to a professional-looking finish. With the surface prepped and ready, you’re now ready to move on to the next step: applying the thinset mortar.
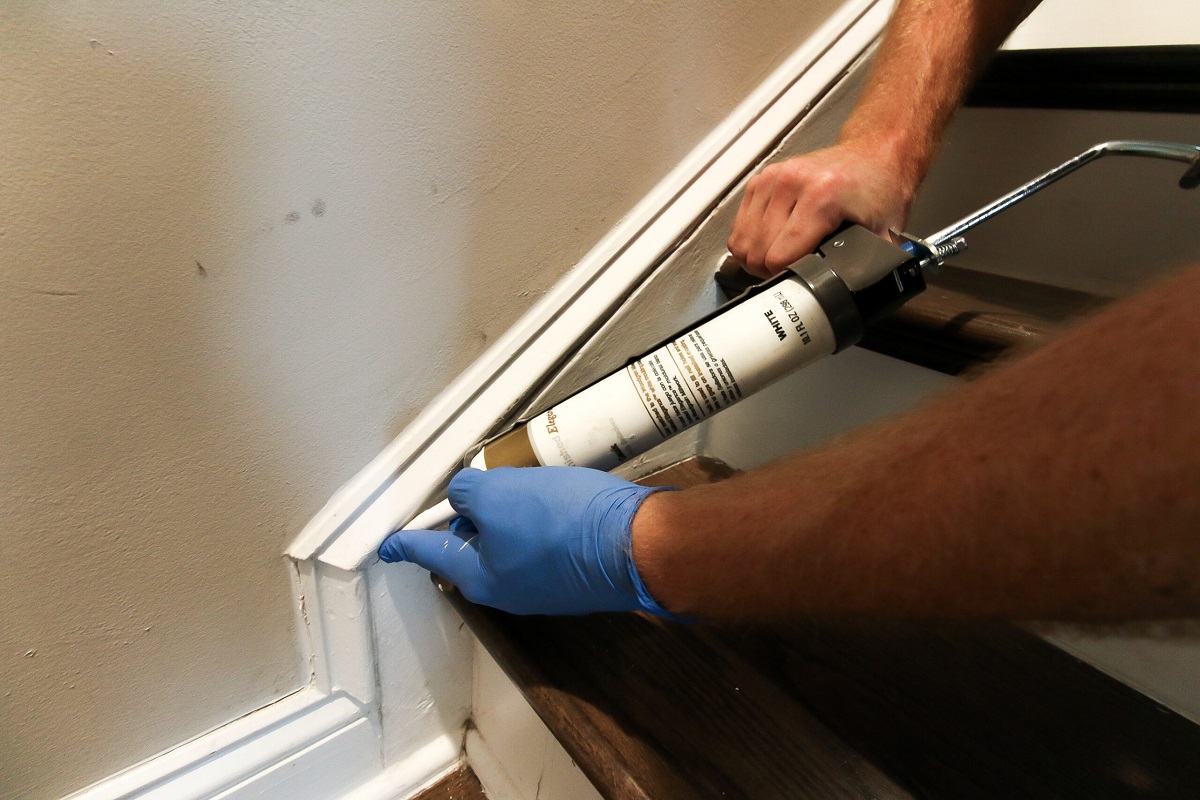
Read more: How To Put Baseboard On Stairs
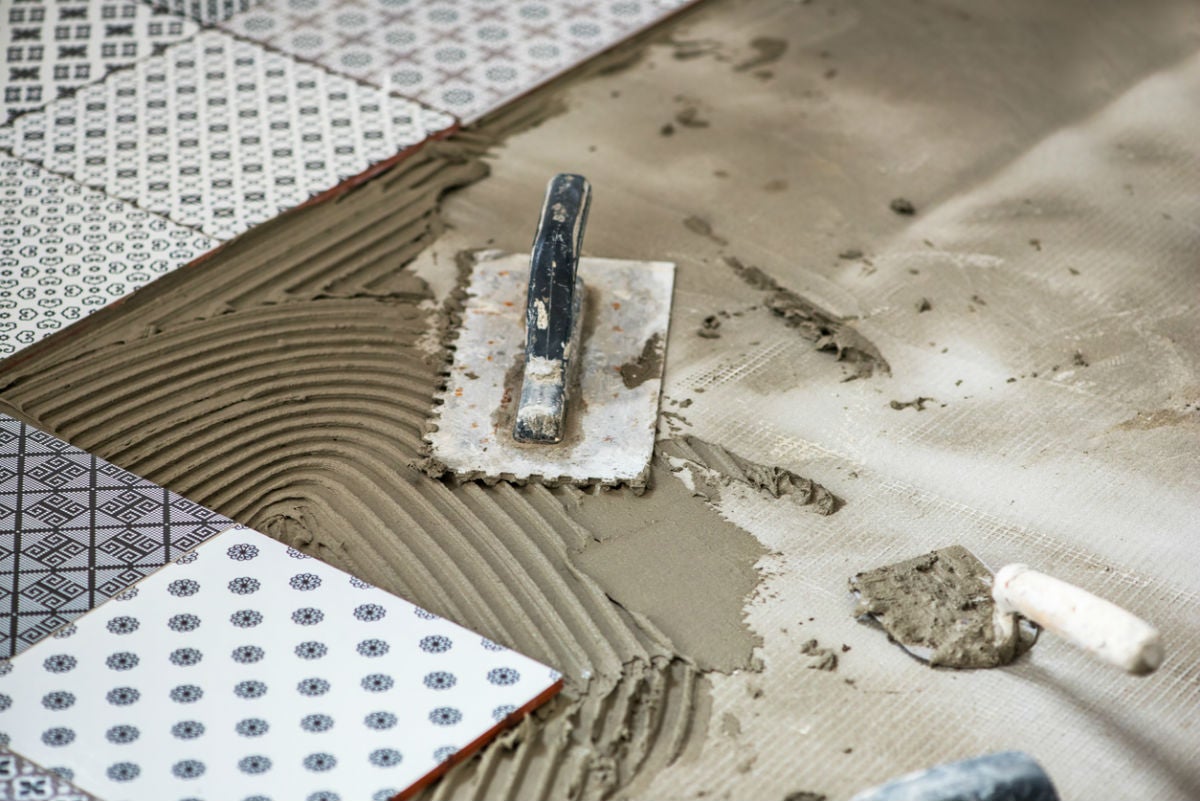
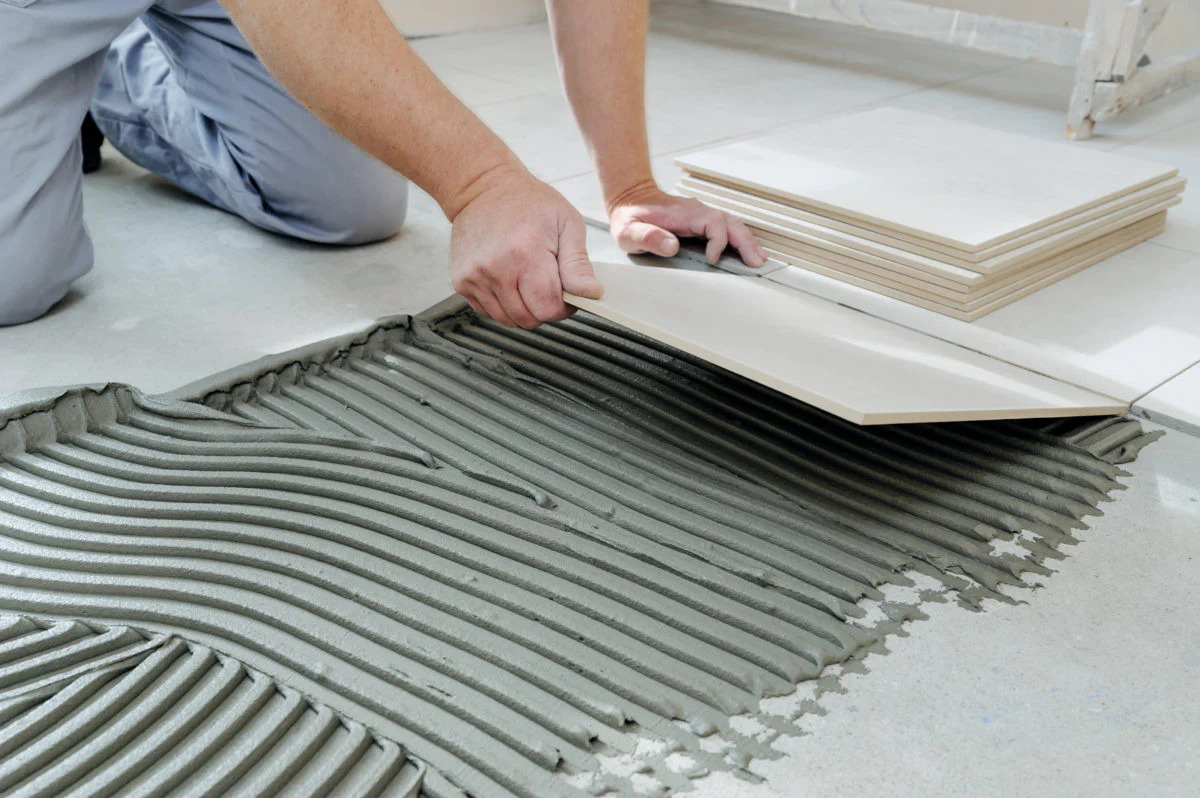
Step 5: Apply Thinset Mortar
Applying thinset mortar is a critical step in installing tile on your stairs. Thinset mortar acts as the adhesive that holds the tiles in place and ensures a strong bond. Follow these steps to properly apply the thinset mortar:
1. Mix the Thinset: Start by mixing the thinset mortar according to the manufacturer’s instructions. Use a mixing bucket and a power drill with a mixing attachment to achieve a smooth and consistent texture. Avoid mixing too much thinset at once to prevent it from drying out before you can use it.
2. Apply the Mortar: Begin at the bottom of the staircase and work your way up. Use a notched trowel to apply the thinset mortar evenly on the surface of the stairs. Hold the trowel at a 45-degree angle and spread the mortar in smooth, sweeping motions. Make sure to cover the entire surface evenly, leaving no gaps.
3. Create Grooves: After applying a layer of thinset mortar, use the notched side of the trowel to create grooves in the mortar. This helps ensure proper adhesion and allows for better tile placement. The size of the notches on the trowel should match the recommended size for your specific tiles.
4. Work in Small Sections: To prevent the thinset from drying out, work in small sections at a time. This allows you to apply the mortar and lay the tiles before the thinset becomes too dry. Start from the bottom of the stairs and work your way up, applying the thinset to each step one by one.
5. Press Tiles into Place: Once the thinset mortar is applied, gently press each tile into place. Use a twisting motion to ensure proper contact between the tile and the mortar. Place tile spacers between the tiles to maintain consistent spacing. As you work, periodically check that the tiles are level and aligned.
6. Clean Excess Mortar: As you go, be sure to clean off any excess mortar that squeezes up between the tiles. Use a damp sponge or cloth to carefully wipe away the excess mortar without disturbing the tiles. This will ensure a clean and professional-looking finish.
Remember to work efficiently and avoid applying more thinset mortar than you can tile over within the recommended working time. This will help ensure the mortar remains workable and able to properly bond with the tiles. With the thinset mortar applied, you’re now ready to move on to the next step: laying the tiles on the stairs.
When tiling stairs, start from the top and work your way down. Use a notched trowel to apply adhesive and press the tiles firmly into place. Use a level to ensure each tile is straight and even.
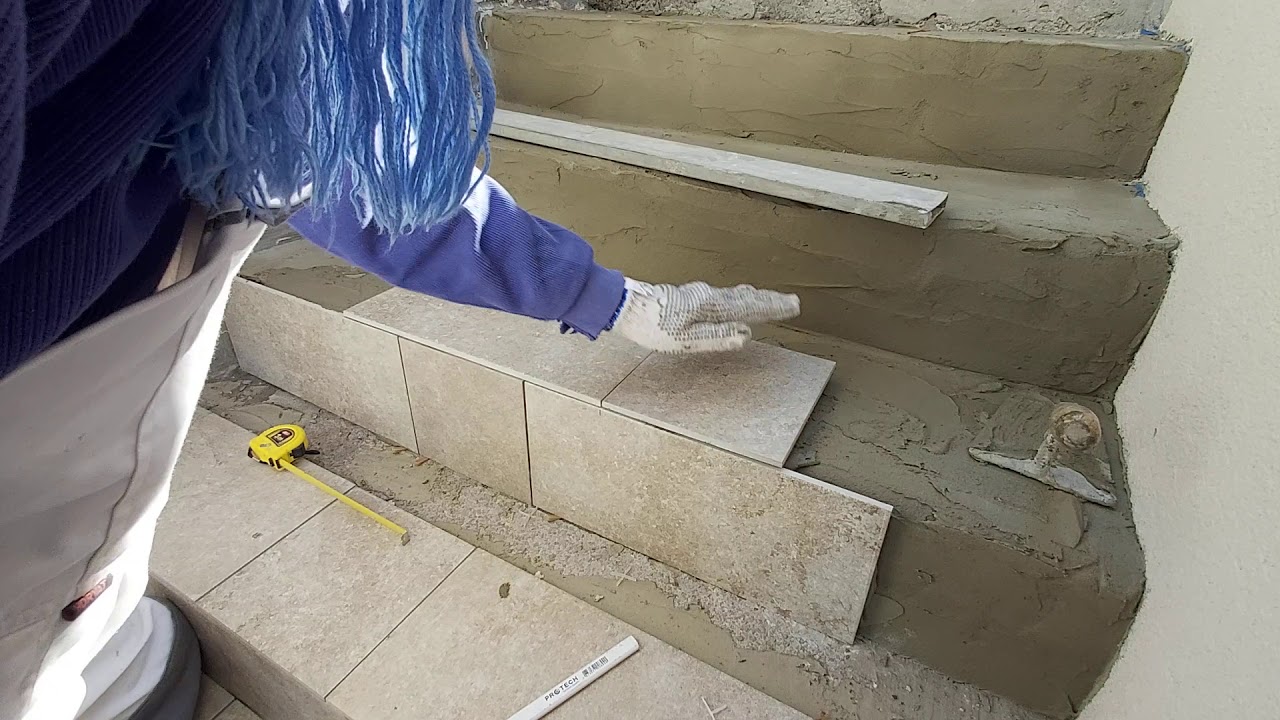
Step 6: Lay the Tiles
Laying the tiles is an exciting step in the process of putting tile on your stairs. This is where you’ll see the transformation unfold as the stairs start to take shape. Follow these steps to lay the tiles on your staircase:
1. Start at the Bottom: Begin laying the tiles at the bottom of the staircase and work your way up. Place the first tile in the corner, aligning it with the guideline you created during the preparation stage.
2. Press the Tiles Down: Gently press each tile into the thinset mortar using a twisting motion. Ensure that each tile is firmly in place and sits flush with the neighboring tiles. Use a level to check that the tiles are evenly aligned horizontally and vertically.
3. Maintain Consistent Spacing: Place tile spacers between each tile to maintain consistent spacing. These spacers ensure that there’s enough room for grout and allow for a professional finish. Remove any excess mortar that may squeeze out between the tile joints.
4. Continue Installing Tiles: Working from the bottom to the top, continue laying the tiles on each step. Use the guidelines you established earlier to ensure that the tiles are straight and properly aligned. Trim tiles as needed to fit along the edges and corners of the staircase.
5. Check for Levelness: Periodically check that the tiles are level as you go. Adjust as necessary to ensure a smooth and even surface. Use a rubber mallet or a wooden block and a hammer to gently tap down any uneven tiles.
6. Work in Small Sections: To prevent the thinset mortar from drying out, it’s best to work in small sections at a time. Apply the mortar and lay the tiles, then move on to the next section. This will allow you to maintain control and ensure that the mortar is in its optimal working condition.
7. Let the Tiles Set: Once all the tiles have been laid on the stairs, allow the thinset mortar to dry and set according to the manufacturer’s instructions. This typically takes at least 24 hours, but it’s best to check the specific drying time on the thinset package.
Laying the tiles requires patience and attention to detail. Take your time to ensure that each tile is placed securely and aligns perfectly with the others. With the tiles laid down, you’re ready for the next step: cutting tiles for edges and corners.
Step 7: Cut Tiles for Edges and Corners
When tiling stairs, it’s common to encounter edges and corners that require specially cut tiles to ensure a seamless and professional-looking installation. Follow these steps to cut tiles for edges and corners:
1. Measure and Mark: Measure the dimensions of the area where a tile needs to be cut to fit along the edge or corner of the staircase. Use a pencil or marker to mark these measurements on the tile’s surface. Double-check your measurements to ensure accuracy.
2. Use Safety Precautions: Before cutting tiles, be sure to wear safety goggles and gloves to protect yourself from any potential injury. Handling tile-cutting tools can be hazardous if proper precautions are not taken.
3. Tile Cutter: If you’re working with ceramic or porcelain tiles, a tile cutter can be used to make straight cuts. Place the tile in the cutter, aligning the marked line with the cutter’s guide. Apply pressure to score the surface of the tile along the marked line. Then, using the cutter’s handle or lever, apply pressure to snap the tile along the score line.
4. Wet Saw: For more intricate cuts or when working with natural stone or thicker tiles, a wet saw is recommended. Carefully measure and mark the tile as before. Adjust the cutting table and the blade depth on the wet saw according to your tile thickness and desired cut. Gently feed the tile into the saw, following the marked line, and slowly cut through the tile.
5. Make Multiple Cuts: In some cases, you may need to make multiple cuts to achieve the desired size and shape. Take your time and cut cautiously to avoid any mistakes or damage to the tile.
6. Test the Fit: After making the necessary cuts, test the fit of the tile in the desired area. It’s better to make slight adjustments if needed at this point before applying the adhesive.
7. Apply Thinset Mortar: Once the tile is cut to the correct shape and size, apply thinset mortar to the back of the tile using a notched trowel. Press the tile into place, ensuring it is secured and aligned with the surrounding tiles. Use tile spacers to maintain consistent spacing.
8. Let the Thinset Dry: Allow the thinset mortar to dry and set according to the manufacturer’s instructions. Avoid disturbing the tiles during this time to ensure they bond properly.
By following these steps, you’ll be able to cut and install tiles for edges and corners, ensuring a precise and professional finish. Take your time and make careful cuts to achieve the desired fit and appearance. With the special tiles in place, you’re ready for the next step: applying grout.
Step 8: Apply Grout
Applying grout is the next important step in the process of putting tile on your stairs. Grout not only fills the gaps between the tiles but also provides stability and helps protect against moisture. Follow these steps to apply grout to your newly tiled stairs:
1. Choose the Right Grout: Select a grout color that complements your tiles and desired aesthetic. Additionally, consider the type of grout that is suitable for your specific tile material and the location of the stairs.
2. Prepare the Grout: Follow the manufacturer’s instructions to properly mix the grout to the desired consistency. Typically, grout is mixed with water until it forms a smooth paste-like consistency. Avoid making excessive amounts of grout that may dry out before you can use it.
3. Apply the Grout: Using a grout float or a rubber spatula, apply the grout to the tiled stairs. Hold the float at a 45-degree angle and firmly press the grout into the joints, ensuring they are completely filled. Work in small sections at a time to prevent the grout from drying out before you can properly clean it.
4. Remove Excess Grout: After applying the grout, use the edge of the grout float to scrape off any excess grout from the surface of the tiles. Hold the float at a 90-degree angle and slowly drag it across the tiles diagonally, making sure to remove the excess grout without disturbing the grout lines.
5. Clean the Grout Lines: Once the excess grout is removed, use a damp sponge or cloth to clean the grout lines. Lightly wipe the surface of the tiles, making circular motions to remove any remaining grout residue. Rinse the sponge or cloth frequently and continue cleaning until the grout lines are smooth and free from excess grout.
6. Allow the Grout to Set: Let the grout dry and set for the recommended time specified by the grout manufacturer. This typically takes a few hours. Avoid walking on the newly grouted stairs or disturbing the grout during this time to ensure a proper bond and a professional finish.
7. Apply Grout Sealer (optional): Depending on the type of grout you have used, you may consider applying a grout sealer to enhance its longevity and durability. Follow the manufacturer’s instructions for applying the sealer and allow it to dry completely before using the stairs.
With the grout applied and properly cleaned, your newly tiled stairs are almost complete. The final step involves cleaning and finishing touches to ensure they look their best. Let’s move on to the last step: cleaning and finishing.
Read more: How To Put Carpet On Stairs
Step 9: Clean and Finish
Step 9 in the process of putting tile on stairs is to clean and finish your newly tiled staircase. This step is essential to ensure that your stairs look polished and ready to be admired. Follow these steps to clean and finish your tiled stairs:
1. Remove Grout Haze: After the grout has dried, you may notice a haze or residue on the surface of the tiles. To remove this haze, use a dry or slightly damp cloth or sponge and gently buff the tiles in a circular motion. This will help to remove any remaining grout residue without damaging the grout lines or the tiles.
2. Clean the Stairs: Use a mild cleaning solution and warm water to clean the surface of the tiles. Avoid using abrasive or harsh chemicals that could potentially damage the tiles or the grout. Gently scrub the stairs using a soft-bristle brush or sponge to remove any dirt or residue. Rinse thoroughly and allow the stairs to dry completely.
3. Apply Tile Sealer (optional): Depending on the type of tile you have used on your stairs, you may consider applying a tile sealer to enhance its durability and protect it from stains. Follow the manufacturer’s instructions and apply the sealer evenly on the surface of the tiles. Allow the sealer to dry according to the recommended drying time.
4. Install Stair Nosing (optional): If desired, you can install stair nosing for added safety and a finished look. Stair nosing, typically made of metal or wood, covers the edge of each stair, providing a smoother transition and preventing wear and tear. Follow the manufacturer’s instructions to install the stair nosing securely.
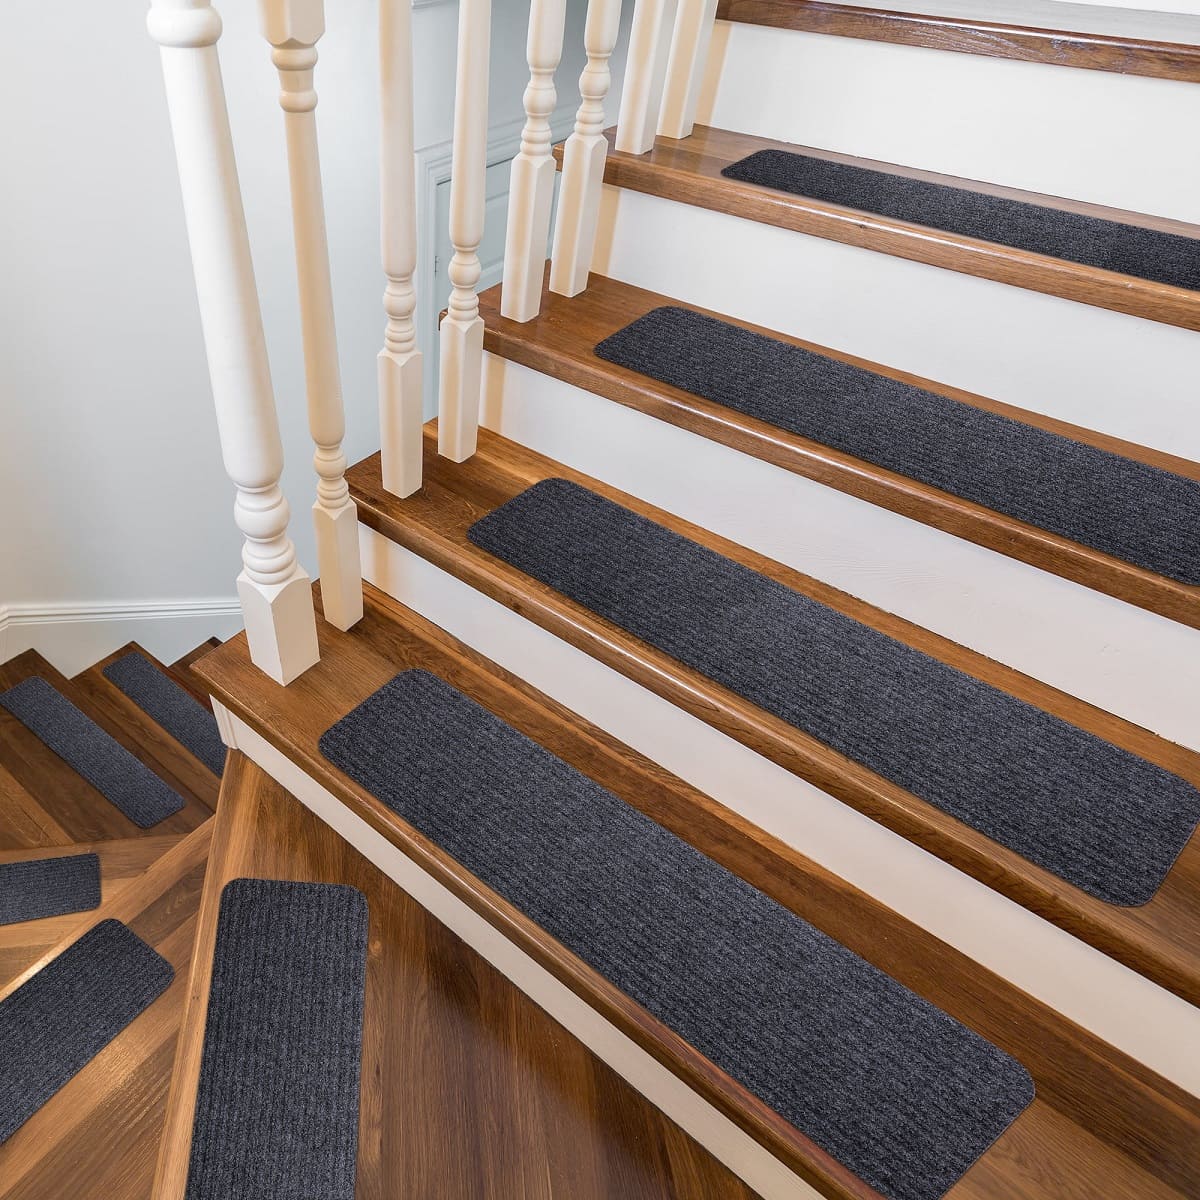
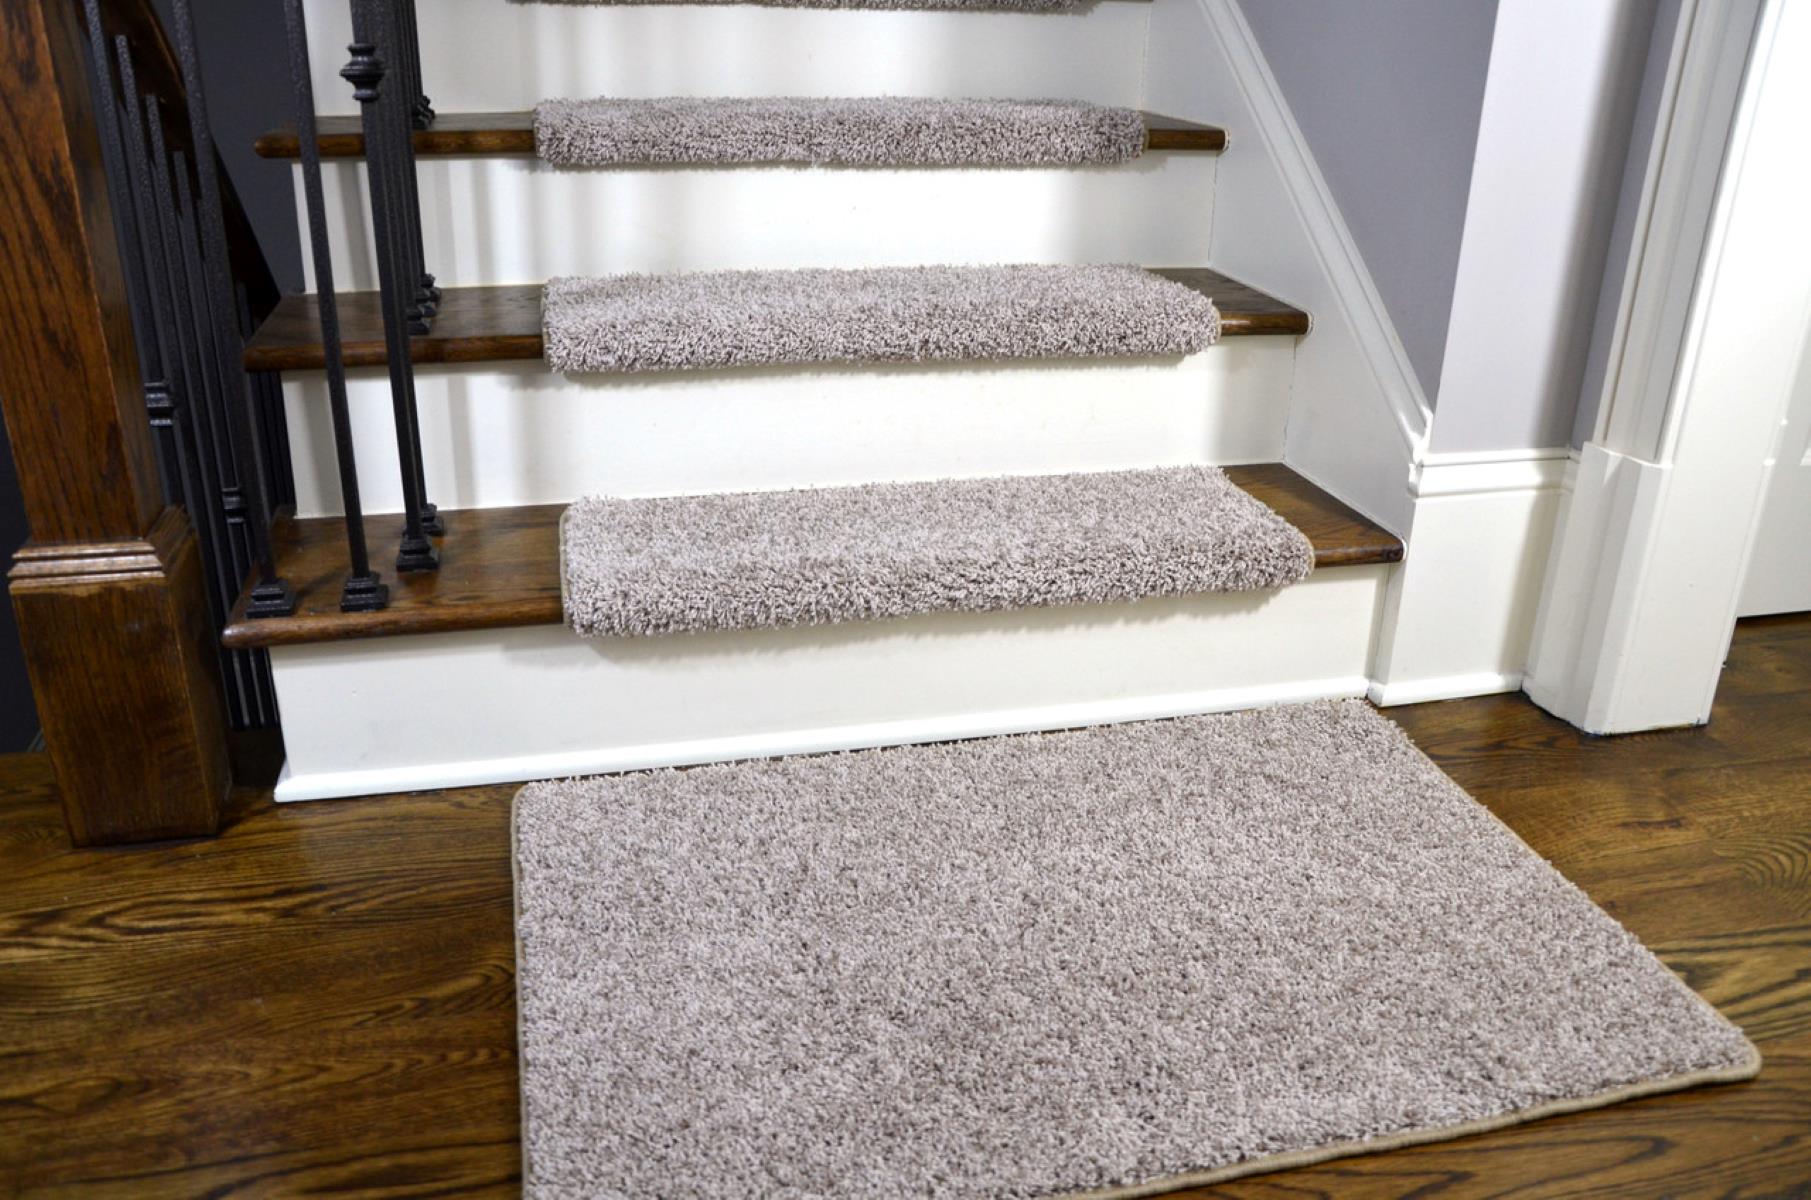
5. Add Finishing Touches: Consider adding finishing touches to enhance the overall appearance of your tiled stairs. This could include decorative accents, like mosaic tiles or border pieces, placed strategically along the edges or on the landing. Additionally, you can add slip-resistant stair treads or rugs for added safety and comfort.
6. Regular Maintenance: After completing the installation and finishing touches, maintain the beauty of your tiled stairs by regularly cleaning them. Routinely sweep or vacuum to remove dirt and debris, and use a non-abrasive cleaner to wipe down the tiles. If spills occur, clean them up promptly to prevent staining or discoloration of the tiles.
Cleaning and finishing your tiled stairs will elevate the overall aesthetic of your staircase and ensure its longevity. Take pride in your newly tiled stairs and enjoy the beauty and durability they add to your home.
With Step 9 completed, you have successfully put tile on your stairs. By following each step carefully, you have transformed your staircase into a stunning focal point that enhances the overall appearance of your home.
Congratulations on completing the installation process! Now, sit back and enjoy the beauty and functionality of your newly tiled stairs.
Conclusion
Putting tile on stairs is a rewarding home improvement project that can completely transform the look and feel of your staircase. By following the step-by-step guide provided in this article, you have learned how to successfully install tile on your stairs, from gathering materials to cleaning and finishing the final product.
Throughout the process, you have discovered the benefits of using tile on stairs, such as durability, easy maintenance, and a wide range of design options. You have also learned about the importance of proper preparation and careful measuring to ensure an accurate fit and a professional finish.
From removing old flooring to applying thinset mortar, cutting tiles for edges and corners, applying grout, and finally cleaning and finishing, each step has contributed to the overall success of your tile installation project. The attention to detail and meticulousness you have applied will result in a beautiful, functional, and long-lasting tiled staircase.
Remember, safety is always a priority, so be sure to use the appropriate safety gear and exercise caution when handling tools and materials. Additionally, while this guide provides comprehensive instructions, it’s always recommended to consult with professionals or experts if you feel unsure or need assistance with any step of the process.
As you enjoy your newly tiled stairs, take pride in the hard work and dedication you have put into this project. The clean lines, sleek design, and durability of the tiles will not only add value to your home but also create a welcoming and impressive first impression for visitors.
With proper maintenance and care, your tiled stairs will continue to be a standout feature in your home for years to come. Regular cleaning, prompt attention to spills, and occasional resealing, if necessary, will help preserve the beauty and extend the lifespan of your tiles.
Congratulations on successfully completing the process of putting tile on your stairs. Sit back, relax, and admire the stunning results of your hard work and dedication. Your beautifully tiled stairs are ready to be enjoyed by you, your family, and all who enter your home.
Frequently Asked Questions about How To Put Tile On Stairs
Was this page helpful?
At Storables.com, we guarantee accurate and reliable information. Our content, validated by Expert Board Contributors, is crafted following stringent Editorial Policies. We're committed to providing you with well-researched, expert-backed insights for all your informational needs.


0 thoughts on “How To Put Tile On Stairs”