Home>Construction & Tools>Building Materials>How To Build Brick Steps On A Hill

Building Materials
How To Build Brick Steps On A Hill
Modified: May 6, 2024
Learn how to build brick steps on a hill using high-quality building materials. Our step-by-step guide will help you create a durable and visually appealing solution for your landscape.
(Many of the links in this article redirect to a specific reviewed product. Your purchase of these products through affiliate links helps to generate commission for Storables.com, at no extra cost. Learn more)
Introduction
Welcome to the comprehensive guide on building brick steps on a hill! Whether you’re enhancing the functionality and aesthetics of your landscape or looking for a rewarding DIY project, constructing brick steps on a hill can be a fulfilling endeavor. These steps not only provide safe passage on sloped terrain but also add a touch of timeless elegance to your outdoor space.
In this guide, we will walk you through the step-by-step process of planning, preparing, and executing the construction of brick steps on a hill. From gathering the necessary materials to adding the finishing touches, we’ve got you covered. By the end of this guide, you’ll have the knowledge and confidence to tackle this project with precision and skill.
So, roll up your sleeves, put on your DIY hat, and let’s dive into the exciting world of building brick steps on a hill!
Key Takeaways:
- Planning and preparation are crucial for building brick steps on a hill. Assess the terrain, check local regulations, and create a detailed plan to ensure a successful and safe construction project.
- Attention to detail and thoughtful finishing touches, such as sealing the bricks and integrating landscaping, elevate the appearance and functionality of the brick steps. Personalized accents and a maintenance plan add character and ensure long-lasting beauty.
Read more: How To Build Brick Steps
Planning and Preparation
Before embarking on the construction of brick steps on a hill, meticulous planning and thorough preparation are essential. Here’s a breakdown of the key steps to ensure a successful project:
- Assess the Terrain: Begin by carefully assessing the hillside where the steps will be installed. Take note of the slope, soil composition, and any existing landscaping features. Understanding the terrain will help determine the optimal design and placement of the steps.
- Design Considerations: Consider the overall aesthetic of your landscape and how the brick steps will complement it. Additionally, factor in the desired width, rise, and run of each step to ensure comfort and safety for users.
- Check Local Regulations: Depending on your location, there may be building codes or regulations that dictate the specifications for outdoor steps. Check with local authorities to ensure compliance with any relevant requirements.
- Gather Necessary Permits: If permits are required for outdoor construction projects in your area, be sure to obtain them before proceeding with the brick steps installation.
- Create a Detailed Plan: Sketch out a detailed plan for the layout of the steps, including measurements, materials needed, and any additional features such as handrails or lighting.
By investing time in the planning and preparation phase, you’ll set the stage for a smooth and efficient construction process. With a clear vision and a well-thought-out plan, you’ll be ready to move on to the next steps of gathering materials and bringing your brick steps to life on the hillside.
Gathering Materials
With the planning phase complete, it’s time to gather the essential materials and tools required for building brick steps on a hill. Here’s a comprehensive list of what you’ll need:
- Bricks: Select high-quality bricks that are durable and suitable for outdoor use. Consider the color and texture of the bricks to ensure they complement the surrounding landscape.
- Concrete: You’ll need concrete for creating a solid base and securing the bricks in place. Choose a high-quality concrete mix that provides excellent adhesion and strength.
- Gravel and Sand: These materials are essential for creating a stable foundation for the steps. Gravel provides drainage and support, while sand is used for leveling and setting the bricks.
- Landscape Fabric: Use landscape fabric to prevent weed growth beneath the steps and to promote proper drainage.
- Rebar or Metal Stakes: Depending on the height and length of the steps, you may need rebar or metal stakes to reinforce the structure and enhance stability.
- Level and Tape Measure: Precise measurements and leveling are crucial for ensuring the safety and functionality of the steps. A reliable level and tape measure are indispensable tools for this purpose.
- Masonry Saw and Hammer: These tools will be essential for cutting bricks to size and shape, as well as for making precise adjustments during the construction process.
- Protective Gear: Safety should always be a priority. Be sure to have protective gear such as gloves, safety goggles, and a dust mask to safeguard yourself during the construction work.
By gathering these materials and tools, you’ll be well-equipped to commence the next phase of the project: excavating the area and preparing the site for the construction of the brick steps.
Excavating the Area
Excavating the area where the brick steps will be installed is a crucial initial step in the construction process. Proper excavation sets the foundation for a stable and long-lasting structure. Here’s a detailed guide to excavating the area for your brick steps:
- Marking the Layout: Begin by marking the layout of the steps using stakes and string. This will provide a clear visual guide for the excavation and construction process.
- Digging the Trenches: Use a shovel to carefully dig trenches for the steps, ensuring that the depth and width correspond to the planned dimensions. Remove any rocks, roots, or debris from the trenches to create a clean and even base.
- Creating a Stable Base: Once the trenches are excavated, add a layer of gravel to the bottom to facilitate drainage and provide stability. Compact the gravel thoroughly to create a firm base for the steps.
- Installing Landscape Fabric: Lay landscape fabric over the gravel to prevent weed growth and help maintain the integrity of the base over time. Trim the fabric to fit the dimensions of the trenches.
- Checking for Levelness: Use a level to ensure that the base of the trenches is even and level. Making precise adjustments at this stage will contribute to the overall stability and safety of the steps.
- Reinforcement and Drainage Considerations: Depending on the height and length of the steps, consider adding rebar or metal stakes for reinforcement. Additionally, incorporate proper drainage channels to prevent water accumulation beneath the steps.
By meticulously excavating the area and creating a solid foundation, you’ll establish the groundwork for the successful construction of your brick steps on the hill. With the site prepared, you’re ready to move on to the next phase: building the base for the steps.
Building the Base
Building a sturdy and level base is essential for the structural integrity and longevity of your brick steps. The base serves as the foundation upon which the steps will be securely laid. Here’s a detailed guide to constructing the base for your brick steps on a hill:
- Mixing and Pouring Concrete: Prepare a high-quality concrete mix according to the manufacturer’s instructions. Pour the concrete into the trenches, ensuring an even distribution throughout the excavated area. Smooth the surface of the concrete with a trowel to create a level base.
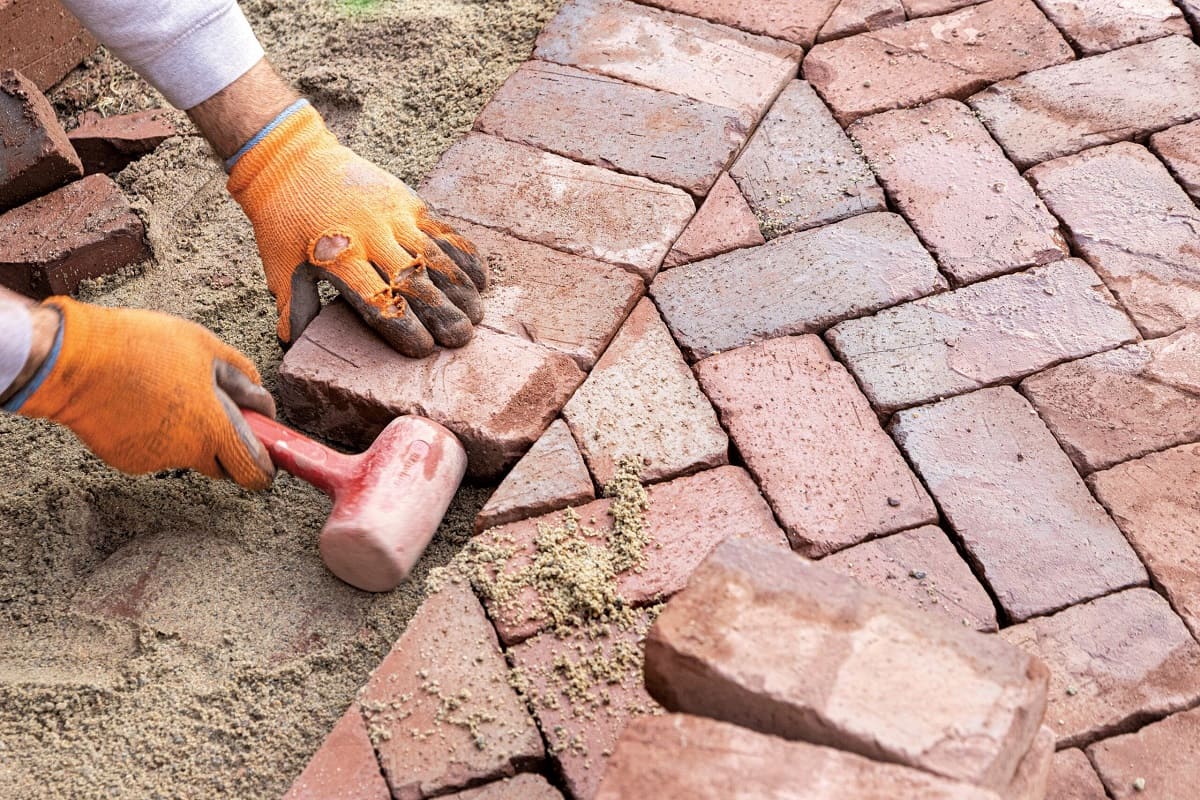
- Setting the First Course: Once the concrete is poured and leveled, it’s time to set the first course of bricks. Place the bricks directly onto the concrete, ensuring a snug fit and maintaining consistent spacing between each brick. Use a level to check the alignment and adjust as needed.
- Securing the Bricks: To secure the bricks in place, apply a layer of mortar to the top surface of the concrete base before laying each brick. This will enhance stability and prevent shifting over time.
- Creating a Uniform Rise: Pay close attention to the rise of each step, ensuring that it is consistent and comfortable for walking. Use spacers or a specialized tool to maintain uniformity in the height of each step.
- Checking for Levelness and Alignment: As you progress with laying the first course of bricks, regularly use a level to verify that the steps are horizontally level and align with the predetermined design. Making adjustments at this stage is crucial for precision.
- Curing and Drying: Allow the concrete and mortar to cure and dry according to the recommended timeframe provided by the product manufacturers. This will ensure optimal strength and durability for the base of the brick steps.
By meticulously constructing a solid base, you’ll establish a reliable platform for the subsequent layers of bricks, ultimately leading to the successful completion of your brick steps on the hillside. With the base in place, you’re ready to progress to the next phase: laying the first course of bricks.
When building brick steps on a hill, make sure to properly prepare the ground by leveling and compacting it. Use a string line to ensure the steps are straight and level, and use a sturdy adhesive to secure the bricks in place.
Read more: How To Build Stairs Into A Hill
Laying the First Course
As you transition to laying the first course of bricks, you’re taking a significant step towards bringing your brick steps to life on the hill. This phase requires precision and attention to detail to ensure a stable and visually appealing foundation for the entire structure. Here’s a comprehensive guide to laying the first course of bricks:
- Preparing the Mortar: Mix mortar according to the manufacturer’s instructions, achieving a consistency that allows for strong adhesion while remaining workable. A mortar hawk and trowel are essential tools for this task.
- Applying Mortar and Setting Bricks: Use the trowel to apply a layer of mortar on top of the base and along the sides of the bricks. Carefully set each brick in place, pressing it firmly into the mortar and ensuring a consistent joint width between bricks.
- Checking Alignment and Levelness: As you lay each brick, use a level to verify that the surface is horizontally level and that the bricks are aligned with the predetermined design. Make adjustments as needed to maintain uniformity and precision.
- Using Spacers: Employ plastic spacers to maintain consistent spacing between the bricks, promoting uniformity and allowing for the proper application of mortar. These spacers will contribute to the overall stability and aesthetics of the steps.
- Trimming and Cutting Bricks: In cases where custom-sized bricks are required to fit the design, use a masonry saw to make precise cuts. Pay attention to the accuracy of the cuts to ensure a seamless and professional-looking first course.
- Smoothing and Cleaning: As you progress with laying the first course, periodically clean excess mortar from the brick surfaces and ensure that the joints are uniformly filled and smoothed for a polished appearance.
By meticulously laying the first course of bricks with precision and care, you’re establishing a solid and visually appealing foundation for the subsequent layers. With the first course in place, you’re ready to continue the construction process, bringing your brick steps one step closer to completion.
Continuing the Construction
As you progress with the construction of your brick steps on the hill, the continuation of the process involves building upon the foundation laid in the earlier phases. This stage is pivotal in ensuring the structural integrity and aesthetic appeal of the steps. Here’s a detailed guide to continuing the construction of your brick steps:
- Laying Additional Courses: Build upon the first course by laying subsequent courses of bricks, ensuring a staggered pattern for enhanced stability and visual appeal. Apply mortar to the top of the previous course before setting each brick in place.
- Checking for Uniform Rise: As you add each new course, maintain a consistent rise for each step to ensure comfort and safety for users. Use a level to verify the uniformity of the rise and make adjustments as necessary.
- Creating Secure Joints: Pay close attention to the joints between bricks, ensuring they are properly filled with mortar to provide strength and stability. Smooth and shape the mortar joints to achieve a clean and professional finish.
- Installing Handrails: If your design includes handrails for the brick steps, carefully install them at this stage, ensuring they are securely anchored and aligned with the steps for added safety and support.
- Adding Lighting Features: Consider incorporating lighting features along the steps to enhance visibility and ambiance, especially in the evening hours. Low-voltage LED lights can be strategically placed to illuminate the path.
- Applying Finishing Touches: As you near the completion of the construction process, take the time to inspect the steps for any imperfections, and make any necessary adjustments. Clean the surfaces and remove any debris to reveal the beauty of the finished structure.
By continuing the construction process with meticulous attention to detail and craftsmanship, you’re bringing your vision of brick steps on the hill to fruition. Each step forward brings you closer to completing a stunning and functional addition to your outdoor space.
Finishing Touches
As you approach the final stages of constructing your brick steps on the hill, it’s time to add the finishing touches that will elevate the overall appearance and functionality of the structure. Attention to detail and thoughtful additions can transform the steps into a standout feature of your landscape. Here’s a guide to the finishing touches:
- Sealing the Bricks: Consider applying a suitable sealant to the brick surfaces to enhance their durability and resistance to weathering. The sealant can also bring out the natural colors and textures of the bricks, adding to their visual appeal.
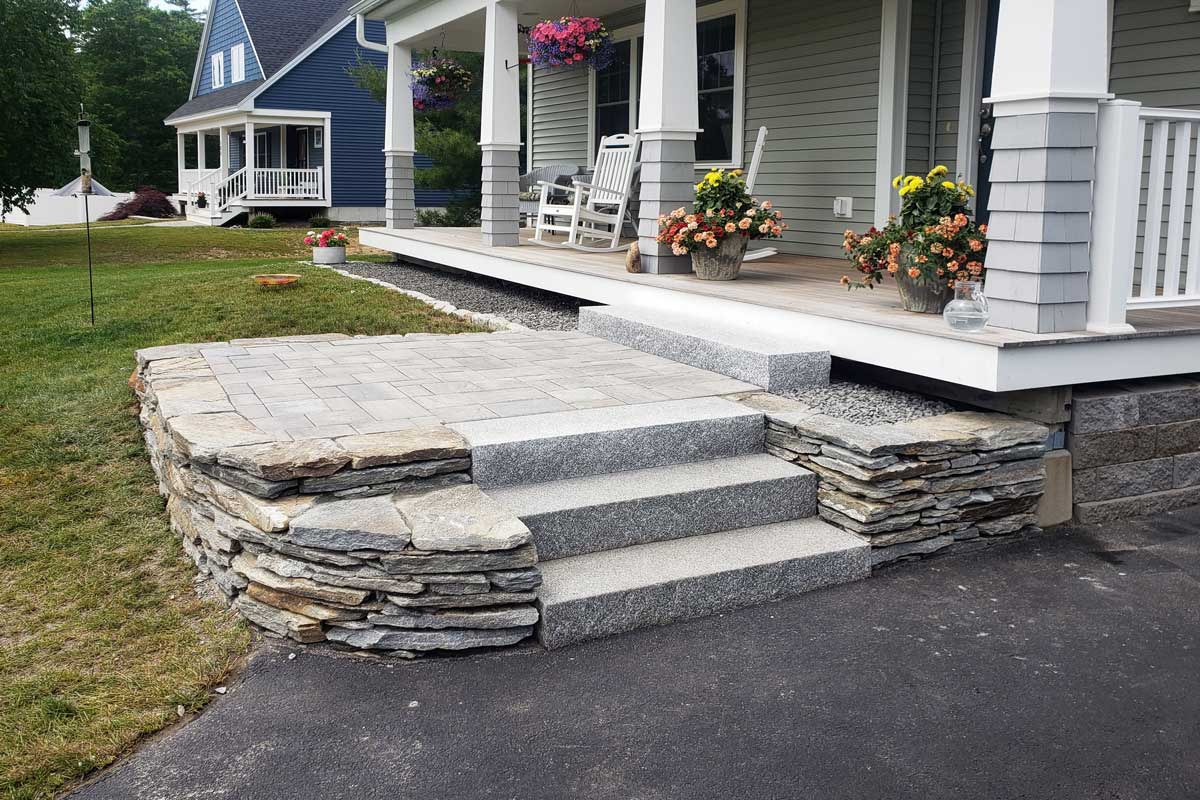
- Landscaping Integration: Integrate the surrounding landscape with the steps by adding planters, shrubs, or flowers along the sides. This softens the transition between the steps and the hill, creating a harmonious and inviting environment.
- Adding Non-Slip Treads: For enhanced safety, especially in wet conditions, consider incorporating non-slip treads on the surface of the steps. These treads provide traction and reduce the risk of slipping, particularly during inclement weather.
- Maintaining Drainage: Ensure that proper drainage channels are in place to prevent water accumulation on the steps. Clear any debris or obstructions from the drainage pathways to maintain optimal functionality.
- Personalized Accents: Infuse your personal style by adding decorative accents such as mosaic tiles, engraved bricks, or custom patterns to make the steps uniquely yours. These personalized touches can add character and charm to the structure.
- Regular Maintenance Plan: Develop a maintenance plan to preserve the beauty and functionality of the brick steps. This may include periodic cleaning, inspection for wear and tear, and prompt repairs as needed.
By attending to these finishing touches, you’re not only enhancing the aesthetics and safety of the brick steps but also ensuring that they seamlessly integrate with your outdoor space. The final result will be a visually striking and durable addition that enriches the overall appeal of your landscape.
Conclusion
Congratulations on completing the journey of building brick steps on a hill! The process of transforming a sloped terrain into a functional and visually captivating feature has been both rewarding and enriching. As you stand back and admire the finished steps, you’ve not only added practical accessibility to your outdoor space but also infused it with timeless charm and character.
Throughout this endeavor, you’ve embraced the art of craftsmanship, precision, and creativity. From the meticulous planning and preparation to the hands-on construction and thoughtful finishing touches, each phase has contributed to the realization of your vision. The result is a testament to your dedication and attention to detail.
As you enjoy the newly constructed brick steps, envision the countless moments they will facilitate – whether it’s a leisurely stroll through your garden, a gathering with friends and family, or simply a quiet moment of reflection amidst the beauty of nature. The steps now stand as a seamless link between different levels of your landscape, inviting exploration and connection.
Remember that the completion of the construction is just the beginning of the steps’ journey. As they become an integral part of your outdoor environment, regular maintenance and care will ensure their enduring beauty and functionality for years to come. Embrace the evolving seasons and the changing landscape, knowing that the brick steps will remain a steadfast and enduring feature.
With the construction process behind you, take pride in the craftsmanship and artistry that have shaped the brick steps on the hill. Your dedication to this project has not only transformed the physical space but has also left an indelible mark on your outdoor sanctuary. As the seasons unfold and time leaves its gentle touch, the brick steps will stand as a testament to your creativity and passion for enhancing the natural world.
So, as you embark on the next chapters of your outdoor adventures, may the brick steps serve as a reminder of the joy found in creating, shaping, and connecting with the beauty of the world around us.
Ready to spruce up your garden or tackle some hands-on projects? Delve into our collection of creative garden fence ideas, perfect for any landscaping enthusiast looking to enhance their outdoor space. If you're also keen on crafting and personal achievements, our insights into DIY projects will surely pique your interest. Get set to transform your surroundings and skills with these engaging reads.
Frequently Asked Questions about How To Build Brick Steps On A Hill
Was this page helpful?
At Storables.com, we guarantee accurate and reliable information. Our content, validated by Expert Board Contributors, is crafted following stringent Editorial Policies. We're committed to providing you with well-researched, expert-backed insights for all your informational needs.




0 thoughts on “How To Build Brick Steps On A Hill”