Home>Construction & Tools>Building Materials>How To Build A Brick Wall In The Garden
Building Materials
How To Build A Brick Wall In The Garden
Modified: February 18, 2024
Learn how to build a sturdy brick wall in your garden using high-quality building materials. Our step-by-step guide will help you create a durable and attractive structure.
(Many of the links in this article redirect to a specific reviewed product. Your purchase of these products through affiliate links helps to generate commission for Storables.com, at no extra cost. Learn more)
Introduction
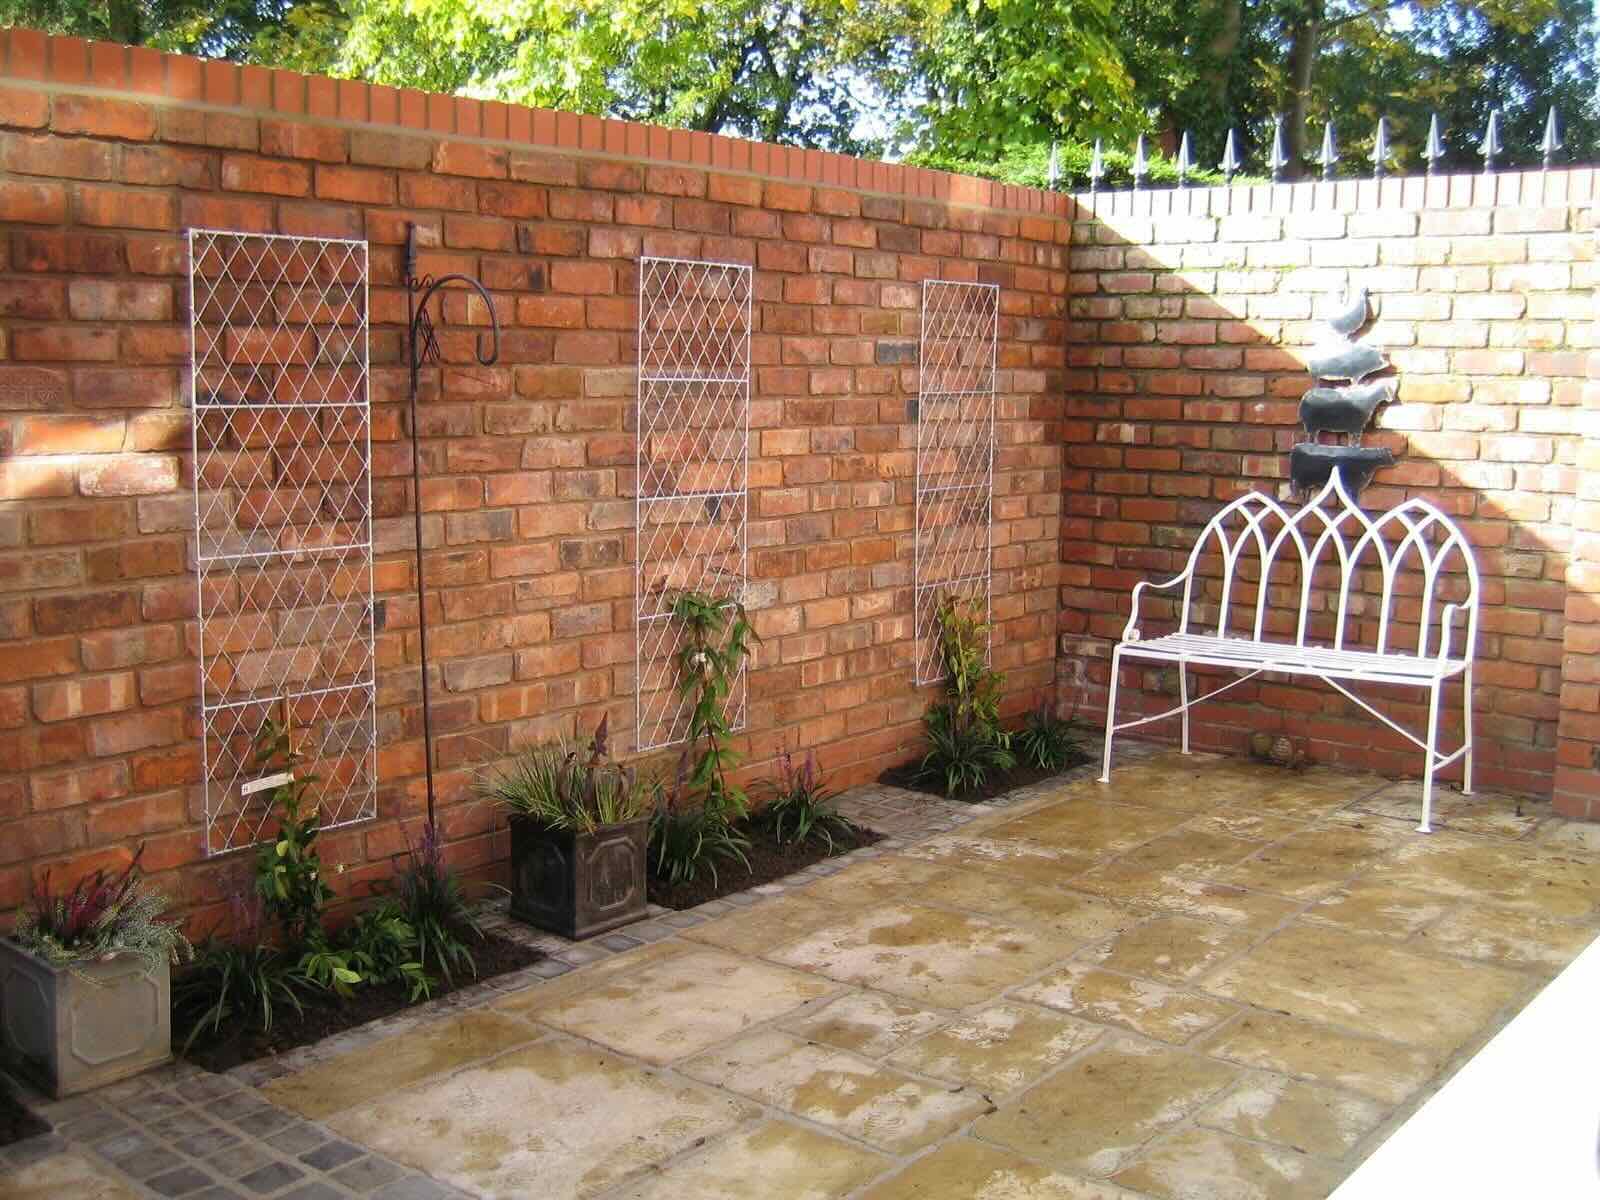
Building a brick wall in your garden can add a touch of timeless elegance and functionality to your outdoor space. Whether you're looking to create a boundary, define a flower bed, or add a decorative element, a well-constructed brick wall can enhance the overall aesthetic and value of your property. In this comprehensive guide, we'll walk you through the step-by-step process of building a brick wall, covering everything from planning and preparation to the finishing touches. By following these instructions and tapping into your creativity, you can transform your garden into a captivating oasis that reflects your personal style and enhances the beauty of your outdoor living space. So, roll up your sleeves, put on your work gloves, and let's get started on this rewarding and fulfilling project!
Key Takeaways:
- Building a brick wall in your garden adds timeless elegance and functionality. Plan carefully, gather high-quality materials, and pay attention to finishing touches for a stunning and enduring result.
- The foundation is crucial for stability and durability. Mark out the wall meticulously, lay a solid foundation, and build with precision for a visually appealing and long-lasting garden wall.
Read more: How To Build A Brick Garden Wall
Planning and Preparation
Before embarking on the exciting journey of building a brick wall in your garden, it’s essential to start with a well-thought-out plan. Begin by determining the purpose of the wall. Are you creating a boundary, defining a specific area, or adding a decorative element? Understanding the function of the wall will guide the design and construction process. Consider the overall aesthetic of your garden and how the wall will complement the existing landscaping elements.
Next, it’s crucial to check local building codes and regulations. Some areas have specific requirements for the construction of walls, especially those that exceed a certain height. Ensuring compliance with these regulations will save you from potential headaches down the road.
Once you have a clear vision and understanding of the regulatory considerations, it’s time to gather the necessary tools and materials. This includes bricks, mortar, a spirit level, trowels, a shovel, a wheelbarrow, and safety equipment such as gloves and goggles. Having everything on hand before you begin will streamline the construction process and prevent unnecessary delays.
Additionally, take the time to assess the terrain where the wall will be built. If the ground is uneven, you may need to level it to create a stable foundation for the wall. Consider drainage as well; proper water runoff is essential to prevent damage to the wall over time.
Finally, sketch out the dimensions and layout of the wall on paper. This will serve as a visual guide and help you estimate the quantity of materials needed. With careful planning and thorough preparation, you’ll set the stage for a successful and rewarding brick-laying endeavor in your garden.
Gathering Materials
With the planning phase complete, it’s time to gather the materials necessary for constructing your brick wall. The primary materials include bricks, mortar, and a sturdy foundation. When selecting bricks, consider both the aesthetic and structural aspects. Choose bricks that complement the overall style of your garden while ensuring they are durable enough to withstand outdoor elements. Additionally, consider the color and texture of the bricks to achieve the desired visual impact.
For the mortar, opt for a high-quality mix suitable for outdoor use. The mortar should provide strong adhesion and weather resistance, ensuring the longevity of your wall. It’s also wise to invest in a spirit level to ensure the bricks are laid evenly and vertically, contributing to the structural integrity and visual appeal of the wall.
Other essential tools and equipment include trowels for applying mortar, a shovel for excavating the foundation, a wheelbarrow for transporting materials, and safety gear such as gloves and goggles. Having these items readily available will streamline the construction process and contribute to a safe working environment.
Consider the quantity of materials needed based on the dimensions of the wall. It’s advisable to purchase a surplus of bricks and mortar to account for any miscalculations or unexpected challenges during construction. Additionally, if your wall will include corners or intricate designs, plan for the necessary materials to execute these features seamlessly.
By gathering high-quality materials and ensuring you have an ample supply, you’ll be well-prepared to commence the construction phase with confidence and efficiency. With the materials in hand, you’re one step closer to bringing your vision of a stunning brick wall in your garden to life.
Marking Out the Wall
Before laying the first brick, it’s essential to mark out the precise location and dimensions of the wall in your garden. Start by using pegs and a string line to outline the perimeter of the wall. This step will provide a clear visual guide, ensuring that the wall is straight, properly aligned, and in harmony with the surrounding landscape.
Using a tape measure, carefully mark the positions where the corners and any turns in the wall will be. This meticulous approach will help maintain accuracy and precision throughout the construction process. Additionally, consider using a spray paint or chalk to mark the ground, providing a visible reference as you prepare the foundation and begin laying the bricks.
When marking out the wall, it’s crucial to consider the desired height and thickness of the structure. These dimensions will influence the depth and width of the foundation, as well as the quantity of bricks and mortar required. Take the time to double-check the measurements and ensure that the marked-out area aligns with your initial plan and vision for the wall.
Furthermore, if your wall will include corners or curves, pay special attention to marking these areas accurately. Use additional pegs and string lines to outline these features, maintaining a consistent level of precision and alignment. This meticulous approach will contribute to the overall visual appeal and structural integrity of the wall.
By taking the time to mark out the wall meticulously, you’ll establish a solid foundation for the construction phase. This careful preparation will set the stage for a smooth and successful brick-laying process, ensuring that your garden wall meets your expectations in both form and function.
When building a brick wall in your garden, make sure to start with a solid foundation and use mortar to hold the bricks together. It’s important to level each row as you go to ensure a straight and sturdy wall.
Laying the Foundation
The foundation serves as the backbone of your brick wall, providing stability and support to ensure its longevity and structural integrity. Before laying the first brick, it’s crucial to prepare a solid foundation that will withstand the test of time and environmental factors. Here’s a step-by-step guide to laying the foundation for your garden wall:
- Excavation: Begin by excavating the marked-out area to the required depth, typically below the frost line to prevent shifting and cracking due to freezing temperatures. Use a shovel to remove the soil, creating a level and uniform trench along the perimeter of the wall.
- Compaction: Once the trench is excavated, compact the soil at the bottom using a hand tamper or a mechanical compactor. This step is essential for creating a stable base that minimizes the risk of settling over time.
- Adding Gravel: To enhance drainage and further stabilize the foundation, add a layer of gravel to the compacted trench. The gravel will facilitate water runoff and prevent moisture-related issues that could compromise the integrity of the wall.
- Leveling: Use a spirit level to ensure the gravel base is level and uniformly distributed throughout the trench. This step is crucial for establishing a consistent and stable foundation for the brick wall.
- Adding Concrete: Pour concrete into the trench, filling it to the desired height. Use a trowel to smooth the surface and create a level bed for the first course of bricks. Allow the concrete to cure according to the manufacturer’s recommendations before proceeding with the bricklaying process.
By meticulously executing each step of the foundation-laying process, you’ll establish a solid base for your garden wall, ensuring its stability and durability for years to come. A well-constructed foundation is the cornerstone of a successful brick-laying project, setting the stage for the next phase of building your stunning garden wall.
Read more: How To Build Brick Wall
Building the Wall
With the foundation securely in place, it’s time to embark on the exciting phase of building your brick wall. This process requires precision, patience, and attention to detail to ensure a visually appealing and structurally sound result. Here’s a comprehensive guide to constructing your garden wall:
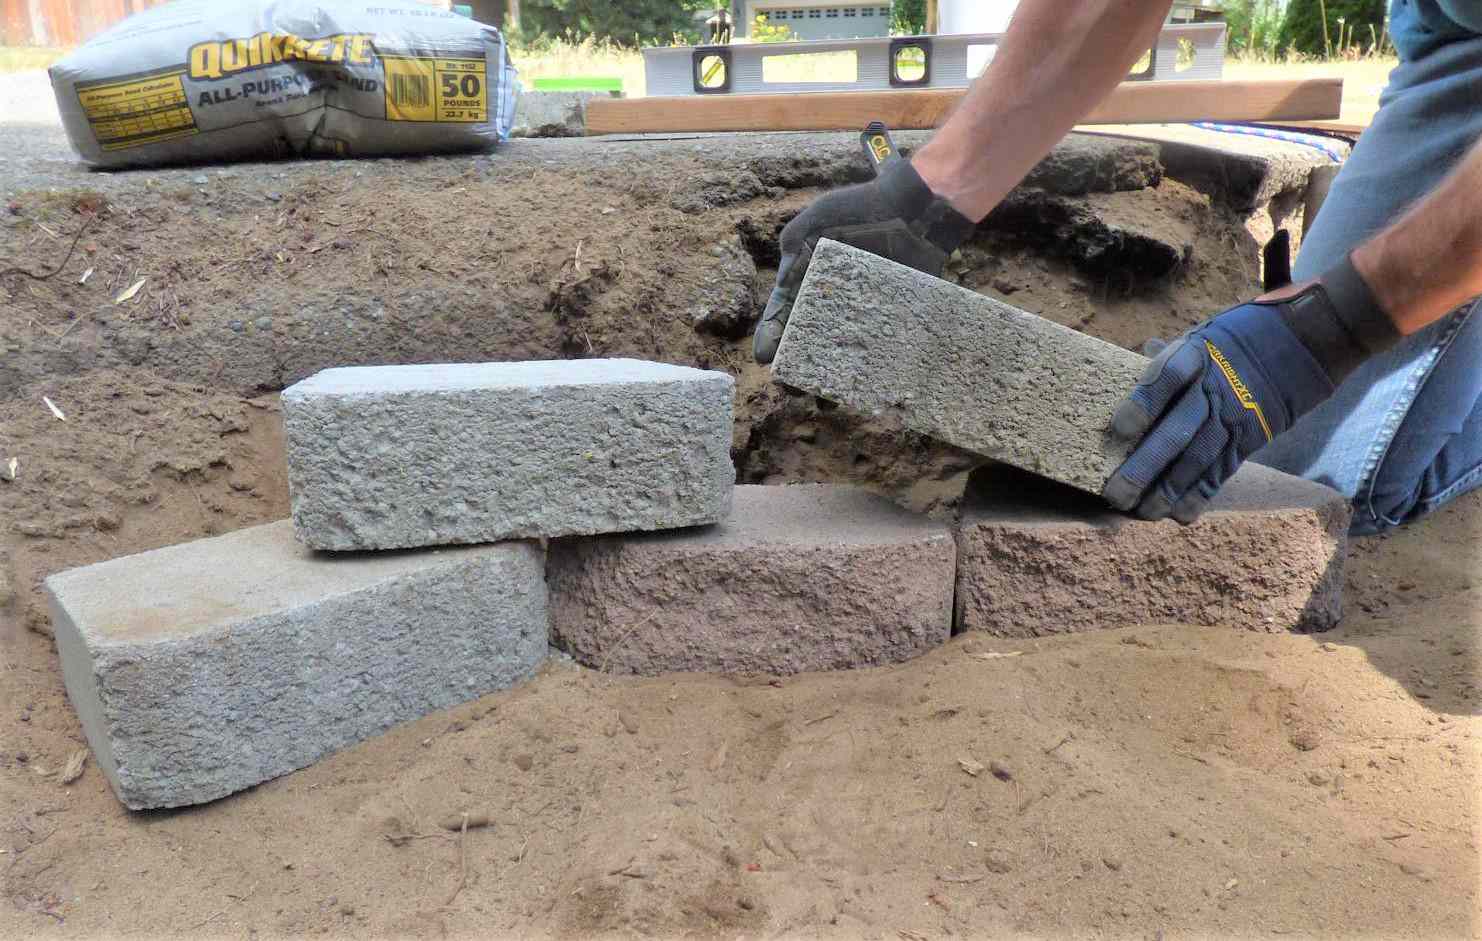
- Applying Mortar: Begin by applying a layer of mortar to the concrete foundation using a trowel. This will serve as the adhesive for the first course of bricks. Ensure the mortar is evenly distributed and of the appropriate consistency for optimal adhesion.
- Laying the First Course: Carefully place the first row of bricks on the mortar, ensuring they are aligned with the marked-out perimeter and each other. Use a spirit level to check for evenness and adjust the positioning of the bricks as needed. Proper alignment at this stage is crucial for the overall stability and visual appeal of the wall.
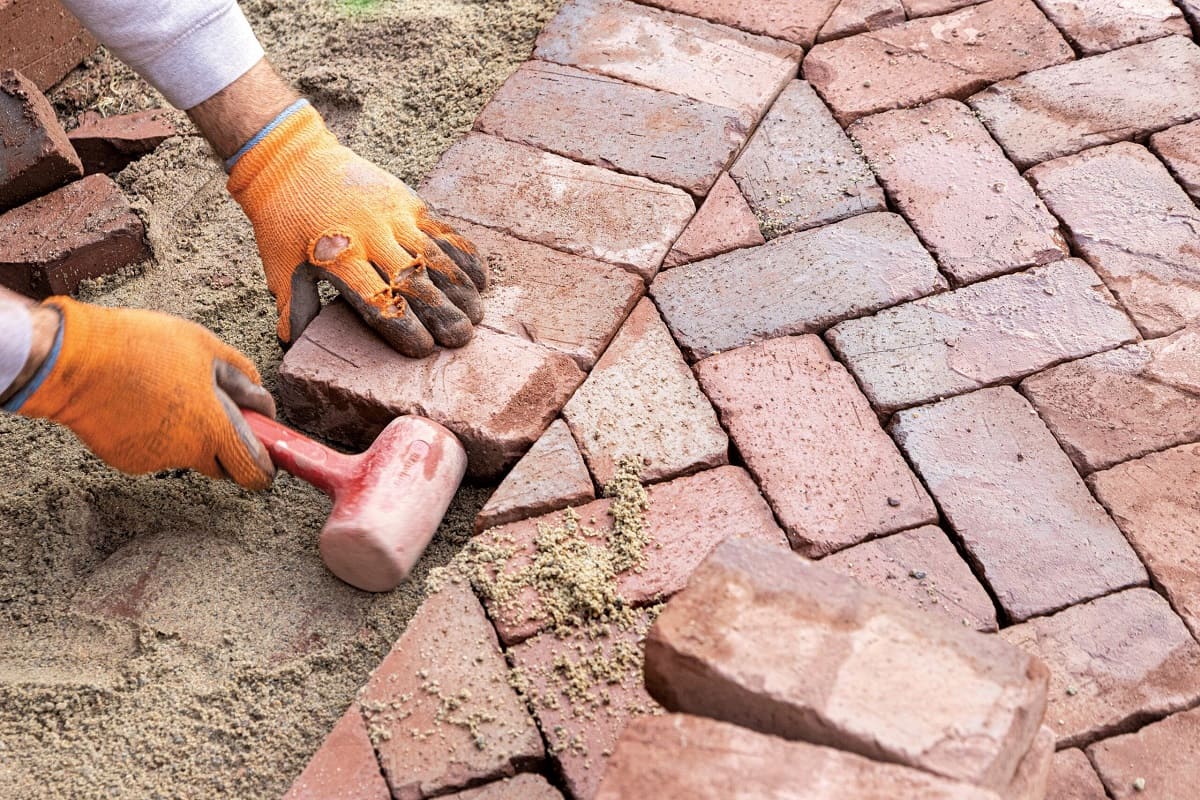
- Building Upward: As you progress to subsequent courses, apply mortar to the top of the previous layer before adding the next row of bricks. Stagger the joints between bricks to enhance the strength and stability of the wall. Use a spirit level regularly to ensure the wall remains plumb and level as it rises.
- Creating Openings: If your wall will include openings for gates, windows, or other features, plan and construct these areas carefully, ensuring proper support and alignment. Use lintels or other structural elements as needed to maintain the integrity of the wall around these openings.
- Finishing Touches: Once the wall reaches the desired height, carefully finish the top course to create a clean and polished appearance. Use a pointing trowel to fill the joints between bricks with mortar, creating a cohesive and visually appealing finish.
Throughout the construction process, maintain a keen eye for detail and ensure each brick is securely and evenly positioned. The careful execution of each course will contribute to the overall strength and aesthetic appeal of your garden wall. By methodically following these steps, you’ll bring your vision of a stunning and enduring brick wall to fruition, adding a touch of timeless charm to your outdoor space.
Finishing Touches
As you near the completion of your brick wall, it’s time to focus on the finishing touches that will elevate the overall appearance and functionality of the structure. These final steps will add polish and character to your garden wall, ensuring that it seamlessly integrates with your outdoor space. Here are essential finishing touches to consider:
- Cleaning: Once the mortar has set, use a stiff brush to remove any excess mortar or debris from the surface of the bricks. This will reveal the natural beauty of the bricks and give the wall a clean, professional appearance.
- Sealing: Consider applying a suitable sealant to the bricks to enhance their durability and weather resistance. A quality sealant can protect the bricks from moisture, UV exposure, and other environmental factors, prolonging the life of your garden wall.
- Adding Capstones: If desired, consider adding capstones to the top of the wall. Capstones not only provide a decorative finish but also offer protection against water penetration, helping to preserve the integrity of the wall over time.
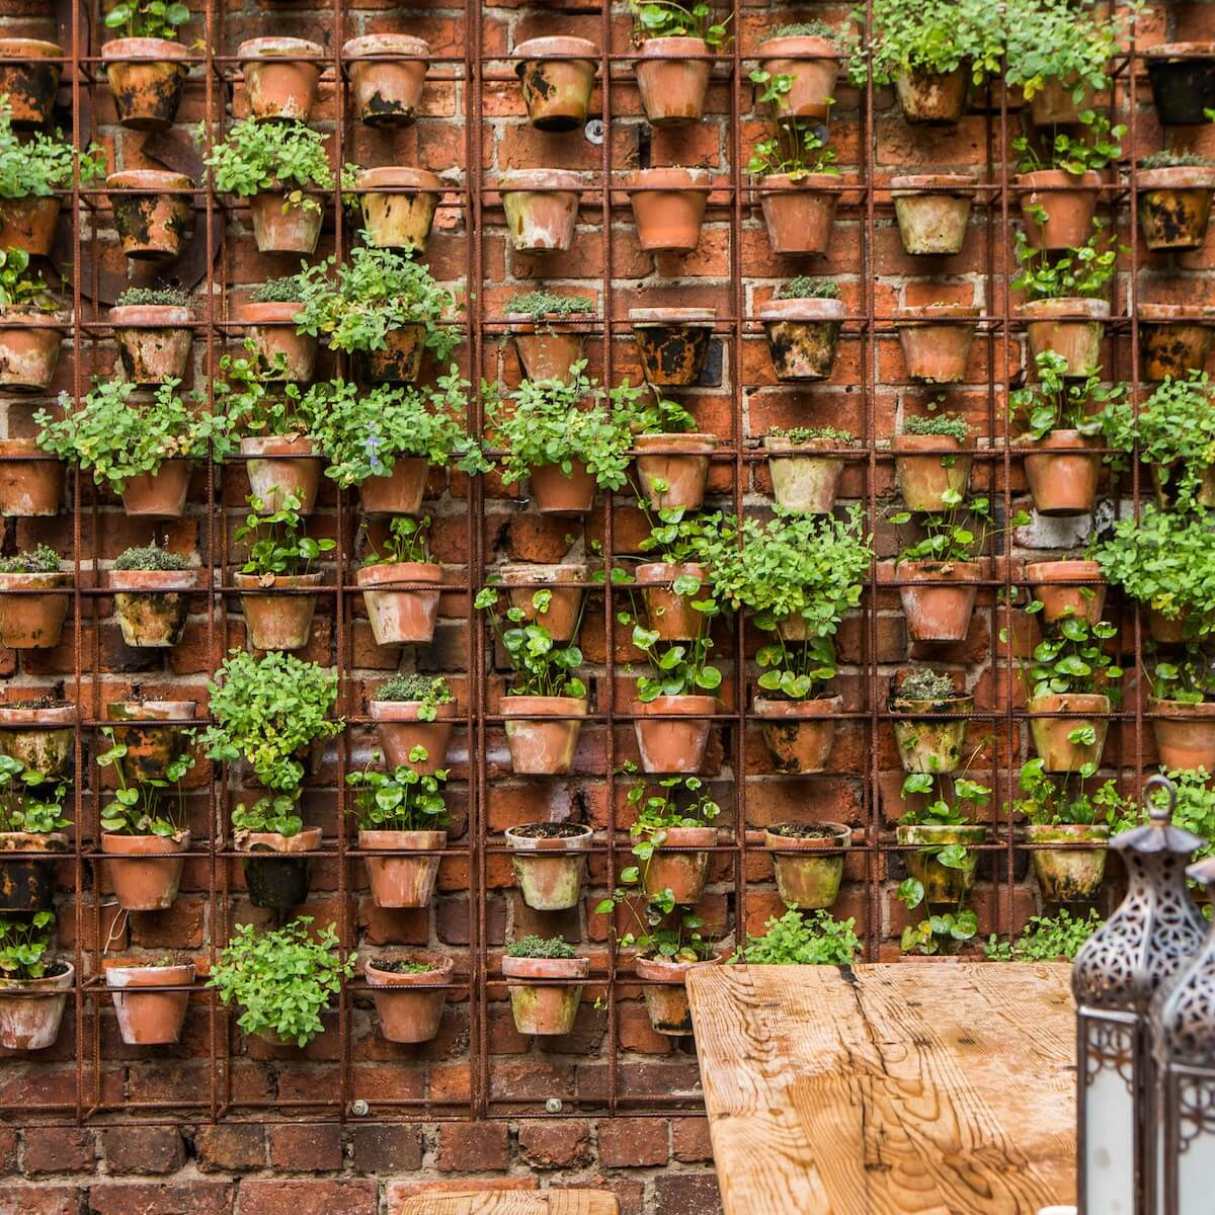
- Landscaping: Incorporate landscaping elements around the base of the wall to soften its appearance and seamlessly integrate it into the garden. Planting flowers, shrubs, or ornamental grasses can enhance the visual appeal of the wall and create a harmonious transition between the structure and the surrounding greenery.
- Lighting: Strategically placed outdoor lighting can accentuate the beauty of your garden wall, creating a captivating ambiance during the evening hours. Consider installing low-voltage LED lights to illuminate the wall and highlight its architectural features.
By attending to these finishing touches, you’ll elevate the aesthetic appeal and functionality of your brick wall, transforming it into a captivating focal point in your garden. Each detail contributes to the overall impact of the structure, creating a seamless integration with your outdoor living space and reflecting your personal style and creativity.
Conclusion
Congratulations on successfully completing the construction of your brick wall in the garden! This rewarding endeavor has not only enhanced the visual appeal of your outdoor space but also added a touch of timeless elegance and functionality to your property. As you admire the fruits of your labor, it’s important to reflect on the journey and the sense of accomplishment that comes with creating a lasting and impactful feature in your garden.
Building a brick wall is a testament to your creativity, patience, and dedication to transforming your vision into reality. The careful planning, meticulous preparation, and precise execution have culminated in a structure that not only defines your garden but also reflects your personal style and attention to detail.
As you enjoy the presence of your new garden wall, take pride in the craftsmanship and enduring beauty it brings to your outdoor oasis. Whether it serves as a boundary, a decorative element, or a backdrop for lush greenery, your brick wall stands as a testament to your commitment to enhancing your living space.
With the completion of this project, you’ve not only added value to your property but also created a lasting legacy that will be admired for years to come. Your garden wall is a testament to the artistry and craftsmanship that you’ve poured into your outdoor environment, enriching your daily life and providing a source of pride and satisfaction.
As you bask in the satisfaction of a job well done, take the time to appreciate the transformation you’ve achieved and the beauty you’ve brought to your garden. Your brick wall stands as a symbol of your creativity and dedication, enriching the landscape and creating a welcoming and captivating atmosphere for all who enter your outdoor sanctuary.
So, as you savor the sense of accomplishment, take a moment to revel in the beauty of your newly constructed brick wall—a testament to your vision, perseverance, and the enduring allure of a well-crafted outdoor space.
Frequently Asked Questions about How To Build A Brick Wall In The Garden
Was this page helpful?
At Storables.com, we guarantee accurate and reliable information. Our content, validated by Expert Board Contributors, is crafted following stringent Editorial Policies. We're committed to providing you with well-researched, expert-backed insights for all your informational needs.


0 thoughts on “How To Build A Brick Wall In The Garden”