Home>Construction & Tools>Building Materials>How To Grout Thin Brick
Building Materials
How To Grout Thin Brick
Published: January 22, 2024
Learn how to grout thin brick with our comprehensive guide on building materials. Discover the best techniques and tips for a professional finish.
(Many of the links in this article redirect to a specific reviewed product. Your purchase of these products through affiliate links helps to generate commission for Storables.com, at no extra cost. Learn more)
Introduction
Grouting thin brick is a crucial step in achieving a polished and professional finish for your interior or exterior brick surfaces. Whether you're embarking on a DIY project or working with a professional contractor, understanding the grouting process is essential for ensuring the longevity and aesthetic appeal of your thin brick installation. Grout not only serves as a structural element, but it also enhances the overall appearance of the brickwork, providing a cohesive and seamless look.
In this comprehensive guide, we will walk you through the step-by-step process of grouting thin brick, from preparing the surface to applying the grout and adding the finishing touches. By following these instructions, you can elevate the visual impact of your thin brick installation while ensuring its durability and resilience.
Grouting thin brick requires attention to detail and precision, but the results are well worth the effort. Whether you're revamping a fireplace, accent wall, or exterior façade, mastering the art of grouting thin brick will empower you to transform ordinary surfaces into stunning focal points within your living spaces.
Now, let's dive into the tools and materials you'll need to get started on your grouting journey.
Key Takeaways:
- Grouting thin brick requires meticulous preparation, precise mixing, and careful application. Attention to detail ensures a durable and visually appealing finish, transforming ordinary surfaces into stunning focal points.
- The finishing touches, including cleaning and sealing the grout, are essential for protecting and enhancing the longevity of the thin brick installation. These steps contribute to a polished and professional appearance, elevating the visual impact of interior or exterior surfaces.
Read more: How Thick Is Thin Brick
Tools and materials needed
Before embarking on the grouting process for thin brick, it's essential to gather the necessary tools and materials to ensure a smooth and efficient workflow. Here's a comprehensive list of what you'll need:
Tools:
-
Grout Float: A grout float is a rubber or foam tool used to apply and pack grout into the joints between the thin bricks. Its flat surface allows for even distribution and smooth application of the grout.
-
Grout Bag: This tool resembles a pastry bag and is used for precise grout application, especially in narrow or hard-to-reach areas. It provides greater control over the grout flow, minimizing waste and ensuring clean lines.
-
Margin Trowel: A margin trowel is a small, rectangular-shaped tool with a flat blade. It's ideal for scooping and spreading grout, especially in tight spaces and corners.
-
Bucket: A clean bucket is essential for mixing the grout to the desired consistency. Opt for a sturdy, medium-sized bucket to accommodate the grout and water while allowing ample space for mixing.
-
Sponge: A large, dense sponge is crucial for cleaning excess grout from the brick surface without disturbing the freshly applied grout in the joints.
-
Grout Sealer: While not a tool, grout sealer is a vital component for protecting the grout from moisture, stains, and discoloration. Ensure you have an appropriate sealer for the type of grout you'll be using.
Materials:
-
Grout: Select a high-quality grout that complements the color and style of your thin brick. Choose between sanded or unsanded grout based on the width of the joints and the desired finish.
-
Water: Clean water is essential for mixing the grout to the proper consistency. Ensure you have access to water for the grout mixing process and for rinsing the sponge during cleanup.
-
Thin Brick: Of course, you'll need the thin brick itself for the installation. Ensure that the thin brick is securely adhered to the substrate before proceeding with the grouting process.
-
Protective Gear: Consider wearing gloves and safety goggles to protect your hands and eyes during the grouting process. Additionally, wearing old or protective clothing is advisable to prevent grout stains on your attire.
By having these tools and materials at your disposal, you'll be well-equipped to tackle the grouting process with confidence and precision, ensuring a professional and visually appealing outcome for your thin brick installation.
Preparing the surface
Preparing the surface is a critical initial step before grouting thin brick. Proper surface preparation sets the foundation for a successful grouting process and ensures the longevity and visual appeal of the installation. Here's a detailed guide on how to prepare the surface for grouting thin brick:
Read more: How To Install Thin Brick
Inspecting the Thin Brick Installation:
Before proceeding with grouting, carefully inspect the thin brick installation to ensure that the bricks are securely adhered to the substrate. Check for any loose or protruding bricks, as these can hinder the grouting process and compromise the overall finish. Additionally, assess the cleanliness of the brick surface, ensuring that it is free from dust, debris, or any adhesive residue.
Protecting Adjacent Surfaces:
To prevent unintended grout stains on adjacent surfaces, such as walls, flooring, or countertops, it's essential to apply masking tape or protective coverings. This precautionary measure safeguards surrounding areas from potential grout splatter or spills during the application process.
Clearing the Joints:
Using a narrow brush or vacuum with a crevice attachment, clear out any debris, dust, or loose particles from the joints between the thin bricks. It's crucial to achieve clean and debris-free joints to facilitate proper grout adhesion and ensure a seamless finish.
Dampening the Thin Brick Surface:
Before applying the grout, lightly dampen the surface of the thin brick with a clean, damp sponge. This step helps prevent the bricks from absorbing moisture from the freshly mixed grout, which can affect its curing and bonding properties. However, it's important to ensure that the bricks are not overly saturated, as excessive moisture can hinder the grout's ability to set properly.
Read more: How To Get Grout Off Brick
Checking Joint Depth and Width:
Verify that the joints between the thin bricks are uniform in depth and width. Consistent joint dimensions are crucial for achieving a cohesive and aesthetically pleasing grout line. If necessary, make any adjustments to ensure uniformity in the joint dimensions before proceeding with the grouting process.
By meticulously preparing the surface according to these guidelines, you'll establish an optimal environment for grouting thin brick, setting the stage for a seamless and visually striking finish. This meticulous preparation ensures that the grout adheres effectively, resulting in a durable and aesthetically pleasing thin brick installation.
Mixing the grout
Mixing the grout is a crucial step that demands precision and attention to detail. The consistency and thoroughness of the grout mixture directly impact the strength, durability, and visual appeal of the final grout lines. Here's a comprehensive guide on how to mix the grout effectively for your thin brick installation:
Selecting the Grout
Before commencing the mixing process, ensure that you have chosen the appropriate type and color of grout for your thin brick project. Consider factors such as the width of the joints, the desired finish, and the overall aesthetic of the installation. Whether opting for sanded or unsanded grout, select a high-quality product that complements the thin brick and aligns with your design vision.
Measuring the Grout and Water
Begin by carefully measuring the required amount of grout powder based on the manufacturer's recommendations. Use a clean bucket as the mixing vessel and pour the specified quantity of grout powder into it. It's essential to follow the manufacturer's guidelines regarding the grout-to-water ratio to achieve the ideal consistency. Gradually add the clean water to the grout powder, ensuring a controlled and measured approach to achieve the desired mixture.
Read more: How To Thin Out Grass
Mixing Technique
Using a margin trowel or a dedicated grout-mixing tool, begin blending the grout and water together. Employ a methodical stirring motion, ensuring that all the dry grout particles are incorporated into the water. Continuously mix the grout to prevent lumps or dry patches, aiming for a smooth and homogeneous consistency throughout the mixture. Pay close attention to the corners and bottom of the mixing vessel to ensure that all the grout powder is effectively hydrated and integrated.
Consistency Check
As you mix the grout, periodically assess its consistency to gauge its readiness for application. The ideal grout consistency resembles creamy peanut butter, exhibiting a smooth texture that holds its shape without being overly stiff or runny. Perform a "ribbon test" by lifting the grout with the margin trowel and allowing it to fall back into the bucket. The grout should form a cohesive ribbon without crumbling, indicating the optimal consistency for application.
Resting Period
Once the grout reaches the desired consistency, allow it to rest for a brief period as recommended by the manufacturer. This resting period allows the grout components to fully hydrate and bond, enhancing its workability and adhesive properties. During this time, refrain from adding additional water or adjusting the mixture, as it may compromise the integrity of the grout.
By meticulously following these steps and guidelines, you'll achieve a well-mixed grout mixture that is primed for seamless application and exceptional results. The proper mixing of grout is a foundational element in the grouting process, contributing to the structural integrity and visual allure of your thin brick installation.
Applying the grout
With the surface meticulously prepared and the grout mixture expertly mixed, it's time to embark on the pivotal stage of applying the grout to the thin brick installation. This process demands precision, patience, and a keen eye for detail to ensure that the grout seamlessly integrates with the brickwork, resulting in a polished and cohesive finish.
Read more: How To Grout Shower Floor
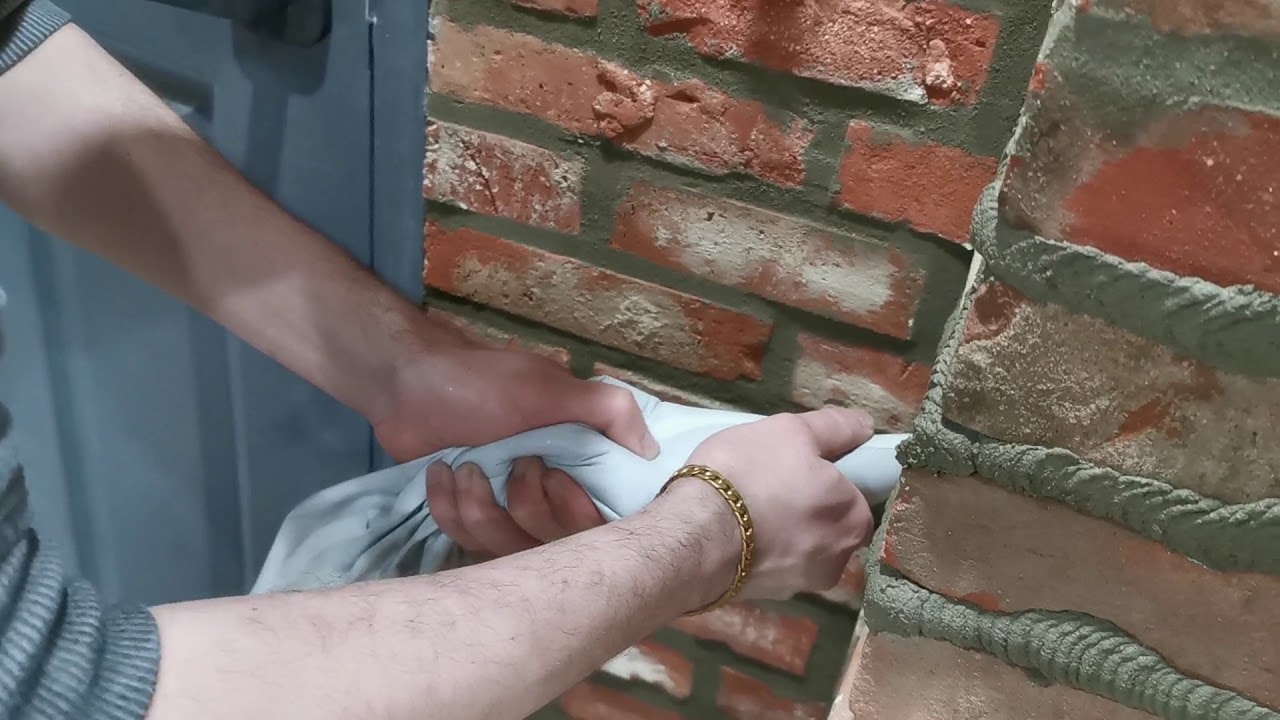
Grout Application Technique
Begin by scooping a generous amount of the prepared grout onto the grout float, ensuring that it is amply loaded for efficient application. Hold the grout float at a 45-degree angle and firmly press the grout into the joints between the thin bricks, working in a diagonal motion. This technique facilitates thorough grout coverage within the joints, ensuring that they are uniformly filled without air pockets or gaps.
As you progress, periodically inspect the grout lines to verify that they are consistently filled and level with the surface of the thin bricks. Pay particular attention to any recessed or uneven areas, using the grout float to distribute the grout evenly and achieve a smooth, flush finish. It's essential to work in manageable sections, ensuring that the grout is applied and shaped before it begins to set.
Precision and Cleanliness
Maintain precision and attention to detail as you navigate corners, edges, and intricate areas within the thin brick installation. For narrow or challenging spaces, utilize a grout bag to apply the grout with enhanced control and accuracy, ensuring that every joint receives the necessary attention. This meticulous approach contributes to the overall uniformity and visual appeal of the grout lines, elevating the aesthetic impact of the installation.
Addressing Excess Grout
As the grout begins to set within the joints, utilize a damp sponge to gently and diagonally wipe away any excess grout from the surface of the thin bricks. Rinse the sponge frequently to prevent grout residue from accumulating on the bricks, maintaining a clean and unblemished appearance. Exercise caution to avoid disturbing the freshly applied grout within the joints, focusing on delicately refining the surface without compromising the integrity of the grout lines.
Seamless Integration
Throughout the grout application process, prioritize achieving a seamless integration of the grout with the thin brick, ensuring that the joints are uniformly filled and impeccably finished. This meticulous approach not only enhances the visual allure of the installation but also contributes to the structural integrity and longevity of the grout lines.
By adhering to these guidelines and techniques, you'll navigate the grout application process with confidence and finesse, culminating in a striking and professionally executed thin brick installation. The application of grout is a transformative stage that brings the vision of the project to fruition, resulting in a captivating and enduring enhancement to your living spaces.
Read more: What Is Grouting In Construction
Cleaning the excess grout
Once the grout has been meticulously applied to the thin brick installation, the next critical step involves the careful removal of excess grout from the surface of the bricks. This process is essential for refining the appearance of the grout lines and ensuring that the thin bricks exhibit a clean and polished finish. Here's a detailed guide on how to effectively clean the excess grout from your thin brick installation:
Initial Assessment
Before initiating the cleaning process, take a moment to assess the state of the grout lines and the surface of the thin bricks. Verify that the grout within the joints has begun to set and firm up, indicating that it is ready for the cleaning phase. It's crucial to wait until the grout reaches the appropriate stage of curing to prevent unintentional displacement or damage during the cleaning process.
Damp Sponge Technique
Armed with a clean, damp sponge, gently begin wiping the surface of the thin bricks at a 45-degree angle, focusing on the grout lines. The goal is to delicately remove any residual grout that may have lingered on the brick surface during the application phase. Rinse the sponge frequently to prevent grout residue from being redistributed onto the bricks, maintaining a pristine appearance.
Refinement and Precision
Exercise precision and patience as you navigate the surface, ensuring that the excess grout is methodically and thoroughly removed without disrupting the freshly applied grout within the joints. Pay particular attention to any areas where the grout may have accumulated unevenly, using the damp sponge to achieve a uniform and refined finish. This meticulous approach contributes to the overall visual appeal of the thin brick installation, elevating its aesthetic impact.
Read more: How To Clean Backsplash Grout
Final Inspection
Upon completing the initial cleaning phase, conduct a comprehensive inspection of the grout lines and the surface of the thin bricks. Verify that the grout lines exhibit a consistent and flush finish, devoid of any residual grout or blemishes. Address any remaining areas that require refinement, ensuring that the thin bricks showcase a pristine and professionally executed appearance.
Sealing the Grout
Following the cleaning process, consider applying a high-quality grout sealer to protect the grout from moisture, stains, and discoloration. The sealer acts as a safeguard, enhancing the longevity and resilience of the grout lines while preserving their visual allure. Select a suitable sealer based on the type of grout used and follow the manufacturer's guidelines for application.
By meticulously adhering to these cleaning guidelines, you'll refine the appearance of the grout lines and the surface of the thin bricks, culminating in a visually striking and enduring enhancement to your living spaces. The cleaning of excess grout is a transformative stage that contributes to the overall refinement and longevity of your thin brick installation.
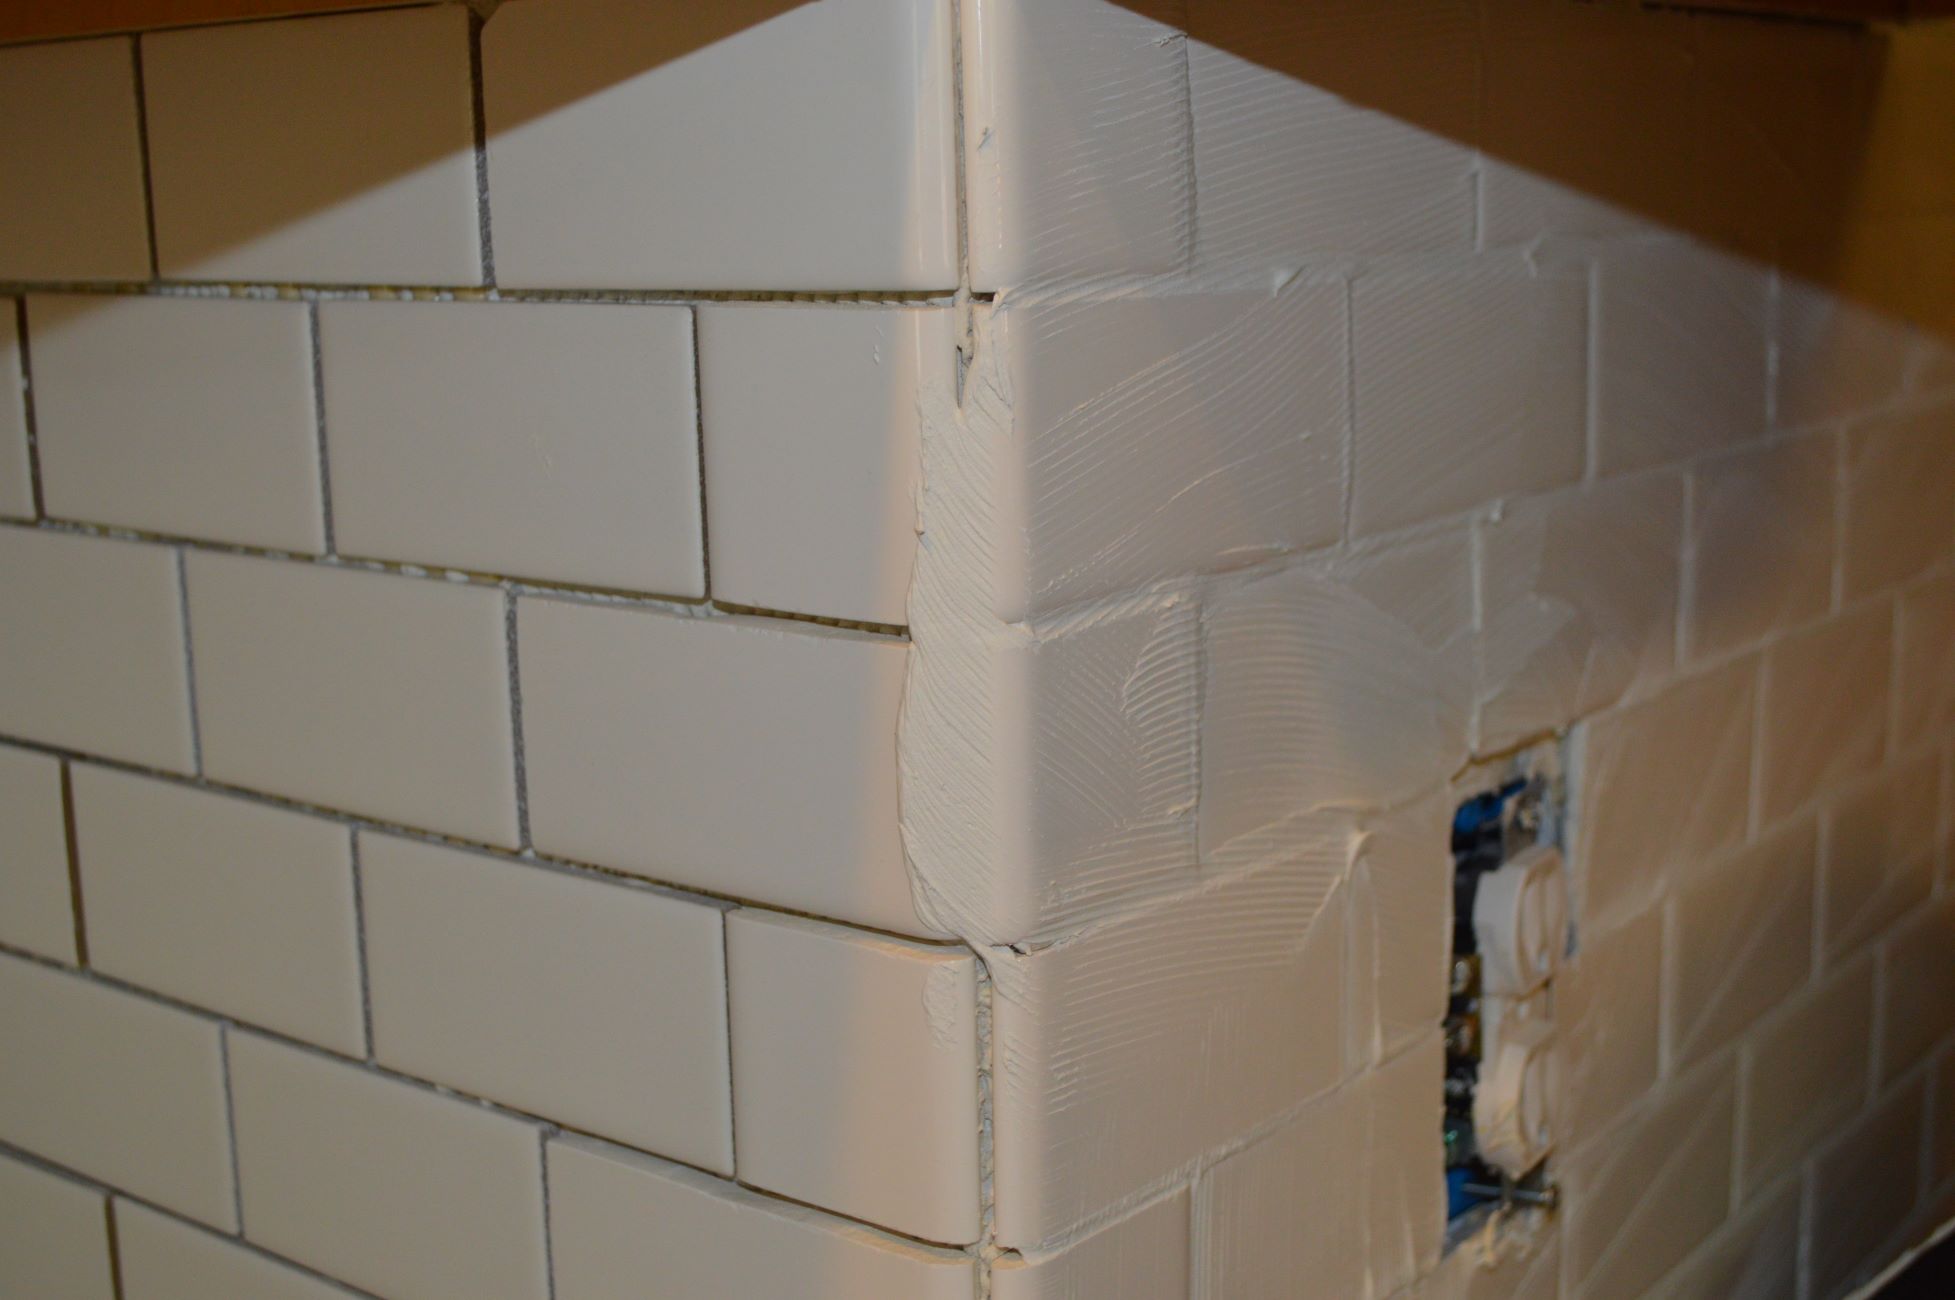
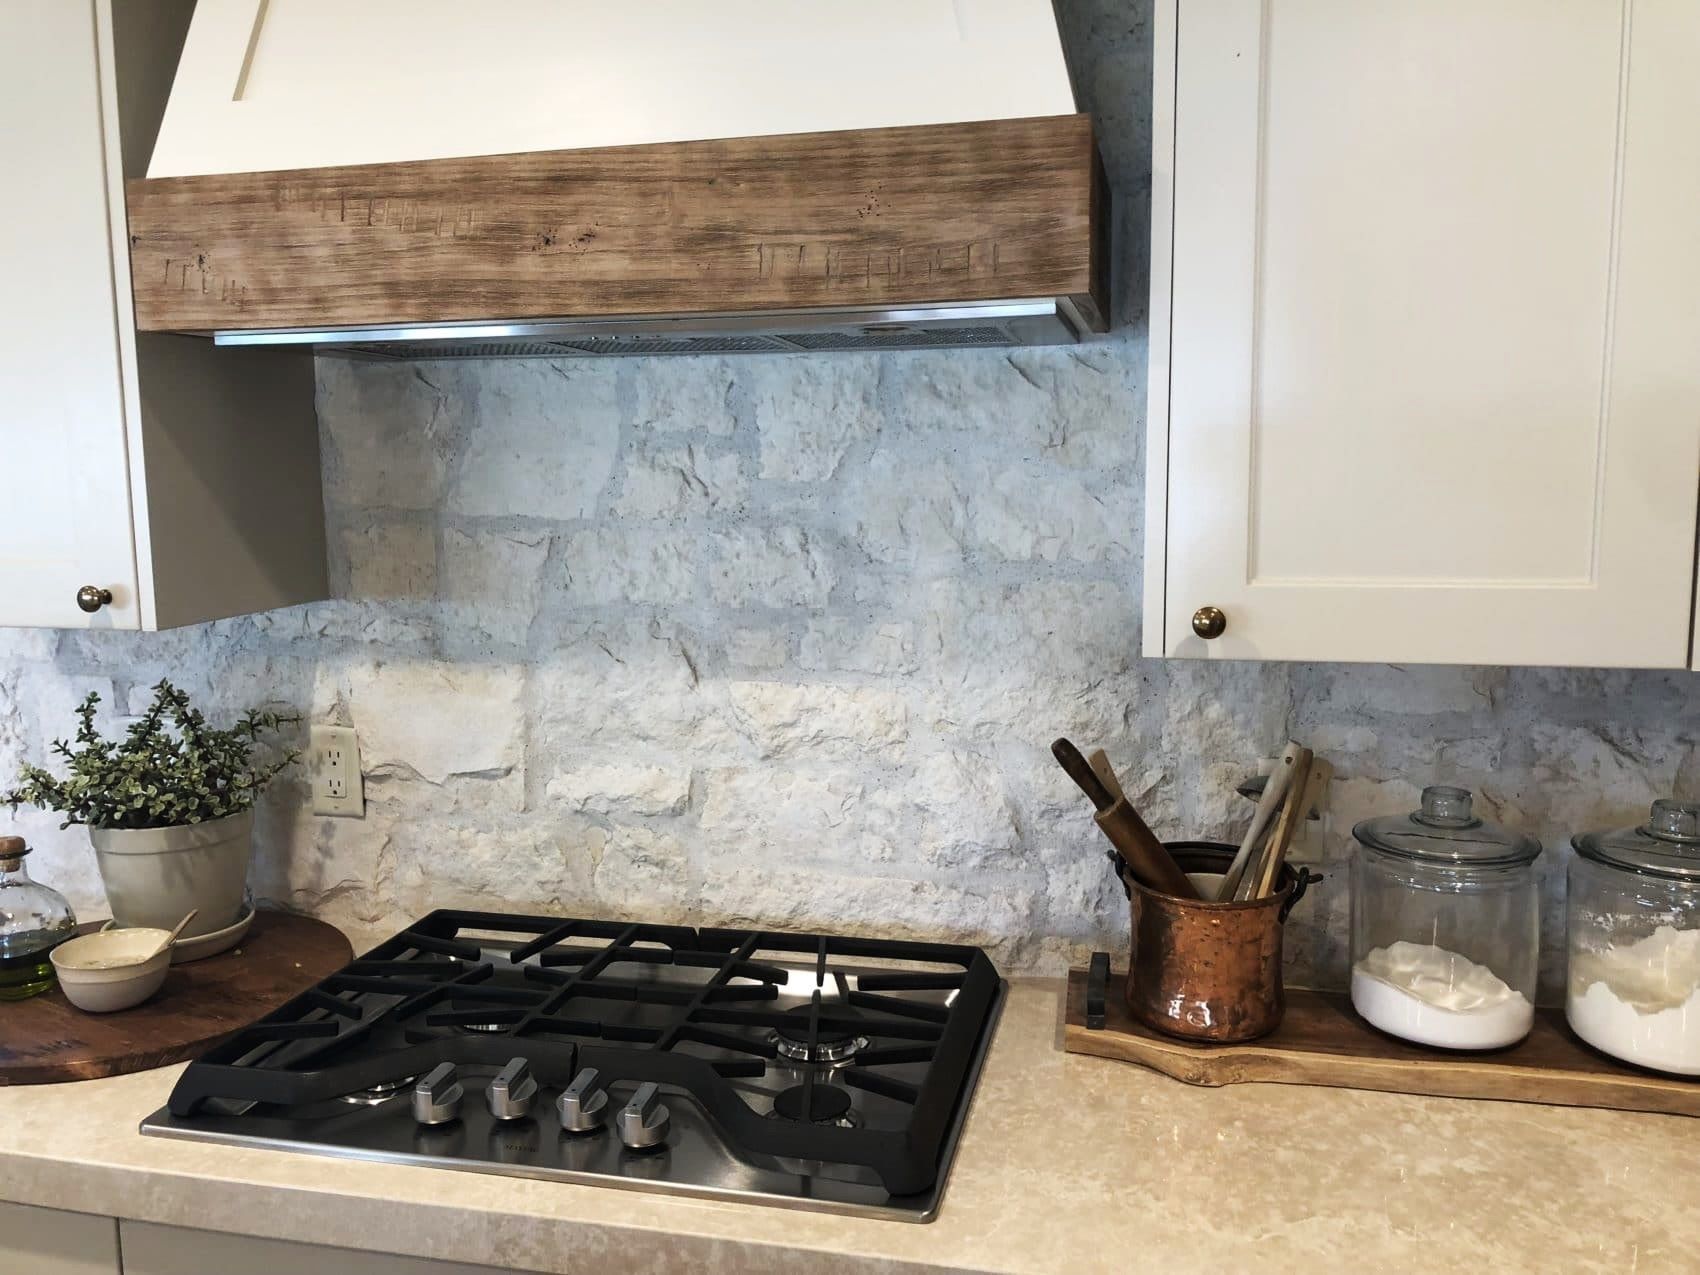
Finishing touches
After the meticulous application and cleaning of the grout, the finishing touches play a pivotal role in elevating the overall aesthetic impact and longevity of your thin brick installation. This phase encompasses the final steps that contribute to the refinement, protection, and visual allure of the grout lines and the thin bricks. Here's a detailed guide on the essential finishing touches to complete your thin brick project:
Grout Line Inspection
Conduct a comprehensive inspection of the grout lines, ensuring that they exhibit a uniform and flush finish. Verify that the grout is evenly distributed within the joints and that the transitions between the bricks are seamless. Address any minor imperfections or inconsistencies, refining the grout lines to achieve a polished and professional appearance.
Read more: How To Seal Floor Grout
Surface Cleaning
Thoroughly clean the surface of the thin bricks to remove any residual grout haze or debris that may have accumulated during the grouting process. Utilize a clean, damp sponge to gently wipe the bricks, ensuring that they showcase a pristine and unblemished surface. This meticulous cleaning enhances the visual appeal of the thin bricks, allowing their natural beauty to shine through.
Grout Sealing
Consider applying a high-quality grout sealer to protect the grout from moisture, stains, and discoloration. The sealer acts as a safeguard, enhancing the longevity and resilience of the grout lines while preserving their visual allure. Select a suitable sealer based on the type of grout used and follow the manufacturer's guidelines for application. This crucial step contributes to the overall durability and maintenance of the grout lines, ensuring their enduring beauty.
Final Inspection and Touch-Ups
Conduct a final inspection of the entire thin brick installation, paying close attention to the grout lines, transitions, and surface cleanliness. Address any areas that require touch-ups or refinement, ensuring that the installation exudes a professional and meticulously executed finish. This meticulous attention to detail enhances the overall visual impact and longevity of the thin brick project.
By meticulously attending to these finishing touches, you'll elevate the thin brick installation to a refined and enduring enhancement within your living spaces. The culmination of these steps ensures that the grout lines and thin bricks exhibit a polished and professional appearance, enriching the visual appeal and structural integrity of your interior or exterior surfaces.
Frequently Asked Questions about How To Grout Thin Brick
Was this page helpful?
At Storables.com, we guarantee accurate and reliable information. Our content, validated by Expert Board Contributors, is crafted following stringent Editorial Policies. We're committed to providing you with well-researched, expert-backed insights for all your informational needs.

0 thoughts on “How To Grout Thin Brick”