Articles
How To Seal Floor Grout
Modified: October 20, 2024
Learn how to seal floor grout with these informative articles. Protect your grout from stains and extend its lifespan.
(Many of the links in this article redirect to a specific reviewed product. Your purchase of these products through affiliate links helps to generate commission for Storables.com, at no extra cost. Learn more)
Introduction
Welcome to our comprehensive guide on how to seal floor grout. Whether you have recently installed new grout or noticed that your existing grout is starting to look worn and dirty, sealing the grout is an essential step in maintaining the longevity and appearance of your floors. In this article, we will walk you through the process of sealing floor grout, from understanding the importance of grout sealing to the step-by-step instructions for achieving impeccable results.
Grout is a crucial component of tiled floors. It fills the gaps between tiles, preventing moisture, dirt, and debris from seeping in. Over time, however, grout can become stained, discolored, or even cracked, compromising the integrity of your floor. Sealing the grout can help to protect it from stains, water damage, and general wear and tear, while also making it easier to clean and maintain.
Before we dive into the process of sealing floor grout, let’s take a moment to understand different types of grout. There are two main types: cement-based grout and epoxy grout. Cement-based grout is the most common and is typically used for residential applications. Epoxy grout, on the other hand, is a more durable option often chosen for commercial or high-traffic areas due to its resistance to staining and discoloration.
Now that you have a basic understanding of grout and its importance, let’s move on to the next section: preparing the grout. This step is crucial for ensuring a successful grout sealing process. So, grab your cleaning supplies, put on your gloves, and let’s get started!
Key Takeaways:
- Protect your floor grout by understanding the type of grout you have and choosing the right sealer. Proper preparation, application, and maintenance are essential for long-lasting, impeccable results.
- Regular cleaning, prompt spill cleanup, and periodic resealing are key to maintaining sealed grout. Protect your investment and keep your floors looking their best with these simple maintenance tips.
Read more: How To Seal Grout In Kitchen Backsplash
Understanding Floor Grout
If you have tile flooring in your home or any other space, you are likely familiar with grout. Grout is a material used to fill the gaps between tiles, providing stability and preventing movement. It plays a vital role in keeping the tiles in place and protecting the subfloor from moisture damage.
Floor grout comes in various types, including cement-based grout and epoxy grout. Cement-based grout is made from a mixture of cement, sand, and water. It is the most commonly used grout and offers versatility, affordability, and ease of installation. This type of grout is suitable for most residential applications.
Epoxy grout, on the other hand, is a more durable and resistant option. It is composed of epoxy resins and a hardener. Epoxy grout is highly resistant to staining, discoloration, and moisture, making it an excellent choice for areas prone to spills and high humidity, such as kitchens and bathrooms. However, it is more challenging to work with and requires special handling and installation techniques.
Understanding the type of grout you have is important when it comes to sealing. Cement-based grout is porous, meaning it can absorb liquids and stains over time. Hence, sealing cement-based grout is highly recommended to protect it from spills, stains, and general wear and tear. Epoxy grout, on the other hand, is non-porous and resistant to stains, so it may not require sealing in most cases.
Before sealing your floor grout, it’s essential to inspect it closely. Look for signs of cracks, crumbling, or discoloration. If you notice any significant damage, it may be necessary to repair or replace the grout before proceeding with the sealing process.
Another crucial factor to consider when sealing floor grout is the curing time. Newly installed grout requires sufficient time to fully cure before applying a sealer. This can range from a few days to a few weeks, depending on the type of grout and the manufacturer’s recommendations. Be sure to check the curing time specified on the grout packaging or consult with a professional to ensure optimal results.
Now that you have a better understanding of different types of floor grout and the importance of sealing, let’s move on to the next section: preparing the grout for the sealing process.
Preparing the Grout
Before you can apply a sealer to your floor grout, it’s crucial to properly prepare the grout surface. Preparing the grout ensures that the sealer can adhere effectively and provide optimal protection. Here are the steps to prepare the grout for sealing:
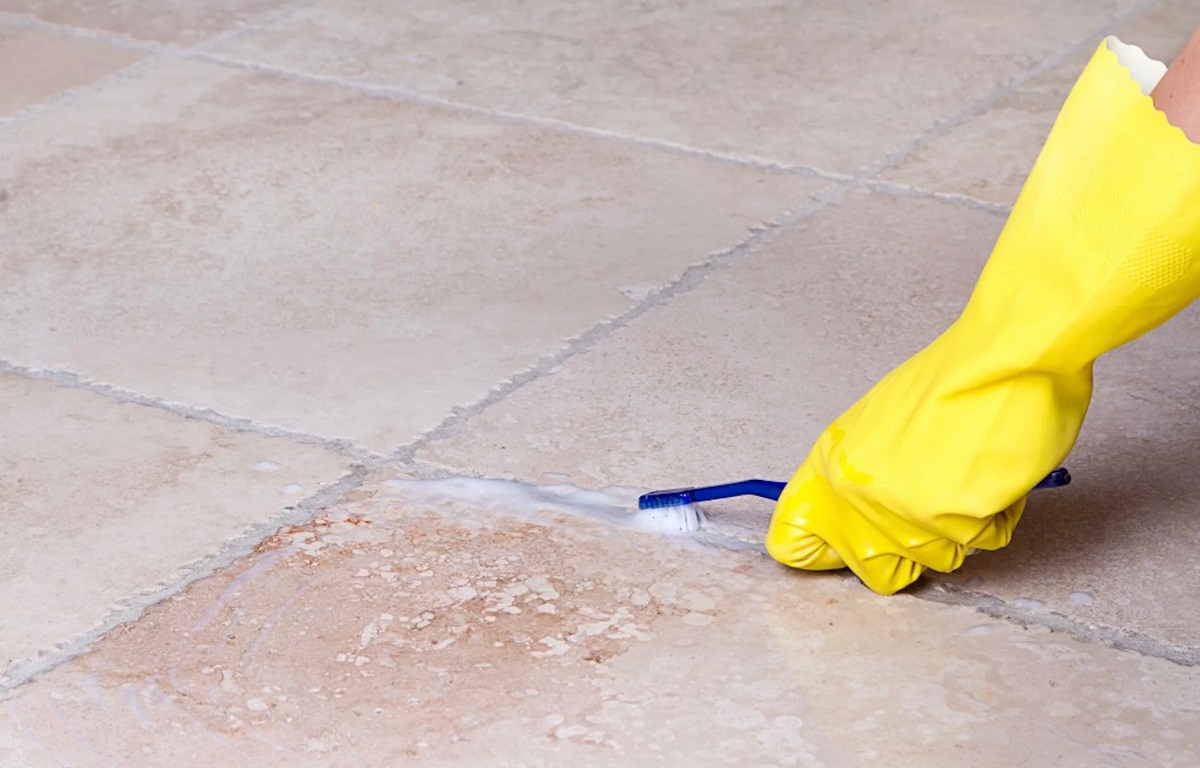
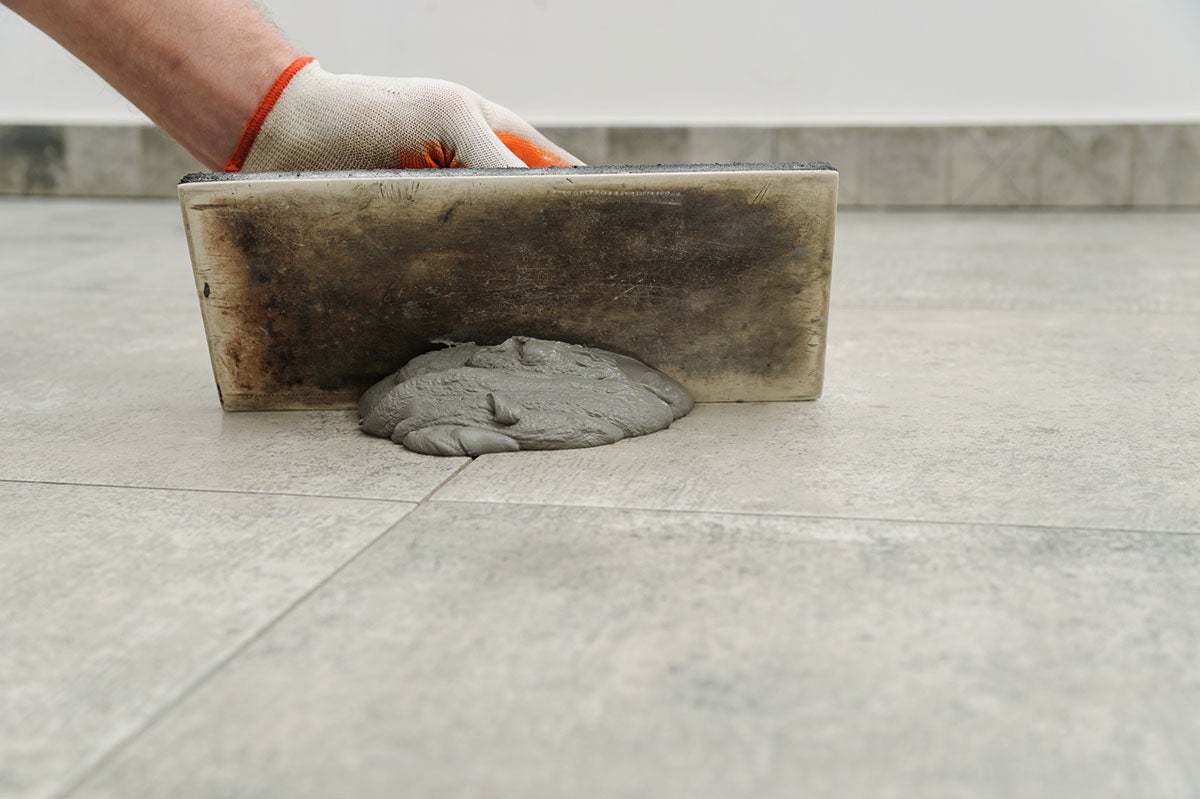
- Thoroughly clean the grout lines: Start by removing any surface dirt, dust, or debris from the grout lines. You can use a broom or vacuum to clear away loose particles. For more stubborn dirt and stains, a gentle scrub with a grout brush and mild cleaning solution can be effective. Be sure to rinse away any residue and allow the grout lines to dry completely before proceeding.
- Remove any existing sealant: If your grout has been previously sealed, it’s essential to remove the old sealant before applying a new one. Various options are available for removing sealant, including commercial sealant removers or a mixture of baking soda and water. Follow the manufacturer’s instructions and use a scrub brush or sponge to scrub away the old sealant. Rinse the grout lines thoroughly and allow them to dry.
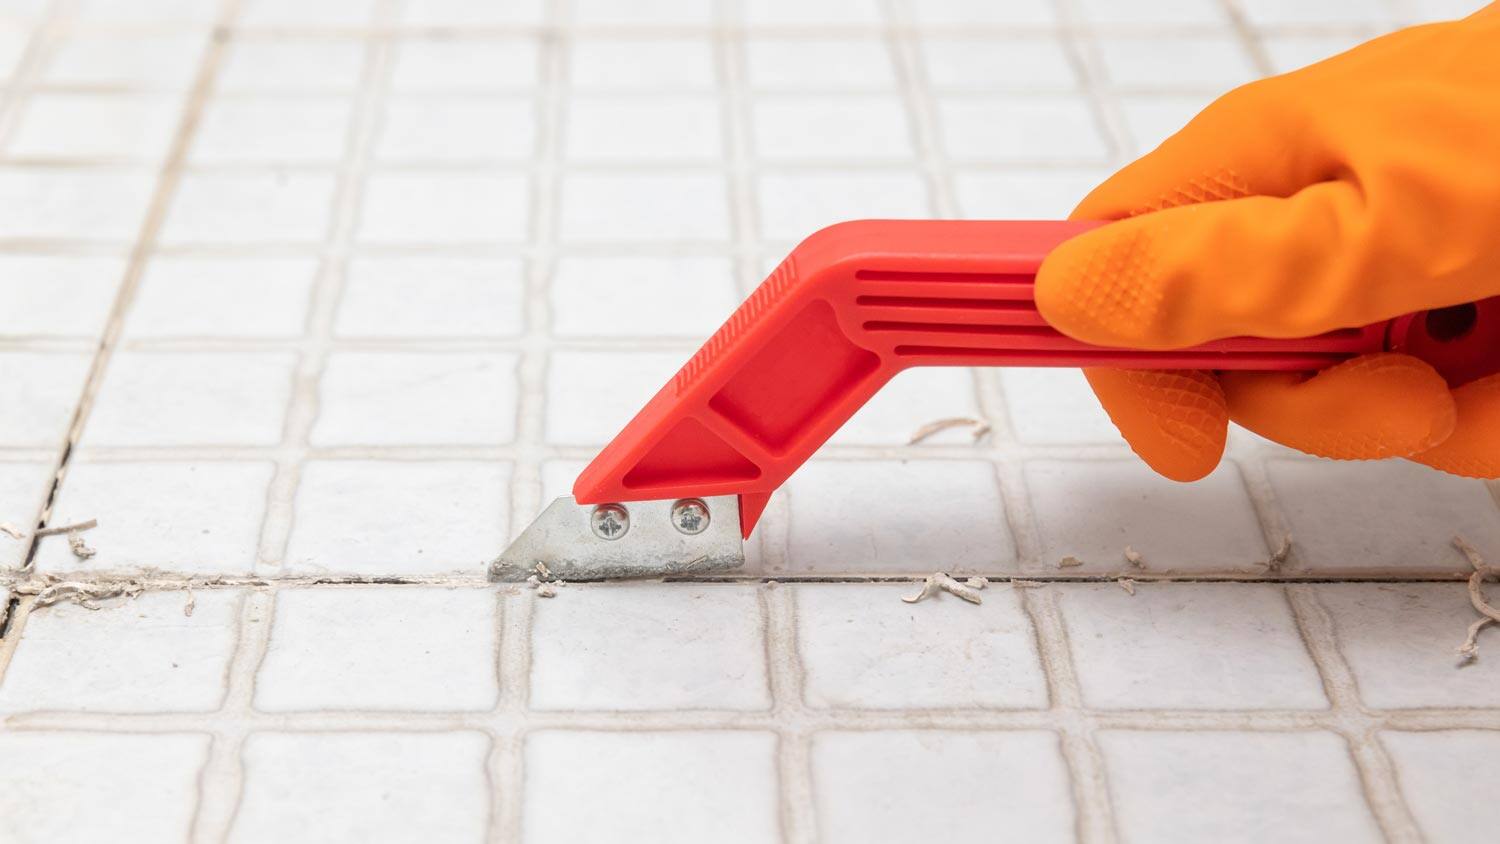
- Check for cracks or damage: Inspect the grout lines carefully for any cracks, crumbling, or damage. If you notice any significant issues, such as loose or missing grout, it may be necessary to repair or replace the affected areas. Use a grout saw to remove damaged grout and fill the gaps with new grout. Allow the repairs to dry completely before moving on to the next step.
- Protect adjacent surfaces: Before applying any sealer to the grout lines, it’s essential to protect adjacent surfaces, such as tiles or baseboards. Cover these areas with painter’s tape or plastic sheeting to prevent any accidental sealer overspray or drips.
By following these steps, you can ensure that your grout is properly prepared for the sealing process. Taking the time to prepare the grout will not only enhance the effectiveness of the sealer but also contribute to a cleaner and longer-lasting grout appearance.
Now that you have prepared the grout, it’s time to move on to the next step: choosing the right sealer for your floor grout.
Choosing the Right Sealer
When it comes to sealing your floor grout, choosing the right sealer is crucial to achieving the desired results. There are several types of grout sealers available, each with its own advantages and considerations. Here are some factors to keep in mind when selecting the right sealer for your floor grout:
- Type of grout: Consider the type of grout you have, whether it’s cement-based or epoxy grout. Cement-based grout is porous and requires a penetrating sealer that can soak into the grout lines. Epoxy grout, on the other hand, is non-porous and may not require sealing.
- Water-based vs. solvent-based: Grout sealers are available in water-based or solvent-based formulas. Water-based sealers are typically easier to apply, have a lower odor, and provide a more natural look. Solvent-based sealers, on the other hand, tend to be more durable and offer enhanced stain resistance. Consider your specific needs and preferences when deciding between the two options.
- Sheen level: Grout sealers come in various sheen levels, including matte, satin, and glossy. Consider the desired finish you want for your grout. A matte finish provides a more natural and subtle appearance, while a glossy finish offers a more polished and reflective surface.
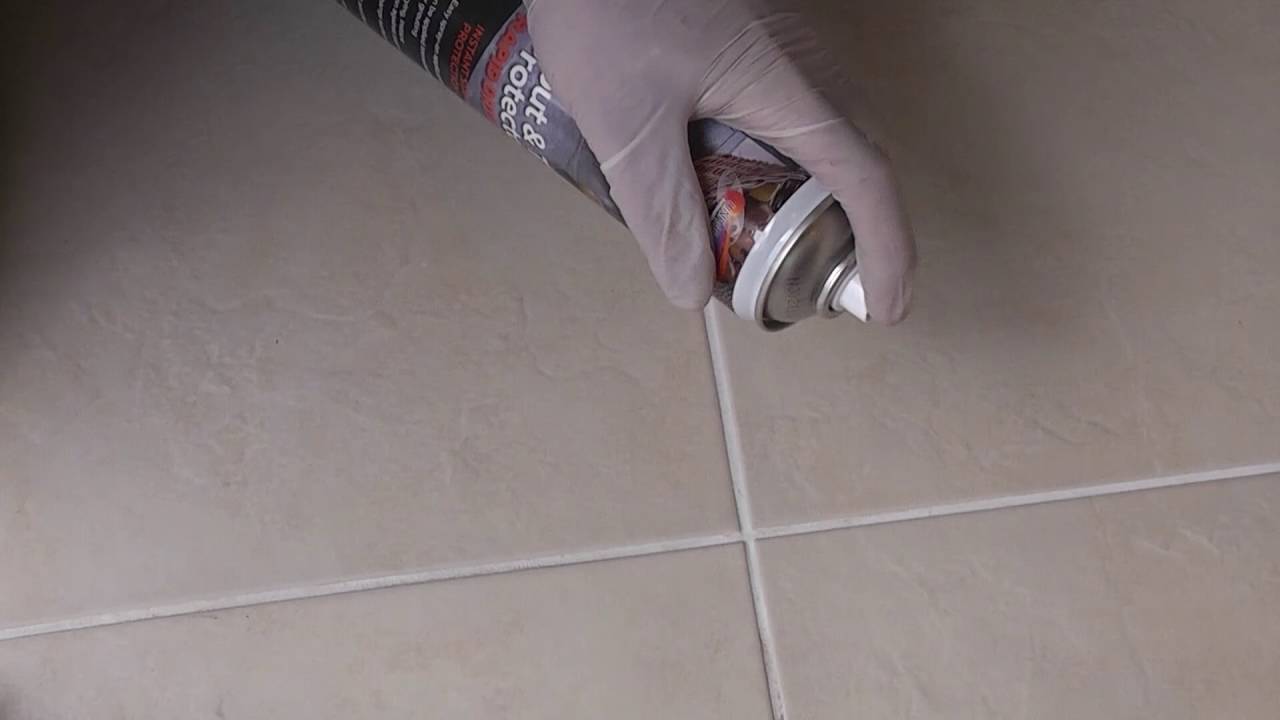
- Application method: Some grout sealers come in spray bottles for easy application, while others are brush-on or roll-on. Consider the size and accessibility of your grout lines and choose a sealer application method that will be most convenient for you.
It’s also important to read the manufacturer’s instructions and consider any specific recommendations for your type of grout. Some sealers may require multiple coats or have specific curing times, so be sure to follow the instructions closely for optimal results.
Lastly, consider factors such as durability, stain resistance, and ease of maintenance when choosing a grout sealer. Look for products with good reviews and recommendations from professionals or experts in the field.
By carefully considering these factors, you can select the right sealer that will provide the necessary protection and enhance the appearance of your floor grout. Now that you have chosen the sealer, it’s time to gather the necessary tools for the sealing process.
Gathering the Necessary Tools
Before you begin the process of sealing your floor grout, it’s essential to gather all the necessary tools and materials. Having the right tools on hand will ensure a smooth and efficient sealing process. Here are the tools you will need:
- Grout sealer: As discussed in the previous sections, choose the appropriate grout sealer for your specific grout type and desired finish. Make sure you have enough sealer to cover the entire floor area.
- Applicator: The applicator you choose will depend on the sealer you are using. For brush-on or roll-on sealers, you will need a paintbrush or a grout sealing roller. If you are using a spray sealer, make sure you have a spray bottle or a spray applicator specifically designed for grout sealing.
- Protective equipment: Sealing grout can involve working with chemicals, so it’s important to protect yourself. Wear gloves to protect your hands and consider wearing safety goggles to shield your eyes. If you are using a spray sealer, wearing a mask is recommended to avoid inhaling any fumes.
- Drop cloths or plastic sheeting: To protect the surrounding areas, lay down drop cloths or plastic sheeting to catch any drips or spills during the sealing process. This will ensure that your tiles, baseboards, or other adjacent surfaces are shielded from potential damage.
- Clean cloth or sponge: You will need a clean cloth or sponge to wipe off any excess sealer after application. Choose a lint-free cloth or a sponge specifically designed for grout sealing to avoid leaving behind any fibers or lint on the surface.
- Utility knife: A utility knife will come in handy for cutting open the sealer bottle or for any other minor cutting tasks that may arise during the sealing process.
- Cleaning supplies: Although this step may come before sealing, it’s important to have cleaning supplies on hand. This includes a broom or vacuum for removing loose debris, a grout brush for scrubbing away any stubborn dirt, and a mild cleaning solution for cleaning the grout lines prior to sealing.
Having all the necessary tools and materials ready before starting the sealing process will help you avoid any unnecessary interruptions or delays. Once you have gathered everything you need, it’s time to move on to the next step: cleaning the grout lines.
After cleaning the grout, use a silicone-based grout sealer to seal the floor grout. Apply it with a small brush or roller, making sure to cover all the grout lines. Wipe off any excess sealer from the tiles before it dries.
Read more: How To Grout Shower Floor
Cleaning the Grout Lines
Before you can apply a sealer to your floor grout, it’s crucial to thoroughly clean the grout lines. Cleaning the grout lines ensures that any dirt, stains, or residues are removed, allowing the sealer to adhere properly and provide optimal protection. Here are the steps to follow when cleaning the grout lines:
- Remove loose debris: Start by removing any loose debris, such as dust, dirt, or pet hair, from the grout lines. You can use a broom, a vacuum with a brush attachment, or a soft-bristle brush to sweep away the loose particles. Pay attention to the corners and edges to ensure all debris is cleared.
- Prepare a cleaning solution: Mix a mild cleaning solution in a bucket. You can use warm water with a small amount of dish soap, or you can opt for a commercial grout cleaner. Be mindful of any specific instructions or dilution ratios provided by the manufacturer if using a commercial cleaner.
- Apply the cleaning solution: Dip a grout brush or sponge into the cleaning solution and apply it directly to the grout lines. Use a scrubbing motion to work the solution into the grout, focusing on any stained or dirty areas. Be thorough but gentle to avoid damaging the grout or tiles.
- Let the solution sit: Allow the cleaning solution to sit on the grout lines for a few minutes to penetrate and loosen any embedded dirt or stains. This will make it easier to remove them during the next step.
- Scrub the grout lines: Take the grout brush or sponge and scrub along the grout lines, paying extra attention to areas that require more cleaning. Apply more cleaning solution if necessary. For stubborn stains, you may need to put in some extra effort and use a bit of elbow grease.
- Rinse the grout lines: Once you are satisfied with the cleanliness of the grout lines, rinse away the cleaning solution with clean water. You can use a damp cloth or sponge to wipe away the residue, or you can use a spray bottle filled with water to rinse the grout lines thoroughly.
- Allow the grout lines to dry: Give the grout lines enough time to fully dry before proceeding with the sealing process. This will ensure that there is no moisture trapped in the grout, which could affect the sealer’s adhesion and performance.
Properly cleaning the grout lines is essential for achieving optimal results when sealing floor grout. It removes dirt, stains, and residues, creating a clean surface for the sealer to adhere to. Now that the grout lines are clean and dry, it’s time to move on to the next step: applying the sealer.
Applying the Sealer
With the grout lines clean and dry, it’s time to apply the sealer. Applying the sealer will protect the grout from stains, moisture, and general wear and tear. Follow these steps to ensure a successful application:
- Read the manufacturer’s instructions: Before applying the sealer, carefully read and follow the instructions provided by the manufacturer. Different sealers may have specific application methods and curing times, so it’s important to understand and adhere to the recommended guidelines.
- Prepare the sealer: If you are using a liquid sealer, shake the bottle well to ensure the contents are thoroughly mixed. Do not dilute the sealer unless specifically instructed by the manufacturer.
- Start in a small area: Begin applying the sealer in a small, inconspicuous area to test the coverage and to ensure that you are comfortable with the application process. This will give you an opportunity to make any adjustments if needed before moving on to larger areas.
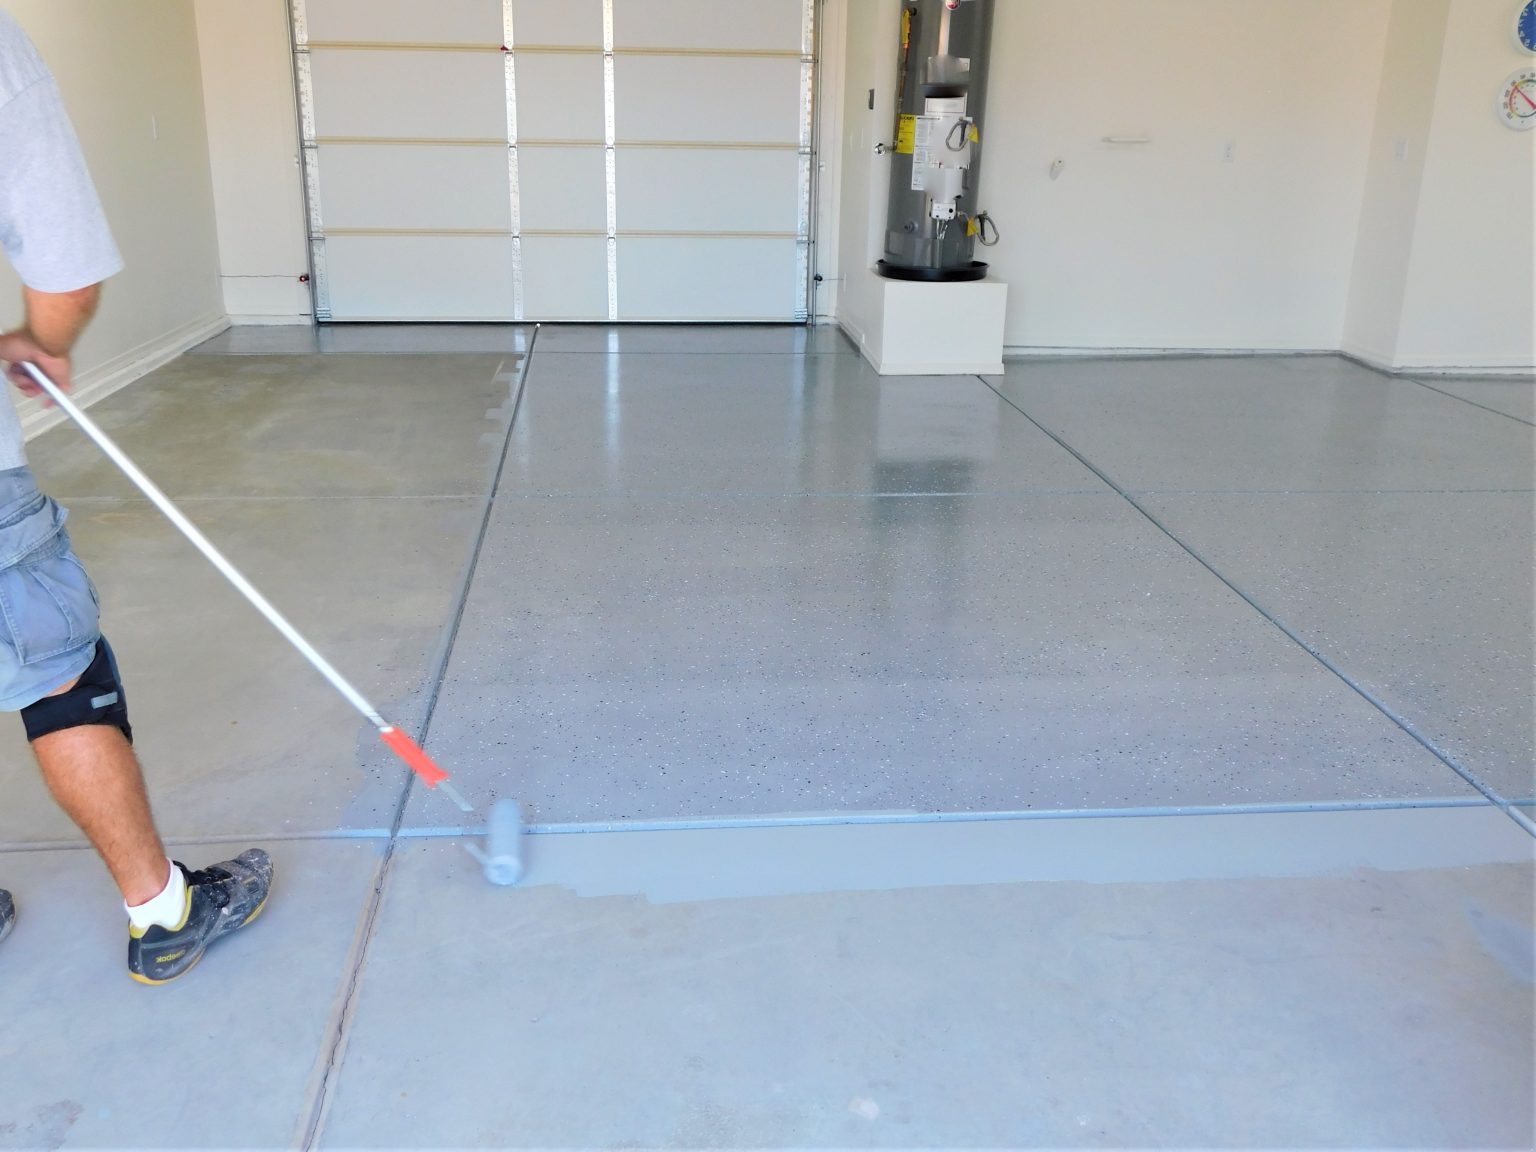
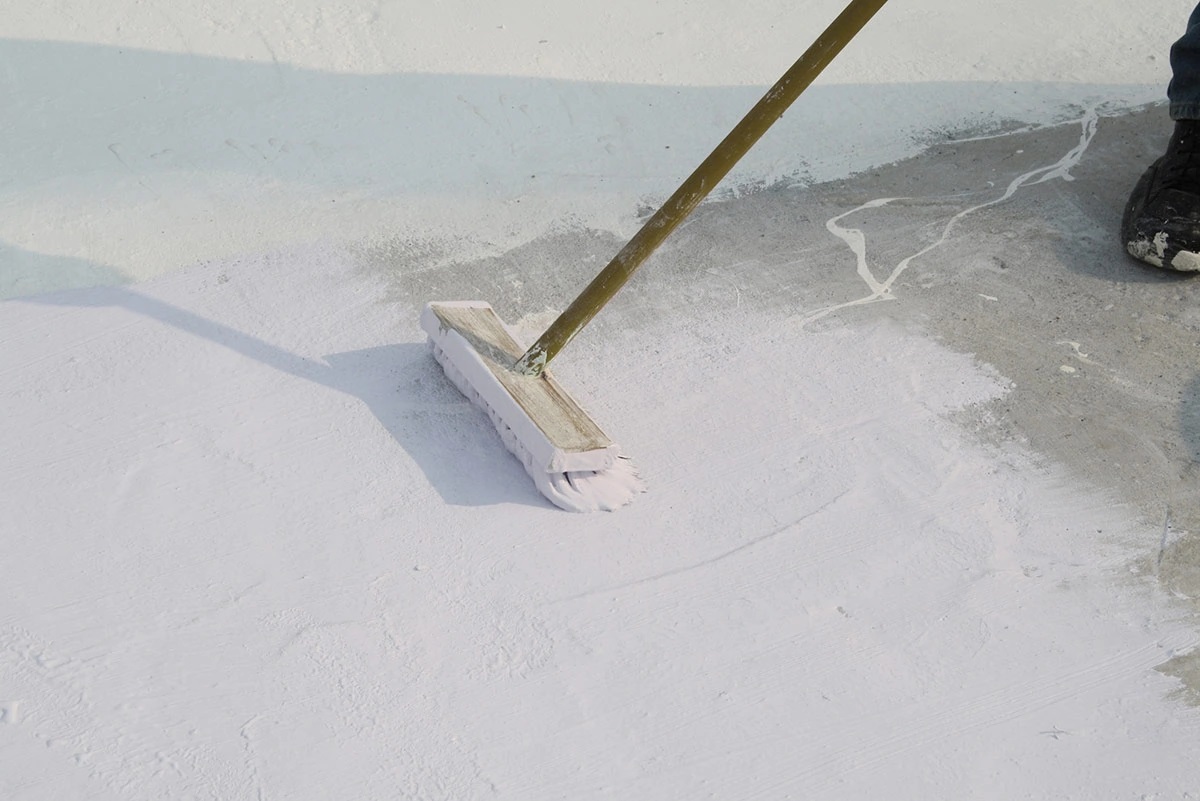
- Apply the sealer to the grout lines: Using the appropriate applicator, such as a paintbrush, grout sealing roller, or spray bottle, start applying the sealer to the grout lines. Work in manageable sections to ensure even coverage and to prevent the sealer from drying too quickly. Apply the sealer generously but avoid excessive drips or pooling.
- Work the sealer into the grout lines: Once the sealer is applied, use the applicator or a clean cloth to work the sealer into the grout lines. Apply light pressure and make sure the sealer reaches the entire depth of the grout. This will help the sealer penetrate and provide maximum protection.
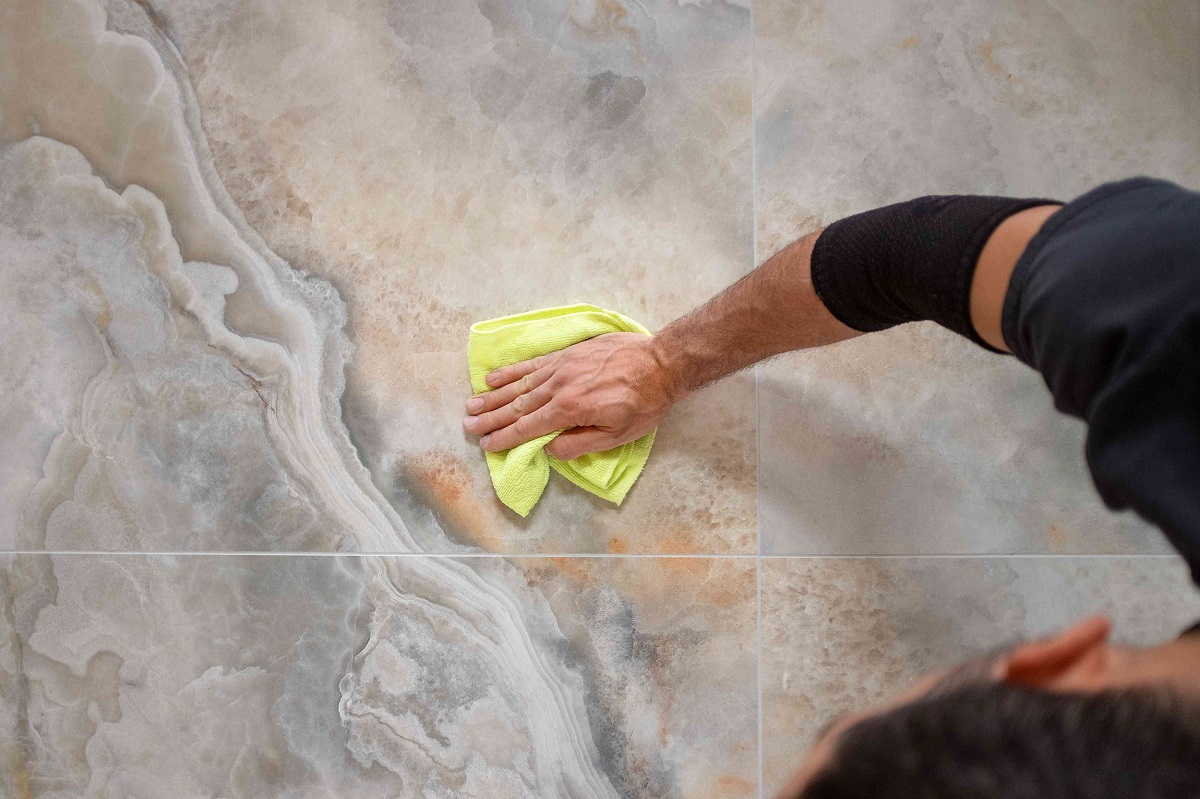
- Wipe off excess sealer: After working the sealer into the grout lines, use a clean cloth or sponge to wipe off any excess sealer from the tile surfaces. Be thorough in removing the excess sealer to prevent streaks or a cloudy appearance on the tiles. Take care not to disturb the sealer in the grout lines.
- Check for missed spots: Once you have wiped off the excess sealer, take a step back and inspect the treated area for any missed spots or uneven coverage. If necessary, apply another coat of sealer to ensure complete protection and a consistent finish.
Remember to allow the sealer to cure according to the manufacturer’s instructions. This may involve avoiding foot traffic or moisture exposure for a certain period. Be patient and follow the recommended curing time to ensure the longevity and effectiveness of the sealer.
Now that the sealer is applied to the grout lines, it’s time to clean off any residual sealer and allow the proper drying and curing time.
Wiping off Excess Sealer
After applying the sealer to the grout lines, it’s important to wipe off any excess sealer from the tile surfaces. Wiping off the excess sealer ensures a clean and professional finish. Follow these steps to effectively remove the excess sealer:
- Wait for the recommended time: Check the manufacturer’s instructions to determine the recommended wait time after applying the sealer. This time allows the sealer to penetrate the grout while still being wet enough to be removed.
- Prepare the cleaning cloth: Take a clean, lint-free cloth or sponge and fold it into a manageable size. This will be used to wipe off the excess sealer from the tile surfaces.
- Dampen the cloth: Lightly dampen the cloth with water. Make sure it is not soaking wet, as excessive moisture can dilute the sealer and compromise its effectiveness.
- Gently wipe the tile surfaces: Starting at one end of the tiled area, gently wipe the tile surfaces with the damp cloth in a back-and-forth or circular motion. Apply light pressure to remove the excess sealer, but be careful not to disturb the sealer in the grout lines.
- Change the cloth if necessary: Depending on the amount of excess sealer and the size of the area, you may need to change to a clean cloth or rinse it out frequently to avoid spreading sealer residue on the tiles.
- Inspect for streaks or smudges: Once you have wiped off the excess sealer, step back and inspect the tiles for any streaks or smudges. If you notice any, you can lightly dampen a fresh cloth with water and go over the affected areas to clean them up.
- Allow the sealer to dry: After wiping off the excess sealer, allow the remaining sealer in the grout lines to dry completely. This will typically take the curing time specified by the manufacturer, which can range from a few hours to a few days.
Properly wiping off the excess sealer ensures that your tiles have a clean and finished appearance while avoiding any potential damage or discoloration caused by sealer residue. Once the sealer is dry, your newly sealed grout will be ready to withstand daily use and continue to look its best.
Now that the excess sealer is removed, it’s important to allow sufficient time for the sealer to dry and cure. Stay tuned for the next step: drying and curing time.
Drying and Curing Time
After sealing the grout and wiping off the excess sealer, it’s crucial to allow sufficient time for the sealer to dry and cure. Drying and curing time is essential to ensure the sealer properly bonds with the grout and provides the desired level of protection. Here’s what you need to know about the drying and curing process:
- Drying time: Drying time refers to the time it takes for the sealer to dry on the surface. It usually takes a few hours for the sealer to dry completely. However, the actual drying time can vary depending on the type of sealer used, the ambient temperature, and humidity levels. Consult the manufacturer’s instructions for specific drying time recommendations.
- Curing time: Curing time is the period during which the sealer fully develops its protective properties. It’s important to note that curing time can be longer than drying time. The sealer needs sufficient time to chemically bond with the grout and reach its maximum strength. This can take anywhere from a few days to a few weeks. Refer to the manufacturer’s guidelines to determine the recommended curing time for the specific sealer you used.
- During drying and curing: It’s essential to avoid any moisture exposure, foot traffic, or cleaning during the drying and curing process. Moisture or disturbance can disrupt the sealer’s adhesion and affect its effectiveness. It’s best to keep the sealed area off-limits and allow ample time for the sealer to fully dry and cure.
- Maintain proper ventilation: Ensure proper ventilation in the sealed area to aid the drying process. Good airflow helps evaporate any remaining moisture and speeds up the drying time. Open windows or use fans to promote air circulation, but avoid direct airflow over the sealed grout lines.
- Regular maintenance: Once the sealer has dried and cured, it’s important to implement a regular cleaning and maintenance routine to preserve the sealed grout’s longevity. Follow manufacturer recommendations for appropriate cleaning methods and products to avoid any potential damage to the sealer.
By allowing the sealer to dry and cure properly, you ensure that the grout is fully protected and ready for regular use. Respect the recommended drying and curing time to achieve the best possible results and maintain the durability and appearance of your sealed grout.
Now that your sealed grout is properly dried and cured, it’s time to take the final steps and implement some maintenance tips to keep your grout looking its best.
Read more: How To Tile And Grout A Floor
Final Steps and Maintenance Tips
Congratulations! You have successfully sealed your floor grout. To ensure your sealed grout continues to look its best and maintain its durability, here are some final steps and maintenance tips to follow:
- Inspect and touch up: Once the grout sealer has fully dried and cured, take a close look at the sealed grout lines. Inspect for any missed spots or areas that may need a touch-up. If you notice any thin or unsealed areas, apply additional sealer as needed to ensure complete coverage.
- Protect the sealed grout: To prolong the life of your sealed grout, take steps to protect it from potential damage. Place doormats near entry points to trap dirt and prevent it from being tracked onto the floor. Use protective furniture pads or felt under furniture legs to prevent scratching or etching the grout surface.
- Regular cleaning routine: Implement a regular cleaning routine for your sealed grout. Sweep or vacuum the floor regularly to remove loose debris that can scratch the surface. Use a pH-neutral cleaner specifically formulated for sealed grout and follow the manufacturer’s instructions for dilution and application. Avoid using harsh chemicals or abrasive cleaners that can degrade the sealer.
- Wipe up spills promptly: Spills happen, but it’s important to promptly wipe up any spills that occur on your sealed grout. This prevents the liquid from seeping into the grout and potentially causing stains or damage. Use a soft cloth or paper towel to absorb the spill and clean the area with a mild cleaner if necessary.
- Avoid excessive moisture: While sealed grout is resistant to moisture, prolonged exposure to standing water or excessive moisture can still be detrimental. Avoid leaving wet towels or mats on the grout surface, and promptly dry any surface moisture to maintain the integrity of the sealer.
- Periodic resealing: Over time, the protective properties of the sealer may diminish due to wear and tear. To ensure continued protection, periodic resealing is recommended. The frequency of resealing will depend on factors such as the type of sealer used, the amount of foot traffic, and the level of maintenance. As a general guideline, it’s recommended to reseal the grout every one to three years.
- Seek professional help if needed: If your grout begins to show signs of significant wear, staining, or damage, it may be time to seek professional help. Professional grout cleaning and sealing services can rejuvenate your grout and ensure it remains in top condition.
Following these final steps and maintenance tips will help you maintain the quality and appearance of your sealed grout for years to come. With proper care, your floor grout will continue to provide protection, enhance the beauty of your floors, and withstand daily use.
Thank you for following this comprehensive guide on how to seal floor grout. We hope this information has been helpful and that your newly sealed grout brings long-lasting satisfaction!
Frequently Asked Questions about How To Seal Floor Grout
Was this page helpful?
At Storables.com, we guarantee accurate and reliable information. Our content, validated by Expert Board Contributors, is crafted following stringent Editorial Policies. We're committed to providing you with well-researched, expert-backed insights for all your informational needs.


0 thoughts on “How To Seal Floor Grout”