Home>Construction & Tools>Building Materials>How To Repair Cracks In Brick Wall
Building Materials
How To Repair Cracks In Brick Wall
Published: January 23, 2024
Learn how to effectively repair cracks in brick walls using the right building materials and techniques. Keep your property in top condition with our expert tips.
(Many of the links in this article redirect to a specific reviewed product. Your purchase of these products through affiliate links helps to generate commission for Storables.com, at no extra cost. Learn more)
Introduction
Welcome to our comprehensive guide on repairing cracks in a brick wall. Over time, the exterior of a building can develop cracks due to various factors such as settling, temperature changes, or structural issues. While these cracks may seem like minor blemishes, they can compromise the integrity of the wall if left unattended. In this article, we will walk you through the step-by-step process of repairing cracks in a brick wall, empowering you to tackle this common maintenance task with confidence.
Whether you are a seasoned DIY enthusiast or a novice homeowner, understanding the fundamentals of brick wall repair is essential for preserving the aesthetics and structural soundness of your property. By following our expert advice and utilizing the right materials and techniques, you can restore the beauty and strength of your brick wall, ensuring its longevity and resilience against the elements.
Join us as we delve into the art of brick wall repair, providing you with valuable insights and practical tips that will equip you to take on this challenge effectively. Let’s roll up our sleeves and embark on this rewarding journey of revitalizing your brick wall!
Key Takeaways:
- Assess cracks in brick walls carefully to understand their cause and choose the right repair method. This helps maintain the wall’s strength and appearance for a long time.
- By following the steps for filling and finishing cracks in brick walls, you can achieve a professional repair that seamlessly blends with the existing brickwork, ensuring a durable and visually appealing outcome.
Read more: What Causes Cracks In Brick Walls
Assessing the Damage
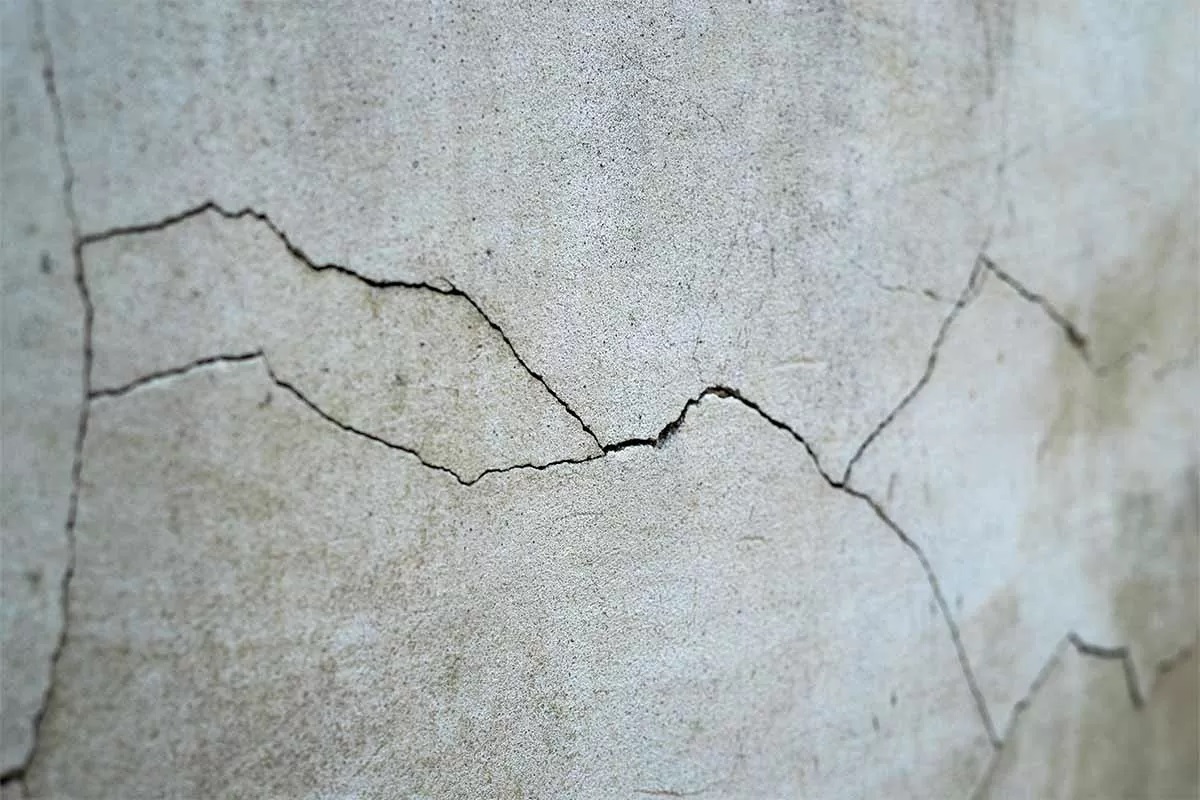
Before diving into the repair process, it’s crucial to assess the extent and nature of the damage to your brick wall. Cracks in brick walls can manifest in various forms, ranging from hairline fissures to more substantial fractures. By closely examining the cracks, you can determine the underlying causes and devise an appropriate repair strategy.
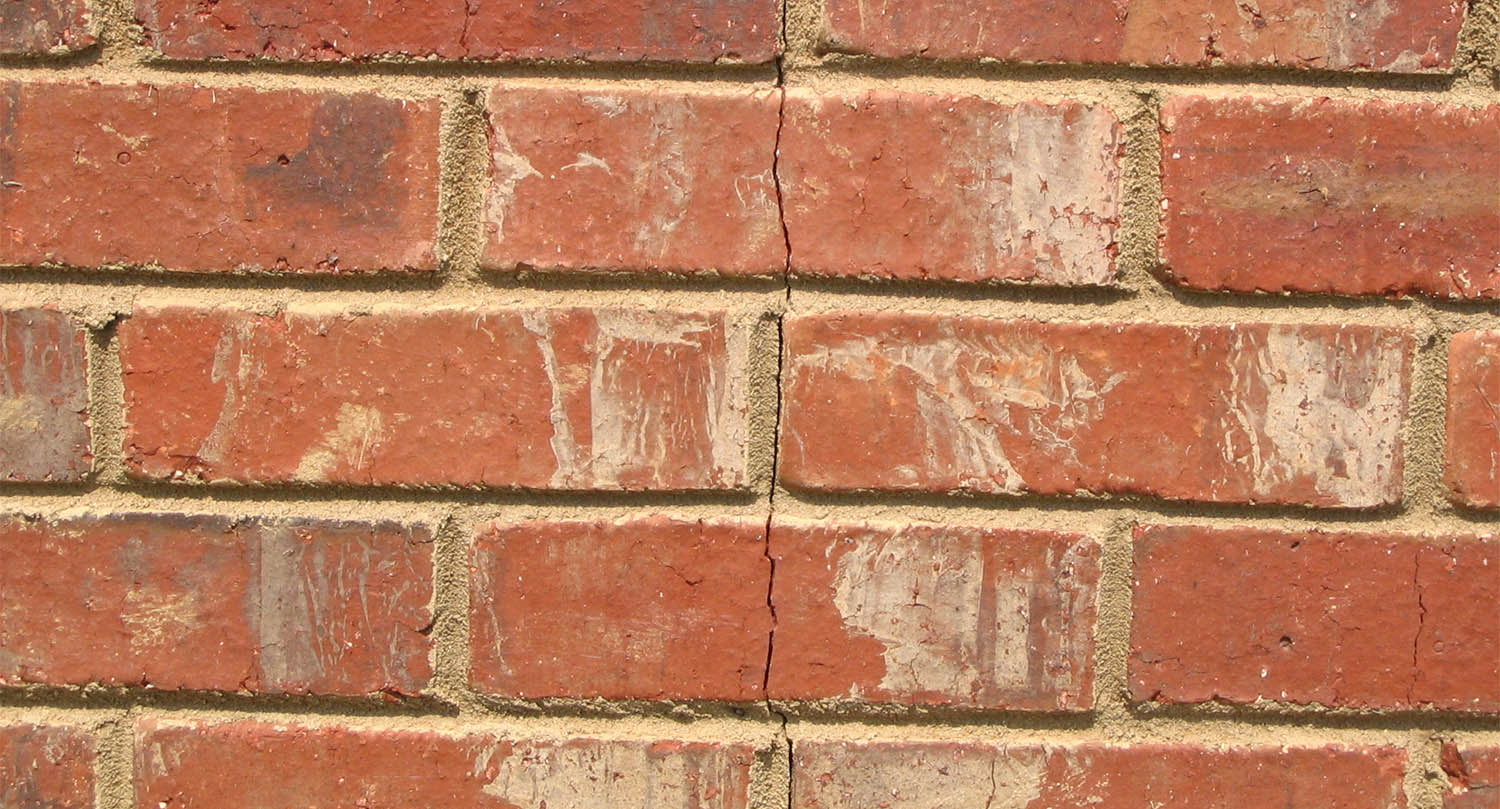
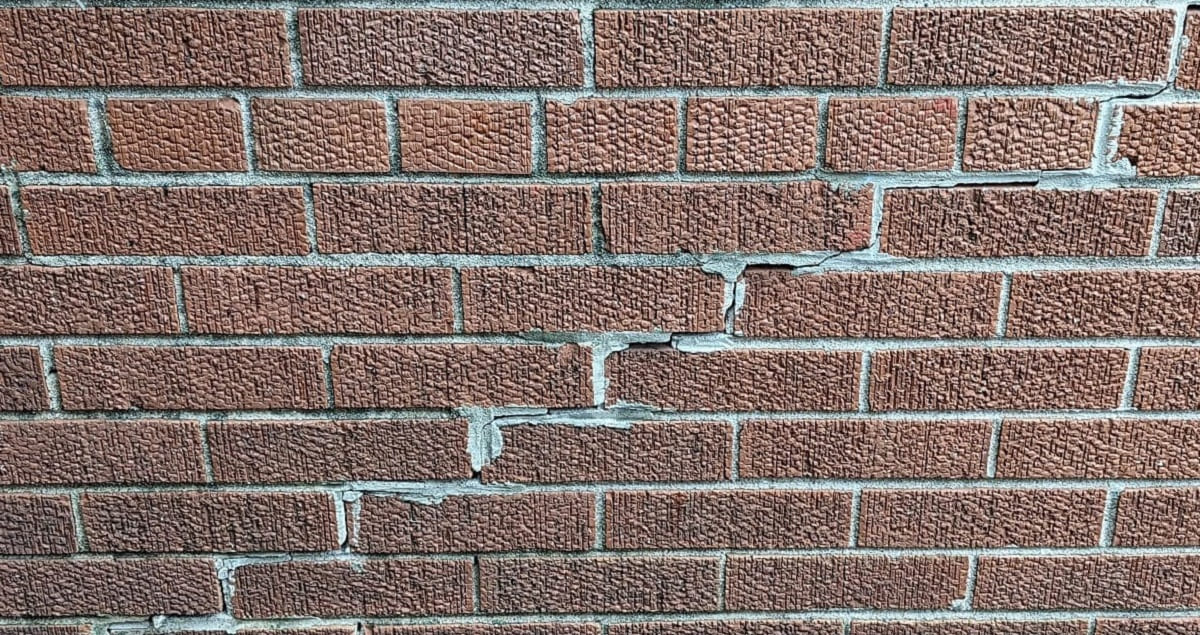
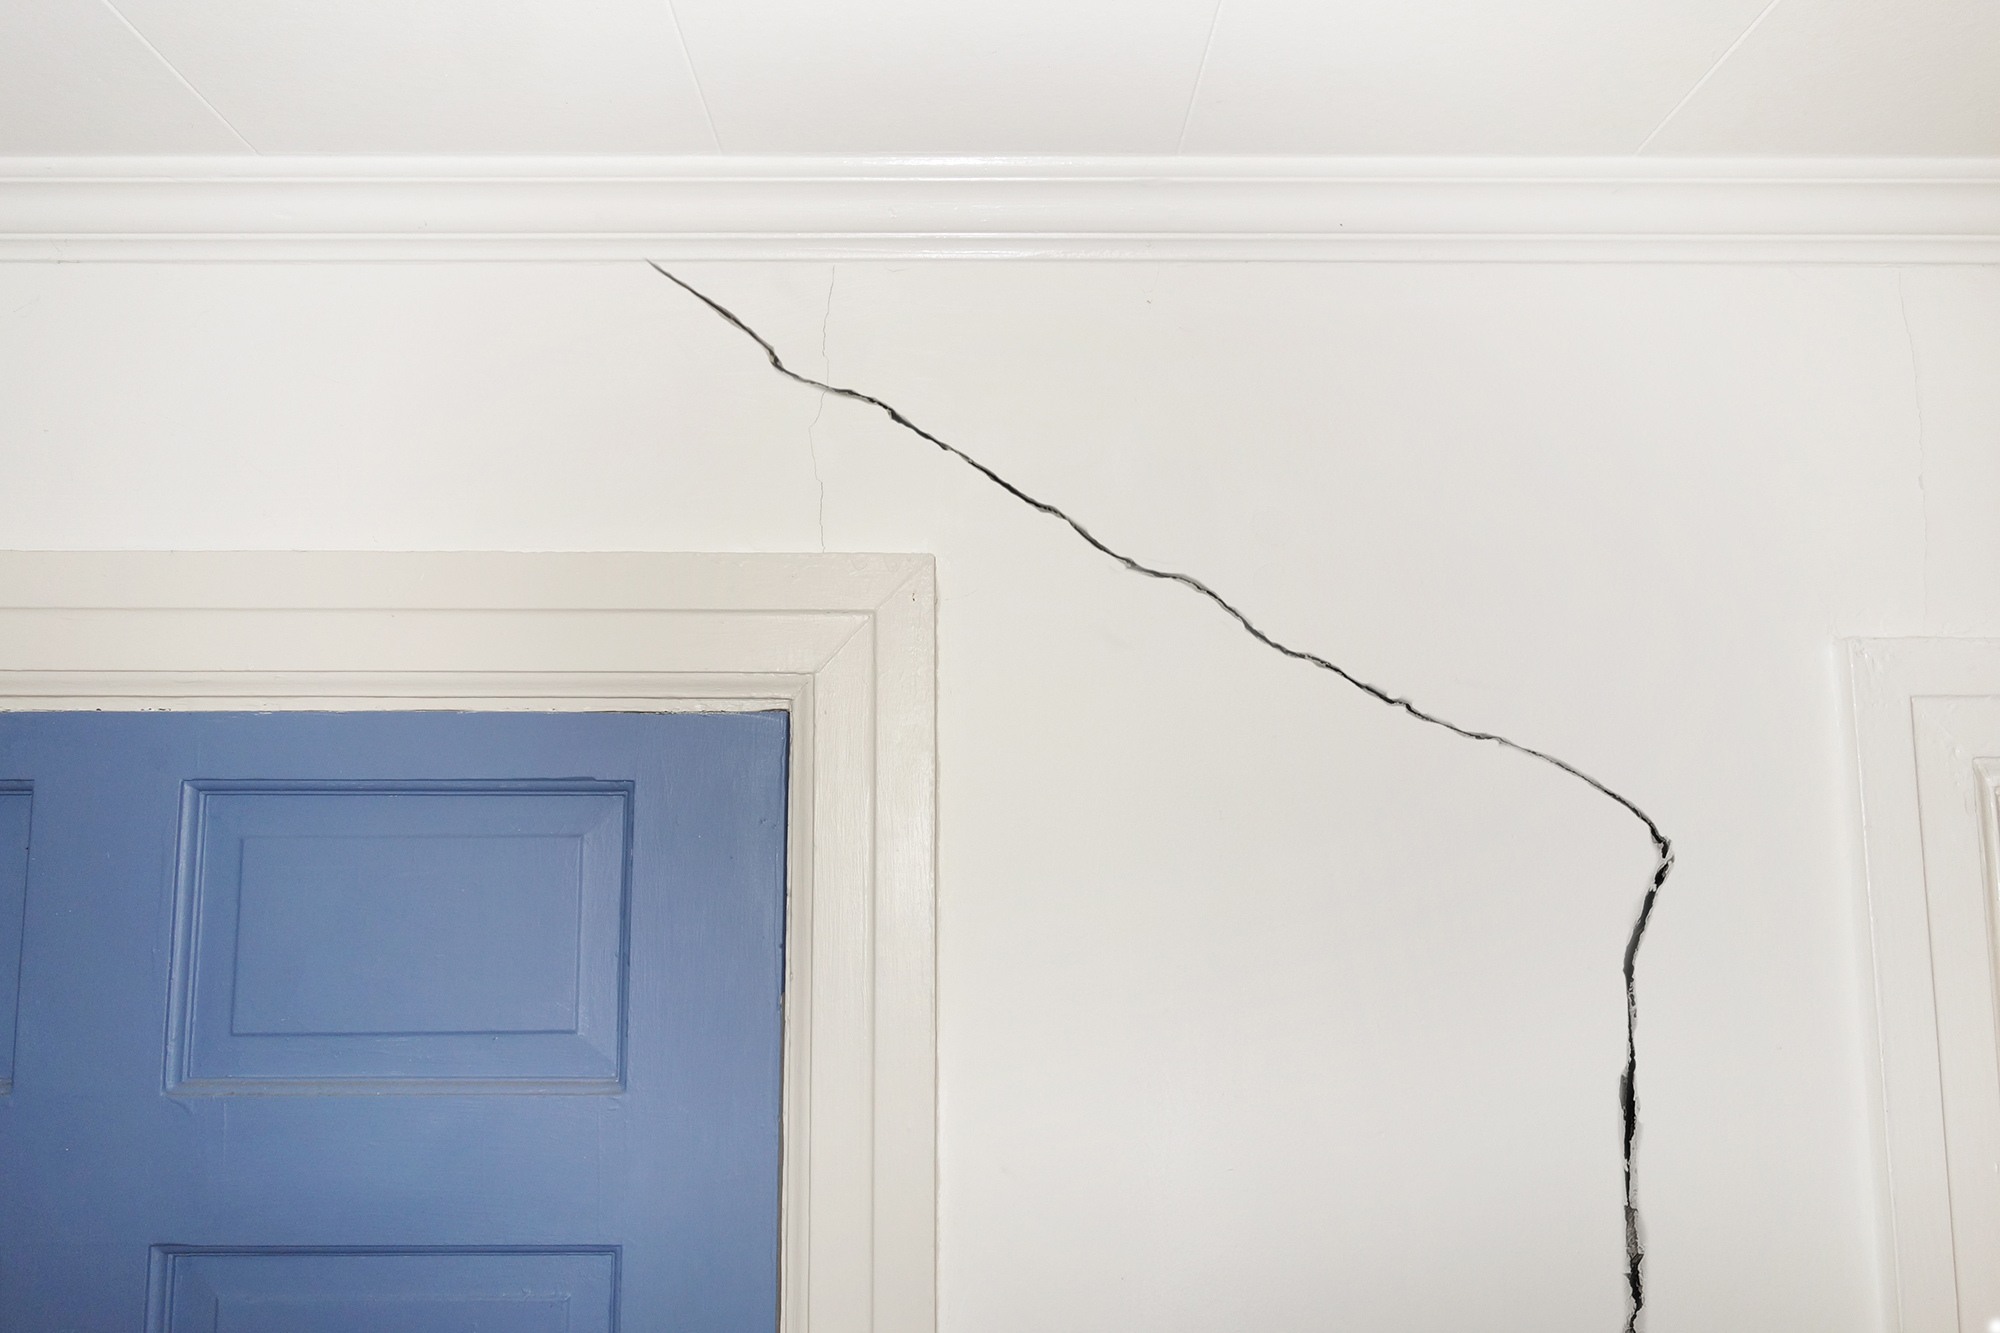
Begin by inspecting the size, location, and direction of the cracks. Hairline cracks, typically less than 1/8 inch wide, may be superficial and primarily affect the surface mortar. In contrast, wider cracks could indicate more significant structural issues, requiring thorough investigation and remediation.
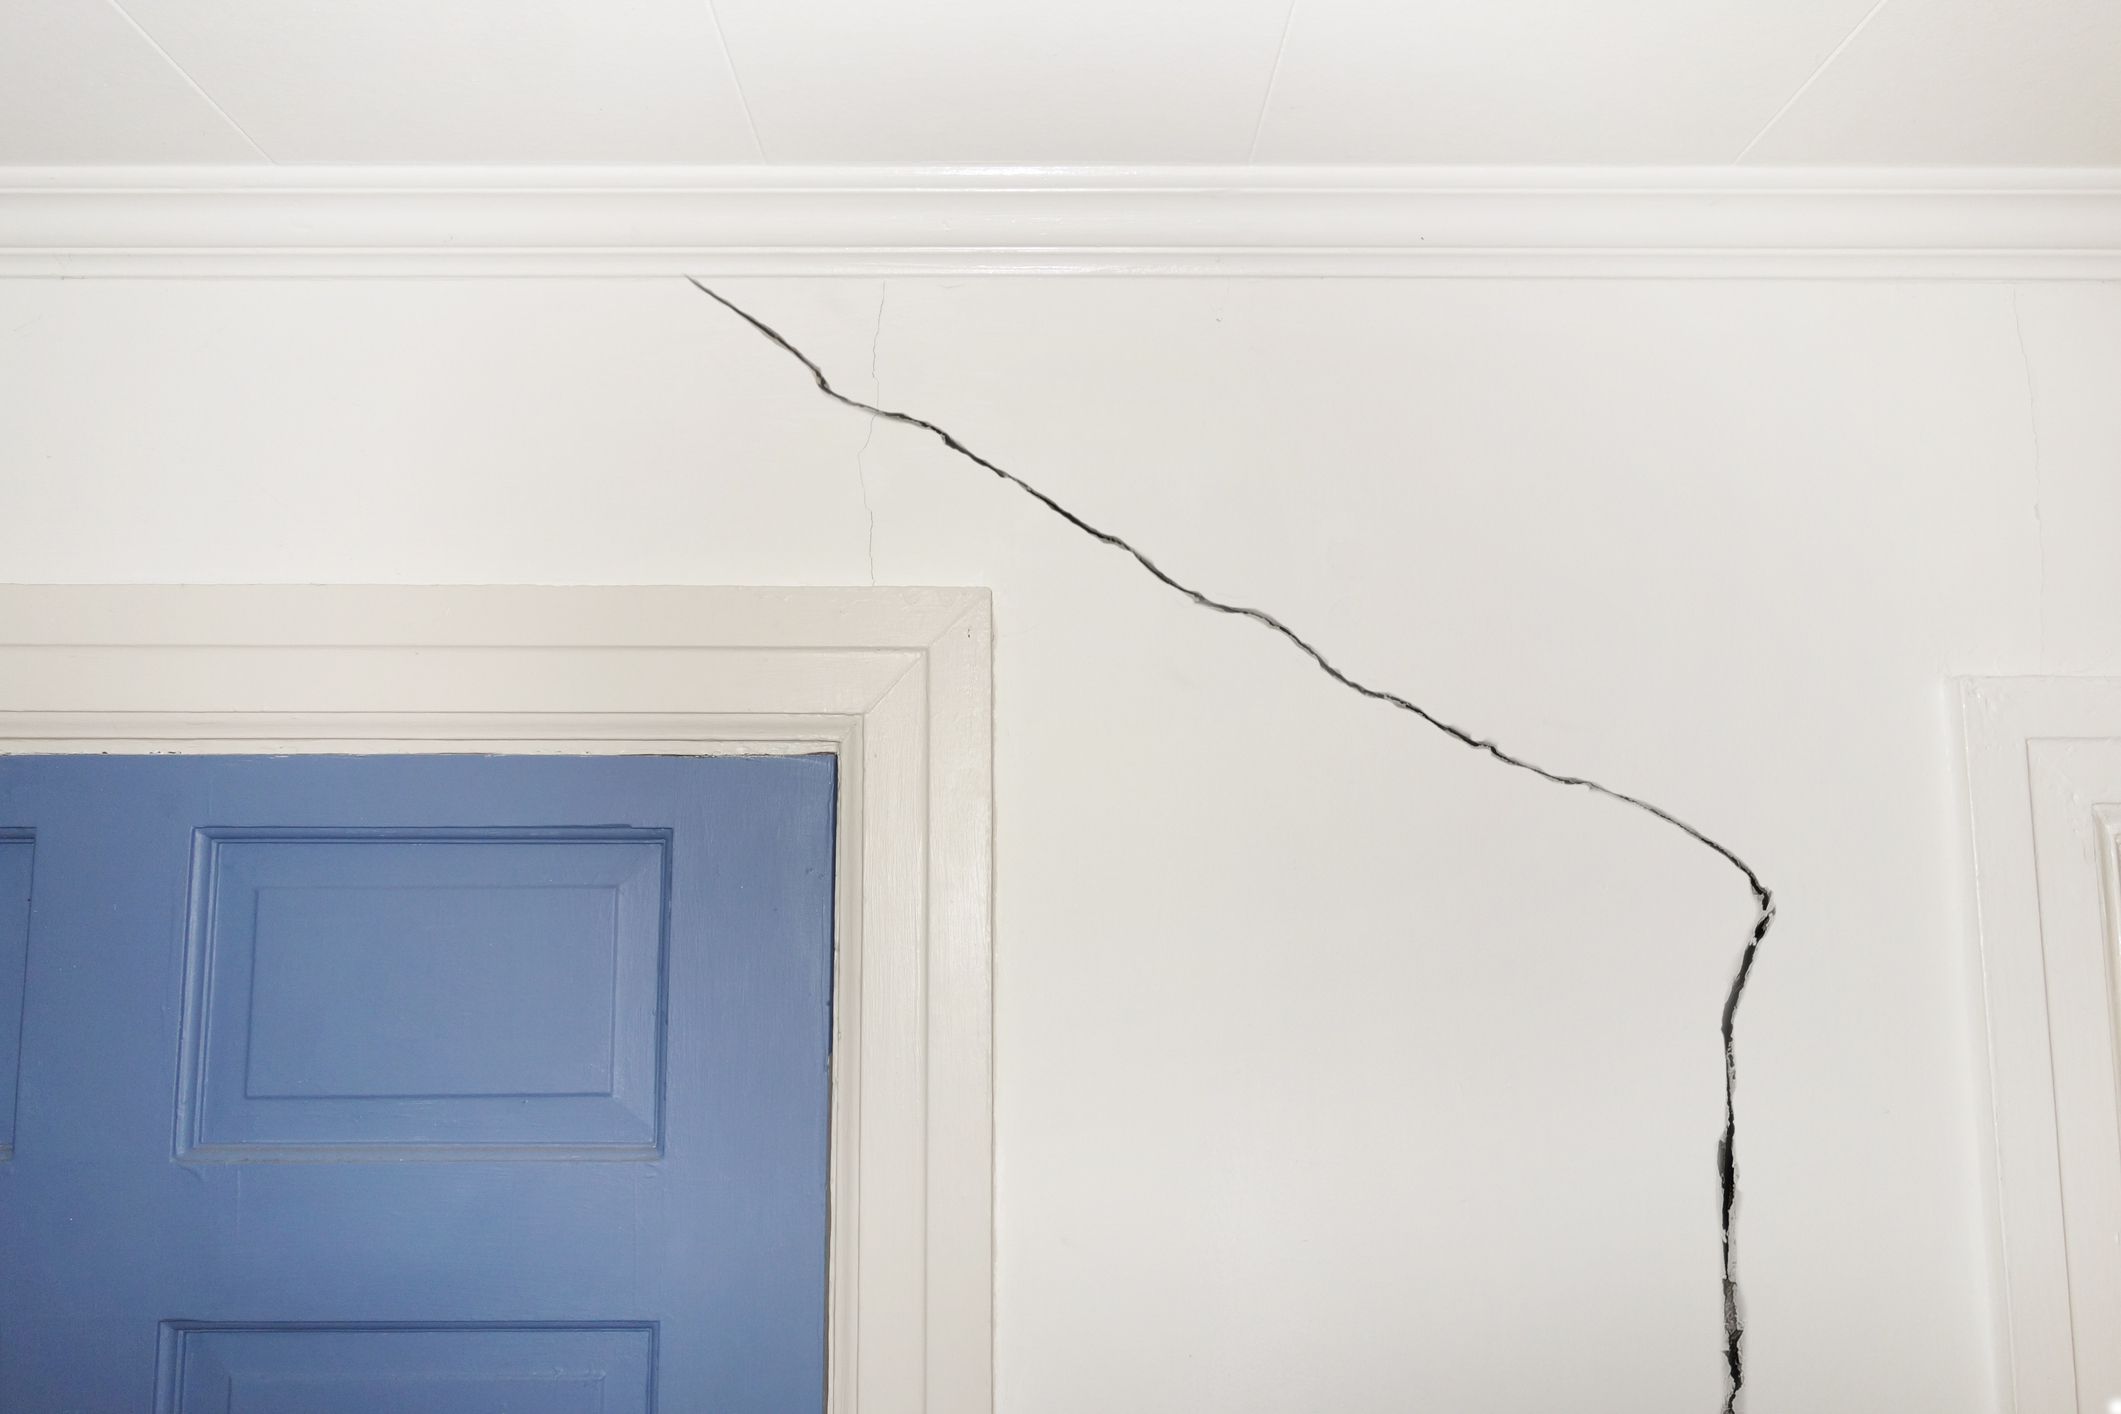
Next, consider the pattern of the cracks. Vertical cracks are commonly attributed to settling or foundation shifts, while horizontal cracks may signal excessive pressure or water damage. Diagonal cracks, on the other hand, could be indicative of thermal expansion and contraction.
Furthermore, evaluate the surrounding areas for signs of moisture or discoloration, as these can offer valuable clues about the underlying cause of the cracks. Additionally, if the cracks are accompanied by bulging or displacement of bricks, it may signify a more urgent need for intervention to prevent further deterioration.
By conducting a meticulous assessment, you can gain a comprehensive understanding of the damage and make informed decisions regarding the appropriate repair methods and materials. Remember, a thorough evaluation is the cornerstone of a successful repair project, laying the groundwork for a durable and visually appealing outcome.
Gathering Materials and Tools
Equipping yourself with the right materials and tools is essential for executing a successful brick wall repair. Before commencing the repair process, it’s crucial to gather the following items:
- Brick mortar mix: Select a high-quality mortar mix that matches the composition and color of your existing mortar. Opting for a pre-mixed mortar can streamline the repair process and ensure a seamless blend with the surrounding bricks.
- Water: You’ll need water for mixing the mortar to the appropriate consistency. Ensure that the water is clean and free from impurities to achieve optimal bonding and strength.
- Protective gear: Safety should always be a priority. Equip yourself with gloves, safety goggles, and a dust mask to safeguard against potential hazards during the repair work.
- Trowel: A pointed or square-notch trowel is indispensable for applying and shaping the mortar within the cracks. Choose a trowel that facilitates precise maneuvering and smooth application of the mortar.
- Wire brush: Use a wire brush to clean the crack and remove any loose debris or old mortar. This step is crucial for promoting adhesion and ensuring a clean surface for the new mortar application.
- Bucket and mixing tool: Prepare a clean bucket for mixing the mortar, and use a suitable mixing tool, such as a margin trowel, to achieve a uniform and workable mortar consistency.
- Soft brush: A soft-bristled brush is handy for gently smoothing the mortar and blending it with the existing surface, ensuring a professional finish.
- Level: A level is indispensable for assessing the alignment and verticality of the repaired area, guaranteeing a visually pleasing and structurally sound outcome.
By assembling these essential materials and tools, you can embark on the repair process with confidence, knowing that you have everything needed to achieve a professional and enduring result. Adequate preparation sets the stage for a smooth and efficient repair experience, allowing you to focus on restoring the integrity and aesthetics of your brick wall.
Preparing the Area
Prior to applying the mortar, it’s imperative to prepare the crack and its surrounding area to ensure optimal adhesion and a seamless repair. Follow these essential steps to ready the area for the repair process:
- Clean the Crack: Use a wire brush to meticulously clean the crack, removing any loose debris, old mortar, and dirt. This step is crucial for promoting strong adhesion and preventing potential contaminants from compromising the repair.
- Dampen the Crack: Lightly dampen the crack using a clean, damp cloth or spray bottle. Moistening the crack helps prevent the surrounding bricks from absorbing moisture from the fresh mortar, which could compromise its strength and curing process.
- Mix the Mortar: Follow the manufacturer’s instructions to prepare the mortar mix, ensuring that it reaches the ideal consistency for application. Consistency is key, as overly wet or dry mortar can hinder the repair process and compromise the final result.
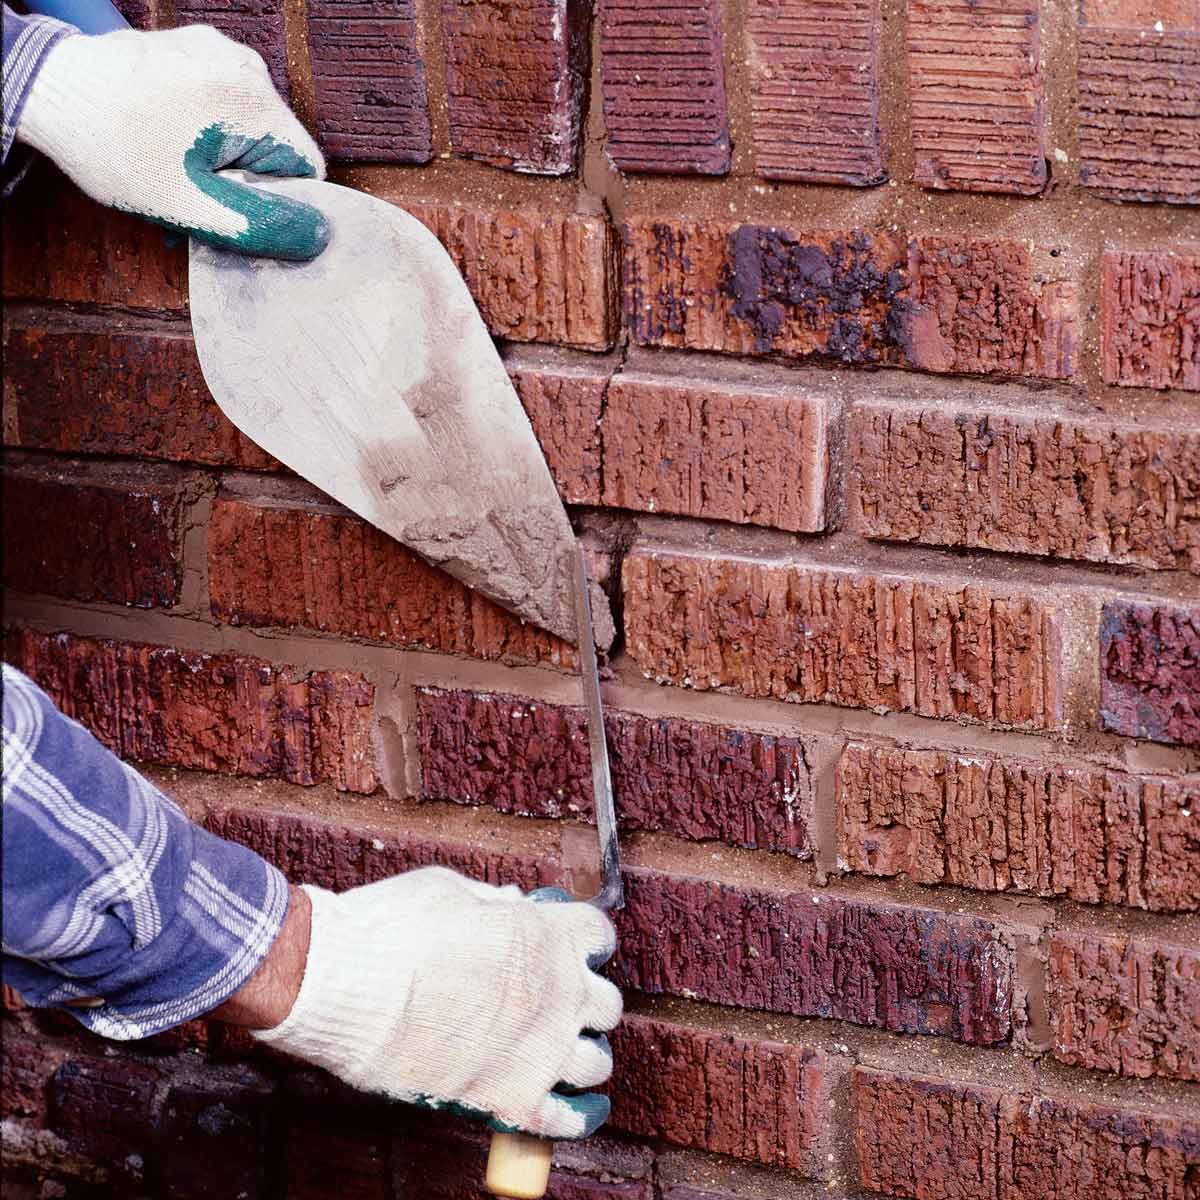
- Apply the Mortar: Using a trowel, carefully fill the crack with the prepared mortar, ensuring that it is packed tightly and extends slightly above the surface of the wall. Smooth the mortar to achieve a uniform and seamless finish, blending it with the surrounding area for a cohesive appearance.
- Shape and Texture: After applying the mortar, use a soft brush or sponge to texture the surface, matching the surrounding brickwork. This step is essential for achieving a visually harmonious result that seamlessly integrates with the existing wall.
- Monitor and Cure: Allow the repaired area to cure according to the mortar manufacturer’s recommendations. During the curing process, protect the area from excessive moisture or direct sunlight, as these factors can impede proper curing and compromise the strength of the repair.
By meticulously preparing the area and executing these fundamental steps, you can lay the groundwork for a successful and enduring brick wall repair. Thorough preparation not only enhances the durability and visual appeal of the repair but also sets the stage for a seamless integration with the existing brickwork, ensuring a cohesive and professional outcome.
Use a wire brush to clean out the crack, then fill it with a high-quality masonry caulk or patching compound. Smooth the surface with a trowel and let it dry completely before painting.
Filling the Crack
As you embark on the pivotal stage of filling the crack in your brick wall, it’s essential to approach this process with precision and attention to detail. Follow these steps to effectively fill the crack and restore the structural integrity of the wall:
- Prepare the Mortar: Begin by mixing the mortar according to the manufacturer’s instructions, ensuring that it attains the ideal consistency for application. Consistency is crucial, as it directly impacts the workability and adhesion of the mortar.
- Apply the Mortar: Using a trowel, carefully pack the prepared mortar into the crack, ensuring that it completely fills the void and adheres securely to the surrounding brick surfaces. Press the mortar firmly into the crack to eliminate air pockets and achieve a robust bond.
- Level and Smooth: After filling the crack, use the edge of the trowel or a straight edge to level the mortar with the surface of the wall. This step is essential for creating a seamless and visually appealing repair that seamlessly integrates with the surrounding brickwork.
- Texturing and Blending: To achieve a cohesive finish, texture the mortar to match the surrounding brickwork. You can use a brush, sponge, or specialized tool to impart a texture that harmonizes with the existing wall, ensuring a professional and unobtrusive result.
- Curing and Protection: Allow the filled crack to cure as per the mortar manufacturer’s recommendations. During the curing process, shield the repaired area from excessive moisture and direct sunlight, as these factors can impede proper curing and compromise the strength of the repair.
By meticulously executing these steps, you can effectively fill the crack in your brick wall, fortifying its structural integrity and visual appeal. Attention to detail and adherence to best practices are essential for achieving a durable and aesthetically pleasing repair that seamlessly integrates with the existing brickwork, ensuring a seamless and professional outcome.
Read more: How To Repair Cracks In Basement Wall
Finishing Touches
As you approach the final stages of repairing the cracks in your brick wall, it’s time to focus on the finishing touches that will elevate the overall quality and aesthetics of the repair. Paying attention to these essential details will ensure a seamless integration with the existing brickwork and a visually appealing outcome:
- Inspect and Refine: After the mortar has cured, carefully inspect the repaired area to identify any imperfections or unevenness. Use a soft brush or sponge to refine the texture and appearance of the mortar, ensuring that it seamlessly blends with the surrounding brick surfaces.
- Clean the Surface: Once the repair is finalized, gently clean the entire surface of the brick wall to remove any residual mortar, dust, or debris. This step is essential for revealing the full visual impact of the repair and ensuring a polished and professional appearance.
- Assess Color and Consistency: Evaluate the color and consistency of the mortar to ensure that it harmonizes with the existing brickwork. If necessary, consider applying a suitable brick tint or pigment to achieve a perfect color match and a cohesive overall appearance.
- Protective Measures: Consider applying a breathable, water-repellent sealant to the repaired area to enhance its longevity and resistance to moisture infiltration. Select a sealant that is compatible with the mortar and brick materials, providing an additional layer of protection against the elements.
- Final Inspection: Conduct a final inspection of the repaired area, ensuring that the texture, color, and overall finish align seamlessly with the surrounding brickwork. Address any last-minute refinements or adjustments to achieve a flawless and integrated repair.
By meticulously attending to these finishing touches, you can elevate the quality and longevity of the repair, ensuring that it seamlessly integrates with the existing brick wall. Attention to detail and a commitment to achieving a polished and professional outcome are essential for revitalizing the aesthetics and structural integrity of your brick wall, leaving you with a visually stunning and enduring result.
Conclusion
Congratulations on completing the journey of repairing cracks in your brick wall! By following the comprehensive steps outlined in this guide, you have not only revitalized the aesthetics of your property but also fortified the structural integrity of the brick wall. Your dedication to meticulous preparation, precise application, and attention to detail has culminated in a professional and enduring repair that will stand the test of time.
As you admire the seamless integration of the repaired area with the surrounding brickwork, take pride in knowing that you have successfully preserved the beauty and resilience of your property. The skills and knowledge you’ve gained in the process of brick wall repair empower you to tackle future maintenance tasks with confidence, ensuring that your property remains a bastion of strength and visual appeal.
Remember, regular inspection and proactive maintenance are key to safeguarding the longevity of your brick wall. By promptly addressing any emerging cracks or blemishes, you can prevent minor issues from escalating into significant structural concerns, preserving the beauty and value of your property for years to come.
We hope this guide has not only equipped you with practical know-how but also inspired a sense of accomplishment and empowerment as a homeowner. The art of brick wall repair is a testament to your dedication to maintaining and enhancing your living space, and your commitment to excellence shines through in the meticulous execution of this repair project.
As you revel in the satisfaction of a job well done, take a moment to appreciate the transformative impact of your efforts. Your brick wall stands as a testament to your care and attention, radiating strength, beauty, and enduring quality for all to admire.
Thank you for embarking on this enriching journey with us, and may your revitalized brick wall serve as a lasting testament to your dedication to creating a home that exudes timeless charm and resilience.
Frequently Asked Questions about How To Repair Cracks In Brick Wall
Was this page helpful?
At Storables.com, we guarantee accurate and reliable information. Our content, validated by Expert Board Contributors, is crafted following stringent Editorial Policies. We're committed to providing you with well-researched, expert-backed insights for all your informational needs.


0 thoughts on “How To Repair Cracks In Brick Wall”