Home>diy>Architecture & Design>How To Design Christmas Lights On A House

Architecture & Design
How To Design Christmas Lights On A House
Modified: August 20, 2024
Learn how to beautifully design Christmas lights on your house with our expert tips and techniques in architecture design. Create a festive and eye-catching display that will impress your neighbors and spread holiday cheer.
(Many of the links in this article redirect to a specific reviewed product. Your purchase of these products through affiliate links helps to generate commission for Storables.com, at no extra cost. Learn more)
Introduction
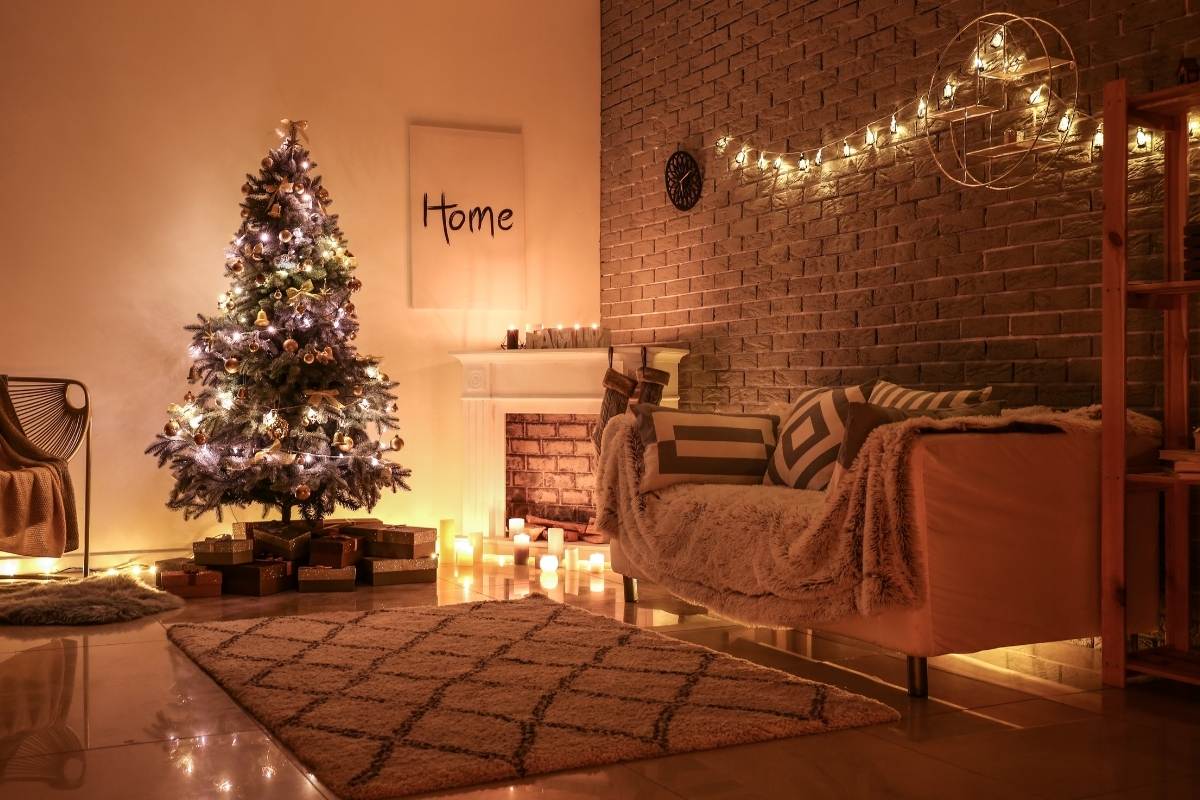
Christmas is a time of joy, festivities, and beautiful decorations. One of the most beloved traditions during this season is lighting up our homes with dazzling Christmas lights. Whether you’re a homeowner looking to create a stunning display or a professional designer working on a residential project, the design of Christmas lights on a house requires careful planning and attention to detail. In this article, we will guide you through the process of designing Christmas lights on a house, from planning and inspiration to the final installation and special effects.
The design of Christmas lights on a house is not just about randomly stringing lights around; it’s an art that can transform a mundane house into a magical winter wonderland. Each house has its own unique characteristics and features that can be accentuated by the right lighting design. With the right planning and execution, you can create a memorable and festive display that will bring joy to your family and passersby alike.
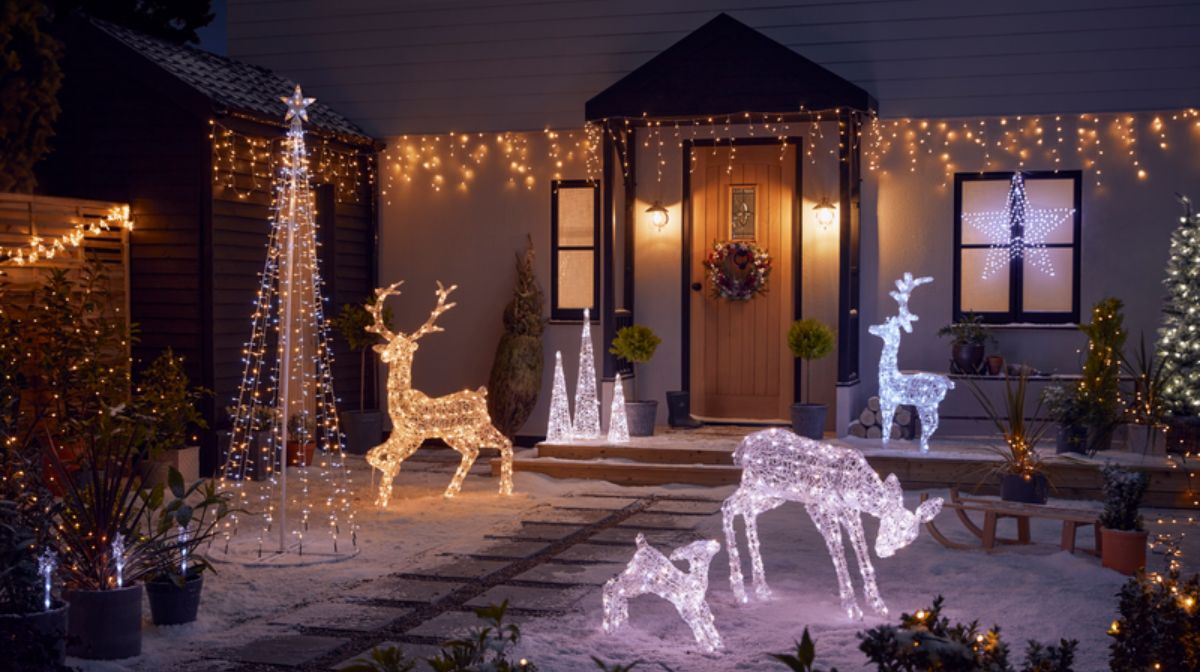
Whether you prefer a classic look with traditional white lights or a bold and vibrant display with colorful lights and patterns, the design options are endless. The key is to find inspiration and determine the desired effect you want to achieve. Are you going for a simple and elegant look, or do you want to go all out with a dazzling and extravagant display? The choice is yours, and the possibilities are only limited by your imagination.
In the following steps, we will walk you through the process of designing Christmas lights on a house, providing you with valuable tips and insights along the way. From gathering the necessary supplies to creating special effects and patterns, this article will equip you with the knowledge and inspiration you need to create a stunning Christmas light display that will be the talk of the neighborhood.
So, get ready to delve into the world of Christmas light design and turn your house into a festive spectacle that will brighten up the night and spread holiday cheer.
Key Takeaways:
- Create a magical Christmas light display by planning, gathering inspiration, and incorporating special effects. Share the joy with others and embrace the spirit of the holiday season through your beautifully designed lights.
- Be mindful of energy usage, safety precautions, and efficient installation to create a stunning and environmentally friendly Christmas light display. Spread warmth, happiness, and the beauty of the holiday season through your creatively designed lights.
Read more: How To Put Christmas Lights On Porch Railing
Step 1: Planning and Inspiration
The first step in designing Christmas lights on a house is to plan and gather inspiration. Take some time to envision how you want your house to look and feel during the holiday season. Look for inspiration in magazines, online galleries, or even by driving around your neighborhood to see how others have decorated their homes.
Consider the architectural features of your house and how they can be enhanced with different lighting techniques. For example, if you have a grand entrance with columns, you can wrap them with lights to create a welcoming effect. If you have a tall tree in your front yard, you can use lights to highlight its branches and create a focal point.
When it comes to choosing the color scheme for your Christmas lights, you can go with traditional colors like red, green, and gold, or opt for more contemporary combinations such as blue and silver or purple and white. The color scheme should complement the overall theme and aesthetics of your house.
Additionally, consider the style or theme you want to portray. Do you want a classic, elegant look with simple and understated lights, or do you prefer a fun and whimsical display with an abundance of colors and patterns? Aligning your lighting design with the overall theme will create a cohesive and visually appealing look.
Before you start installing the lights, make a plan of where you want to place them. Sketch a rough diagram of your house and identify areas where lights will be most effective, such as along the roofline, around windows and doors, or wrapping around trees and bushes.
Take into account any power sources or outlets available around your house. This will help you determine the length of the light strings you need and where you may need extension cords or additional power options.
Remember to also take safety into consideration during the planning stage. Make sure any outdoor electrical connections and outlets are compatible with your lights and follow proper safety guidelines for outdoor installations. If you have any doubts, consult with a professional electrician.
By taking the time to plan and gather inspiration, you will have a clear vision of how you want your house to look and be better prepared for the next steps in the design process. So grab a pen, sketch out your ideas, and let your creativity flow!
Step 2: Determine the Desired Effect
Now that you have gathered inspiration and planned out the placement of your lights, it’s time to determine the desired effect you want to achieve with your Christmas light display.
Consider the mood you want to create. Do you want your lights to evoke a sense of warmth and coziness, or are you aiming for a more vibrant and festive atmosphere? The desired effect will help guide your choices in terms of light colors, patterns, and special effects.
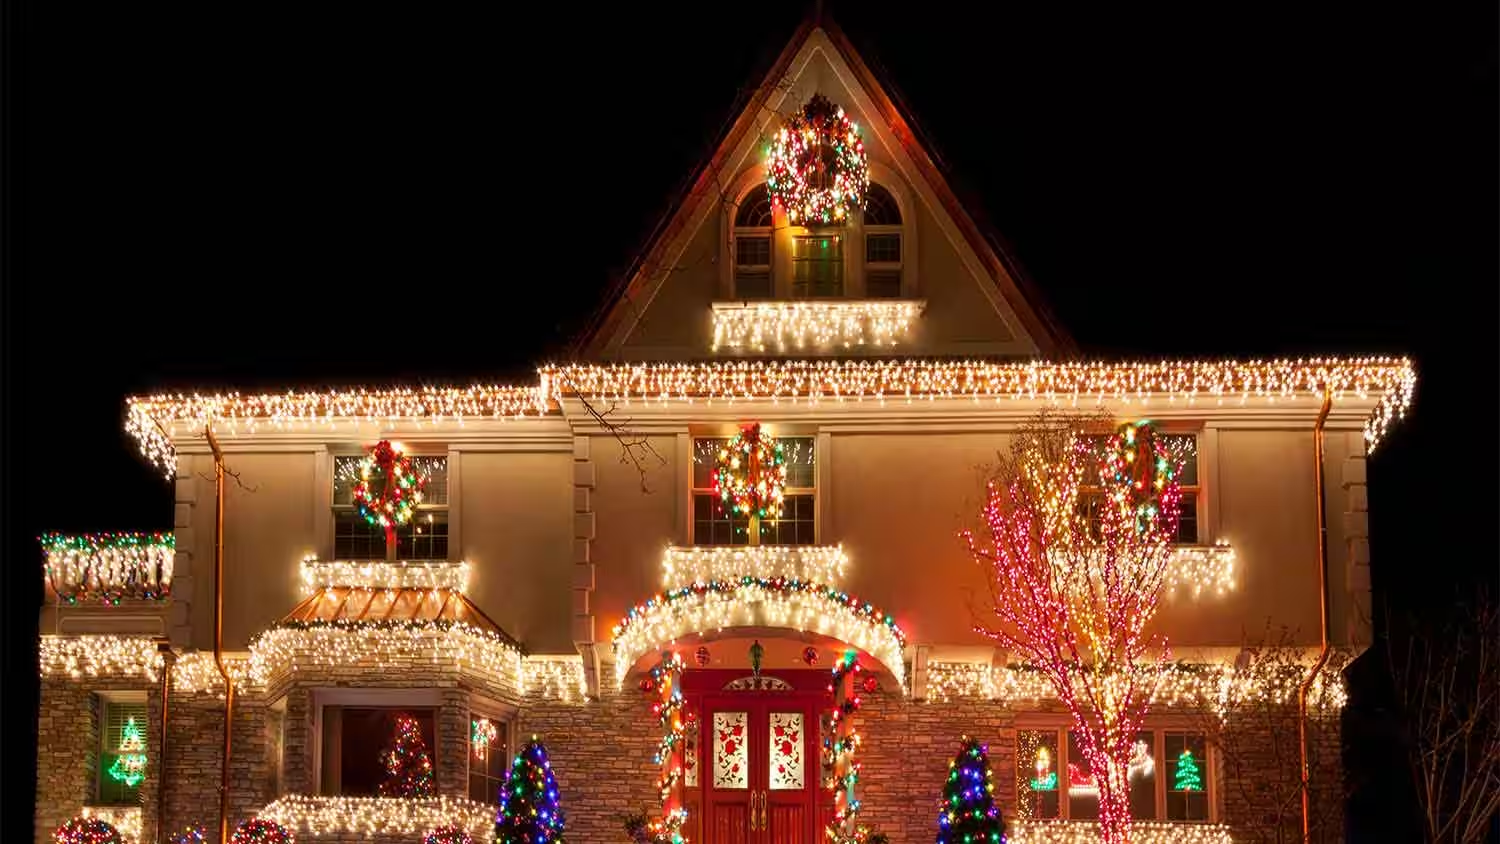
If you prefer a traditional look, you can go for a simple and elegant design with white or warm white lights. These lights create a classic ambiance and can accentuate the architectural features of your house. Use them to highlight rooflines, window frames, and doorways for a timeless and sophisticated display.
On the other hand, if you want to create a more whimsical and playful atmosphere, consider incorporating colorful lights, such as red, green, blue, or multi-colored strands. These vibrant lights can add a festive touch to your display, especially when used in combination with special effects like twinkling, fading, or chasing patterns.
Additions like icicle lights or net lights can create a dramatic effect, resembling cascading snow or a starry night sky. They are perfect for adding depth and dimension to your light display.
For a unique and eye-catching effect, consider using light projectors or laser lights. These devices project moving patterns and images onto your house, instantly transforming it into a magical spectacle. From snowflakes and reindeer to stars and holiday greetings, the possibilities are endless with light projectors.
Another way to add a special touch to your display is to incorporate music-synced lights. These lights can be programmed to dance and flash in sync with your favorite holiday tunes. They bring a festive energy to your display that is sure to captivate and delight viewers.
Remember to keep in mind the overall theme and style you want to showcase. The desired effect should align with your initial vision to create a cohesive and visually pleasing display.
Take the time to experiment and play with different light combinations and effects. Don’t be afraid to get creative and try new ideas. The design of your Christmas lights should reflect your personal style and bring joy to both you and your visitors.
Once you have determined the desired effect, you are now ready to gather the necessary supplies to bring your vision to life. In the next step, we will explore the essential tools and materials you’ll need for your Christmas light design.
Step 3: Gather the Necessary Supplies
Now that you have a clear plan and know the desired effect you want to achieve, it’s time to gather the necessary supplies for your Christmas light design. Here are some essential tools and materials you’ll need:
- Christmas Lights: Choose lights that are suitable for outdoor use and have the desired color and style. Make sure to measure the length needed for each area of your house to ensure you have enough lights. Consider using LED lights, as they are energy-efficient and have a longer lifespan.
- Extension Cords and Power Adapters: Determine the distance between your power source and the areas where you plan to install the lights. Make sure to have enough outdoor-rated extension cords and power adapters to reach all the desired locations.
- Outdoor Hooks or Clips: These will help you securely attach the lights to your house and other structures. Make sure to choose clips or hooks that are appropriate for the type of lights you are using and the surface you are attaching them to.
- Ladder or Scaffolding: Depending on the height of your house, you may need a ladder or scaffolding to safely reach and install the lights. Ensure that your ladder or scaffolding is stable and positioned on a level surface.
- Timer: Consider using a timer to automatically turn your lights on and off at specific times. This not only saves energy but also ensures your display is visible during peak viewing times.
- Safety Equipment: Prioritize safety by wearing gloves, safety glasses, and appropriate footwear while installing the lights. These precautions will help protect you from any accidents or injuries.
Additionally, you may also want to consider other decorative elements such as wreaths, garlands, or inflatable figures to complement your light display. These extra touches can add depth and visual interest to your overall design.
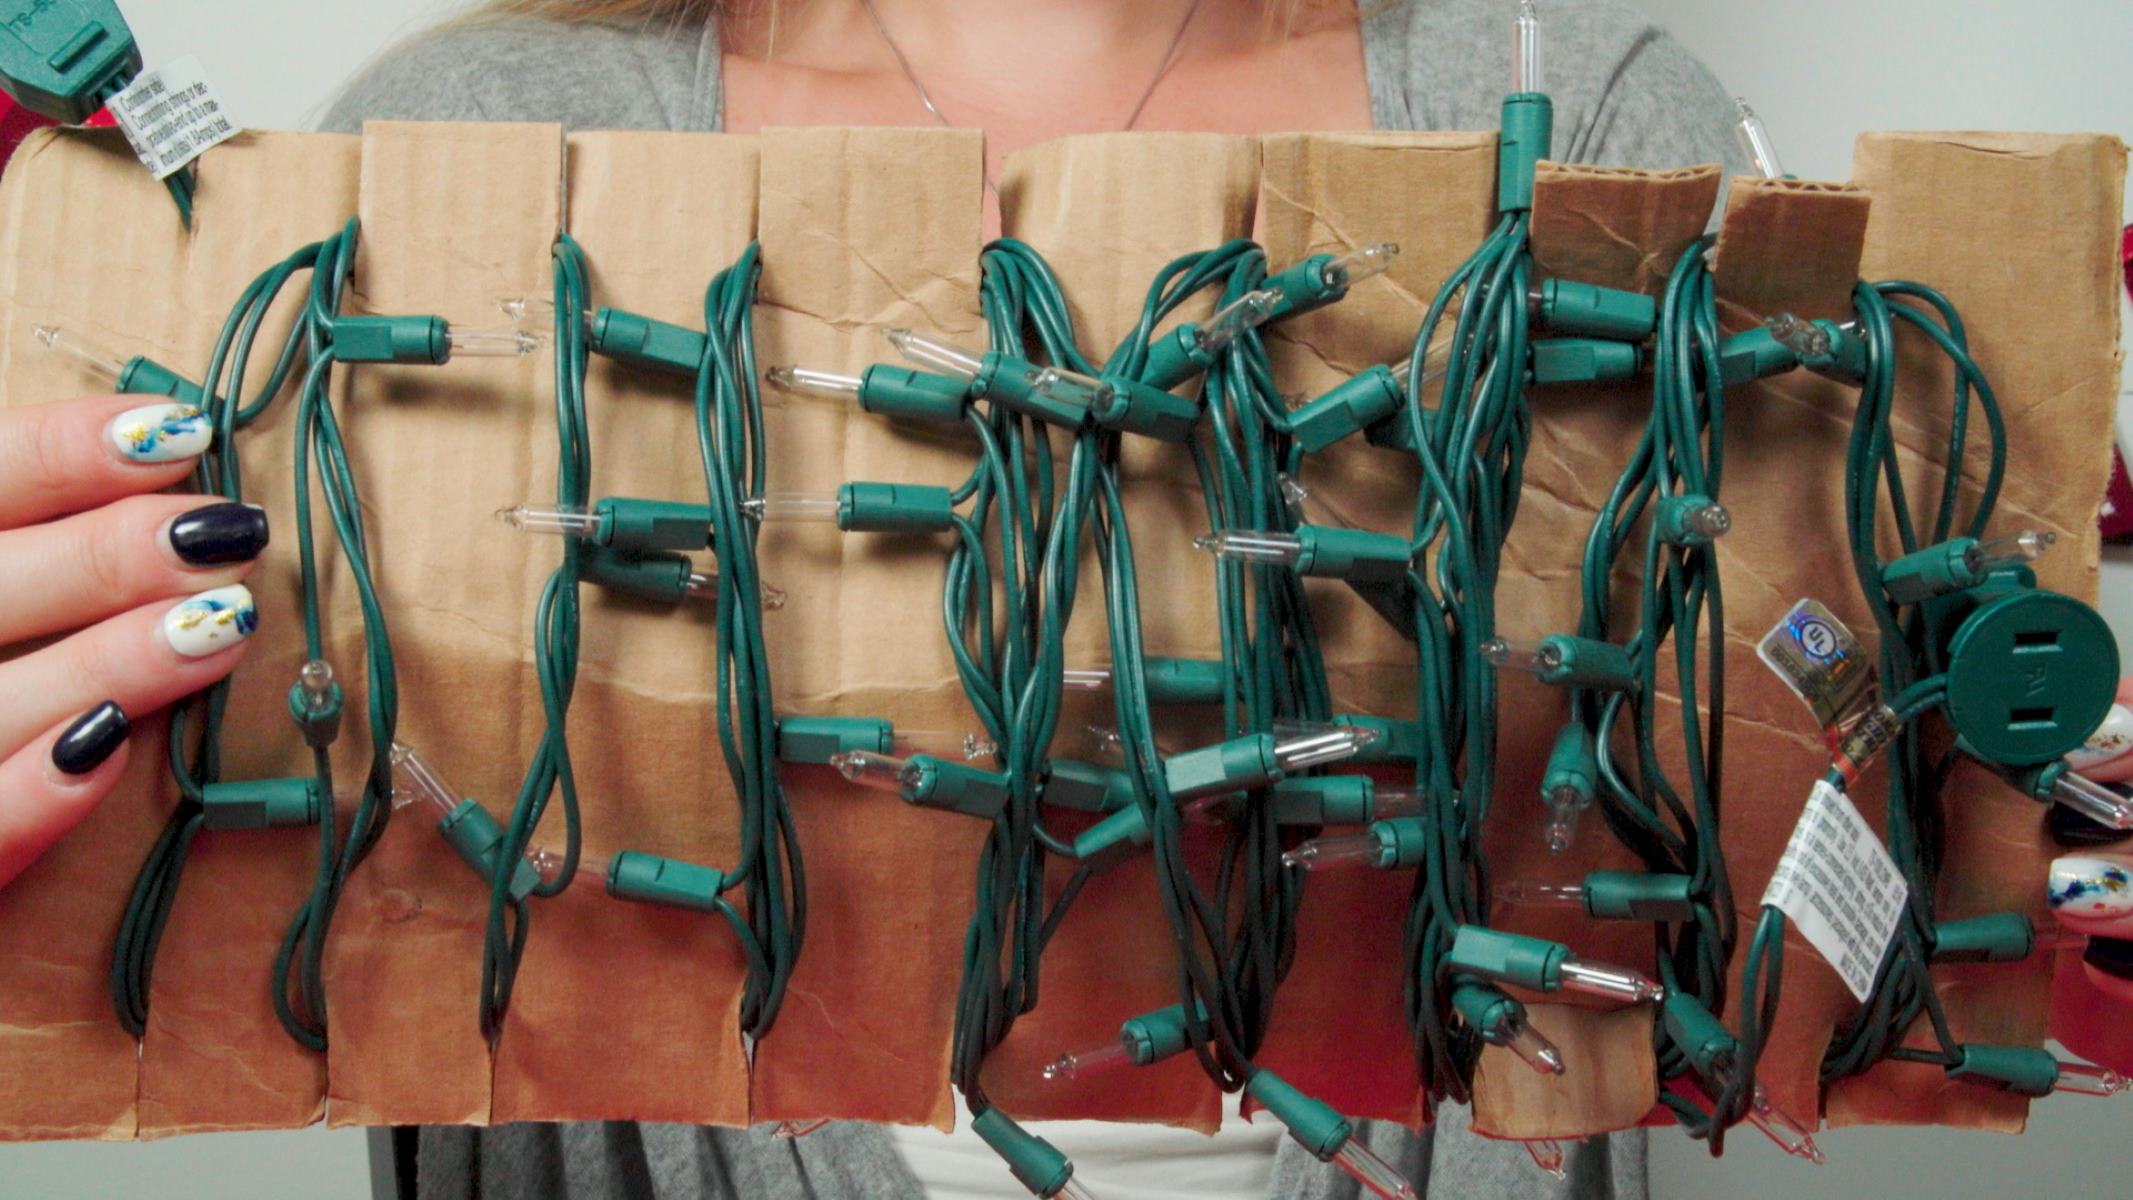
Before making any purchases, it’s important to check the existing lights and decorations you have from previous years. Assess their condition and determine whether you can reuse them. This will help you avoid unnecessary expenses and minimize waste.
If you find that you need to purchase new supplies or want to add to your existing collection, visit local stores or search online for the best deals. Consider checking out holiday-specific stores or clearance sales for discounted items.
By gathering all the necessary supplies, you will be well-prepared to begin the installation process and bring your Christmas light design to life. In the next step, we will explore the important steps for testing and ensuring safety before installing the lights.
Step 4: Test and Check Safety Precautions
Before you start installing your Christmas lights, it’s crucial to test them and check safety precautions to ensure a smooth and secure installation. Here are the steps to follow:
- Inspect the Lights: Carefully inspect each strand of lights for any signs of damage, such as broken bulbs, frayed wires, or loose connections. Replace any faulty lights to prevent electrical hazards.
- Test the Lights: Plug in each strand and ensure that all the bulbs are working properly. Replace any burned-out bulbs to maintain consistent illumination across your display.
- Check Power Sources: Verify that all your power sources, including outdoor outlets and extension cords, are in good condition and free from any defects or exposed wiring. If you notice any issues, consult with a professional electrician to address the problem.
- Read the Instructions: Familiarize yourself with the manufacturer’s instructions for the lights and any additional equipment you’ll be using. Follow their guidelines for safe installation and usage.
- Calculate Electrical Capacity: Determine the electrical capacity of your outlets and circuits to ensure they can handle the load of your Christmas lights. Overloading the circuits can lead to electrical malfunctions or even fire hazards. Spread the lights across multiple circuits if necessary.
- Ground Fault Circuit Interrupters (GFCIs): Use GFCIs in outdoor outlets to protect against electrical shocks. GFCIs detect ground faults and quickly trip the circuit, preventing potential harm. If your outlets are not equipped with GFCIs, consider using portable GFCI adapters.
- Outdoor Lighting Timers: Set up timers to automatically turn your lights on and off. This will not only save energy but also reduce the risk of electrical issues caused by leaving the lights on for an extended period.
- Secure Extension Cords: Ensure that all extension cords are securely fastened and protected from moisture, tripping hazards, or damage from sharp objects. Use appropriate outdoor cord covers to safeguard against these potential hazards.
- Stay Away from Power Lines: Be cautious when installing lights near overhead power lines. Maintain a safe distance to prevent any accidental contact with high-voltage wires. If in doubt, consult your local utility company for guidance.
Keep in mind that safety should always be your top priority when installing Christmas lights. Take your time to double-check everything before proceeding with the installation process. If you have any concerns or are unsure about any aspect of the installation, consult with a professional electrician or seek guidance from experienced individuals.
By thoroughly testing the lights and following safety precautions, you will minimize the risk of accidents and ensure a safe and enjoyable experience for everyone.
Now that you have tested the lights and checked all the necessary safety precautions, it’s time to move on to the exciting part – installing the lights! In the next step, we will guide you through the process of installing the lights on your house.
Read more: How To Design Your House For Christmas
Step 5: Begin Installing the Lights
With all the necessary preparations in place, it’s time to start installing the Christmas lights on your house. Follow these steps to ensure a smooth installation:
- Begin at the Power Source: Start by connecting your lights to the power source. Plug them into the outdoor outlets or extension cords, ensuring a secure fit. If using multiple extension cords, use electrical tape or cord clips to keep them firmly connected.
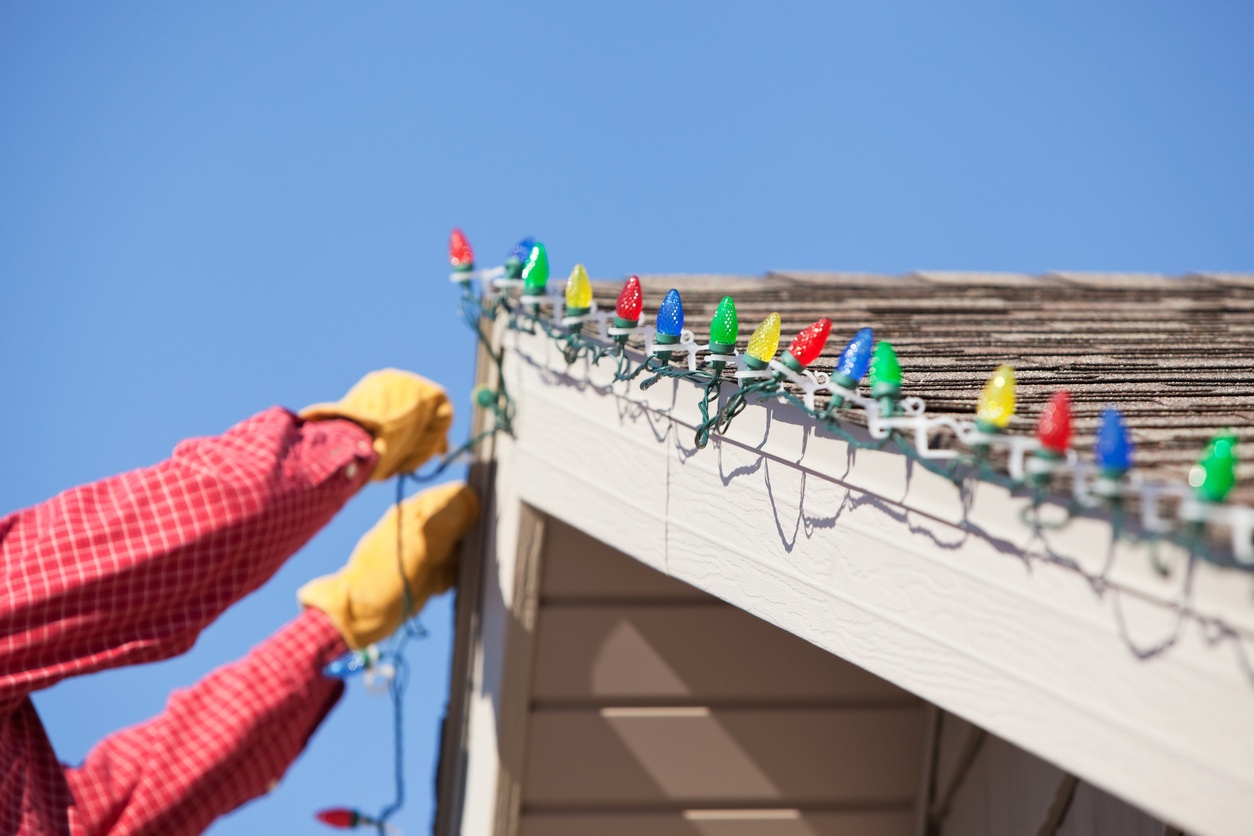
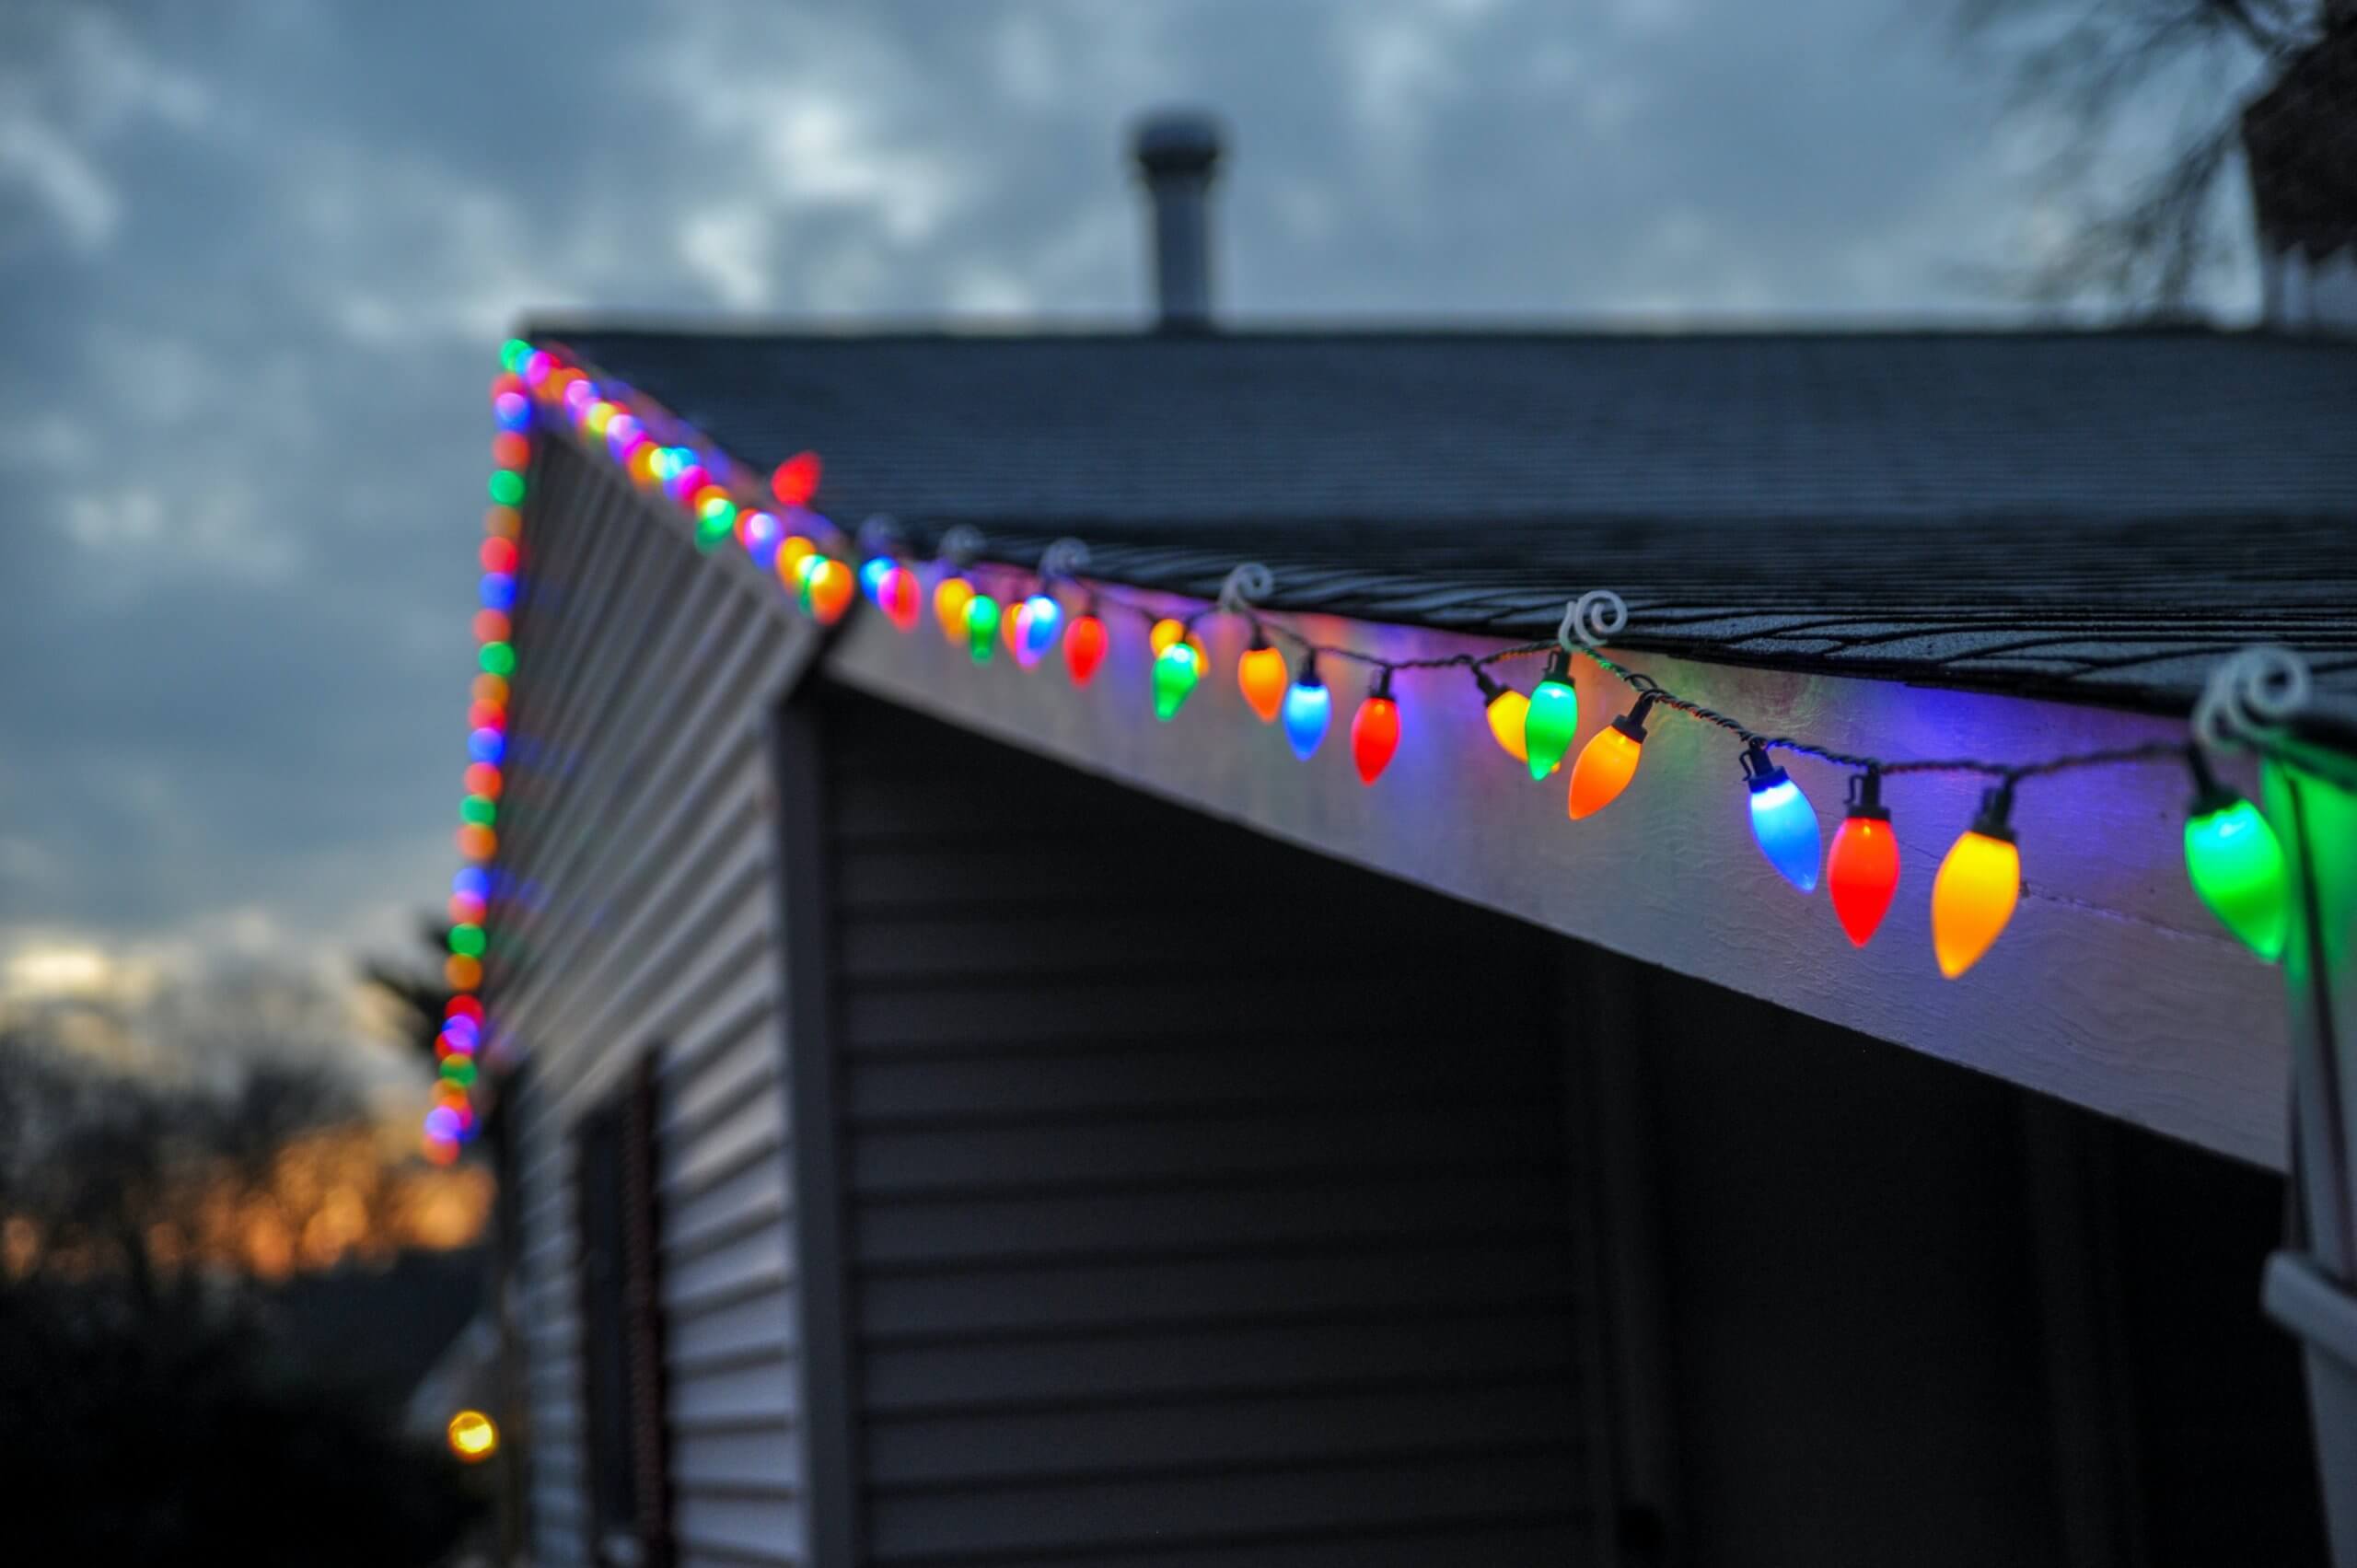
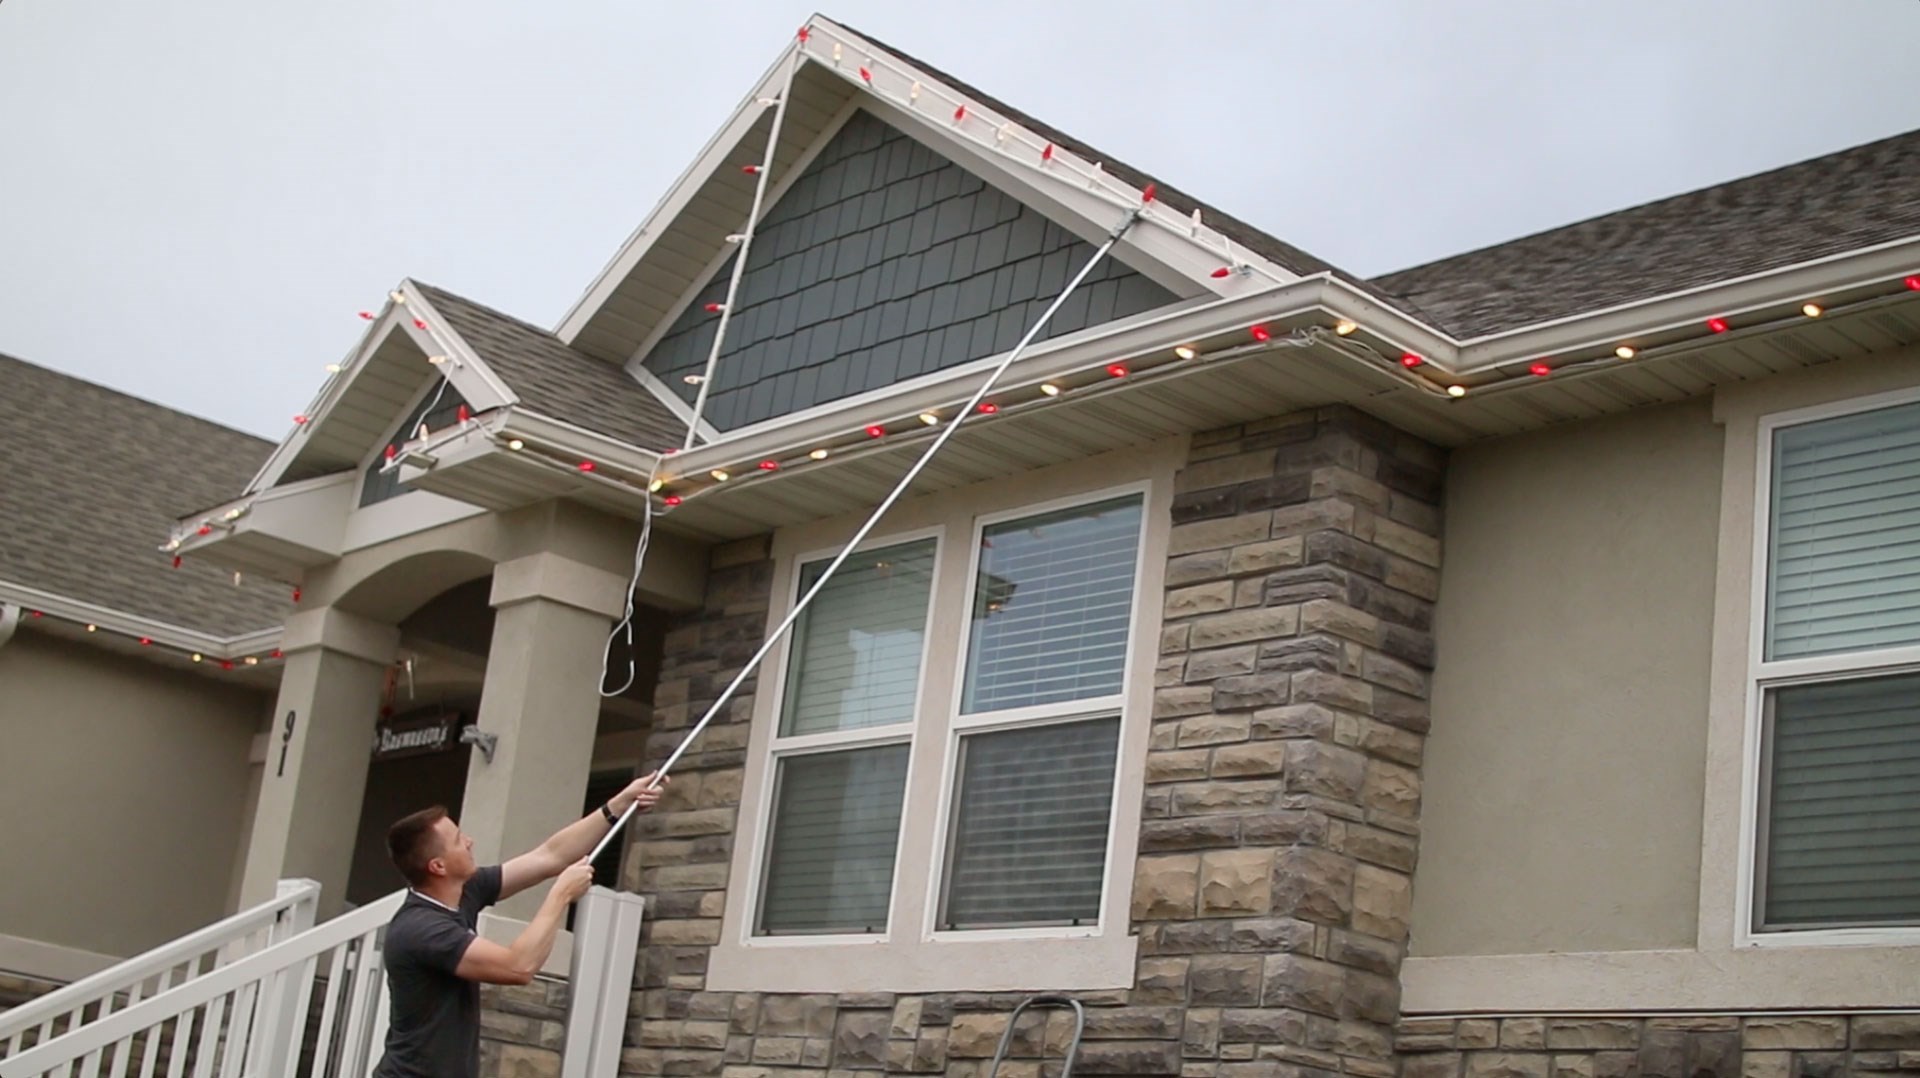
- Work from Top to Bottom: Starting at the highest point of your house, such as the roofline or eaves, begin installing the lights. This will prevent tangling or damage to the lights as you work your way down.
- Attach Lights to the Roofline: Use outdoor hooks or clips to secure the lights along the roofline. Space them evenly, maintaining consistent tension along the strand. Avoid stapling or nailing the lights, as this can damage the cords and pose a safety risk.
- Wrap Trees and Bushes: For trees and bushes, carefully wrap the light strands around the branches, ensuring the lights are evenly distributed. Use zip ties or twist ties if needed to secure the lights in place.
- Accentuate Architectural Features: If there are any architectural features you want to highlight, such as columns, pillars, or windows, use lights to accentuate them. Wrap the lights around these structures, enhancing their beauty and adding depth to your display.
- Be Mindful of Safety: While installing the lights, always prioritize your safety. Use a stable ladder or scaffolding when working on high areas, and have someone assist you if needed. Avoid overstretching or reaching beyond your comfortable reach to avoid accidents.
- Double-Check Connection Points: Regularly inspect the connection points between light strands to ensure they are securely fastened. This will help maintain a continuous flow of electricity and prevent any disruptions in illumination.
Take your time during installation and ensure that each strand of lights is placed with care and precision. Step back periodically to review your progress and make any necessary adjustments to achieve the desired effect.
Remember, the beauty of Christmas lights lies in the attention to detail. Take pride in your work and ensure that the lights are neatly arranged, creating a visually appealing and balanced display.
By following these steps and taking the necessary safety precautions, you will be well on your way to creating a captivating Christmas light display that will bring joy and delight to everyone who sees it.
In the next step, we will explore how to connect and secure the lights to achieve a seamless and professional look.
Consider the architectural features of your house when designing Christmas lights. Highlight windows, doors, and rooflines to create a cohesive and visually appealing display.
Step 6: Connect and Secure the Lights
After installing the lights on your house, it’s important to properly connect and secure them for a seamless and professional look. Follow these steps to ensure a secure and tidy display:
- Check Electrical Connections: Double-check that all the electrical connections are secure and held tightly. Ensure that the plugs are inserted fully into the outlets or extension cords and that there are no loose connections.
- Hide Excess Cord: If you have excess cord between light strands or from the extension cords, neatly bundle and secure them using zip ties or cord clips. This will prevent tripping hazards and create a tidier appearance.
- Conceal Outdoor Extension Cords: Use cord covers or bury them underground (if permitted) to conceal the outdoor extension cords. This will help protect them from the elements and create a more polished look.
- Secure Lights with Clips or Hooks: Use outdoor clips or hooks to secure the lights to the surfaces you are decorating. These clips or hooks will hold the lights in place and prevent them from sagging or falling down.
- Consider Lighting Frames: If you want a more structured and uniform appearance, consider using lighting frames or grids. These frames can be attached to your house and provide a guide for arranging and attaching the lights.
- Ensure Lights Are Straight and Taut: As you secure the lights, ensure that they are straight and taut along the surfaces. This will create a neat and professional look to your lighting design.
- Secure Lights on Trees and Bushes: If you wrapped lights around trees or bushes, use zip ties or twist ties to secure the lights to the branches. This will prevent them from slipping or getting tangled as the branches move.
- Be Aware of Safety Considerations: Throughout the process, keep safety in mind. Avoid attaching lights to sharp objects or areas that may cause damage to the cords. Regularly inspect the attachment points to ensure they remain secure and intact.
By securely connecting and fastening the lights, you’ll create a professional finish that will withstand various weather conditions and maintain the desired effect throughout the holiday season.
After taking these steps, step back and admire your work. Make any necessary adjustments to ensure the lights are evenly spaced and create the desired visual impact.
Remember, the goal is to create a visually appealing light display that brings joy and delight to both you and those who see it. Taking the time to connect and secure the lights properly will ensure that your display remains beautiful and functional throughout the holiday season.
In the next step, we will explore how you can add special effects and patterns to your Christmas light design.
Step 7: Create Special Effects and Patterns
Once you have connected and secured your Christmas lights, it’s time to take your display to the next level by adding special effects and patterns. Creating different effects can bring a sense of magic and wonder to your light design. Here are some ideas to get you started:
- Twinkling Lights: Some string lights come with a twinkle or fade effect. Utilize these settings to give your display a whimsical and enchanting ambiance. Twinkling lights resemble the shimmer of stars, while fading lights create a gentle and soothing effect.
- Chasing Lights: Chasing lights provide a dynamic look by creating an illusion of lights moving in a chasing pattern. This effect can be achieved by using special controllers or pre-programmed light strands. Use chasing lights to outline specific areas or architectural features of your house.
- Color Changing Lights: Consider using color-changing LED lights to add a vibrant and eye-catching element to your display. These lights can cycle through various colors, creating a captivating and dynamic effect.
- Layered Lighting: Experiment with different layers of light by combining different colors or types of lights. This technique can add depth and dimension to your design, making it visually intriguing and exciting.
- Animated Lighting: Use lighting controllers or smart devices to program your lights to synchronize with music or create animated patterns. This advanced technique can bring your light display to life and captivate your audience.
- Unique Patterns: Get creative with patterns! Instead of simply wrapping lights around surfaces, create unique shapes or patterns. Outline the edges of windows and doors, create snowflake patterns, or spell out holiday phrases using lights.
- Use Projected Patterns: Light projectors can project various patterns onto your house, such as snowflakes, stars, or holiday-themed images. These projectors add a touch of magic and diversity to your display.
- Highlight Landscaping: Extend your light design beyond your house by incorporating landscape lighting. Use spotlights to illuminate trees, shrubs, or other focal points in your yard to create a cohesive and well-rounded display.
Remember to consider the overall theme and desired effect you envisioned earlier in the design process. Choose special effects and patterns that complement your theme and enhance the visual impact you want to achieve.
Take the time to experiment and play around with different settings and patterns until you achieve the desired look. Avoid overcrowding your display with too many effects, as it can become overwhelming and distract from the overall design. Aim for a harmonious and balanced blend of special effects and patterns.
By incorporating special effects and patterns, you’ll create a display that stands out and captures the attention of everyone who sees it. This will add an extra level of excitement and magic to your Christmas light design.
In the next step, we will discuss the importance of being mindful of energy usage and how to ensure an efficient display.
Step 8: Be Mindful of Energy Usage
As you design your Christmas light display, it’s essential to be mindful of energy usage to minimize your environmental impact and manage your electricity costs. Here are some tips to help you be more energy-efficient:
- Choose LED Lights: LED lights are more energy-efficient than traditional incandescent lights. They consume significantly less electricity and have a longer lifespan. Opting for LED lights will save you energy and money in the long run.
- Use Timers or Sensors: Set up timers or use sensors to automatically turn your lights on and off at specific times. This way, you won’t accidentally leave them on during daylight hours, reducing unnecessary energy consumption.
- Consider Solar-Powered Lights: Solar-powered lights harness the energy from the sun during the day and automatically illuminate at night. They are an eco-friendly option and can save you energy by eliminating the need for electrical power.
- Reduce the Number of Lights: While it’s tempting to have an abundance of lights, consider reducing the number of strands or bulbs. A well-designed display doesn’t necessarily require excessive lighting. Focus on quality rather than quantity.
- Utilize Power Strips: Connect your lights to power strips with built-in timers or switches. This allows you to easily control when your lights are powered, preventing them from consuming energy when not needed.
- Opt for Lower Wattage Lights: When purchasing lights, check the wattage of the bulbs. Lower wattage lights consume less energy. Look for energy-efficient options that still provide the desired brightness and effect.
- Consider Low Voltage Lighting: Low voltage lighting systems consume less energy compared to regular voltage systems. They are safer and pose a lower risk of electrical hazards.
- Avoid Overly Complex Designs: Intricate designs with multiple layers and intense special effects consume more energy. Keep your design simple and elegant to minimize energy usage.
- Regularly Inspect and Maintain: Periodically inspect your lights for any issues, such as loose connections or burned-out bulbs. Replace faulty lights promptly to maintain optimal energy efficiency.
- Spread Joy with Less Lighting: Remember that the spirit of Christmas is not solely dependent on the number of lights you use. By focusing on creating a warm and welcoming atmosphere, you can bring joy to others without excessive energy consumption.
By being mindful of energy usage, you can enjoy your Christmas light display while minimizing your impact on the environment and your electricity bill. Remember, a thoughtfully designed display can still be stunning and festive without excessive energy consumption.
In the final step, we will discuss how to finalize the design and ensure you can fully enjoy your beautifully lit house.
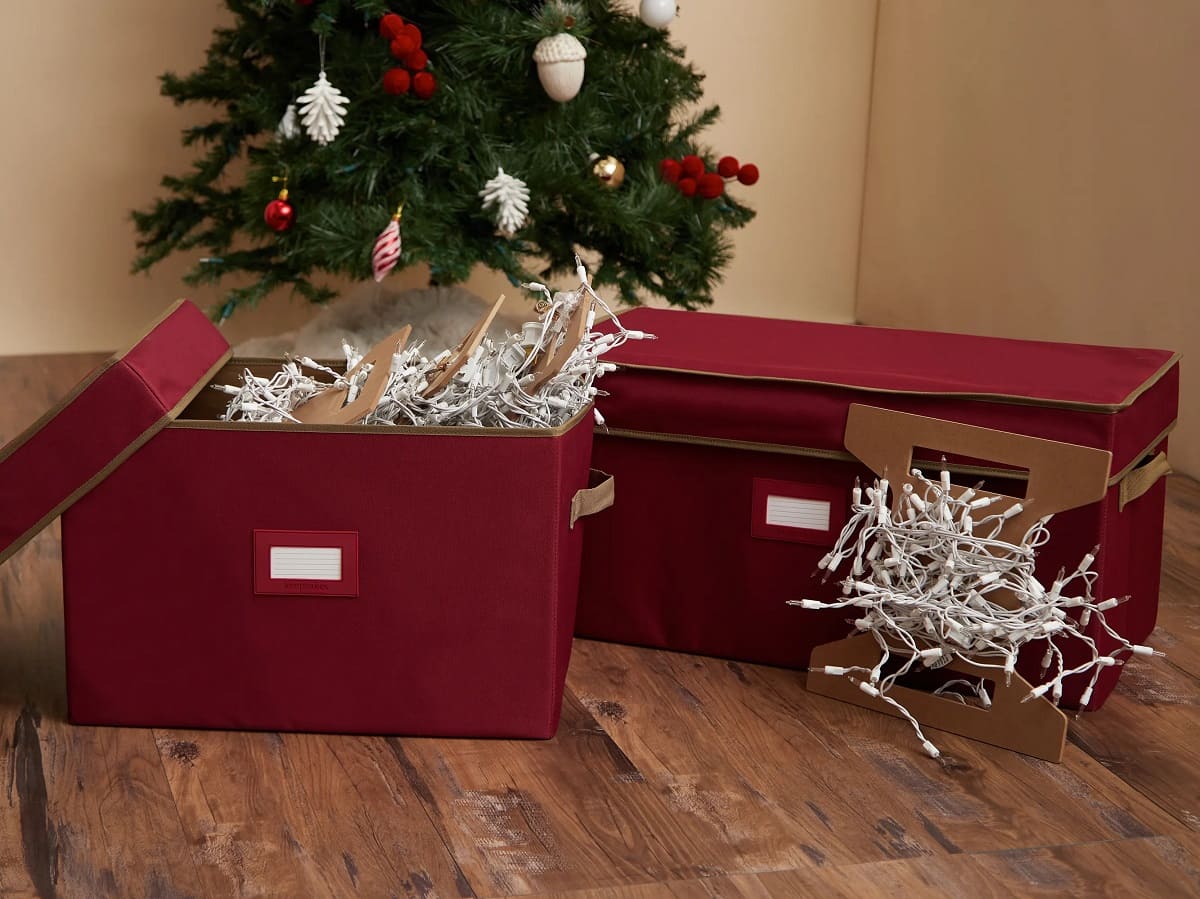
Read more: How To Store Outdoor Christmas Lights
Step 9: Finalize the Design and Enjoy Your Christmas Lights
After putting in all the hard work and effort, it’s time to finalize your Christmas light design and bask in the joy of your beautifully lit house. Follow these final steps to complete your display and fully enjoy the magic of the holiday season:
- Step Back and Review: Take a moment to step back and review your entire Christmas light display. Assess the overall effect and make any necessary adjustments to achieve the desired look. Ensure that all the lights are properly connected and secure.
- Showcase Focal Points: Highlight any prominent architectural features, such as windows, entryways, or pillars, by accentuating them with extra lights or special effects. Pay attention to creating a focal point that draws the eyes and adds interest to your design.
- Add Complementary Decorations: Consider adding other festive decorations, such as wreaths, garlands, or inflatable figures, to complement your light display. These additions can enhance the overall ambiance and bring a touch of holiday spirit.
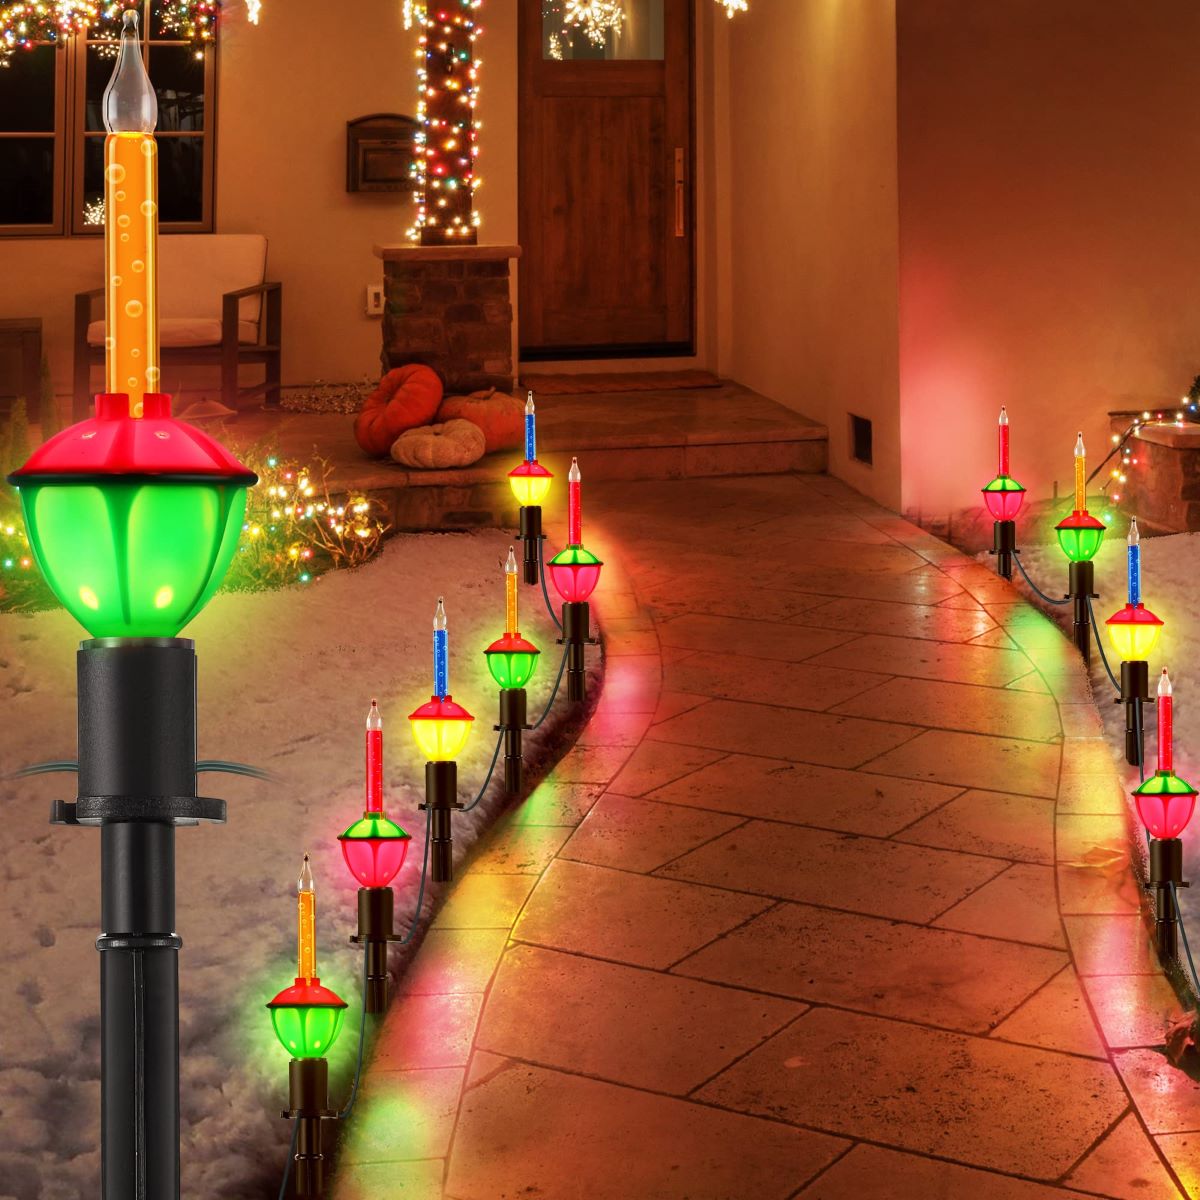
- Accessorize with Outdoor Décor: Enhance the magical atmosphere by incorporating other outdoor décor elements. Consider adding lanterns, pathway lights, or illuminated figures to create a cohesive theme and extend the enchantment throughout your outdoor space.
- Celebrate Special Occasions: Customize your light display to celebrate special occasions during the holiday season. Add decorations related to Hanukkah, Kwanzaa, or New Year’s to showcase the diversity and inclusivity of the holiday season.
- Share the Joy: Invite friends, family, and neighbors to come and enjoy your beautifully lit house. Organize a small gathering or open house to spread the holiday cheer and create memorable moments for everyone to cherish.
- Document and Share: Capture the beauty of your Christmas light display by taking photographs or videos. Share them with loved ones who may not be able to visit, or even upload them to social media to inspire others with your creativity and design.
- Maintain and Monitor: Regularly inspect your lights throughout the holiday season to ensure they are functioning properly. Replace any burnt-out bulbs or repair any damaged connections promptly. This will help maintain the beauty and longevity of your display.
- Take Time to Enjoy: Finally, take a moment to step outside on a clear, crisp evening, and enjoy the glow and warmth of your Christmas lights. Embrace the joy and happiness it brings, not only to you but also to the community.
Remember, the purpose of your Christmas light display is to spread joy and create a magical atmosphere. Enjoy the process of designing and installing your lights, and take pride in the beauty you have created.
As the holiday season unfolds, take the time to appreciate the smiles on people’s faces as they admire your display. Embrace the spirit of giving and let your lights be a symbol of hope, love, and joy.
From all of us, we wish you a wonderful holiday season filled with warmth, happiness, and the beauty of your stunning Christmas light display!
Article Written By: [Your Name]
Conclusion
Designing Christmas lights on a house is a creative and exciting process that allows you to share the holiday spirit with others. By following the steps outlined in this guide, you can create a stunning light display that will bring joy and warmth to your home.
From planning and gathering inspiration to connecting and securing the lights, each step plays a crucial role in bringing your vision to life. Remember to be mindful of energy usage, check safety precautions, and add special effects and patterns to enhance the overall design. By paying attention to the details and incorporating your personal style, you can create a unique and breathtaking display.
As you finalize your Christmas light design, take a step back and admire the beauty you have created. Share the joy with others by inviting them to experience the magic of your display.
The holiday season is a time for celebration, love, and sharing. Your Christmas lights add a touch of enchantment to the world and create lasting memories for those who see them. Embrace the spirit of the season, and let your beautifully lit house be a beacon of hope and happiness.
So, gather your supplies, unleash your creativity, and let the magic begin. Whether you choose a classic and elegant design or an extravagant and whimsical display, remember that the most important thing is to enjoy the process and share the joy with others.
Wishing you a joyful holiday season filled with the warmth and sparkle of your beautifully designed Christmas lights!
Article Written By: [Your Name]
Frequently Asked Questions about How To Design Christmas Lights On A House
Was this page helpful?
At Storables.com, we guarantee accurate and reliable information. Our content, validated by Expert Board Contributors, is crafted following stringent Editorial Policies. We're committed to providing you with well-researched, expert-backed insights for all your informational needs.


0 thoughts on “How To Design Christmas Lights On A House”