Home>Furniture & Design>Bathroom Fixtures>How To Repair A Bathroom Shower Tile
Bathroom Fixtures
How To Repair A Bathroom Shower Tile
Modified: January 24, 2024
Learn how to repair bathroom shower tile with our expert tips and advice. Fix your bathroom fixtures with our step-by-step guide.
(Many of the links in this article redirect to a specific reviewed product. Your purchase of these products through affiliate links helps to generate commission for Storables.com, at no extra cost. Learn more)
Introduction
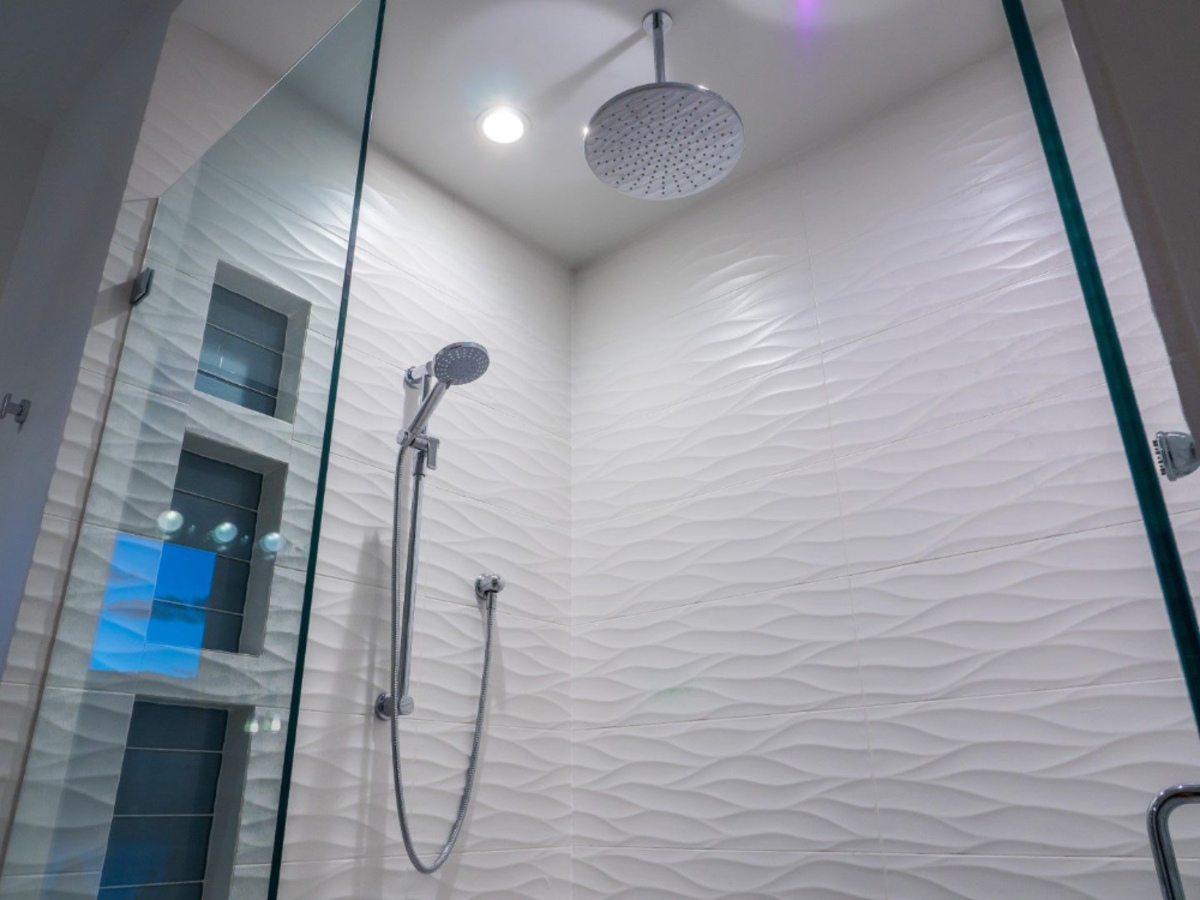
Welcome to the ultimate guide on repairing bathroom shower tiles! Your shower area is a vital part of your daily routine, and damaged tiles can not only be unsightly but also lead to more significant issues such as water damage. Fear not, as this comprehensive guide will equip you with the knowledge and skills needed to tackle this common household problem.
Whether your tiles have cracks, chips, or have come loose, addressing these issues promptly is crucial to maintain the integrity and aesthetics of your bathroom. By following the steps outlined in this guide, you can restore your shower tiles to their former glory without the need for professional help.
In the following sections, we will delve into the step-by-step process of assessing the damage, gathering the necessary materials and tools, removing damaged tiles, preparing the surface, installing new tiles, grouting and sealing, and adding the finishing touches. Each step is accompanied by clear instructions, tips, and insights to ensure that you can confidently undertake this project.
Repairing bathroom shower tiles may seem like a daunting task, but with the right guidance and a bit of effort, you can achieve impressive results. So, roll up your sleeves, gather your tools, and let's embark on this fulfilling journey to rejuvenate your bathroom shower tiles!
Key Takeaways:
- Transform your bathroom shower with a DIY tile repair project. Assess, gather materials, remove old tiles, install new ones, and add finishing touches for a rejuvenated space.
- By following step-by-step instructions, you can restore your bathroom shower tiles to their former glory without the need for professional help. Save time and effort with a comprehensive evaluation at the outset.
Assessing the Damage
Before diving into the repair process, it’s crucial to thoroughly assess the extent of the damage to your bathroom shower tiles. This initial step will help you determine the scope of the project and the specific materials needed for the repair.
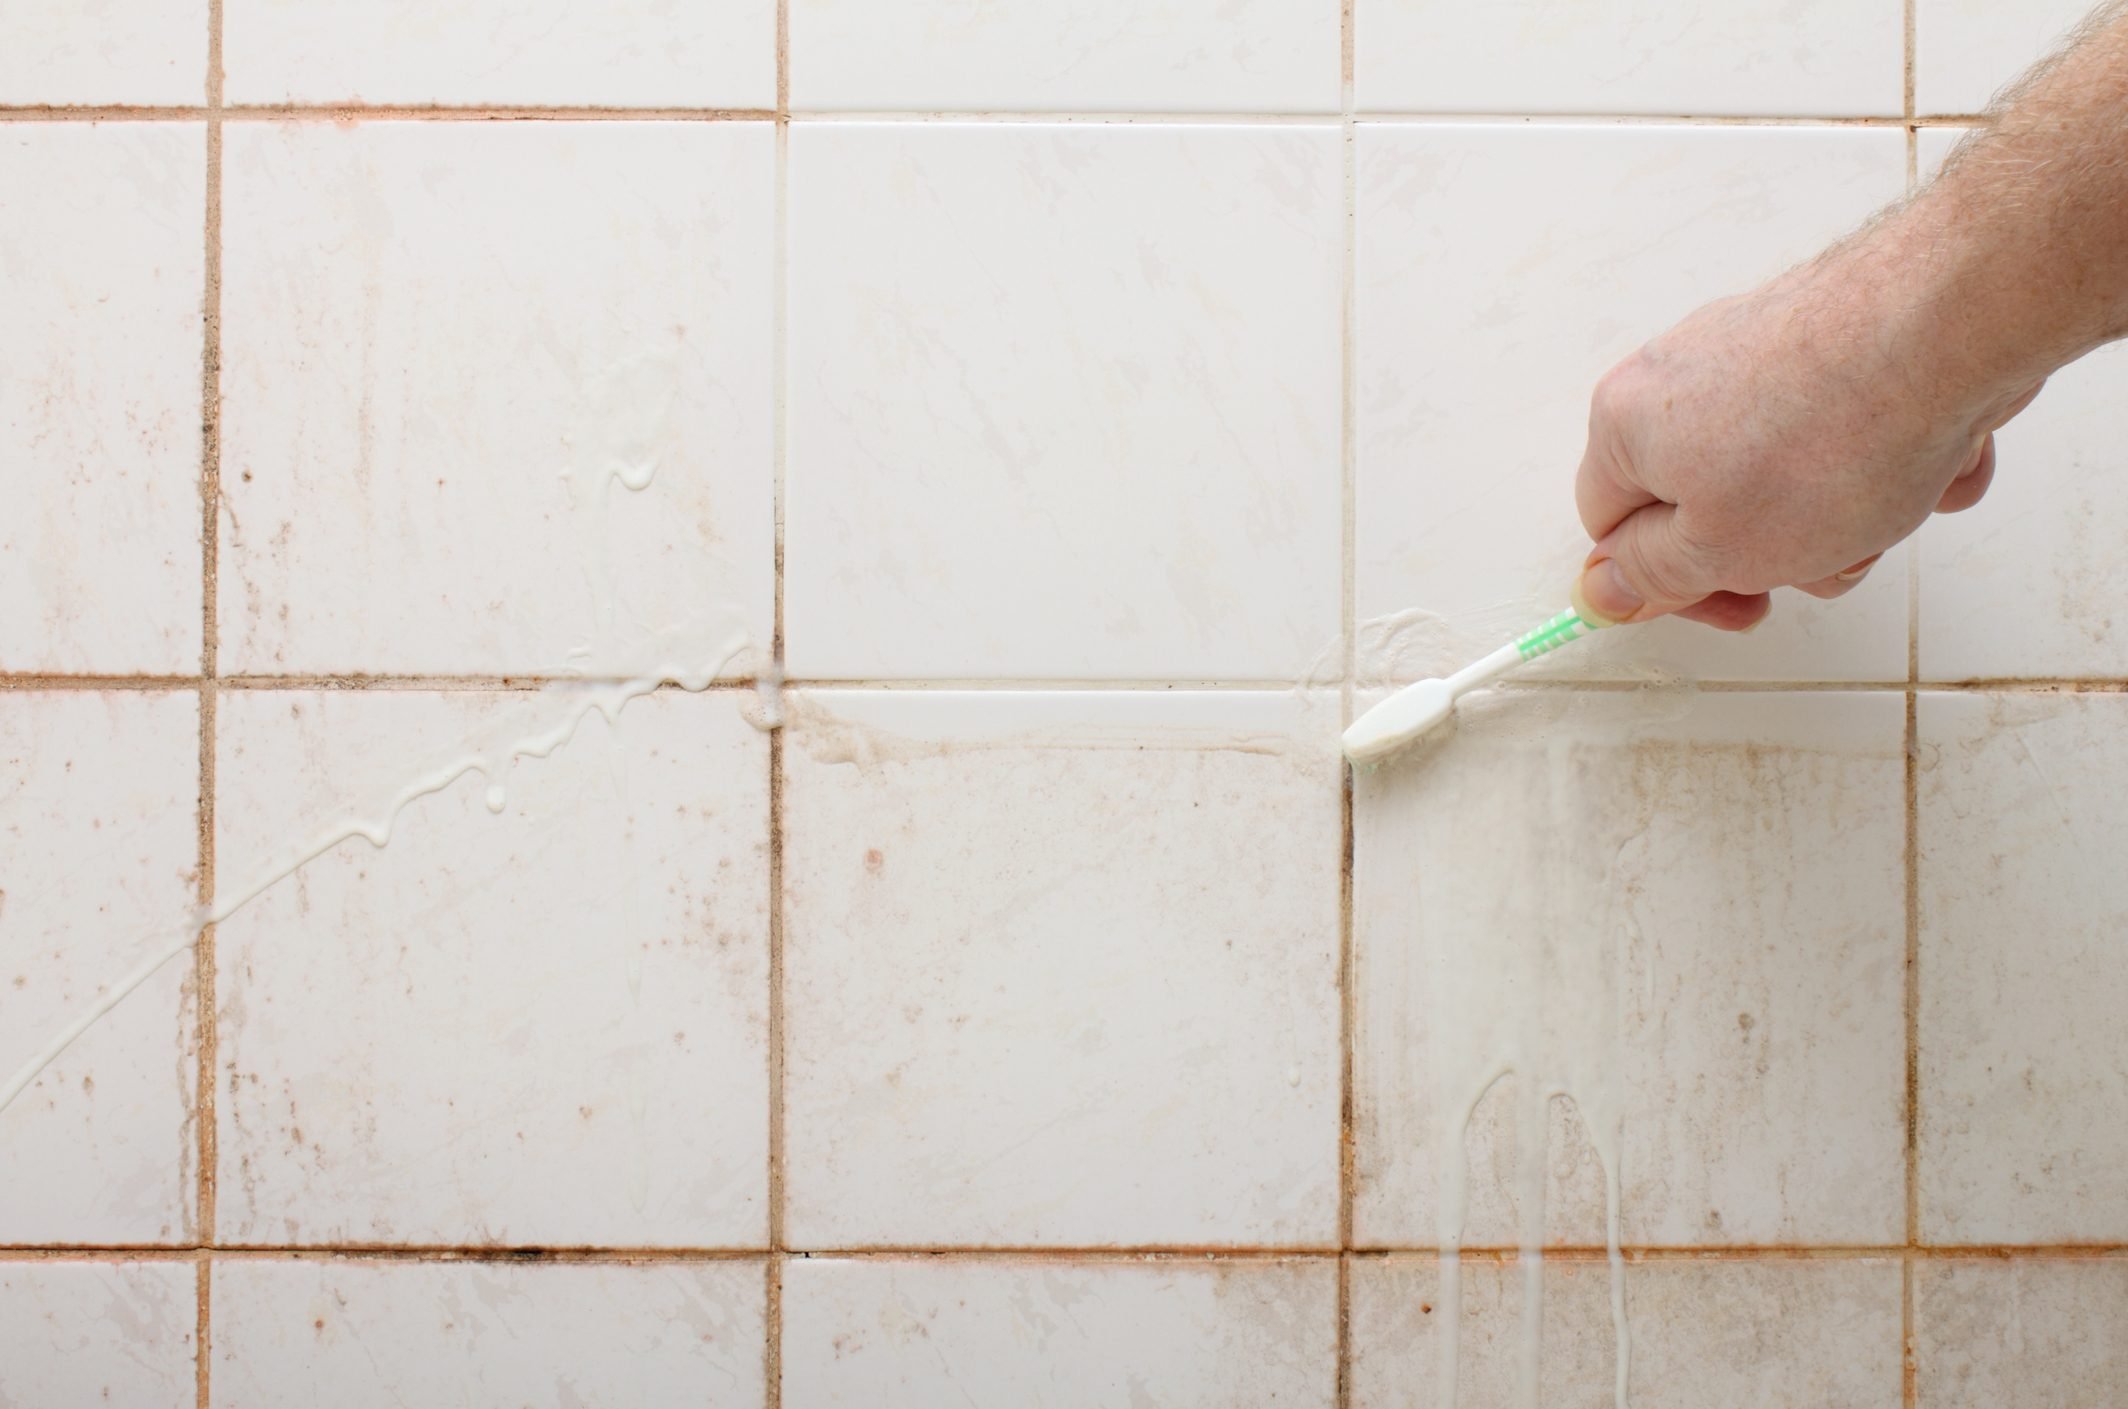
Start by carefully examining the tiles for any visible signs of damage, such as cracks, chips, or loose tiles. Pay close attention to the grout lines as well, as they are prone to wear and tear over time. Additionally, check for any water stains or discoloration, as these may indicate underlying water damage.
Use a small tool, such as a screwdriver or putty knife, to gently tap on the tiles. A hollow sound may indicate that the tile adhesive has loosened, while a solid sound suggests that the tiles are securely in place. This simple assessment will help identify tiles that need to be replaced or re-secured.
Furthermore, inspect the surrounding areas for any signs of mold or mildew, as these issues often accompany damaged tiles and may require separate remediation. Take note of the type and size of the tiles, as well as the condition of the grout, as this information will be valuable when sourcing replacement materials.
By thoroughly assessing the damage, you will be better prepared to tackle the necessary repairs and ensure that the final result is both durable and visually appealing. Remember, a comprehensive evaluation at the outset can save time and effort in the long run, setting the stage for a successful tile repair project.
Gathering Materials and Tools
Once you’ve assessed the damage to your bathroom shower tiles, the next step is to gather the essential materials and tools required for the repair process. Having the right supplies at your disposal will streamline the project and ensure that you can proceed with confidence.
Here’s a comprehensive list of materials and tools you’ll need:
Materials:
- Replacement tiles: Ensure they match the size and style of your existing tiles.
- Tile adhesive: Opt for a waterproof adhesive suitable for wet areas.
- Grout: Choose a high-quality, mold-resistant grout in a color that complements your tiles.
- Grout sealer: Essential for protecting the grout from moisture and stains.
- Caulk: Select a silicone-based caulk for sealing the edges and corners of the tiled area.
- Cleaner: A tile and grout cleaner to prepare the surface for repairs.
- Primer: If you're working with a damaged substrate, a suitable primer may be necessary.
Tools:
- Chisel and hammer: For removing damaged tiles and old grout.
- Grout saw: To cleanly remove grout from around the damaged tiles.
- Putty knife: Useful for applying adhesive and removing old grout and caulk.
- Tile cutter: If you need to trim replacement tiles to fit the space.
- Notched trowel: For spreading adhesive evenly on the substrate.
- Tile spacers: Ensure consistent spacing between tiles for a professional finish.
- Grout float: To apply and pack grout into the joints between tiles.
- Tile sponge: For cleaning excess grout and sealer from the tiles.
Before starting the repair, double-check that you have all the necessary materials and tools on hand. This proactive approach will minimize interruptions and ensure a smooth and efficient repair process, allowing you to focus on restoring your bathroom shower tiles to their former glory.
Read more: How To Tile Shower Floor
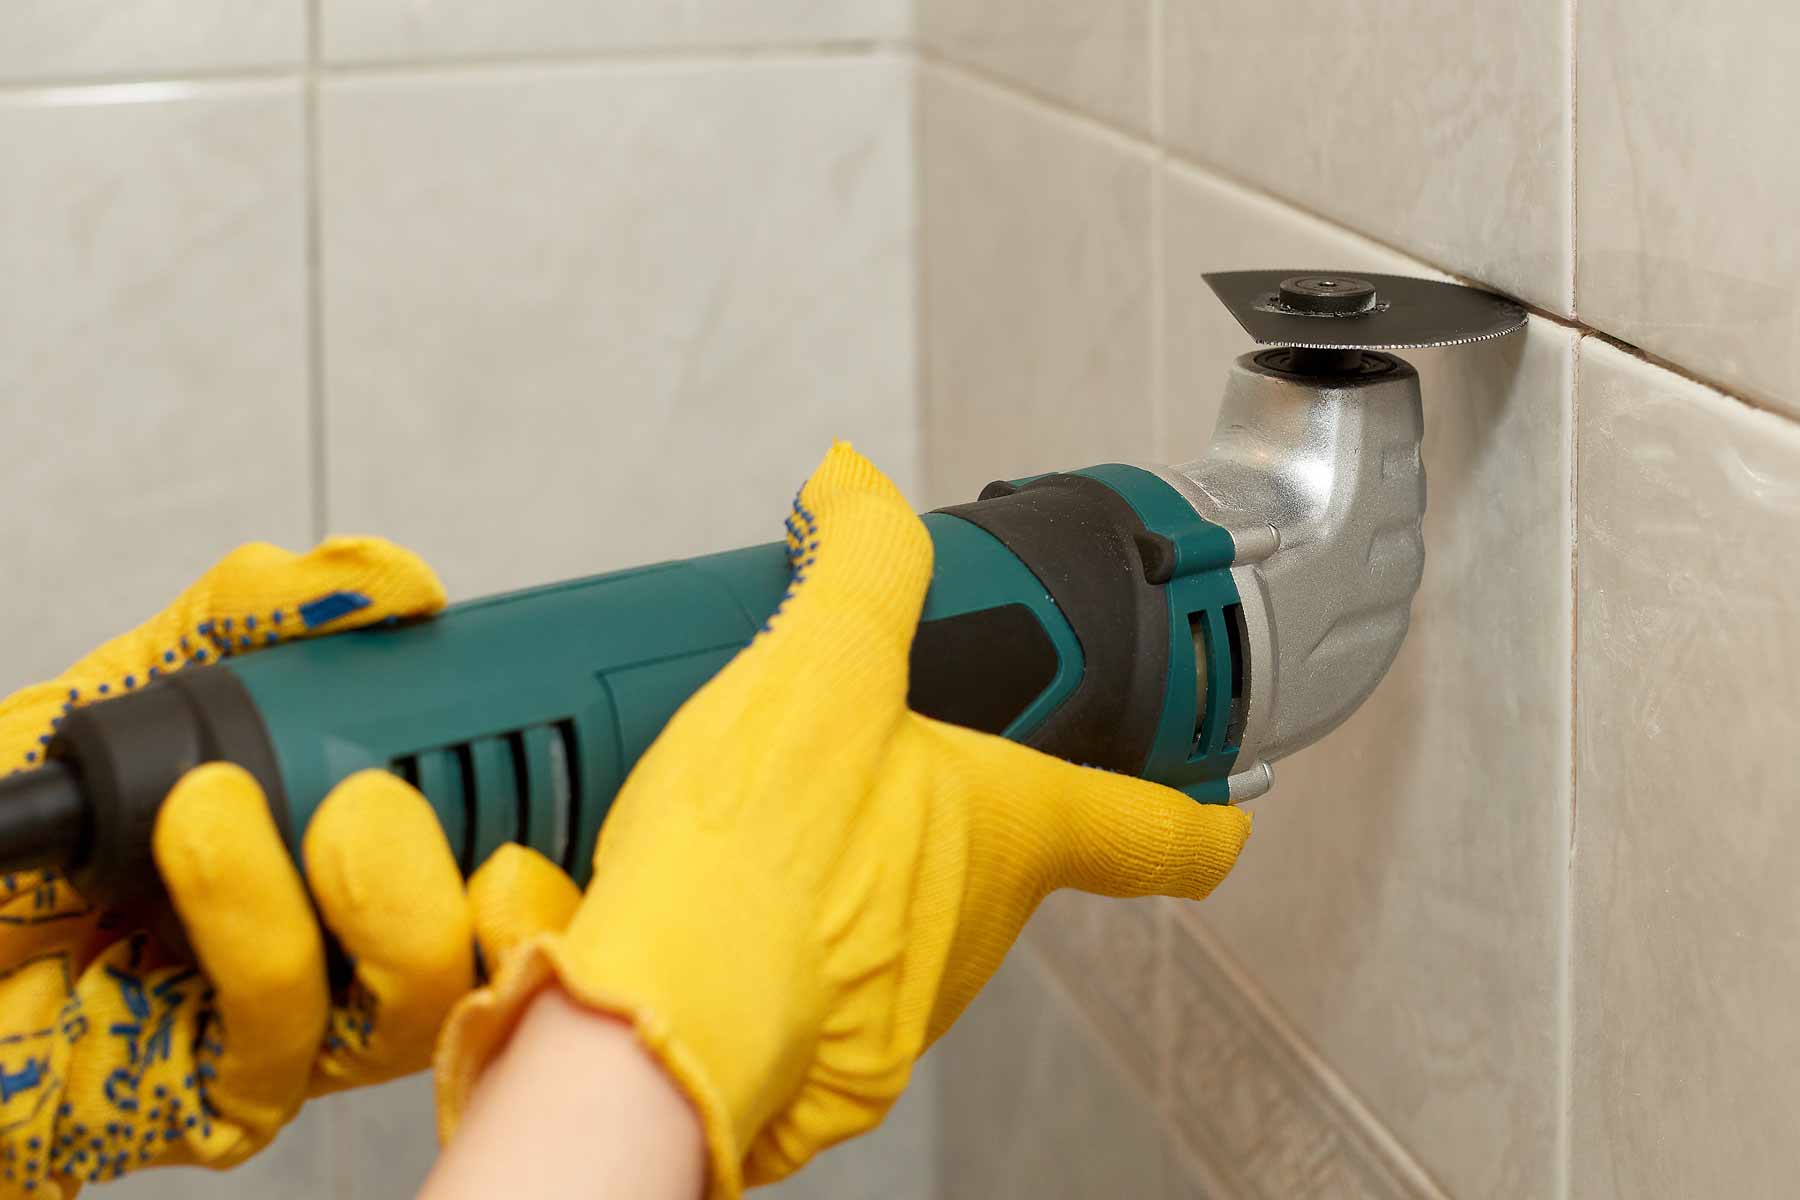
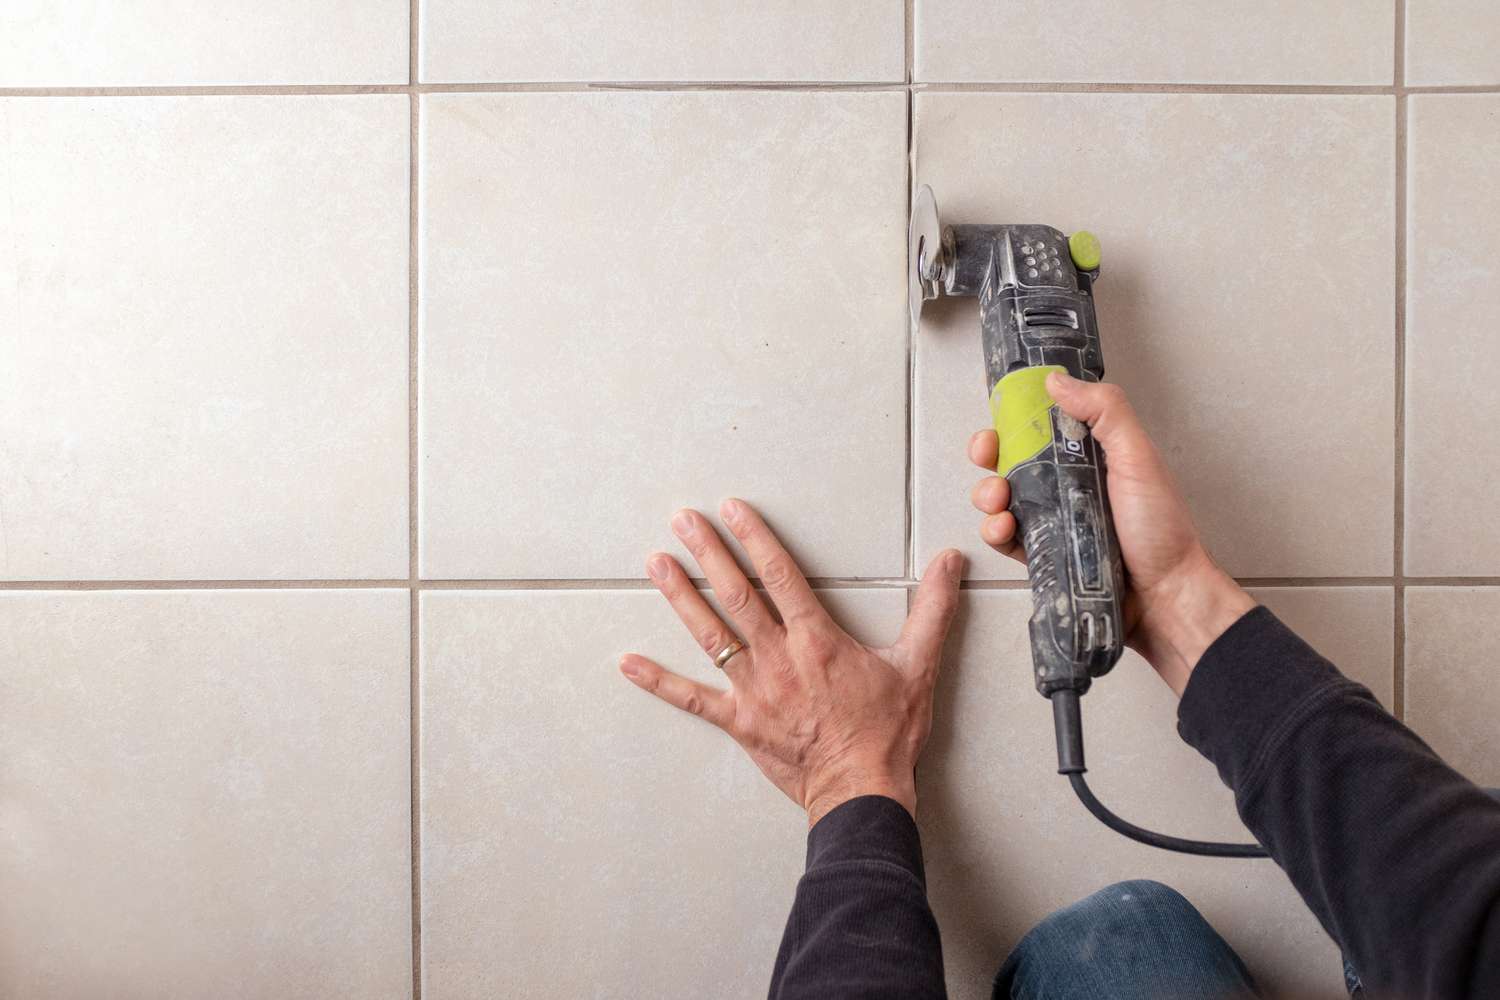
Removing Damaged Tiles
With the materials and tools gathered, it’s time to embark on the process of removing the damaged tiles from your bathroom shower. This step requires precision and care to avoid causing further damage to the surrounding tiles and substrate.
Follow these steps to safely remove the damaged tiles:
- Prepare the Work Area: Clear the shower area of any personal items and lay down protective materials to catch debris. Ensure proper ventilation to minimize dust accumulation.
- Protect Yourself: Wear safety goggles and gloves to shield your eyes and hands from tile shards and dust.
- Loosen the Grout: Use a grout saw to carefully remove the grout surrounding the damaged tiles. Take your time to avoid damaging adjacent tiles.
- Break the Tile: With a chisel and hammer, carefully break the damaged tile into smaller pieces. Start from the center and work your way towards the edges to minimize the risk of damaging the surrounding tiles.
- Remove Adhesive: Use a putty knife to scrape away the old tile adhesive from the substrate. Ensure that the surface is clean and free of debris before proceeding to the next step.
- Clean the Area: Thoroughly clean the exposed substrate to remove any remaining adhesive, grout, and dust. A clean surface is essential for ensuring proper adhesion of the new tiles.
Throughout this process, it’s important to exercise patience and caution to avoid causing unnecessary damage. Take your time to ensure that the surrounding tiles remain intact and that the substrate is adequately prepared for the installation of new tiles.
By following these steps, you can successfully remove the damaged tiles, laying the groundwork for the next phases of the repair process. Remember, precision and attention to detail are key to achieving professional-looking results.
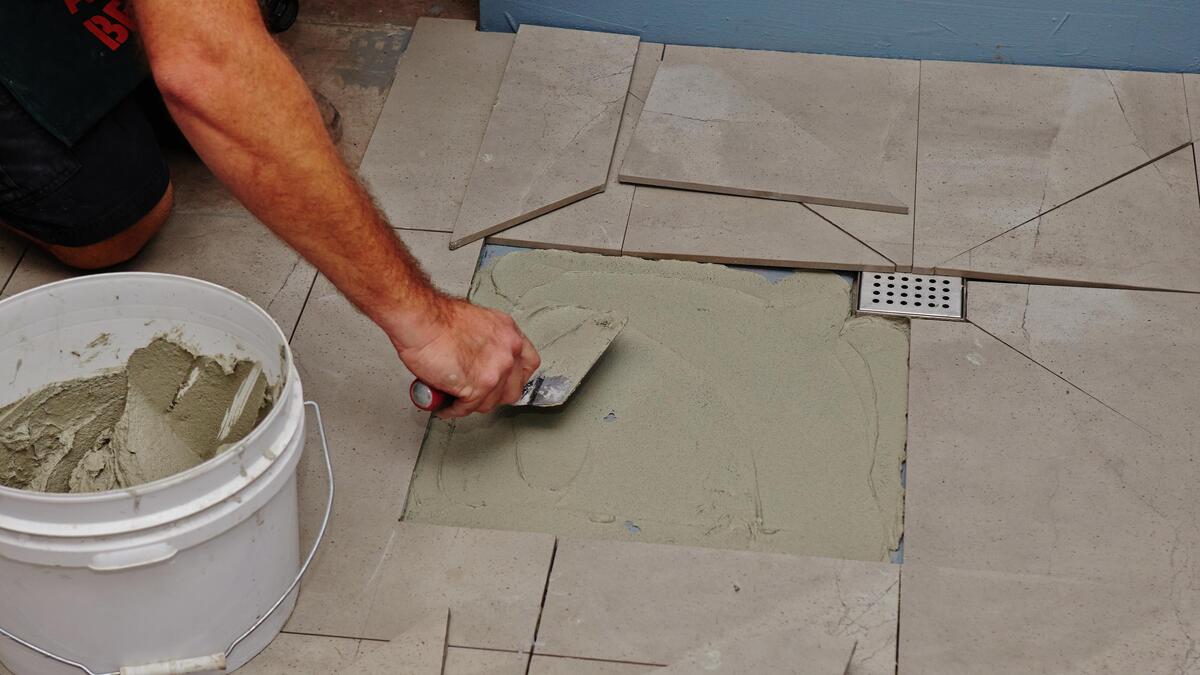
Preparing the Surface
With the damaged tiles successfully removed, the next crucial step in the repair process is to prepare the surface for the installation of new tiles. This phase involves ensuring that the substrate is clean, level, and primed to facilitate optimal adhesion and longevity of the repaired area.
Follow these essential steps to prepare the surface for the new tile installation:
- Inspect the Substrate: Thoroughly examine the exposed substrate for any signs of damage, such as cracks or uneven areas. Address any issues to ensure a stable foundation for the new tiles.
- Apply Primer: If the substrate is damaged or porous, apply a suitable primer to enhance the adhesion of the tile adhesive. Follow the manufacturer’s instructions for the application and drying time.
- Spread Tile Adhesive: Use a notched trowel to evenly spread a layer of tile adhesive over the prepared substrate. Ensure that the adhesive layer is consistent in thickness to support the new tiles.
- Position Replacement Tiles: Carefully place the replacement tiles into the adhesive, pressing them firmly to ensure full contact and proper alignment with the surrounding tiles. Use tile spacers to maintain uniform spacing between the tiles.
- Check for Levelness: Use a level to verify that the newly installed tiles are flush and level with the existing tiles. Make any necessary adjustments before the adhesive sets.
- Allow Adhesive to Cure: Follow the manufacturer’s guidelines for the recommended curing time of the tile adhesive. Avoid disturbing the newly installed tiles during this crucial phase.
By meticulously preparing the surface, you are laying the groundwork for a successful tile installation that is both visually appealing and long-lasting. Taking the time to ensure a solid and level substrate will contribute to the overall quality and durability of the repair.
With the surface prepared, you are now ready to proceed with the installation of the new tiles, bringing you one step closer to revitalizing your bathroom shower and restoring its functionality and aesthetic appeal.
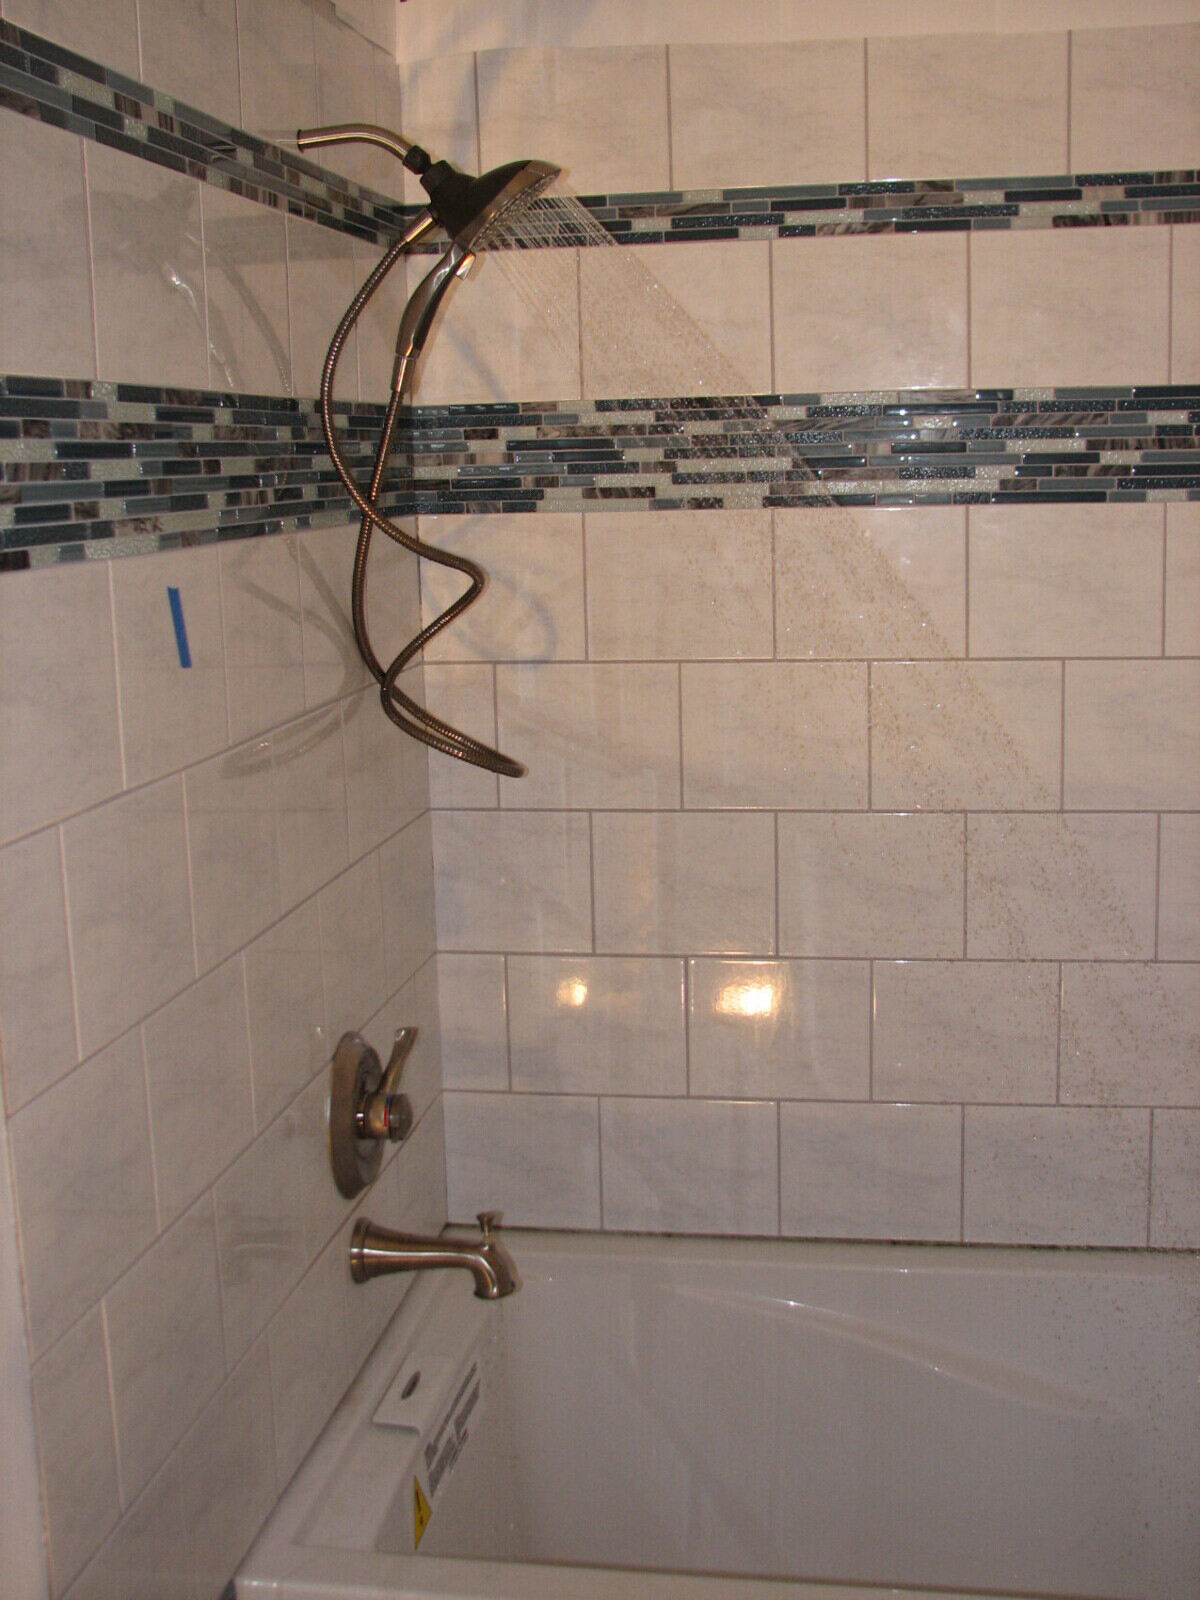
Installing New Tiles
With the surface prepared, it’s time to embark on the exciting phase of installing the new tiles in your bathroom shower. This step is essential for rejuvenating the visual appeal of the space and ensuring the integrity of the tiled area.
Follow these steps to successfully install the new tiles:
- Apply Adhesive: Use a notched trowel to apply a layer of tile adhesive to the prepared surface, ensuring even coverage.
- Position the Tiles: Carefully place the new tiles into the adhesive, pressing them firmly to ensure proper adhesion. Use tile spacers to maintain consistent spacing between the tiles.
- Check Alignment: Use a level to verify that the newly installed tiles are aligned and flush with the existing tiles. Make any adjustments as needed to maintain a uniform and professional appearance.
- Trim Tiles if Necessary: If the new tiles require trimming to fit the space, use a tile cutter to achieve precise cuts. Ensure that the trimmed tiles fit seamlessly into the designated areas.
- Allow Adhesive to Set: Follow the manufacturer’s recommendations for the curing time of the tile adhesive, allowing sufficient time for the tiles to firmly bond to the substrate.
Throughout the installation process, pay close attention to the alignment and spacing of the new tiles, striving for a seamless and visually appealing result. Taking the time to ensure precision during this phase will contribute to the overall quality of the repair.
By meticulously installing the new tiles, you are one step closer to revitalizing your bathroom shower and achieving a polished and rejuvenated appearance. The installation phase sets the stage for the final steps of grouting, sealing, and adding the finishing touches, bringing you closer to the completion of this rewarding project.
Use a grout saw to remove old grout, then apply new grout with a grout float. Seal the grout to prevent water damage and keep your shower tile looking new.
Grouting and Sealing
As you near the completion of the tile repair process, grouting and sealing play a pivotal role in enhancing the durability and visual appeal of the newly installed tiles in your bathroom shower. Grout not only fills the gaps between tiles but also provides structural support and prevents moisture infiltration, while sealing helps protect the grout from stains and moisture damage.
Follow these essential steps to successfully grout and seal the newly installed tiles:
- Mix the Grout: Prepare the grout mixture according to the manufacturer’s instructions, ensuring a smooth and lump-free consistency.
- Apply Grout: Use a grout float to pack the grout into the joints between the tiles, ensuring full coverage and a uniform appearance. Work in small sections to prevent the grout from drying before it is fully packed.
- Clean Excess Grout: Use a damp tile sponge to gently clean off excess grout from the surface of the tiles, taking care not to remove grout from the joints. Rinse the sponge frequently to achieve a clean and polished finish.
- Allow Grout to Cure: Follow the manufacturer’s recommendations for the curing time of the grout, allowing it to set and achieve its full strength.
- Apply Grout Sealer: Once the grout has fully cured, apply a high-quality grout sealer to protect the grout from moisture and stains. Use a small brush or applicator to ensure thorough coverage.
- Wipe Excess Sealer: After applying the sealer, carefully wipe off any excess sealer from the surface of the tiles to achieve a clean and polished appearance.
By meticulously grouting and sealing the newly installed tiles, you are not only enhancing their longevity but also elevating the overall aesthetic of your bathroom shower. The grouting and sealing phase represents the final touch that brings the repair project to completion, leaving you with a revitalized and visually stunning tiled area.
With the grout and sealer in place, your repaired bathroom shower tiles are now ready to withstand daily use and maintain their pristine appearance for years to come. The completion of this phase marks the successful culmination of your efforts in restoring and rejuvenating your bathroom shower, creating a space that is both functional and visually appealing.
Read more: How To Remove Shower Floor Tile
Finishing Touches
As you approach the final stages of the bathroom shower tile repair project, attention to detail and thoughtful finishing touches will elevate the overall outcome, ensuring that your efforts culminate in a polished and rejuvenated space. These final steps encompass cleaning, inspecting, and adding subtle enhancements to achieve a professional and visually appealing result.
Follow these essential steps to add the finishing touches to your repaired bathroom shower tiles:
- Clean the Tiles: Thoroughly clean the newly installed and grouted tiles using a tile and grout cleaner, ensuring that the surface is free of grout residue and any accumulated debris.
- Inspect and Touch Up: Carefully inspect the entire tiled area, addressing any remaining imperfections or inconsistencies. Make any necessary touch-ups to the grout or caulk to achieve a seamless and uniform appearance.
- Apply Caulk: Use a silicone-based caulk to seal the edges and corners of the tiled area, providing a clean and water-resistant finish. Pay attention to areas where the tiles meet the shower pan or tub to prevent moisture infiltration.
- Polish and Protect: Use a clean, dry cloth to polish the tiles and remove any remaining residue. Consider applying a tile and grout sealer to further protect the entire tiled area from moisture and stains.
- Reinstall Fixtures: Once the tiles and grout have fully set and cured, carefully reinstall any shower fixtures and accessories that were temporarily removed during the repair process.
By meticulously attending to these finishing touches, you are ensuring that the repaired bathroom shower tiles not only function optimally but also exude a fresh and revitalized aesthetic. The attention to detail in this phase contributes to the overall professional quality of the repair project.
With the completion of the finishing touches, step back and admire the transformation of your bathroom shower. The revitalized tiles, clean grout lines, and meticulous finishing details culminate in a space that is both functional and visually captivating, breathing new life into your daily routine.
Embrace the satisfaction of a job well done as you revel in the rejuvenated ambiance of your bathroom shower, a testament to your dedication and craftsmanship in restoring and enhancing this essential space.
Conclusion
Congratulations on successfully completing the comprehensive repair of your bathroom shower tiles! Your dedication and attention to detail have resulted in a rejuvenated and visually stunning tiled area that is poised to withstand the rigors of daily use while enhancing the overall ambiance of your bathroom.
Throughout this journey, you’ve embarked on a transformative process, from assessing the damage and gathering materials to meticulously installing new tiles and adding the final finishing touches. Each step has contributed to the restoration and enhancement of your bathroom shower, showcasing your commitment to maintaining a functional and aesthetically pleasing space.
By taking a proactive approach to addressing damaged tiles and investing the time and effort into this repair project, you’ve not only revitalized the appearance of your bathroom but also fortified the structural integrity of the tiled area. The meticulous attention to detail and adherence to best practices have resulted in a professional-quality repair that will stand the test of time.
As you revel in the completed repair, take pride in the newfound allure and functionality of your bathroom shower. The rejuvenated tiles, clean grout lines, and thoughtful finishing touches are a testament to your craftsmanship and determination to create a space that exudes both practicality and visual appeal.
Moving forward, continue to maintain and care for your revitalized bathroom shower, ensuring that it remains a welcoming and functional oasis within your home. By promptly addressing any future issues and staying proactive in maintenance, you can prolong the longevity and pristine appearance of the repaired tiles, allowing you to enjoy the fruits of your labor for years to come.
Once again, congratulations on completing this fulfilling and transformative project. Your dedication to restoring and enhancing your bathroom shower exemplifies your commitment to creating a harmonious and inviting living environment, setting the stage for many moments of relaxation and rejuvenation in the comfort of your revitalized space.
Frequently Asked Questions about How To Repair A Bathroom Shower Tile
Was this page helpful?
At Storables.com, we guarantee accurate and reliable information. Our content, validated by Expert Board Contributors, is crafted following stringent Editorial Policies. We're committed to providing you with well-researched, expert-backed insights for all your informational needs.


0 thoughts on “How To Repair A Bathroom Shower Tile”