Articles
How To Build A Walkway With Stepping Stones
Modified: October 18, 2024
Discover step-by-step articles on how to create a beautiful walkway using stepping stones. Enhance your outdoor space with this unique DIY project.
(Many of the links in this article redirect to a specific reviewed product. Your purchase of these products through affiliate links helps to generate commission for Storables.com, at no extra cost. Learn more)
Introduction
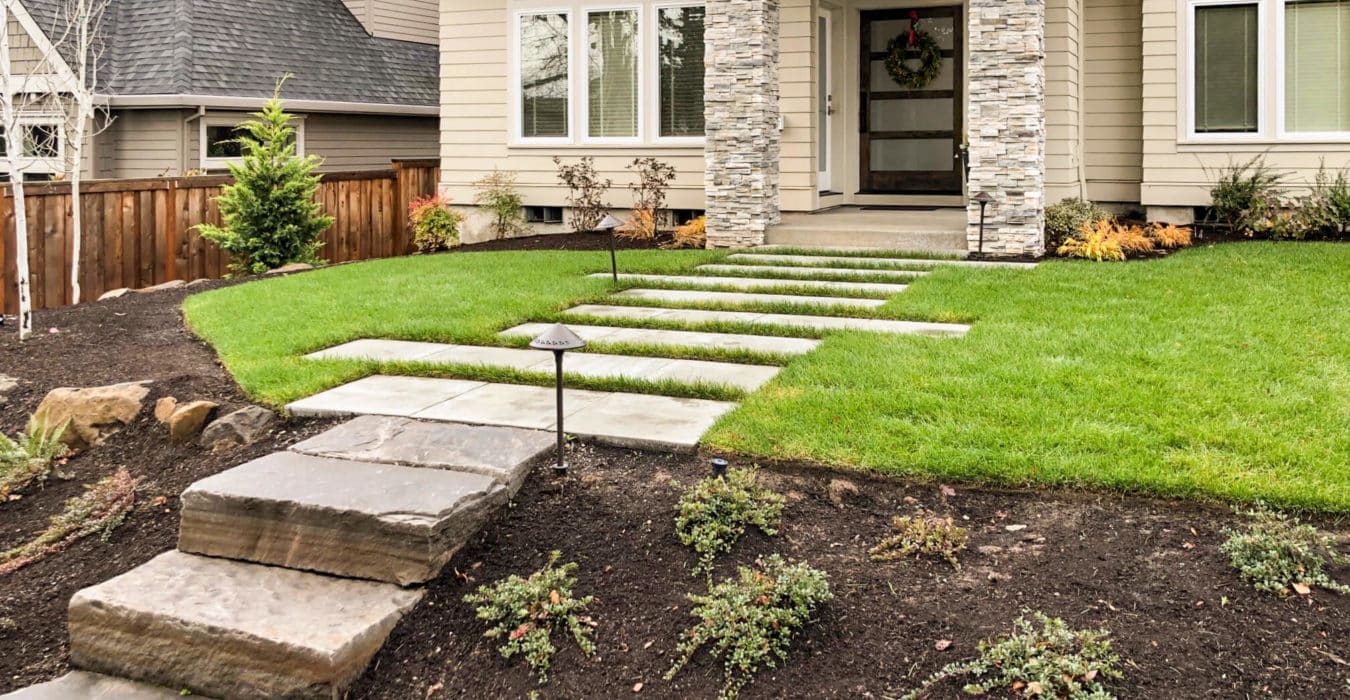
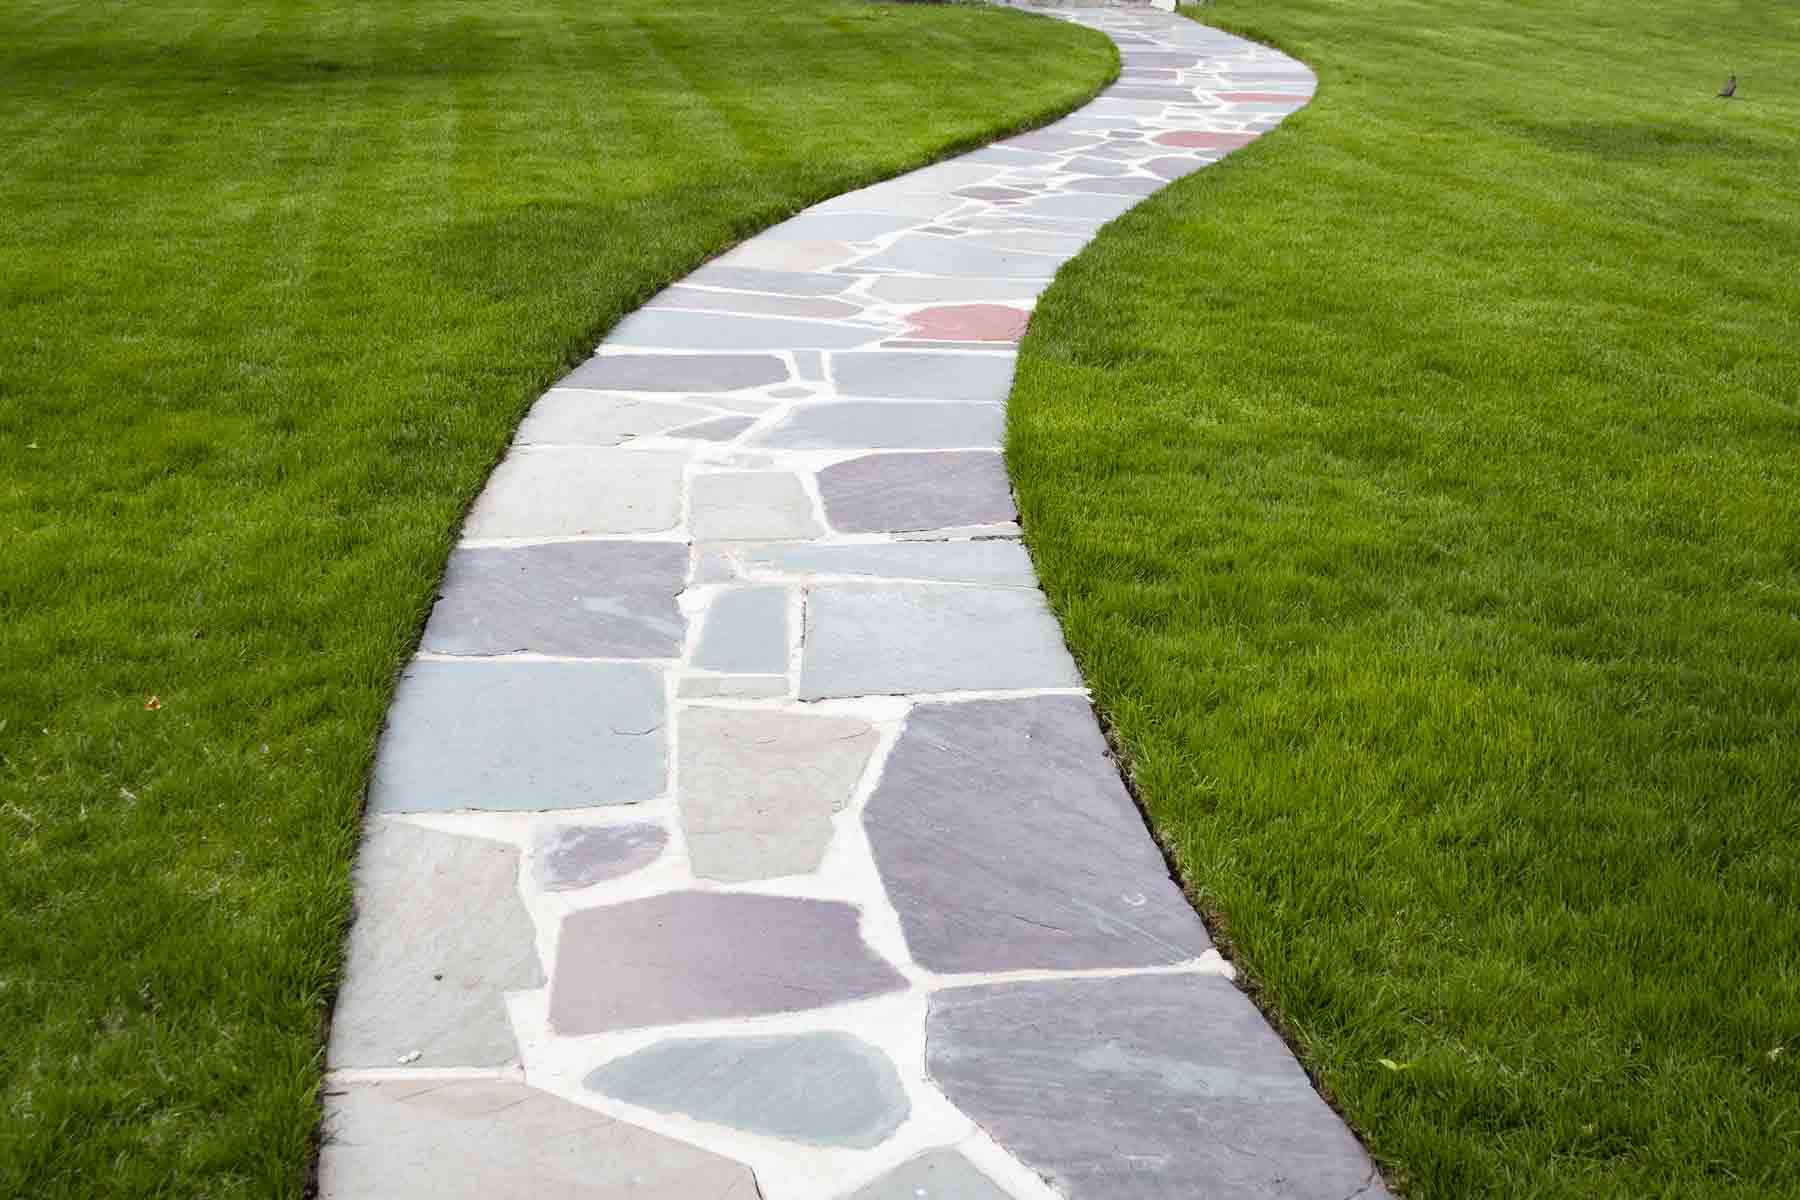
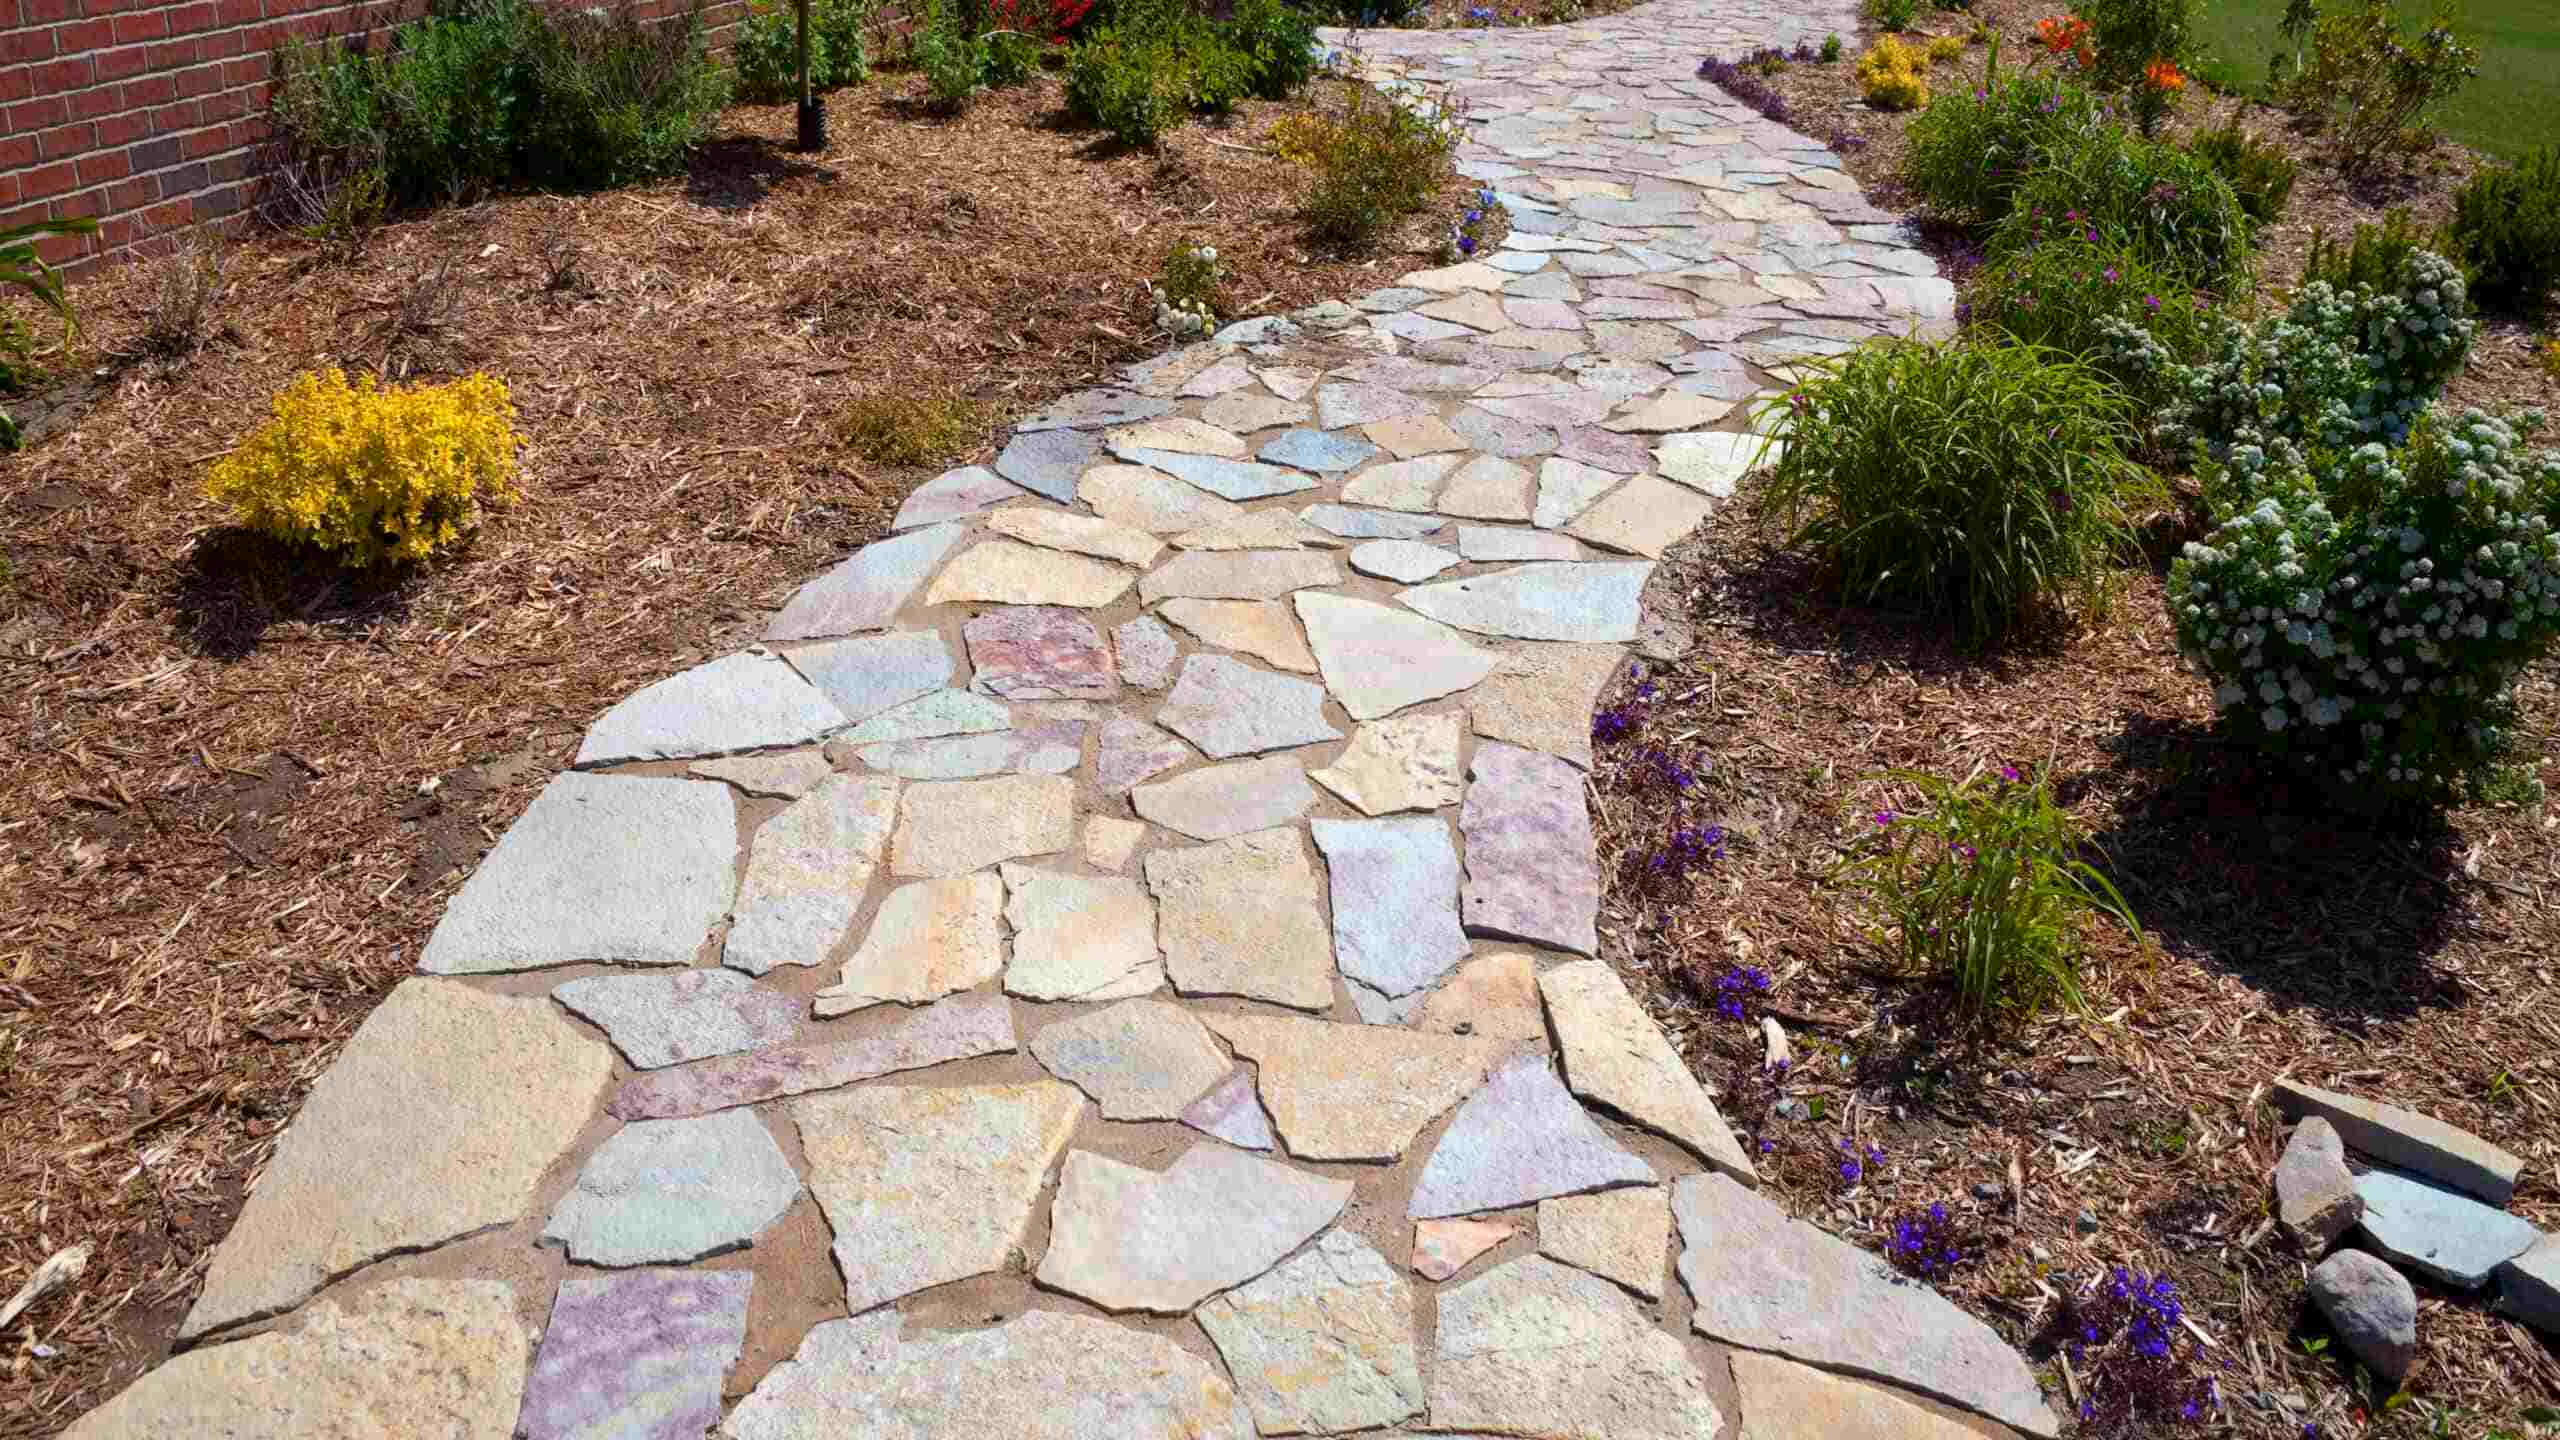
Building a walkway with stepping stones can add beauty, functionality, and charm to any outdoor space. Whether you’re creating a path through your garden, connecting different areas of your yard, or simply adding a decorative element, stepping stones offer an excellent solution. In this article, we will guide you through the process of building a walkway with stepping stones, from planning and preparation to the finishing touches.
Stepping stones are not only practical but can also enhance the overall aesthetic of your outdoor space. They come in a variety of shapes, sizes, and materials, allowing you to create a customized pathway that suits your style and complements your landscape. By following these step-by-step instructions, you’ll be able to create a beautiful and functional walkway that will be the envy of your neighbors.
Before diving into the process, it’s important to gather the necessary tools and materials. You’ll need a measuring tape, string or rope, stakes, a shovel, a level, sand or gravel, stepping stones of your choice, a rubber mallet, a broom, and landscape fabric. Once you have everything ready, let’s get started on building your walkway with stepping stones!
Key Takeaways:
- Create a visually appealing and functional walkway with stepping stones by carefully planning, measuring, and installing the pathway. Consider the location, alignment, and finishing touches to enhance your outdoor space.
- Building a walkway with stepping stones is a rewarding and creative project that adds charm and elegance to your outdoor space. From planning and preparation to the final touches, each step contributes to a beautiful and practical pathway.
Step 1: Planning and Preparation
Before you begin any construction project, it’s essential to start with proper planning and preparation. This step will ensure that your walkway turns out exactly the way you envision it. Here’s what you need to do:
- Visualize your walkway: Take some time to think about the purpose and design of your walkway. Consider factors such as the pathway’s length, curves, and width. Decide if you want a straight, meandering, or curved walkway, depending on the available space and the overall look you want to achieve.
- Measure the area: Use a measuring tape to assess the dimensions of the walkway. This will help you determine the number of stepping stones you’ll need and the amount of other materials required, such as sand or gravel.
- Mark the pathway: Once you have a clear idea of the pathway’s layout, use string or rope to mark the edges of the walkway. This will give you a visual representation of how the path will look before you start digging.
- Consider the terrain: Evaluate the terrain where you plan to build the walkway. Take note of any slopes, uneven surfaces, or areas prone to erosion. These factors will influence the construction process and the choice of materials.
- Check for underground utilities: Before digging, it’s crucial to locate any underground utilities, such as water pipes, electrical cables, or gas lines. Contact your local utility companies to mark the location of these services to avoid any accidents or disruptions during construction.
By taking the time to plan and prepare, you’ll have a solid foundation for your walkway project. This initial step ensures that you have a clear vision of the final outcome and helps prevent any unexpected issues along the way. Once you’re confident with your plan, it’s time to move on to the next step: choosing the location for your walkway.
Step 2: Choosing the Location
Choosing the right location for your walkway is crucial for its functionality and visual appeal. Consider the following factors when deciding where to install your stepping stone path:
- Accessibility: Think about where you want your walkway to lead and connect. Choose a location that provides convenient access to different areas of your yard or garden. For example, if you want to connect your patio to a garden bed, consider placing the walkway in a direct path between the two.
- Landscaping: Take into account the existing landscape and vegetation. Avoid damaging or removing large trees, shrubs, or flower beds when installing the walkway. Consider how the pathway will complement and enhance the natural beauty of your outdoor space.
- Sunlight: Evaluate how much sunlight the area receives throughout the day. If you desire a shaded pathway, choose a location with trees or structures that provide natural shade. Conversely, if you prefer a sun-drenched walkway, select an area that gets ample sunlight.
- Drainage: Ensure that the chosen location has proper drainage to prevent water accumulation and potential damage to the walkway. Avoid low-lying areas or places prone to excessive runoff during heavy rains.
- Visual impact: Consider the overall visual impact of the walkway in your landscape design. Think about how the path will look from different angles and viewpoints. Choose a location that provides a picturesque view and complements the surrounding elements.
Once you have carefully considered these factors, you’ll be able to select the perfect location for your walkway. Remember to take measurements and mark the area to ensure accurate placement during the construction process. With the location decided, you’re ready to move on to the next step: measuring and marking the pathway.
Step 3: Measure and Mark the Pathway
Measuring and marking the pathway is an essential step in the construction of your walkway. This process will help you determine the exact dimensions and layout of the path. Here’s how to measure and mark your pathway:
- Clear the area: Remove any vegetation, debris, or obstacles from the chosen location to ensure a clear workspace.
- Decide the width: Determine the desired width of your walkway. A standard width is usually around 18 to 24 inches, but you can adjust this according to your needs and available space.
- Measure the length: Use a measuring tape to measure the length of the pathway. Start from the beginning point and extend it to the desired endpoint, accounting for any curves or turns.
- Mark the edges: Using stakes, place them at regular intervals along the pathway, marking the edges of the walkway. Ensure that the distance between the stakes is consistent and matches the intended width of the path.
- Connect the stakes: Tie a string or rope between the stakes, following the marks you made. This will create a visual representation of the walkway’s edges and help guide the construction process.
- Check for alignment: Use a level to make sure that the string is level and the pathway will have a slight slope for proper drainage. Adjust the stakes or string as needed.
By measuring and marking the pathway accurately, you’ll have a clear outline of where your stepping stones will be placed. This step serves as a guide during the excavation and installation process, ensuring that your walkway aligns with your vision. With the pathway outlined, you can now move on to preparing the area for construction in Step 4: Clearing the Area.
Step 4: Clearing the Area
Clearing the area is an important step in preparing the ground for the installation of your walkway. This process involves removing any existing vegetation, debris, or obstacles that may hinder the construction process or impact the stability of the pathway. Here’s how to clear the area effectively:
- Remove vegetation: Start by removing any grass, weeds, or plants within the designated pathway area. Use a shovel or garden rake to dig up the vegetation, making sure to remove both the roots and the top layer of soil.
- Eliminate debris: Clear away any rocks, stones, or other debris that may be present in the pathway area. These objects can create an uneven surface and affect the stability of the stepping stones.
- Level the ground: Use a shovel or a garden rake to level the ground. Remove any high spots or bumps and fill in any low areas to create a smooth and even surface for the walkway.
- Consider weed prevention: To minimize weed growth in the future, you can lay landscape fabric or use a weed barrier beneath the walkway area. This additional step will help keep unwanted plants at bay and maintain the integrity of your walkway.
Clearing the area ensures that the ground is prepared for the next steps of the installation process. It provides a clean and stable foundation for the stepping stones and ensures a level surface for safer and more comfortable walking. With the area cleared, you can now proceed to Step 5: Laying the Foundation.
Before laying stepping stones, make sure to level the ground and create a stable base using sand or gravel. This will prevent the stones from shifting over time.
Read more: How To Build Stone Porch Steps
Step 5: Laying the Foundation
The foundation of your walkway is essential for its stability and longevity. In this step, you will create a solid base that will support the stepping stones and provide a level surface. Here’s how to lay the foundation:
- Excavate the area: Use a shovel or an edging tool to dig a trench along the marked pathway area. The depth of the trench should be equal to the thickness of the stepping stones plus an additional 1 to 2 inches for the base material.
- Add a layer of gravel or sand: Pour a layer of gravel or sand into the excavated trench. This layer serves as a base, helping with drainage and providing stability for the stepping stones. Use a rake or a hand tamper to ensure the layer is level and well compacted.
- Check for levelness: Use a level to ensure that the layer of gravel or sand is even and level across the entire pathway. Adjust the amount of material as needed to achieve a flat surface.
- Add a layer of landscape fabric: To prevent weed growth and keep the base material separate from the underlying soil, lay landscape fabric over the layer of gravel or sand. Trim the fabric to fit within the pathway area.
- Add more gravel or sand: Apply another layer of gravel or sand on top of the landscape fabric. Again, use a rake or a hand tamper to level and compact the material.
Laying a solid foundation is crucial for the stability and durability of your walkway. The layers of gravel or sand provide a level surface for the stepping stones and help with proper drainage. The landscape fabric prevents weeds from growing through the pathway, which helps to maintain its overall appearance. With the foundation in place, you can now move on to the exciting step of installing the stepping stones in Step 6: Installing the Stepping Stones.
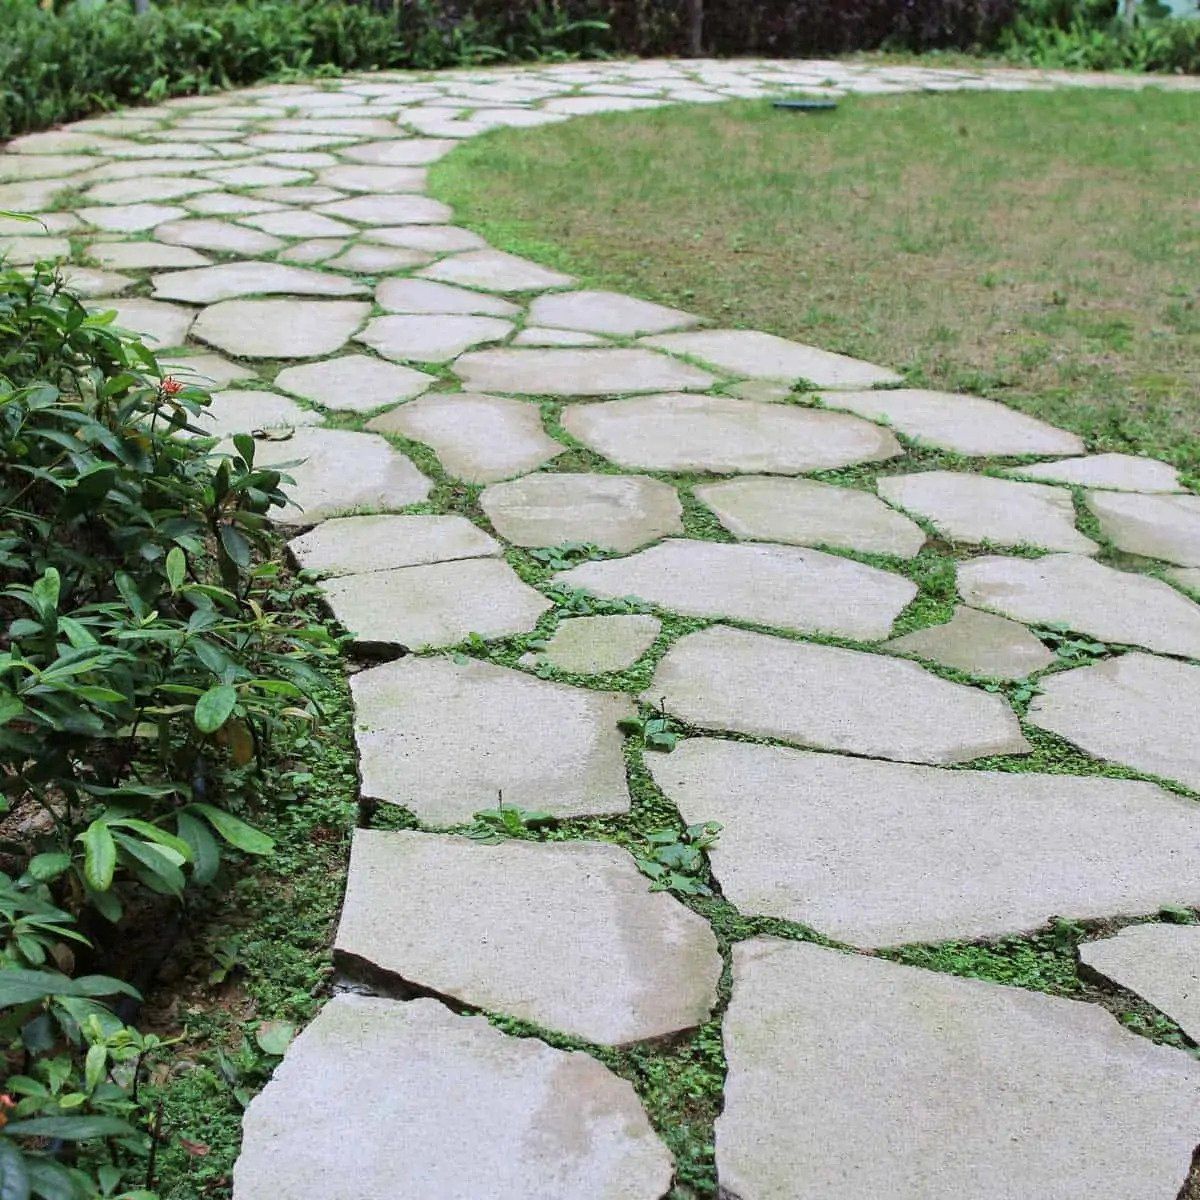
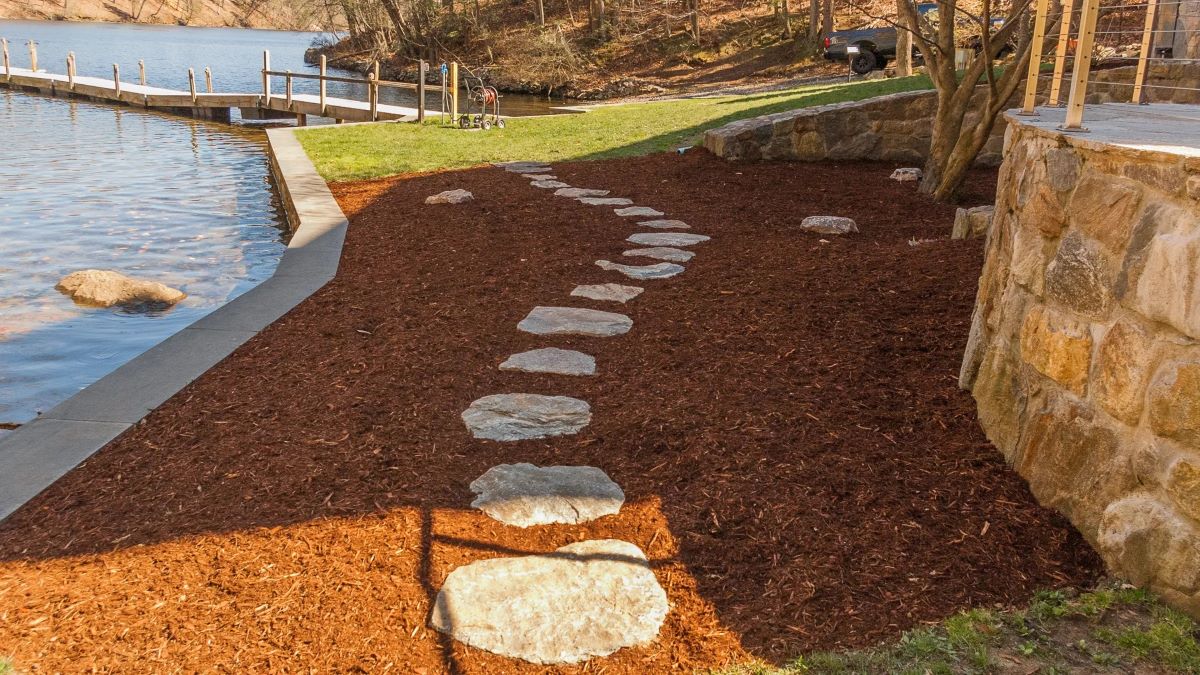
Step 6: Installing the Stepping Stones
Installing the stepping stones is a crucial step in building your walkway. These stones will not only serve as functional elements but also add visual interest to your pathway. Follow these steps to ensure a proper installation:
- Arrange the stepping stones: Place your stepping stones along the pathway, following the desired design. Consider spacing them out evenly, leaving enough room for comfortable walking. Experiment with different arrangements until you find the perfect layout.
- Position the first stepping stone: Start at one end of the pathway and position the first stepping stone in place. Wiggle it slightly to ensure it sits securely on the gravel or sand base.
- Align the stones: Use a level to ensure that each stepping stone is level from front to back and side to side. Adjust the base material as needed to achieve a level surface.
- Tap the stones: Use a rubber mallet to gently tap the stepping stones into place. This will help to embed them securely in the base material and ensure they are stable.
- Check for alignment: Continuously check the alignment of each stepping stone as you progress along the pathway. Make any necessary adjustments to maintain a straight and even walkway.
- Continue with the remaining stepping stones: Repeat the process of positioning, aligning, and tapping each stone into place. Take your time to ensure proper placement and alignment throughout the entire pathway.
Installing the stepping stones requires attention to detail and precision. By taking the time to arrange and align each stone properly, you’ll create a visually pleasing and functional walkway. Once all the stepping stones are in place, it’s time to move on to Step 7: Filling the Gaps.
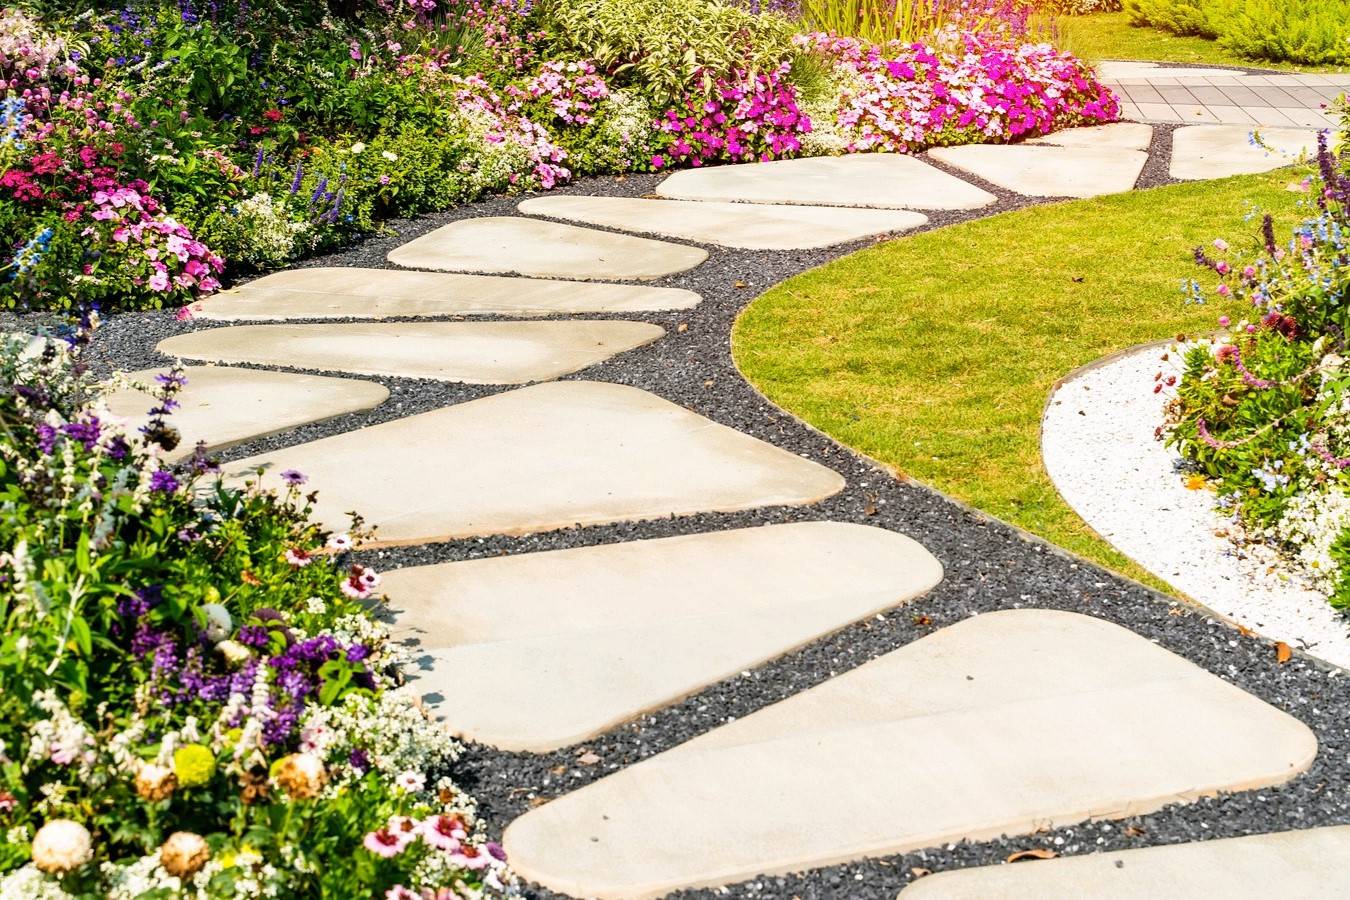
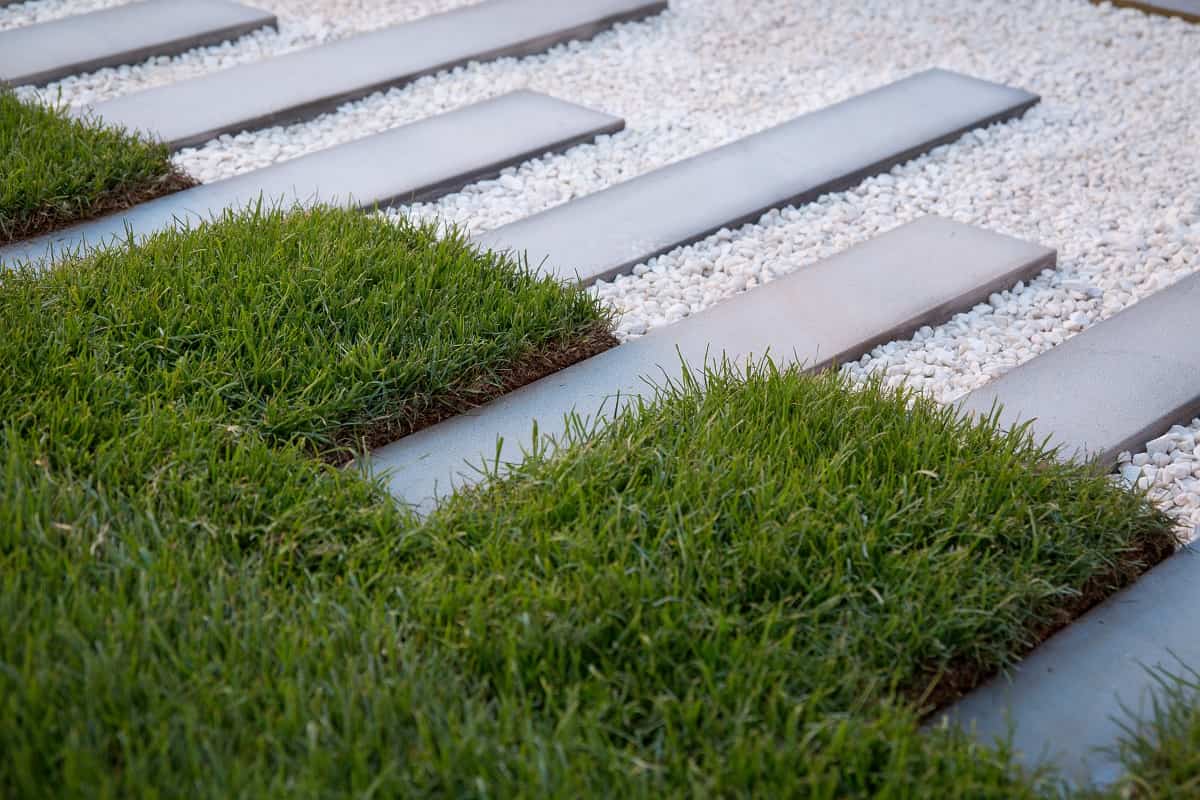
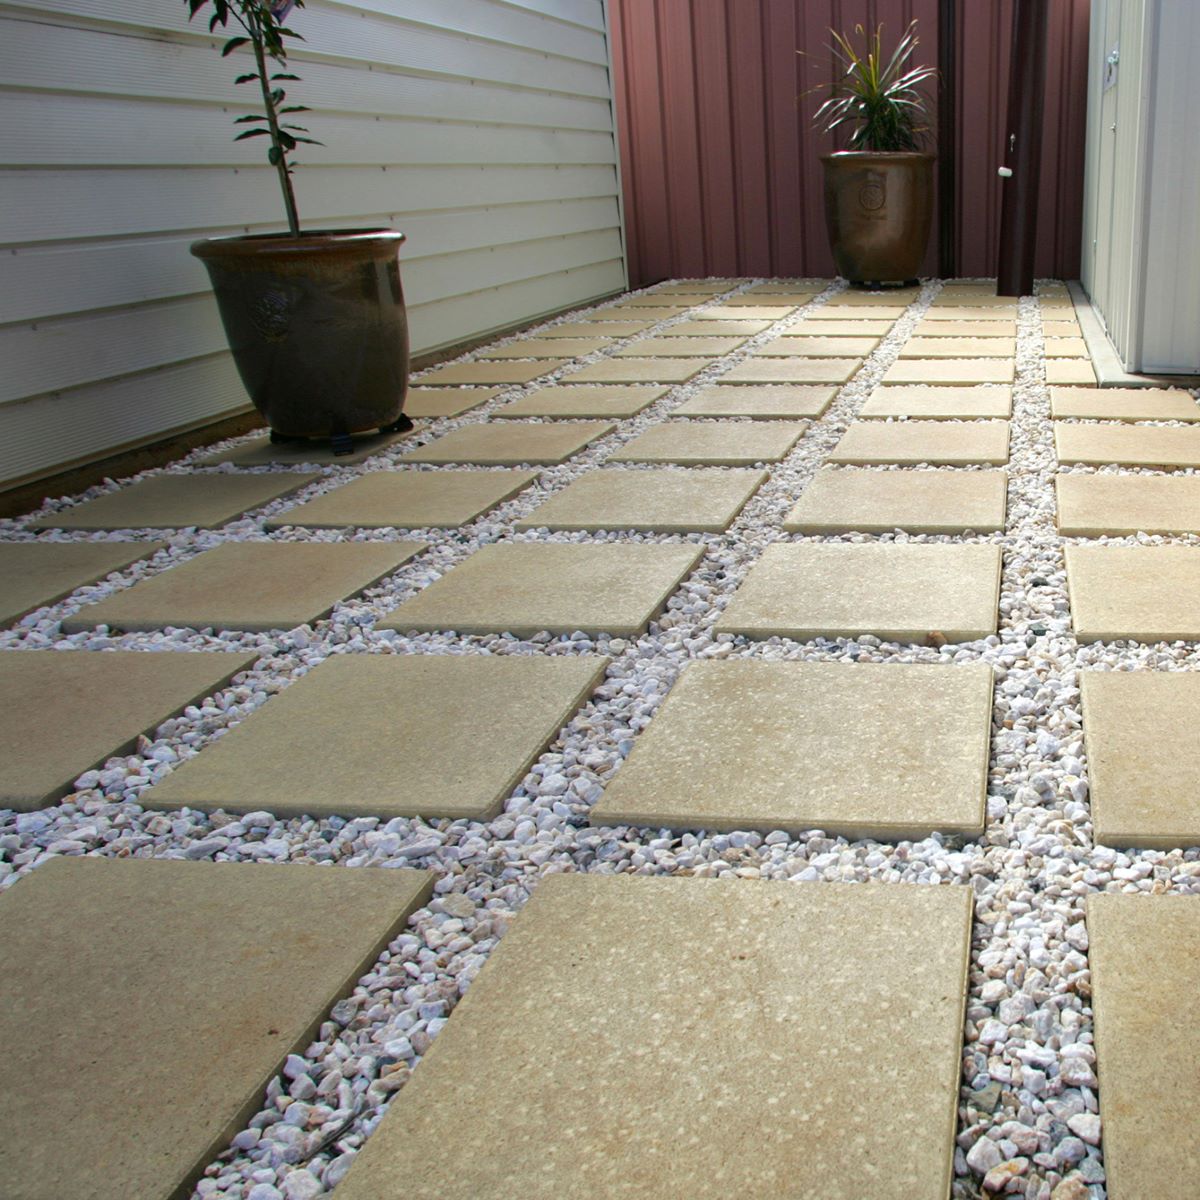
Step 7: Filling the Gaps
Filling the gaps between the stepping stones is an important step that not only enhances the overall appearance of your walkway but also helps stabilize the stones. Here’s how to fill the gaps effectively:
- Select the filling material: Choose a filling material that suits your aesthetic preferences and the design of your walkway. Common options include fine gravel, decorative pebbles, or polymeric sand.
- Pour the filling material: Carefully pour the filling material into the gaps between the stepping stones. Use a small trowel or your hands to ensure that the material fills the gaps completely, reaching the same level as the stepping stones.
- Brush off excess material: Use a broom or a brush to sweep off any excess filling material from the surface of the stepping stones. Brush diagonally across the gaps to remove any excess material and achieve a clean and finished look.
- Compact the filling: Gently tap the filling material with the rubber mallet or press it down with your hands to compact it. This will help to ensure the stability of the stones and prevent the filling material from shifting over time.
- Inspect and reapply if needed: Examine the gaps between the stepping stones and fill in any remaining gaps if necessary. Make sure the filling material is evenly distributed and level with the surface of the stones.
Filling the gaps between the stepping stones not only gives your walkway a finished look, but it also helps to prevent weed growth and keeps the stones securely in place. By choosing a filling material that complements the overall aesthetics of your pathway, you’ll add the final touch to your walkway construction. With the gaps filled, you’re ready for the last step: Step 8: Finishing Touches.
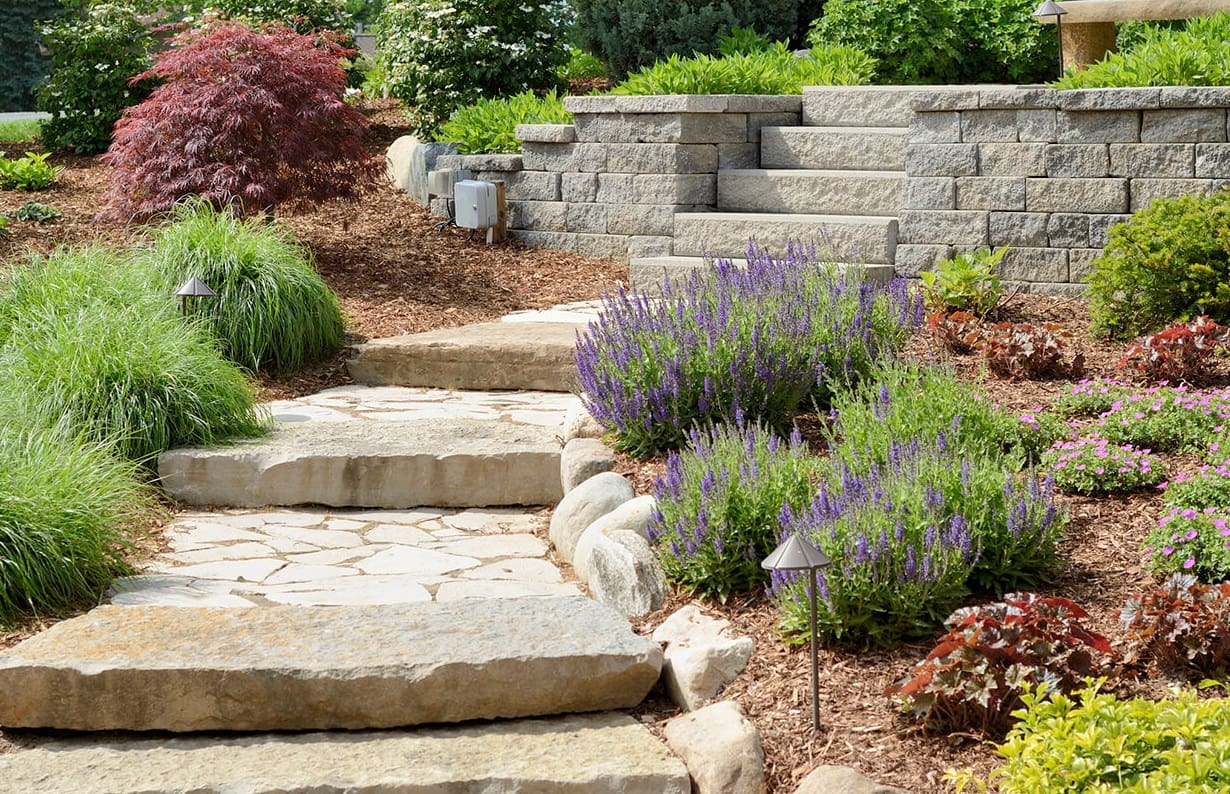
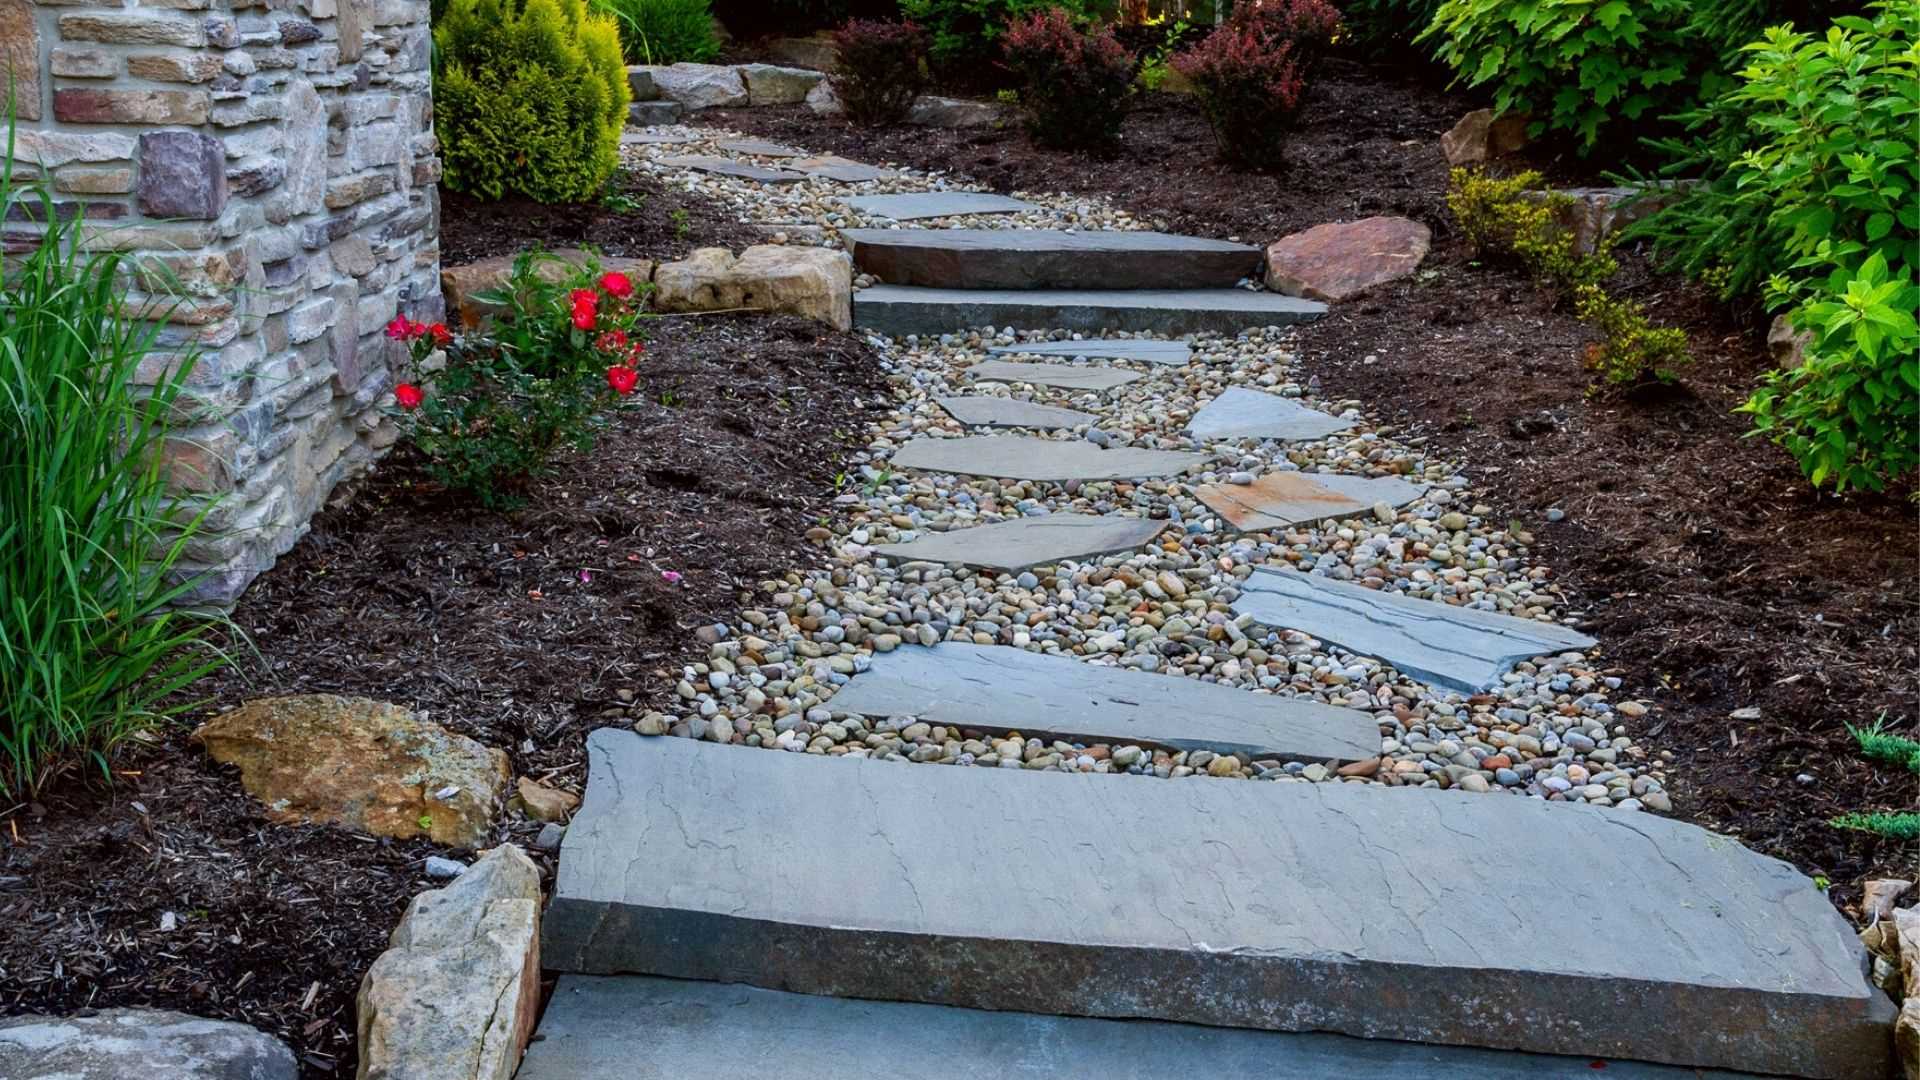
Step 8: Finishing Touches
Adding the finishing touches to your walkway will enhance its overall appearance and ensure its longevity. These final steps will help you create a polished and well-maintained pathway. Here’s what to do:
- Inspect and adjust: Take a final walk along the pathway, inspecting the stepping stones and the overall alignment. Make any necessary adjustments by tapping the stones or repositioning them if needed.
- Sweep and clean: Use a broom or a brush to sweep off any debris or loose filling material from the surface of the walkway. This will give your pathway a clean and tidy look.
- Add edging: Install edging material along the edges of the walkway, if desired. This will help define the boundaries of the pathway and prevent the stepping stones from shifting over time.
- Enhance with landscaping: Consider adding landscaping elements around the walkway, such as flowers, plants, or decorative features, to further enhance its visual appeal. This will create a cohesive and inviting outdoor space.
- Maintain and upkeep: Regularly inspect the walkway for any signs of wear or damage. Replace any damaged stepping stones or refresh the filling material as needed. Additionally, keep the pathway clean by removing any debris or weeds that may accumulate over time.
By focusing on these finishing touches, you’ll ensure that your walkway remains beautiful and functional for years to come. Regular maintenance and upkeep will extend the lifespan of your pathway and keep it looking its best. Congratulations, you have successfully completed the process of building a walkway with stepping stones!
Remember to enjoy the fruits of your labor and take pride in the beautiful pathway you have created. Whether it’s a meandering pathway through a picturesque garden or a straight path connecting different areas of your yard, your walkway with stepping stones is sure to add charm and elegance to your outdoor space.
Conclusion
Building a walkway with stepping stones is a rewarding project that can transform your outdoor space into a functional and visually appealing area. By following the steps outlined in this guide, you can create a beautiful pathway that enhances the aesthetics of your landscape and provides a practical route for walking.
From the initial planning and preparation to the final finishing touches, each step plays a crucial role in the construction process. Careful consideration of the location, precise measurements, proper excavation, and precise installation of the stepping stones all contribute to the success of your project.
Throughout the process, it’s important to maintain a balance between functionality and aesthetics. A well-designed walkway with thoughtfully chosen stepping stones can elevate the overall look of your outdoor area while providing a safe and comfortable pathway.
Remember to regularly inspect and maintain your walkway to ensure its longevity and appearance. Replace any damaged stones, refresh the filling material, and keep the pathway clean and free from debris.
Building a walkway with stepping stones is not just a practical project but a creative endeavor that allows you to express your personal style and enhance the beauty of your outdoor space. Enjoy the process, take pride in your accomplishment, and savor the joy of strolling along your own handcrafted pathway.
So, gather your tools, choose your stepping stones, and embark on this exciting journey of creating a stunning walkway that will be both functional and visually captivating.
Now that you've mastered building a walkway with stepping stones, why not spruce up your garden's boundaries with some creative fencing ideas? For those who love transforming their outdoor areas, we've got loads of DIY projects that will keep you busy and beautify your space. Whether you're looking to redefine your landscape or tackle some fun, hands-on tasks, our upcoming articles will keep your creativity flowing and your hands dirty!
Frequently Asked Questions about How To Build A Walkway With Stepping Stones
Was this page helpful?
At Storables.com, we guarantee accurate and reliable information. Our content, validated by Expert Board Contributors, is crafted following stringent Editorial Policies. We're committed to providing you with well-researched, expert-backed insights for all your informational needs.


0 thoughts on “How To Build A Walkway With Stepping Stones”