Home>Furniture>Bedroom Furniture>How To Build A Pipe Bed Frame
Bedroom Furniture
How To Build A Pipe Bed Frame
Modified: December 7, 2023
Learn how to build a stylish pipe bed frame for your bedroom with our step-by-step guide. Elevate your bedroom furniture with this unique DIY project.
(Many of the links in this article redirect to a specific reviewed product. Your purchase of these products through affiliate links helps to generate commission for Storables.com, at no extra cost. Learn more)
Introduction
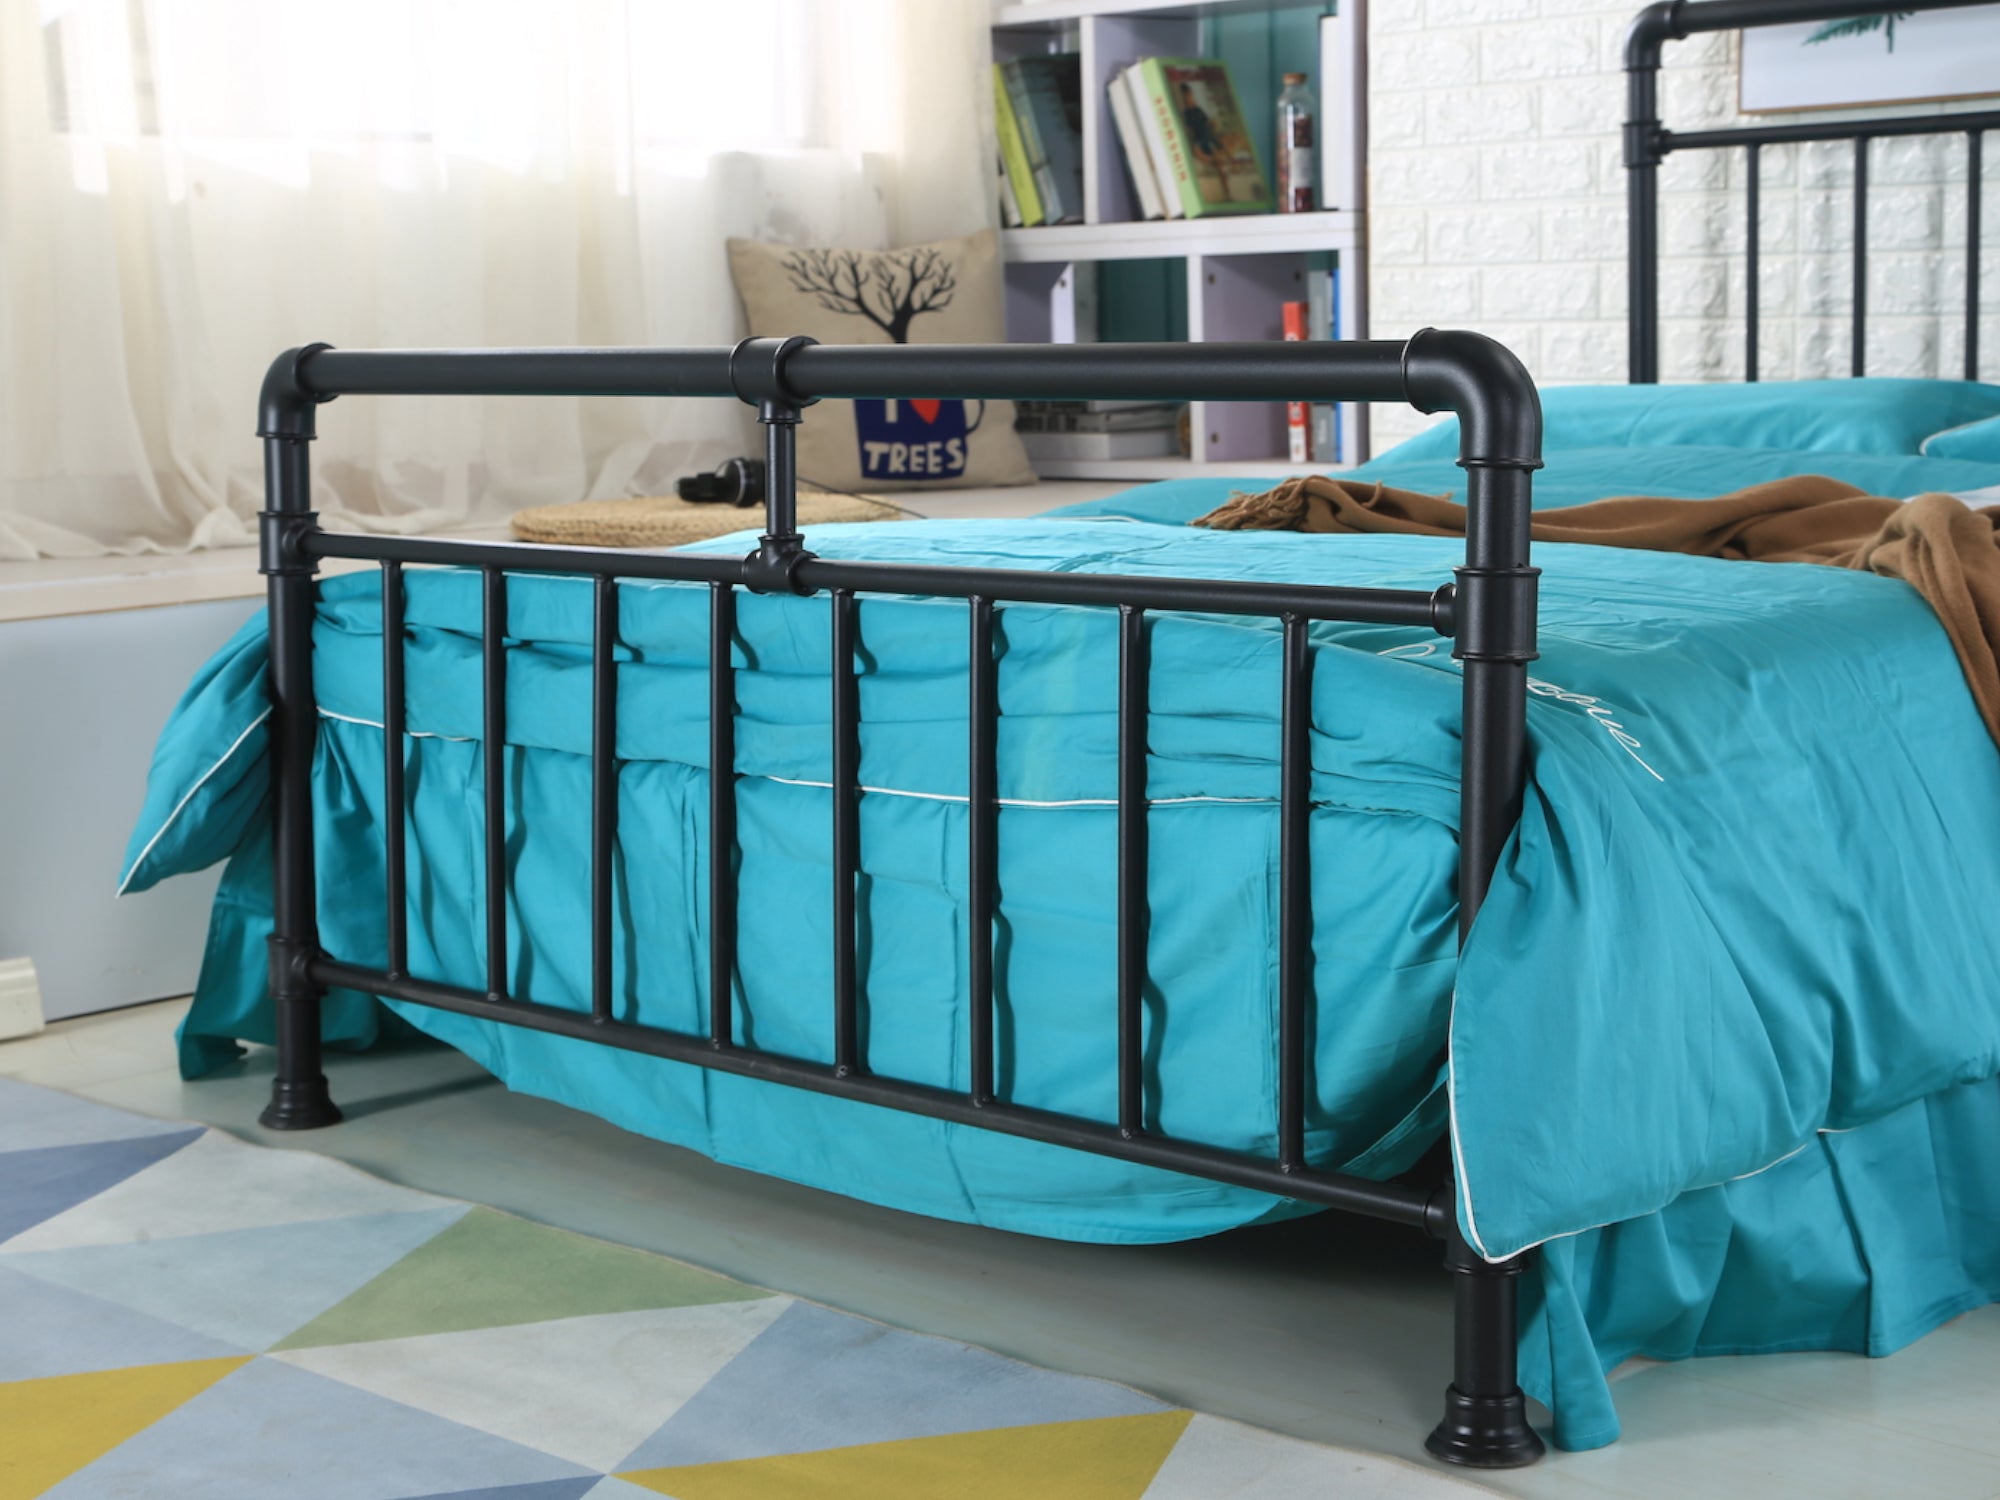
Welcome to our comprehensive guide on how to build a pipe bed frame. If you’re looking to add a unique and industrial touch to your bedroom, a pipe bed frame is the perfect solution. Not only are they stylish and trendy, but they also offer durability and stability to ensure a comfortable night’s sleep.
Building a pipe bed frame may seem daunting at first, but with the right materials and tools, it can be a rewarding and fulfilling project. In this article, we will walk you through the step-by-step process of creating your own pipe bed frame, from measuring and cutting the pipes to assembling the different components. So, get ready to showcase your DIY skills and create a stunning focal point in your bedroom!
Before we dive into the construction process, let’s take a look at the materials and tools you’ll need:
Key Takeaways:
- Create a unique and durable pipe bed frame by following our step-by-step guide. Elevate your bedroom with an industrial touch and enjoy the satisfaction of building a stylish and functional piece of furniture.
- Personalize your pipe bed frame with optional painting or staining to match your bedroom decor. Enjoy the process of creating a trendy and visually appealing piece of furniture while ensuring stability and durability for years to come.
Read more: How To Build A Bed Frame
Materials and Tools Required
Before you start building your pipe bed frame, make sure you have the following materials and tools:
Materials:
- Pipe: You’ll need black iron or steel pipes, typically ¾ inch in diameter. The exact amount will depend on the size of your bed frame.
- Pipe Fittings: These include elbows, tees, flanges, and caps to connect and support the pipes. Make sure to choose fittings that match the size of your pipes.
- Wood: Select high-quality, sturdy wood for the headboard, footboard, and slats. You can choose from various options, such as pine, oak, or plywood.
- Screws: Use screws to secure the different components of the bed frame. Make sure they are compatible with the type of wood you’re using.
- Sandpaper: To smooth the edges of the wood and achieve a polished finish.
- Primer and Paint or Stain (Optional): If you want to add a pop of color or protect the wood, choose a primer, paint, or stain that suits your style.
- Mattress: The final piece of the puzzle, ensure you have a mattress that fits the dimensions of your bed frame.
Tools:
- Tape Measure: Essential for accurate measurements.
- Hacksaw or Pipe Cutter: Used to cut the pipes to the desired length.
- Pipe Wrench: Helps tighten the pipe fittings securely.
- Screwdriver or Power Drill: For attaching screws and assembling the bed frame.
- Sandpaper or Electric Sander: To smooth the wood surfaces.
- Paintbrush or Stain Applicator: If you choose to paint or stain the wood.
- Level: Ensures the bed frame is straight and balanced.
With these materials and tools ready, you’re all set to begin constructing your pipe bed frame. The next section will guide you through the step-by-step process, starting with measuring and cutting the pipes.
Step 1: Measure and Cut the Pipes
The first step in building your pipe bed frame is to measure and cut the pipes to the desired lengths. Keep in mind the size of your bed frame as well as any specific design considerations you may have.
Here’s how to go about it:
- Measure your mattress dimensions: Start by measuring the length and width of your mattress. This will determine the overall size of your bed frame.
- Determine the height of the bed frame: Consider the desired height of your bed frame. Take into account the thickness of your mattress, as well as personal preference for how high or low you want the frame to be.
- Add the legs and horizontal supports: Take into account the length of the pipe fittings when measuring the pipes for the legs and horizontal supports. These fittings will add some extra length to each section, so be sure to include them in your calculations.
- Mark and cut the pipes: Using a tape measure, mark the desired lengths on the pipes. A hacksaw or pipe cutter can be used to cut the pipes accurately. Take your time and double-check the measurements before making any cuts.
- Sand the cut edges: Once the pipes are cut, use sandpaper or an electric sander to smooth out the edges. This will help prevent any sharp ends or rough surfaces that could cause injury or damage to the wood or mattress.
By following these steps, you will have successfully measured and cut the pipes for your bed frame. The next section will guide you on how to prepare the pipe fittings before assembling the different components.
Read more: How To Build A Tall Bed Frame
Step 2: Prepare the Pipe Fittings
Once you have measured and cut the pipes for your bed frame, the next step is to prepare the pipe fittings. These fittings will be used to connect and support the different sections of the frame.
Here’s what you need to do:
- Clean the fittings: Before you start assembling, make sure to clean the pipe fittings with a damp cloth. This will remove any dirt or debris and ensure a secure connection.
- Apply thread seal tape: To ensure a watertight seal and prevent any leaks, apply thread seal tape to the threaded ends of the pipes and fittings. This will help create a tight connection and prevent any potential issues down the line.
- Tighten the fittings: Use a pipe wrench to tighten the fittings securely. Ensure that they are properly aligned and tightened to prevent wobbling or instability in the finished bed frame.
- Double-check the connections: Take a moment to double-check all the connections. Make sure that each fitting is securely tightened and aligned correctly. This will help ensure the stability and durability of your bed frame.
By properly preparing the pipe fittings, you will have a solid foundation for your bed frame. The next step will guide you through assembling the legs and horizontal supports.
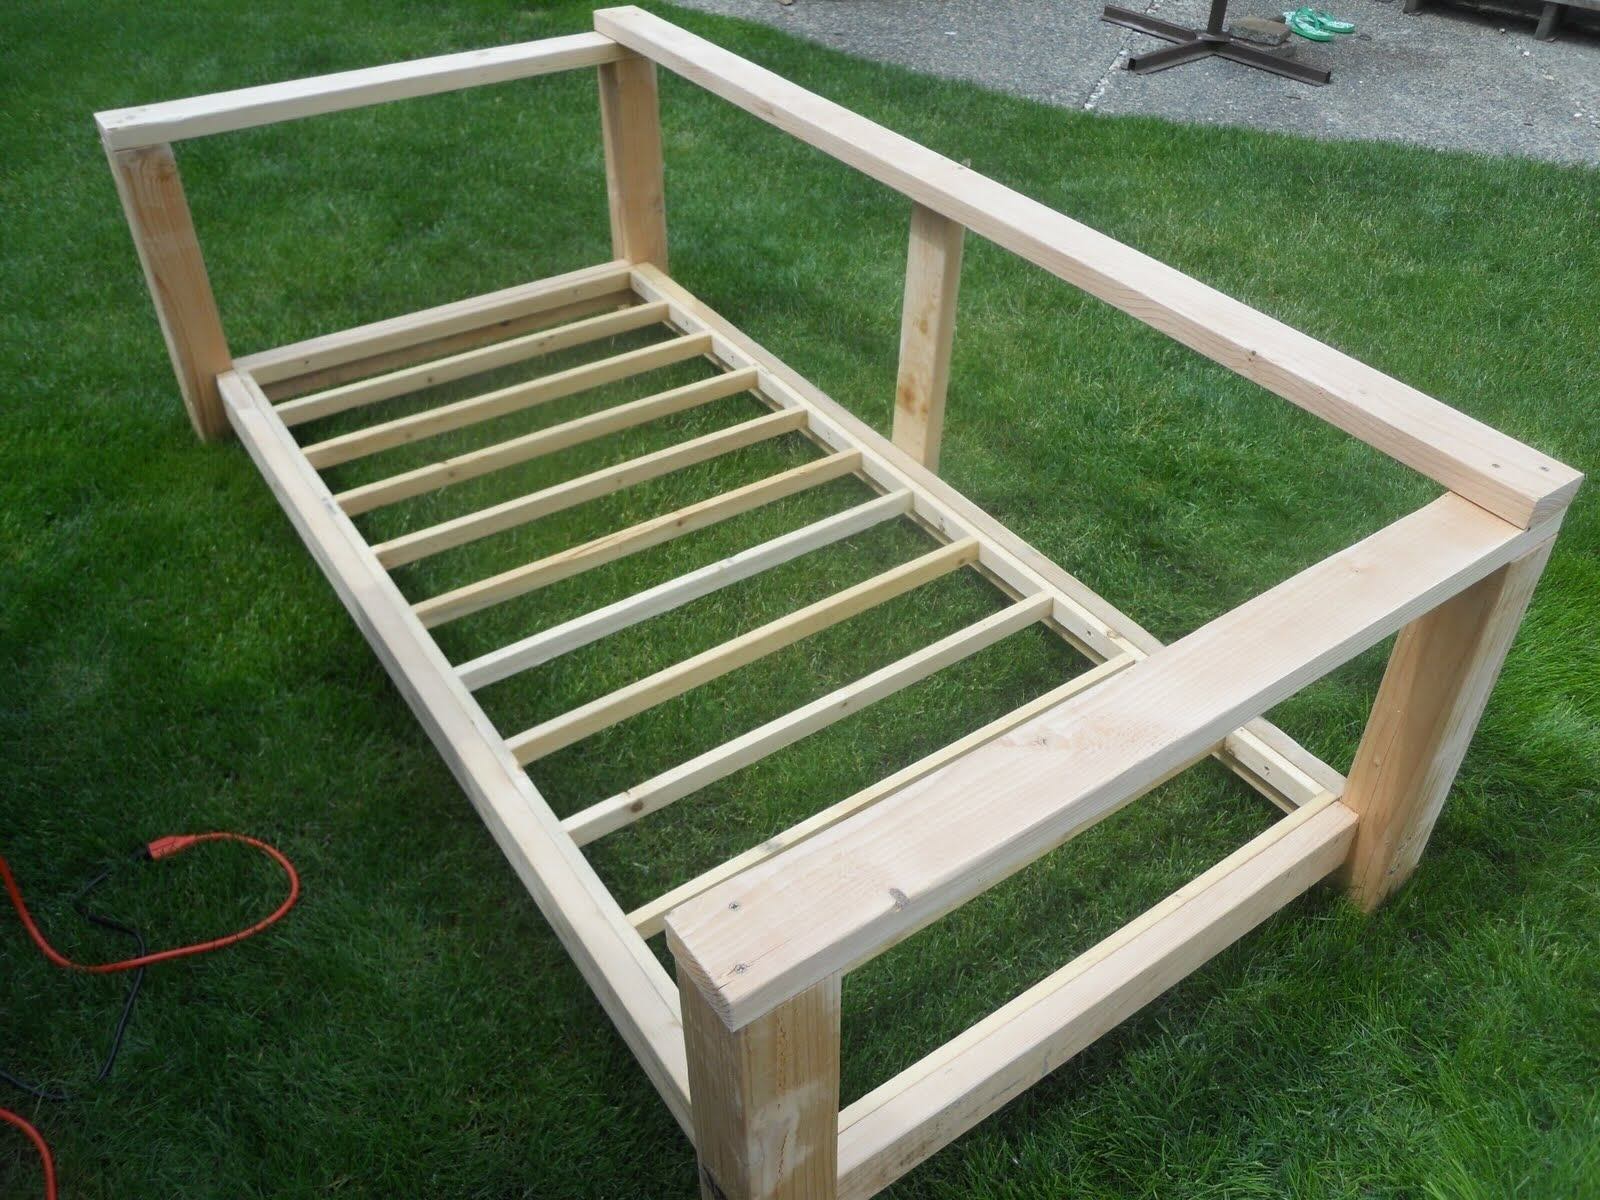
Step 3: Assemble the Legs and Horizontal Supports
With the pipe fittings prepared, it’s time to assemble the legs and horizontal supports of your pipe bed frame. This step will involve connecting the pipes and fittings to form the basic structure of the frame.
Follow these steps to assemble the legs and horizontal supports:
- Start with the legs: Begin by connecting the cut pipes and fittings to create the legs of the bed frame. Use the appropriate fittings, such as elbows or tees, to join the sections together. Ensure that the connections are tight and secure.
- Add the horizontal supports: Once the legs are assembled, it’s time to add the horizontal supports. Measure and cut the pipes to the desired length for the supports, considering the width of your bed frame.
- Connect the horizontal supports: Attach the horizontal supports to the legs using the appropriate fittings. Depending on the design of your bed frame, you may need additional fittings such as tees or elbows to create the desired angles.
- Check for stability: As you assemble the legs and horizontal supports, check for stability. Ensure that all connections are tight, and the frame is sturdy. Use a level to make sure the frame is straight.
By following these steps, you will have successfully assembled the legs and horizontal supports of your pipe bed frame. In the next step, we will guide you on how to attach the headboard and footboard.
Step 4: Attach the Headboard and Footboard
Now that you have assembled the legs and horizontal supports of your pipe bed frame, it’s time to attach the headboard and footboard. These components will not only add visual appeal but also provide additional stability to the frame.
Follow these steps to attach the headboard and footboard:
- Measure and cut the wood: Start by measuring the dimensions for the headboard and footboard. Using a saw, cut the wood to the desired size. Take into consideration the height and width of your bed frame.
- Position the wood pieces: Place the cut wood pieces against the frame at the head and foot ends. Ensure that they align properly and are centered within the frame.
- Secure the wood to the frame: Use screws to securely attach the wood to the frame. Drill pilot holes in the wood before driving in the screws to prevent splitting. Make sure to countersink the screws for a flush finish.
- Check for stability: Once the headboard and footboard are attached, check for stability. Wiggle the frame to ensure that the wood is secured and there is no movement. Make any necessary adjustments or tighten any loose screws.
By following these steps, you will have successfully attached the headboard and footboard to your pipe bed frame. The next step will guide you on how to secure the slats for mattress support.
When building a pipe bed frame, make sure to measure and cut the pipes accurately to ensure a sturdy and level structure. Use a pipe threader to create secure connections between the pipes.
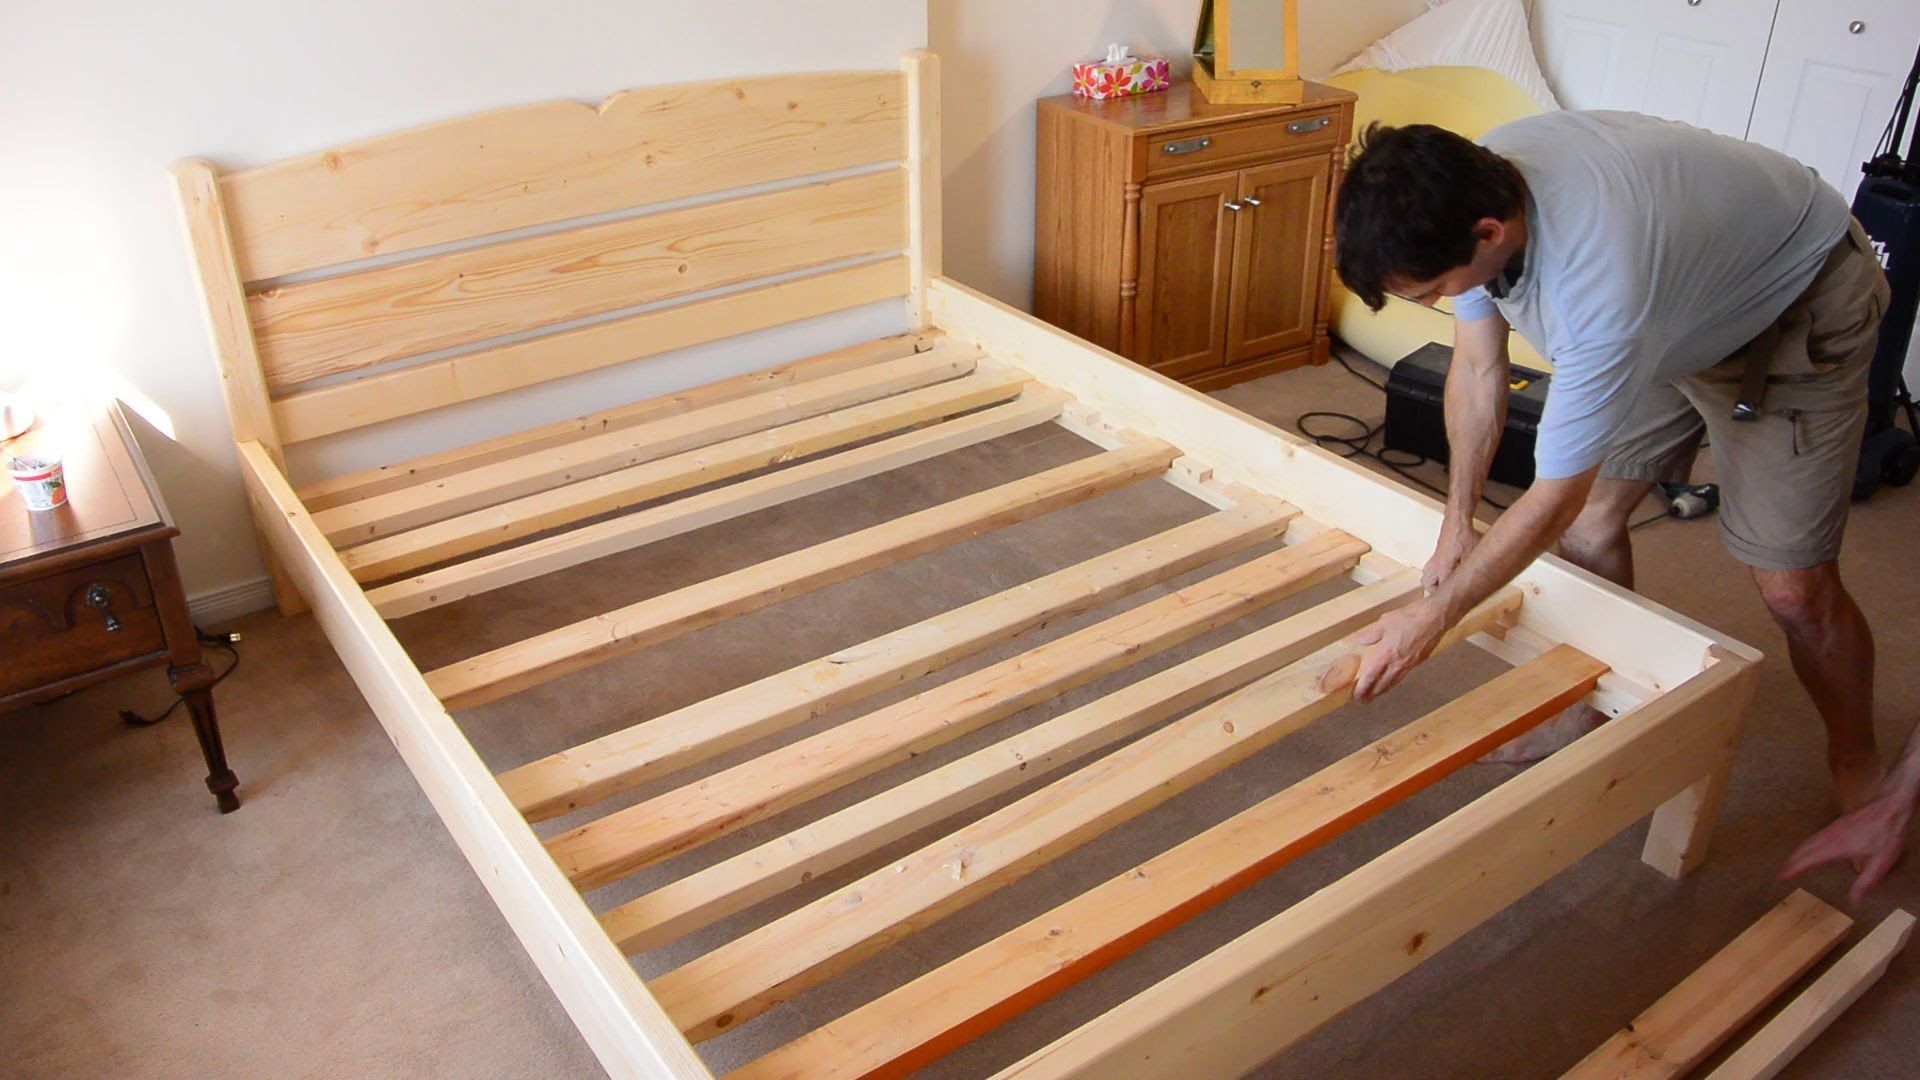
Step 5: Secure the Slats
With the headboard and footboard attached, it’s time to secure the slats for mattress support. The slats will provide a sturdy base for your mattress, ensuring comfort and stability while you sleep.
Follow these steps to secure the slats:
- Measure and cut the slats: Measure the width of your bed frame and cut the slats accordingly. The number of slats will depend on the size of your bed and personal preference. Typically, spacing them around 2-3 inches apart is sufficient.
- Place the slats: Lay the slats evenly across the horizontal supports of the bed frame. Make sure they are positioned perpendicular to the supports for maximum strength and support.
- Secure the slats: Use screws or nails to secure the slats to the horizontal supports. Place them at the edges of the slats to prevent them from shifting. Make sure each slat is securely fastened to ensure stability.
- Check for a level surface: Once the slats are secured, check for a level sleeping surface. If any slats are uneven, use sandpaper or a sander to smooth them out. This will ensure a comfortable sleeping experience.
By following these steps, you will have successfully secured the slats for your mattress support. The next step will guide you on how to paint or stain the bed frame to add a finishing touch.
Read more: How To Build A Bunk Bed Frame
Step 6: Paint or Stain the Bed Frame (Optional)
Once you have completed the assembly of your pipe bed frame, you can choose to further enhance its appearance by painting or staining the wood components. This step is optional but can add a personalized touch and protect the wood from wear and tear.
Here’s how to paint or stain your bed frame:
- Prepare the wood: Before applying any paint or stain, ensure that the wood surfaces are clean and smooth. Use sandpaper to remove any rough spots or imperfections.
- Choose your finish: Decide whether you want to paint the bed frame for a vibrant look or stain it to enhance the natural beauty of the wood. Consider the overall aesthetic of your bedroom and personal preferences when making this decision.
- Apply the primer (if painting): If you choose to paint the bed frame, applying a primer is recommended. This will provide a smooth base for the paint and help it adhere to the wood surfaces better. Allow the primer to dry completely before applying the paint.
- Paint or stain application: When applying the paint or stain, use a brush, roller, or stain applicator, depending on the desired finish. Apply thin, even coats, allowing each coat to dry before applying the next. Follow the manufacturer’s instructions for the recommended drying time.
- Protective finish (optional): Once the paint or stain has dried, consider applying a protective finish such as polyurethane or varnish. This will help protect the wood from scratches and damage over time.
This optional step allows you to customize your pipe bed frame and make it truly unique. Choose a paint color or wood stain that complements your bedroom’s decor and personal style.
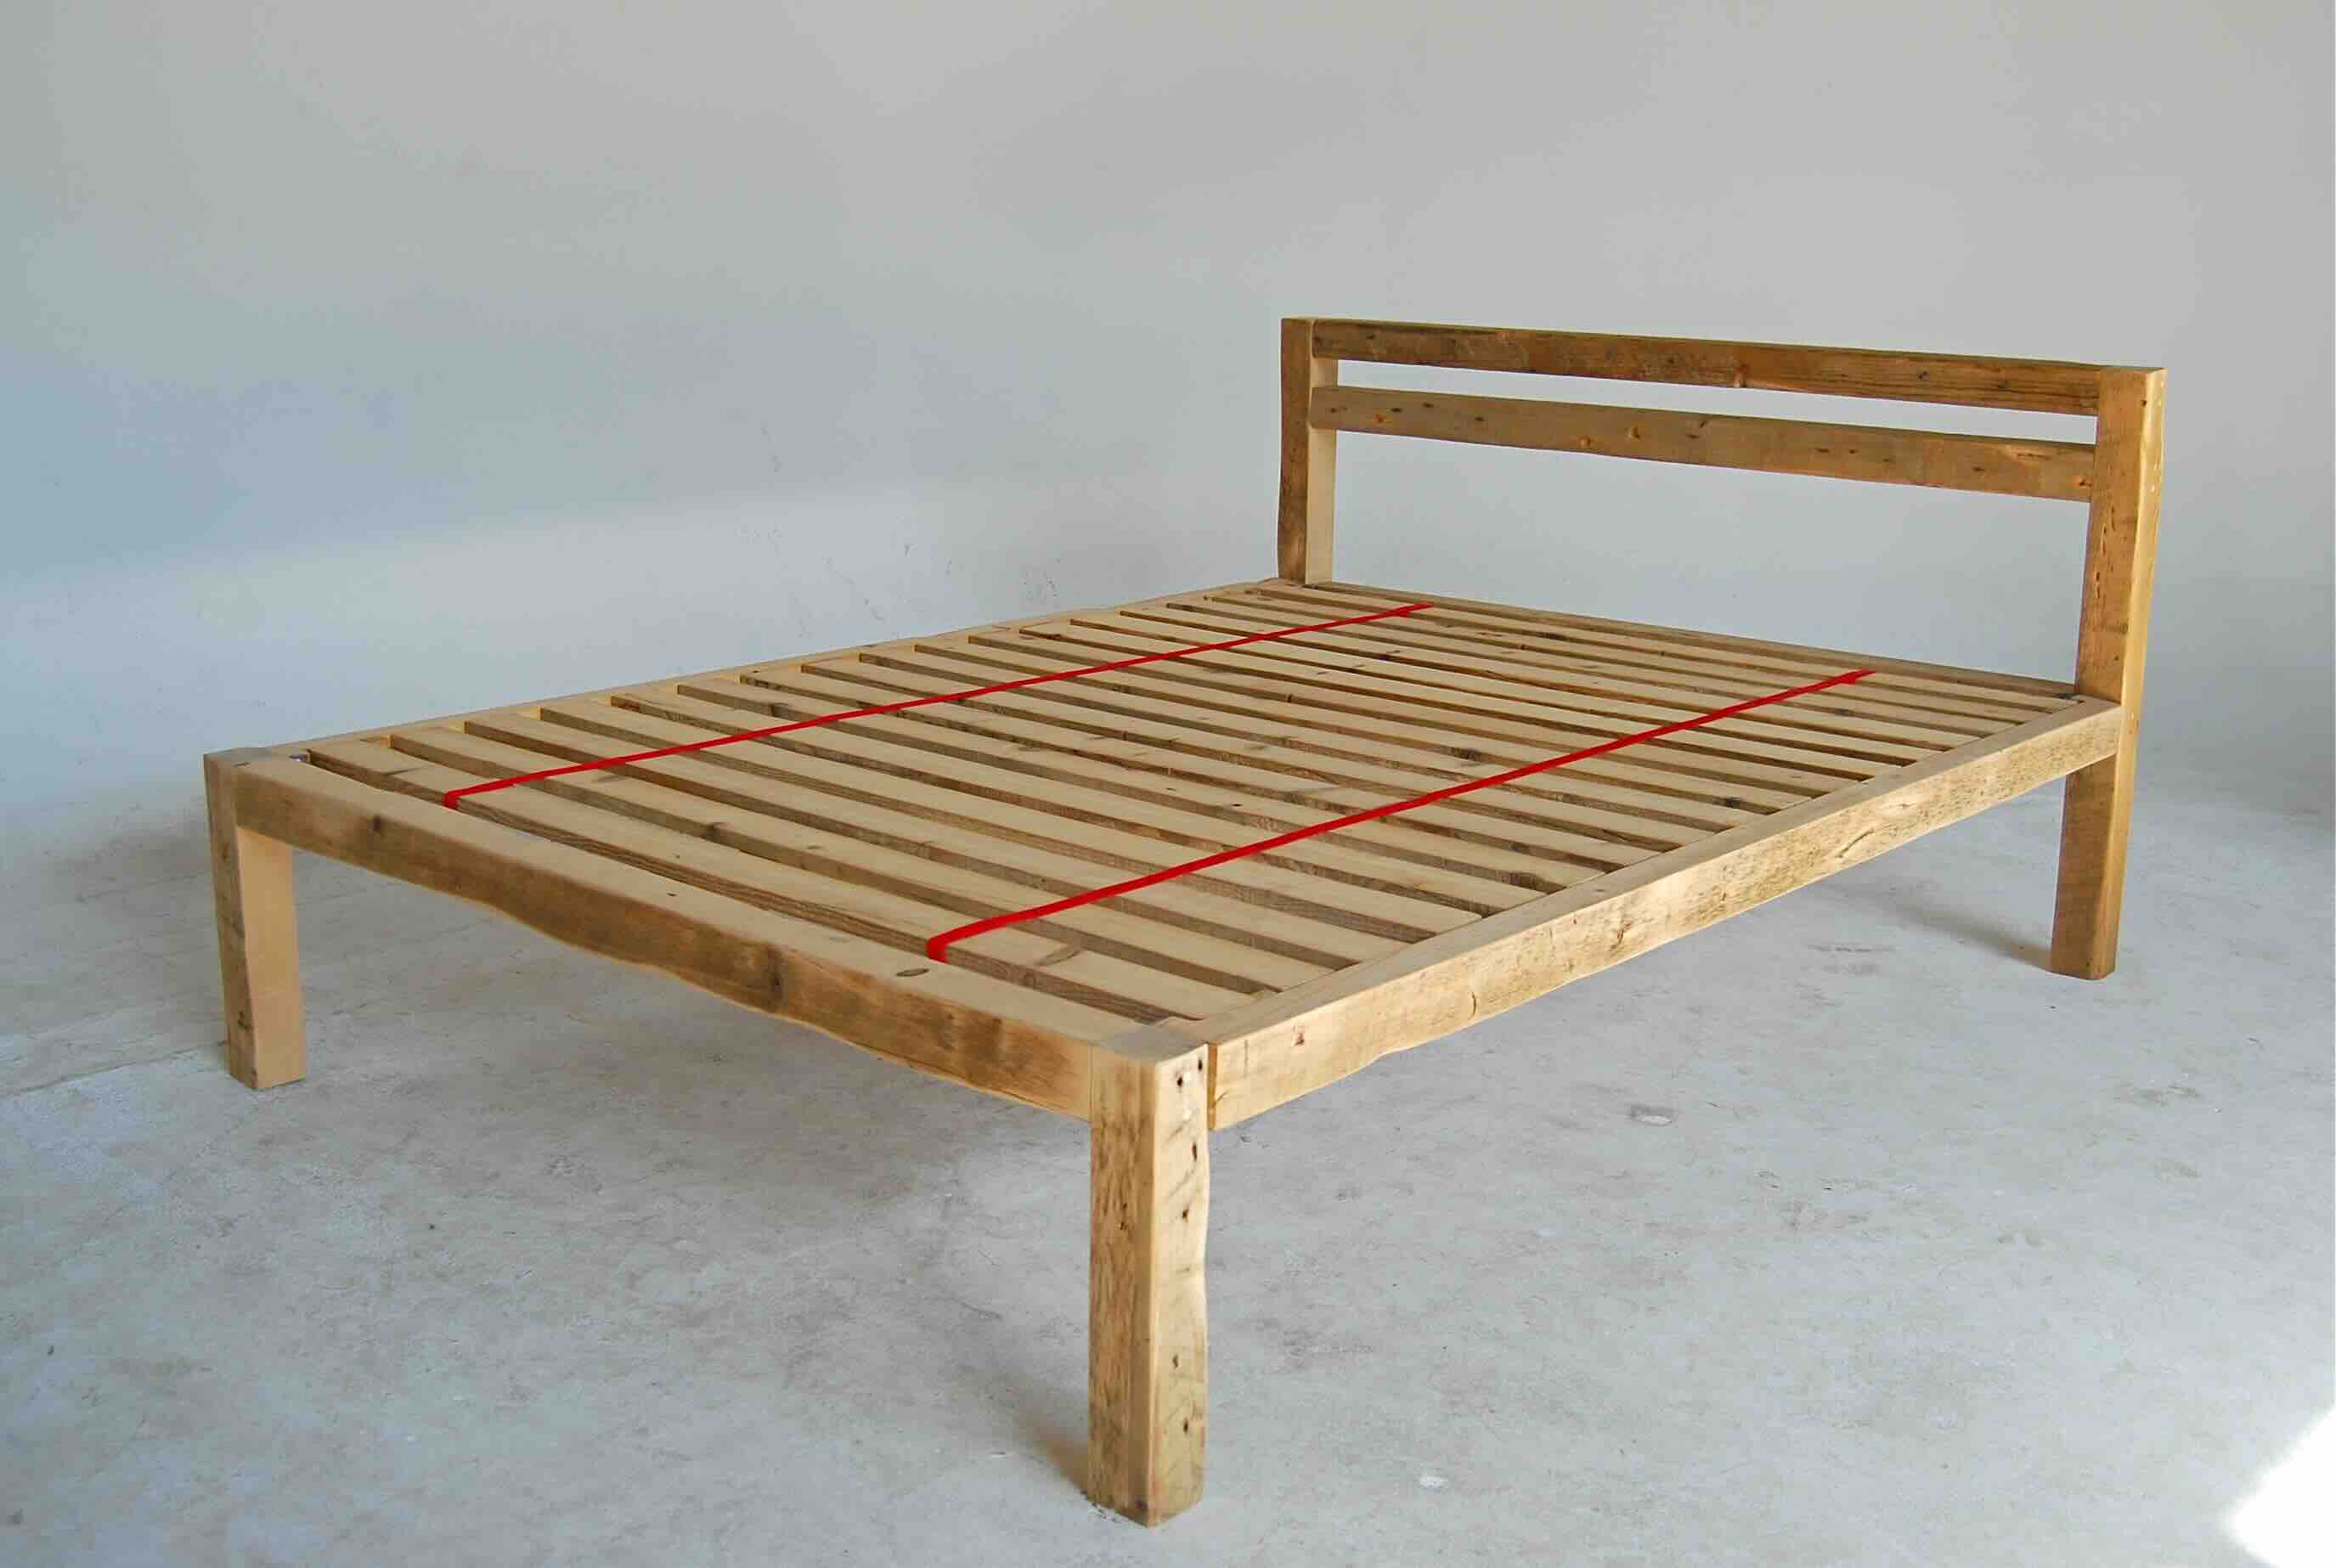
Congratulations! By following these steps, you have successfully built and customized your very own pipe bed frame. Enjoy the fruits of your labor and rest easy knowing you’ve created a beautiful and functional piece of furniture.
With your bed frame complete, it’s time to add the finishing touches to your bedroom and create a cozy sanctuary that you’ll love coming home to.
Conclusion
Congratulations on completing the construction of your pipe bed frame! You now have a unique and stylish piece of furniture that adds an industrial touch to your bedroom. By following the step-by-step guide in this article, you have successfully built a durable and comfortable bed frame that will provide you with years of restful sleep.
Throughout the process, you measured and cut the pipes, prepared the fittings, assembled the legs and horizontal supports, attached the headboard and footboard, secured the slats, and optionally painted or stained the bed frame to your desired finish.
Not only is a pipe bed frame a trendy and visually appealing choice, but it also offers stability and durability that traditional bed frames may lack. The combination of pipes and wood creates a captivating contrast that can truly elevate the overall aesthetic of your bedroom.
Remember to take proper care of your bed frame by periodically checking the fittings for tightness and ensuring the slats remain secure. Additionally, consider using a mattress that suits your comfort preferences and fits the dimensions of your bed frame for optimal sleep quality.
We hope this comprehensive guide has been helpful in guiding you through the process of building your own pipe bed frame. Enjoy the satisfaction that comes with creating a piece of furniture tailored to your specific needs and style.
Now that you’ve mastered the art of building a pipe bed frame, you might find yourself inspired to take on other DIY projects to further enhance your space. So, go ahead and let your creativity flourish as you continue to transform your bedroom into a personalized oasis of comfort and style.
Frequently Asked Questions about How To Build A Pipe Bed Frame
Was this page helpful?
At Storables.com, we guarantee accurate and reliable information. Our content, validated by Expert Board Contributors, is crafted following stringent Editorial Policies. We're committed to providing you with well-researched, expert-backed insights for all your informational needs.


0 thoughts on “How To Build A Pipe Bed Frame”