Furniture
How To Paint A Metal Lamp
Modified: December 7, 2023
Learn how to paint a metal lamp and give it a fresh look with our easy furniture painting guide. Transform your furniture with this step-by-step tutorial.
(Many of the links in this article redirect to a specific reviewed product. Your purchase of these products through affiliate links helps to generate commission for Storables.com, at no extra cost. Learn more)
Introduction
When it comes to home decor, lighting plays a crucial role in creating the desired ambiance. A metal lamp can be a stylish addition to any room, but over time, it may start to show signs of wear and tear. Instead of tossing out your old metal lamp and spending money on a new one, why not give it a fresh new look with a fresh coat of paint?
Painting a metal lamp is a great way to revitalize its appearance and add a personal touch to your home decor. Whether you want to match it with your existing color scheme or experiment with a bold new hue, painting a metal lamp is a fun and affordable DIY project that can yield impressive results.
In this article, we will guide you through the step-by-step process of painting a metal lamp, from gathering the necessary materials to giving the finishing touches. So, let’s dive in and discover how you can transform your metal lamp into a statement piece that elevates the overall aesthetics of your space.
Before we get started, remember to choose a well-ventilated area for this project and wear protective gear such as goggles and gloves to ensure your safety.
Key Takeaways:
- Revitalize your old metal lamp with a fresh coat of paint, adding a personal touch to your home decor while saving money on buying a new one. Follow the step-by-step guide for impressive results.
- Transform your metal lamp into a statement piece that elevates the overall aesthetics of your space. With the right materials and techniques, painting a metal lamp is a fun and rewarding DIY project.
Read more: How To Paint A Metal Shed
Materials Needed
Before you embark on your metal lamp painting project, make sure you have the following materials on hand:
- Drop cloth or newspaper: This will protect your work surface from any paint spills or drips.
- Painter’s tape: Use this to mask off any areas you don’t want to paint, such as the lamp socket or cord.
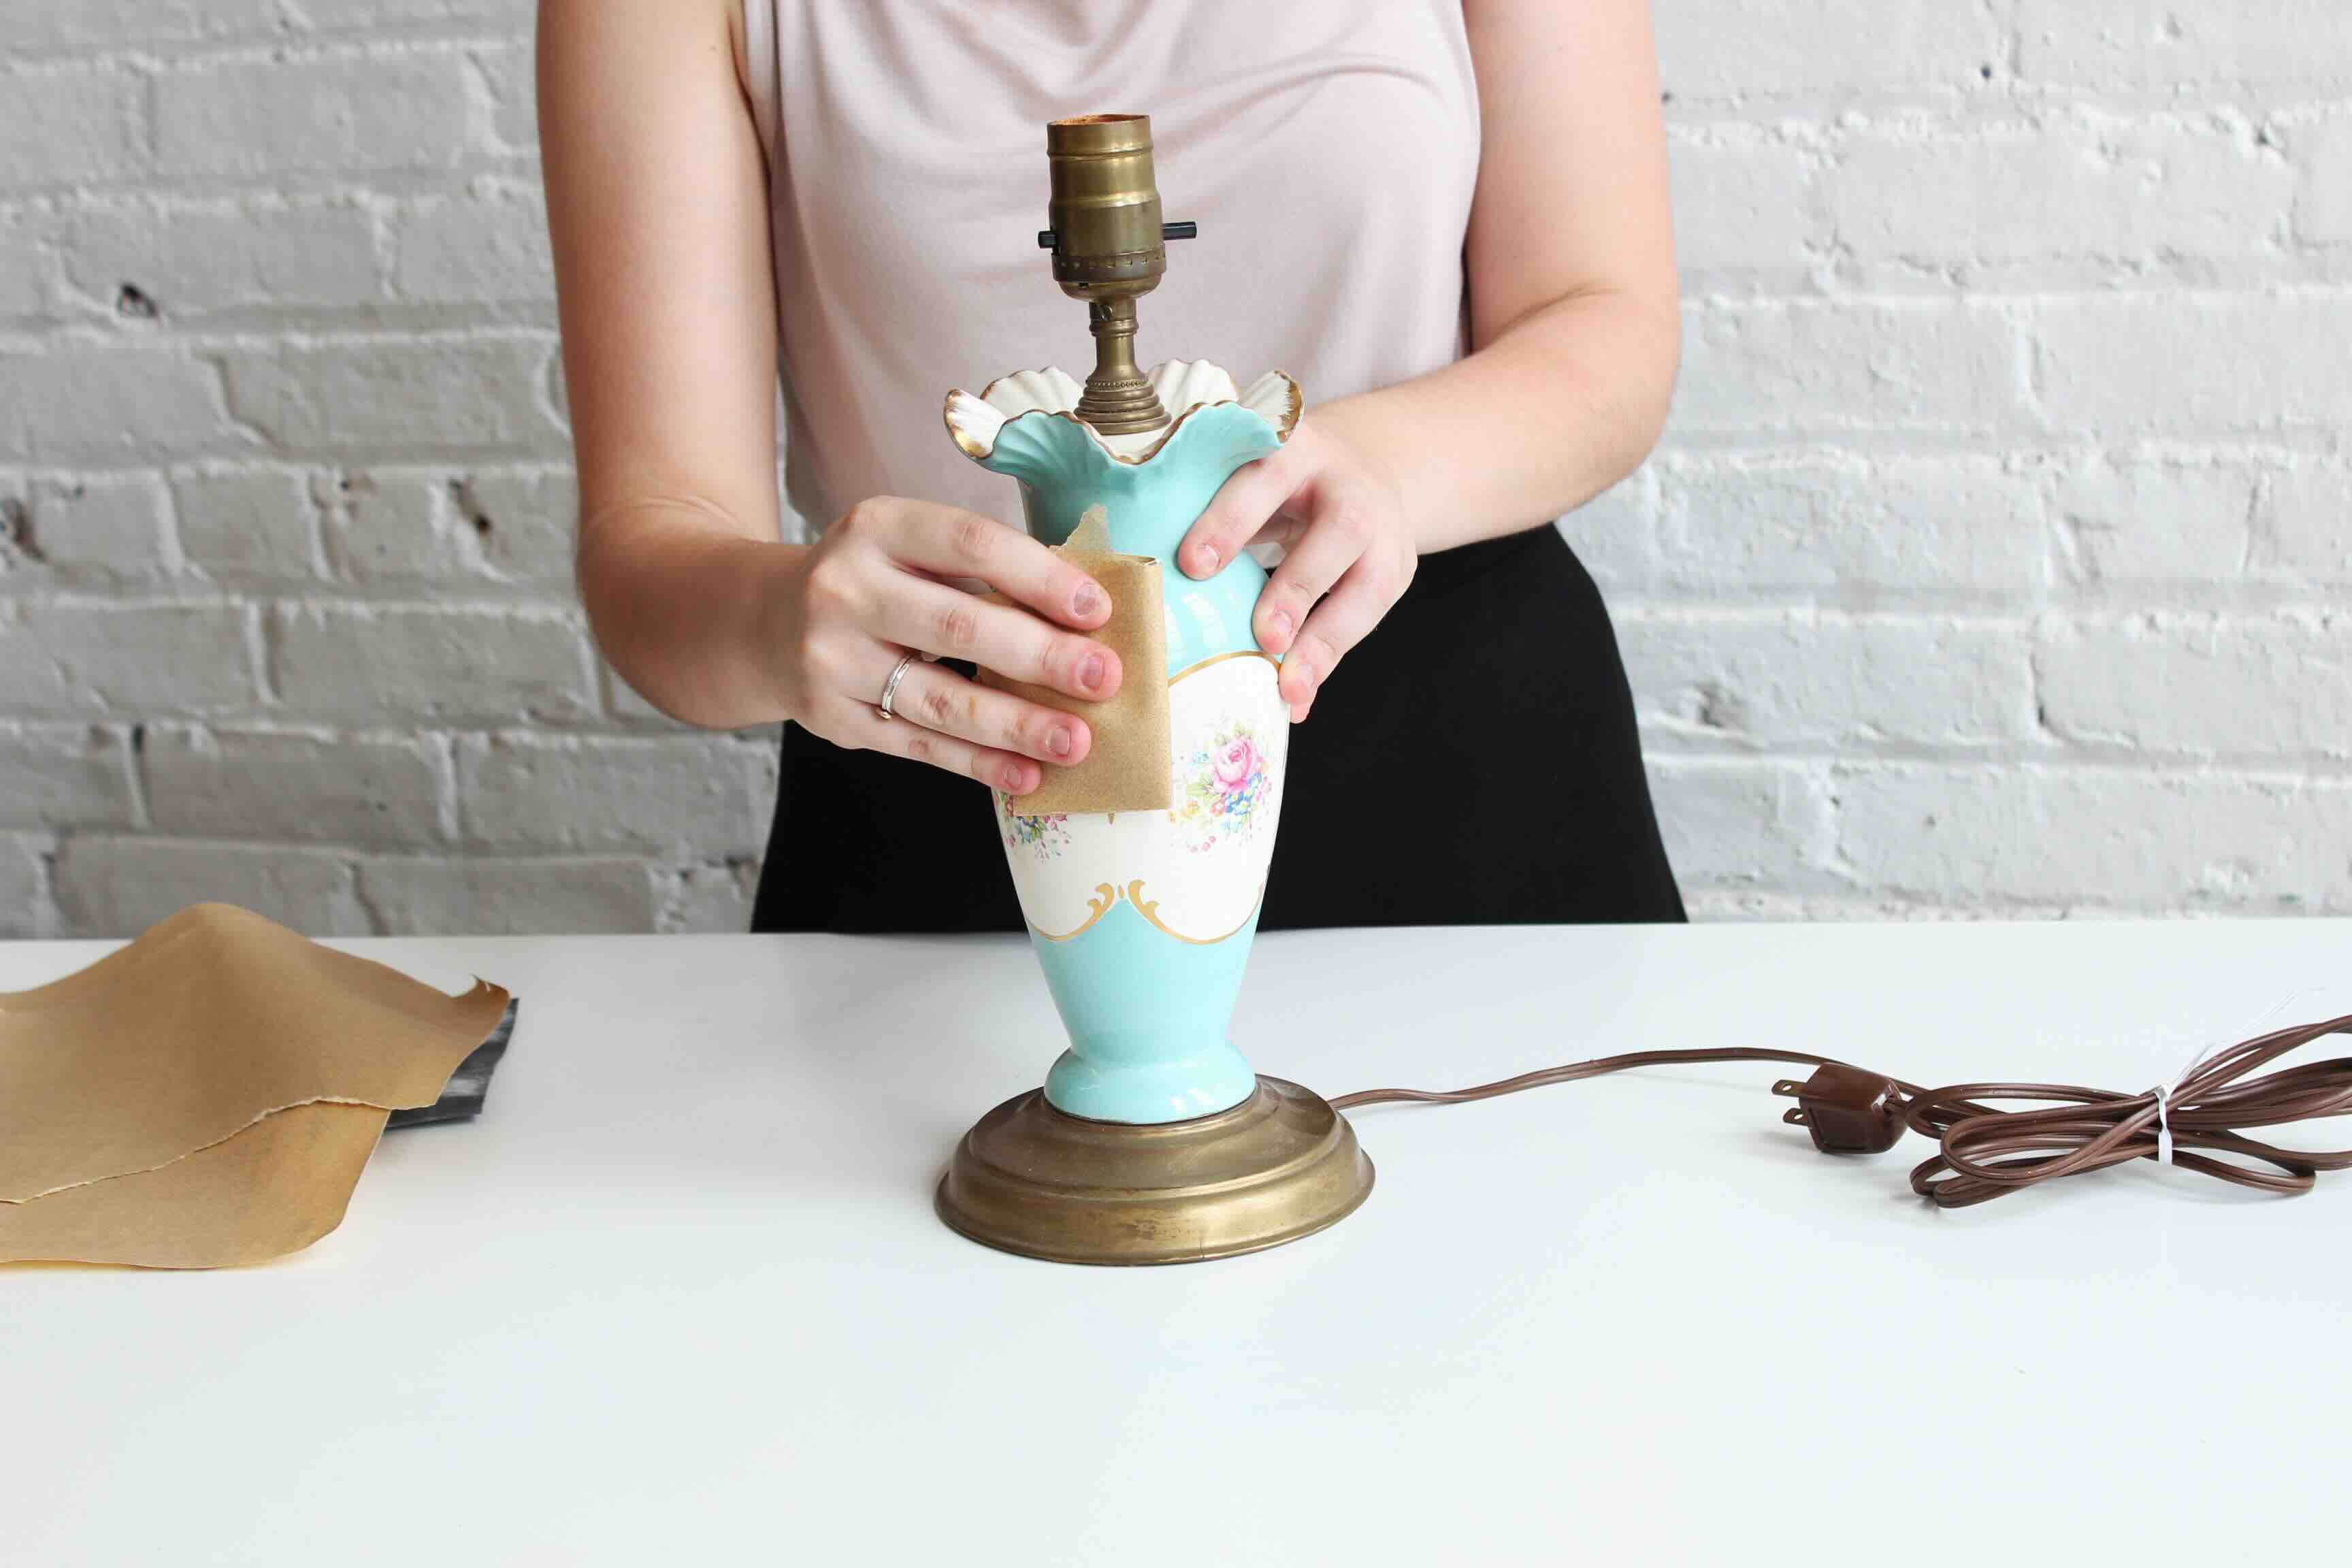
- Sandpaper: Choose a medium-grit sandpaper to roughen up the surface of the lamp and ensure proper paint adhesion.
- Primer: Opt for a metal-specific primer that provides good adhesion and corrosion resistance.
- Paint: Select a paint that is suitable for use on metal surfaces, such as a spray paint or a metal-specific paint in the color of your choice.
- Paintbrush or paint sprayer: Depending on your preference and the size of the lamp, you can choose to apply the paint with a brush or use a paint sprayer for a more even and professional finish.
- Clear coat (optional): If you want to add an extra layer of protection and shine to your painted lamp, a clear coat can be a great addition.
- Cloth or sponge: This will be handy for cleaning the lamp and removing any dust or debris before painting.
- Masking materials: If you plan on painting only certain parts of the lamp, you may need masking materials such as paper or plastic bags to cover the areas you want to protect.
- Isopropyl alcohol: Use this to clean the lamp surface thoroughly before painting, as it helps remove any grease or residue.
Having these materials ready will ensure a smooth and successful painting process for your metal lamp. Now that you have everything you need, let’s move on to preparing the lamp for painting.
Preparing the Lamp
Before diving into the painting process, it’s important to properly prepare the metal lamp to ensure optimal paint adhesion and a long-lasting finish. Here’s how you can get your lamp ready for its makeover:
- Remove the lampshade and lightbulb: Start by carefully removing the lampshade and unscrewing the lightbulb. Set them aside in a safe place to avoid any damage during the painting process.
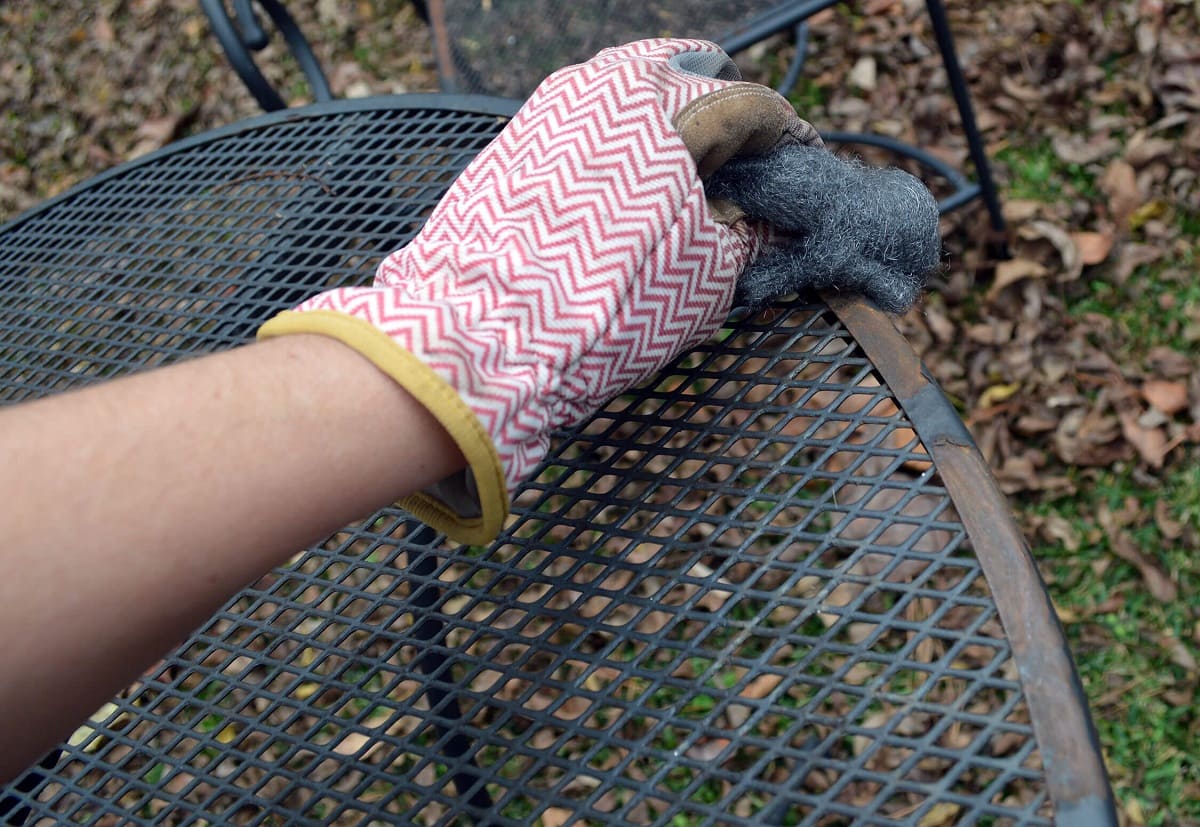
- Clean the lamp: Use a cloth or sponge dampened with isopropyl alcohol to thoroughly clean the lamp surface. This will remove any grease, dust, or residue that could hinder the paint from adhering properly.
- Mask off any areas: If there are any parts of the lamp that you don’t want to paint, such as the socket or cord, use painter’s tape and masking materials to cover and protect them.
- Prepare the work area: Lay a drop cloth or place newspaper beneath the lamp to catch any paint drips or spills. This will make cleanup much easier.
- Sand the lamp: Using medium-grit sandpaper, gently roughen up the surface of the lamp. This will help the primer and paint adhere better. Make sure to sand any areas that will be painted.
- Wipe away dust: After sanding, wipe down the lamp with a clean, dry cloth to remove any dust or debris. This will ensure a smooth and clean painting surface.
By following these steps, you’ll create the perfect canvas for your paint application and ensure a professional-looking finish. Once your lamp is prepped and ready, it’s time to move on to the next step: applying the primer.
Applying the Primer
Now that your metal lamp is properly prepped, it’s time to apply the primer. Primer is essential for promoting paint adhesion and providing a smooth and even base for your final coat of paint. Here’s how to apply the primer:
- Shake the primer can: Thoroughly shake the can of primer to ensure that the contents are well mixed. This will help achieve consistent coverage.
- Start spraying: Holding the can approximately 6-8 inches away from the lamp, begin spraying the primer in a smooth and even motion. Start from the top and work your way down to ensure complete coverage.
- Overlap each pass: As you spray, make sure to overlap each pass slightly to achieve even coverage. This will help prevent any patchy areas once the primer dries.
- Keep a steady hand: Maintain a steady hand and a consistent distance from the lamp to ensure an even coat of primer. Avoid spraying too heavily in one area, as this can lead to drips or pooling.
- Allow the primer to dry: Follow the manufacturer’s instructions for drying time. Typically, it is recommended to allow the primer to dry for 24 hours, but this may vary depending on the specific product used.
- Check for any imperfections: After the primer has dried, inspect the lamp for any imperfections or areas that may need further sanding or touch-ups. If necessary, lightly sand and apply a second coat of primer.
- Wipe away any dust: Before moving on to the next step, use a clean, dry cloth to wipe away any dust or debris that may have settled on the lamp surface.
Applying the primer is a crucial step in ensuring a smooth and durable paint finish. Once the primer is dry and any necessary touch-ups are done, it’s time to move on to the exciting part – applying the paint!
Before painting a metal lamp, make sure to clean the surface thoroughly with a degreaser to remove any dirt or oil. This will help the paint adhere better and result in a smoother finish.
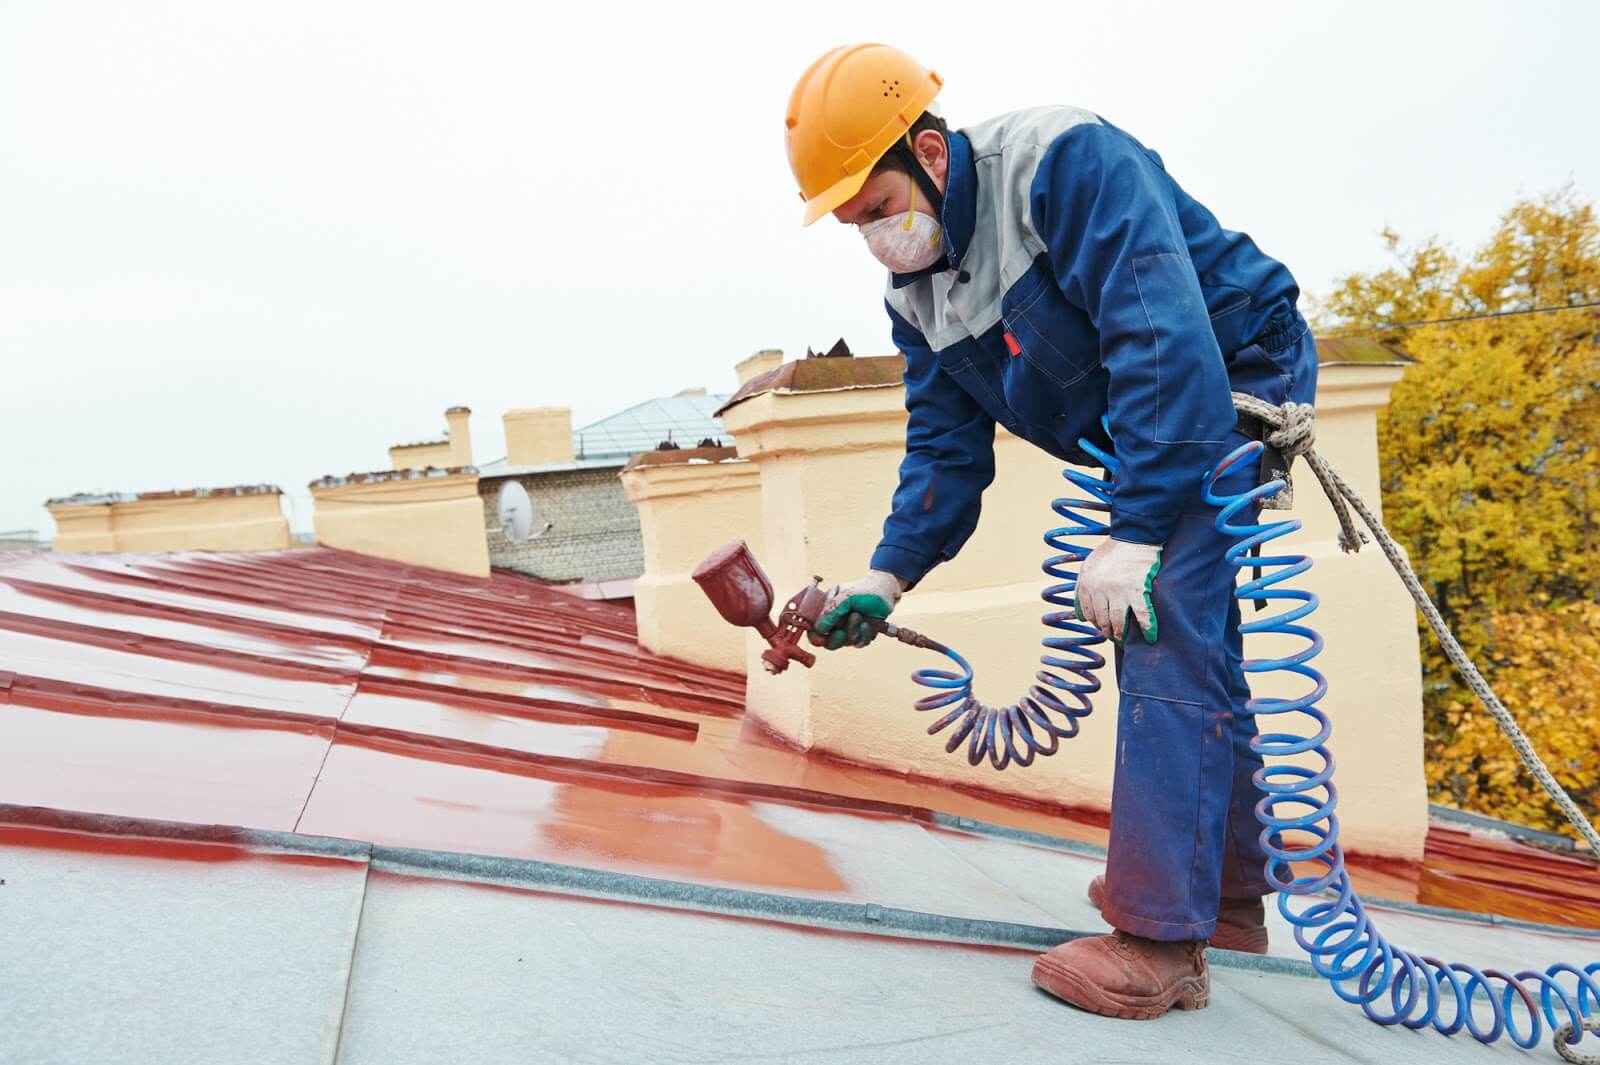
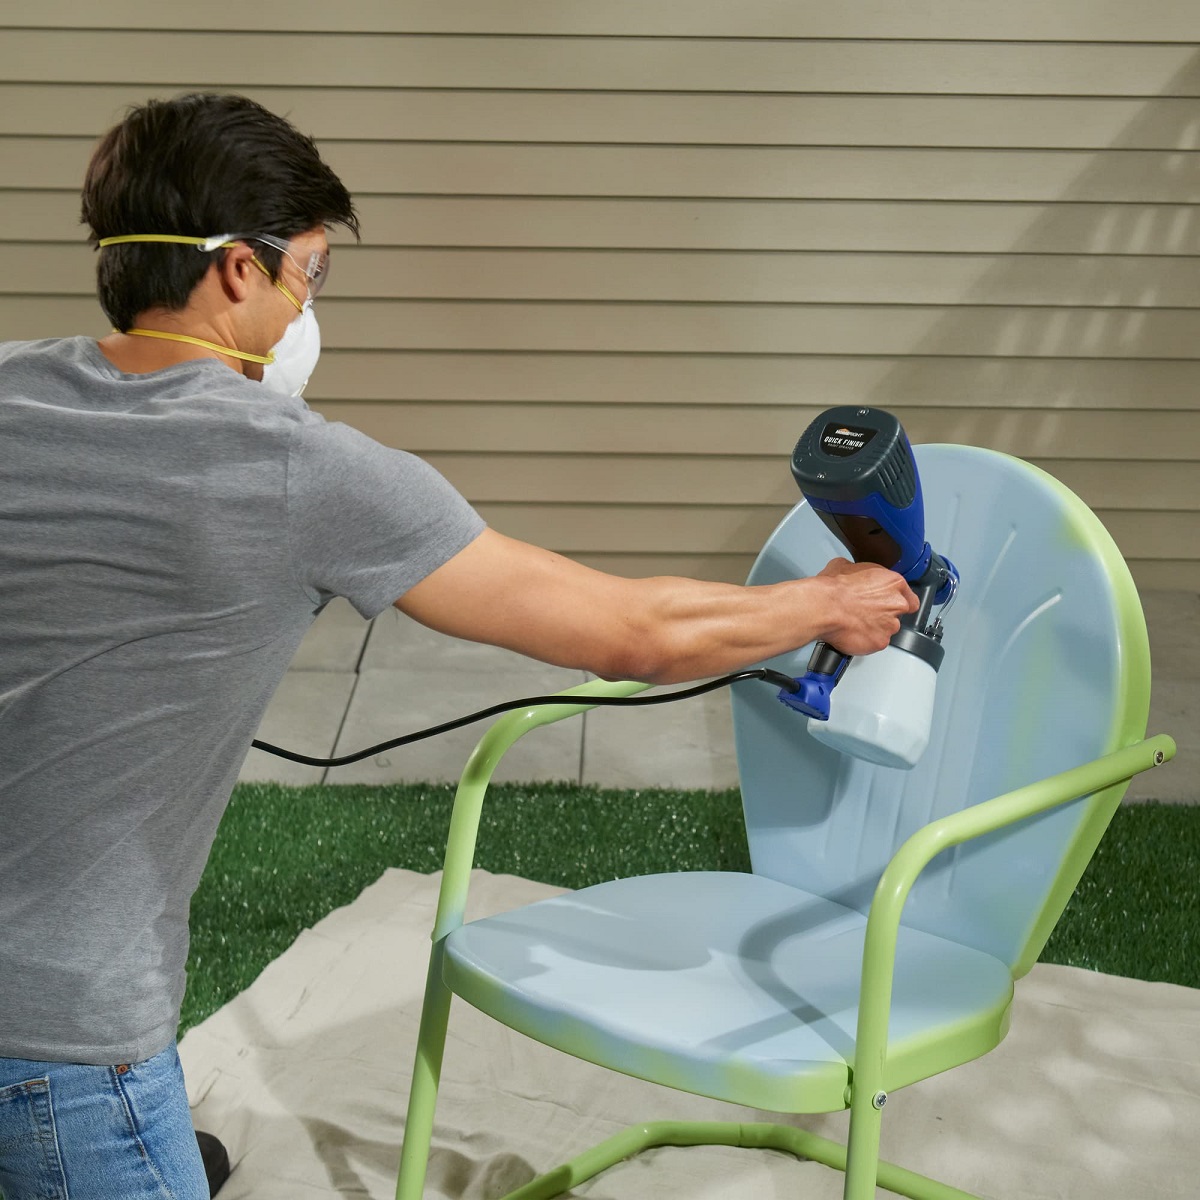
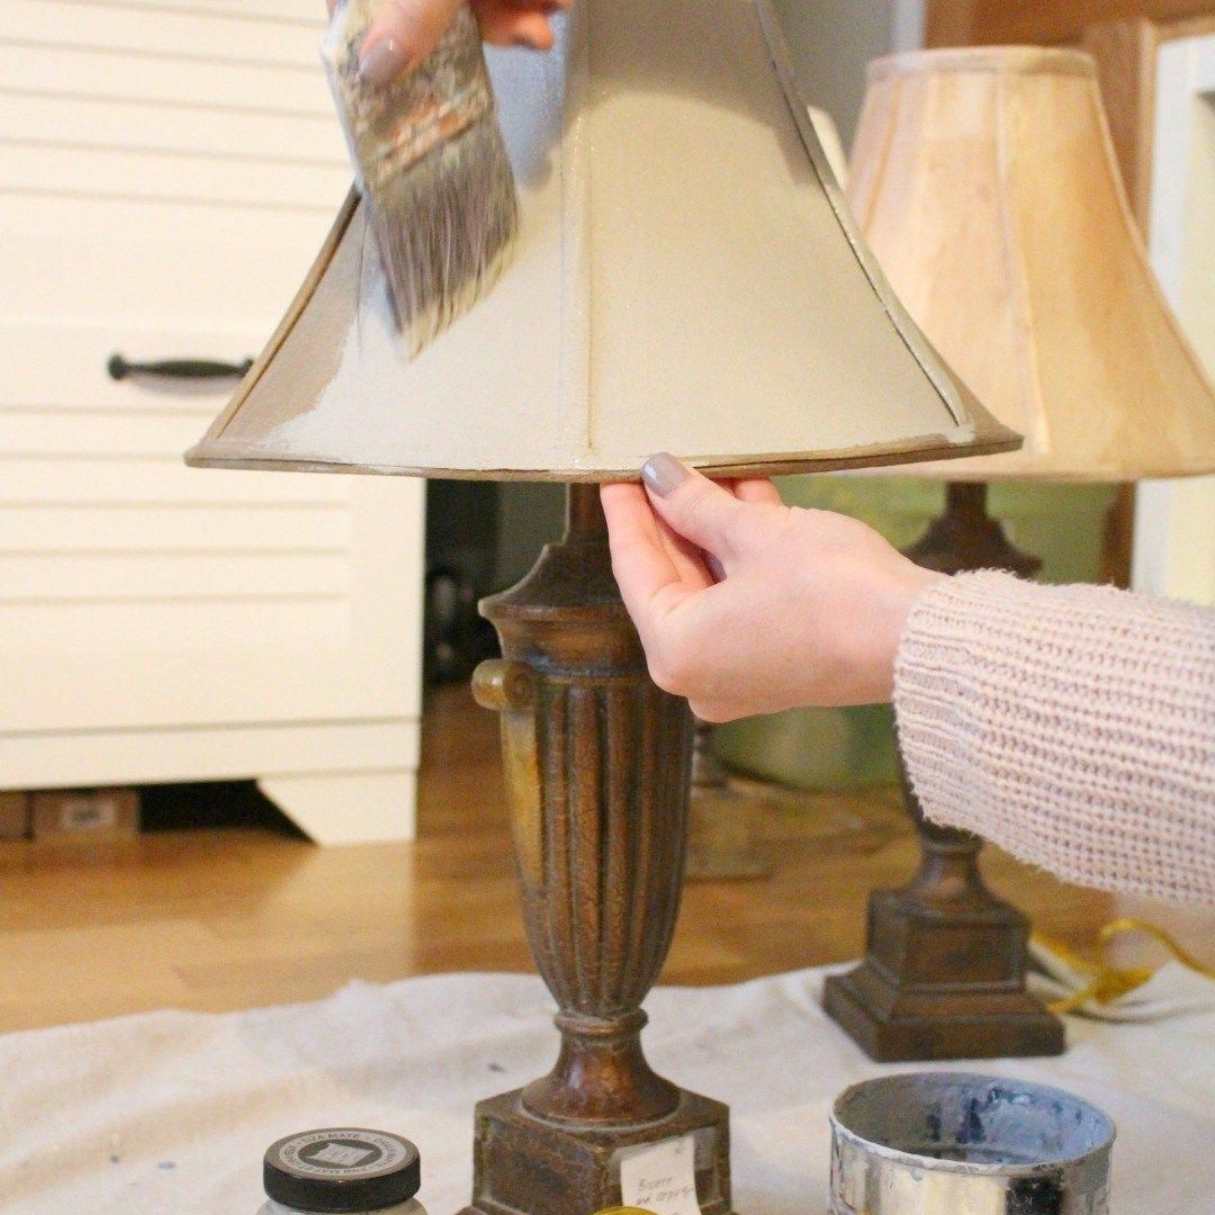
Applying the Paint
Now that your lamp is prepped and the primer is dry, it’s time to apply the paint. The paint you choose will determine the overall look and feel of your metal lamp, so choose a color that complements your decor style. Here’s how to apply the paint:
- Shake the paint can: Just like with the primer, give the paint can a good shake to mix the contents thoroughly.
- Start spraying or painting: If you’re using spray paint, hold the can about 6-8 inches away from the lamp and apply thin, even coats in a sweeping motion. For a brush-on paint, use a high-quality paintbrush and apply smooth, even strokes in the direction of the lamp’s shape.
- Overlap each pass: Whether you’re spraying or painting, make sure to overlap each pass slightly to ensure even coverage. This will help avoid any streaks or uneven patches in the final finish.
- Apply multiple coats if needed: Depending on the color and coverage you desire, you may need to apply multiple coats of paint. Allow each coat to dry according to the manufacturer’s instructions before applying the next one.
- Check for any drips or pooling: While the paint is still wet, check for any drips or pooling and smooth them out with a brush or gently wipe them away if needed.
- Allow the paint to dry: Follow the paint manufacturer’s instructions for drying time. Typically, it is recommended to allow the paint to dry for at least 24 hours before handling or moving the lamp.
Remember to work in a well-ventilated area and protect your work surface from any overspray or spills. Applying the paint requires a steady hand and attention to detail, but with patience and care, you’ll achieve a beautifully painted metal lamp.
If you want to add an extra layer of protection and shine to your painted lamp, you can also consider applying a clear coat after the paint has fully dried. This will provide additional durability and a polished finish.
Now that you’ve applied the paint and allowed it to dry, it’s time to move on to the next step of the process – allowing the paint to fully cure before adding any finishing touches.
Read more: How To Paint Metal Cabinet
Allowing the Paint to Dry
After applying the paint to your metal lamp, it’s crucial to allow it to fully dry and cure before moving or handling the lamp. Proper drying time will ensure a durable and long-lasting finish. Here’s what you need to know about allowing the paint to dry:
- Follow the manufacturer’s instructions: Different paints have varying drying times, so it’s essential to refer to the specific instructions provided by the paint manufacturer. Typically, it is recommended to allow the paint to dry for at least 24 hours before handling.
- Avoid touching or moving the lamp: While the paint is drying, avoid touching or moving the lamp to prevent any smudges or damage to the finish. Patience is key in this step to achieve the best results.
- Keep the lamp in a well-ventilated area: To facilitate the drying process, ensure that the lamp is placed in a well-ventilated area with good airflow. This will help the paint cure faster and prevent any lingering odors.
- Check for any additional touch-ups: Once the paint is fully dry, inspect the lamp for any areas that may need additional touch-ups or fixing. If necessary, lightly sand and apply another thin coat of paint to achieve the desired look.
Allowing the paint to dry completely is essential to avoid any smudging or damage to the finish of your metal lamp. It’s worth the wait to ensure a polished and professional result. Once the paint is dry and any touch-ups have been made, you’re ready to move on to the final step – adding the finishing touches to your painted lamp.
Finishing Touches
With the paint fully dry, it’s time to add the finishing touches to your painted metal lamp. These final steps will enhance the overall look and ensure your lamp is ready to be displayed. Here’s what you can do to complete your project:
- Remove any masking materials: Carefully remove any painter’s tape or masking materials that were used to protect certain areas during the painting process. Take your time to avoid any accidental damage to the newly painted surface.
- Reattach the lampshade and lightbulb: Once the paint is dry and your lamp is free of any masking materials, reattach the lampshade and screw in the lightbulb. This will bring your lamp back to its functional state.
- Inspect for any imperfections: Take a close look at your painted lamp and inspect it for any imperfections or areas that may require additional touch-ups. If you notice any unevenness or spots that need attention, you can carefully touch them up with a small brush and matching paint color.
- Apply a clear coat (optional): If you want to add an extra layer of protection and shine to your painted lamp, consider applying a clear coat. This coat will help seal the paint and provide durability to the finish. Use a high-quality clear coat specifically designed for metal surfaces, following the instructions on the product label.
- Clean and polish: Before placing your lamp in its designated spot, give it a thorough cleaning and polishing. Use a soft cloth and a mild cleaning solution to remove any fingerprints, smudges, or dust. Gently buff the surface to restore its shine.
- Display your painted lamp: Finally, find the perfect spot to showcase your newly painted lamp. Whether it’s on a side table, desk, or nightstand, your repurposed metal lamp will add a touch of style and personality to any room.
By paying attention to these finishing touches, you’ll ensure that your painted metal lamp looks professional, well-polished, and ready to be admired.
Congratulations! You have successfully transformed your old metal lamp into a stunning piece of decor that brings new life to your space. Enjoy the satisfaction of a job well done and bask in the glow of your beautifully painted metal lamp.
Remember, the techniques and tips discussed in this article can be applied to various metal lamp styles and sizes. So, don’t be afraid to unleash your creativity and explore different colors and finishes to make your lamp truly unique.
Conclusion
Painting a metal lamp is a rewarding DIY project that allows you to transform an old or worn-out piece into a stylish and personalized decor item. By following the step-by-step process outlined in this article, you can achieve professional-looking results and give your metal lamp a fresh new look that complements your home decor.
From gathering the necessary materials to preparing the lamp, applying the primer and paint, allowing for proper drying time, and adding the finishing touches, each step is crucial in achieving a durable and aesthetically pleasing outcome.
Remember to choose a well-ventilated area, wear protective gear, and follow the instructions provided by the paint manufacturer for the best results. Taking the time to properly prepare and prime the lamp surface ensures a smooth and even application of paint, while allowing the paint to dry completely before handling or adding any finishing touches guarantees a long-lasting and professional finish.
Whether you choose to match your existing color scheme or experiment with bold and vibrant hues, painting your metal lamp provides the perfect opportunity to add a personal touch to your home decor. With a little creativity and attention to detail, you can create a striking piece that elevates the ambiance of any room.
So, don’t throw away that old metal lamp just yet! Give it a fresh coat of paint, unleash your creativity, and enjoy the sense of accomplishment that comes with transforming something old into something new. Step into the world of DIY painting and make your metal lamp shine bright once again.
Happy painting!
Frequently Asked Questions about How To Paint A Metal Lamp
Was this page helpful?
At Storables.com, we guarantee accurate and reliable information. Our content, validated by Expert Board Contributors, is crafted following stringent Editorial Policies. We're committed to providing you with well-researched, expert-backed insights for all your informational needs.