Furniture
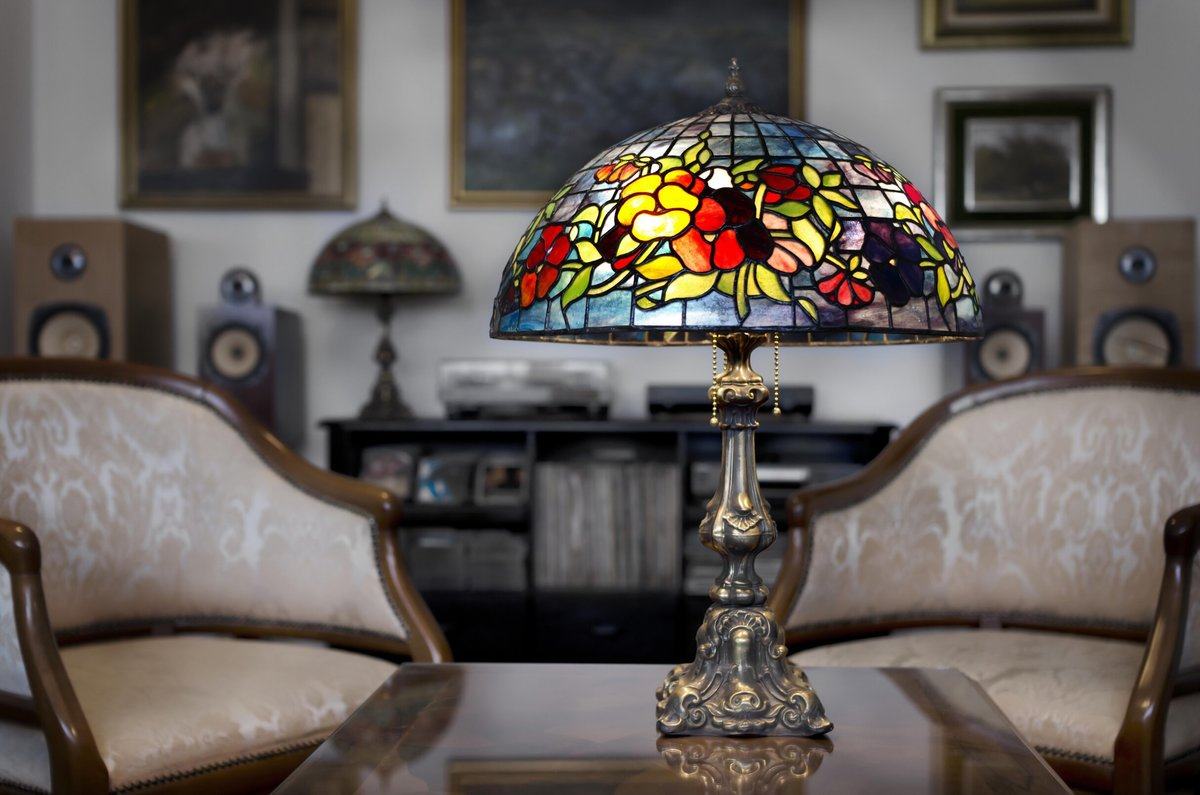
How To Repair A Stained Glass Lamp Shade
Modified: February 6, 2024
Learn how to repair a stained glass lamp shade and bring new life to your furniture. Step-by-step guide with tips and tricks to help you restore your stained glass lamp shade.
(Many of the links in this article redirect to a specific reviewed product. Your purchase of these products through affiliate links helps to generate commission for Storables.com, at no extra cost. Learn more)
Introduction
Welcome to our comprehensive guide on how to repair a stained glass lamp shade. Stained glass lamp shades are beautiful and intricate pieces of art that add a touch of elegance and character to any room. However, over time, these delicate lamp shades can suffer from wear and tear, including stains, cracks, and broken glass pieces. Fortunately, with the right tools, materials, and techniques, you can restore the beauty and functionality of your stained glass lamp shade.
In this article, we will walk you through each step of the repair process, from assessing the damage to finishing touches. Whether you are a DIY enthusiast or a professional, our guide will provide you with the knowledge and expertise needed to successfully repair a stained glass lamp shade.
Before we dive into the detailed steps, it is important to gather all the necessary tools and materials to ensure a smooth repair process. Let’s take a look at what you’ll need:
Key Takeaways:
- Restore the beauty of your stained glass lamp shade by assessing damage, cleaning, repairing cracks, replacing broken pieces, and adding finishing touches. With patience and care, you can bring back its timeless elegance.
- Equip yourself with the right tools and materials to repair your stained glass lamp shade, from cleaning supplies to epoxy resin glue and soldering equipment. By following the step-by-step guide, you can restore its beauty and functionality.
Read more: How To Make A Stained Glass Lamp Shade
Tools and Materials Needed
- Glass cleaner
- Soft cloth or sponge
- Mild detergent
- Toothbrush
- Epoxy resin glue
- Clear adhesive tape
- Replacement glass pieces
- Soldering iron
- Solder
- Flux
- Safety goggles
- Heat-resistant gloves
Now that you have all the necessary tools and materials, let’s proceed to the first step: assessing the damage of your stained glass lamp shade.
Key Takeaways:
- Restore the beauty of your stained glass lamp shade by assessing damage, cleaning, repairing cracks, replacing broken pieces, and adding finishing touches. With patience and care, you can bring back its timeless elegance.
- Equip yourself with the right tools and materials to repair your stained glass lamp shade, from cleaning supplies to epoxy resin glue and soldering equipment. By following the step-by-step guide, you can restore its beauty and functionality.
Read more: How To Make A Stained Glass Lamp Shade
Tools and Materials Needed
Before you begin repairing your stained glass lamp shade, it’s essential to gather all the necessary tools and materials. Here’s a list of what you’ll need:
Glass cleaner
A good quality glass cleaner is crucial for removing dirt, grime, and smudges from the surface of the lamp shade. Look for a cleaner specifically designed for glass to ensure optimal results.
Soft cloth or sponge
To apply the glass cleaner and gently scrub away any stains or debris, you’ll need a soft cloth or a sponge. Avoid using abrasive materials that could scratch or damage the delicate glass surface.
Read more: How To Put A Lamp Shade On
Mild detergent
In some cases, a mild detergent may be necessary to remove stubborn stains from the lamp shade. Choose a gentle, non-abrasive detergent and dilute it with water before using it on the glass.
Toothbrush
A toothbrush with soft bristles can be handy for reaching into small crevices and cleaning hard-to-reach areas on the lamp shade.
Epoxy resin glue
If your lamp shade has cracks or chips that need repair, epoxy resin glue is an excellent adhesive for securing the broken pieces together. It provides a strong bond and dries clear, ensuring a seamless repair.
Clear adhesive tape
Clear adhesive tape can be used to temporarily hold broken glass pieces in place while you work. It provides stability and prevents further damage to the lamp shade.
Read more: How To Cover A Lamp Shade
Replacement glass pieces
If your lamp shade has significant damage and requires the replacement of glass pieces, make sure to have suitable replacement pieces on hand. Measure the dimensions and shape of the broken pieces to ensure an accurate replacement.
Soldering iron
If you need to repair cracked or broken solder lines in your stained glass lamp shade, a soldering iron is essential for melting the solder and creating a secure bond between the pieces.
Solder
Solder is a fusible metal alloy with a low melting point that is used to connect glass pieces together. It creates a strong and durable joint, ensuring the stability of the lamp shade.
Flux
Flux is a chemical compound that helps clean the metal surfaces and promotes the flow of solder during the soldering process. It ensures a smooth and reliable bond between the solder and the glass.
Read more: How To Dye Lamp Shades
Safety goggles
Your safety is a top priority when working with glass and a soldering iron. Safety goggles protect your eyes from any flying glass shards or solder splatter during the repair process.
Heat-resistant gloves
When using a soldering iron, heat-resistant gloves provide protection for your hands from burns and ensure a firm grip on the lamp shade and tools.
Now that you have all the necessary tools and materials, you are ready to begin assessing the damage and cleaning your stained glass lamp shade.
Assessing the Damage
Before you start the repair process, it’s important to assess the damage to your stained glass lamp shade. This will help you determine the extent of the repairs needed and the appropriate course of action. Here are two crucial steps in assessing the damage:
Identifying the type of stains
Take a close look at the stains on the glass surface. Stains can be caused by various factors, such as dust, grease, or oxidation. Identifying the type of stains will help you choose the most effective cleaning method. For example, dust and surface grime can usually be removed with a simple glass cleaner and a soft cloth. On the other hand, stubborn stains may require a mild detergent or additional cleaning techniques.
Read more: How To Store Lamp Shades
Inspecting the structural integrity
Carefully examine the lamp shade for any cracks, chips, or broken glass pieces. Check the overall structural integrity of the lamp shade to ensure it is stable and safe to use. If you notice any signs of damage, such as loose or wobbly glass pieces, prioritize repairing these areas to prevent further deterioration.
If you find small cracks or chips, they can usually be repaired without having to replace the entire piece of glass. However, if the damage is extensive or compromising the stability of the lamp shade, you may need to consider replacing the affected glass pieces.
Assessing the damage will give you a clear picture of what needs to be addressed during the repair process. Whether it’s cleaning stains or repairing cracks, knowing the extent of the damage will help you plan and execute the necessary repairs effectively.
Cleaning the Stained Glass Lamp Shade
Now that you have assessed the damage to your stained glass lamp shade, it’s time to clean the surface and remove any dust, dirt, or stains that may have accumulated over time. Cleaning the lamp shade not only improves its appearance but also ensures that the repairs will be performed on a clean and smooth surface. Here are the steps to follow:
Removing dust and dirt
Begin by gently removing any loose dust or dirt particles from the lamp shade. You can use a soft cloth or a dry brush to carefully brush away the debris. Be cautious not to apply excessive pressure that could potentially damage the delicate glass.
Cleaning the glass surface
Using a glass cleaner and a soft cloth or sponge, apply the cleaner to the stained glass surface. Gently wipe the surface in circular motions, paying close attention to any stained or dirty areas. Be thorough but take care not to scrub too hard, as this could scratch the glass.
Read more: How To Decorate Lamp Shades
Removing stubborn stains
If you encounter stubborn stains that do not come off with regular cleaning, you may need to use a mild detergent. Mix a small amount of the detergent with water and apply it to the stained area using a soft cloth or a toothbrush. Gently scrub the stains in a circular motion until they begin to fade away.
If the stains persist, you can try using a specialized stained glass cleaner or a solution of vinegar and water. However, make sure to test any new cleaning solution on a small, inconspicuous area to ensure it does not cause any damage or discoloration.
Once you have successfully cleaned the stained glass lamp shade and removed all the dust, dirt, and stains, it will be ready for the next steps of the repair process. As a cautionary note, always handle the lamp shade with care to avoid any accidental damage during the cleaning process.
Repairing Small Cracks and Chips
If your stained glass lamp shade has small cracks or chips, don’t worry – they can be repaired with a few simple steps. Here’s how to fix them:
Preparing the surface
Start by cleaning the damaged area of the lamp shade using a glass cleaner or a mild detergent. Remove any dirt and dust particles to create a clean surface for the repair. Ensure that the area is completely dry before proceeding.
Applying epoxy resin glue
Apply a small amount of epoxy resin glue to the cracked or chipped area. Use a toothpick or a small brush to spread the glue evenly over the surface. Be careful not to apply too much glue, as it can cause overflow and become visible on the glass.
Make sure the glue covers the entire damaged area and seeps into any cracks. Epoxy resin glue is an excellent choice for this repair as it provides a strong and durable bond. Choose a clear or transparent epoxy resin to ensure that the repair is not easily noticeable.
Read more: How To Shade Glass
Smoothing the repaired area
After applying the epoxy resin, use a toothpick or a small brush to smooth out the glued area. Ensure that the repaired section is level with the surrounding glass. This will help create a seamless and invisible repair.
If necessary, you can lightly scrape away any excess glue using a razor blade or a small knife. Be extremely careful during this step to avoid scratching the surrounding glass or causing any further damage.
Polishing the glass
To restore the shine and clarity of the repaired area, use a gentle glass cleaner or a mixture of vinegar and water. Apply the cleaner to a soft cloth and gently buff the repaired section in small circular motions. This will help blend the repaired area with the rest of the glass and ensure a polished finish.
Remember to handle the lamp shade with care throughout the repair process to avoid any accidental damage. Allow the repaired glass to dry completely before moving on to the next step of the repair process.
With the cracks and chips repaired and the glass polished, your stained glass lamp shade will start to regain its original beauty and charm. However, if your lamp shade has broken glass pieces that cannot be repaired, you’ll need to replace them, which we’ll discuss in the next section.
Replacing Broken Glass Pieces
If your stained glass lamp shade has broken glass pieces that cannot be repaired, you will need to replace them. Here’s a step-by-step guide on how to replace broken glass pieces:
Removing the damaged pieces
Begin by carefully removing the broken glass pieces from the lamp shade. Use caution and take your time to avoid causing further damage to the surrounding glass. If necessary, you can use a pair of needle-nose pliers or a thin blade to loosen any adhesive or solder that may be holding the pieces in place.
Read more: How To Measure A Lamp For A New Lamp Shade
Cutting new glass pieces
Measure the dimensions of the broken glass pieces and transfer those measurements onto a new piece of stained glass. Use a glass cutter to carefully score the marked lines on the glass. Place the scored line over a straight edge and gently break the glass along the scored line. Repeat this process for each replacement piece you need.
Ensure that the new glass pieces are cut precisely to fit the empty spaces left by the broken pieces. Take into consideration any curves or contours of the lamp shade to ensure a proper fit.
Fitting the new glass pieces
Once you have cut the new glass pieces, place them into the empty spaces of the lamp shade. Check their fit and make any necessary adjustments to ensure they align properly and are level with the surrounding glass.
If the new glass pieces don’t fit perfectly, you may need to trim them further using the glass cutter or a grinding tool. Take your time and be patient to achieve the desired fit.
Securing the glass with adhesive tape
Temporarily secure the new glass pieces in place using clear adhesive tape. This will hold the pieces securely while you prepare to permanently attach them. It’s important to use clear tape to prevent it from being visible once the repair is complete.
Ensure that the tape is placed strategically to provide support for the new glass pieces while allowing access to the areas where adhesive or solder will be applied.
With the broken glass pieces replaced and securely taped, you are now ready to proceed with permanently securing them by applying adhesive or solder. Remember to take your time and work carefully to ensure a seamless repair that blends harmoniously with the rest of the lamp shade.
Soldering Cracked or Broken Solder Lines
If your stained glass lamp shade has cracked or broken solder lines, soldering is the technique you’ll need to use to repair them. Soldering creates a strong and durable bond between the pieces of glass. Here’s how to solder cracked or broken solder lines:
Read more: How To Make A Paper Lamp Shades
Preparing the area
Begin by cleaning the area where the solder lines are damaged. Use a glass cleaner or a mixture of vinegar and water to remove any dirt, grime, or flux residue from the surrounding glass and the cracked solder lines. Ensure the area is completely dry before proceeding.
Applying flux and solder
Apply a small amount of flux to the cracked or broken solder lines. Flux helps remove any oxidation and ensures a clean and smooth soldering surface. Using a soldering iron, heat the flux until it becomes liquid and flows smoothly.
Once the flux is melted, apply solder to the cracked or broken solder lines. Hold the solder wire against the heated flux, allowing it to melt and flow into the damaged areas. Ensure a thin, even layer of solder covers the entire length of the cracked or broken solder lines.
Reinforcing weak solder joints
If you notice weak solder joints in the surrounding areas of the damaged solder lines, it’s important to reinforce those joints as well. Apply flux and solder to these weak points to strengthen the overall stability of the lamp shade.
As you work with the soldering iron, ensure you follow proper soldering safety precautions. Use a soldering iron stand to hold the iron when not in use, wear safety goggles, and work in a well-ventilated area to avoid inhaling fumes.
Continue soldering all the affected solder lines until all the cracks and breaks are repaired. Take your time and work carefully to ensure proper adhesion and a seamless repair. Allow the soldered areas to cool completely before proceeding with the finishing touches.
Finishing Touches
With the main repairs completed, it’s time to give your stained glass lamp shade those final touches that will enhance its appearance and make it look as good as new. Here are the key steps to take:
Read more: How To Paint A Lamp Shade
Cleaning any residual glue
Inspect the lamp shade for any residual glue from the repair process. Use a cloth dampened with warm water or a glass cleaner to gently wipe away any excess glue. Take care not to apply too much pressure to avoid damaging the surface of the glass or disturbing the repaired areas.
Using a mild detergent or glass cleaner, you can also give the entire lamp shade a final clean to ensure it is free from any remaining dirt or residues.
Buffing and polishing the lamp shade
To bring out the shine and beauty of the stained glass lamp shade, you can gently buff and polish the entire surface. Use a soft cloth or a specialized glass polishing cloth to gently wipe the glass in circular motions.
If desired, you can also apply a glass polishing compound to the cloth and gently buff the lamp shade to remove any minor scratches or imperfections. Make sure the compound is suitable for stained glass and follow the instructions provided by the manufacturer.
As you buff and polish the lamp shade, take care to cover all areas, including the repaired sections. This will ensure that the repaired areas blend in seamlessly with the rest of the glass, creating a uniform and polished appearance.
Once you have completed the finishing touches, step back and admire your restored stained glass lamp shade. The repairs you have made should be nearly invisible, and the overall beauty and charm of the lamp shade should be fully restored.
Remember to handle the lamp shade with care and avoid any sudden impacts or excessive pressure that could potentially cause damage. By following these steps and giving your stained glass lamp shade the attention it deserves, you can enjoy its timeless beauty for years to come.
Conclusion
Repairing a stained glass lamp shade can be a rewarding and satisfying process. With the right tools, materials, and techniques, you can bring back the beauty and functionality of your lamp shade. Whether you’re dealing with stains, small cracks, broken glass pieces, or damaged solder lines, following the steps outlined in this guide will help you restore your lamp shade to its former glory.
By carefully assessing the damage, cleaning the glass surface, and using appropriate repair methods such as epoxy resin glue or soldering, you can address various issues that may arise with your stained glass lamp shade. It’s important to note that patience, attention to detail, and a gentle touch are key to achieving successful repairs.
Throughout the repair process, always prioritize safety by wearing goggles and heat-resistant gloves when working with glass and soldering irons. Ensure proper ventilation in your workspace and take breaks as needed to prevent fatigue and maintain focus.
Once the repairs are complete, don’t forget the finishing touches. Cleaning away any residual glue and gently buffing and polishing the lamp shade will give it that final touch of perfection, ensuring it looks as good as new.
Remember, every stained glass lamp shade is unique, and the challenges you may encounter during the repair process may vary. If you’re unsure about any step or encounter significant damage, it’s always best to consult with a professional stained glass artisan who can provide expert guidance and assistance.
By investing time and effort into repairing your stained glass lamp shade, you’re not only preserving a beautiful piece of art but also honoring the craftsmanship and history behind it. Your restored lamp shade will continue to bring warmth, beauty, and a touch of elegance to your space for years to come.
So, roll up your sleeves, gather your tools, and embark on the journey of repairing your stained glass lamp shade. The satisfaction and joy of seeing your efforts pay off and witnessing the transformation of your lamp shade will be well worth it.
Frequently Asked Questions about How To Repair A Stained Glass Lamp Shade
Was this page helpful?
At Storables.com, we guarantee accurate and reliable information. Our content, validated by Expert Board Contributors, is crafted following stringent Editorial Policies. We're committed to providing you with well-researched, expert-backed insights for all your informational needs.