
Furniture
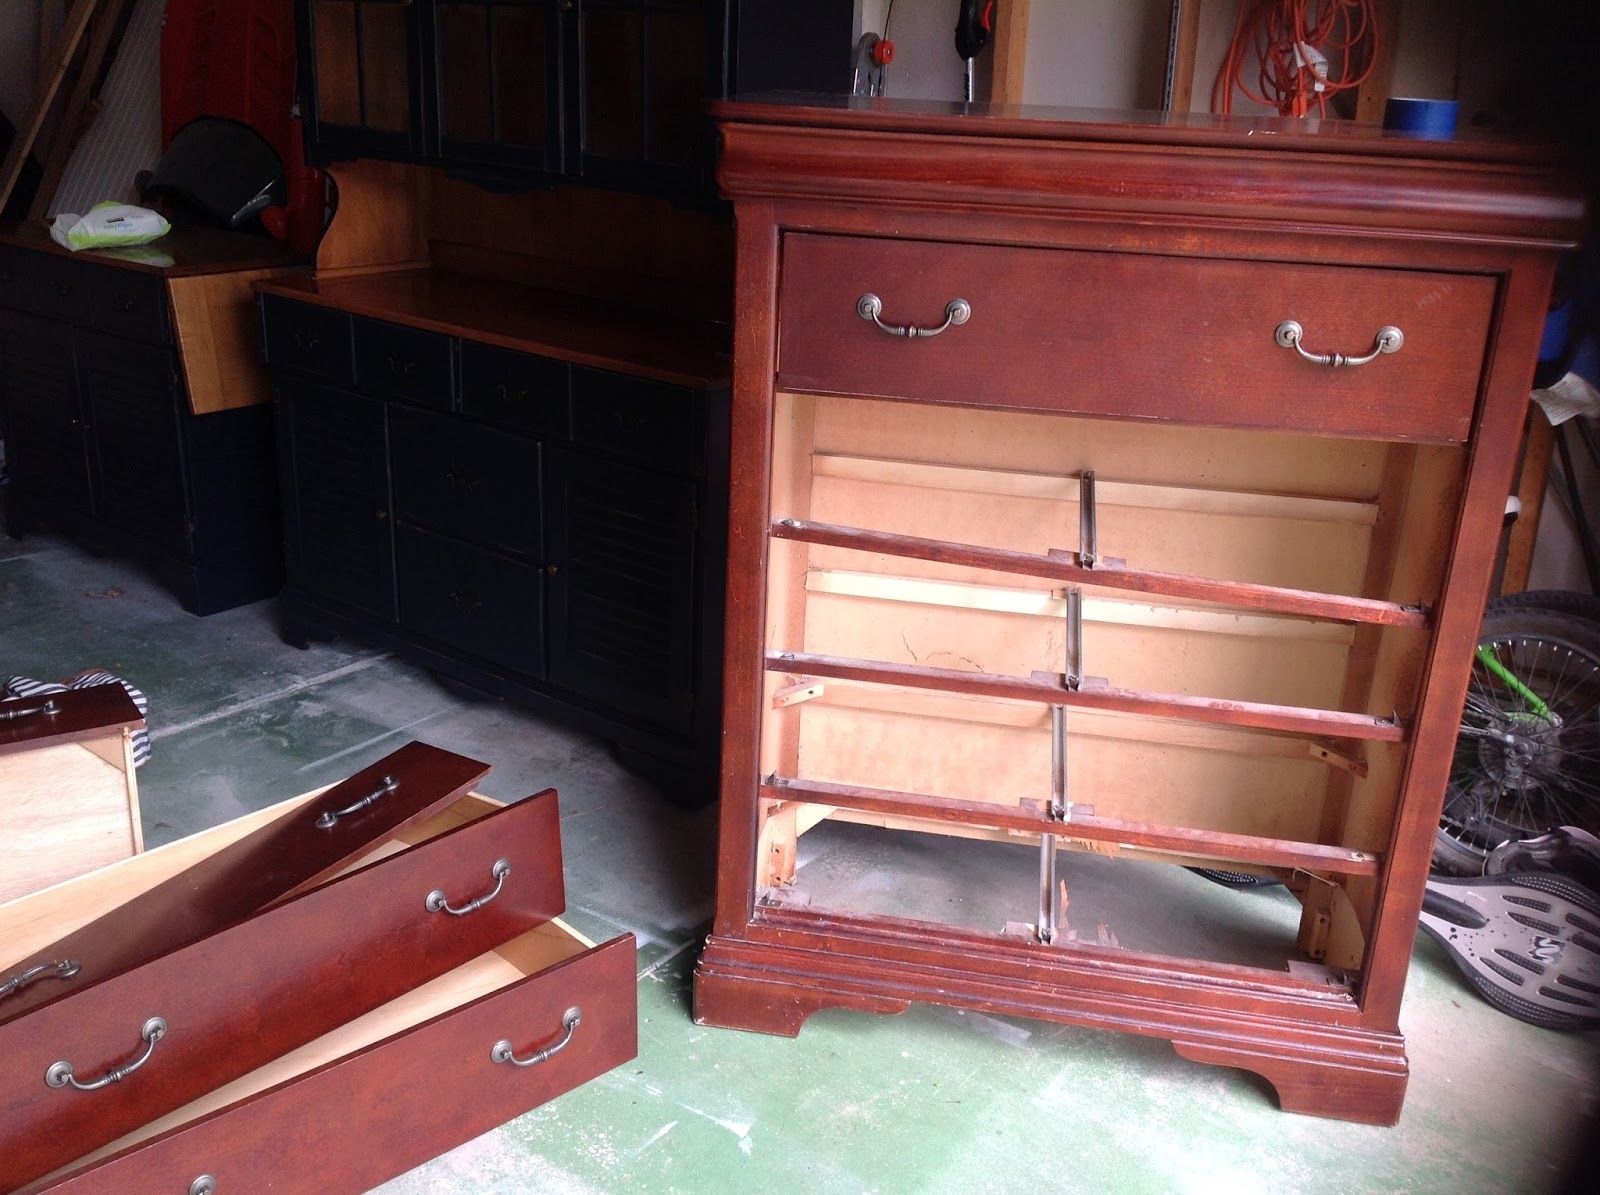
How To Repair The Bottom Of A Dresser Drawer
Modified: December 7, 2023
Learn how to fix the bottom of your dresser drawer with this comprehensive guide. Restore your furniture to its former glory with our easy step-by-step instructions.
(Many of the links in this article redirect to a specific reviewed product. Your purchase of these products through affiliate links helps to generate commission for Storables.com, at no extra cost. Learn more)
Introduction
When it comes to furniture, dressers are a staple in many homes. They provide a convenient storage solution for clothes, accessories, and other personal items. However, over time, the bottom of a dresser drawer may become damaged or worn out due to heavy use or improper handling.
If you’ve noticed that the bottom of your dresser drawer is sagging, cracked, or broken, don’t worry – it can be repaired! In this article, we will guide you through the steps to repair the bottom of a dresser drawer, restoring it to its original sturdy and functional state.
Repairing the bottom of a dresser drawer is a relatively simple process that can be completed with a few basic tools and materials. Whether you’re a seasoned DIY enthusiast or just starting out, this project can be successfully tackled by anyone with a little bit of patience and a willingness to learn.
Before we dive into the step-by-step instructions, let’s quickly go over the tools and materials you’ll need for this project.
Key Takeaways:
- Repairing the bottom of a dresser drawer is a manageable DIY project that can save money and extend the life of your furniture. With basic tools and materials, anyone can restore a sagging or damaged drawer bottom to its original sturdy state.
- By following the step-by-step instructions in this guide, you can assess, repair, reinforce, and even replace the bottom panel of a dresser drawer if necessary. With attention to detail and a touch of creativity, you can breathe new life into your furniture while enjoying the satisfaction of a successful DIY project.
Read more: How To Repair A Dresser Drawer
Tools and Materials Needed
Before you begin repairing the bottom of your dresser drawer, gather the following tools and materials:
- Flathead screwdriver
- Wood glue
- Clamps or weights
- Sandpaper (medium and fine grit)
- Paintbrush or foam brush (if applying finish or paint)
- Wood putty (for filling cracks or holes)
- Replacement panel (if the bottom is beyond repair)
- Measuring tape or ruler
- Saw (if cutting a replacement panel)
- Gloves and safety goggles
Having these tools and materials on hand will make the repair process smoother and more efficient. Make sure to wear gloves and safety goggles to protect yourself from any potential accidents.
Now that you have everything ready to go, let’s get started with repairing the bottom of your dresser drawer.
Step 1: Remove the Drawer
Before you can begin repairing the bottom of the dresser drawer, you’ll need to remove it from the dresser. Here’s how:
- Empty the drawer: Remove all items from the drawer and set them aside.
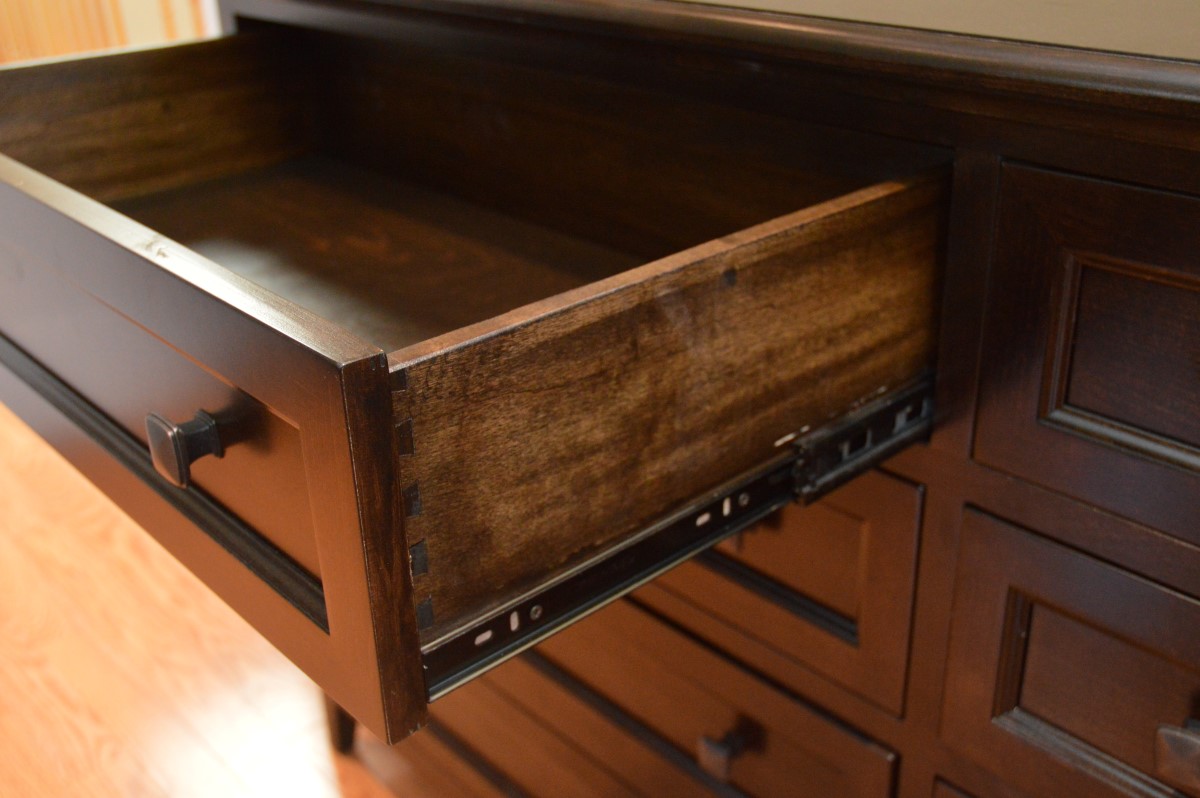
- Open the drawer completely: Pull the drawer out as far as it can go, ensuring it is fully extended.
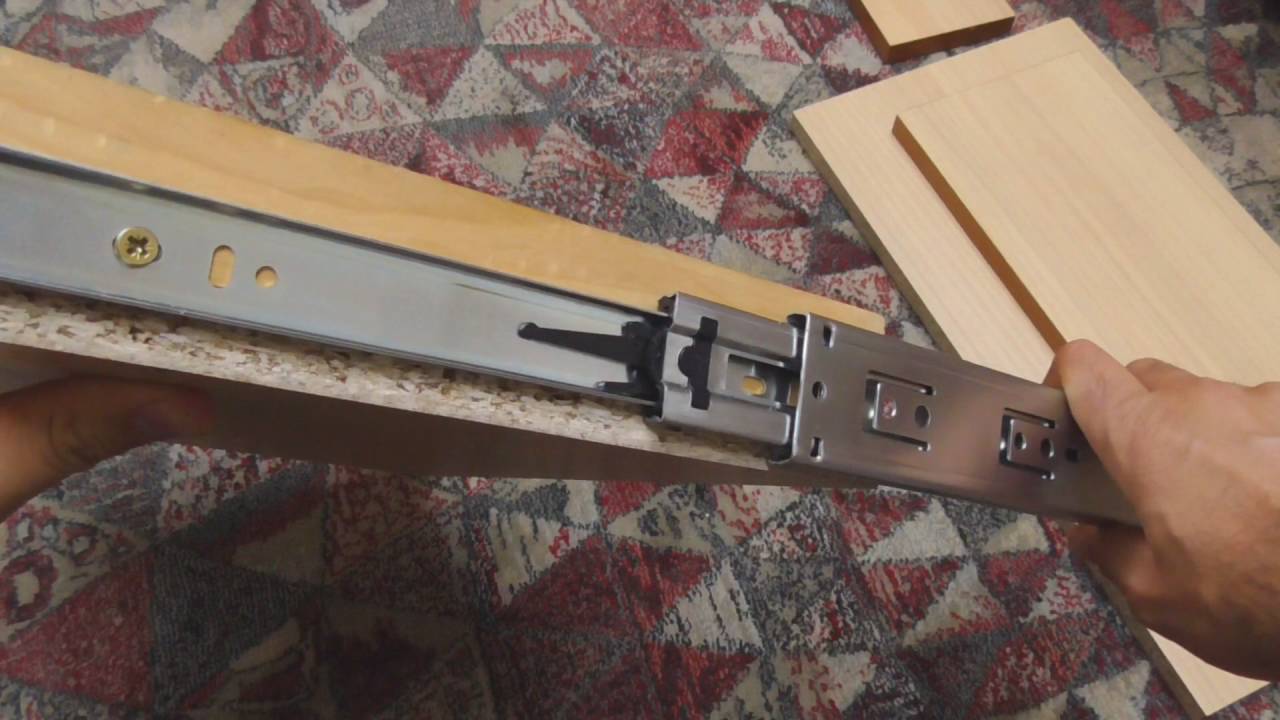
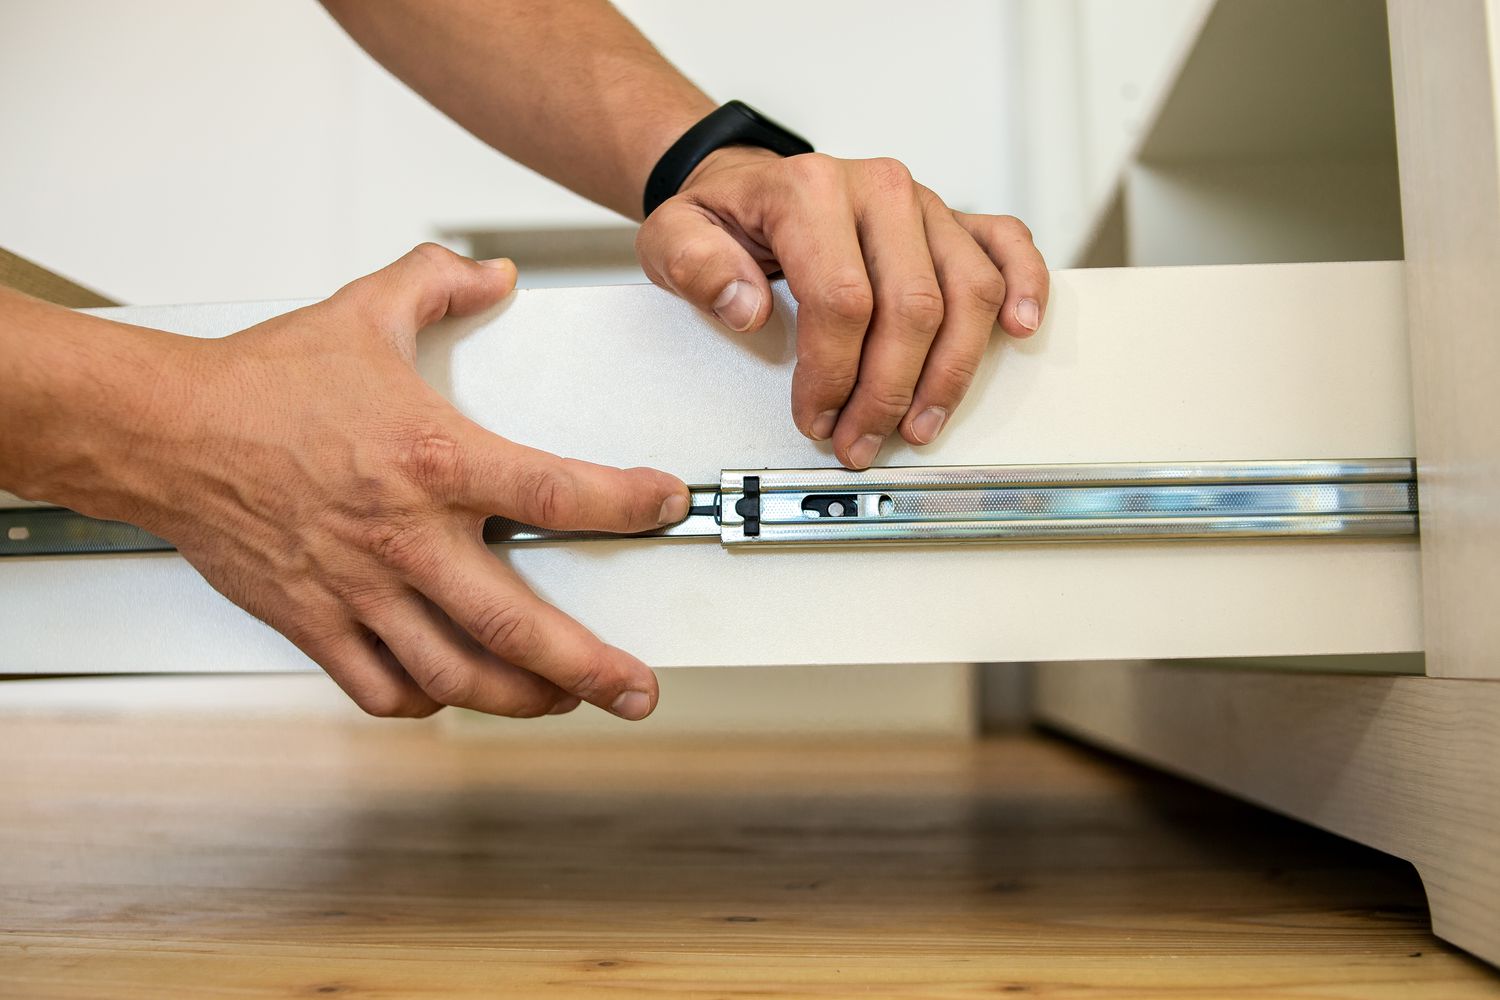
- Locate the release mechanisms: Look for the release mechanisms on the sides or bottom of the drawer. These could be metal slides or plastic levers.
- Release the drawer: Using your hands or a screwdriver, manipulate the release mechanisms to detach the drawer from the dresser. Be gentle to avoid damaging the drawer or dresser.
- Set the drawer aside: Once the drawer is detached, carefully set it aside in a safe and stable location.
By removing the drawer, you’ll have easier access to the bottom, allowing you to thoroughly inspect and repair it. Make sure to keep track of any screws or hardware that may have come loose during the removal process.
Now that the drawer is out of the way, we can move on to the next step: inspecting the damage.
Step 2: Inspect the Damage
With the drawer removed, it’s time to take a closer look at the bottom to assess the extent of the damage. Here’s what you should do:
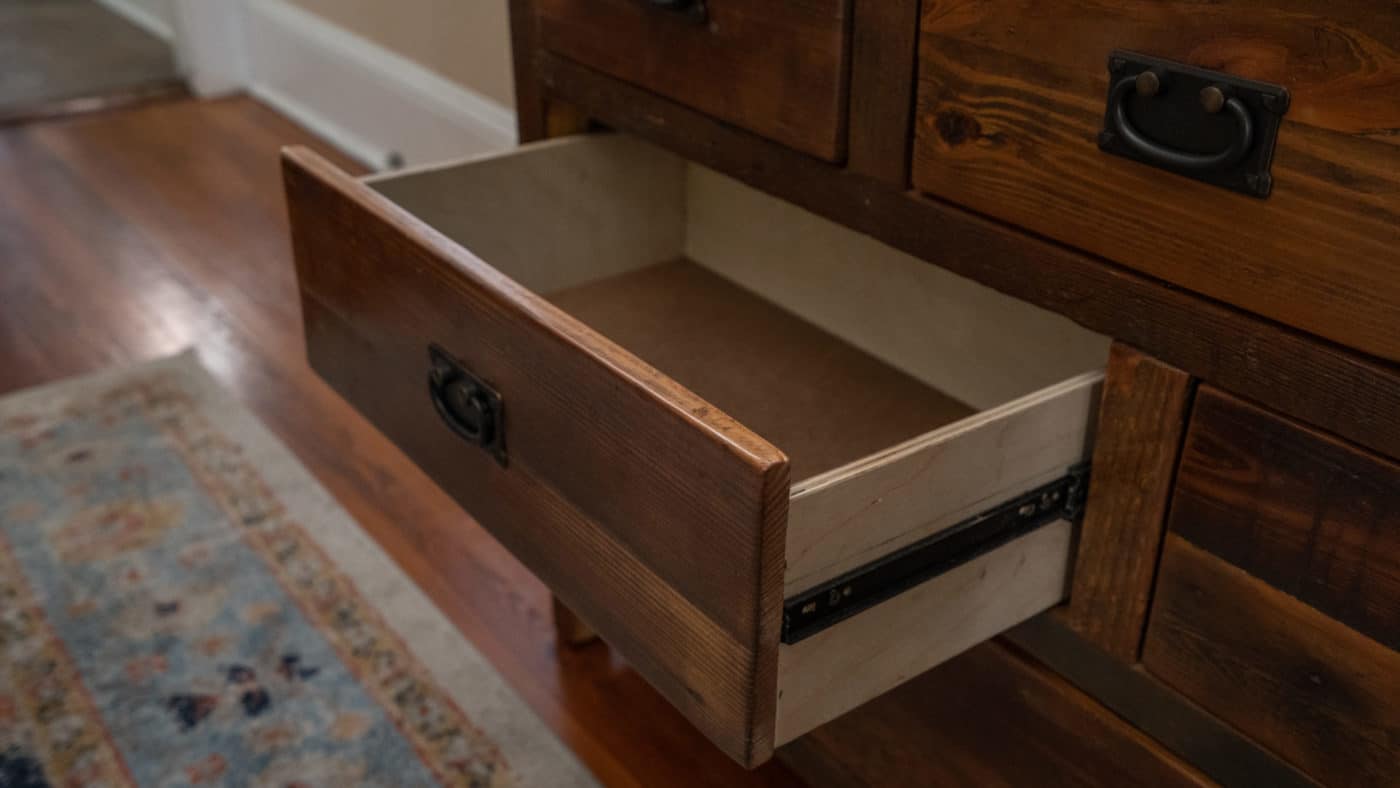
- Examine the bottom of the drawer: Carefully inspect the entire surface of the bottom panel. Look for any cracks, breaks, or signs of wear and tear.
- Check for loose or missing pieces: Pay attention to any loose or missing support pieces, such as wooden slats or dowels, that may contribute to the damage.
- Identify weak areas: Note any areas where the bottom panel feels weak or sagging. These areas may require additional reinforcement during the repair process.
- Assess the overall condition: Evaluate the overall condition of the bottom panel. Determine if it can be repaired or if a replacement panel is necessary.
By inspecting the damage, you’ll have a better understanding of what needs to be done to restore the bottom of the drawer. If the damage is relatively minor, you can move forward with repairing it. However, if the damage is extensive or the bottom panel is beyond repair, you may need to consider replacing it entirely.
Once you’ve assessed the damage, you can proceed to the next step: repairing cracks or breaks in the bottom panel.
Step 3: Repair Cracks or Breaks
If you’ve discovered cracks or breaks in the bottom panel of your dresser drawer, don’t worry – they can be fixed. Here’s how to repair them:
- Clean the damaged area: Use a clean cloth or brush to remove any dust or debris from the cracks or breaks. This will ensure a proper bond when applying wood glue.
- Apply wood glue: Squeeze a small amount of wood glue into the cracks or breaks in the bottom panel. Use a toothpick or small brush to spread the glue evenly along the damaged area.
- Press the cracks or breaks together: Gently press the cracked or broken sections of the bottom panel together to close the gaps. Hold them in place for a few minutes to allow the glue to set.
- Wipe off excess glue: Use a damp cloth to wipe off any excess wood glue that may have seeped out during the repair process. This will prevent it from drying and leaving a visible residue.
Wood glue is a strong adhesive that will bond the cracked or broken sections of the bottom panel together, restoring its structural integrity. It’s important to let the glue fully dry according to the manufacturer’s instructions before moving on to the next step.
If there are larger cracks or breaks that cannot be easily repaired with wood glue, you may need to consider using wood putty. Follow the instructions on the wood putty container to fill in the damaged areas, and sand it smooth once it has dried.
Now that you’ve repaired the cracks or breaks, we can move on to the next step: sanding and smoothing the bottom panel.
Read more: How To Line Dresser Drawers
Step 4: Sand and Smooth the Bottom
After repairing any cracks or breaks in the bottom panel of your dresser drawer, it’s time to sand and smooth the surface. This step will ensure a clean and even finish when you’re done. Here’s how to do it:
- Select the appropriate sandpaper: Start with a medium-grit sandpaper (around 120-150 grit) to remove any rough patches and imperfections. Then, switch to a finer grit sandpaper (around 220-240 grit) for a smoother finish.
- Sand the entire bottom panel: Use a sanding block or a folded piece of sandpaper to sand the entire surface of the bottom panel. Sand in a circular motion or along the grain of the wood, being careful not to apply too much pressure.
- Smooth out any rough areas: Pay extra attention to any rough or uneven areas on the bottom panel. Continuously check the surface with your hand to ensure it feels smooth and even.
- Remove dust and debris: Once you’re satisfied with the smoothness of the bottom panel, use a clean cloth or brush to wipe away any dust or debris that may have accumulated during the sanding process.
Sanding the bottom panel will not only create a more polished appearance but also help prepare the surface for the next steps, such as applying finish or paint, if desired. Remember to work in a well-ventilated area and wear a dust mask to protect yourself from inhaling any sanding dust.
With the bottom panel nicely sanded and smooth, it’s time to move on to the next step: reinforcing weak areas.
Use wood glue and clamps to reattach any loose or broken pieces at the bottom of the dresser drawer. Allow the glue to dry completely before using the drawer again.
Step 5: Reinforce Weak Areas
If you’ve identified any weak areas in the bottom panel of your dresser drawer during the inspection process, reinforcing them is essential to ensure its long-term stability. Here’s how you can reinforce the weak areas:
- Cut wooden slats or dowels: Measure the length and width of the weak areas and cut wooden slats or dowels to fit. These will provide additional support to strengthen the bottom panel.
- Apply wood glue: Apply a thin layer of wood glue along the length of the wooden slats or dowels.
- Position the slats or dowels: Place the slats or dowels on the weak areas of the bottom panel, ensuring they are centered and aligned properly.
- Secure with clamps or weights: Use clamps or place weights on top of the slats or dowels to hold them in place while the glue dries. Leave them in place for the recommended drying time according to the wood glue instructions.
- Remove clamps or weights: Once the wood glue has fully dried, remove the clamps or weights and check the stability of the reinforced areas.
By reinforcing the weak areas with additional support, you are strengthening the overall structure of the bottom panel. This will help prevent future sagging and ensure the durability of your dresser drawer.
If you don’t have the necessary tools or materials to cut and install wooden slats or dowels, an alternative option is to use metal corner brackets or braces. These can be secured to the weak areas of the bottom panel using screws. Just make sure to choose brackets or braces that are of appropriate size and strength for the load they will bear.
With the weak areas properly reinforced, we can now move on to the next step: replacing the bottom panel (if necessary).
Step 6: Replace Bottom Panel (if necessary)
If the damage to the bottom panel of your dresser drawer is extensive and cannot be effectively repaired, it may be necessary to replace the entire panel. Here’s how you can replace the bottom panel:
- Measure the dimensions: Carefully measure the length and width of the existing bottom panel to ensure the replacement panel will fit properly.
- Purchase a replacement panel: Visit your local hardware store or contact a professional furniture supplier to purchase a new panel that matches the size and material of the original.
- Remove the old panel: Using a screwdriver or appropriate tools, remove any screws or nails that are securing the old bottom panel to the drawer frame.
- Cut the replacement panel: If the replacement panel is not already cut to the correct size, use a saw or a sharp utility knife to trim it down to match the measurements you took earlier.
- Fit the replacement panel: Carefully fit the replacement panel into the bottom of the drawer, making sure it sits flush and securely within the frame.
- Secure the replacement panel: Use screws or nails to secure the replacement panel to the drawer frame. Make sure they are positioned in the same areas as the original fasteners.
- Test for stability: Gently test the stability of the replacement panel by applying slight pressure and ensuring it is securely in place.
Replacing the bottom panel may require a bit more effort and precision, but it can be a worthwhile investment if the original panel is beyond repair. Remember to select a replacement panel that matches the material and thickness of the existing drawer to maintain its structural integrity.
With the replacement panel in place, you can now move on to the optional step of applying finish or paint to enhance the appearance of your repaired dresser drawer.
Step 7: Apply Finish or Paint (optional)
If you want to give your repaired dresser drawer a fresh look or enhance its appearance, applying a finish or paint is an optional step. Here’s how you can apply finish or paint to your dresser drawer:
- Select the appropriate finish or paint: Choose a finish or paint that is suitable for the material of your dresser drawer. Common options include varnish, polyurethane, stain, or acrylic paint.
- Prepare the surface: If you’re applying a finish, lightly sand the surface of the bottom panel to create a smooth and clean surface. If you’re painting, you may need to prime the surface first for better adhesion.
- Apply the finish or paint: Use a paintbrush or foam brush to apply a thin and even layer of finish or paint to the bottom panel. Work in long, smooth strokes, following the grain of the wood if applicable.
- Allow time to dry: Follow the instructions on the finish or paint container to determine the recommended drying time between coats. Typically, multiple coats are necessary to achieve the desired finish or color.
- Sand between coats (optional): If you’re applying multiple coats, lightly sand the surface between coats with fine-grit sandpaper to create a smoother finish.
- Ensure proper ventilation: Make sure you are working in a well-ventilated area when applying finish or paint to minimize inhaling any fumes.
Applying a finish or paint can not only protect the surface of the bottom panel but also enhance the overall aesthetic of your dresser drawer. Choose a finish or paint color that complements your existing decor or personal style.
With the finish or paint applied and fully dried, you’re almost ready to reassemble your dresser drawer. But before that, let’s move on to the final step: reassembling the drawer.
Read more: How To Install Dresser Drawers
Step 8: Reassemble the Drawer
After completing all the necessary repairs, it’s time to reassemble the dresser drawer and put everything back together. Here’s how you can reassemble the drawer:
- Clean the drawer tracks: Use a clean cloth or brush to remove any dirt or debris from the drawer tracks inside the dresser.
- Reinsert the drawer: Position the drawer on the tracks and slide it back into the dresser, ensuring that it is properly aligned.
- Test the movement: Open and close the drawer a few times to ensure that it slides smoothly along the tracks without any binding or sticking.
- Check for proper fit: Make sure the bottom panel fits securely inside the drawer without any sagging or instability.
- Tighten loose screws or hardware: If you notice any loose screws or hardware during the reassembly process, use a screwdriver or appropriate tools to tighten them.
- Replace any removed hardware: If you had to remove any hardware such as drawer pulls or handles, reattach them securely to the front of the drawer.
Double-check that everything is in place and functioning properly before loading the drawer with your items. This will help ensure that your dresser drawer is ready for use and can withstand everyday use without any issues.
Congratulations! You have successfully repaired the bottom of your dresser drawer and reassembled it. Your dresser is now restored to its functional and visually appealing state!
Remember, proper maintenance and care can help prolong the lifespan of your repaired dresser drawer. Avoid overloading the drawer with heavy items and regularly clean and inspect it to catch any potential issues early on.
Thank you for following this step-by-step guide. We hope it has been helpful in guiding you through the process of repairing and reassembling your dresser drawer. Enjoy your refreshed piece of furniture!
Conclusion
Repairing the bottom of a dresser drawer is a practical and rewarding DIY project that can save you the cost and hassle of replacing the entire piece of furniture. By following the steps outlined in this guide, you have learned how to assess the damage, make repairs, reinforce weak areas, and even replace the bottom panel if necessary. With the right tools, materials, and a little bit of patience, you can restore the functionality and beauty of your dresser.
Remember, safety is paramount during any DIY project. Always wear protective gear, such as gloves and safety goggles, to reduce the risk of injury. Additionally, work in a well-ventilated area and follow the instructions on the products you’re using, whether it’s wood glue, sandpaper, or paint.
Don’t be afraid to unleash your creativity in this project! If you’re looking for a fresh look, consider applying a finish or paint to the bottom panel. This will not only provide added protection but also give your dresser a personalized touch that matches your style and decor.
Regular maintenance is crucial for keeping your dresser drawer in good condition. Inspect it periodically for any signs of wear or damage, and address any issues promptly. By taking care of your repaired dresser drawer, you can ensure it continues to serve its purpose for many years to come.
We hope this comprehensive guide has empowered you to tackle the task of repairing the bottom of your dresser drawer with confidence. Remember, DIY projects can be not only practical but also enjoyable, giving you a sense of accomplishment and showcasing your skills. So go ahead and breathe new life into your dresser by repairing its bottom panel!
Happy repairing!
Frequently Asked Questions about How To Repair The Bottom Of A Dresser Drawer
Was this page helpful?
At Storables.com, we guarantee accurate and reliable information. Our content, validated by Expert Board Contributors, is crafted following stringent Editorial Policies. We're committed to providing you with well-researched, expert-backed insights for all your informational needs.

0 thoughts on “How To Repair The Bottom Of A Dresser Drawer”