Home>Furniture>Outdoor Furniture>How To Lay A Paver Patio

Outdoor Furniture
How To Lay A Paver Patio
Modified: August 17, 2024
Learn how to lay a beautiful paver patio and create the perfect outdoor space for your outdoor furniture. Get step-by-step instructions and helpful tips.
(Many of the links in this article redirect to a specific reviewed product. Your purchase of these products through affiliate links helps to generate commission for Storables.com, at no extra cost. Learn more)
Introduction
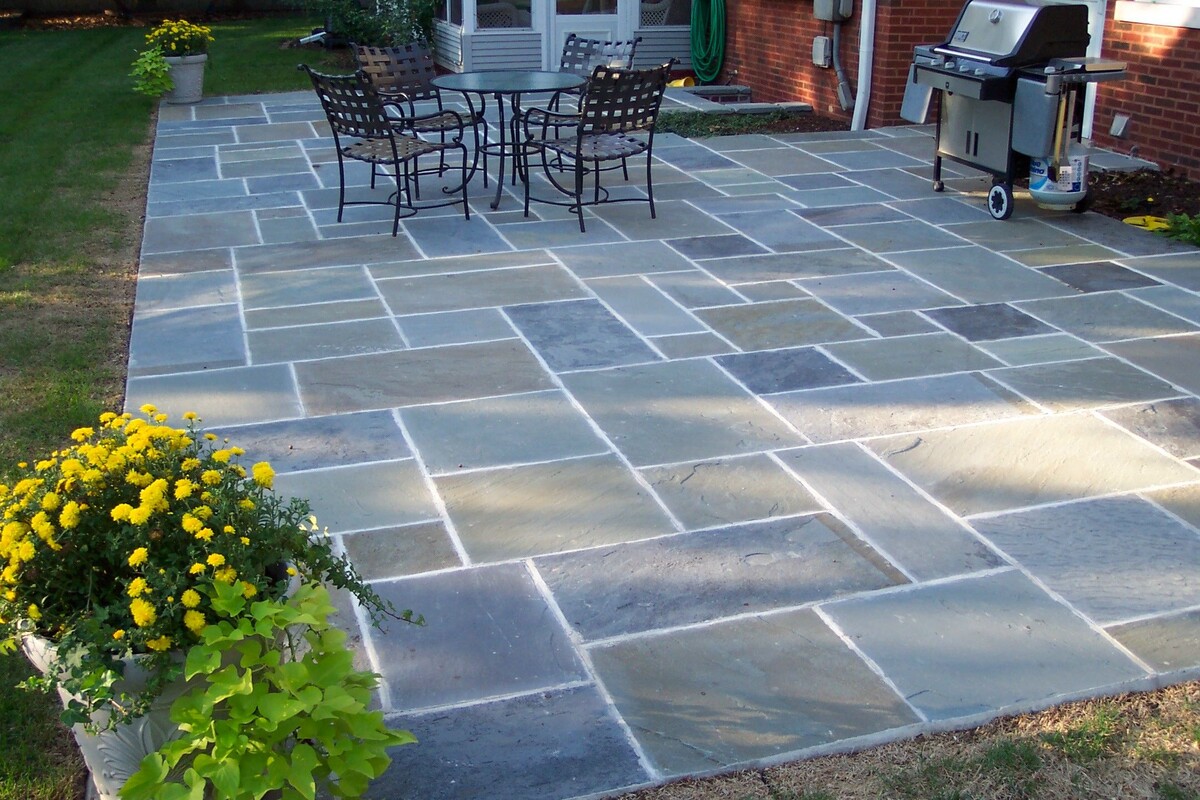
Welcome to the wonderful world of outdoor living! There’s nothing quite like having a beautiful patio where you can relax, entertain, and enjoy the great outdoors. And when it comes to creating the perfect outdoor space, one of the most popular choices is a paver patio.
A paver patio offers a versatile and durable solution for outdoor flooring. Whether you want a cozy nook for your morning coffee or a spacious area for hosting barbecues, a properly installed paver patio can transform your outdoor space into a true oasis.
In this article, we will guide you through the step-by-step process of how to lay a paver patio. We’ll cover everything from planning and preparation to the finishing touches. So grab your tools and let’s get started on creating the patio of your dreams!
But before we dive into the nitty-gritty details, let’s take a moment to appreciate the benefits of a paver patio. First and foremost, pavers are incredibly durable. They can withstand heavy foot traffic, extreme weather conditions, and even the occasional dropped plate at your backyard cookout.
Pavers also offer a wide range of design options. They come in various sizes, shapes, colors, and textures, allowing you to create a unique and personalized look for your patio. Whether you prefer a classic brick pattern or a contemporary geometric design, the possibilities are endless.
Furthermore, pavers are relatively low maintenance. Unlike other types of outdoor flooring, such as wood or concrete, pavers don’t require annual staining or sealing. Simply sweep off debris and rinse with water as needed, and your patio will continue to look pristine for years to come.
Lastly, if you ever decide to change the layout or expand your patio in the future, pavers make it easy. They can be lifted and repositioned without any damage, providing you with the flexibility to adapt your outdoor space to your evolving needs and preferences.
Now that we’ve covered the basics, it’s time to roll up our sleeves and start our paver patio project. So let’s move on to the first step: planning and preparation.
Key Takeaways:
- Planning and preparation are essential for laying a paver patio. From measuring and marking the area to gathering materials and tools, each step sets the foundation for a successful outdoor oasis.
- Laying a paver patio requires attention to detail, from compacting the base material to cutting and fitting pavers. The process creates a durable and beautiful outdoor space for relaxation and entertainment.
Read more: How To Lay Patio Pavers On Grass
Step 1: Planning and Preparation
Before you start any construction project, proper planning and preparation are essential. When it comes to laying a paver patio, this step is particularly crucial to ensure a successful outcome. Here’s what you need to do:
- Measure and mark the area: Start by determining the size and shape of your desired patio. Use a measuring tape and stakes to mark the perimeter of the area. Consider factors such as existing structures, drainage, and accessibility when selecting the location for your patio.
- Check for utility lines: Before digging, contact your local utility company to identify the location of utility lines. This will avoid any accidents and ensure the safety of your project.
- Clear the area: Remove any existing vegetation, rocks, or debris from the marked area. Level the ground by removing any high spots and filling in any low spots to ensure a smooth and even surface.
- Plan the layout: Decide on the pattern and design you want for your paver patio. Consider factors such as the size and shape of the pavers, the direction of the pattern, and any accent pieces or borders you may want to include. Use a pencil and paper or a design software to create a layout plan.
- Calculate materials: Measure the dimensions of the patio area to calculate the quantity of pavers, base material, edge restraints, and joint sand you will need. It’s always a good idea to add a little extra to account for cuts, mistakes, or any future repairs.
- Obtain materials and tools: Make a list of all the materials and tools you will need for the project, including pavers, base material (such as gravel or sand), edge restraints, joint sand, a shovel, a wheelbarrow, a level, and a rubber mallet, among others. Gather all the necessary supplies before you begin.
By carefully planning and preparing the area, you’ll be setting yourself up for a smooth and efficient installation process. Now that you’ve completed step one, let’s move on to gathering the materials and tools for the project.
Step 2: Gathering Materials and Tools
Now that you have a clear plan for your paver patio, it’s time to gather all the materials and tools you will need to bring your vision to life. Here’s a comprehensive list of what you’ll need:
- Pavers: Choose pavers that match your desired style and meet your durability needs. Common options include concrete, brick, and natural stone. Consider factors such as color, texture, and size when selecting your pavers.
- Base material: The base material provides stability and support for the pavers. It can be a combination of gravel, crushed stone, or sand. The type and thickness of the base material will depend on the soil conditions and the expected load on the patio.
- Edge restraints: Edge restraints help to keep the pavers in place and prevent them from shifting over time. They can be made of plastic, metal, or concrete, and should be installed along the perimeter of the patio.
- Joint sand: Joint sand is used to fill the gaps between the pavers, providing stability and preventing weeds from growing. Opt for polymeric sand, which hardens when activated with water, for a more durable and long-lasting joint.
- Shovel: A sturdy shovel will be your best friend during the excavation and leveling process. Look for one with a sharp edge to make the job easier.
- Wheelbarrow: A wheelbarrow will come in handy for transporting materials, such as gravel and sand, around the work area. It will save you time and effort compared to carrying everything by hand.
- Level: A level is essential for ensuring that your patio is even and flat. A long spirit level or a laser level can help you achieve accurate results.
- Rubber mallet: A rubber mallet is used to tap the pavers into place without damaging them. It’s an essential tool for creating a stable and uniform surface.
- Plate compactor: A plate compactor is a heavy machine used to compact the base material and ensure a solid foundation for the pavers. It’s especially important for larger patios or areas with heavy foot traffic.
- Paver sealer (optional): If you want to add an extra layer of protection to your paver patio, consider applying a paver sealer. It enhances the color, provides weather resistance, and helps to prevent stains.
Once you have gathered all the necessary materials and tools, you’ll be well-equipped to tackle the installation process. In the next step, we’ll dive into marking and excavating the area to prepare it for the paver patio.
Step 3: Marking and Excavating the Area
Now that you have all the materials and tools ready, it’s time to mark and excavate the area where your paver patio will be located. This step is crucial to ensure a level and stable foundation for your patio. Here’s how to do it:
- Revisit your plan: Take out your layout plan and use it as a guide to mark the perimeter of the patio on the ground. Use string lines and stakes to create straight and even lines.
- Apply a marking spray: If you’re having trouble visualizing the layout, apply a marking spray or use powdered chalk to draw the outline of the patio on the ground. This will make it easier to see and follow during excavation.
- Excavate the area: Start digging within the marked area using a shovel. Remove the top layer of grass, soil, and any other debris until you reach the desired depth. The depth will depend on the thickness of the pavers, plus the thickness of the base material.
- Create a slight slope: To allow for proper drainage, create a slight slope away from your home or any structures. This will help prevent water from pooling on the surface of the patio and causing damage.
- Check for evenness: Use a level to ensure that the excavated area is level and flat. Make adjustments as needed by adding or removing soil.
- Compact the soil: Once you’ve achieved the desired depth and evenness, use a plate compactor to compact the soil. This will create a stable and solid base for your paver patio.
By marking and excavating the area properly, you are laying the groundwork for a sturdy and long-lasting paver patio. The next step will involve applying the base material to provide a solid foundation for the pavers. Stay tuned!
Step 4: Applying Base Material
With the marked and excavated area ready, it’s time to apply the base material to create a stable foundation for your paver patio. The base material provides support, helps with drainage, and prevents the pavers from shifting over time. Follow these steps to apply the base material:
- Add a layer of gravel: Start by adding a layer of gravel to the excavated area. This coarse material acts as a stable base and aids in drainage. Spread the gravel evenly, using a rake or shovel to level it out.
- Compact the gravel: Use a plate compactor to compact the layer of gravel. This will ensure that it is tightly packed and provides a solid foundation for the pavers. Go over the area multiple times, making sure to cover the entire surface.
- Add a layer of sand: After compacting the gravel, add a layer of sand on top. The sand allows for fine adjustments and helps ensure a level surface for the pavers. Spread the sand evenly and use a screed board or a long, straight piece of wood to level it out.
- Screed the sand: Move the screed board back and forth in a sawing motion to level the sand. This will create a smooth and even surface for your pavers. Check the level using a straight edge or a level tool to ensure accuracy.
- Compact the sand: Once the sand is screeded and leveled, compact it using the plate compactor. This step will further stabilize the sand and create a solid base for the pavers. Be careful not to over-compact and cause the sand to become too dense.
- Check for evenness: After compacting the sand, check for any uneven spots. Use additional sand to fill in any low areas, and re-screed and compact as needed to achieve a uniformly flat surface.
By applying the base material correctly, you are ensuring a strong and stable foundation for your paver patio. The next step will involve installing edge restraints to keep the pavers in place. Let’s move on!
Read more: How To Lay Pavers On Grass
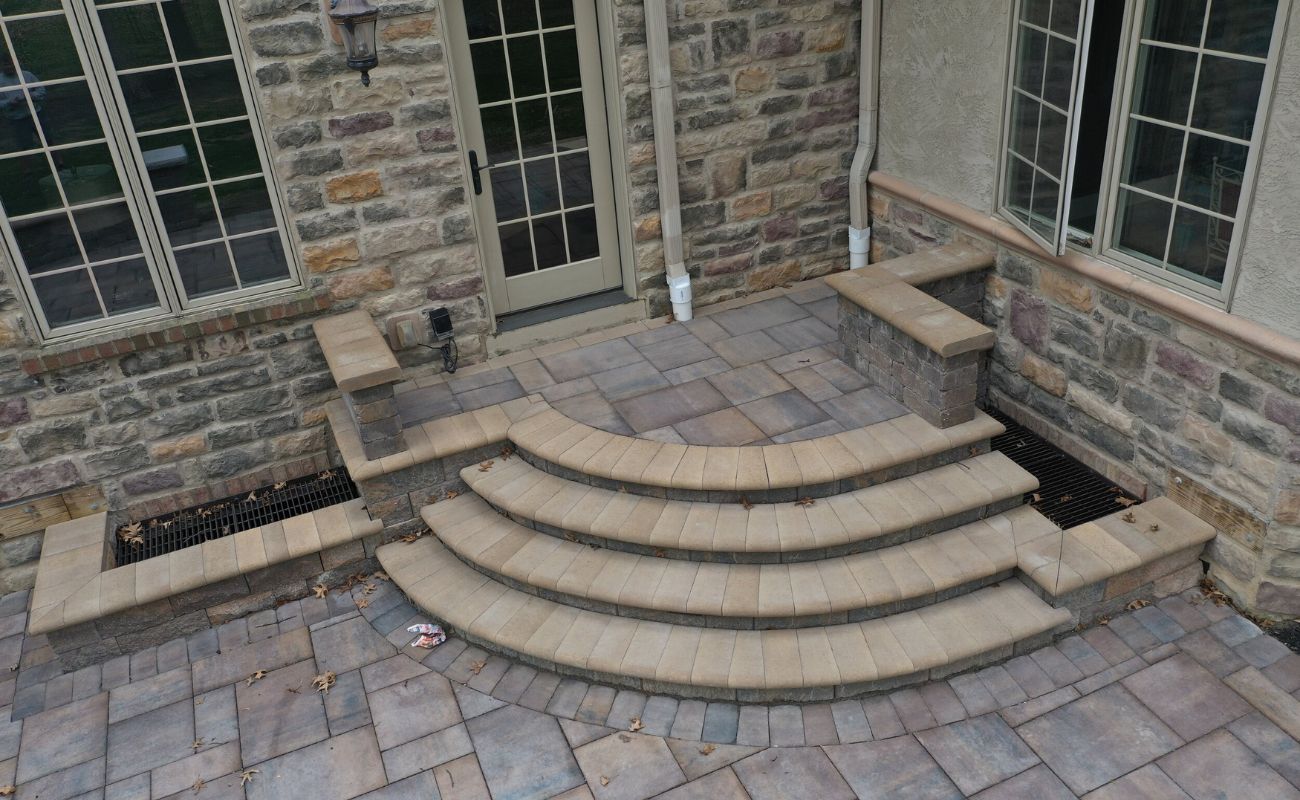
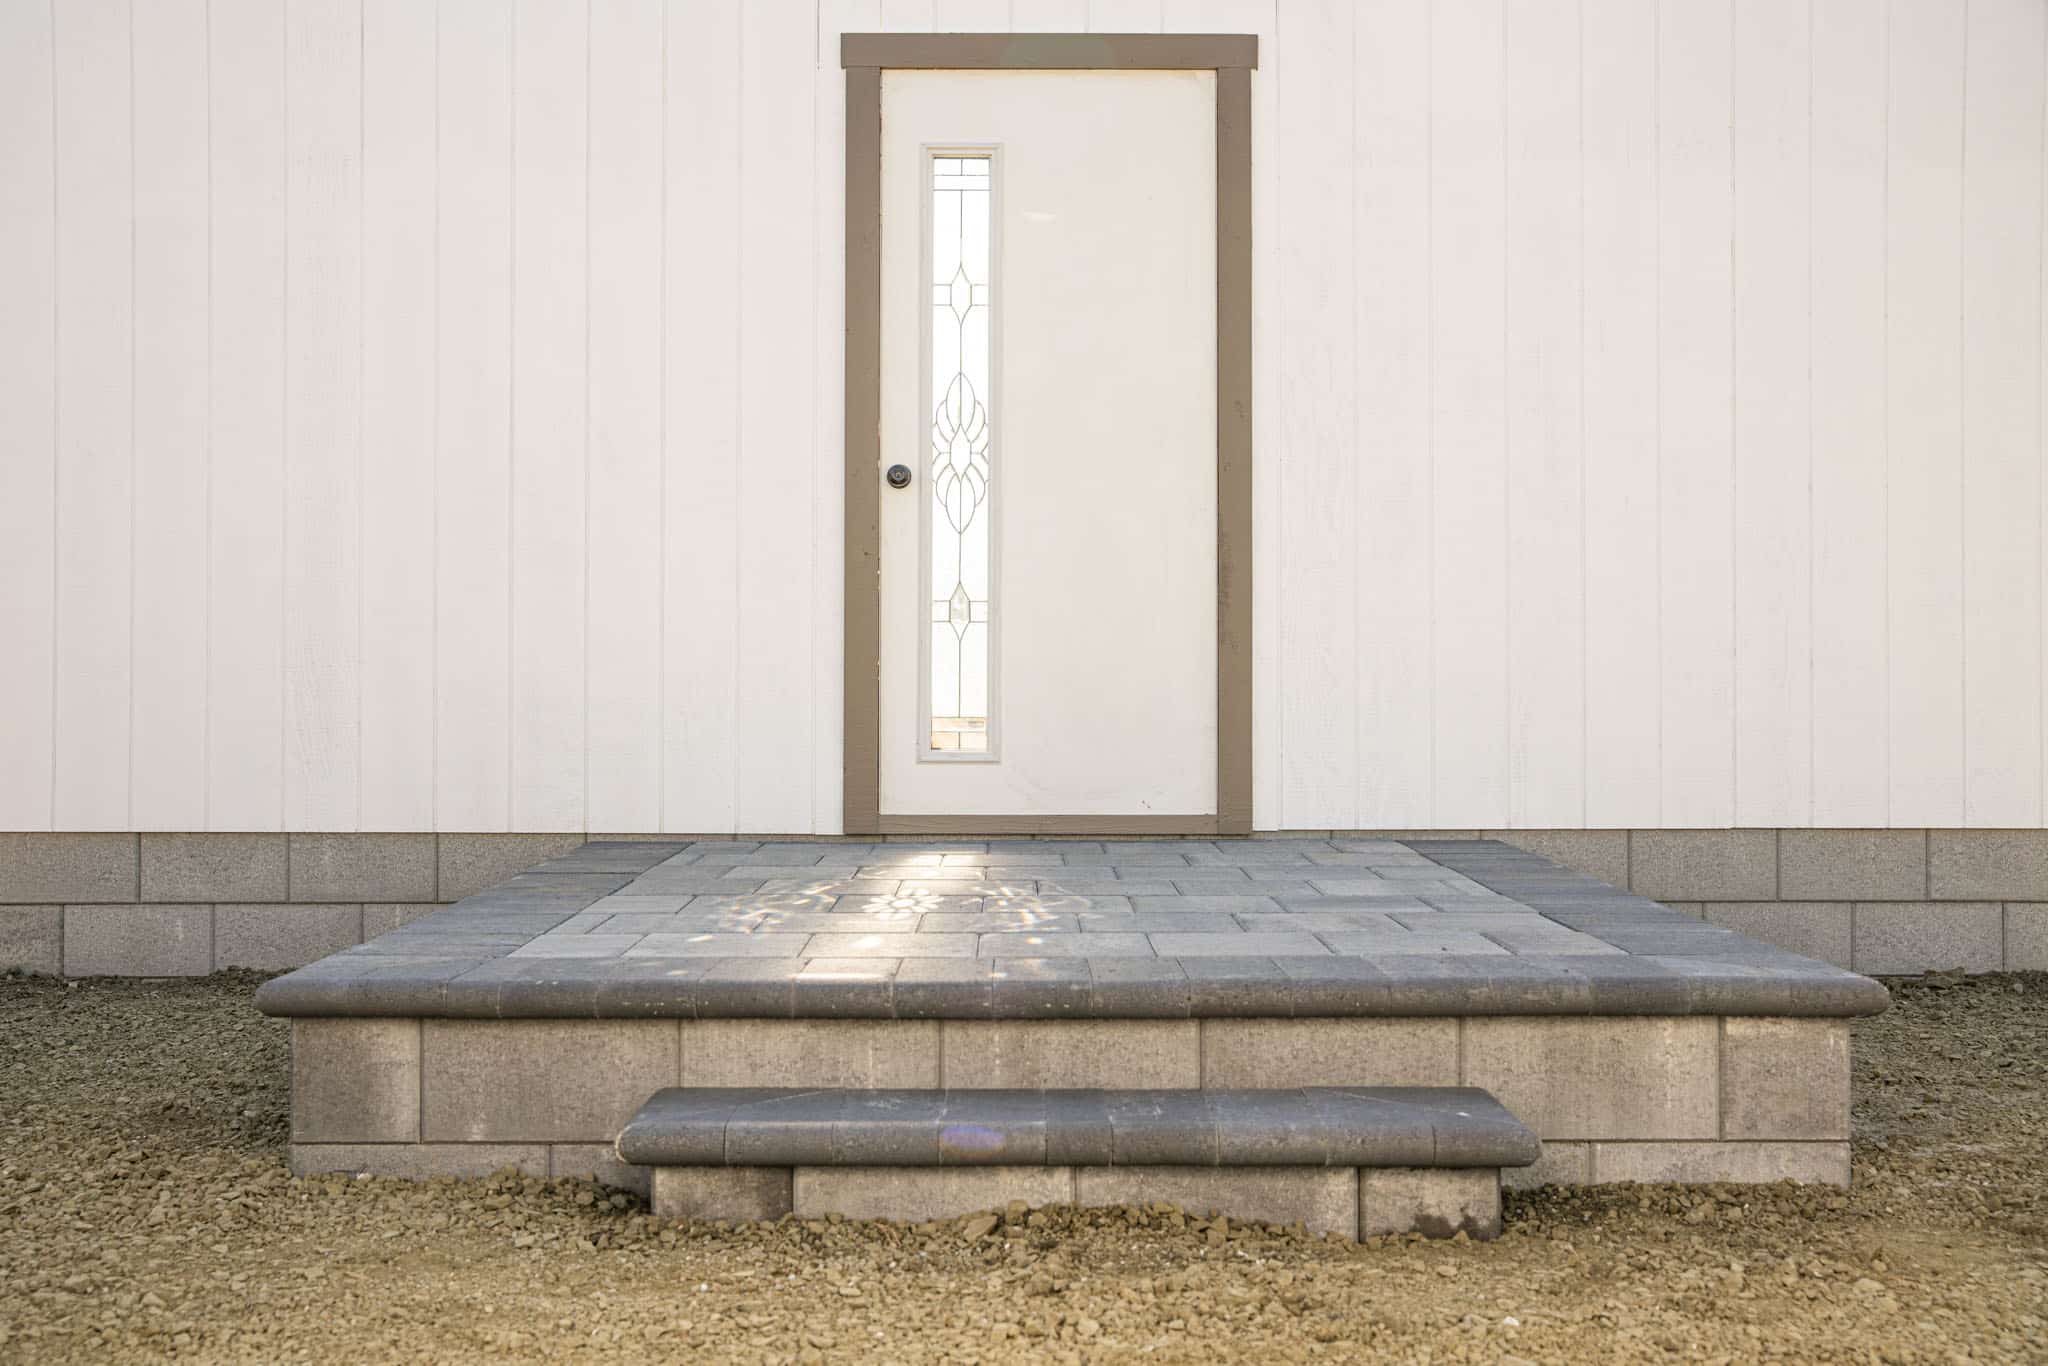
Step 5: Installing Edge Restraints
Edge restraints are an important component of a paver patio as they keep the pavers in place and prevent them from shifting or spreading over time. Installing edge restraints is a crucial step to ensure the longevity and stability of your patio. Follow these steps to properly install edge restraints:
- Choose the right type of edge restraints: There are various options available for edge restraints, including plastic, metal, or concrete. Consider the style and design of your patio, as well as the expected traffic and load, when selecting the appropriate type of edge restraints.
- Prepare the perimeter: Before installing the edge restraints, make sure the perimeter of the excavated area is clean and free of debris. Use a pressure washer or a broom to remove any dirt or loose material.
- Place the edge restraints: Start by placing the edge restraints along the perimeter of your patio. Ensure they are positioned flush against the outer edge of the compacted base material. Align them straight and secure them in place using stakes or spikes.
- Check for straightness: Use a string line or a straight edge to check the alignment of the edge restraints. Make any necessary adjustments to ensure they are perfectly straight and in line with your patio design.
- Secure the edge restraints: Once you are satisfied with the placement and alignment of the edge restraints, secure them firmly in place by hammering stakes or spikes through the pre-drilled holes. Space the stakes at regular intervals to provide adequate support.
- Double-check the level: Use a level to ensure that the edge restraints are level and at the desired height. Adjust the stakes or add/remove base material if needed to achieve a level surface.
By installing edge restraints, you are creating a boundary and support system for your paver patio. This will help maintain the structural integrity of the patio and prevent the pavers from shifting or separating. The next step will involve laying the pavers themselves. Let’s move on to the exciting part!
Before laying a paver patio, make sure to properly prepare the base by compacting the soil and adding a layer of gravel for drainage. This will help prevent shifting and settling over time.
Step 6: Laying the Pavers
Now comes the exciting part of actually laying the pavers and bringing your patio to life. This step requires careful attention to detail and precision to ensure a beautiful and long-lasting outcome. Follow these steps to properly lay the pavers:
- Start from a straight edge: Begin laying the pavers from a straight edge, such as a wall or an existing structure. This will serve as your reference point and help maintain a straight and aligned pattern.
- Place the first paver: Position the first paver in the desired orientation and gently press it into the sand or base material. Use a rubber mallet to tap it into place, ensuring that it sits level and flush with the surrounding edge restraints.
- Add more pavers: Continue placing the pavers one by one, working from the first paver in a pattern of your choice. Leave a small gap, typically around 1/8 to 1/4 inch, between each paver to allow for joint sand and accommodate any expansion or movement.
- Check for level and alignment: Regularly use a level to check that the pavers are level and even. Adjust the height or add/remove sand as needed to ensure a consistent surface. Use a straight edge or string line to keep the rows straight and aligned.
- Make adjustments: If you encounter any pavers that are higher or lower than the rest, adjust their height by adding or removing sand underneath. Use a level to ensure they are at the same level as the surrounding pavers.
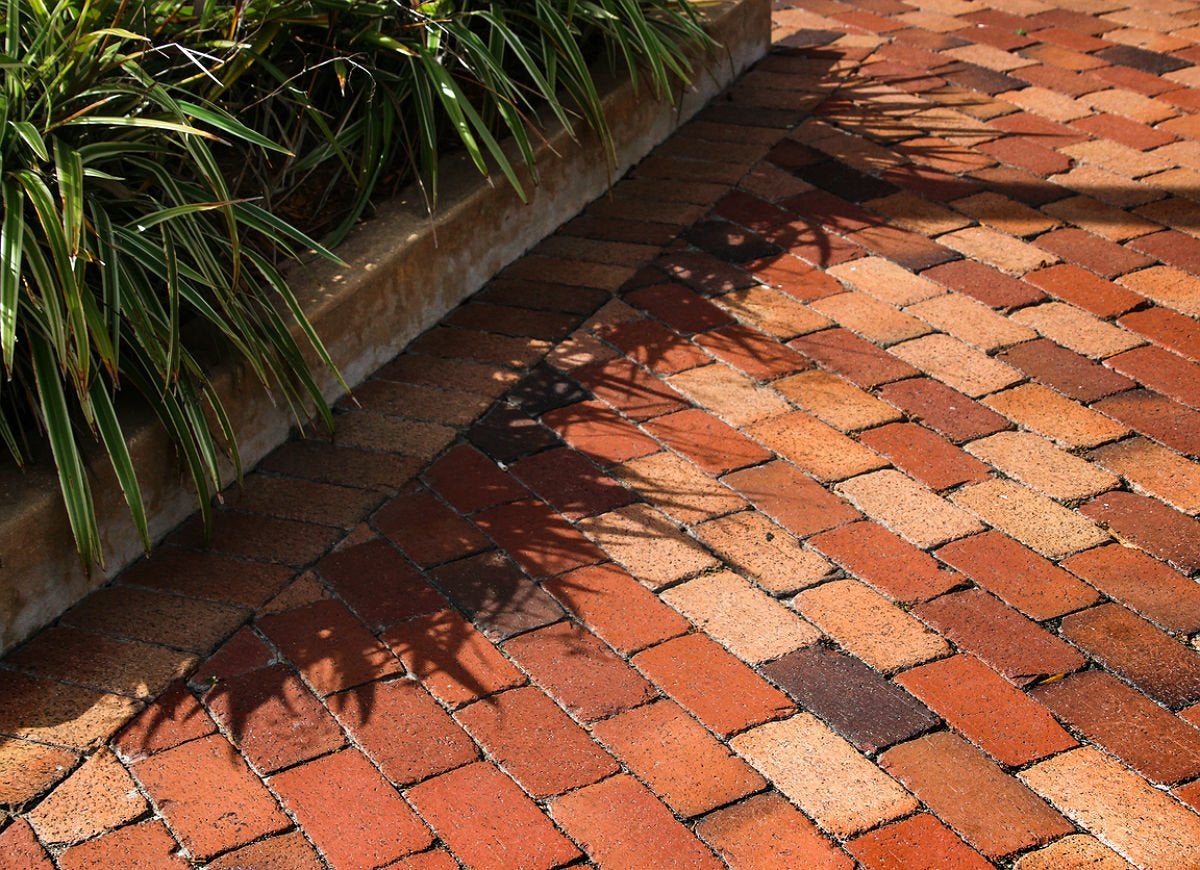
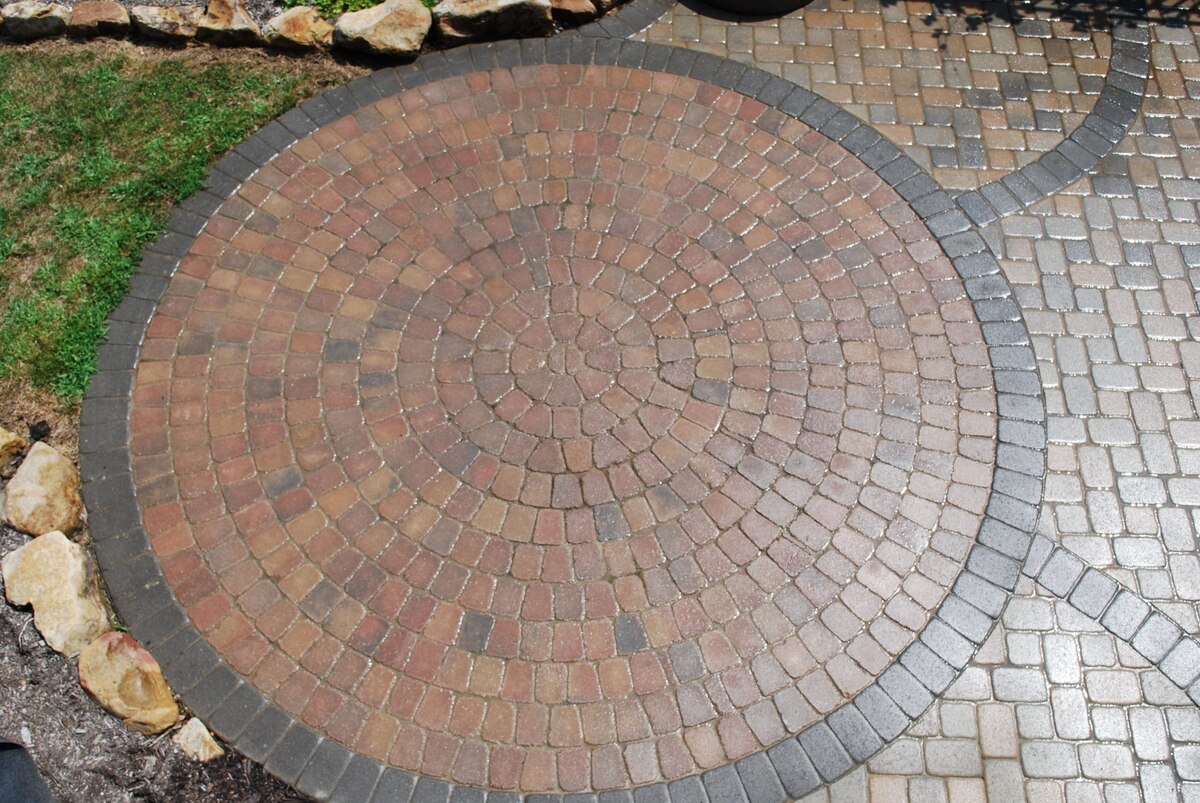
- Create a pattern: Depending on your design preference, you can create various patterns, such as running bond, herringbone, or basket weave. Follow the pattern consistently throughout the patio area for a cohesive and visually appealing result.
- Continue laying pavers: Repeat the process of placing, leveling, and aligning the pavers until the entire patio area is covered. Take your time and pay attention to detail to ensure a professional-looking finish.
By carefully laying the pavers, you are creating the foundation of your patio and establishing the overall design and aesthetic. The next step involves cutting and fitting pavers to accommodate different areas. Let’s move on to that step!
Step 7: Cutting and Fitting Pavers
When it comes to laying a paver patio, it’s inevitable that you’ll encounter areas where full-sized pavers won’t fit perfectly. This is where cutting and fitting pavers becomes necessary to ensure a seamless and professional-looking finish. Follow these steps to cut and fit pavers:
- Assess the areas: Take a careful look at the areas where pavers need to be cut or fitted. This includes the perimeter edges, corners, and any irregularly shaped areas.
- Measure and mark: Use a measuring tape to determine the dimensions of the space where a paver needs to be cut. Mark these measurements directly on the paver using a pencil or chalk.
- Use a paver saw or chisel: Depending on the type and thickness of the pavers, you can either use a wet saw with a diamond blade or a chisel and hammer to make the necessary cuts. Follow the manufacturer’s instructions when using a paver saw and wear appropriate safety gear.
- Cut the pavers: Carefully cut along the marked lines using the saw or chisel, ensuring a smooth and straight cut. Take your time and make small, controlled cuts to avoid any mistakes or damages.
- Fit the cut pavers: Once the pavers are cut, place them in the designated areas and ensure a tight fit. Use a rubber mallet to gently tap them into place, ensuring they sit level and flush with the surrounding pavers.
- Fill gaps with joint sand: Once all the pavers, both full-sized and cut, are in place, fill the gaps between them with joint sand. This helps to stabilize the patio, prevent weed growth, and enhance the overall appearance. Use a broom to brush the sand into the joints, ensuring thorough coverage.
- Compact the pavers: Finally, use a plate compactor or a rubber mallet to gently compact the pavers into the base material. This will ensure a solid and stable patio surface.
By cutting and fitting the pavers, you can achieve a professional and seamless look for your patio, even in areas with unique dimensions. The next step will involve adding joint sand to further stabilize the paver patio. Let’s move on!
Step 8: Adding Joint Sand
Adding joint sand to your paver patio is an essential step that helps stabilize the pavers, prevent weed growth, and enhance the overall strength and longevity of your patio. Follow these steps to properly add joint sand:
- Ensure dry conditions: Make sure the patio surface is completely dry before adding joint sand. Moisture can interfere with the sand settling properly between the pavers.
- Pour the sand: Pour the joint sand onto the surface of the paver patio, distributing it evenly. Use a brush or broom to sweep the sand into the joints, filling them completely.
- Compact the sand: Using a plate compactor or a rubber mallet, gently compact the sand into the joints. This will help settle the sand and create a solid bond between the pavers.
- Continue adding sand: As you compact the sand, you may notice that the joints need more sand to fill them completely. Add more sand as necessary and continue compacting until the joints are fully filled and packed.
- Remove excess sand: Sweep off any excess sand from the surface of the pavers using a broom. This will help avoid any sand stains or residue on the surface of the patio.
- Mist the patio: Lightly mist the entire patio with water. This will activate the polymeric properties of the sand if you are using polymeric joint sand, helping it harden and become more stable.
- Re-apply sand if necessary: Depending on the settling of the sand, you may need to add more sand and repeat the compaction and misting process. Ensure that the joints are fully filled and compacted for optimal stability.
- Allow the sand to cure: Let the joint sand cure for the recommended period of time specified by the manufacturer. This will allow the sand to fully harden and secure the pavers in place.
By adding joint sand, you are providing additional support and stability to your paver patio, ensuring that the pavers remain in place and the joints stay strong. The next step will involve compacting and finishing the patio. Let’s move on!
Read more: What Is A Paver Patio
Step 9: Compacting and Finishing
After completing the previous steps of laying the pavers and adding joint sand, it’s time to give your paver patio a final touch with compaction and finishing. This step ensures that the pavers are securely set and that your patio looks polished and ready to enjoy. Follow these steps to properly compact and finish your paver patio:
- Inspect the patio surface: Take a thorough look at the entire patio surface to check for any loose pavers, uneven areas, or excess sand. Make any necessary adjustments or repairs before proceeding.
- Remove debris: Use a broom or leaf blower to remove any debris, such as leaves, twigs, or dirt, from the surface of the patio. This will give you a clean and clear area to work with.
- Compact the pavers: Use a plate compactor to compact the pavers firmly into place. Pass the compactor over the entire patio, ensuring even coverage. This step helps to lock the pavers together and create a stable and cohesive surface.
- Check for evenness: Use a level to check that the surface of the pavers is even and flat. Pay attention to any areas that may feel uneven or unstable, and make any necessary adjustments by adding or removing sand underneath the pavers.
- Fill in any gaps: If you notice any gaps between the pavers, use additional joint sand to fill them in. Sweep the sand into the gaps and compact it lightly with a rubber mallet or broom handle to ensure a snug fit.
- Seal the pavers (optional): If desired, you can apply a sealer to enhance the color, protect against stains, and provide added durability to your paver patio. Follow the manufacturer’s instructions when applying the sealer and allow ample drying time.
- Enjoy your finished patio: Once the pavers are compacted, any gaps are filled, and the optional sealer is applied and dried, your paver patio is ready to be enjoyed! Furnish it with outdoor furniture, plants, or decor to create a welcoming outdoor space.
By properly compacting and finishing your paver patio, you’ll ensure that it remains stable, level, and visually appealing for years to come. Now that you’ve completed the main steps of the installation process, it’s time to move on to the final step: sealing the paver patio (optional). Let’s dive in!
Step 10: Sealing the Paver Patio
Sealing your paver patio is an optional but beneficial step that can enhance the appearance, longevity, and durability of the surface. The sealer acts as a protective barrier, preventing stains, inhibiting weed growth, and providing resistance to harsh weather conditions. Here’s how to properly seal your paver patio:
- Clean the patio: Before sealing, make sure the paver patio is clean and free of any dust, debris, or stains. Sweep the surface thoroughly or use a pressure washer to remove any lingering dirt or grime. Allow the patio to dry completely.
- Choose the right sealer: There are different types of sealers available, such as solvent-based or water-based sealers. Consider factors such as the type of pavers and the desired finish when selecting the appropriate sealer. Read and follow the manufacturer’s instructions for the specific sealer you choose.
- Apply the sealer: Use a brush, roller, or sprayer to apply the sealer evenly on the paver surface. Start from one end and work your way across the entire patio. Make sure to cover all areas and avoid overlapping or leaving any puddles of sealer.
- Pay attention to joints and edges: Apply sealer to the joints between the pavers as well to ensure that they are adequately protected. Pay special attention to the edges and corners of the patio, where the pavers are more vulnerable to wear and tear.
- Allow drying time: Follow the recommended drying time specified by the manufacturer. This can vary depending on the type of sealer used. Avoid walking on or placing any objects on the sealed surface until the sealer has fully cured.
- Apply additional coats (optional): Depending on the desired level of protection, you may choose to apply multiple coats of sealer. Follow the manufacturer’s instructions for the recommended number of coats and drying time between each application.
- Maintain the sealed patio: Regularly clean the sealed patio to prolong the life of the sealer. Sweep away debris, remove any stains promptly, and rinse with water when needed. Avoid using harsh chemicals or abrasive cleaners that could damage the sealer.
By sealing your paver patio, you’ll add an extra layer of protection, enhance its appearance, and make maintenance easier in the long run. Now that you’ve completed all the steps, take a moment to admire your beautifully laid and sealed paver patio. It’s ready for you to enjoy and create lasting memories in your outdoor oasis!
Conclusion
Congratulations! You have successfully completed the installation process of laying a paver patio. By following the step-by-step guide, you have transformed your outdoor space into a beautiful and functional area for relaxation and entertainment.
From the initial planning and preparation to the final step of sealing the paver patio, each stage has been crucial in achieving a durable and aesthetically pleasing result. By taking the time to measure and mark the area, gather the necessary materials and tools, excavate and prepare the base, and carefully lay and fit the pavers, you have created a patio that will withstand the test of time.
By adding edge restraints and joint sand, you have ensured that the pavers remain securely in place, preventing shifting and providing stability. The process of compacting and finishing the patio has further solidified the structure, while the optional step of sealing adds an extra layer of protection and beauty.
As you venture forward with your newly created paver patio, remember to maintain it by keeping it clean, performing regular inspections, and addressing any issues promptly. With proper care and maintenance, your paver patio will continue to be a source of joy and relaxation for years to come.
Now it’s time to sit back, relax, and enjoy your outdoor haven. Whether you’re hosting a summer barbecue, sipping your morning coffee, or simply unwinding after a long day, your paver patio will be a gathering place for cherished moments and cherished memories.
Thank you for reading, and here’s to many wonderful moments on your beautifully laid paver patio!
Frequently Asked Questions about How To Lay A Paver Patio
Was this page helpful?
At Storables.com, we guarantee accurate and reliable information. Our content, validated by Expert Board Contributors, is crafted following stringent Editorial Policies. We're committed to providing you with well-researched, expert-backed insights for all your informational needs.


0 thoughts on “How To Lay A Paver Patio”