Home>Furniture>Outdoor Furniture>How To Create A Patio From Brick Pavers
Outdoor Furniture
How To Create A Patio From Brick Pavers
Modified: March 23, 2024
Learn how to transform your outdoor space with a beautiful patio made from durable brick pavers. Enhance your patio with stylish and comfortable outdoor furniture for the perfect outdoor oasis.
(Many of the links in this article redirect to a specific reviewed product. Your purchase of these products through affiliate links helps to generate commission for Storables.com, at no extra cost. Learn more)
Introduction
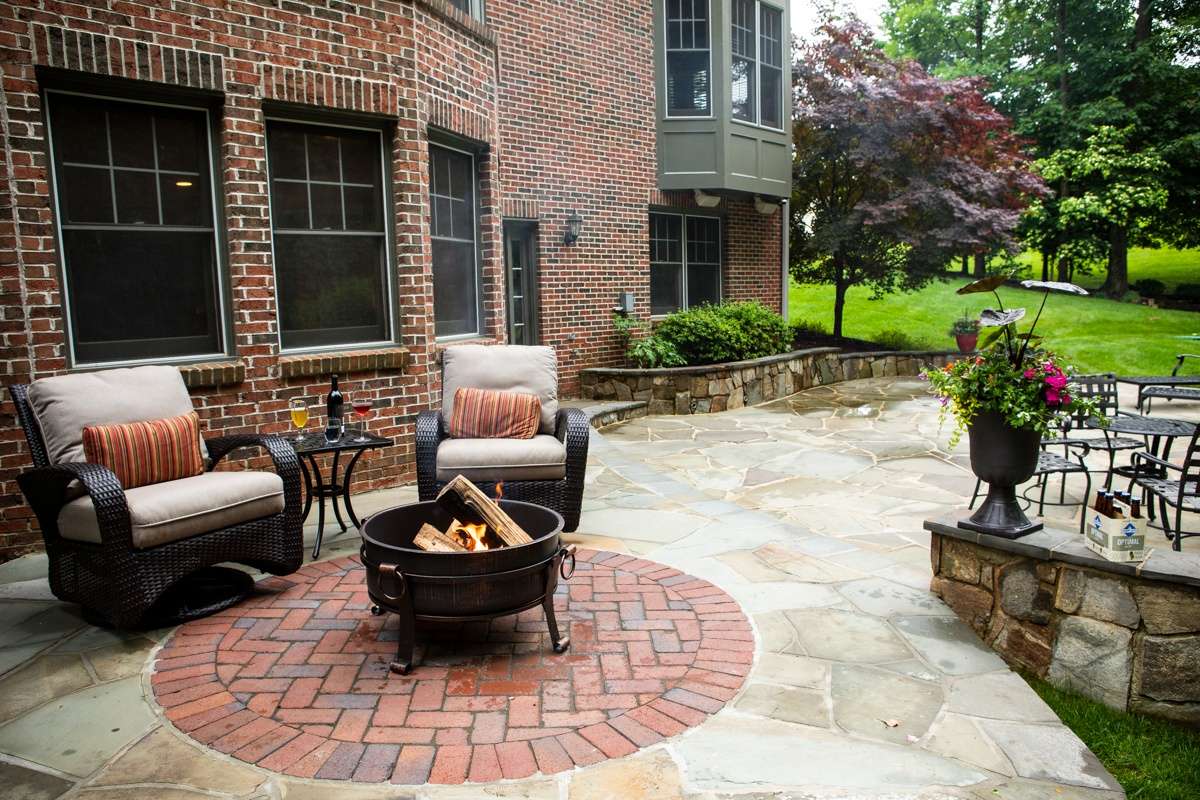
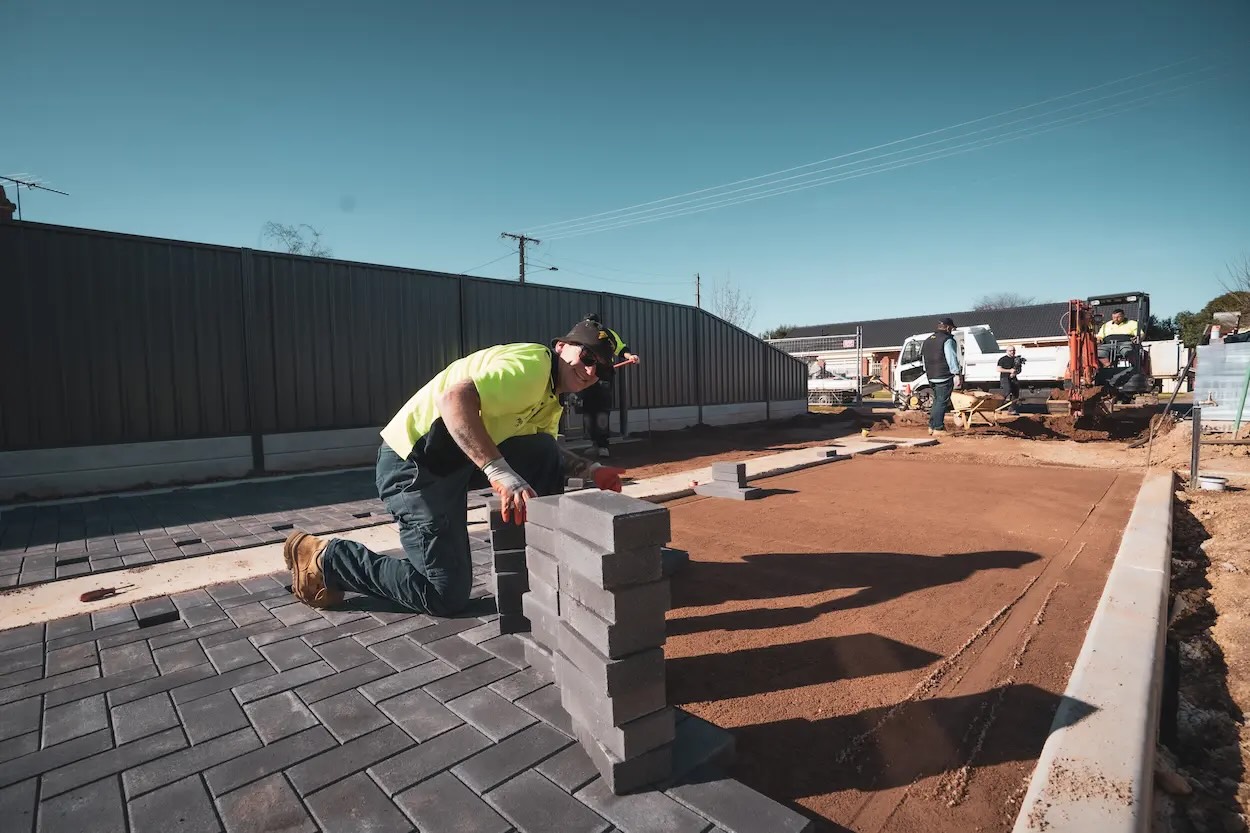
Welcome to the world of outdoor living! Creating a patio with brick pavers is a fantastic way to transform your outdoor space into a beautiful and functional area where you can relax, entertain, and enjoy nature. Whether you’re a seasoned DIY enthusiast or a beginner, this step-by-step guide will provide you with all the information you need to create your own stunning patio from brick pavers.
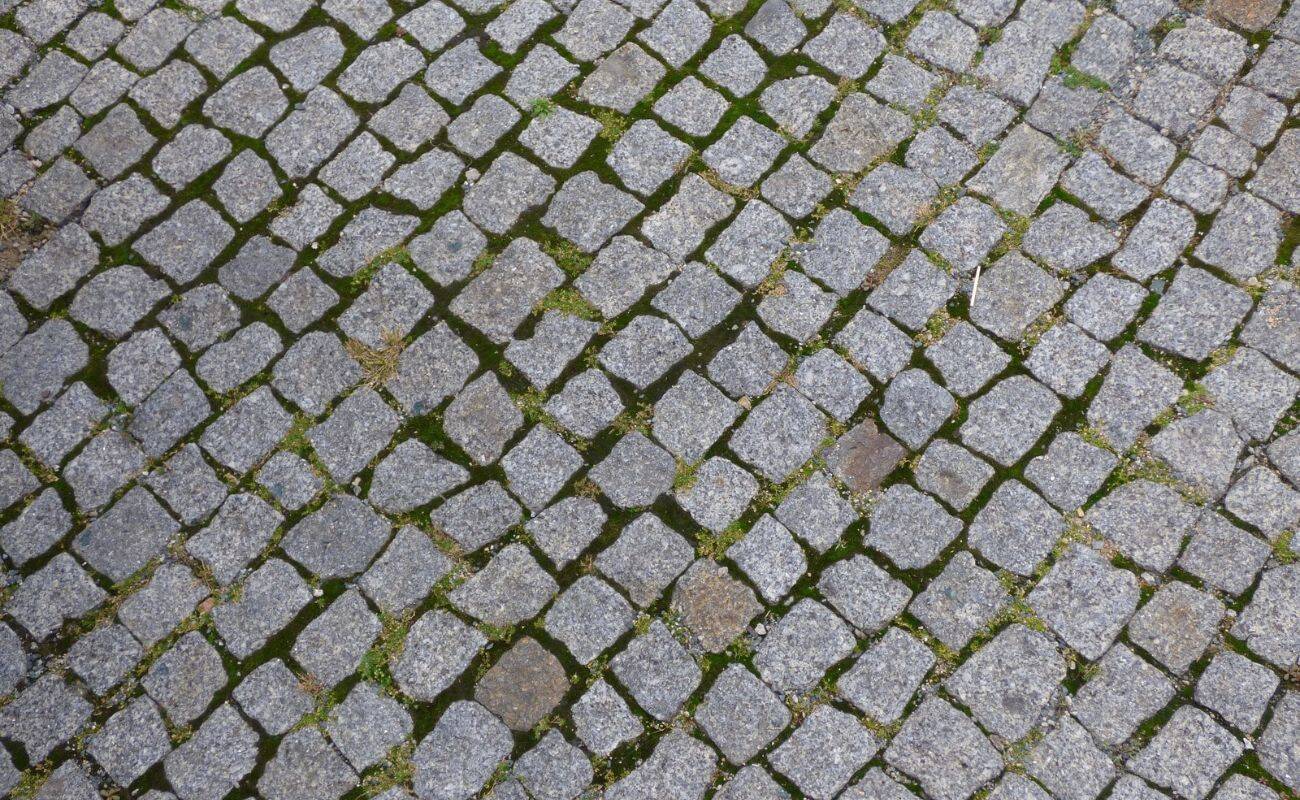
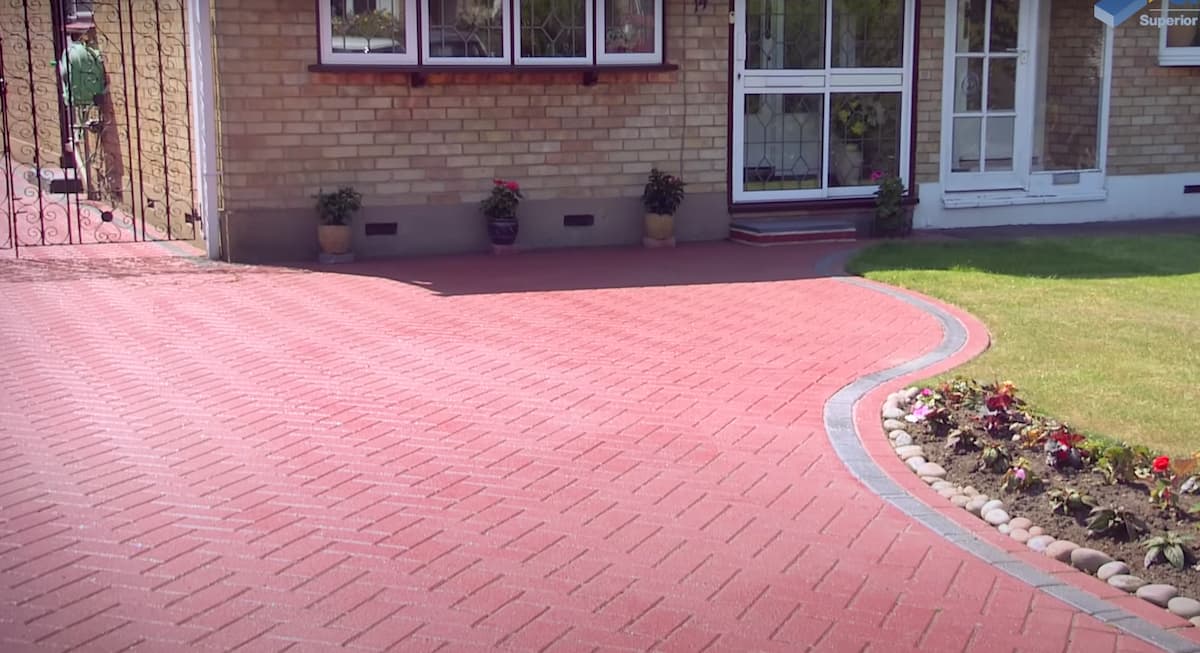
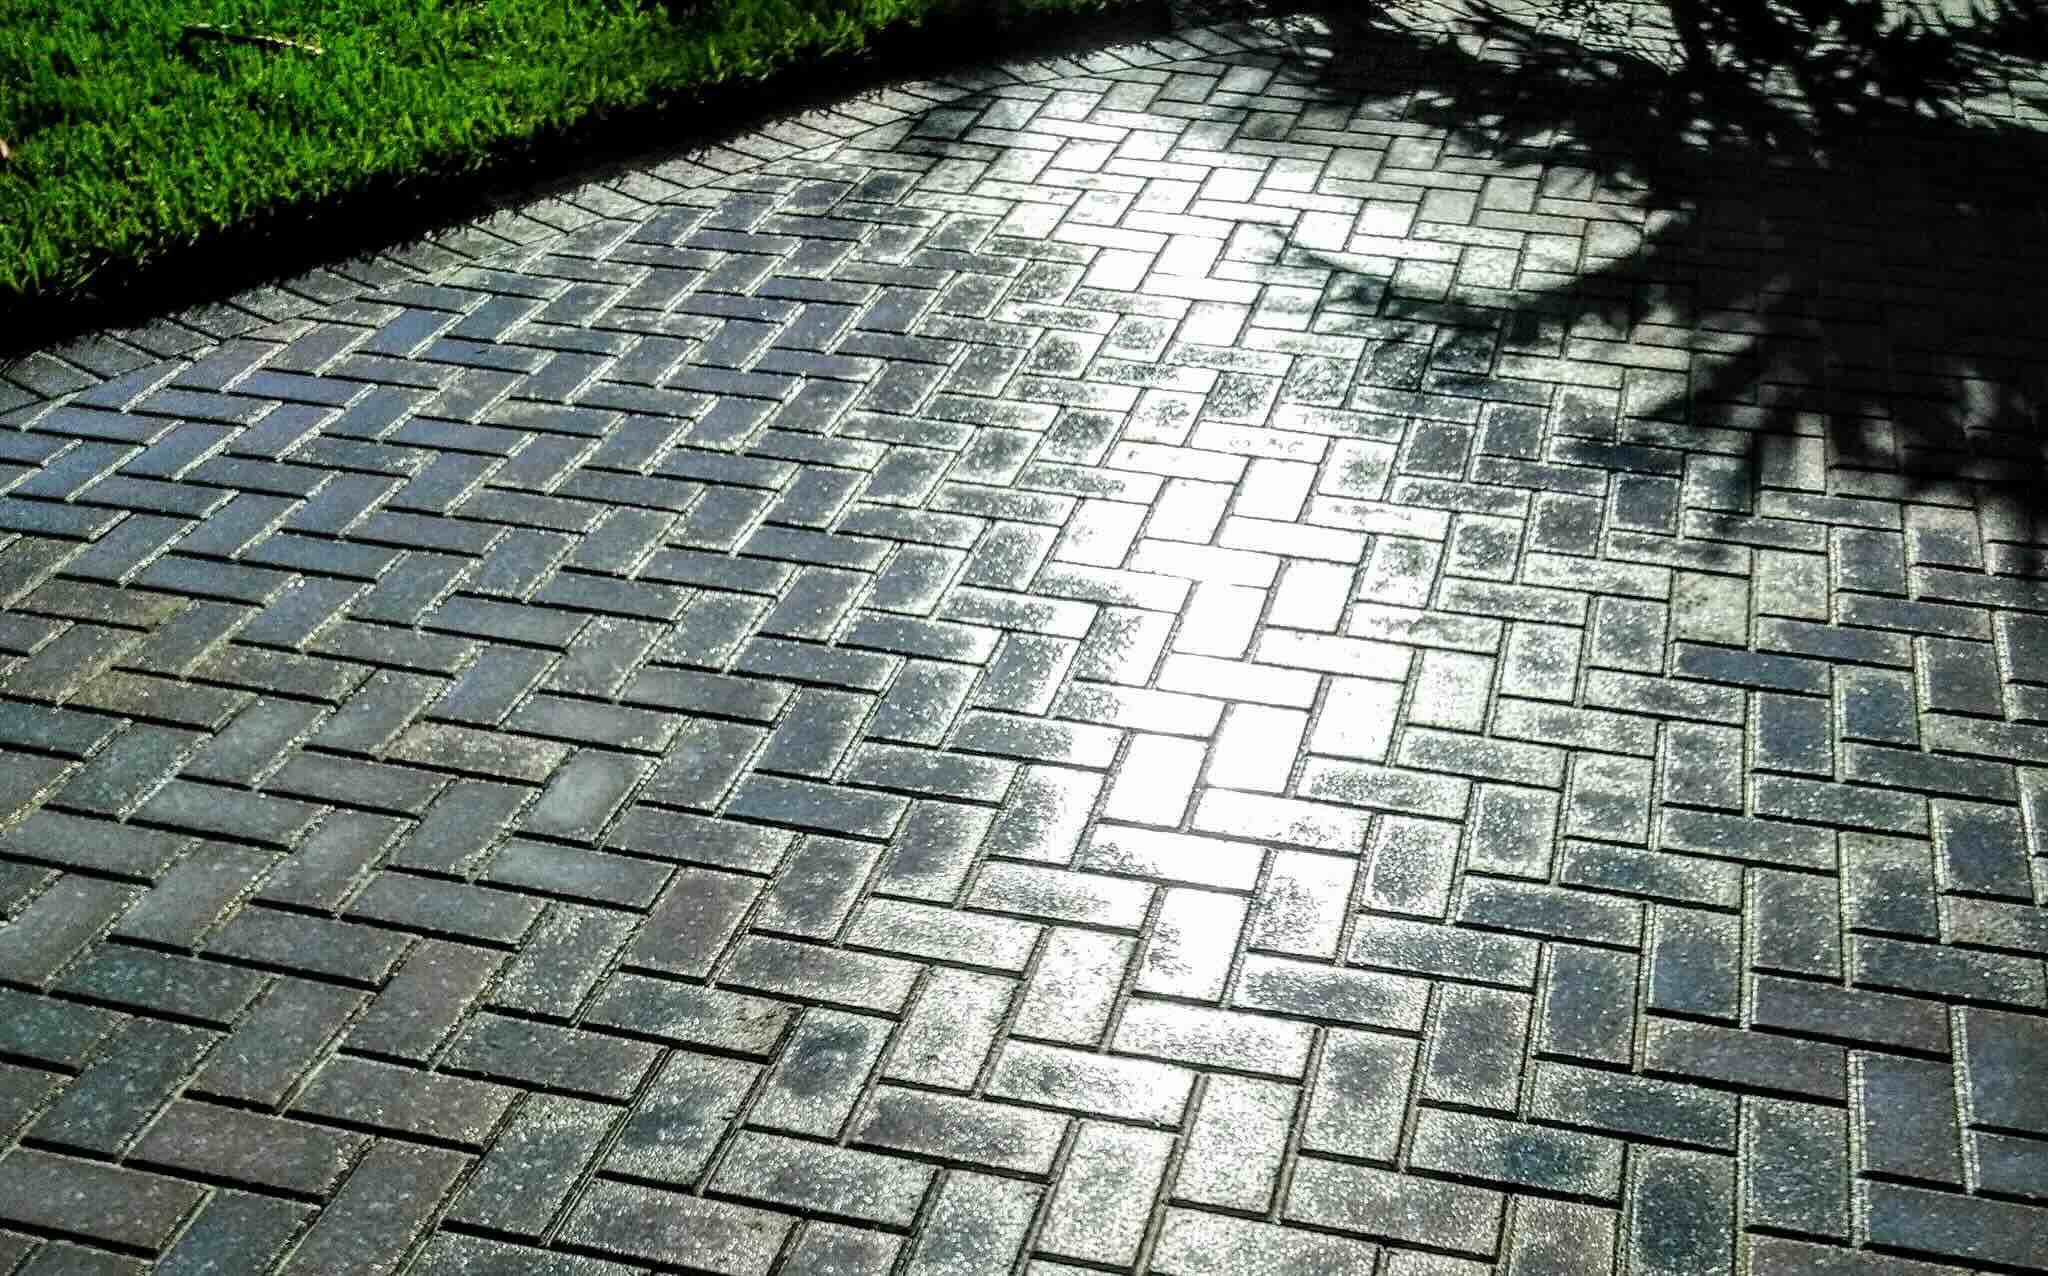
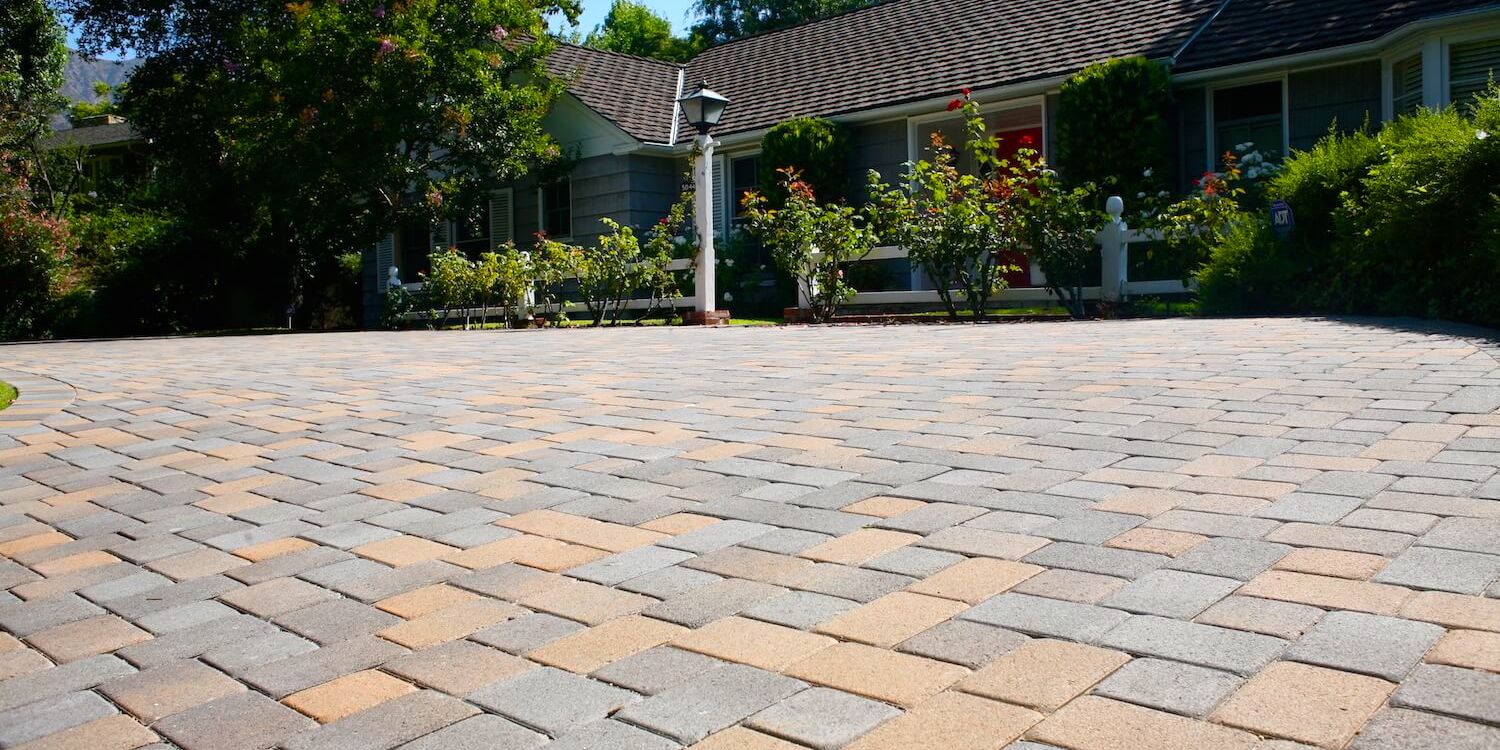
A brick paver patio not only adds value to your property but also provides a durable and low-maintenance surface for your outdoor activities. With its timeless charm and versatility, brick pavers offer a wide range of design possibilities to suit your personal style and preferences. Whether you prefer a classic herringbone pattern or a more intricate design, the flexibility of brick pavers allows you to create a patio that reflects your unique taste.
Before you dive into the project, it’s important to have a clear plan in place. This will help ensure a smooth and successful installation process. It’s also important to gather the necessary materials and tools beforehand, so you have everything you need at your fingertips. By following the steps outlined in this guide, you’ll be able to create a patio that you can enjoy for years to come.
Whether you envision lazy summer afternoons lounging on your patio furniture or hosting unforgettable BBQ parties, your brick paver patio will become the perfect setting for outdoor gatherings. So, grab your creative hat and let’s get started on this exciting journey of creating your own brick paver patio!
Key Takeaways:
- Planning and design are crucial for creating a beautiful and functional brick paver patio. Consider the space, purpose, style, and other factors to ensure a successful and personalized outdoor retreat.
- Proper site preparation, precise installation, and regular maintenance are essential for a long-lasting brick paver patio. Attention to detail and care throughout the process will result in a stunning outdoor space.
Read more: How To Create A Paver Patio
Step 1: Planning and Design
The first and most crucial step in creating a patio from brick pavers is planning and designing your outdoor space. This step sets the foundation for the entire project and ensures that your patio meets your needs and complements your existing landscape.
Start by assessing the available space in your backyard or chosen area for the patio. Consider the dimensions, shape, and any existing features that may impact the design, such as trees, plants, or utility lines. Sketching a rough layout will help you visualize the space and make accurate measurements.
Next, determine the purpose of your patio. Will it be a cozy retreat for relaxation, a space for entertaining guests, or a combination of both? This will help you decide on the size and layout of the patio, as well as any additional features you may want to include, such as a fire pit, seating area, or built-in grill.
Consider the overall style you want to achieve. Do you prefer a traditional, rustic look or a more modern and sleek design? This will influence the choice of brick pavers, patterns, and colors.
Take into account other factors like drainage, sun exposure, and the surrounding landscape. It’s essential to ensure proper water drainage to prevent pooling or flooding on your patio. Orienting the patio in a way that takes advantage of natural shade or sunlight can enhance the comfort and usability of the space.
Once you have a clear vision of your patio, it’s time to create a detailed plan. Use graph paper or online design tools to sketch out your patio’s layout, noting the dimensions, pathways, and any features you want to incorporate. This plan will serve as a guide during the installation process.
Consult with a professional if you’re unsure about any aspect of the planning and design. An experienced landscaper or contractor can offer valuable advice and ensure that your patio meets local building codes and regulations.
Remember, the planning and design phase is an opportunity to unleash your creativity and personalize your patio. Take your time to explore different options and envision how your patio will enhance your outdoor living experience. Once you’re satisfied with the plan, it’s time to move on to the next step: site preparation.
Step 2: Site Preparation
Now that you’ve completed the planning and design phase, it’s time to prepare the site for your brick paver patio. Proper site preparation is essential for ensuring a stable and long-lasting foundation.
Start by clearing the area of any vegetation, rocks, or debris. Use a shovel and rake to remove grass, weeds, and roots, ensuring that the ground is level and smooth. This will minimize the risk of uneven pavers and potential tripping hazards.
Next, mark the boundaries of your patio using stakes and string. This will help you visualize the layout and ensure that the patio remains within the desired dimensions. Double-check the measurements to ensure accuracy.
If your patio will be located on an existing concrete slab or any solid, level surface, you can skip the next step. However, if you’re building on bare soil or an uneven surface, you’ll need to excavate the area to create a stable foundation.
Use a shovel to dig approximately 6-8 inches deep to remove the top layer of soil. This depth allows for a sufficient base and helps accommodate any necessary drainage. Ensure that the excavation is level and even throughout the entire patio area.
Once the excavation is complete, it’s time to address the issue of drainage. A proper drainage system is crucial to prevent water from pooling on your patio. If necessary, consult with a professional to install a French drain or a slope that directs water away from the patio area.
After addressing drainage, you’ll need to add a layer of crushed stone or gravel to create a stable and level base. This base layer should be approximately 4-6 inches thick. Use a tamper or plate compactor to compact the stone, ensuring it is solid and even.
To further enhance stability and prevent shifting, consider adding a layer of landscape fabric over the compacted stone. This will help prevent weeds from growing through the paver joints and minimize the risk of future unevenness.
With the site preparation complete, your patio is ready for the next step: gathering materials and tools. Having everything you need at hand will make the installation process much smoother and more efficient.
Step 3: Gathering Materials and Tools
As you move forward with your brick paver patio project, it’s essential to gather all the necessary materials and tools. Being prepared in advance will save you time and ensure a smooth installation process.
Here are some of the materials you’ll need:
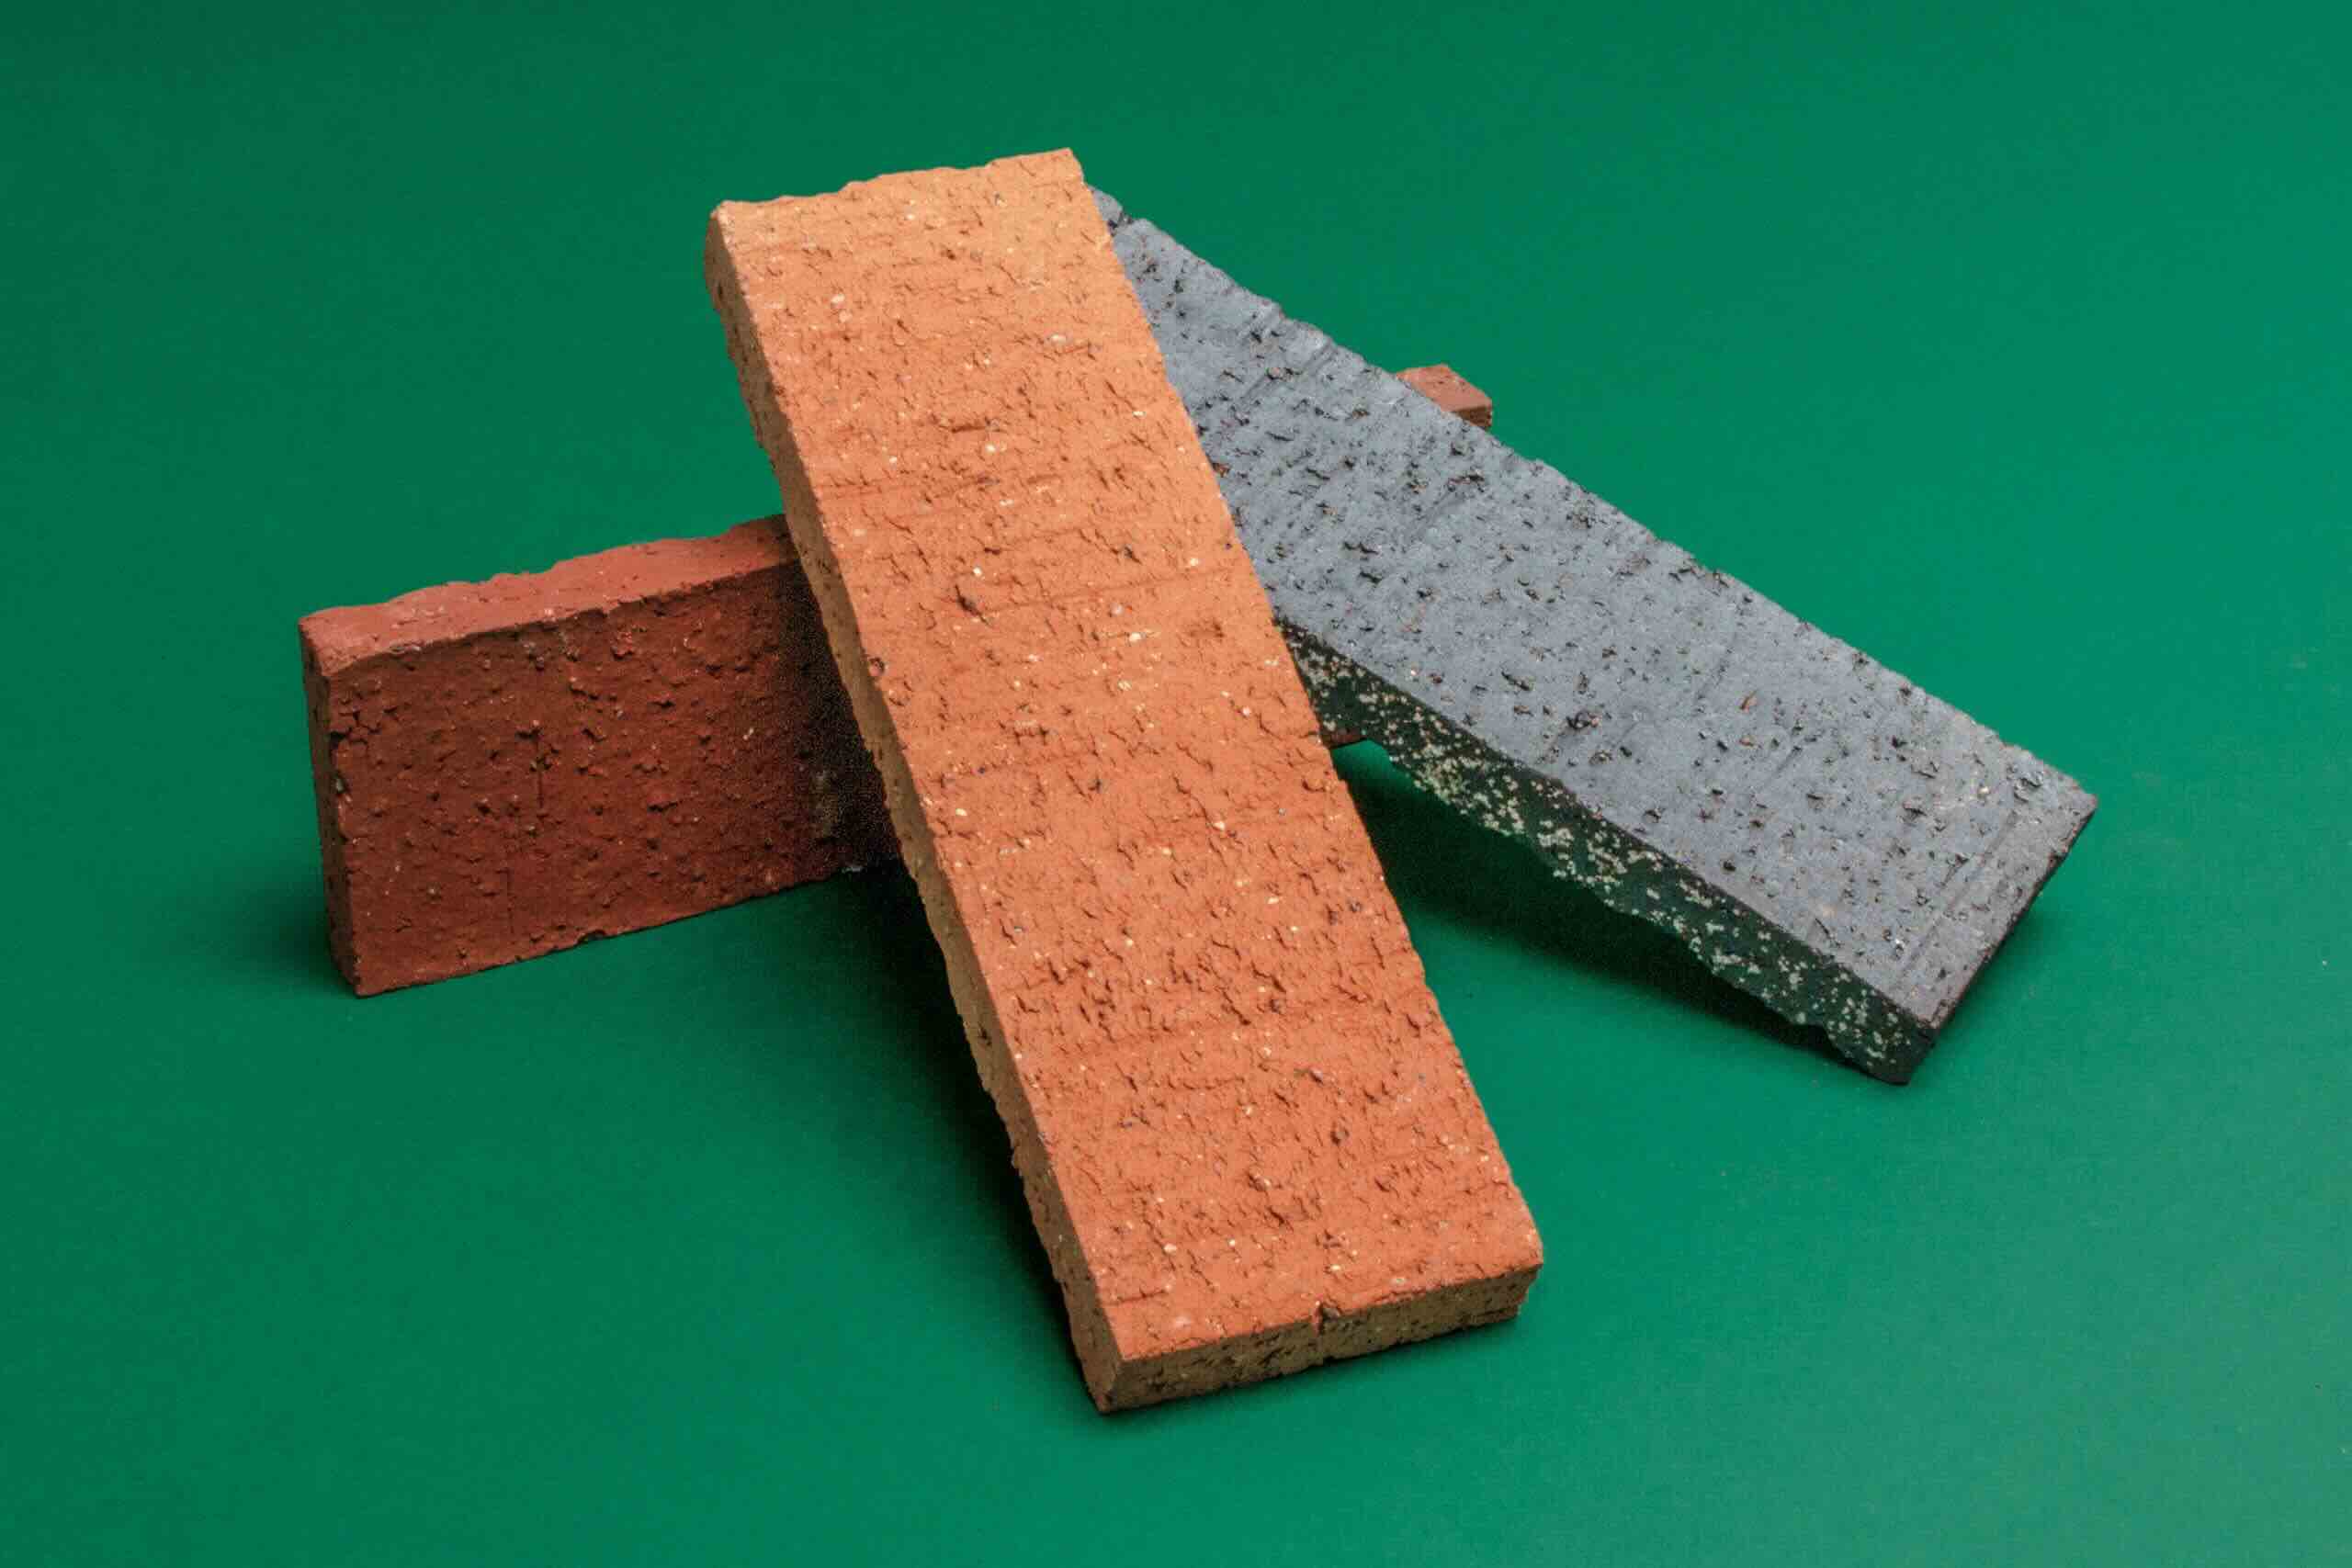
- Brick pavers: Choose high-quality pavers that suit your desired style and budget. Consider factors such as color, shape, and texture.
- Edge restraints: These are used to hold the pavers in place and prevent shifting or spreading. You can use plastic, metal, or concrete restraints depending on your preference and the design of your patio.
- Sand bedding: A layer of sand provides a cushion and helps level the pavers. Opt for coarse sand or concrete sand for better stability.
- Paver joint sand: This fine sand is used to lock the pavers together and prevent weed growth. Make sure to choose a polymeric or stabilizing joint sand for better long-term results.
- Base material: In addition to the crushed stone for the foundation, you may need additional materials such as gravel, limestone, or sand to create a stable base depending on your specific project requirements.
Aside from the materials, you’ll also need a set of tools to successfully install your patio:
- Shovel and rake: These are essential for site preparation, leveling the ground, and spreading the base material.
- Plate compactor or hand tamper: Used to compact the base material and ensure a solid foundation.
- Masonry saw or wet saw: Needed for cutting pavers to fit around edges, corners, or any obstructions in the patio area.
- Mallet or rubber mallet: Used to ensure the pavers are firmly set in place.
- Landscape fabric: Helps prevent weed growth and maintain the stability of the patio.
- Broom and hose: Used during the cleaning and finishing stage to remove excess sand and give the patio a polished look.
- Gloves and safety glasses: Ensure you have proper protective gear throughout the installation process.
Before starting the project, double-check that you have all the necessary materials and tools. It’s also a good idea to have extra pavers on hand in case of breakage or future repairs.
With all the materials and tools ready to go, you’re now well-equipped to move on to the next step: installing the base for your brick paver patio.
Step 4: Installing the Base
With your materials and tools gathered, it’s time to start building the foundation of your brick paver patio. The base layer is crucial for ensuring stability and preventing shifting or unevenness in the pavers.
Follow these steps to install the base:
- Spread a layer of the base material, such as crushed stone or gravel, over the excavated area. Aim for a thickness of 4-6 inches to provide a sturdy foundation.
- Use a rake or shovel to evenly distribute and level the base material. Make sure it is compacted to create a solid surface.
- Use a plate compactor or hand tamper to further compact and stabilize the base material. Move the compactor over the entire area, ensuring an even and firm base.
- Check the level of the base using a long straight board or a level. Make any necessary adjustments to achieve a perfectly level surface.
- Add additional base material and compact as needed to ensure a uniform thickness throughout the patio area.
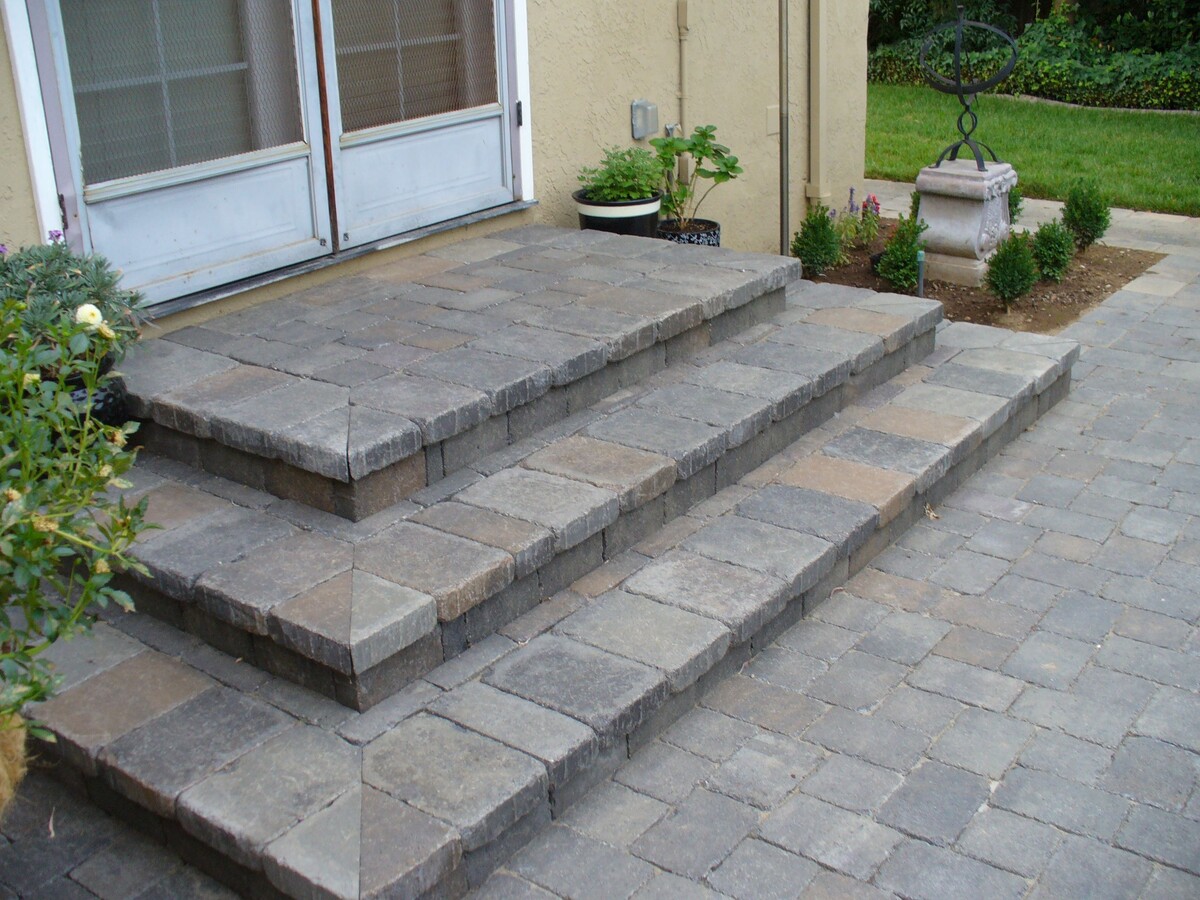
- If your patio will include retaining walls or steps, build them at this stage using the appropriate materials and techniques. This will ensure they are integrated seamlessly with the patio’s base.
Once the base is properly set and compacted, it’s time to move on to the next step: laying the brick pavers. The base provides a solid foundation for the pavers and ensures the stability and longevity of your patio.
Remember to take your time during the base installation process and ensure that it is level and compacted correctly. This will set the stage for a successful and long-lasting brick paver patio.
When creating a patio from brick pavers, make sure to properly prepare the base by compacting the soil and adding a layer of sand before laying the bricks. This will ensure a stable and long-lasting patio.
Read more: How To Make A Patio With Brick Pavers
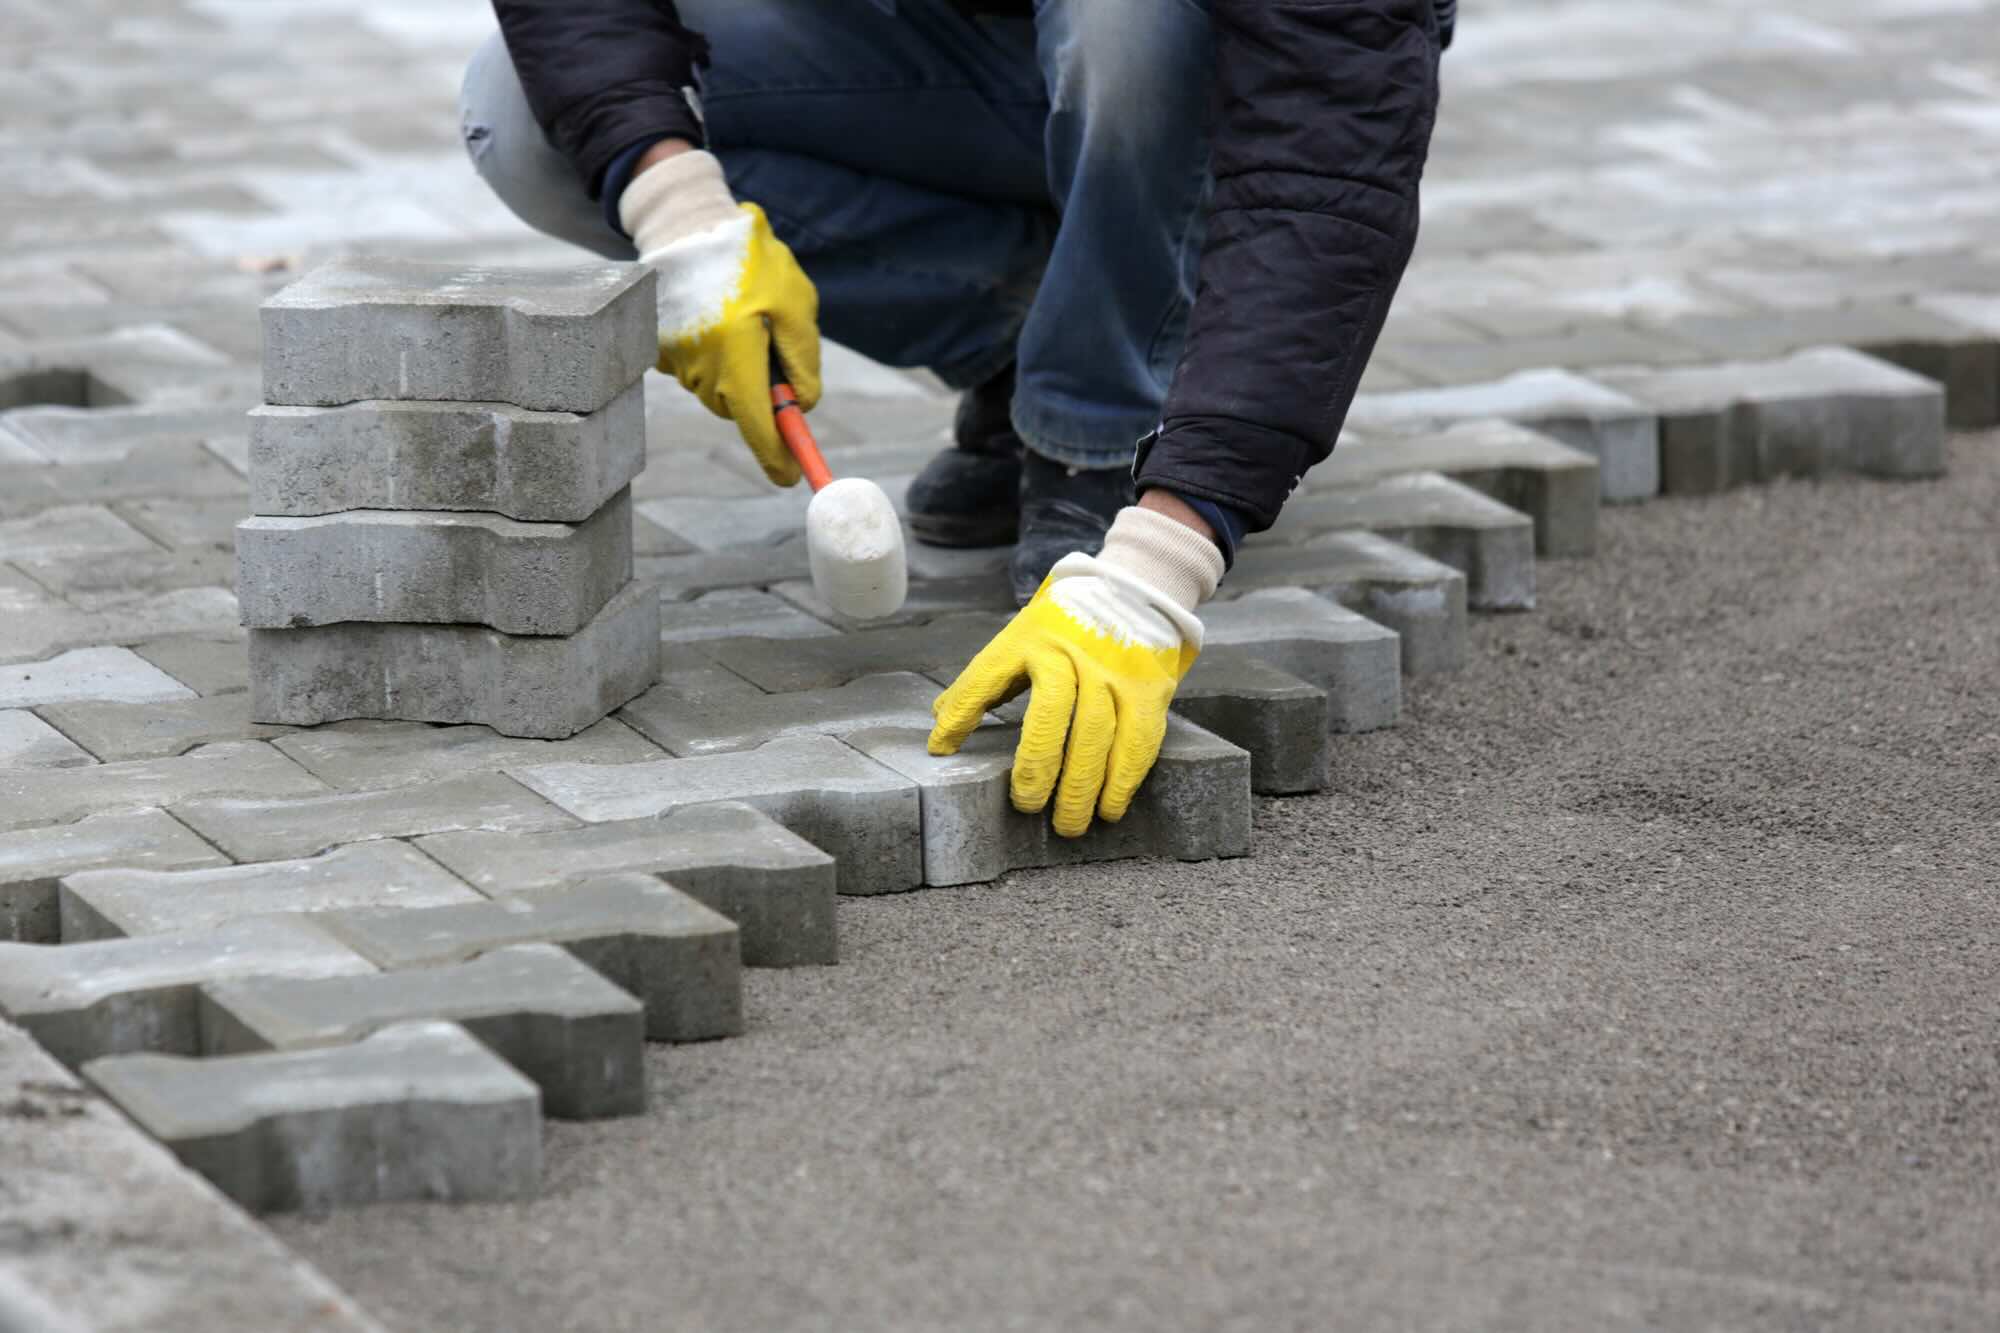
Step 5: Laying the Brick Pavers
Now that you’ve completed the base installation, it’s time to start laying the brick pavers for your patio. This step requires precision and attention to detail to ensure a seamless and visually appealing surface.
Follow these steps to lay the brick pavers:
- Start at one corner of your patio and lay the first paver. Make sure it is properly aligned with the edge restraints and the desired pattern.
- Place the next paver tightly against the first one, ensuring there are no gaps between them. Continue laying pavers in this manner, working in rows or sections.
- Consistently check for levelness by using a level or straight edge. Adjust the height of each paver as necessary by adding or removing base material underneath.
- Pay attention to the pattern and design. Use different shapes or sizes of pavers, if desired, to create visual interest. Consider incorporating a border or decorative accents for added aesthetics.
- As you lay the pavers, periodically step back and assess the overall look and alignment. This will help you make adjustments before moving on to the next row or section.
- Use a rubber mallet or mallet with a scrap piece of wood to gently tap each paver into place. This will ensure they are firmly set in the base and create a level surface.
- Continue laying pavers, making sure to maintain consistent spacing between them. A small gap (around 1/8 to 1/4 inch) allows for joint sand to be added later, securing the pavers in place.
- Regularly step on the newly laid pavers to ensure they are stable and evenly set. Adjust as needed to maintain a level surface.
It’s important to maintain accuracy and patience while laying the brick pavers. Take frequent breaks to assess the progress and make any necessary adjustments. This will ensure that your patio turns out beautiful and structurally sound.
Once all the pavers have been laid, you’re ready to move on to the next step: cutting and fitting pavers, if needed, to complete the patio’s design.
Step 6: Cutting and Fitting Pavers
In some cases, you may need to cut and fit brick pavers to create a seamless and professional-looking patio. This step requires careful measurement and precision to ensure the correct size and shape of each paver.
Follow these steps to cut and fit pavers:
- Measure the space where a paver needs to be cut. Use a tape measure to accurately determine the required dimensions.
- Mark the cutting line on the paver using a pencil or chalk. Double-check the measurement before making any cuts to avoid errors.
- Use a masonry saw or a wet saw specifically designed for cutting pavers. Follow the manufacturer’s instructions and take necessary safety precautions.
- Carefully cut along the marked line, ensuring a smooth and precise cut. Slow and steady movements will yield the best results.
- After cutting the paver, test the fit in the designated area. Make any necessary adjustments by trimming small amounts until the paver fits properly.
- Continue this process as needed for any other pavers that require cutting or fitting. Take your time to ensure a snug fit and an even, cohesive appearance.
Keep in mind that cutting and fitting pavers may also be required for areas of the patio where obstructions like columns or trees are present. This step allows you to create a beautifully customized patio that maximizes your available space.
When cutting pavers, wear protective eyewear and gloves to ensure your safety. Additionally, take breaks as needed to avoid fatigue and maintain accuracy in your cuts.
With the cutting and fitting step complete, you’re ready to move on to securing the pavers and adding the finishing touches to your patio.
Step 7: Securing the Pavers
Securing the pavers is an important step to ensure the stability and longevity of your brick paver patio. By properly securing the pavers, you’ll prevent shifting, weed growth, and other potential issues.
Follow these steps to secure the pavers:
- Once all the pavers are laid and fitted, spread a layer of fine sand over the surface of the patio.
- Using a broom or brush, sweep the sand into the joints between the pavers, ensuring it fills the gaps completely.
- Once the joints are filled, use a plate compactor or a hand tamper to gently compact the pavers. This will help the sand settle further and create a more stable surface.
- After compacting, add more sand to the joints, if needed, and repeat the compaction process until the joints are firmly filled.
- Once the pavers are secured and the joints are filled, it’s time to remove the excess sand from the surface of the patio. Using a broom, sweep the patio to remove any loose sand.
- Next, lightly mist the patio with water. This will activate the sand and help it settle further into the joints. Allow the patio to dry completely.
- After the patio has dried, inspect the joints and add more sand if necessary. Repeat the misting and drying process until the joints are fully filled and compacted.
Securing the pavers with joint sand not only prevents weed growth but also enhances the overall stability of the patio. The sand acts as a locking mechanism, keeping the pavers in place and allowing for slight movement or expansion.
Additionally, regular maintenance, such as reapplying joint sand every few years and addressing any damaged or loose pavers, will help maintain the integrity of the patio over time.
With the pavers securely in place, it’s time to move on to the final step: adding the finishing touches and ensuring proper maintenance for your new brick paver patio.
Step 8: Finishing Touches and Maintenance
Congratulations on completing your brick paver patio! Now it’s time to add those final touches and implement a maintenance routine to keep your patio looking its best for years to come.
Here are some finishing touches and maintenance tips:
- Inspect the entire patio and make any necessary adjustments. Check for any loose or uneven pavers and secure or level them as needed.
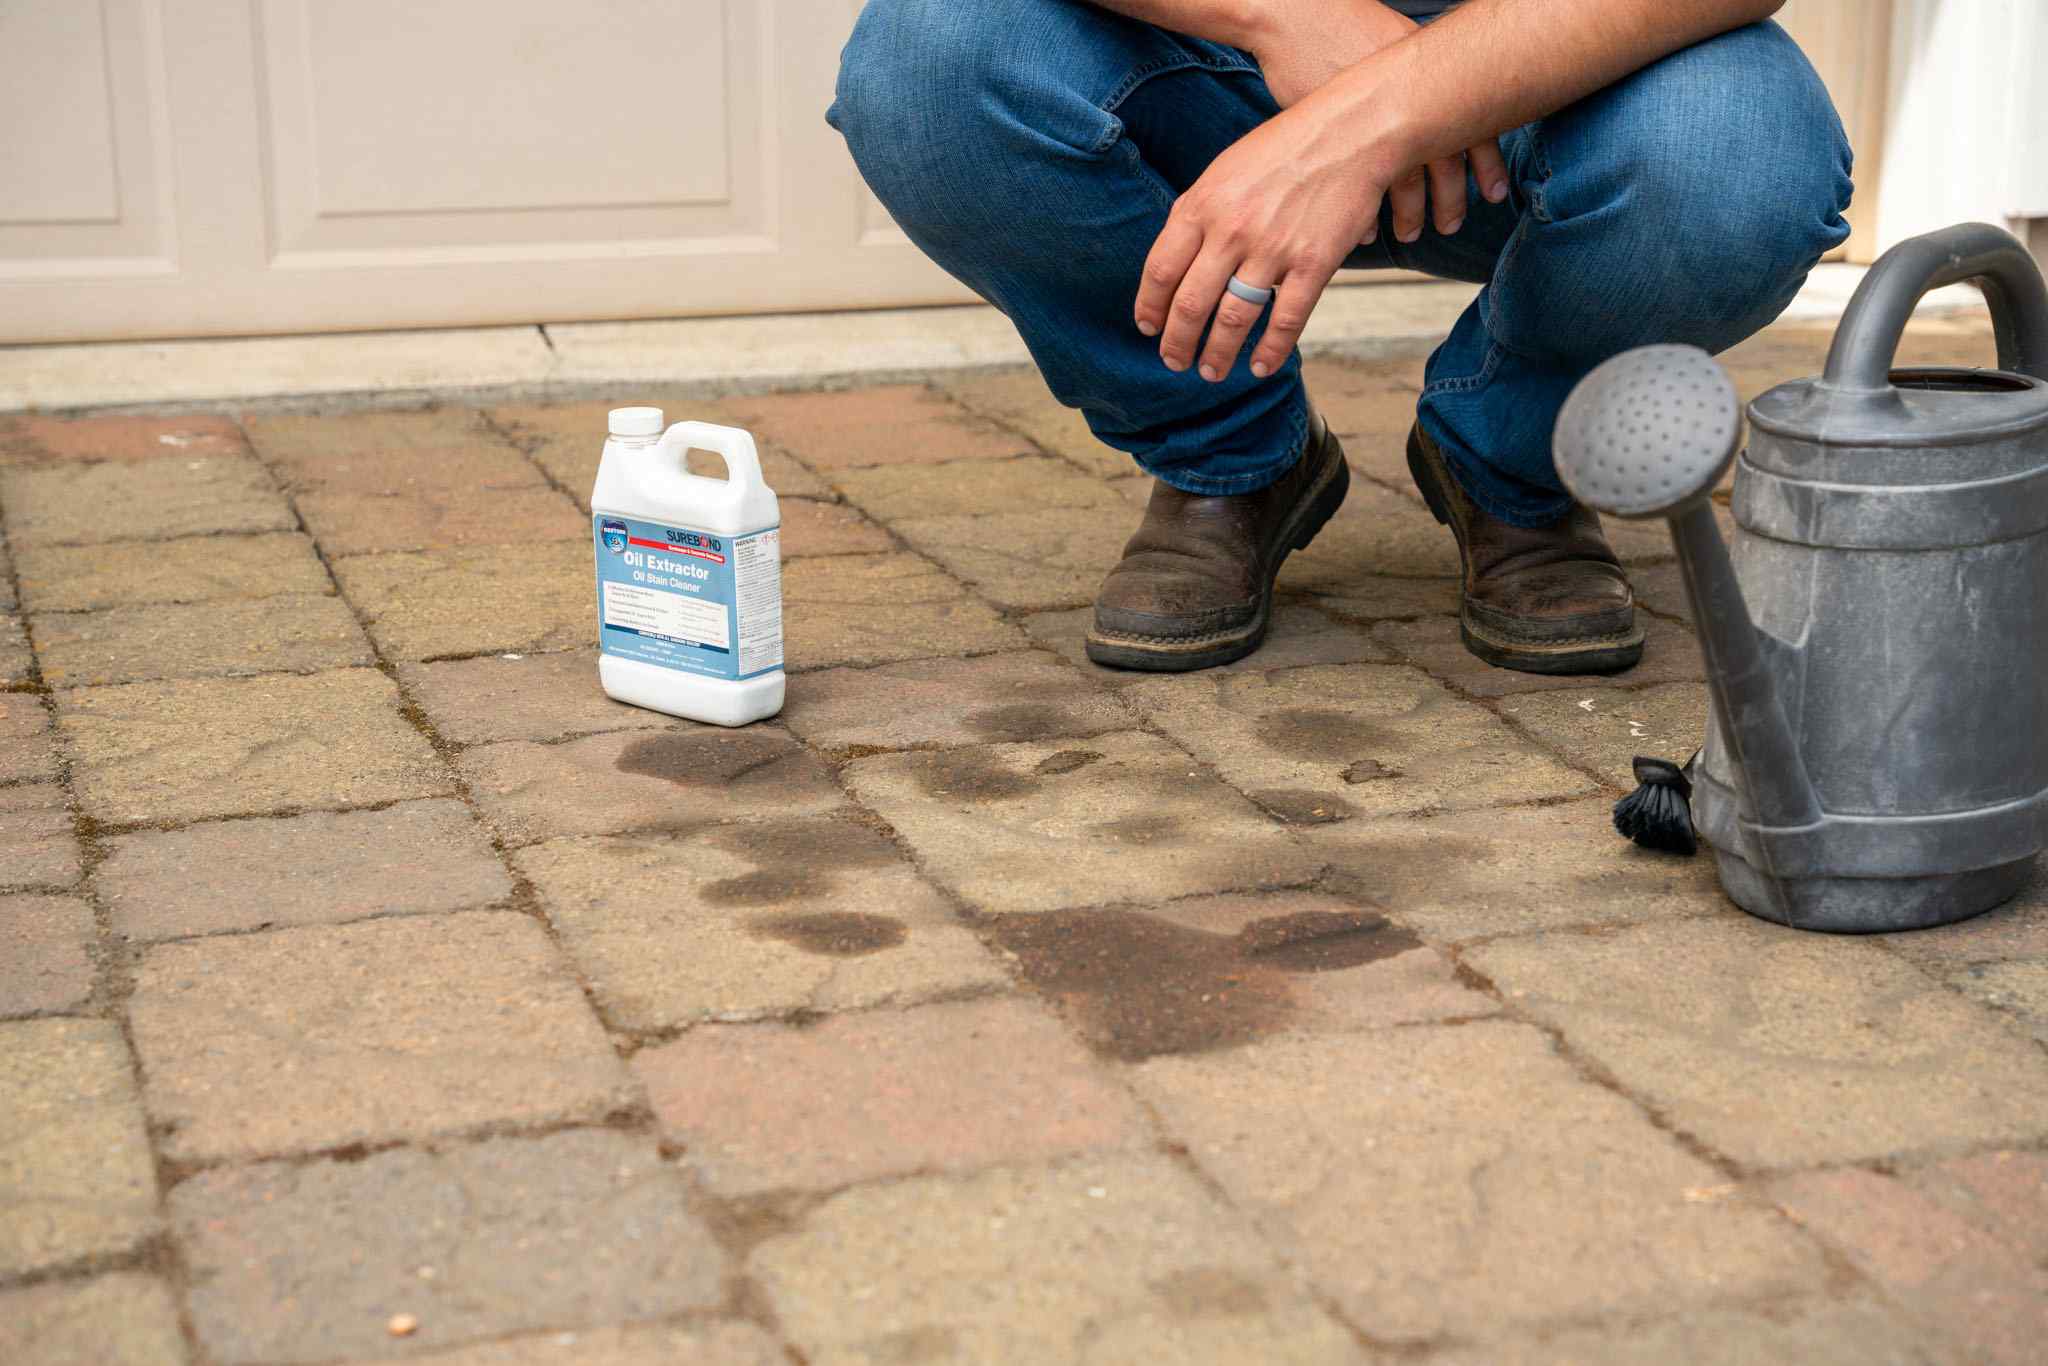
- Clean the surface of the patio using a broom or leaf blower to remove debris and dirt. For more stubborn stains, you can use a mild detergent and water mixture, scrubbing gently with a brush.
- Rinse the patio with a hose to remove any soap residue, and allow it to dry completely before proceeding.
- Apply a high-quality sealer to protect and enhance the appearance of your patio. Follow the manufacturer’s instructions for proper application and drying times.
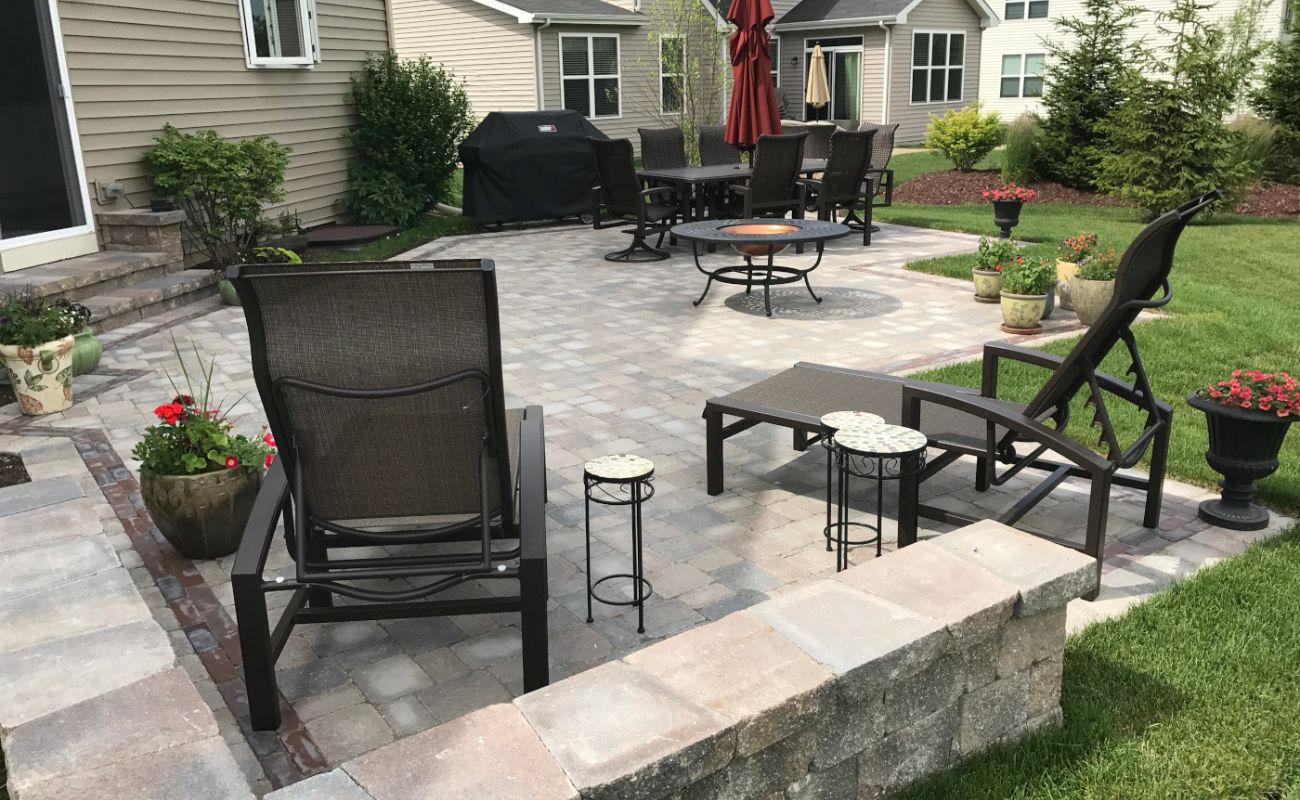
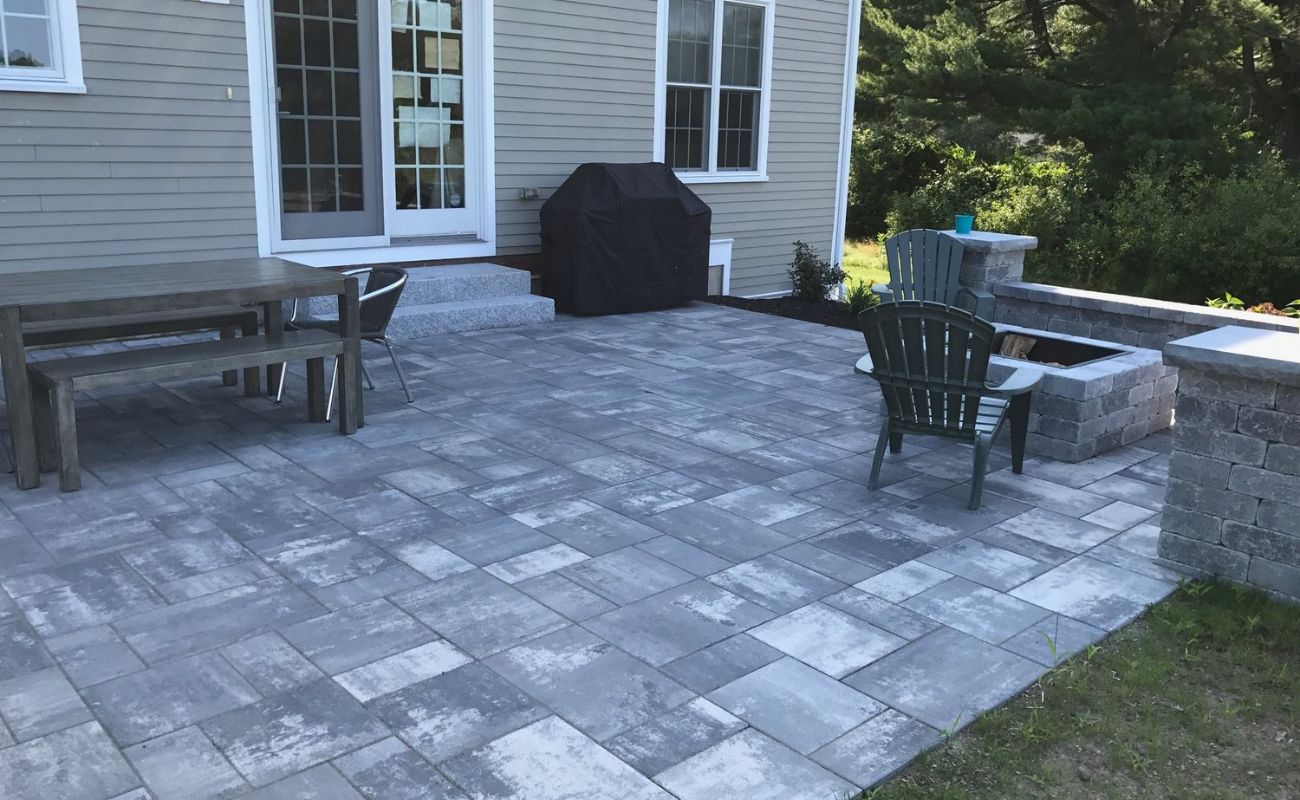
- Add some finishing touches to your patio by incorporating outdoor furniture, umbrellas, plants, and lighting. This will create a welcoming and comfortable outdoor space.
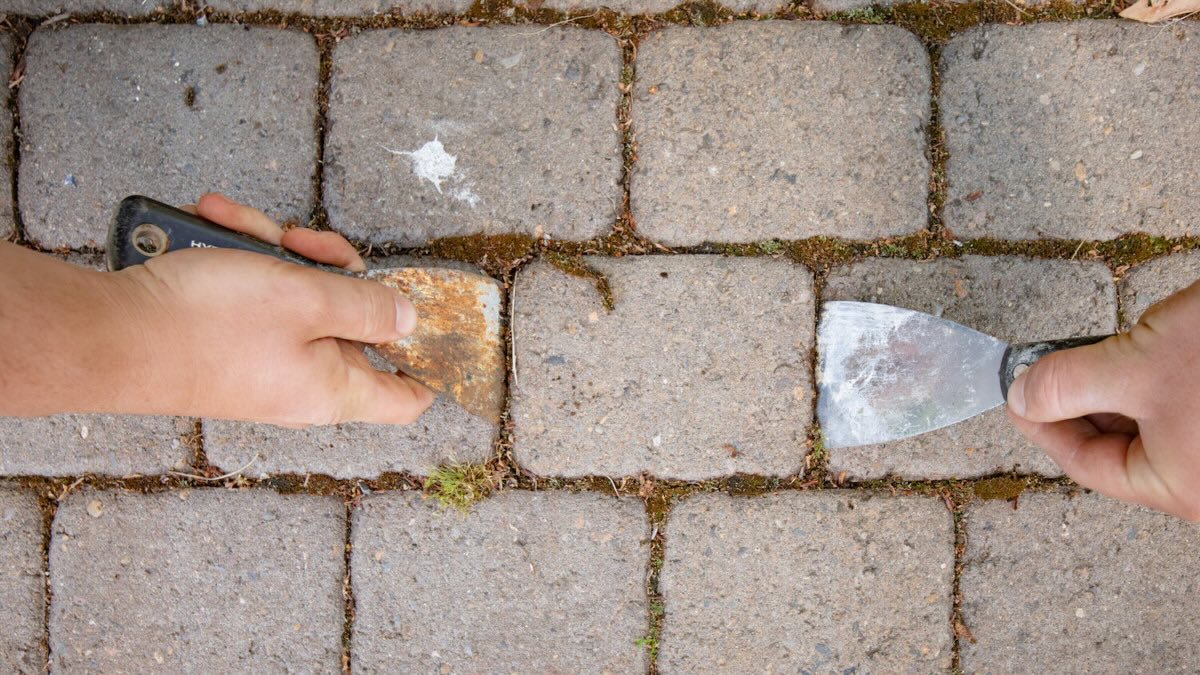
- Regularly inspect the patio for any signs of weed growth in the joints. Remove any weeds promptly to prevent them from spreading and causing damage.
- Reapply joint sand every few years or as needed to maintain the stability and appearance of the patio. This will help prevent shifting and maintain a level surface.
- Consider applying a fresh coat of sealer every few years to protect the pavers and maintain their color and finish. This will also help prolong the lifespan of your patio.
- During the winter months, be mindful of snow and ice removal. Use plastic shovels or snow blowers with rubber paddles to avoid scratching or damaging the pavers.
- Regularly sweep or rinse the patio to remove dirt, leaves, and debris. This will help maintain its cleanliness and prevent potential staining or damage.
By following these finishing touches and maintenance tips, your brick paver patio will continue to be a beautiful and functional outdoor space for you to enjoy. Remember to regularly inspect, clean, and make any necessary repairs to ensure its longevity.
Now that you’re done with all the steps, it’s time to sit back, relax, and take pleasure in the charming ambiance of your new brick paver patio!
Read more: How To Clean Brick Pavers Patio
Conclusion
Creating a patio from brick pavers is a rewarding and transformative DIY project that can elevate your outdoor space to new levels of beauty and functionality. With careful planning, precise installation, and regular maintenance, your brick paver patio will provide you with years of enjoyment.
Throughout this guide, we’ve covered the essential steps to take from planning and design to laying the pavers, cutting and fitting, securing, and adding the final touches. Each step plays a crucial role in the successful completion of your patio.
Remember to invest time in the planning and design phase, as this will set the foundation for your patio’s overall style and functionality. Take the time to choose the right materials, paver patterns, and colors that suit your personal preferences and the overall aesthetic of your outdoor space.
Site preparation is key to building a strong and stable foundation for your patio. Proper excavation, drainage considerations, and compaction of the base material will contribute to the longevity of your patio.
When it comes to installation, take care to accurately lay and fit each paver, ensuring tight joints and a level surface. Cutting and fitting pavers may be necessary to create an aesthetically pleasing design and accommodate any obstructions in the patio area.
Securing the pavers with joint sand and implementing a regular maintenance routine will help keep your patio looking its best. Regular inspection, cleaning, and resealing will prolong the lifespan of your patio and protect it from weathering and wear.
As you add your finishing touches and furniture, your brick paver patio will become a cozy, inviting retreat in your outdoor space. Whether you’re hosting gatherings, enjoying family time, or simply unwinding after a long day, your patio will be the perfect backdrop for creating lasting memories.
Now that you have the knowledge and confidence to create your own brick paver patio, it’s time to get started. Grab your materials, gather your tools, and embark on this exciting journey of turning your outdoor dreams into a reality!
Frequently Asked Questions about How To Create A Patio From Brick Pavers
Was this page helpful?
At Storables.com, we guarantee accurate and reliable information. Our content, validated by Expert Board Contributors, is crafted following stringent Editorial Policies. We're committed to providing you with well-researched, expert-backed insights for all your informational needs.

0 thoughts on “How To Create A Patio From Brick Pavers”