Home>Garden Essentials>How To Install Gravel Landscaping

Garden Essentials
How To Install Gravel Landscaping
Modified: March 7, 2024
Learn how to install a beautiful gravel landscaping in your garden with our step-by-step guide. Transform your outdoor space with this low maintenance and versatile option.
(Many of the links in this article redirect to a specific reviewed product. Your purchase of these products through affiliate links helps to generate commission for Storables.com, at no extra cost. Learn more)
Introduction
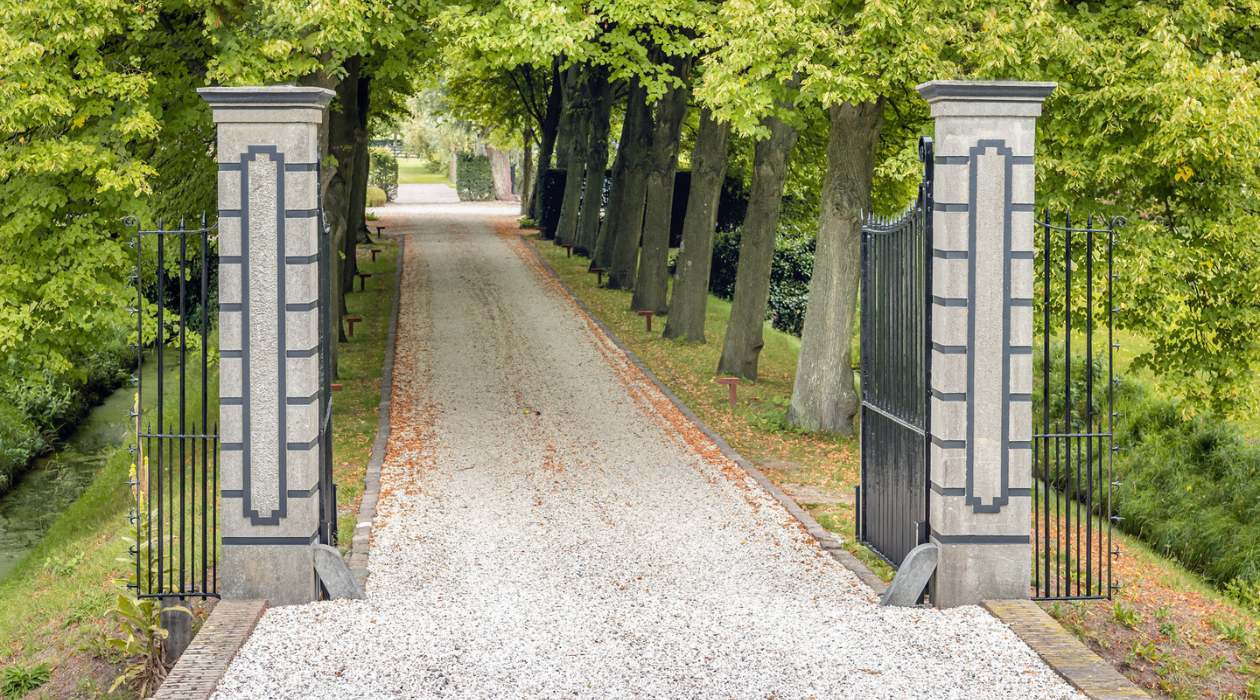
Welcome to the world of gravel landscaping! If you’re looking to transform your outdoor space into a low-maintenance, visually appealing oasis, gravel can be the perfect solution. Whether you’re revamping your backyard, creating a pathway, or designing a garden bed, gravel offers versatility and durability.
Gravel is a popular choice for landscaping for several reasons. It provides excellent drainage and helps prevent soil erosion. It’s also relatively affordable and comes in a wide range of colors and sizes, allowing you to choose the perfect style to complement your home and personal taste.
In this article, we’ll take you through the process of installing gravel landscaping step by step. From choosing the right gravel to adding the finishing touches, we’ll cover everything you need to know!
But before we dive into the installation process, it’s important to consider your specific needs and preferences. Take some time to envision your desired outdoor space and think about how gravel can enhance its beauty and functionality. Are you looking for a traditional or modern design? Do you want a smooth or textured gravel surface? These considerations will help guide you in choosing the right gravel for your project.
Next, let’s explore the various types of gravel available and how to select the perfect one for your landscaping needs.
Key Takeaways:
- Gravel landscaping offers versatility, durability, and low maintenance. Choosing the right gravel, preparing the area, and adding edging are crucial steps for creating a visually appealing and long-lasting outdoor space.
- Final touches such as adding plants, lighting, and seating areas enhance the beauty and functionality of your gravel landscape. Enjoy your transformed outdoor oasis and take pride in your accomplishment!
Read more: How To Use Pea Gravel In Landscaping
Choosing the Right Gravel
When it comes to selecting the right gravel for your landscaping project, there are a few factors to consider. The first is the size of the gravel. Gravel is typically categorized into three main sizes: small, medium, and large. Small gravel, often referred to as pea gravel, is about the size of a pea and is ideal for pathways and decorative purposes. Medium gravel, which ranges in size from a quarter inch to one inch, is commonly used for driveways and garden beds. Large gravel, with sizes exceeding one inch, is better suited for areas where you want to create a bolder statement.
Another consideration is the color of the gravel. Gravel comes in a wide range of colors, including shades of gray, brown, red, and even blue. Consider the existing color scheme of your outdoor space and choose a gravel color that complements it. Earth-tone-colored gravels tend to blend well with natural surroundings, while vibrant-colored gravels can add a pop of color to your landscape.
Texture is another important factor to take into account. Smooth gravel provides a more polished and refined look, making it suitable for formal or modern landscape designs. On the other hand, textured gravel adds depth and interest to the space and is great for creating a rustic or natural aesthetic.
Finally, it’s essential to assess the quality of the gravel you’re considering. Look for gravel that is free from debris, such as dirt and dust, as these impurities can affect the overall appearance of your landscaping. Additionally, opt for gravel that has been properly washed and screened to ensure consistency in size and shape.
Once you have a clear idea of the size, color, texture, and quality of the gravel you desire, it’s time to move on to the next step: preparing the area for installation.
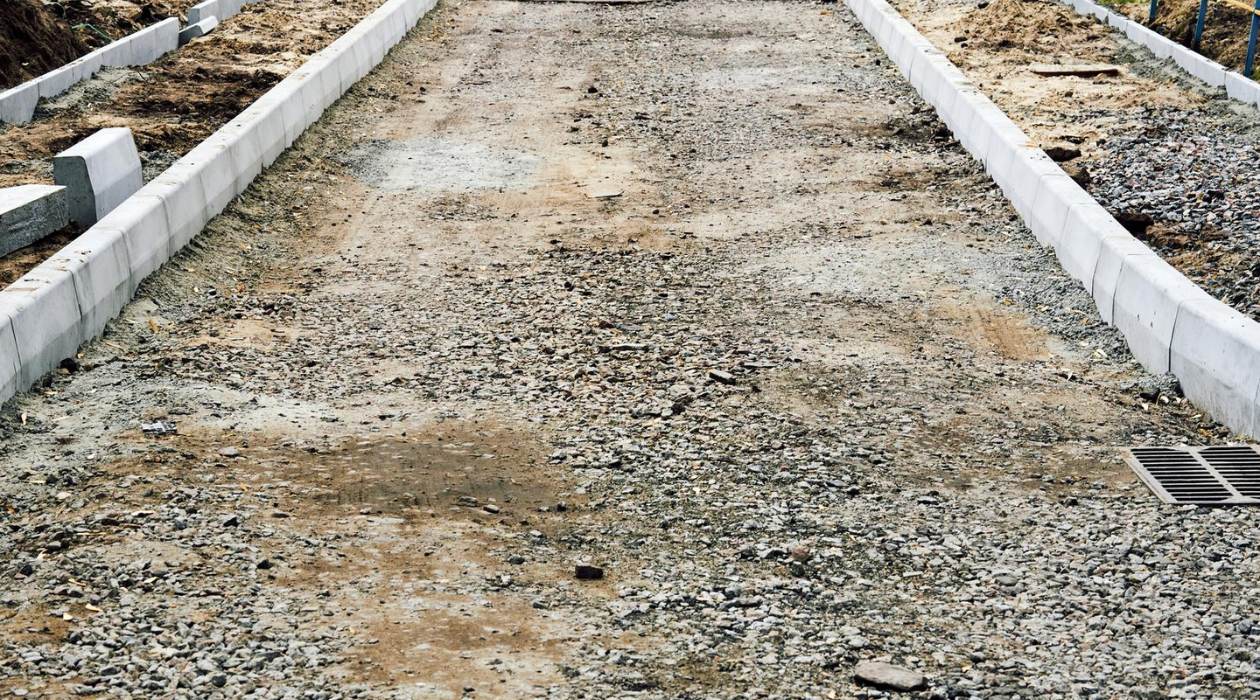
Preparing the Area
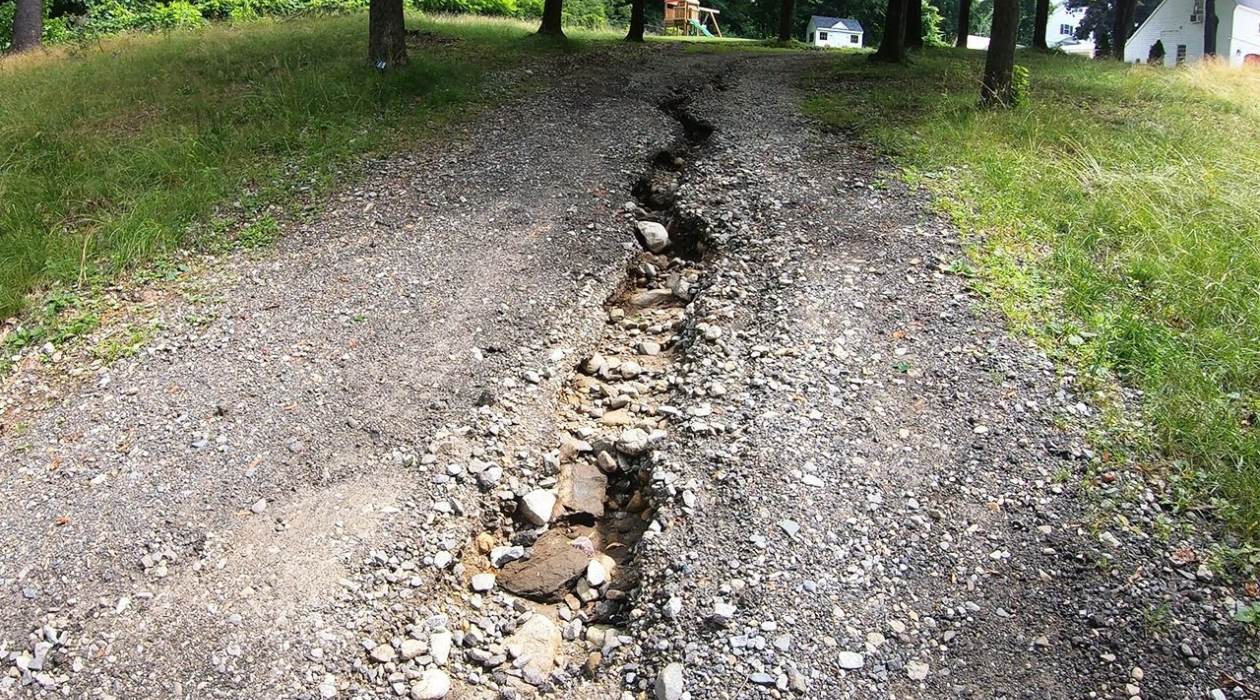
Before you start installing your gravel landscaping, it’s important to properly prepare the area. This step ensures a solid foundation for the gravel and helps prevent future issues such as uneven settling or weed growth.
The first step in preparing the area is to mark the boundaries of your desired gravel space. Use stakes and string or a garden hose to outline the area. This will give you a visual guide while working and help ensure a clean and defined gravel installation.
Next, clear the area of any existing vegetation, rocks, or debris. Use a rake or shovel to remove any grass, weeds, or other unwanted plants. It’s important to create a blank canvas for the gravel to be laid down properly.
If the area is particularly uneven or has significant slopes, consider excavating the soil to create a more level surface. This can be done with a shovel or a rented excavation equipment, depending on the size of the area. Leveling the ground will not only provide a more stable base but also create a visually appealing final result.
Once the area is clear and leveled, it’s time to install landscape fabric. Landscape fabric acts as a barrier, preventing weed growth and helping to maintain the stability of the gravel. Roll out the fabric over the entire area, making sure to overlap the edges by a few inches. Secure the fabric in place with landscape fabric pins or staples to keep it from shifting during the gravel installation.
With the landscape fabric in place, you’re now ready to start the exciting part of the project: spreading the gravel! This step will be covered in the next section, so let’s move on to the process of spreading and leveling the gravel.
Marking Boundaries
Before you begin installing your gravel landscaping, it’s important to mark the boundaries of the area. This step will help ensure that you have a clear and defined space to work with.
To mark the boundaries, you can use a variety of materials, such as stakes, string, or a garden hose. Start by locating the area where you want the gravel to be installed. Place stakes at each corner of the desired space. If you’re working with a curved or irregularly shaped area, use stakes at key points along the perimeter.
Once the stakes are in place, use string or a garden hose to connect them. Pull the string or hose taut and attach it securely to each stake. This will create a visual guide and serve as a reference point while installing the gravel.
It’s important to ensure that the boundaries are straight and even. Use a level or a measuring tape to check for uniformity. Adjust the placement of the stakes or string as needed to achieve a consistent line.
Marking the boundaries is especially crucial if you have other landscaping elements nearby, such as plants, flower beds, or paved areas. It helps create a clear separation between the gravel space and the adjacent features, ensuring a clean and well-defined look.
By marking the boundaries before you start the installation process, you can save time and effort by avoiding any unnecessary gravel placement. It also allows you to visualize the final result and make any adjustments to the layout if necessary.
Once you have marked the boundaries, you are ready to move on to the next step: clearing the area of any existing vegetation or debris.
Clearing the Area
Now that you have marked the boundaries of your gravel landscaping project, it’s time to clear the area of any existing vegetation or debris. This step is essential to ensure a clean and level surface for your gravel installation.
Start by removing any plants, weeds, or grass that are within the marked boundaries. Use a shovel or a garden hoe to dig up the plants, making sure to remove as much of the root system as possible. If you have a large area to clear, consider using a weed trimmer or a lawnmower to cut down the vegetation before removing it.
Dispose of the cleared vegetation properly, either by composting it or by placing it in yard waste bags for pickup. Avoid dumping the vegetation in natural areas or water bodies, as it can disrupt the local ecosystem.
Next, remove any rocks or large debris from the area. Use a rake or a shovel to gather and remove any stones, branches, or other objects that may interfere with the smooth installation of the gravel. Clearing the area of debris will not only improve the aesthetics of your gravel landscaping but also prevent potential damage to the landscape fabric or the gravel itself.
Inspect the cleared area thoroughly to ensure that it is free of any remaining vegetation or debris. Take the time to walk around and visually assess the surface. If you notice any remaining plants or objects, remove them promptly.
By clearing the area before installing the gravel, you create a clean and blank canvas for your landscaping project. This will allow for a more efficient and visually pleasing installation process. Additionally, it helps prevent weed growth and ensures that the gravel remains intact and evenly distributed.
With the area cleared, the next step is to excavate the soil, if necessary, to create a level surface for your gravel landscaping. This will be covered in the next section.
Read more: How To Install A Gravel Walkway
Excavating the Soil
Excavating the soil is an important step in the preparation process for your gravel landscaping project. By excavating the soil, you create a level and stable foundation for the gravel to be laid upon.
Start by assessing the area and determining if any excavation is required. If the ground is already relatively level and there are no significant slopes or dips, you may not need to excavate. However, if there are areas with uneven terrain or if you’re looking to create a specific grade for your landscape design, excavation will be necessary.
Before you begin, gather the necessary tools, such as a shovel, a rake, and a wheelbarrow. If you have a large area to excavate, consider renting a mini excavator or hiring a professional for efficient and precise results.
Start by removing the top layer of soil using a shovel or a spade. Dig down to a depth of about 4 to 6 inches, removing any rocks, roots, or other obstructions as you go. Place the excavated soil in a wheelbarrow or a designated area for disposal.
As you excavate, periodically check the surface with a level to ensure that you’re achieving a consistent and even grade. This will help prevent any standing water or unevenness in your gravel landscaping.
If you encounter areas with compacted soil or heavy clay, consider loosening it with a garden fork or a rototiller to improve drainage and create a more suitable base for the gravel.
Once the soil has been excavated, take the time to compact the area using a tamper or a hand-held plate compactor. This will help create a firm and stable surface for the gravel.
Excavating the soil may seem like a labor-intensive task, but it is crucial for the success and longevity of your gravel landscaping. By creating a level and well-prepared base, you can ensure that your gravel stays in place and looks its best for years to come.
With the soil excavated, the next step is to install landscape fabric to prevent weed growth and maintain the stability of your gravel. This will be covered in the next section.
Installing Landscape Fabric
Installing landscape fabric is a crucial step in the preparation process for your gravel landscaping project. Landscape fabric acts as a barrier, preventing weed growth and helping to maintain the stability of the gravel.
Start by rolling out the landscape fabric over the excavated soil. Make sure to cover the entire area within the marked boundaries. If necessary, cut the fabric to fit the specific shape and dimensions of your landscape.
Overlap the edges of the fabric by a few inches to ensure complete coverage. This will help prevent any weed growth or gravel displacement at the seams.
Once the fabric is in place, secure it by using landscape fabric pins or staples. These should be inserted along the edges and throughout the fabric, approximately every 12 inches. This will prevent the fabric from shifting or sliding during the gravel installation process.
Take care when securing the fabric not to pierce it with the pins or staples. Avoid creating large holes or tears, as this can compromise the effectiveness of the barrier against weeds.
As you work, periodically pull on the fabric to ensure it is taut and smooth. This will help prevent any wrinkles or bumps that can affect the appearance of your gravel landscaping.
Once the landscape fabric is properly installed, take a final walk-through to inspect any visible areas for any missed spots or loose sections. Address any issues before proceeding to the next step.
Installing landscape fabric will help reduce weed growth and provide a stable base for your gravel landscaping. It is an essential step in creating a low-maintenance and long-lasting outdoor space.
With the landscape fabric in place, it’s time to move on to the exciting part: spreading the gravel. This will be covered in the next section.
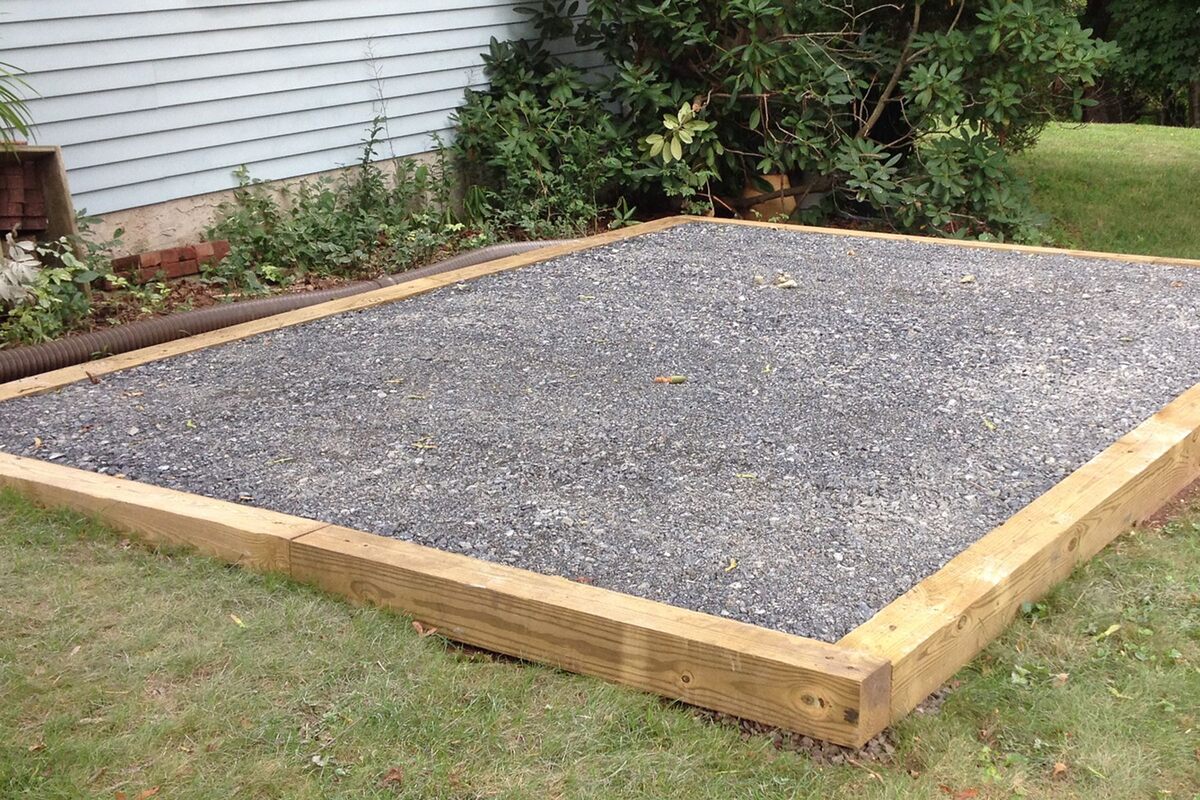
Before installing gravel landscaping, make sure to properly prepare the area by removing any existing vegetation, leveling the ground, and installing a weed barrier to prevent weed growth. This will ensure a clean and long-lasting gravel surface.
Spreading the Gravel
Now that you have prepared the area and installed the landscape fabric, it’s time to start spreading the gravel. This step is where your vision begins to come to life and your outdoor space transforms into a beautiful and functional landscape.
Start by acquiring the gravel you have selected for your landscaping project. Ensure that you have enough to cover the entire area within the marked boundaries. It’s always better to have slightly more than you need, as you can use any excess gravel for future touch-ups or additions.
Using a shovel or a wheelbarrow, begin distributing the gravel evenly over the landscape fabric. Start at one corner of the marked area and work your way across, moving in a consistent pattern. This will help ensure a uniform look and prevent any gaps or inconsistencies in the gravel coverage.
As you spread the gravel, aim for a depth of about 2 to 3 inches. This will provide enough coverage to create a solid surface while allowing for proper drainage. Adjust the amount of gravel as needed to achieve your desired depth.
Use a rake or a shovel to level and smooth the gravel as you go. This will help create an even and visually appealing surface. Take your time and pay attention to any areas that may need extra attention, such as corners or edges, to achieve a polished look.
If you’re working with a larger area, consider using a gravel spreader or hiring a professional to ensure an even distribution and minimize physical strain.
Take breaks as needed to rest and assess your progress. Step back and view the area from different angles to evaluate the overall appearance and make adjustments where necessary.
It’s important to keep safety in mind while spreading the gravel. Lift with your legs, not your back, to avoid strain or injury. Wear appropriate footwear to provide traction and protection from sharp gravel edges.
Continue spreading and leveling the gravel until the entire area is covered to your satisfaction. Take pride in your work and enjoy the transformation of your outdoor space!
With the gravel spread, the next step is to properly compact it to ensure stability and longevity. This process will be covered in the following section.
Leveling the Gravel
Once you have spread the gravel over the area, the next step is to ensure that it is properly leveled. Leveling the gravel not only enhances its appearance but also helps with drainage and prevents any uneven areas or potential tripping hazards.
To begin leveling the gravel, use a rake or a shovel to distribute the gravel evenly across the entire area. Move the gravel back and forth, making sure to fill in any low spots and eliminate any high spots. This will help achieve a uniform thickness throughout the space.
As you level the gravel, pay close attention to the edges and corners. Make sure that the gravel is evenly distributed and flush with any existing borders or edging materials. Taking the time to meticulously level these areas will add to the overall professional look of your landscaping project.
Use a straight-edged board or a screed to check the levelness of the gravel surface. Place the board at various points across the area and look for any areas that need further leveling. Fill in any depressions with additional gravel and use the board to evenly distribute it.
Walk over the gravel surface to ensure that it feels solid and stable underfoot. This will help identify any loose areas that might need more compacting or additional gravel for support.
Remember to take breaks and step back periodically to assess the overall levelness and appearance of the gravel. Look for any visual inconsistencies or areas that may need adjustments. By doing this, you can ensure that you achieve a visually pleasing and functional gravel landscape.
Keep in mind that some settling may occur over time after the gravel has been spread and leveled. This is normal and can be addressed with occasional maintenance by adding more gravel as needed.
With the gravel properly leveled, the next step is to compact it to enhance its stability and prevent shifting. The compaction process will be covered in the following section.
Read more: How To Install A Gravel Patio
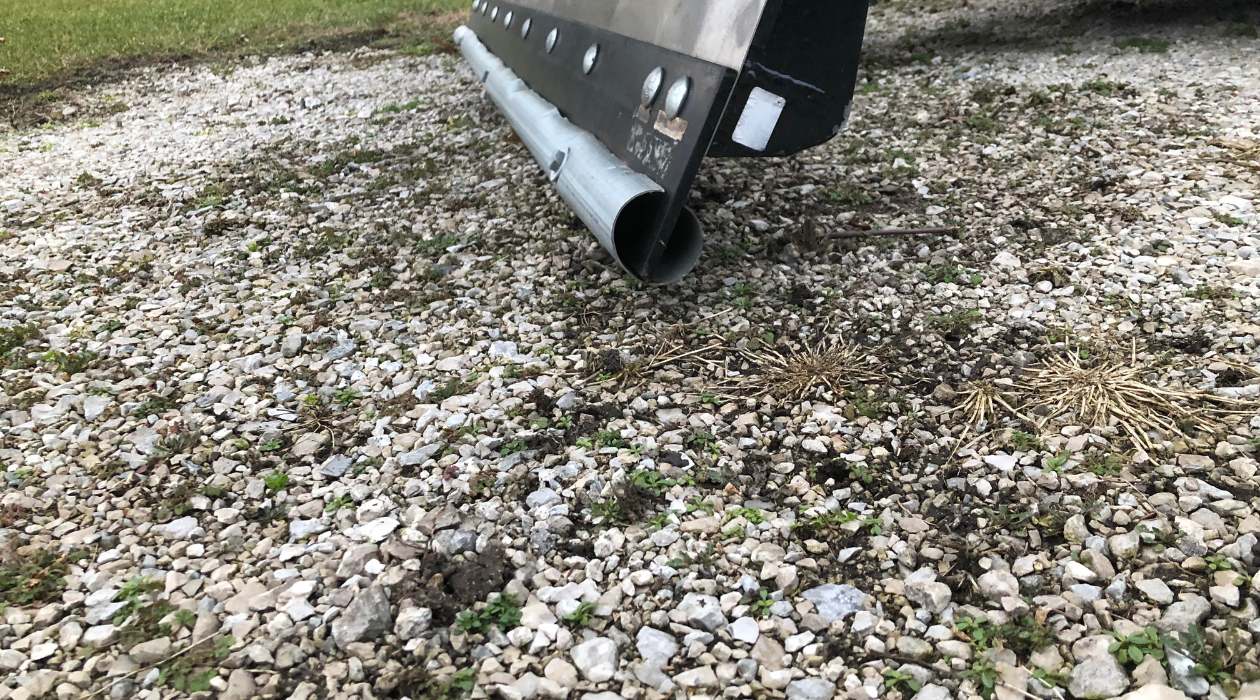
Compact the Gravel
After spreading and leveling the gravel, the next crucial step is to compact it. Compacting the gravel helps to improve its stability, minimize shifting, and create a solid foundation for your landscaping project. It also helps to prevent weeds from growing through the gravel surface.
There are several methods you can use to compact the gravel, depending on the size of the area and the equipment available.
If you have a small area to compact, you can use a hand tamper or a plate compactor. Start at one corner of the space and work your way across, applying firm and even pressure as you tamp down the gravel. Make multiple passes over the entire area to ensure thorough compaction.
For larger areas, consider using a vibratory plate compactor or hiring a professional compaction equipment. These machines provide more force and efficiency in compacting the gravel, saving you time and effort. Follow the manufacturer’s instructions and safety guidelines when using these tools.
When compacting the gravel, pay special attention to the edges and corners of the area. These are areas that are more prone to shifting and settling. Taking the time to thoroughly compact these areas will help maintain the overall stability of your gravel landscape.
Periodically walk over the compacted gravel surface to check for any areas that may need additional compaction or leveling. Any loose or uneven sections should be addressed promptly by adding more gravel and compacting again.
It’s important to note that compacting the gravel too much can cause it to become overly dense and reduce its permeability. This can lead to poor drainage and potential water pooling. Aim for a compacted surface that is firm and stable while still allowing for proper water drainage.
By properly compacting the gravel, you are ensuring a solid and long-lasting foundation for your landscaping project. It will help maintain the aesthetic appeal and structural integrity of your gravel landscape for years to come.
With the gravel compacted, the next step is to add edging to define and enhance the boundaries of your landscaping. This will be covered in the following section.
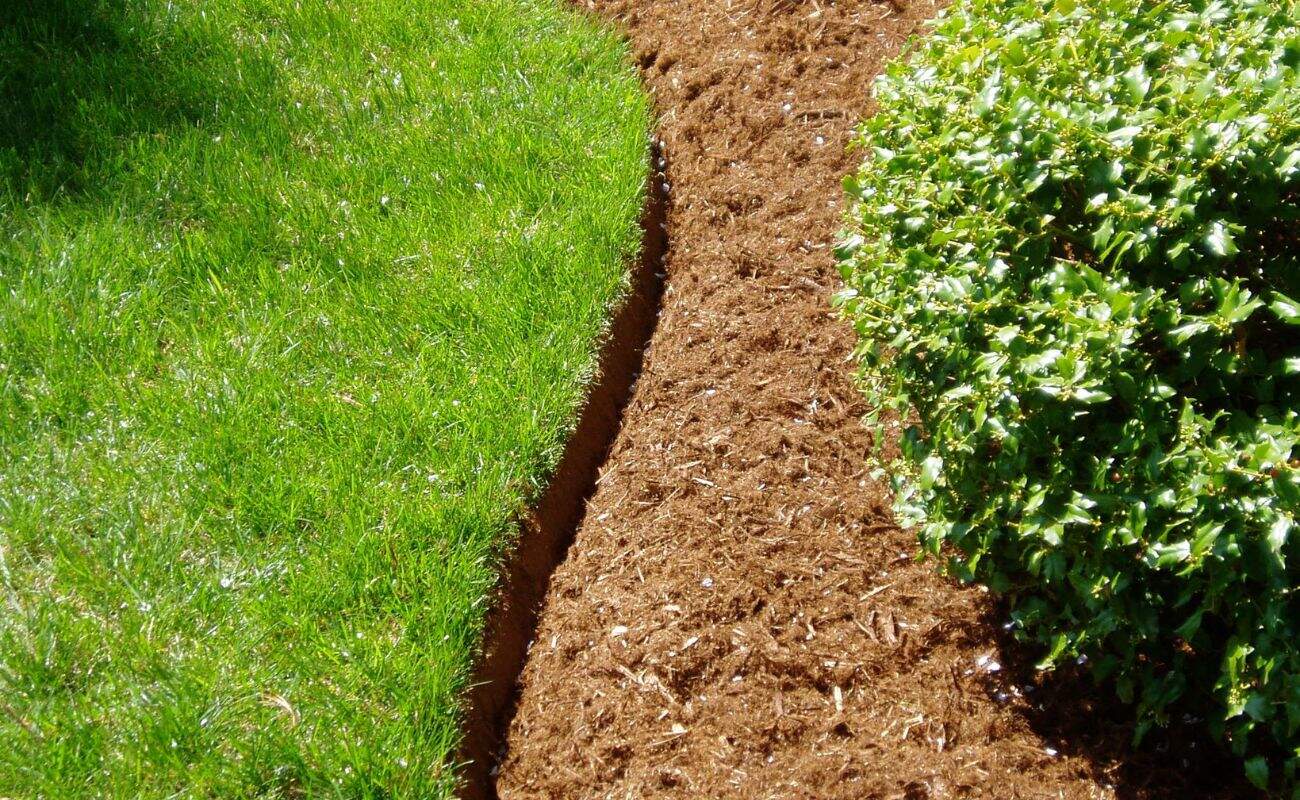
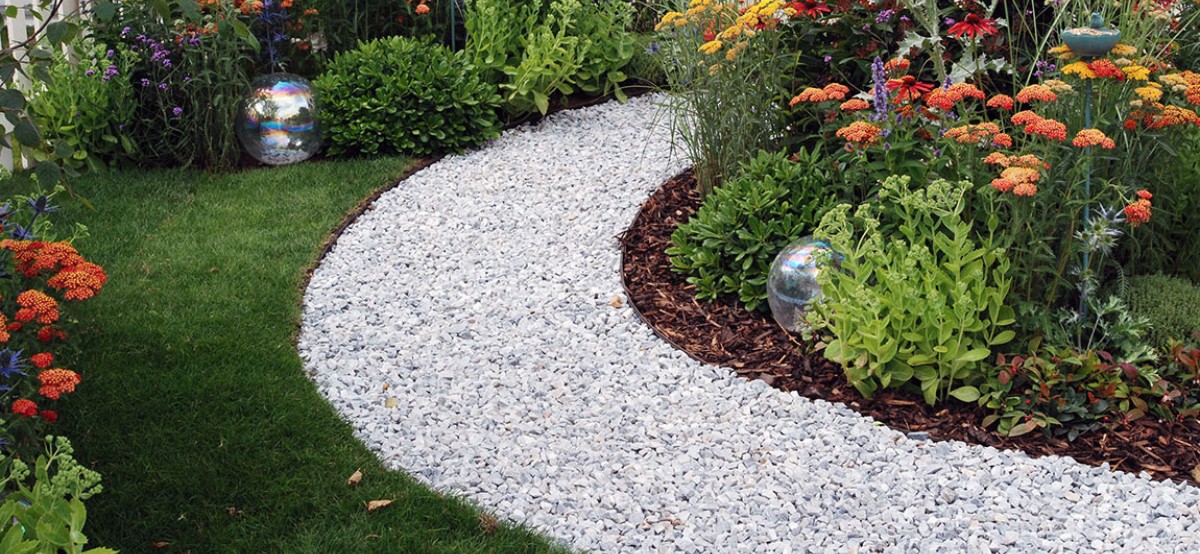
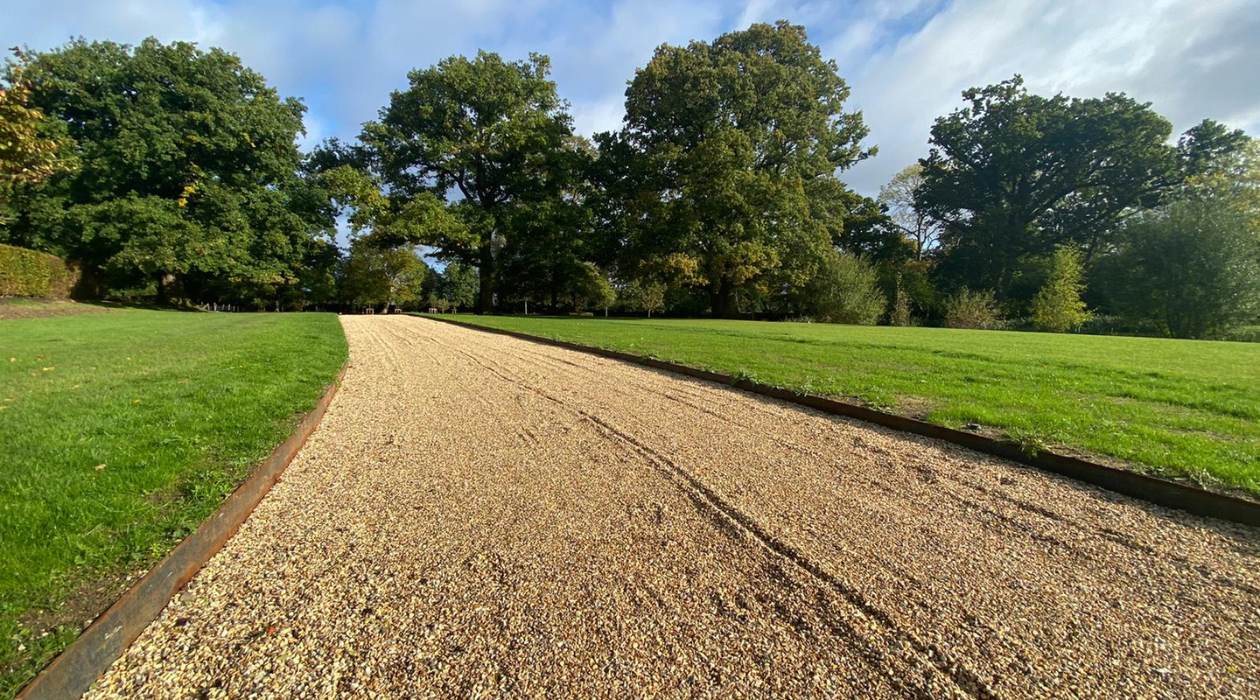
Adding Edging
Adding edging to your gravel landscaping is the final touch that enhances the boundaries, defines the edges, and adds a polished look to your outdoor space. Edging serves multiple purposes, including retaining the gravel, preventing it from spreading into adjacent areas, and providing a visual barrier between the gravel and other landscaping elements.
There are various options available for edging materials, each with its own aesthetic appeal and level of durability. Here are a few popular choices:
- Brick: Brick edging provides a classic and timeless look. It can be laid flush with the gravel or slightly elevated for added visual interest.
- Stone: Natural stone edging adds a rustic and organic feel to your landscaping. It can be irregularly shaped or cut to create a more formal appearance.
- Metal: Metal edging, such as aluminum or steel, offers a sleek and modern touch. It provides a clean line and can be easily installed.
- Wood: Wood edging, such as treated lumber or railway ties, creates a warm and natural border. It can be stained or left untreated for a more rustic look.
- Plastic: Plastic edging is a cost-effective and easy-to-install option. It comes in various styles and colors to suit different design preferences.
Before installing the edging material, ensure that the gravel is level and compacted. This will help create a stable base for the edging to sit on.
Start by placing the edging material along the marked boundaries of your gravel area. Use a rubber mallet or a hammer to drive stakes into the ground on the outer edges of the edging to secure it in place.
Ensure that the edging is level and straight. Make any adjustments as necessary to achieve a consistent and visually appealing appearance.
If using brick or stone edging, you may need to dig a shallow trench to partially bury the edging material for added stability. This will also create a seamless transition between the gravel and the edging.
Once the edging is securely in place, backfill any gaps between the edging and the gravel with additional gravel. This will help prevent any shifting or movement of the edging over time.
Take the time to step back and admire your finished gravel landscaping with the added edging. The edging not only serves a practical purpose but also adds a finishing touch that completes the overall look and feel of your outdoor space.
With the edging in place, you have successfully completed your gravel landscaping project. Whether it’s a pathway, a garden bed, or a backyard transformation, your gravel landscape is now ready to be enjoyed for years to come.
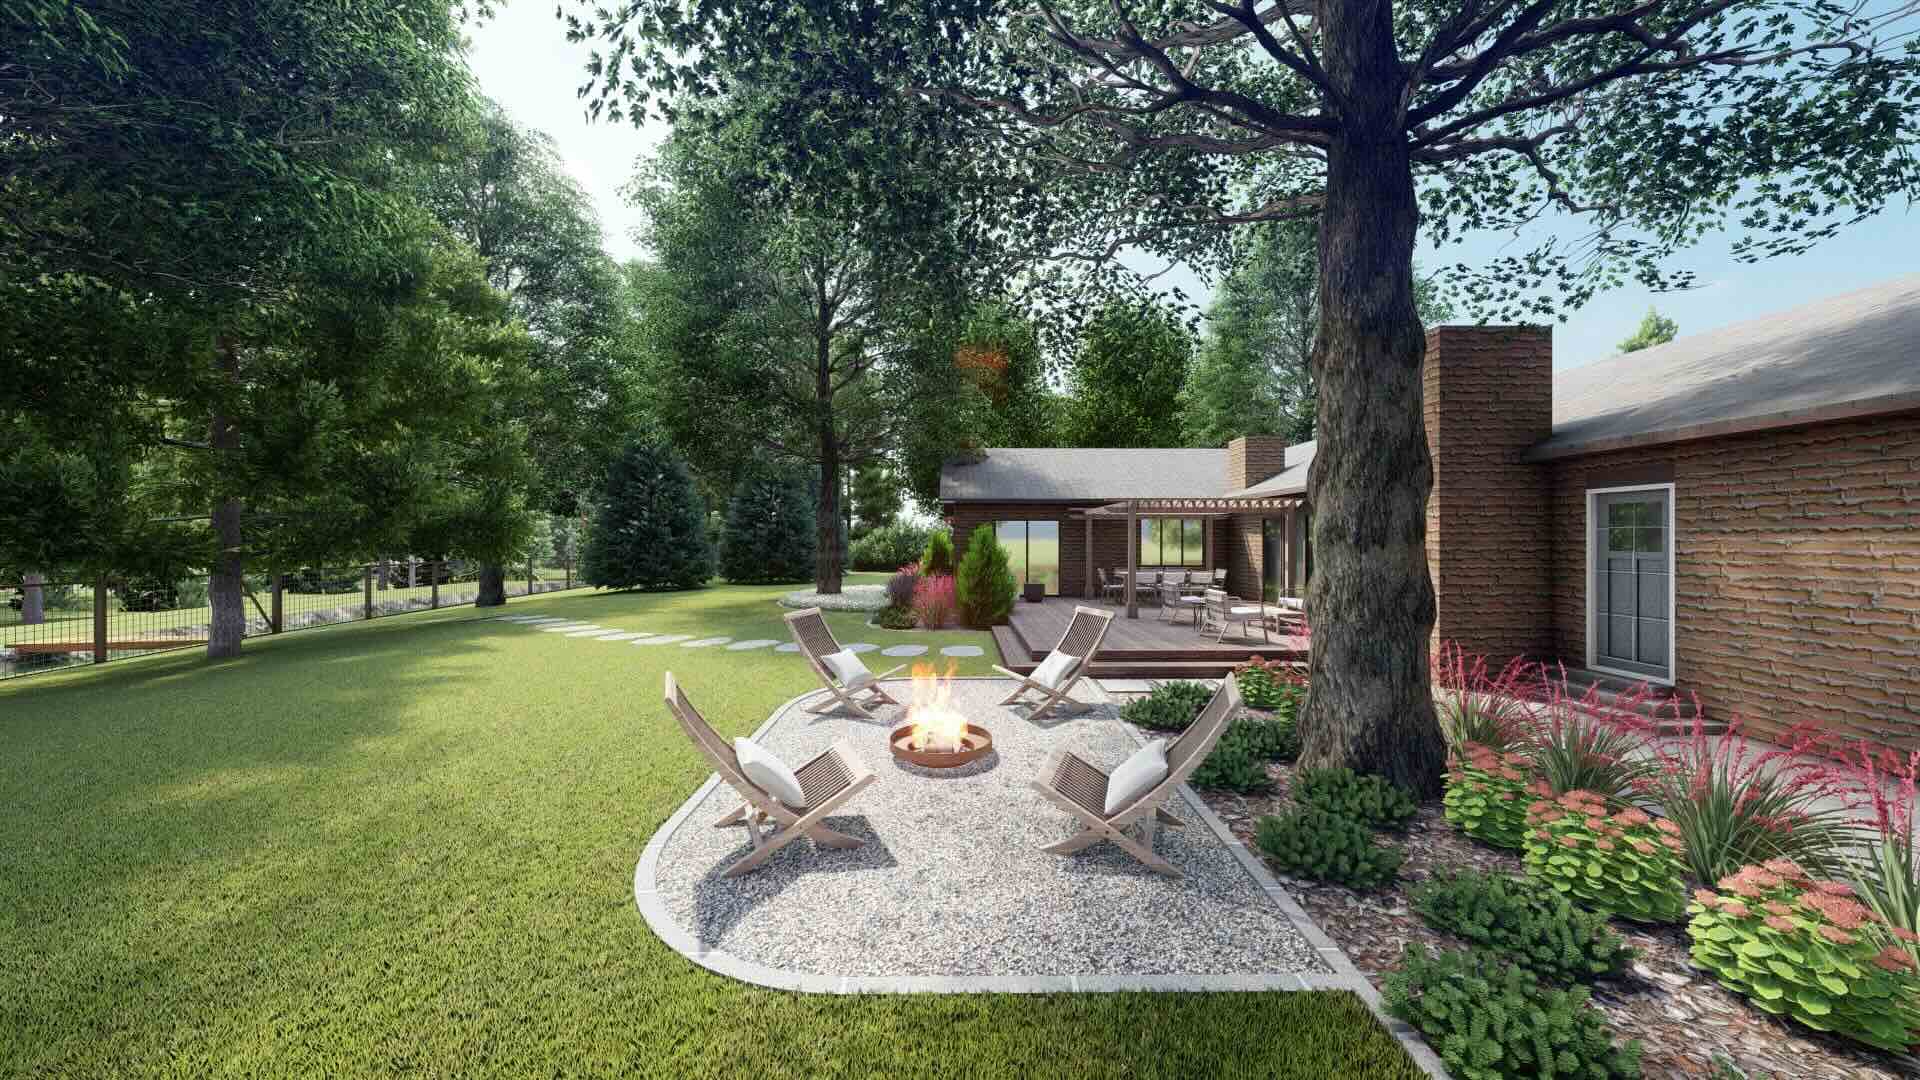
Final Touches
With your gravel landscaping project near completion, it’s time to add the final touches that will truly make your outdoor space shine. These final touches will add personality, functionality, and a sense of completion to your gravel landscape.
Here are a few ideas for final touches:
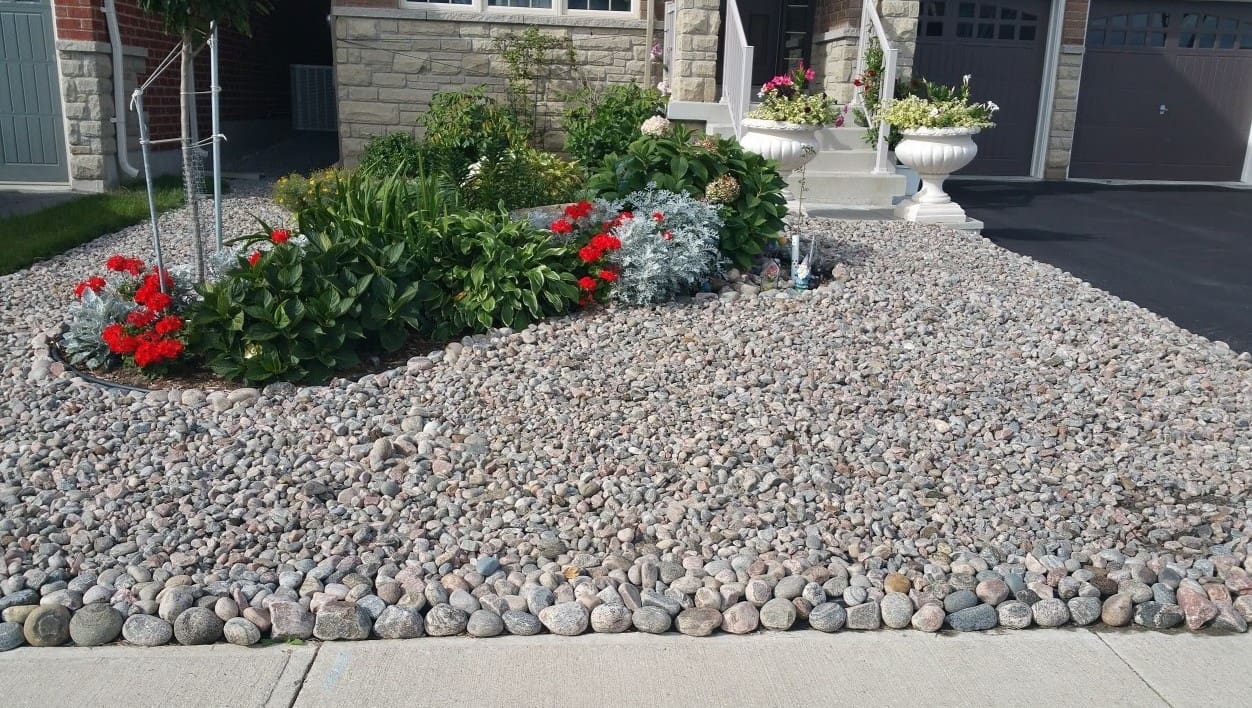
- Adding Plants and Greenery: Integrate plants, shrubs, or flowers into your gravel landscaping to create a vibrant and inviting atmosphere. Consider low-maintenance options that thrive in gravel or container gardens that can be easily moved and rearranged.
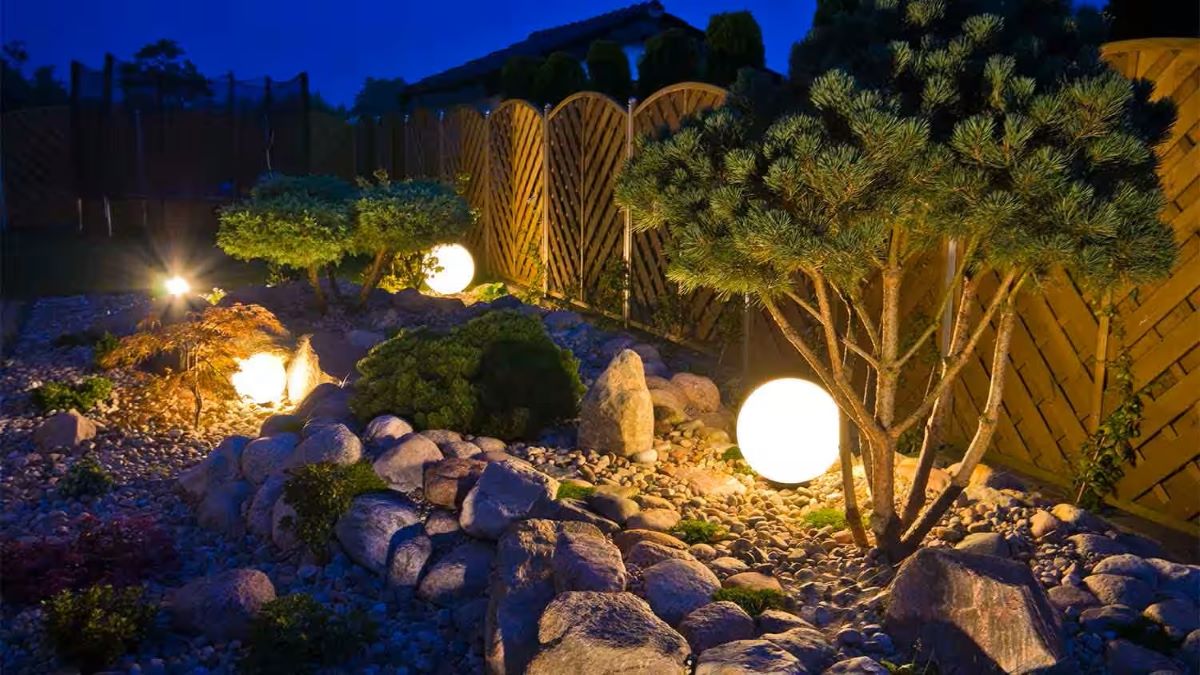
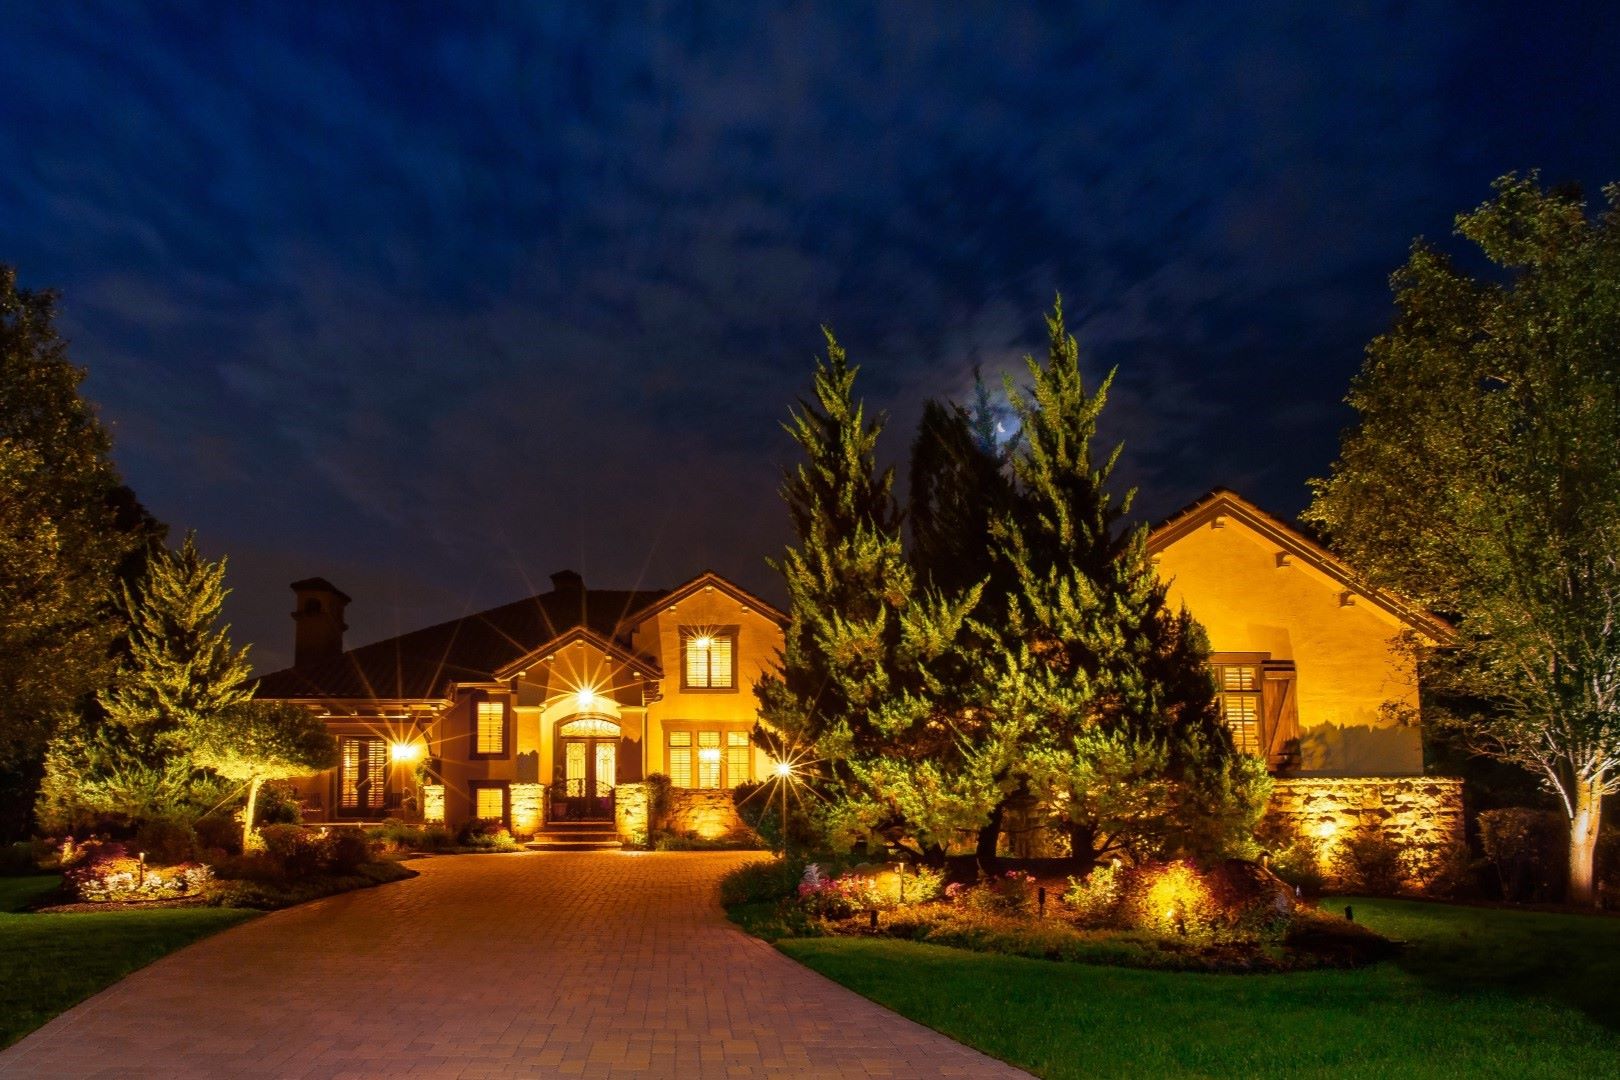
- Installing Lighting: Illuminate your gravel landscape with outdoor lighting. Use path lights to highlight walkways and uplights to accentuate decorative elements. This not only enhances the overall aesthetic but also adds safety and allows you to enjoy your outdoor space even after sunset.
- Incorporating Decorative Elements: Personalize your gravel landscape by adding decorative elements such as statues, birdbaths, or art installations. These eye-catching features can become focal points and add a touch of individuality to your landscape design.
- Creating Seating Areas: Incorporate seating areas within your gravel landscape to create cozy gathering spots for relaxation or entertaining. Install benches, a patio set, or even a fire pit to enhance functionality and encourage socializing.
- Adding Pathway and Stepping Stones: If your gravel landscaping includes pathways, consider adding stepping stones or pavers to create visual interest and guide the flow of foot traffic. This adds a charming and practical element to the overall design.
Remember to consider the overall style and theme of your outdoor space when selecting final touches. Stick to a cohesive design aesthetic that complements the gravel landscape and brings your vision to life.
Once you have added these final touches, take a moment to step back and admire your completed gravel landscape. Revel in the transformation you have achieved and the enhanced beauty and functionality of your outdoor space.
As time passes, periodically inspect and maintain your gravel landscaping. This may involve removing any weeds that may sporadically grow, replenishing gravel in high-traffic areas, or refreshing any decorative elements that may weather over time.
By adding these final touches and maintaining your gravel landscape, you can enjoy a beautiful and low-maintenance outdoor area that brings you closer to nature and provides a tranquil retreat right in your own backyard.
Congratulations on completing your gravel landscaping project and creating a space that you can enjoy and be proud of!
Conclusion
Congratulations! You have successfully completed your gravel landscaping project and transformed your outdoor space into a visually appealing and functional oasis. By following the steps outlined in this guide, you have created a low-maintenance and durable landscape that will bring beauty and enjoyment for years to come.
Choosing the right gravel, preparing the area, spreading and leveling the gravel, and adding edging were key steps in creating a solid foundation for your gravel landscape. The addition of landscape fabric helped prevent weed growth and maintain stability, while compacting the gravel ensured its longevity and minimized shifting.
The final touches, such as adding plants, lighting, decorative elements, and seating areas, have added personality and character to your gravel landscaping. These touches have elevated your outdoor space, allowing you to create an environment that reflects your unique style and provides a welcoming retreat for relaxation and entertainment.
As the seasons change and time passes, periodically maintain your gravel landscape by addressing any weeds, replenishing gravel as needed, and refreshing any decorative elements that may weather over time. This will help preserve the beauty and functionality of your space and ensure its longevity.
Remember to enjoy your newly transformed gravel landscape and take pride in your accomplishment. Whether it’s a peaceful garden, a stylish pathway, or an inviting backyard, your gravel landscaping project has created a space that you can truly call your own.
Thank you for joining us on this journey and we hope that this guide has provided you with the knowledge and inspiration to create a beautiful gravel landscape. Now go out and enjoy the fruits of your labor in your stunning outdoor sanctuary!
Frequently Asked Questions about How To Install Gravel Landscaping
Was this page helpful?
At Storables.com, we guarantee accurate and reliable information. Our content, validated by Expert Board Contributors, is crafted following stringent Editorial Policies. We're committed to providing you with well-researched, expert-backed insights for all your informational needs.
0 thoughts on “How To Install Gravel Landscaping”