Home>Garden Essentials>How To Save Seed
Garden Essentials
How To Save Seed
Modified: March 15, 2024
Learn how to save garden seeds in order to grow your own organic vegetables year after year. Gain independence and sustainability in your garden with our step-by-step guide.
(Many of the links in this article redirect to a specific reviewed product. Your purchase of these products through affiliate links helps to generate commission for Storables.com, at no extra cost. Learn more)
Introduction
Seed saving is a time-honored practice that allows gardeners to preserve and propagate their favorite plant varieties from year to year. It involves carefully selecting, harvesting, cleaning, and storing seeds to ensure their viability for future planting. While seed saving may seem like a daunting task, the benefits far outweigh the effort involved.
In this article, we will explore the numerous advantages of seed saving, as well as provide a step-by-step guide on how to save seeds effectively. Whether you are a seasoned gardener looking to diversify your plant collection or a beginner seeking to reduce gardening expenses, seed saving is a valuable skill to acquire.
By saving seeds, you have the opportunity to preserve heirloom or rare plant varieties that may not be readily available in commercial seed catalogs. This allows you to maintain the genetic diversity of plants and contribute to their ongoing conservation. Moreover, seed saving can be a form of self-sustainability, providing you with a constant supply of seeds without relying on outside sources.
Another significant benefit of seed-saving is its economic value. By saving seeds from your own garden, you can significantly reduce the cost of purchasing new seeds each year. This is particularly advantageous for larger gardens or farms, where the expenses of buying seeds can quickly add up.
Furthermore, seed saving can lead to the development of locally adapted plant varieties. As you save seeds from plants that thrive in your specific growing conditions, you are effectively selecting for traits that are well-suited to your climate, soil, and other environmental factors. This can result in stronger, more resilient plants that are better equipped to withstand pests, diseases, and other challenges.
Seed saving is not only beneficial for the individual gardener, but also for the larger community and the environment. By conserving and sharing seeds, we contribute to the preservation of plant diversity, fostering resilience in our food systems. Additionally, the act of seed saving encourages a deeper connection with nature and promotes a sustainable approach to gardening.
In the following sections, we will delve into the process of seed saving, providing you with practical tips and techniques that can be applied to a wide range of plant varieties. From selecting and harvesting seeds to testing their viability and storing them properly, we will guide you through each step of the process to ensure successful and fruitful seed saving endeavors.
So, grab your gardening gloves and let’s embark on this exciting journey of seed saving!
Key Takeaways:
- Seed saving preserves plant diversity, reduces gardening costs, and fosters self-sustainability. It’s a rewarding skill that empowers gardeners to connect with nature and contribute to conservation efforts.
- Properly storing, labeling, and organizing saved seeds ensures their viability for future planting. Testing seed viability and troubleshooting common issues are essential for successful seed saving.
Read more: How To Save Zucchini Seeds
Benefits of Seed Saving
Seed saving offers a multitude of benefits for both gardeners and the environment. By taking the time to save and preserve seeds, you can enjoy the following advantages:
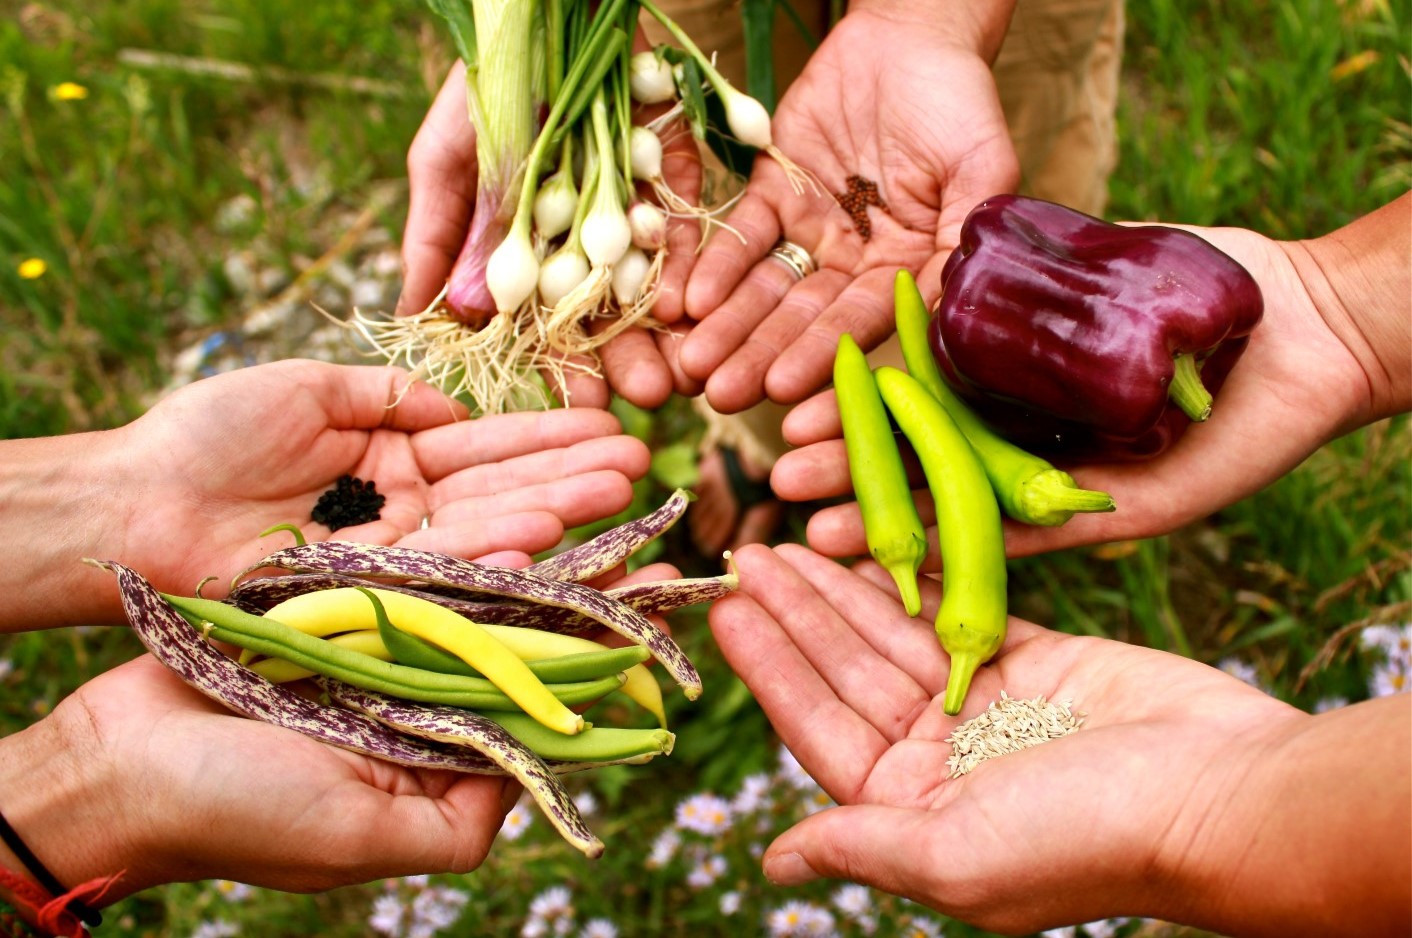
Preserving Genetic Diversity:
One of the primary benefits of seed saving is the preservation of genetic diversity. Commercial seed catalogs often focus on a limited range of plant varieties, leaving many heirloom and rare varieties at risk of extinction. By saving seeds from diverse plants, you contribute to the conservation of unique genetic traits and help maintain the overall biodiversity of plant species.
Cost Savings:
Seed saving is a cost-effective way to build your garden year after year. Instead of purchasing new seeds each season, you can rely on the seeds you have saved. This is especially beneficial for large gardens or farms where the cost of seeds can quickly escalate. By saving seeds, you can significantly reduce your gardening expenses and allocate resources to other areas of your garden.
Adaptation to Local Conditions:
Through seed saving, gardeners have the opportunity to develop plants that are well-adapted to their specific growing conditions. By selecting seeds from plants that have shown resilience, disease resistance, or improved productivity in your local climate, you can gradually develop locally adapted plant varieties. These varieties are more likely to thrive and yield better results in your specific region.
Read more: How To Save Poppy Seeds
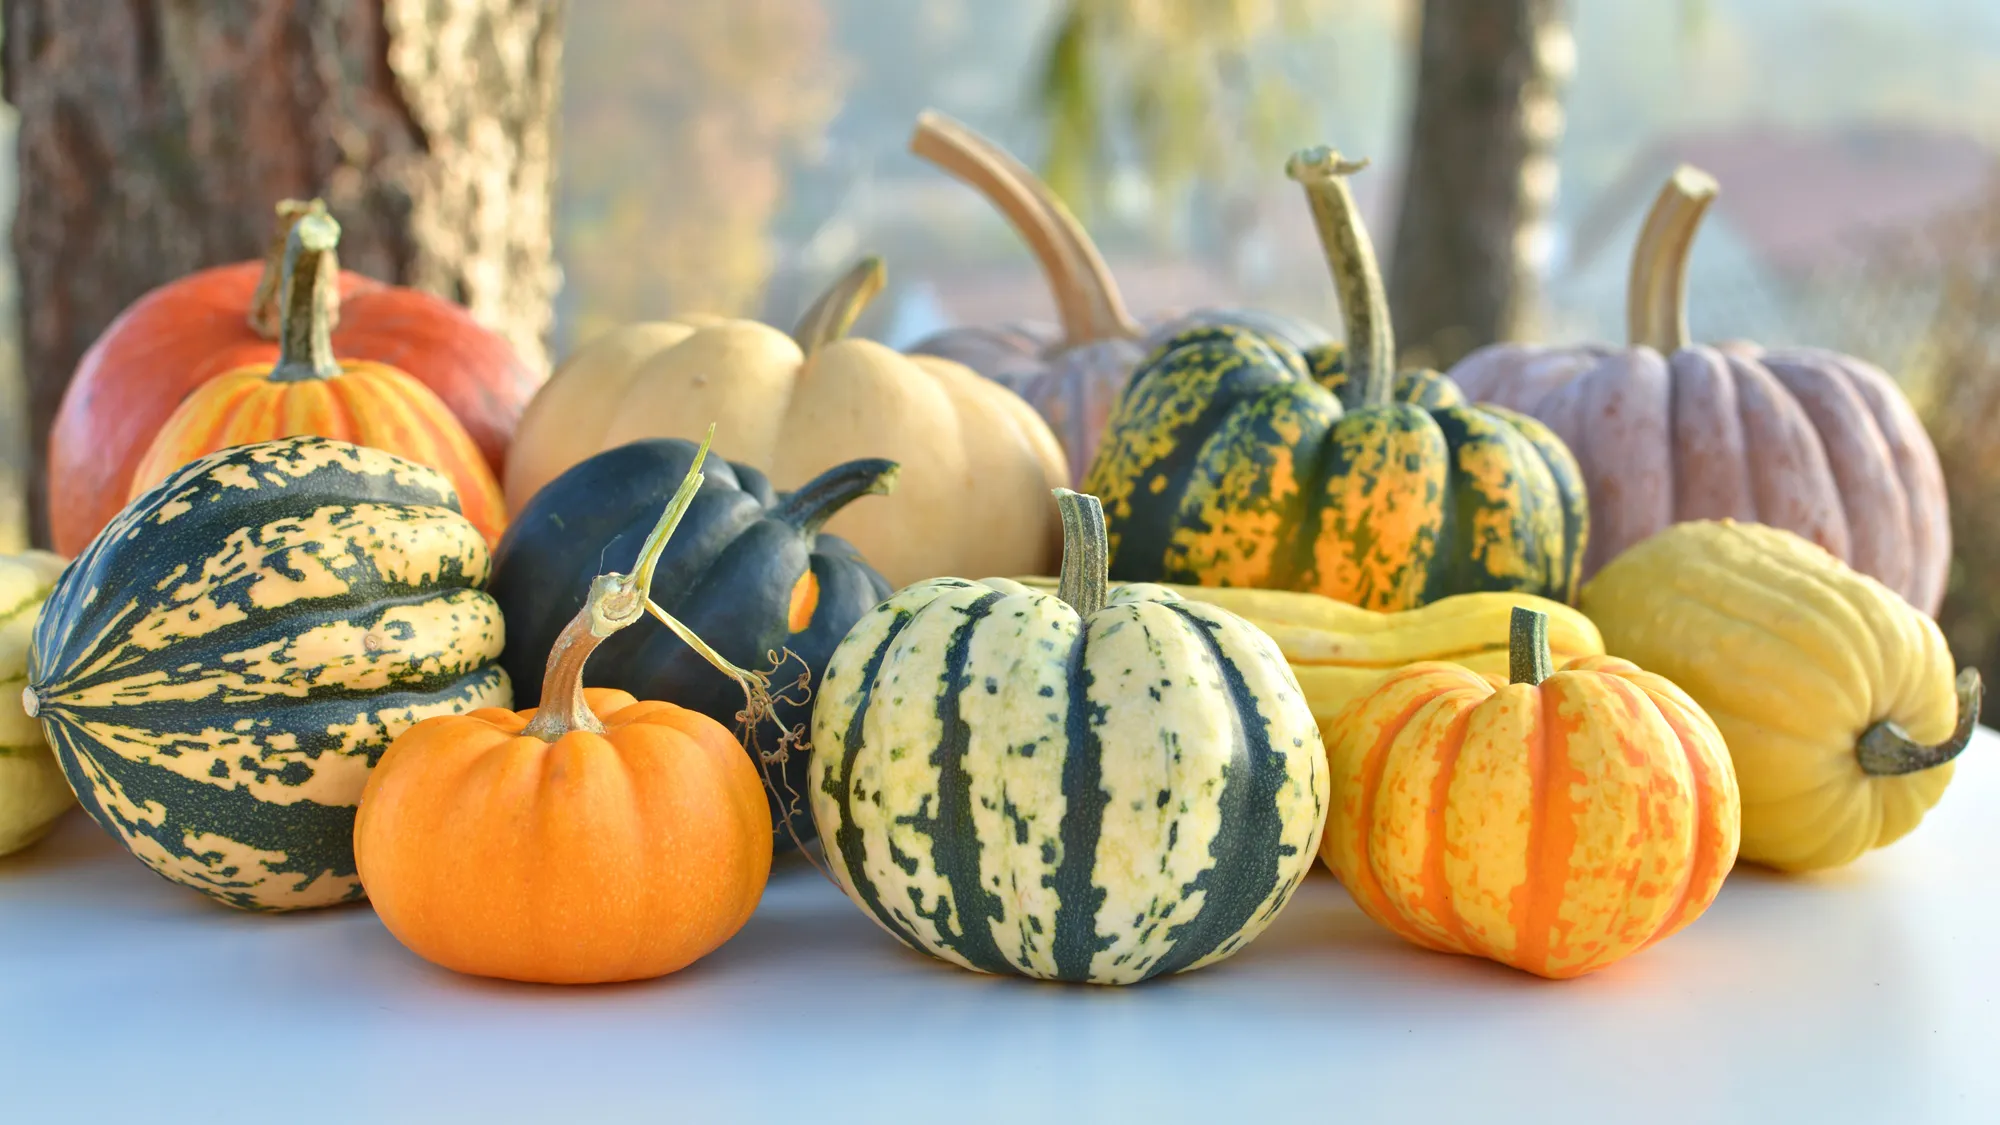
Preserving Traditional and Heirloom Varieties:
Seed saving is essential for preserving traditional and heirloom plant varieties. These varieties often have unique flavors, aromas, textures, or historical significance that commercial varieties may lack. By saving seeds from these plants, you play a part in safeguarding these precious, time-tested varieties for future generations to enjoy.
Environmental Benefits:
Seed saving contributes to a more sustainable and environmentally friendly approach to gardening. By reducing reliance on commercially produced seeds, you decrease the carbon footprint associated with seed production, packaging, and transportation. Additionally, saved seeds are typically grown without the use of harmful pesticides or chemicals, promoting healthier ecosystems and reducing potential environmental pollution.
Self-Sufficiency and Seed Sharing:
As you save and store your own seeds, you become more self-sufficient in your gardening endeavors. You no longer need to depend on outside sources for your seed supply. Additionally, seed saving encourages the sharing of seeds within the gardening community, fostering a sense of connection and cooperation among fellow gardeners.
By engaging in the practice of seed saving, you not only reap immediate benefits for your own garden but also contribute to the larger goals of conserving biodiversity, developing resilient plant varieties, and fostering a sustainable approach to gardening. Now that we understand the advantages of seed saving, let’s explore the process of selecting and harvesting seeds.
Selecting and Harvesting Seeds
When it comes to seed saving, selecting and harvesting seeds from the right plants is crucial. Here are some key steps to follow:
Read more: How To Save Squash Seeds
Choose Open-Pollinated Plants:
For successful seed saving, start with open-pollinated plants. These plants naturally reproduce through pollination by insects, wind, or other mechanisms without human intervention. Open-pollinated plants produce seeds that stay true to their parent plants, allowing you to save seeds that will grow into plants with the same characteristics.
Healthy and Vigorous Plants:
When selecting plants for seed saving, choose those that are healthy and vigorous. A strong and healthy parent plant is more likely to produce high-quality seeds. Look for plants that exhibit desirable traits such as disease resistance, productivity, or flavor.
Isolate Different Varieties:
To maintain the purity of seed varieties, it is important to isolate different varieties of the same plant species. Cross-pollination between different varieties can result in hybridization, leading to unpredictable characteristics in the offspring. Maintain a sufficient distance or use physical barriers, such as mesh bags or netting, to prevent cross-pollination.
Allow Seeds to Mature:
For seed saving, it is essential to allow the seeds to fully mature on the plant. The seeds should reach their full size and color, and the plant should naturally start to senesce and wither. This indicates that the seeds have reached their optimal maturity and are ready for harvest.
Read more: How To Save Watermelon Seeds
Proper Harvesting Techniques:
Harvesting seeds requires specific techniques depending on the plant variety:
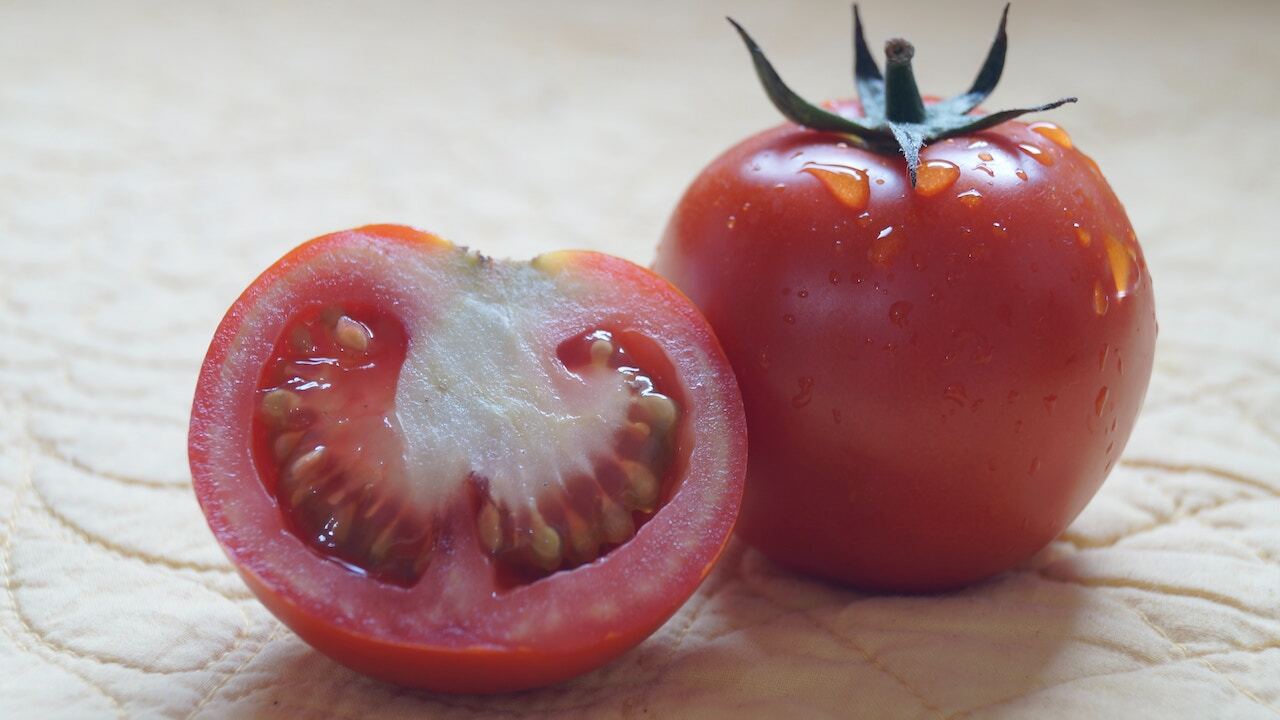
– Dry Seeds: For plants such as beans, peas, or lettuce, where the seeds are dry, wait for the pods or seed heads to dry completely on the plant. Harvest them when they are crisp and easily shatter or release the seeds into a clean container. – Wet Seeds: Some plants, like tomatoes or cucumbers, have seeds surrounded by a gel-like substance. To save seeds, scoop out the seeds along with the gel into a container and allow them to ferment for a few days. Rinse the seeds well to remove the gel, as it can inhibit germination and cause fungal growth. – Fleshy Fruits: Fleshy fruits like melons, squash, or peppers require you to fully ripe the fruit before extracting the seeds. Scoop out the seeds and pulp, rinse them thoroughly, and allow them to dry completely before storing.
Seed Cleaning:
After harvesting the seeds, cleaning is necessary to remove any debris or remnants. For dry seeds, winnowing, sieving, or hand-picking can be used to separate the seeds from chaff or other plant materials. Wet seeds can be cleaned by rinsing them under running water, gently rubbing them between the fingers to remove any remaining pulp or gel.
By carefully selecting and harvesting seeds from healthy plants and using proper techniques for different plant varieties, you can ensure the viability and quality of the seeds for future planting. Once the seeds are clean and dry, it’s time to move on to the next step: cleaning and drying.
Cleaning and Drying Seeds
Cleaning and drying seeds properly is essential to maintain their viability and prevent the growth of mold or fungi. Follow these steps to ensure that your saved seeds are in optimal condition for storage:
Cleaning Dry Seeds:
For dry seeds that have been harvested from plants like beans, lettuce, or flowers, you can use simple techniques to remove any remaining debris:
– Winnowing: This method involves gently pouring the seeds and chaff into a shallow container and allowing a gentle breeze to blow away the lighter chaff while the heavier seeds remain. – Sieving: Using a fine-mesh sieve, you can separate the seeds from the chaff by gently shaking the sieve over a clean container. – Hand-Picking: In some cases, hand-picking may be necessary to remove small debris or non-seed materials from the seeds. This can be done by carefully plucking them out using tweezers or your fingertips.
Read more: How To Save Cantaloupe Seeds
Cleaning Wet Seeds:
Wet seeds, such as those found in tomatoes or cucumbers, require a different cleaning method due to the presence of gel or pulp:
– Fermentation: After harvesting the seeds, place them in a small container along with a small amount of water. Allow them to ferment for a few days, stirring the mixture daily. The fermentation process will help break down the gel coating around the seeds. After fermentation, rinse the seeds thoroughly under running water, rubbing them gently between your fingers to remove any remaining pulp or debris.
Drying Seeds:
After cleaning, it’s important to dry the seeds thoroughly in order to prevent mold or fungal growth during storage:
– Air-Drying: Spread the cleaned seeds out in a single layer on a paper towel or a fine mesh drying screen. Place them in a well-ventilated area away from direct sunlight. Make sure to label the drying area with the seed variety to avoid mix-ups. Stir or turn the seeds occasionally to ensure even and thorough drying. Depending on the seed size and moisture content, drying can take anywhere from a few days to a few weeks. – Temperature and Humidity: The ideal conditions for drying seeds are a cool and dry environment with low humidity. Avoid drying seeds in high humidity or excessively hot areas, as this can lead to the seeds losing viability or becoming moldy. – Test for Dryness: To check if the seeds are dry enough for storage, snap a few seeds in half. If they break easily with a clean snap, they are adequately dried. If they bend or show signs of moisture, continue the drying process until they reach the desired dryness.
By taking the time to clean and dry your saved seeds properly, you ensure their longevity and reduce the risk of seed damage or loss. Once the seeds are thoroughly dry, it’s time to move on to the next crucial step: storing the seeds correctly.
Storing Seeds Properly
Properly storing seeds is essential to maintain their viability and ensure that they remain viable for future planting. Follow these guidelines to store your saved seeds:
Remove Moisture:
Before storing seeds, ensure they are fully dry to prevent moisture from causing mold or rot. Moisture can decrease seed viability and lead to the growth of harmful fungi. Properly dried seeds will have a low moisture content and will break easily when bent.
Read more: How To Save Snapdragon Seeds
Choose Suitable Containers:
Choose containers that are airtight and moisture-resistant to keep seeds safe from pests, moisture, and temperature fluctuations. Options include glass jars with rubber seals, plastic bags, or sealed envelopes. Make sure the containers are clean and dry before placing the seeds inside.
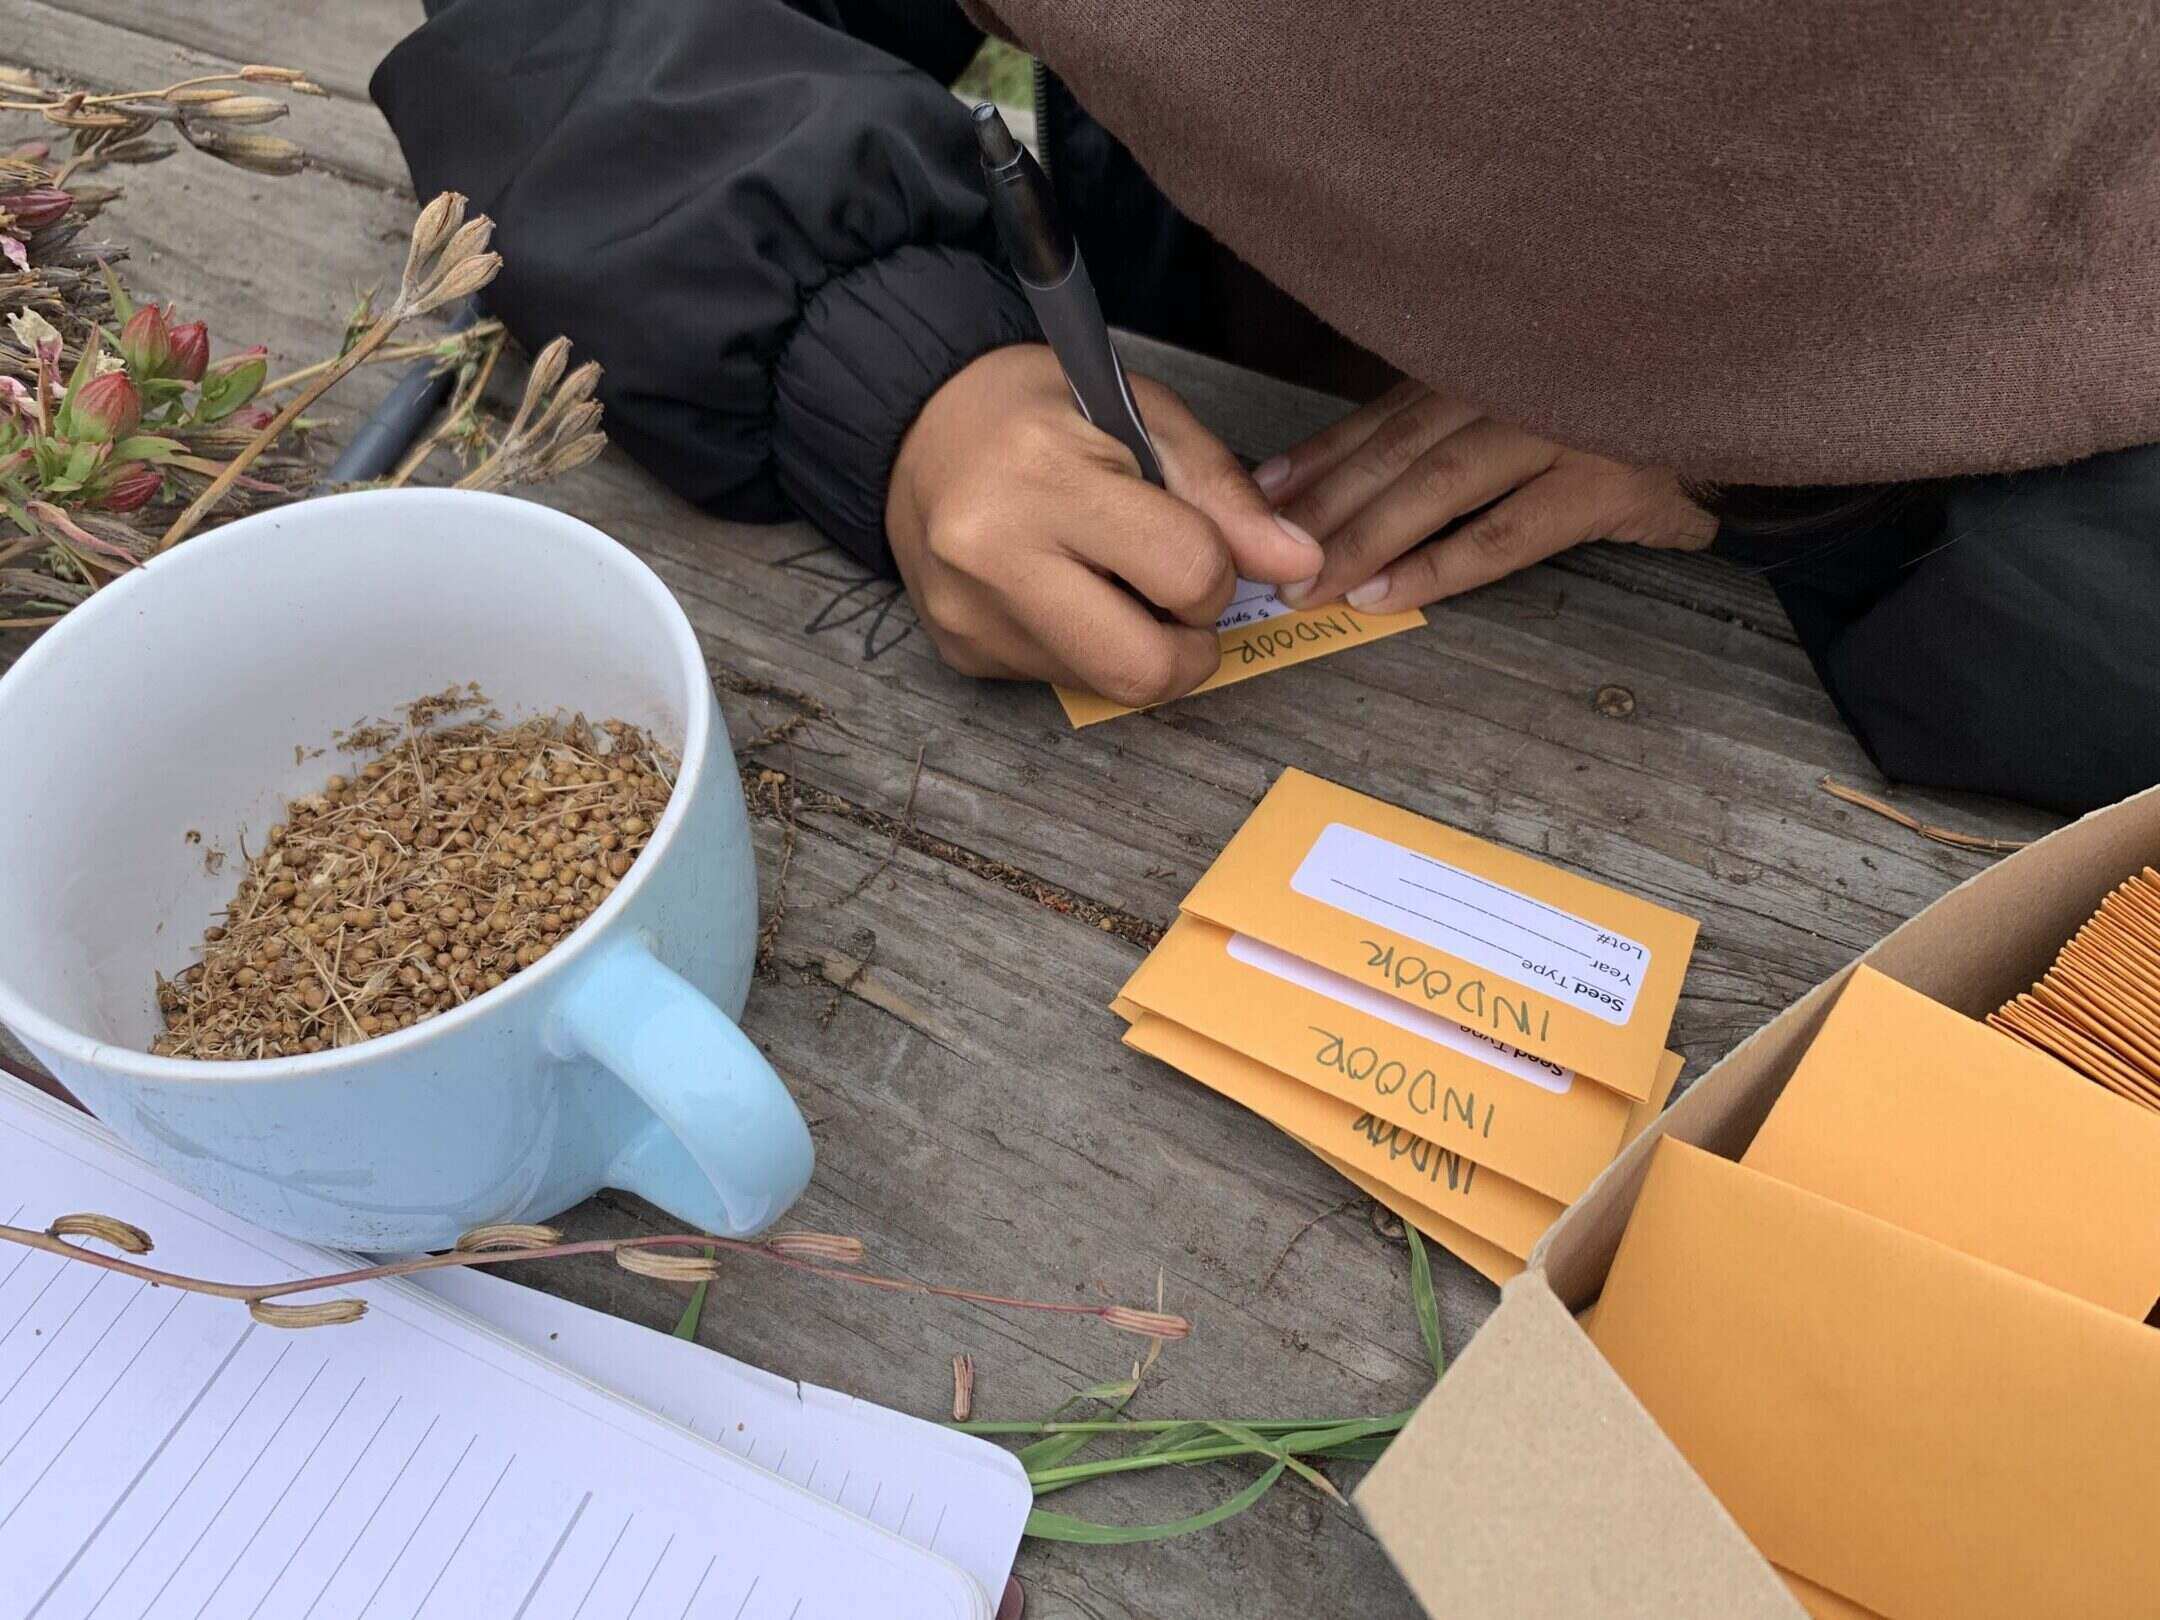
Label Each Container:
Proper labeling is crucial for seed storage. Clearly mark each container or envelope with the seed variety, the date of collection, and any other pertinent information. This will help you identify and organize your seeds, ensuring easy access and preventing mix-ups.
Optimal Storage Conditions:
Seeds should be stored in a cool, dark, and dry place. The optimal temperature for most seeds is around 40°F (4°C) and should not exceed 50°F (10°C). Avoid storing seeds in areas prone to temperature fluctuations, such as near windows or heaters. Additionally, keep seeds away from direct sunlight to prevent damage due to UV radiation.
Consider Seed Longevity:
Seeds vary in terms of their longevity or storage life. Some seeds, such as lettuce or onions, have a relatively short lifespan and may need to be replanted within a year or two. Others, such as tomatoes or peppers, can remain viable for several years under proper storage conditions. Research the specific storage requirements for each type of seed you save.
Read more: How To Save Bean Seeds
Regularly Check Seed Viability:
To ensure the stored seeds are still viable for planting, it’s a good practice to conduct regular germination tests. Take a small sample of seeds and place them between damp paper towels or in a seeding tray. Keep them in a warm and moist environment and monitor germination rates. If the germination rate is significantly low, it may be time to replenish your seed stock.
By providing the right storage conditions and regularly checking seed viability, you can maximize the longevity of your saved seeds. Properly stored seeds can remain viable for several years, allowing you to enjoy successful germination and abundant harvests in the seasons to come.
Now that you know the importance of proper seed storage, let’s move on to the next step: testing seed viability.
Testing Seed Viability
Testing seed viability is a crucial step in seed saving, as it helps determine the germination rate of the seeds. By assessing their viability, you can determine if the seeds are still capable of producing healthy seedlings. Follow these steps to test the viability of saved seeds:
Gather Seed Samples:
Collect a representative sample of seeds from your stored collection. It’s important to sample multiple seeds to get an accurate assessment of their viability. Avoid using seeds that have been damaged, as they may provide inaccurate results.
Perform Germination Test:
There are various methods to perform a germination test, but one commonly used method is the paper towel method:
1. Moisten a paper towel or a piece of filter paper with water until damp but not overly wet. 2. Place a few seeds on the paper towel, leaving space between them. 3. Fold the paper towel over the seeds to cover them completely. 4. Place the damp paper towel with the seeds in a plastic bag or container to maintain moisture. 5. Keep the bag/container in a warm area with a consistent temperature. 6. Check the seeds daily to monitor germination progress.
Read more: How To Save Coleus Seeds
Observe Germination Rates:
Germination times vary depending on the type of seeds. Some seeds may sprout within a few days, while others may take weeks. Monitor the seeds regularly and record the number of seeds that germinate successfully.
Calculate Germination Rate:
Calculate the germination rate by dividing the number of seeds that have sprouted by the total number of seeds tested. Multiply the result by 100 to express it as a percentage. For example, if 8 out of 10 seeds have germinated, the germination rate would be 80%.
Interpreting Results:
The germination rate can help determine the viability of the seeds:
– High Germination Rate: A high germination rate (70% or above) indicates that the seeds are still viable and have a good chance of producing healthy seedlings. – Low Germination Rate: A low germination rate (below 70%) suggests that the seeds may have reduced viability. It may be necessary to sow more seeds to compensate for lower germination rates. – No Germination: If none of the seeds show signs of germination, it is likely that the seeds are no longer viable and should be replaced with fresh seeds.
Record Results:
Record the germination rate and any other relevant observations in a seed-saving journal or spreadsheet. This record will help you track the viability of your saved seeds over time and guide future seed-saving efforts.
Regularly testing seed viability allows you to gauge the quality and viability of your saved seeds. It ensures that you are planting seeds with a high chance of successful germination, leading to healthier plants and more productive gardens. With viable seeds in hand, it’s time to move on to the next step: labeling and organizing saved seeds.
Read more: How To Save Potatoes For Seed
Labeling and Organizing Saved Seeds
Properly labeling and organizing saved seeds is crucial for easy identification and efficient seed management. Follow these steps to ensure your seed collection remains well-organized:
Label Each Seed Packet:
Use small envelopes or seed packets to store your saved seeds. On each packet, clearly label the seed variety, date of collection, and any other relevant information such as plant traits or specific growing instructions.
Include Supporting Information:
Along with the basic labeling information, it can be helpful to include additional details about the seeds. This may include information about the parent plant, any specific growing requirements, or any unique characteristics of the variety. This information will be valuable when it’s time to plant the seeds in the future.
Create a Seed Inventory:
Maintain a seed inventory list or spreadsheet to keep track of the seeds you have saved. Include information such as the seed variety, the date of collection, and the quantity of seeds. This inventory can help you easily locate and manage your seed collection.
Read more: How To Save Pumpkin Seeds
Organize Seeds by Type or Plant Family:
Group your saved seeds by type or plant family to facilitate easy access and organization. For example, you can store all your tomato seeds together, all your flower seeds together, and so on. This approach helps you quickly find the seeds you need when planning your garden or starting your seedlings.
Consider Alphabetical Order:
If you have a large collection of seeds, consider organizing them alphabetically by variety name. This method simplifies the search process and ensures that all seeds are in a standardized order. You can use dividers or labels within a storage container to separate different sections of the alphabet.
Keep Seeds in a Dry and Cool Location:
Store your labeled seed packets in a cool, dry, and dark location. A moisture-resistant container, such as a seed box or an airtight jar, can help protect seeds from humidity and temperature fluctuations. A basement or a cool closet are excellent options for storing seeds.
Regularly Review and Rotate Seed Stock:
Periodically review your seed stock, paying attention to seed viability and expiration dates. Remove any seeds that are no longer viable or have expired and replace them with fresh seeds. This ensures that your collection remains up-to-date and that you have access to high-quality seeds for successful germination.
By labeling and organizing your saved seeds, you create an efficient seed management system that allows for easy identification and access when planning your garden. It also ensures that your valuable seed collection remains viable and well-preserved for future planting endeavors.
Now that you have learned how to label and organize your saved seeds, let’s move on to troubleshooting common seed saving issues.
Read more: How To Save Raspberry Seeds
Troubleshooting Common Seed Saving Issues
Seed saving is a rewarding practice, but it can come with its fair share of challenges. Here are some common issues that may arise during seed saving and tips for troubleshooting them:
Poor Germination Rates:
If you notice consistently low germination rates with your saved seeds, there are several potential causes:
– Low Seed Viability: The seeds may have lost their viability over time. Regularly test seed viability to ensure they are still capable of germination. Replace old or low-viability seeds with fresh ones. – Improper Storage Conditions: Inadequate storage conditions, such as high moisture or temperature fluctuations, can reduce seed viability. Ensure seeds are stored in a cool, dry, and dark environment. – Cross-Pollination: If you have not isolated different varieties, cross-pollination between similar plant varieties may result in seeds with unpredictable germination rates. Isolate varieties to maintain their purity.
Disease or Pest Issues:
Seed-borne diseases or pests can affect the quality of saved seeds. Here’s what you can do:
– Sanitize Tools: Before harvesting seeds, sanitize your tools to prevent the spread of diseases. Clean pruning shears, scissors, or other equipment with a solution of 10% bleach or 70% rubbing alcohol. – Inspect for Damage: Check seeds for signs of disease or pest damage. Discard any seeds that show visible signs of damage, mold, or insect infestation to prevent contamination of your seed stock. – Use Disease- and Pest-Resistant Plants: Select and save seeds from plants that show resistance to common diseases or pests in your area. This can help reduce the risk of disease transmission through seeds.
Inaccurate Seed Identification:
Mixing up or mislabeling seed varieties can lead to confusion and inaccurate garden planning. Take these steps to avoid identification issues:
– Label Immediately: Label seed packets as soon as you collect them to avoid mix-ups. Use waterproof or fade-resistant markers to ensure labels remain legible over time. – Double-Check Identification: When saving seeds, double-check that you are collecting from the correct plant variety. Refer to reference materials or reputable online sources to verify plant characteristics and seed appearance.
Read more: How To Save Seeds From Cantaloupe
Early Seed Loss:
Seeds may be lost prematurely due to various factors. Here’s how to prevent early seed loss:
– Proper Seed Maturity: Wait until seeds have reached full maturity on the plant before harvesting. Prematurely harvested seeds may not have developed properly and have a lower chance of successful germination. – Effective Seed Extraction: Use proper techniques when extracting seeds to avoid damaging or losing them. Follow specific guidelines for each plant variety to ensure successful seed extraction.
By troubleshooting these common seed saving issues, you can increase the success rate of your saved seeds and overcome potential challenges along the way. Remember that seed saving is a continuous learning process, and with each season, you will gain more experience and refine your techniques.
Now that we’ve explored troubleshooting, let’s move on to discussing seed saving methods for different types of plants.
Seed Saving Methods for Different Types of Plants
Each type of plant requires specific seed saving techniques to ensure successful seed collection. Here are some seed saving methods for different types of plants:
1. Self-Pollinating Plants:
Self-pollinating plants, such as tomatoes, peppers, and lettuce, usually have flowers that self-fertilize and produce seeds that are true to the parent plant. To save seeds from self-pollinating plants:
– Isolate Varieties: Prevent cross-pollination by maintaining a sufficient distance between different varieties or using physical barriers like mesh bags or netting. – Allow Fruits to Fully Mature: Wait until fruits are fully ripe or overripe on the plant before harvesting the seeds. – Extract and Clean Seeds: Squeeze or scoop out the seeds from the fruits and remove any pulp or gel. Rinse the seeds thoroughly under running water to clean them. – Dry and Store Seeds: Air-dry the seeds on a paper towel or drying screen until they are fully dry. Store them in labeled envelopes or containers in a cool, dry location.
2. Biennial Plants:
Biennial plants, such as carrots, beets, and onions, require a two-year life cycle to produce seeds. Here’s how to save seeds from biennial plants:
– Overwintering: Leave the plants in the ground through the winter or store the roots in a cool, dark place until the following spring. – Allow Bolting: In the second year, the plants will produce a flower stalk or bolt. Allow the flower stalk to fully develop and produce seeds. – Harvest Seeds: Harvest the seeds when they have dried on the plant. Monitor the seed heads closely to prevent them from shattering and losing seeds. – Thorough Drying: Dry the seeds by placing them in a well-ventilated area out of direct sunlight. Once dry, store them in labeled containers in a cool, dry location.
Read more: How To Save Seeds From Sunflowers
3. Open-Pollinated Annuals:
Open-pollinated annual plants, such as beans, peas, and marigolds, produce seeds within a single growing season. Here’s how to save seeds from open-pollinated annuals:
– Allow Pods to Fully Mature: Let the pods dry and turn brown on the plant before harvesting the seeds. – Harvest and Dry Seeds: Remove the pods from the plant and open them to reveal the seeds. Allow the seeds to dry fully before storing them. – Cleaning Seeds: Some annuals have seeds that are naturally clean, while others may require winnowing or sieving to remove debris or chaff. – Store in airtight Containers: Place the clean, dry seeds in labeled envelopes or airtight containers. Store them in a cool, dry location away from direct sunlight.
4. Cross-Pollinating Plants:
Cross-pollinating plants, such as squash, corn, and sunflowers, rely on pollination by wind, insects, or birds. Saving seeds from cross-pollinating plants requires extra care to maintain genetic purity:
– Isolate Varieties: Isolate different varieties by distance or physical barriers to prevent cross-pollination. – Hand-Pollination: To ensure pure seed, cover the flowers you wish to save seeds from with a mesh bag before they open and hand-pollinate them using a soft brush or by transferring pollen between flowers. – Protect Seed Heads: Cover the developing seed heads with bags or pantyhose to prevent cross-pollination and ensure seed purity. – Monitor and Harvest Seeds: Allow the seeds to fully mature and dry on the plant. Harvest the seeds when they are fully dry and properly formed. – Clean and Dry Seeds: Clean and dry the seeds thoroughly before storing them in labeled containers in a cool, dry location.
By using the appropriate seed saving methods for different types of plants, you can ensure the viability and genetic purity of your saved seeds. Always refer to plant-specific seed saving guidelines to ensure the best results. Now that you have learned about seed saving methods, let’s conclude our journey into the world of seed saving.
Conclusion
Seed saving is a rewarding practice that allows you to preserve the diversity of plant species, reduce gardening expenses, and develop locally adapted plant varieties. Throughout this article, we have explored the numerous benefits of seed saving, from preserving genetic diversity to promoting self-sustainability and fostering a connection with nature.
By carefully selecting, harvesting, cleaning, and storing seeds, you can ensure their viability for future planting. Remember to label and organize your saved seeds, conducting regular seed viability tests and troubleshooting any issues that may arise. Tailoring seed saving methods to different types of plants will further enhance your success in preserving and propagating a wide range of varieties.
Seed saving is not only a practical skill but also a way to contribute to the conservation of traditional and heirloom plant varieties. It empowers individuals and communities to take control of their food systems, reduce reliance on commercial seed sources, and encourage a more sustainable approach to gardening.
So, whether you’re a seasoned gardener looking to preserve your favorite plant varieties or a beginner eager to dive into the world of seed saving, we hope this article has provided you with valuable insights and practical knowledge. With each seed you save and plant, you are playing a role in the preservation of biodiversity and the cultivation of a resilient and thriving garden.
Now it’s time to put your newfound seed saving knowledge into practice and experience the joy of sowing and reaping the rewards for years to come.
Frequently Asked Questions about How To Save Seed
Was this page helpful?
At Storables.com, we guarantee accurate and reliable information. Our content, validated by Expert Board Contributors, is crafted following stringent Editorial Policies. We're committed to providing you with well-researched, expert-backed insights for all your informational needs.
0 thoughts on “How To Save Seed”