Home>Garden Essentials>How To Scarify Seeds
Garden Essentials
How To Scarify Seeds
Modified: August 28, 2024
Learn how to scarify seeds in your garden and improve germination rates. Step-by-step guide with tips and techniques for successful seed scarification.
(Many of the links in this article redirect to a specific reviewed product. Your purchase of these products through affiliate links helps to generate commission for Storables.com, at no extra cost. Learn more)
Introduction
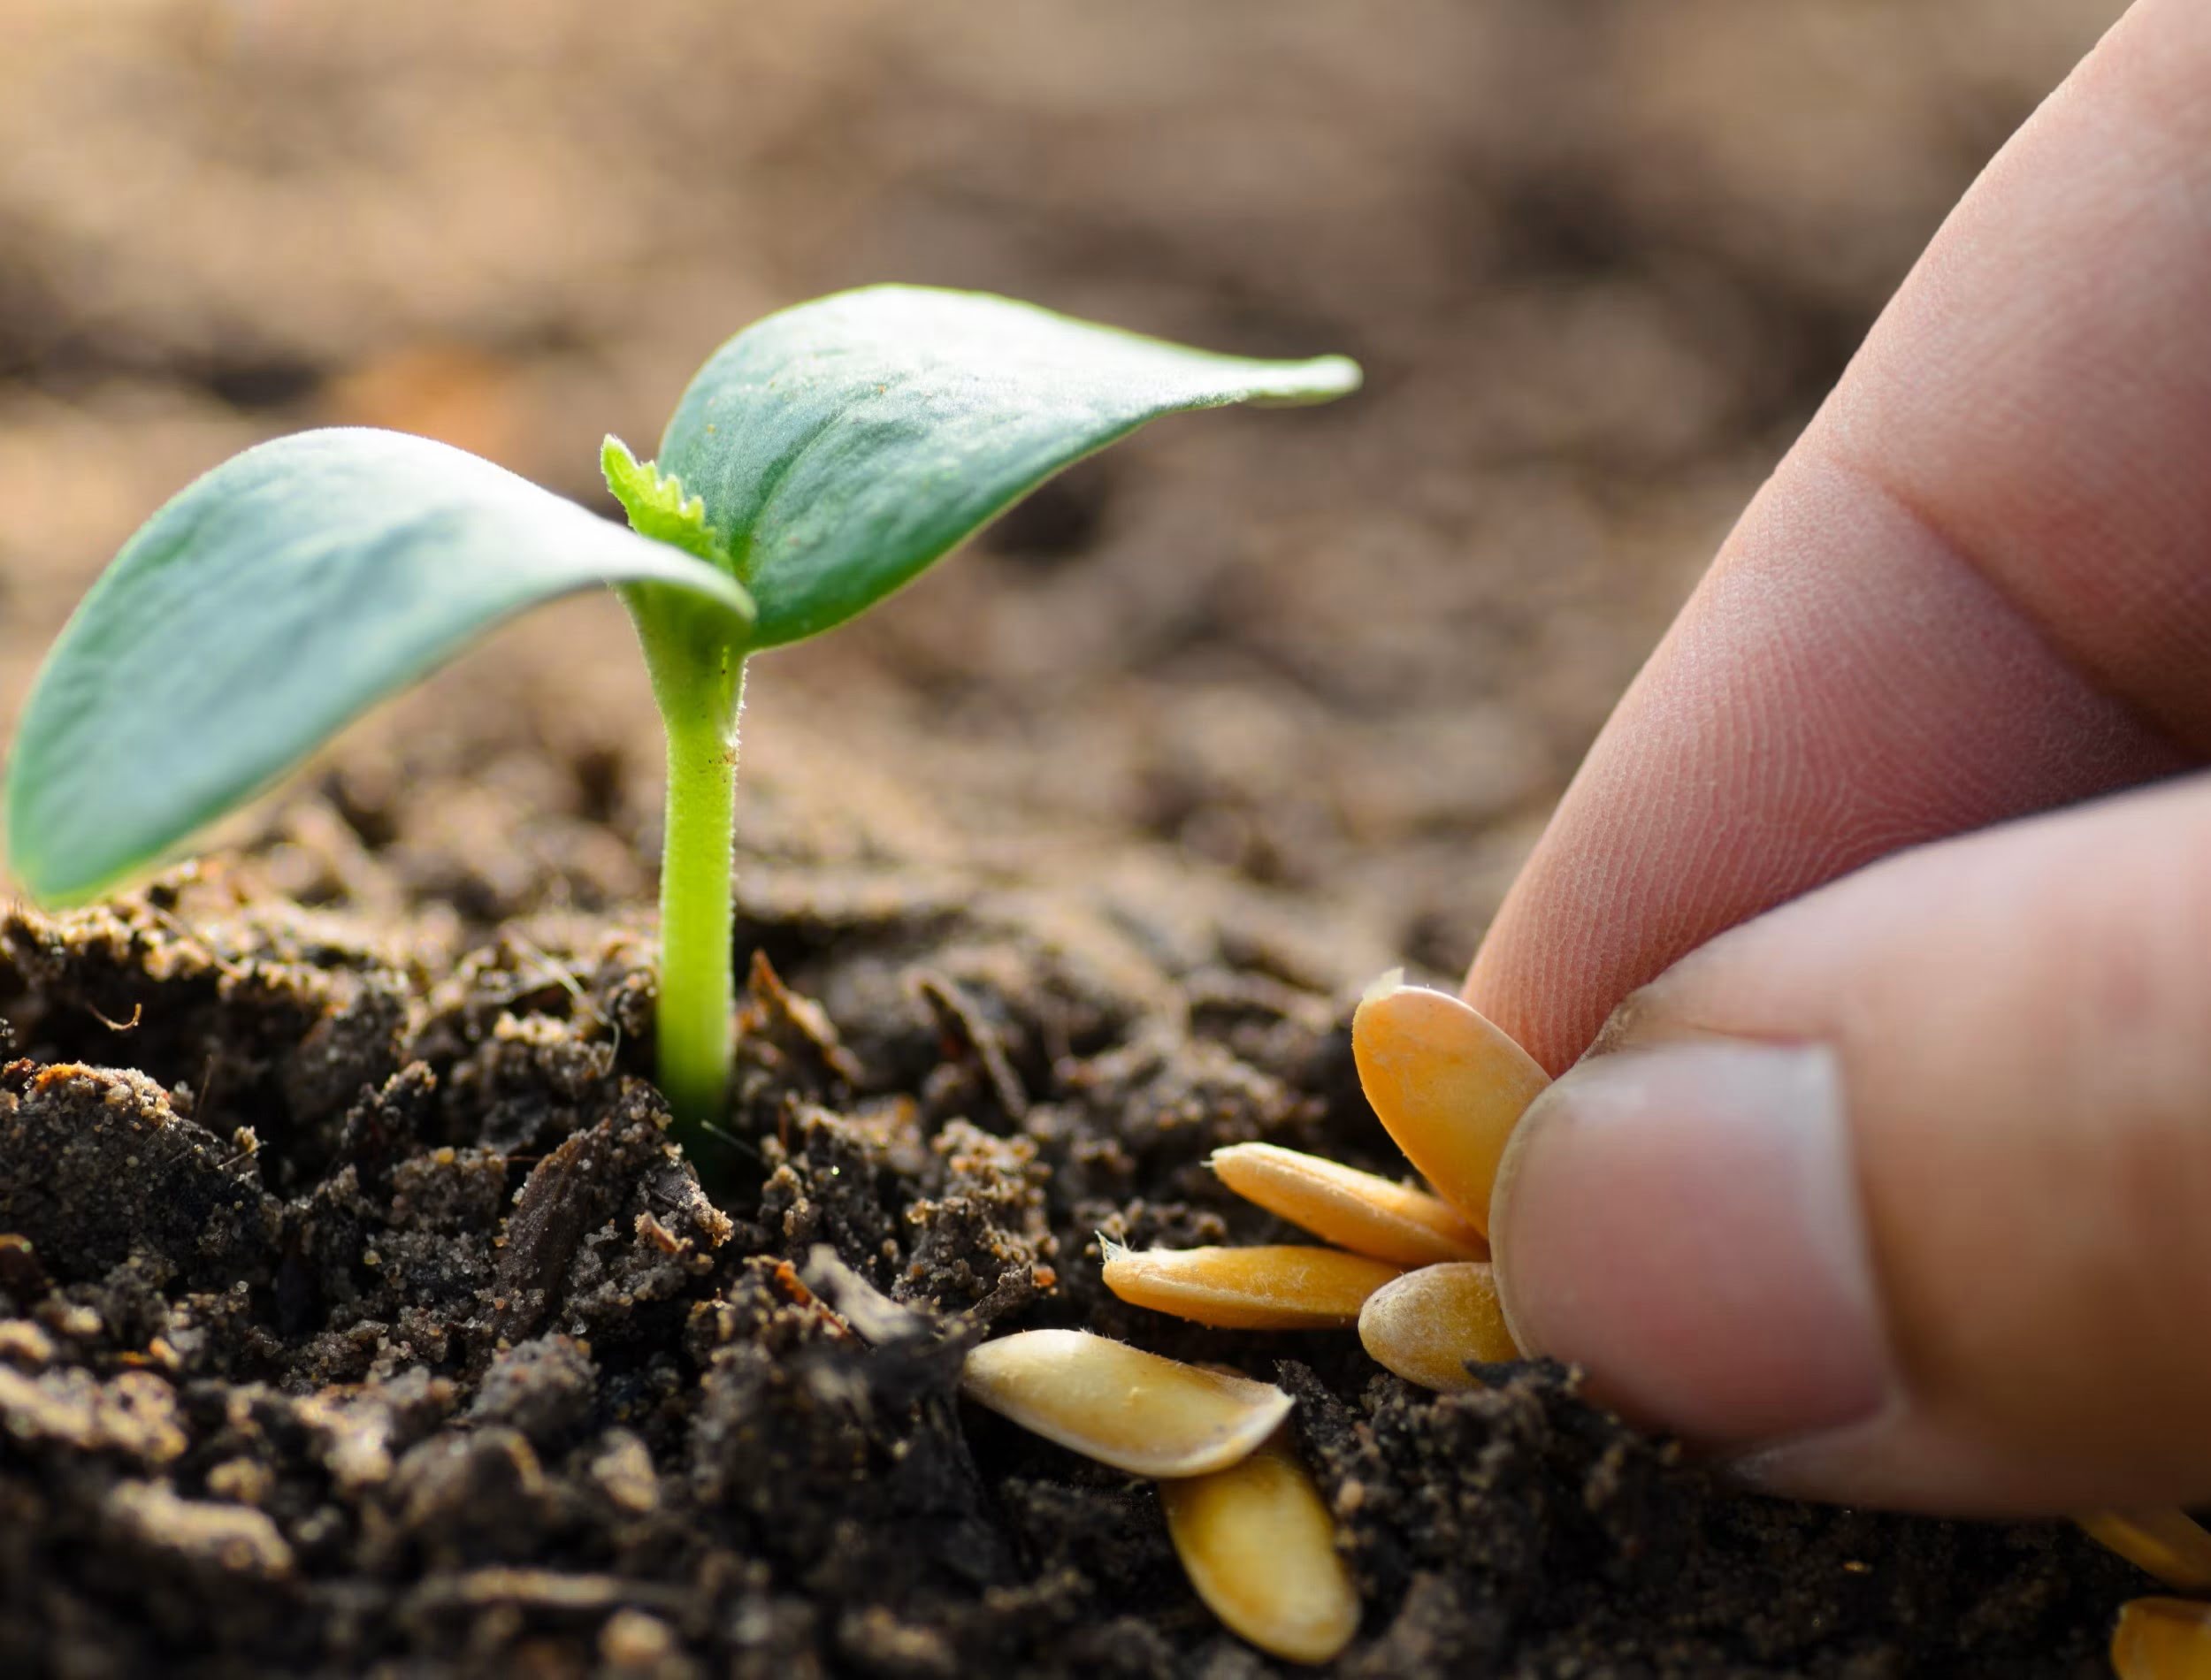
When it comes to gardening, starting from seeds is a popular and rewarding way to grow a variety of plants. However, some seeds have tough outer shells that can make it difficult for them to germinate. This is where seed scarification comes in.
Seed scarification is a technique used to break or weaken the hard seed coat, allowing water, air, and nutrients to penetrate and kickstart the germination process. By scarifying seeds, you can significantly increase the chances of successful germination, leading to healthier and more vigorous plants.
In this article, we will explore the concept of seed scarification in detail, understand the reasons behind it, and learn about various methods to scarify seeds effectively. Whether you are an experienced gardener or just starting out, these insights will help you enhance your gardening skills and achieve better results.
Key Takeaways:
- Break tough seed coats to help seeds grow faster and healthier. Use methods like scratching, soaking, or chilling to give your garden a boost!
- Not all seeds need scarification, so research and handle with care. Experiment, learn, and enjoy the rewards of a thriving garden.
Read more: What Is A Scarifier For Lawns
What is seed scarification?
Seed scarification is a process that involves intentionally breaking, scratching, or weakening the hard outer coat of certain seeds to promote germination. Many plants have seeds protected by a tough seed coat, which acts as a barrier, preventing water and air from reaching the embryo inside. This mechanism ensures that the seed is dormant until favorable conditions for growth are present.
However, some seeds have particularly hard or impermeable seed coats, making it challenging for moisture to penetrate and initiate the germination process. Scarification helps to overcome this barrier by creating small openings, allowing water and air to reach the embryo, kickstarting germination.
The need for scarification varies depending on the plant species. Some seeds require scarification for successful germination, while others may not need any pre-treatment. Factors such as seed size, seed coat thickness, and the plant’s natural germination requirements determine whether scarification is necessary.
It is important to note that not all seeds should be scarified. Some seeds have delicate coats or do not benefit from scarification, and attempting to scarify them may harm the seeds instead. Therefore, it is crucial to research the specific requirements of each plant species or consult gardening resources to determine if scarification is recommended.
Seed scarification can be done using various methods, including mechanical scarification, chemical scarification, hot water scarification, and cold stratification scarification. Each method has its advantages and is suitable for different types of seeds and plants.
In the following sections, we will delve into each method of seed scarification, explaining how they work and providing step-by-step guidance on how to implement them effectively.
Reasons for seed scarification
Seed scarification serves several important purposes in gardening and seed propagation. Understanding the reasons behind seed scarification can help you determine when and why this technique should be applied. Here are some key reasons to consider:
- Breaking seed dormancy: In some plant species, seed dormancy is caused by the hard seed coat. Scarification breaks this dormancy by stimulating the embryo to begin growing and germinating. By weakening or removing the seed coat, scarification provides the necessary conditions for germination to occur.
- Enhancing germination rates: Certain seeds have innate characteristics that make germination difficult. Scarification helps overcome these challenges and improves germination rates. By creating small openings or thinning the seed coat, scarification allows water, air, and nutrients to reach the embryo, increasing the chances of successful germination.
- Accelerating germination: Scarification can speed up the germination process by reducing the time it takes for the seed to break dormancy and sprout. This can be particularly beneficial for gardeners who want quicker results or live in regions with shorter growing seasons.
- Expanding the range of plant species to grow: Some plant species have seeds with hard coats that naturally prevent germination in certain conditions. By scarifying these seeds, gardeners can expand their options and grow a wider variety of plants that would otherwise be challenging to propagate from seed.
- Imitating natural seed scarification: In the wild, seeds are exposed to various environmental factors that naturally scarify them, such as abrasion from wind, water, or animal digestion. By mimicking these natural processes through scarification, gardeners can replicate the conditions necessary for successful seed germination.
By understanding these reasons, you can determine when seed scarification is necessary and choose the appropriate method to ensure optimal germination and plant growth. In the next sections, we will explore different methods of seed scarification and provide step-by-step instructions on how to implement each technique effectively.
Different methods of seed scarification
Seed scarification can be achieved through various methods, each tailored to the specific needs of different plant species. The choice of scarification method depends on factors such as seed coat thickness, hardness, and the desired degree of scarification. Here are some common methods of seed scarification:
- Mechanical scarification: This method involves physically scratching or nicking the seed coat to create small openings. This can be done using sandpaper, a file, or by gently rubbing the seeds between two hard surfaces. Mechanical scarification is suitable for seeds with hard seed coats that require moderate scarification.
- Chemical scarification: Chemical scarification relies on the use of chemicals to soften or weaken the seed coat. A common practice is soaking the seeds in a diluted acid solution, such as sulfuric acid or hydrogen peroxide, for a specific duration. The acid breaks down the seed coat, allowing for easier water absorption and germination. Chemical scarification should be done with caution, following safety guidelines and using the appropriate concentration and duration for each type of seed.
- Hot water scarification: This method involves soaking seeds in hot water to soften the seed coat. The hot water mimics natural conditions, such as exposure to forest fires or the heat of the sun. Seeds are typically soaked in water heated to a specific temperature for a specific duration, varying depending on the plant species. Once scarified, the seeds are immediately cooled and then planted for germination.
- Cold stratification scarification: Cold stratification mimics the natural process of seeds undergoing a period of cold temperatures before germination. Many plant species require a period of cold treatment to break dormancy and stimulate germination. This can be achieved by placing the seeds in a moist medium, such as sand or peat moss, and refrigerating them for a specified period. Cold stratification scarification is particularly effective for seeds that require a prolonged period of cold exposure.
It is essential to research the germination requirements of the specific plant species you are working with to determine the most suitable scarification method. Experimentation may be needed to find the best approach for certain seeds.
In the next sections, we will provide step-by-step instructions on how to implement each scarification method effectively. These guides will help you successfully scarify your seeds and enhance germination rates for a variety of plants.
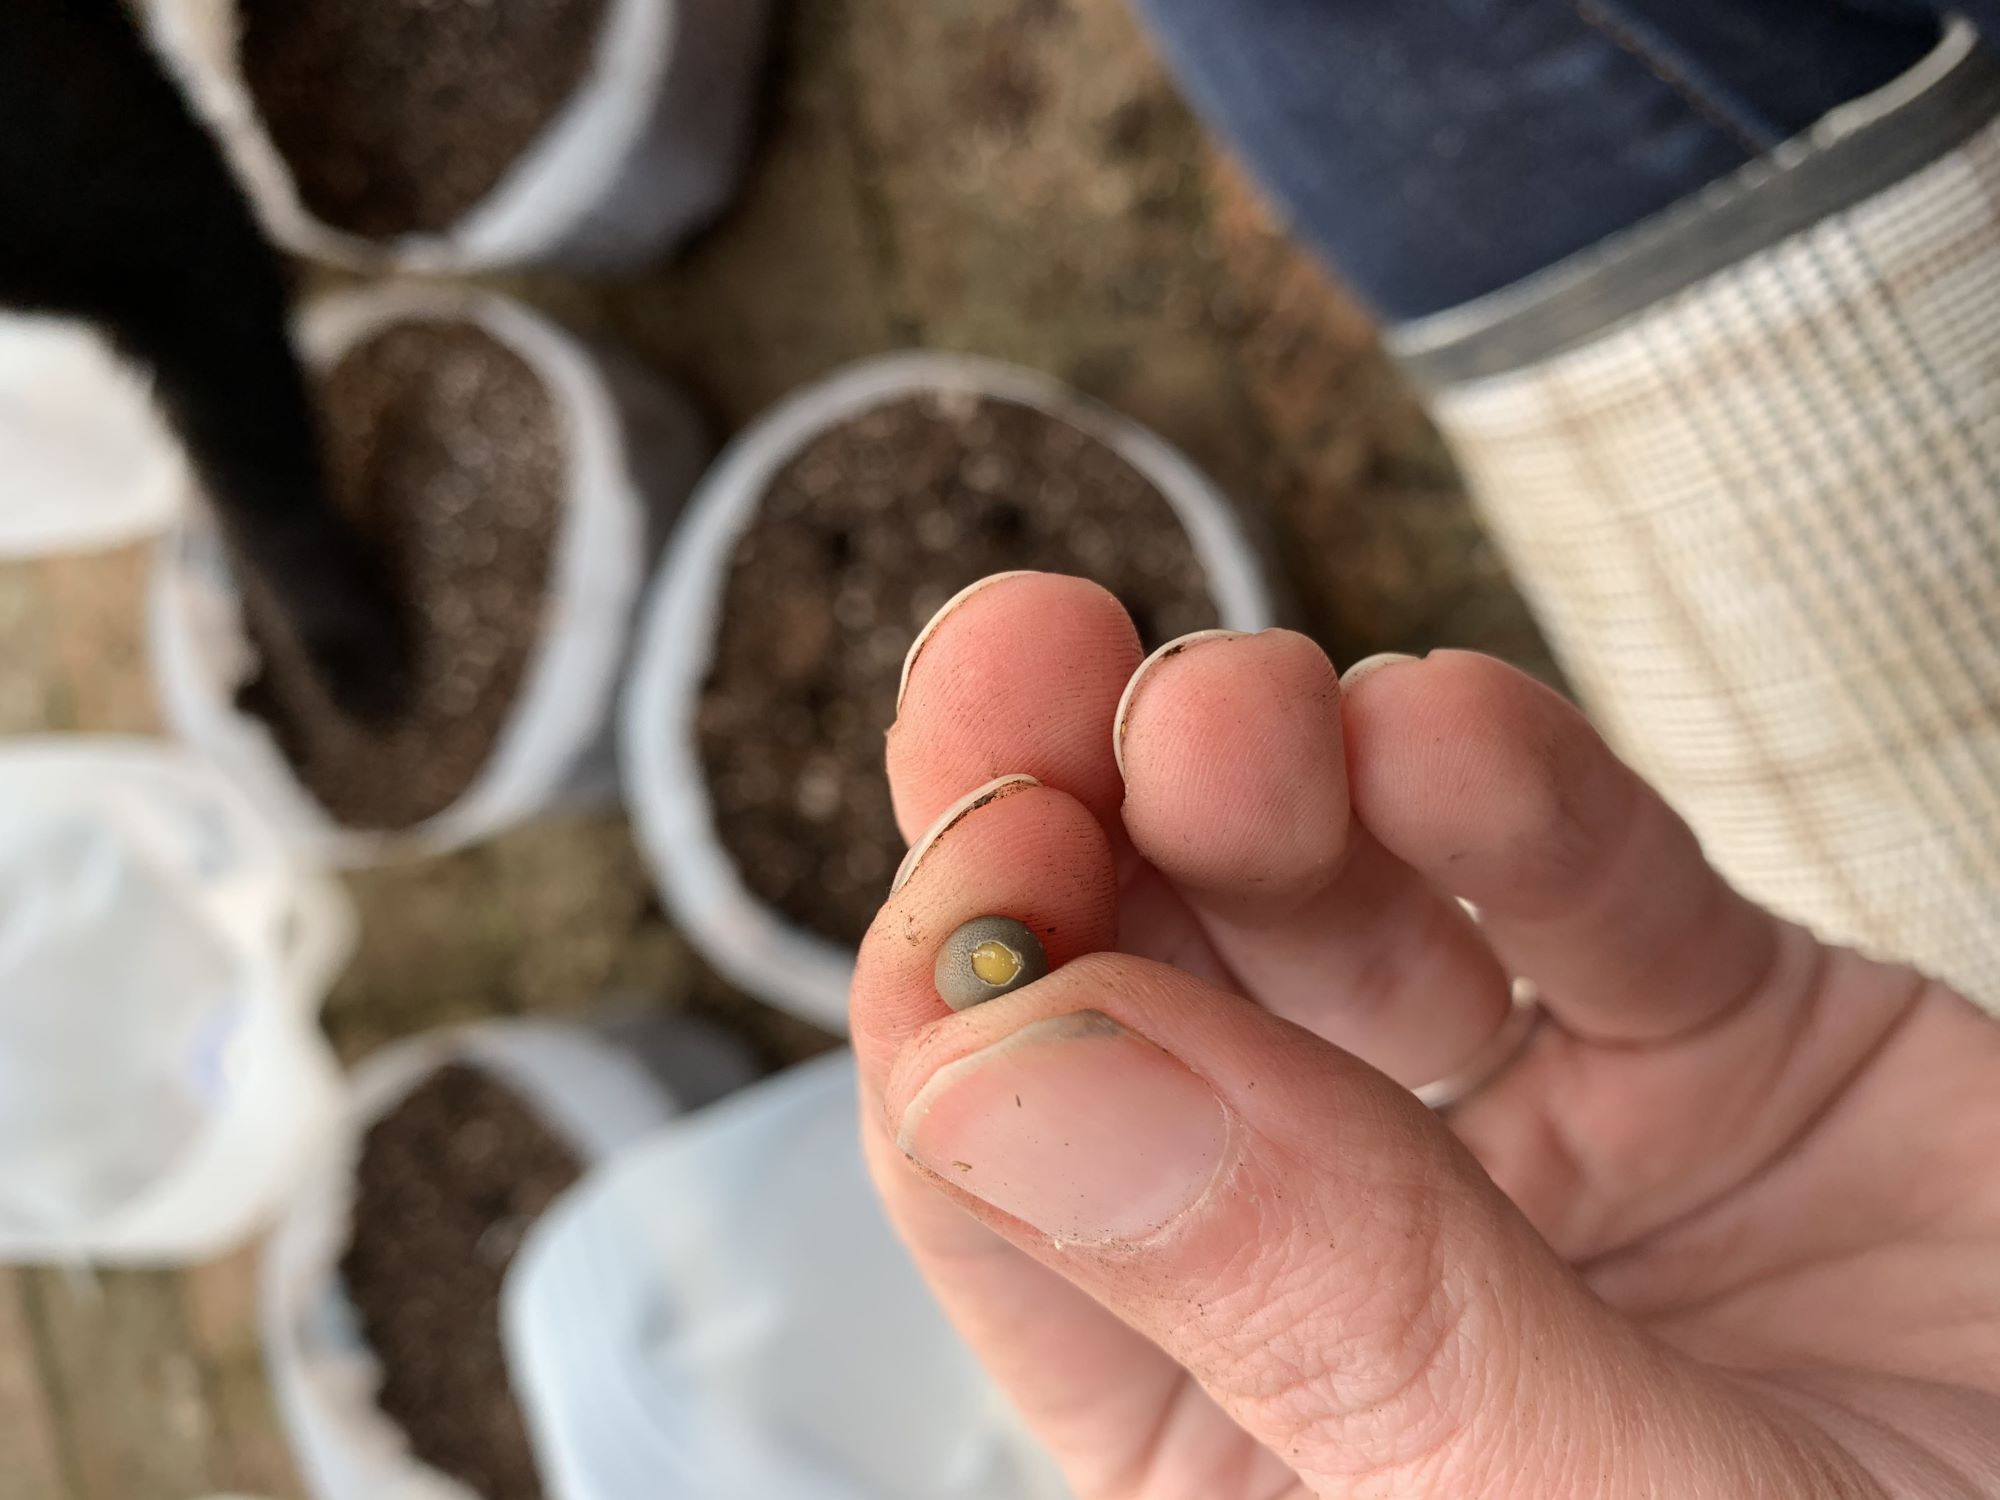
Mechanical scarification
Mechanical scarification is a popular and straightforward method used to break the hard seed coat of certain plant species. This method involves physically scratching or nicking the seed coat to create small openings, allowing water and air to penetrate and initiate germination. Here’s a step-by-step guide on how to perform mechanical scarification:
- Start by gathering the seeds that require scarification. Research the specific plant species to determine if mechanical scarification is suitable.
- Prepare the necessary materials. You will need sandpaper, a file, or any abrasive surface that can create tiny scratches on the seed coat.
- Take one seed at a time and gently rub it against the sandpaper or file. Apply slight pressure and move the seed in a circular or back-and-forth motion. The goal is to create small openings or scratches on the seed coat, but be careful not to damage the seed itself.
- Repeat the process for all the seeds you need to scarify, taking care to maintain a steady and gentle approach for each seed.
- Once you have scarified the seeds, it’s important to sow them immediately. Scarified seeds are more vulnerable to drying out, so timely planting is crucial.
- Prepare the planting medium, whether it’s a potting mix or garden soil, ensuring it is well-drained and suitable for the specific plant species.
- Plant the scarified seeds at the appropriate depth and spacing, following the recommended guidelines for the particular plant species.
- Water the seeds thoroughly after planting, providing enough moisture to facilitate the germination process. Maintain consistent moisture levels throughout the germination period, without overwatering.
- Monitor the progress of the seeds and provide the necessary care, such as regular watering and proper light conditions, according to the specific plant species requirements.
- Observe for signs of germination, such as the emergence of seedlings. Once the seeds have successfully germinated, continue to provide appropriate care and nurture the young plants as they grow.
Mechanical scarification is a simple and effective method that can improve germination rates for seeds with hard seed coats. While it may not be suitable for all plant species, it is worth considering when working with seeds that require moderate scarification. Remember to handle the seeds with care, maintain proper planting conditions, and monitor their progress for successful germination.
Read more: How To Mail Seeds
Chemical scarification
Chemical scarification is a method of seed scarification that involves using chemicals to soften or weaken the hard seed coat. This process helps to enhance water absorption and facilitate germination. It is important to note that chemical scarification should be done with caution, following safety guidelines and using the appropriate concentration and duration for each type of seed. Here’s a step-by-step guide on how to perform chemical scarification:
- Begin by researching the specific plant species to determine if chemical scarification is appropriate. Not all seeds require or benefit from this method, so it is crucial to understand the germination requirements.
- Identify the appropriate chemical for scarification. Common choices include diluted sulfuric acid, hydrogen peroxide, or potassium permanganate.
- Prepare the scarification solution by diluting the chosen chemical in water according to the recommended concentration. Follow the instructions carefully and wear protective gloves and eye goggles.
- Place the seeds in the scarification solution and let them soak for the specified duration. This can vary depending on the plant species and the chemical being used. Refer to reliable sources or gardening references for accurate information.
- Monitor the seeds during the scarification process, and avoid exceeding the recommended soaking time, as it can damage the seeds and hinder germination.
- After the recommended duration, carefully remove the seeds from the scarification solution. Rinse them thoroughly with clean water to remove any traces of the chemical.
- Immediately plant the scarified seeds in a suitable planting medium, such as a well-draining potting mix or garden soil. Plant at the appropriate depth and spacing, following the guidelines for the specific plant species.
- Water the seeds adequately after planting, ensuring the soil or planting medium is moist but not waterlogged. Maintain consistent moisture levels throughout the germination process.
- Provide the necessary care for the seeds, including proper light conditions and temperature requirements, specific to the plant species.
- Monitor the seeds closely for signs of germination, such as the emergence of seedlings. Continue to provide appropriate care and nurture the young plants as they grow.
Chemical scarification can be an effective way to break the dormancy of seeds with hard seed coats, but it requires caution and precise application. Always follow safety guidelines, use the recommended concentration of chemicals, and be mindful of the soaking duration to avoid harming the seeds. With proper execution, chemical scarification can significantly improve germination rates and help you grow a wider range of plant species.
Before scarifying seeds, soak them in warm water for 24 hours to soften the seed coat. Then, gently nick the seed coat with a file or sandpaper to help water and air penetrate, aiding in germination.
Hot water scarification
Hot water scarification is a method of seed scarification that involves soaking seeds in hot water to soften the hard seed coat. This process simulates the natural conditions where seeds are exposed to heat from forest fires or the sun, triggering germination. It is important to note that different plant species have specific temperature and duration requirements for hot water scarification. Here’s a step-by-step guide on how to perform hot water scarification:
- Research the specific plant species to determine if hot water scarification is recommended. Not all seeds require this method, so it is important to understand the germination requirements.
- Gather the seeds that require scarification and the necessary materials, including a heat-resistant bowl or container, hot water, and a thermometer to monitor the water temperature.
- Boil water and pour it into the heat-resistant container. Allow the water to cool slightly to the desired scarification temperature.
- Place the seeds into a sieve or mesh bag, ensuring they are fully submerged in the hot water.
- Set a timer for the specified duration recommended for the specific plant species. This can range from a few minutes to several hours, so consult reliable sources or gardening references for accurate information.
- Monitor the water temperature during the scarification process, ensuring it stays within the recommended range. If the temperature drops, add more hot water to maintain the desired level.
- After the specified duration, carefully remove the seeds from the hot water and transfer them to a sieve or allow them to drain thoroughly.
- Plant the scarified seeds immediately in a suitable planting medium. Ensure the medium is well-draining and appropriate for the specific plant species.
- Water the seeds thoroughly after planting, providing enough moisture to promote germination. Maintain consistent moisture levels throughout the germination period, avoiding overwatering.
- Provide the necessary care for the seeds, such as suitable light conditions and temperature requirements specific to the plant species.
- Monitor the seeds closely for signs of germination, such as the emergence of seedlings. Continue to provide appropriate care and nurture the young plants as they grow.
Hot water scarification can be an effective method to break seed dormancy and enhance germination rates for certain plant species. However, it is crucial to follow the recommended temperature and duration guidelines to avoid damaging the seeds. With proper execution, hot water scarification can increase the success of seed germination and help you grow a wider variety of plants in your garden.
Cold stratification scarification
Cold stratification scarification is a method of seed scarification that mimics the natural process of seeds undergoing a period of cold temperatures before germination. This technique is particularly useful for plants that require a prolonged period of cold treatment to break dormancy. Here’s a step-by-step guide on how to perform cold stratification scarification:
- Start by researching the specific plant species to determine if cold stratification scarification is necessary. Some seeds need a period of cold treatment to stimulate germination.
- Gather the seeds that require scarification and the necessary materials, including a container, a suitable medium like moist sand or peat moss, and a plastic bag or cover to create a mini-greenhouse environment.
- Moisten the medium to ensure it is uniformly damp but not waterlogged. Squeeze out any excess moisture if necessary.
- Place the seeds on the surface of the moist medium, spacing them out evenly. Make sure the seeds are in contact with the medium.
- Cover the container with a plastic bag or place a transparent lid on top to create a mini-greenhouse environment. This helps to maintain moisture levels and create a stable temperature.
- Label the container with the plant species and the date of the start of the cold stratification process.
- Transfer the container to a refrigerator or another cool environment with a temperature range recommended for the specific plant species. Typically, temperatures between 32-41°F (0-5°C) are suitable for most seeds.
- Allow the seeds to undergo the recommended duration of cold stratification. This period can range from a few weeks to several months, depending on the plant species. Consult reliable sources or gardening references for accurate information.
- Periodically check the moisture levels of the medium during the cold stratification process. If it feels dry, lightly mist the medium with water to maintain proper moisture levels.
- After the specified duration, remove the container from the cool environment and gradually acclimate the seeds to room temperature. This can be done by slowly opening the plastic bag or removing the cover over a few days to prevent shock.
- Plant the scarified seeds in a suitable planting medium immediately after the cold stratification period. Follow the recommended planting depth and spacing for the specific plant species.
- Water the seeds thoroughly after planting, ensuring the soil or planting medium is adequately moist. Maintain consistent moisture levels throughout the germination period.
- Provide the necessary care, such as suitable light conditions and temperature requirements specific to the plant species.
- Monitor the seeds closely for signs of germination, and continue to provide appropriate care and nurture the young plants as they grow.
Cold stratification scarification can be an effective method to break seed dormancy in plants that require a prolonged period of cool temperatures. By mimicking the natural conditions, this technique can enhance germination rates and help you grow a wider range of plant species. However, it is important to follow the recommended temperature and duration guidelines specific to each plant species for successful scarification.
How to scarify seeds step-by-step
Scarifying seeds is a process that involves breaking or weakening the hard seed coat to promote germination. The method used for scarification depends on the plant species and the thickness of the seed coat. Here’s a general step-by-step guide on how to scarify seeds effectively:
- Research the specific plant species you are working with to determine if scarification is necessary. Not all seeds require scarification, and some may have specific scarification requirements.
- Gather the seeds that require scarification and the necessary materials for the chosen scarification method. This may include items like sandpaper, a file, chemicals, hot water, or a refrigerator.
- Follow the appropriate scarification method based on the specific needs of the seeds:
- Mechanical scarification: Gently rub the seeds against sandpaper or file, creating small scratches or openings on the seed coat.
- Chemical scarification: Soak the seeds in a diluted chemical solution, such as sulfuric acid or hydrogen peroxide, for the recommended duration. Rinse the seeds thoroughly after scarification.
- Hot water scarification: Place the seeds in hot water at a specific temperature range for the recommended duration. Immediately transfer the seeds to cool water to stop the scarification process.
- Cold stratification scarification: Moisten a suitable medium like sand or peat moss and place the seeds on the surface. Store the container in a refrigerator or cool environment for the recommended duration.
- After scarifying the seeds, it’s important to plant them immediately. Scarified seeds are more vulnerable to drying out, so timely planting is crucial.
- Prepare the planting medium, whether it’s a potting mix or garden soil, ensuring it is suitable for the specific plant species.
- Plant the scarified seeds at the appropriate depth and spacing, following the recommended guidelines for the particular plant species.
- Water the seeds thoroughly after planting, providing enough moisture to initiate germination. Keep the soil or planting medium consistently moist throughout the germination process.
- Provide the necessary care for the seeds, such as suitable light conditions, temperature, and regular monitoring.
- Observe for signs of germination, such as the emergence of seedlings. Continue to provide appropriate care for the young plants as they grow.
Remember to adjust the scarification method and duration according to the specific plant species you are working with. It is also crucial to handle the seeds with care during the scarification process to avoid damaging them. By following these steps, you can effectively scarify seeds and improve their chances of successful germination.
Read more: How To Seed Lawn
Tips for successful seed scarification
Seed scarification can be a valuable technique for improving germination rates, but it requires careful execution to achieve the desired results. Here are some valuable tips to ensure successful seed scarification:
- Research and understand: Take the time to research and understand the specific scarification requirements of the plant species you are working with. Not all seeds require scarification, and different methods may be suitable for different species. Make sure you follow the appropriate scarification method for each type of seed.
- Prioritize seed quality: Start with high-quality seeds that are viable and in good condition. Scarification is most effective when performed on healthy seeds that have the potential to germinate. Avoid scarifying damaged or old seeds, as they may have lower chances of successful germination.
- Use the right tools and materials: Depending on the scarification method, ensure you have the right tools and materials. For mechanical scarification, use sandpaper or a file that is appropriate for the seed material. For chemical scarification, use the recommended chemicals in the correct concentrations. Proper materials and tools will help achieve the desired scarification without damaging the seeds.
- Follow safety precautions: When using chemicals for scarification, always follow safety guidelines and wear protective gloves and eye goggles. Work in a well-ventilated area, and always handle chemicals with caution to prevent any accidents or harm.
- Time scarification correctly: Timing is crucial for scarification. Some seeds require scarification before planting, while others benefit from scarification immediately before sowing. Follow the recommended timing guidelines for each plant species to maximize the effectiveness of scarification.
- Monitor moisture levels: Moisture is essential for scarification and subsequent germination. Whether you are scarifying mechanically, chemically, or through cold stratification, ensure the seeds are exposed to the right moisture conditions. Too much or too little moisture can adversely impact the scarification process.
- Provide optimal growing conditions: After scarification, create the ideal environment for the scarified seeds to germinate. This includes providing appropriate light conditions, maintaining optimal temperature and humidity levels, and ensuring proper airflow. Each plant species has specific requirements, so adapt the growing conditions accordingly.
- Avoid over- or under-scarification: While scarification is essential, it’s important not to overdo it. Be gentle during mechanical scarification to avoid damaging the seeds. In chemical scarification or hot water scarification, closely follow the recommended concentrations and durations to prevent harm to the seeds. Similarly, adhere to the recommended duration for cold stratification to prevent excessive exposure to cold temperatures.
- Keep records: Maintain records of your scarification process, including the method used, duration, and any observations. This documentation will help you track your results and make improvements for future scarification attempts.
- Experiment and learn: Scarification can require some trial and error, as different plant species may respond differently to scarification methods. Don’t be afraid to experiment and learn from your experiences. Share knowledge with other gardeners, consult gardening resources, and stay curious to improve your scarification skills.
By following these tips, you can increase the effectiveness of seed scarification and improve germination rates. Remember that scarification is not always necessary for all seeds, so research and understand the specific requirements of each plant species before attempting scarification. With practice and attention to detail, you can successfully scarify seeds and enhance your gardening endeavors.
Conclusion
Seed scarification is a valuable technique that empowers gardeners to break seed dormancy and improve germination rates. By understanding the concept of seed scarification and utilizing the appropriate methods, you can enhance the chances of successful seed germination and grow a wider variety of plants in your garden.
Through mechanical scarification, chemical scarification, hot water scarification, or cold stratification scarification, you can effectively break or weaken the hard seed coat, allowing water, air, and nutrients to penetrate and initiate germination. Each method has its own requirements and benefits, so it’s important to research and understand the specific needs of the plant species you are working with.
When embarking on seed scarification, it’s crucial to prioritize seed quality, use the correct tools and materials, and follow safety precautions when necessary. Timing the scarification correctly and monitoring moisture levels are also key factors for success. Providing optimal growing conditions and keeping records of your scarification process will help you track your progress and make adjustments for future attempts.
Remember that not all seeds require scarification, so it’s important to research and understand the specific requirements of each plant species. With practice, patience, and a willingness to learn, you can master the art of seed scarification and unlock the full potential of your seeds.
So, if you’re ready to take your gardening skills to the next level, give seed scarification a try. Discover the joy of successfully germinating seeds that were once challenging, and enjoy the rewards of a diverse and thriving garden.
Frequently Asked Questions about How To Scarify Seeds
Was this page helpful?
At Storables.com, we guarantee accurate and reliable information. Our content, validated by Expert Board Contributors, is crafted following stringent Editorial Policies. We're committed to providing you with well-researched, expert-backed insights for all your informational needs.


0 thoughts on “How To Scarify Seeds”