Home>Garden Essentials>Watercolor Painting Step By Step: How To Paint Flowers And Greenery
Garden Essentials
Watercolor Painting Step By Step: How To Paint Flowers And Greenery
Modified: March 7, 2024
Learn the art of watercolor painting step by step. Discover techniques for painting beautiful flowers and lush greenery in your garden.
(Many of the links in this article redirect to a specific reviewed product. Your purchase of these products through affiliate links helps to generate commission for Storables.com, at no extra cost. Learn more)
Introduction
Watercolor painting is a beautiful and expressive art form that allows you to create stunning floral compositions. Whether you are a beginner or an experienced artist, painting flowers and greenery can be a joyful and rewarding experience. In this step-by-step guide, we will explore the process of creating a watercolor painting of flowers and greenery, from selecting a reference image to adding final touches and signatures.
Before we dive into the painting process, it’s important to gather the necessary supplies. Here are the basic materials you will need:
- Watercolor paper: Use a high-quality watercolor paper that can withstand the wet washes and layering of colors.
- Watercolor paints: Invest in a set of artist-grade watercolor paints with a wide range of colors.
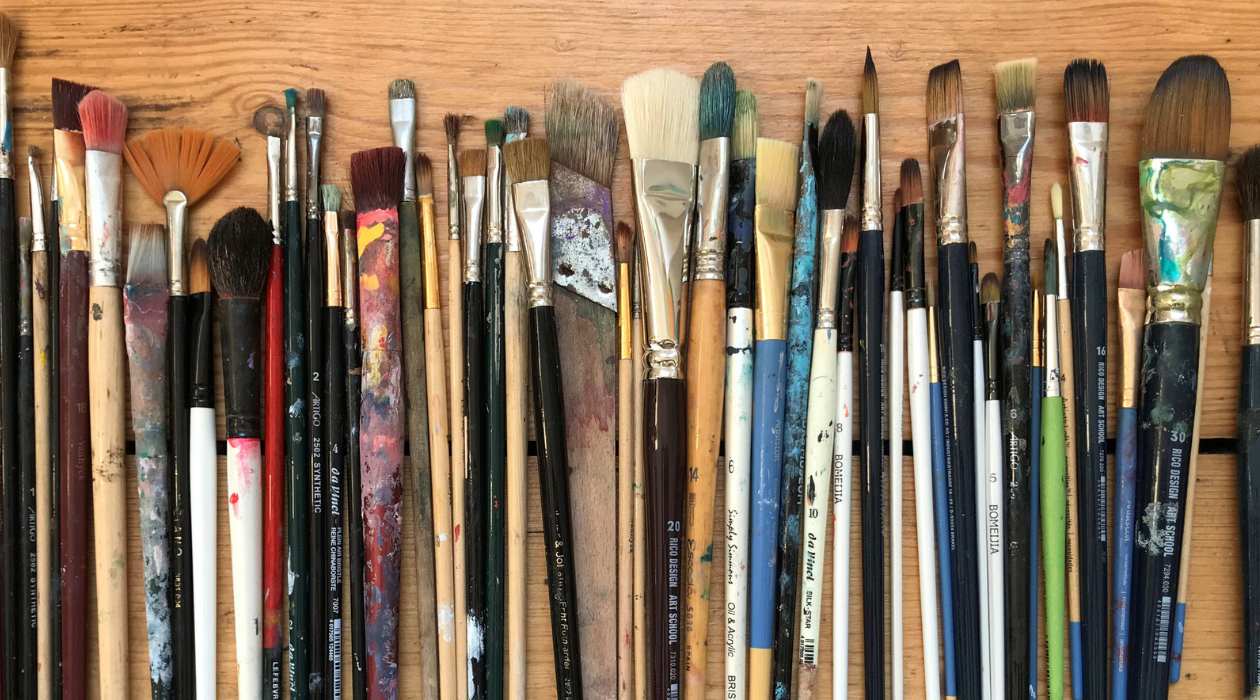
- Paintbrushes: Get a variety of brushes in different sizes, including round brushes for details and flat brushes for larger areas.
- Water container: Use a clean container to hold water for rinsing your brushes.
- Palette: Choose a palette with wells or a mixing surface to mix and dilute your paints.
- Pencil and eraser: Use a graphite pencil to sketch out your composition and an eraser to make any necessary changes.
- Masking tape: Secure your watercolor paper to a board or surface with masking tape to prevent it from warping.
- Paper towels: Keep some paper towels nearby to blot excess water or paint from your brush.
Now that you have your supplies ready, the next step is to choose a reference image to work from. Select a high-resolution photograph or a real-life arrangement of flowers and greenery that inspires you.
Once you have selected your reference image, you can start sketching the composition on your watercolor paper. Lightly draw the basic shapes and positions of the flowers and greenery using a pencil. This preliminary sketch will serve as a guide as you paint.
With your composition sketched out, it’s time to mix your colors. Begin by identifying the main colors of the flowers and greenery in your reference image. Use your watercolor palette to mix the desired hues, keeping in mind the variations and gradients within each element.
Now comes the exciting part – painting the flowers! Start by wetting the area of the flower you wish to paint and gradually add pigment to create depth and dimension. Use different brush strokes and techniques to mimic the intricate details of each petal. Remember to let the layers dry between applications to avoid muddying the colors.
Once you have painted the flowers, it’s time to focus on the greenery. Apply the same wet-on-wet technique, allowing the colors to blend and flow naturally. Experiment with different shades and textures to capture the essence of leaves and stems.
As you progress, don’t forget to add details and highlights to enhance the realism and depth of your painting. Use smaller brushes to add delicate veins, texture, and subtle highlights to the flowers and greenery. This step will bring your composition to life.
Finally, make any necessary final touches and allow your painting to dry completely. Once dry, you can sign your masterpiece with pride. Congratulations, you have created a stunning watercolor painting of flowers and greenery!
Key Takeaways:
- Gather high-quality watercolor supplies, choose a vibrant reference image, and sketch the composition lightly before mixing and painting the flowers and greenery.
- Add depth and dimension to your painting by layering colors, experimenting with brush strokes, and adding details and highlights to bring your watercolor flowers and greenery to life.
Read more: How To Store Watercolor Paintings
Supplies Needed
Before you embark on your watercolor painting journey, it’s important to gather all the necessary supplies. Having the right tools and materials will ensure a smooth and enjoyable painting experience. Here is a list of the basic supplies you will need:
- Watercolor Paper: Choose a high-quality watercolor paper that is specifically designed for wet media. Look for a paper that has a good weight (around 140lb) and a textured surface to hold the water and pigment.
- Watercolor Paints: Invest in a set of artist-grade watercolor paints. These will provide you with a range of vibrant colors and better lightfastness. Look for paints that come in tubes or pans, depending on your preference.
- Paintbrushes: Get a variety of paintbrushes in different sizes and shapes to achieve different effects. Round brushes are versatile and great for fine details, while flat brushes are ideal for larger areas and washes. Make sure to choose brushes with soft, synthetic bristles for watercolor painting.
- Water Container: Any clean container will do the trick, such as a jar or a plastic cup. It should be large enough to hold an adequate amount of water for rinsing your brushes during the painting process.
- Palette: You will need a palette for mixing and diluting your watercolor paints. There are many options available, from traditional artist palettes with wells to plastic or porcelain palettes with mixing areas.
- Pencil and Eraser: A graphite pencil and a good quality eraser are essential for sketching your composition and making any necessary adjustments. Look for a softer pencil (HB, 2B) that can be easily erased without damaging the paper.
- Masking Tape: You will need masking tape to secure your watercolor paper to a board or surface. This prevents the paper from warping or buckling when it gets wet with water or paint.
- Paper Towels: Keep some paper towels or a rag handy to blot excess water from your brushes and to quickly clean up any accidental spills or mistakes.
In addition to these basic supplies, you may want to consider having the following optional items:
- Palette Knife: A palette knife can be helpful for mixing and applying thicker, textured paint onto your paper.
- Masking Fluid: If you want to preserve certain areas of your painting, such as highlight or fine details, you can use masking fluid. It creates a barrier that prevents paint from adhering to the paper.
- Spray Bottle: A spray bottle filled with water can be used to create interesting and spontaneous effects, such as creating soft washes or lifting off paint.
- Watercolor Mediums: Depending on your preferences, you may want to explore watercolor mediums such as granulating medium, lifting preparation, or masking fluids. These can add unique textures and enhance your painting techniques.
- Easel: If you prefer to work upright or at an angle, consider investing in a tabletop or floor easel to provide stability and comfort during your painting sessions.
By ensuring you have the necessary supplies, as well as any optional items that suit your style and preferences, you are well-equipped to embark on your watercolor painting journey. Remember, quality materials will greatly contribute to the overall outcome of your paintings, so it’s worth investing in the best supplies you can afford. Happy painting!
Choosing Your Reference Image
When it comes to creating a watercolor painting of flowers and greenery, choosing the right reference image is crucial. The reference image will serve as your guide throughout the painting process, providing you with inspiration and a visual representation of the subject matter.
Here are some tips to help you choose the perfect reference image:
- Subject Selection: Decide on the type of flowers and greenery you want to paint. Consider your personal taste, the level of complexity you want to take on, and the overall mood you want to convey in your painting. You may prefer the vibrant colors of roses or the delicate petals of daisies. Choose a subject that excites and inspires you.
- Image Quality: Look for high-resolution photographs or real-life arrangements that capture the details and colors of the flowers and greenery accurately. Sharp, clear images with good lighting will enable you to observe and replicate the intricate features of your subject more effectively.
- Composition: Pay attention to the composition of the reference image. Consider factors such as the placement of the flowers and greenery, the balance of elements, and any interesting angles or perspectives that can add visual interest to your painting. Take your time to find a composition that speaks to you and aligns with your artistic vision.
- Variety and Contrast: Look for reference images that offer a good variety of flowers and greenery. Having a mix of different shapes, sizes, and colors will make your painting more dynamic and visually engaging. Additionally, seek out images that showcase contrasting elements, such as light and shadow or soft and hard textures. These contrasts will add depth and dimension to your painting.
- Personal Connection: Consider any personal or emotional connection you may have to the subject matter. If a particular flower holds special meaning for you or evokes certain memories, it can be incredibly fulfilling to paint it. Infusing your paintings with personal significance will add a layer of authenticity and emotion to your artwork.
There are various sources where you can find reference images for your watercolor painting. You can explore photography websites, visit botanical gardens, or even take your own photographs. If you choose to use someone else’s photograph, always ensure you have their permission and give proper credit.
Once you have selected a reference image, take the time to study it. Analyze the colors, shapes, and textures of the flowers and greenery. Observe how the light interacts with the subject and how the individual elements come together to form a cohesive composition. This careful observation will guide your artistic decisions as you translate the reference image onto your watercolor paper.
Remember, the reference image is a starting point and not a strict blueprint. Feel free to make adjustments and interpret the image in your own unique style. Use it as a guide but allow your creativity to shine through. With a well-chosen reference image, you are ready to embark on your watercolor painting journey and bring beautiful flowers and greenery to life on your canvas.
Sketching the Composition
Before you start painting your watercolor flowers and greenery, it’s important to sketch the composition on your paper. The sketch serves as a guideline and helps you plan out the arrangement and proportions of your subjects. Here are some steps to follow when sketching the composition:
- Choose your Layout: Decide on the positioning and size of your main focal point, whether it’s a single flower or a group of flowers. Consider the overall balance and visual flow of your composition. You can also include greenery or other elements to enhance the composition.
- Light Pencil: Start with a light pencil sketch. Use a graphite pencil with a soft lead (HB or 2B) to lightly draw the basic shapes and positions of the flowers and greenery. Keep the lines loose and fluid to allow for adjustments later on.
- Proportions: Pay attention to the proportions of the flowers and greenery. Observe the sizes relative to each other and ensure they fit well within the composition. This step is crucial for achieving a realistic and balanced final painting.
- Perspective: Consider the perspective of your composition. If you want to create a more dynamic effect, you can experiment with different angles and viewpoints. This can add depth and interest to your painting.
- Reference Image: Continuously refer to your chosen reference image as you sketch. Observe the shapes, angles, and positions of the flowers and greenery. Don’t be afraid to make adjustments and deviate from the reference image if you feel it will enhance your composition.
- Refine and Adjust: Once you have the basic shapes sketched out, take a step back and assess the overall composition. Look for any areas that may need adjustment or refinement. Make any necessary changes before proceeding to the next step.
- Erase Guidelines: Once you are satisfied with your sketch, gently erase any visible guidelines or excess pencil marks. Be careful not to press too hard and damage the watercolor paper.
Remember, your sketch is a foundation upon which you will build your painting. It doesn’t have to be overly detailed or precise, as watercolor is a forgiving medium that allows for spontaneity and creativity. Think of your sketch as a roadmap that guides your brushstrokes and color choices.
By taking the time to sketch your composition, you will have a clearer vision of how your final painting will look. It also allows you to work out any potential issues or challenges before applying watercolor. With your composition sketched, you are now ready to mix your colors and bring your painting to life.
Mixing Your Colors
Once you have sketched out the composition of your watercolor painting, it’s time to mix your colors. Mixing colors is an essential step in watercolor painting, as it allows you to create the desired hues and values for your flowers and greenery. Here are some tips to guide you in mixing your colors:
- Identify the Colors: Begin by studying your reference image and identifying the main colors of the flowers and greenery. Look for the prominent hues and variations within each element. Pay attention to the subtle shifts in color temperature, such as warm yellows or cool blues.
- Start with Primary Colors: As a general rule, start with your primary colors – red, yellow, and blue. These colors serve as the foundation for mixing all other colors. Use a clean palette and squeeze out a small amount of each of these primary colors.
- Experiment and Observe: Begin mixing your primary colors to create the desired secondary colors. For example, combining red and yellow will create orange, while blue and yellow will make green. Experiment with different ratios and observe the changes in color intensity and value. Take note of the colors that closely resemble the ones in your reference image.
- Gradations and Gradients: To achieve a realistic look, create various gradations and gradients within each color. Mix lighter and darker shades of the same color by diluting the original mixture with more water or adding a touch of black or complementary color to darken it. This will give depth and dimension to your painting.
- Test and Adjust: Continuously compare your mixed colors to your reference image. Test the colors on a separate piece of paper to see how they appear when dry. Make adjustments as needed by adding or subtracting colors to achieve a closer match to the reference image.
- Keep a Color Chart: It’s helpful to create a color chart as you mix your colors. Label each color and keep a record of the combinations that yielded the desired hues. This will serve as a reference for future paintings and allow you to replicate colors more accurately.
- Variations and Highlights: Remember that flowers and greenery often have variations within their colors. Mix different shades and tones to capture this variation. Add a touch of white or a lighter mix of the same color to create highlights and add dimension to your painting.
As you mix your colors, it’s important to work quickly and confidently. Watercolor paints can dry fast, so it’s crucial to work efficiently to maintain the wet-on-wet blending technique. Don’t be afraid to experiment and trust your instincts. The beauty of watercolor is its ability to flow and create unexpected effects.
By taking the time to mix your colors thoughtfully, you will be able to create a harmonious and realistic representation of the flowers and greenery in your painting. With your colors prepared, you are now ready to paint the flowers and bring life to your composition.
When painting flowers and greenery with watercolors, start with light washes and gradually build up the layers to create depth and dimension. Use a variety of brushstrokes to capture the different textures and shapes of the plants.
Read more: How To Press Flowers: A Step By Step Guide
Painting the Flowers
Now that you have mixed your colors, it’s time to bring the flowers in your watercolor painting to life. Painting the flowers requires careful observation and attention to detail. Here are some steps to guide you as you paint the flowers:
- Wet the Area: Begin by wetting the area of the flower you wish to paint. Use a clean brush and clear water to lightly dampen the surface. This will create a wet-on-wet technique, allowing the colors to blend and flow more easily.
- Layering Colors: Start applying the base color of the flower using a medium-sized round brush. Mix your chosen color with enough water to create a fluid consistency. Start with lighter shades and gradually work towards the darker areas. Layering the colors will create depth and dimension in your painting.
- Add Depth and Shadows: As you progress, add different shades and variations of the base color to create depth and shadows within the petals. Observe your reference image to identify areas of darker tones or shadows. Use a smaller brush for more precise details.
- Define the Petal Edges: To give your flowers a more defined look, add darker tones to the outer edges of the petals. This will create the illusion of depth and dimension. Use a smaller round brush to carefully paint the edges, following the natural shape of the petals.
- Work in Layers: Building up your painting in layers will give a more realistic and textured appearance. Allow each layer to dry completely before adding the next layer. This will prevent your colors from becoming muddy and ensure crisp details and vibrant colors.
- Experiment with Brush Strokes: Flowers have intricate details and textures. Experiment with different brush strokes to represent the different petal shapes and patterns. Use the tip of your brush for thin lines and details, and the side of your brush for broader strokes and washes.
- Highlight and Detail: Once your initial layers are dry, add highlights and finer details to your flowers. Use a smaller round brush and a touch of lighter shade or even white to add highlights to the petals. This will give them a three-dimensional effect and make them pop.
- Step Back and Assess: Throughout the process, step back and assess your work. Compare it to your reference image to ensure you are capturing the essence of the flowers. Make any necessary adjustments and additions to enhance the overall effect.
Remember, painting flowers with watercolors allows for a certain level of spontaneity and variation. Embrace the fluidity of the medium and allow the colors to blend and mingle on the paper. This will add a natural and organic feel to your artwork.
By following these steps and trusting your artistic instincts, you will be able to paint beautiful and realistic flowers in your watercolor painting. Take your time, enjoy the process, and let the flowers blossom on your canvas.
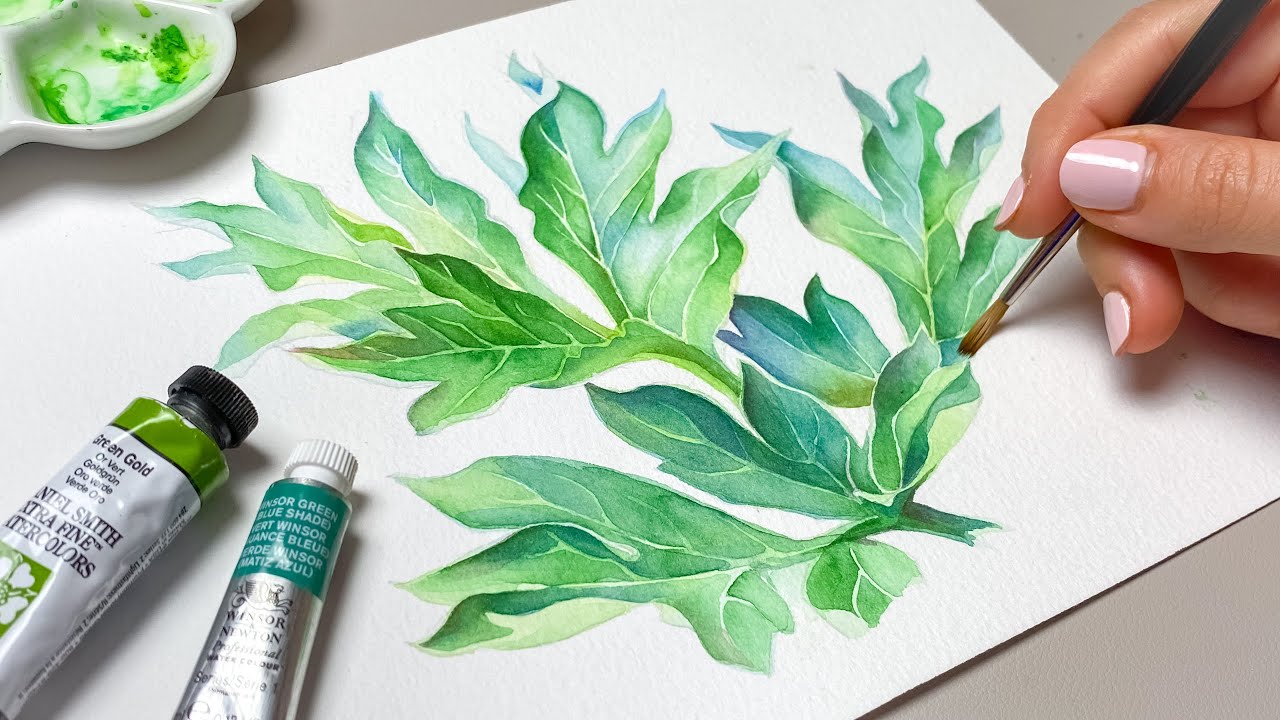
Painting the Greenery
Now that you have beautifully painted the flowers, it’s time to shift your attention to the greenery in your watercolor painting. Painting the greenery requires capturing the various shades and textures of leaves and stems. Here are some steps to guide you as you paint the greenery:
- Observe and Mix Colors: Start by observing the greenery in your reference image. Notice the different shades, from light lime green to deeper emerald tones. Mix your base green color using a combination of blue and yellow watercolor paints, adjusting the ratio to achieve your desired shade.
- Wet-on-Wet Technique: Wet the area of the greenery you wish to paint using a clean brush and clear water. This will create a wet surface, allowing the colors to blend seamlessly and create soft transitions.
- Apply Base Color: Using a medium-sized round brush, apply your base green color to the wet area. Start with lighter tones and gradually work towards darker areas. Keep your brushstrokes loose and free, following the shape and direction of the leaves and stems.
- Add Depth and Texture: To add depth and texture to the greenery, layer different shades of green on top of each other. Play with lighter and darker tones to create the illusion of shadows and highlights within the leaves. Use smaller brushes for more intricate details, such as veins and serrated edges.
- Variation in Leaves: Greenery often presents different types of leaves, each with its unique shape and texture. Observe your reference image to identify different leaf shapes and recreate them in your painting. Vary your brushstrokes to mimic the delicate veins and patterns of the leaves.
- Experiment with Techniques: Watercolor allows for a wide range of techniques to create interesting effects. Try splattering or dabbing your brush to create the illusion of foliage or use a dry brush technique to add texture to the leaves. Explore different techniques to bring the greenery to life on your paper.
- Balance and Composition: As you paint the greenery, keep in mind the overall balance and composition of your painting. Ensure that the greenery complements and enhances the beauty of the flowers. Make any necessary adjustments to maintain a harmonious and visually pleasing composition.
- Step Back and Assess: Throughout the process, step back from your painting and assess your work. Compare it to your reference image to ensure you are capturing the essence of the greenery. Make any necessary adjustments and additions to achieve the desired effect.
Remember, greenery often provides a backdrop or frame for the flowers in your painting. It should enhance the overall composition and serve as a complement to the vibrant colors of the flowers. Be patient and enjoy the process of capturing the intricate details and textures of the leaves and stems.
By following these steps and experimenting with different techniques, you will be able to paint luscious and realistic greenery in your watercolor painting. Let the leaves and stems dance on your canvas and bring a sense of freshness and vibrancy to your artwork.
Adding Details and Highlights
As you near the final stages of your watercolor painting of flowers and greenery, it’s time to add the finishing touches that will truly bring your artwork to life. Adding details and highlights will enhance the realism and depth of your painting. Here are some steps to guide you:
- Refine the Shapes: Take a close look at each element of your painting, including the flowers and greenery. Use a smaller brush to refine the shapes and edges, making sure they accurately represent the forms of the petals and leaves. Add any missing details or adjust any that need fine-tuning.
- Veins and Texture: Flowers and leaves often have intricate veins and textures. Using a fine-tipped brush, carefully add the veins to the petals and leaves, observing the direction and pattern from your reference image. This step will add a realistic touch and bring depth to your painting.
- Splatters and Splashes: To add a touch of spontaneity and movement, consider splattering or splashing small droplets of paint onto your painting. Load your brush with a diluted color and flick it gently with your finger to create small droplets. This technique can represent falling petals or dewdrops on leaves, adding visual interest and a sense of energy to your artwork.
- Highlighting Edges: Use a small round brush and a lighter shade of the base color to add highlights to the edges of the flowers and leaves. Focus on the areas where the light hits, giving a three-dimensional effect and making the elements pop. These highlights will add depth and dimension to your painting.
- Soft Blending: Use a clean, damp brush to soften any harsh edges or transitions in your painting. Lightly brush over the areas you want to blend, allowing the colors to seamlessly flow into one another. This technique will give a softer and more painterly feel to your artwork.
- Contrast and Balance: Assess the overall contrast and balance of your painting. Ensure that your shadows are sufficiently dark and your highlights are bright enough to create a dynamic range. Adjust any areas that need more contrast or subtlety to achieve a visually appealing composition.
- Step Back and Assess: Take a step back from your painting and assess your work as a whole. Look for any final adjustments or additions that need to be made. Compare your painting to your reference image to ensure that you have captured the essence and beauty of the flowers and greenery.
Adding details and highlights is the stage where you can truly showcase your artistic style and bring out the unique characteristics of your subject matter. Take your time and enjoy the process of refining and enhancing your painting. Remember, it’s the small details that can make a significant impact on the overall look and feel of your artwork.
With the final details and highlights in place, your watercolor painting of flowers and greenery is now complete. Take a moment to appreciate the beauty you have created and sign your masterpiece with pride. Your attention to detail and artistic vision have resulted in a stunning portrayal of nature’s elegance.
Final Touches and Signatures
Congratulations! You have reached the final stages of your watercolor painting of flowers and greenery. Now, it’s time to add the final touches and sign your masterpiece. Here are some steps to guide you:
- Assess Your Painting: Step back and carefully assess your painting as a whole. Take a moment to observe the overall composition, colors, and details. Notice any areas that may need additional adjustments or final touches.
- Refining and Enhancing: Use this opportunity to refine and enhance any areas of your painting that you feel could benefit from additional depth or detail. Consider adding more highlights, adjusting colors, or sharpening edges to achieve the desired effect.
- Evaluate Contrast and Balance: Assess the overall contrast and balance of your painting. Ensure that the dark and light areas provide sufficient contrast to create visual interest. Adjust any areas that may appear flat or need more depth and dimension.
- Dry Completely: It’s important to ensure that your painting is completely dry before making any final touches. This will prevent any accidental smudging or smearing of the paint. Give it enough time to air dry or use a hairdryer on a low, cool setting to speed up the process.
- Clean Edges: Use a damp brush or a clean damp cloth to carefully clean up any stray marks or smudges on the edges of your painting. This will give your artwork a polished and professional appearance.
- Sign Your Painting: As a final step, add your signature to the bottom corner of your painting. Sign it using a fine-tipped brush or a permanent pen. Your signature adds a personal touch and signifies your artistic ownership of the artwork.
- Protect Your Artwork: To protect your watercolor painting, consider applying a fixative or a varnish specifically designed for watercolor paintings. This will help preserve the vibrancy and longevity of the colors and provide a protective layer against dirt and moisture.
Remember, the final touches are the finishing strokes that bring your painting together and showcase your unique artistic style. Take your time during this stage, as even the smallest adjustments or additions can make a significant difference in the overall impact of your artwork.
Once you are satisfied with your final touches and your signature is added, step back and truly admire the beautiful piece of art you have created. Celebrate your accomplishment and share your painting with others to showcase your talent and creativity.
Now that your watercolor painting is complete, embrace the feeling of fulfillment that comes from bringing flowers and greenery to life on paper. Your attention to detail and dedication to the art have resulted in a stunning portrayal of nature’s beauty that will be cherished for years to come.
Frequently Asked Questions about Watercolor Painting Step By Step: How To Paint Flowers And Greenery
Was this page helpful?
At Storables.com, we guarantee accurate and reliable information. Our content, validated by Expert Board Contributors, is crafted following stringent Editorial Policies. We're committed to providing you with well-researched, expert-backed insights for all your informational needs.


0 thoughts on “Watercolor Painting Step By Step: How To Paint Flowers And Greenery”