Articles
How To Install Roll Roofing
Modified: October 18, 2024
Learn how to install roll roofing with these helpful articles. Find step-by-step guides, tips, and tricks to ensure a successful roofing project.
(Many of the links in this article redirect to a specific reviewed product. Your purchase of these products through affiliate links helps to generate commission for Storables.com, at no extra cost. Learn more)
Introduction
Installing roll roofing is a cost-effective and efficient way to protect your roof from the elements. Whether you’re tackling a DIY project or hiring a professional, understanding the process is essential for a successful installation. This article will guide you through the steps involved in installing roll roofing, providing you with the knowledge and confidence to get the job done right.
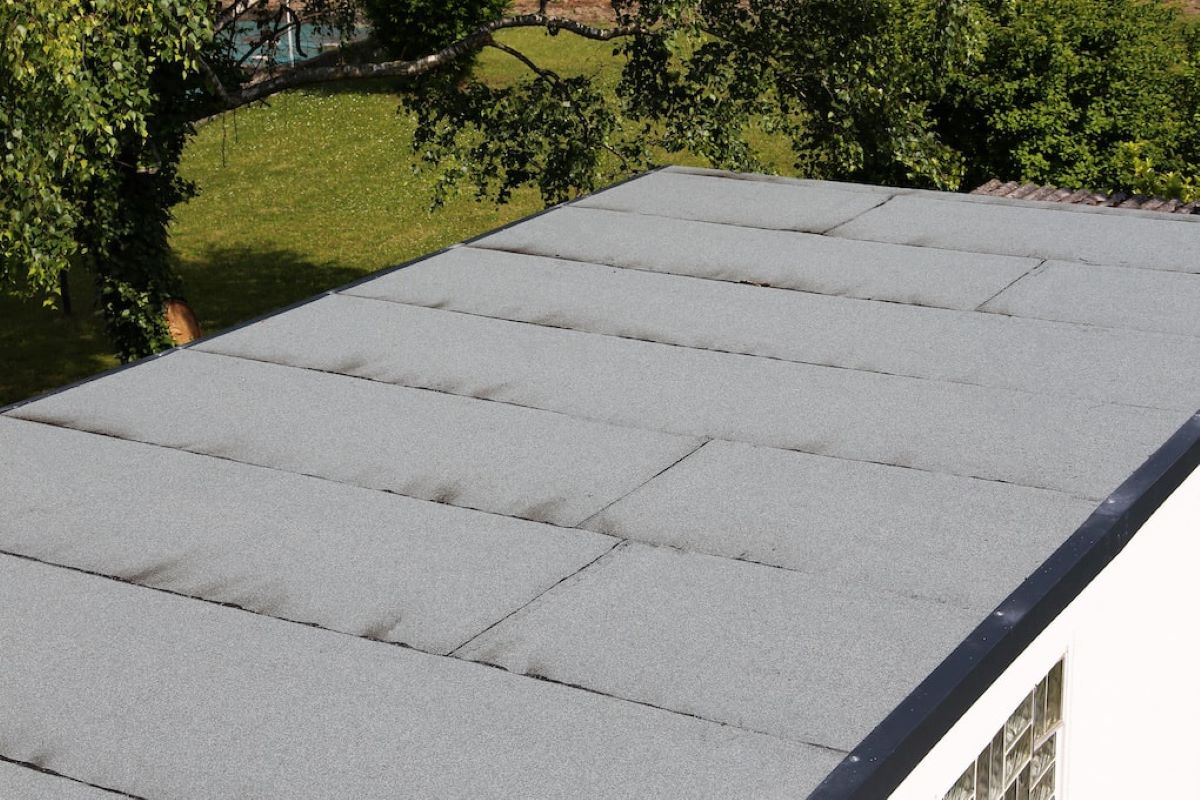
Roll roofing is a type of roofing material that comes in long rolls, typically made of asphalt or a combination of asphalt and fiberglass. It is commonly used on low-slope or flat roofs, and it provides a durable and waterproof layer of protection. While roll roofing is not as aesthetically appealing as other roofing materials, such as shingles, it is a practical choice for areas where appearance is not a primary concern.
Before you begin the installation process, it’s important to gather all the necessary materials. This will ensure that you have everything you need on hand and can complete the project efficiently. Let’s take a look at the materials you will need:
- Roll roofing
- Roofing nails or staples
- Roofing adhesive
- Roofing cement
- Roofing felt or underlayment
- Utility knife
- Hammer or roofing nail gun
- Measuring tape
- Chalk line
- Roofing brush or roller
Once you have all the necessary materials, you can begin the installation process by preparing the roof surface. This involves cleaning the roof, removing any debris, and making any necessary repairs. A clean and smooth surface is crucial for ensuring proper adhesion and a long-lasting installation.
Key Takeaways:
- Proper preparation is crucial for a successful roll roofing installation. From cleaning the roof surface to inspecting for damages and ensuring proper ventilation, attention to detail at the outset sets the stage for a durable and reliable roofing system.
- Securing the edges and conducting a thorough inspection and cleanup after installation are essential steps in ensuring the longevity of your roll roofing. Attention to detail and regular maintenance will help protect your roof from the elements and prevent costly repairs.
Read more: What Is A Rolled Roof
Materials Needed
Before you start the roll roofing installation process, it’s important to gather all the necessary materials. Having everything prepared in advance will save you time and ensure that you have everything you need to complete the project successfully. Here is a list of the materials you will need:
- Roll Roofing: This is the main material you will be installing. Roll roofing comes in long rolls and is typically made of asphalt or a combination of asphalt and fiberglass. Make sure to choose a roll that is appropriate for your roof size.
- Roofing Nails or Staples: You will need roofing nails or staples to secure the roll roofing to the roof surface. Make sure to use nails or staples that are long enough to penetrate the roofing material and reach the roof deck.
- Roofing Adhesive: Roofing adhesive is used to bond the roll roofing to the roof surface. It provides additional waterproofing and helps ensure a secure and long-lasting installation. Choose an adhesive that is compatible with the type of roll roofing you are using.
- Roofing Cement: Roofing cement or roof sealant is used to seal any gaps or joints in the roll roofing. It provides an extra layer of protection against water infiltration and helps prevent leaks.
- Roofing Felt or Underlayment: Roofing felt or underlayment is a layer of material that is installed between the roof deck and the roll roofing. It provides additional waterproofing and helps protect the roof deck from moisture damage.
- Utility Knife: A utility knife is essential for cutting the roll roofing to the appropriate size and shape. Make sure to use a sharp utility knife to ensure clean and precise cuts.
- Hammer or Roofing Nail Gun: You will need a hammer or a roofing nail gun to secure the roofing nails or staples. A roofing nail gun can make the installation process faster and more efficient.
- Measuring Tape: A measuring tape will help you accurately measure the dimensions of the roof and the roll roofing. This will ensure that you cut the roll roofing to the correct size and minimize waste.
- Chalk Line: A chalk line is used to create straight guidelines on the roof surface. It will help you align the roll roofing and ensure a neat and professional-looking installation.
- Roofing Brush or Roller: A roofing brush or roller is used to apply the roofing adhesive and ensure proper bonding between the roll roofing and the roof surface.
By gathering all the necessary materials in advance, you will be well-prepared to tackle the roll roofing installation process. This will help make the project go smoothly and ensure a successful outcome. Once you have all the materials ready, you can proceed to the next step: preparing the roof surface.
Step 1: Preparing the Roof Surface
Before you can begin installing the roll roofing, it’s crucial to properly prepare the roof surface. This step ensures that the roll roofing adheres correctly and provides a secure and long-lasting roofing system. Here are the steps involved in preparing the roof surface:
- Clean the Roof: Start by cleaning the roof surface thoroughly. Remove any debris, dirt, or loose materials that may be present. Use a broom or a roofing brush to sweep away leaves, twigs, and other debris. Ensure that the surface is clean and free from any obstructions.
- Inspect for Damages: Next, inspect the roof for any damages or signs of deterioration. Look for cracks, holes, or areas where the roof may be compromised. If you notice any damages, it’s essential to repair them before proceeding with the roll roofing installation. Use roofing cement or an appropriate sealant to patch any holes or cracks.
- Check for Proper Ventilation: Adequate ventilation is crucial for the longevity of your roof. Make sure that any existing roof vents or ventilation systems are in good condition. Ensure that there are no blockages that could impede proper airflow. If necessary, clean or repair the ventilation system before proceeding.
- Install Roofing Felt: Depending on the specific requirements of your roll roofing system, you may need to install roofing felt or underlayment. This additional layer helps protect the roof deck from moisture and provides an added barrier against leaks. Roll out the roofing felt and secure it to the roof deck using roofing nails or staples.
- Check for Slope: Roll roofing is typically used on low-slope or flat roofs. It’s important to ensure that your roof has the proper slope or pitch for roll roofing installation. Consult the manufacturer’s guidelines or consult with a professional if you’re unsure about the suitability of your roof for this type of roofing material.
- Apply Primer (if required): Some roll roofing systems may require the application of a primer before the installation. Check the manufacturer’s instructions to determine if a primer is necessary. If so, apply the primer as directed and allow it to dry before moving on to the next step.
By properly preparing the roof surface, you create the ideal foundation for installing the roll roofing. This step ensures that the roofing material adheres well and provides optimal protection against the elements. Once you have finished preparing the roof surface, you can proceed to the next step: unrolling and cutting the roll roofing.
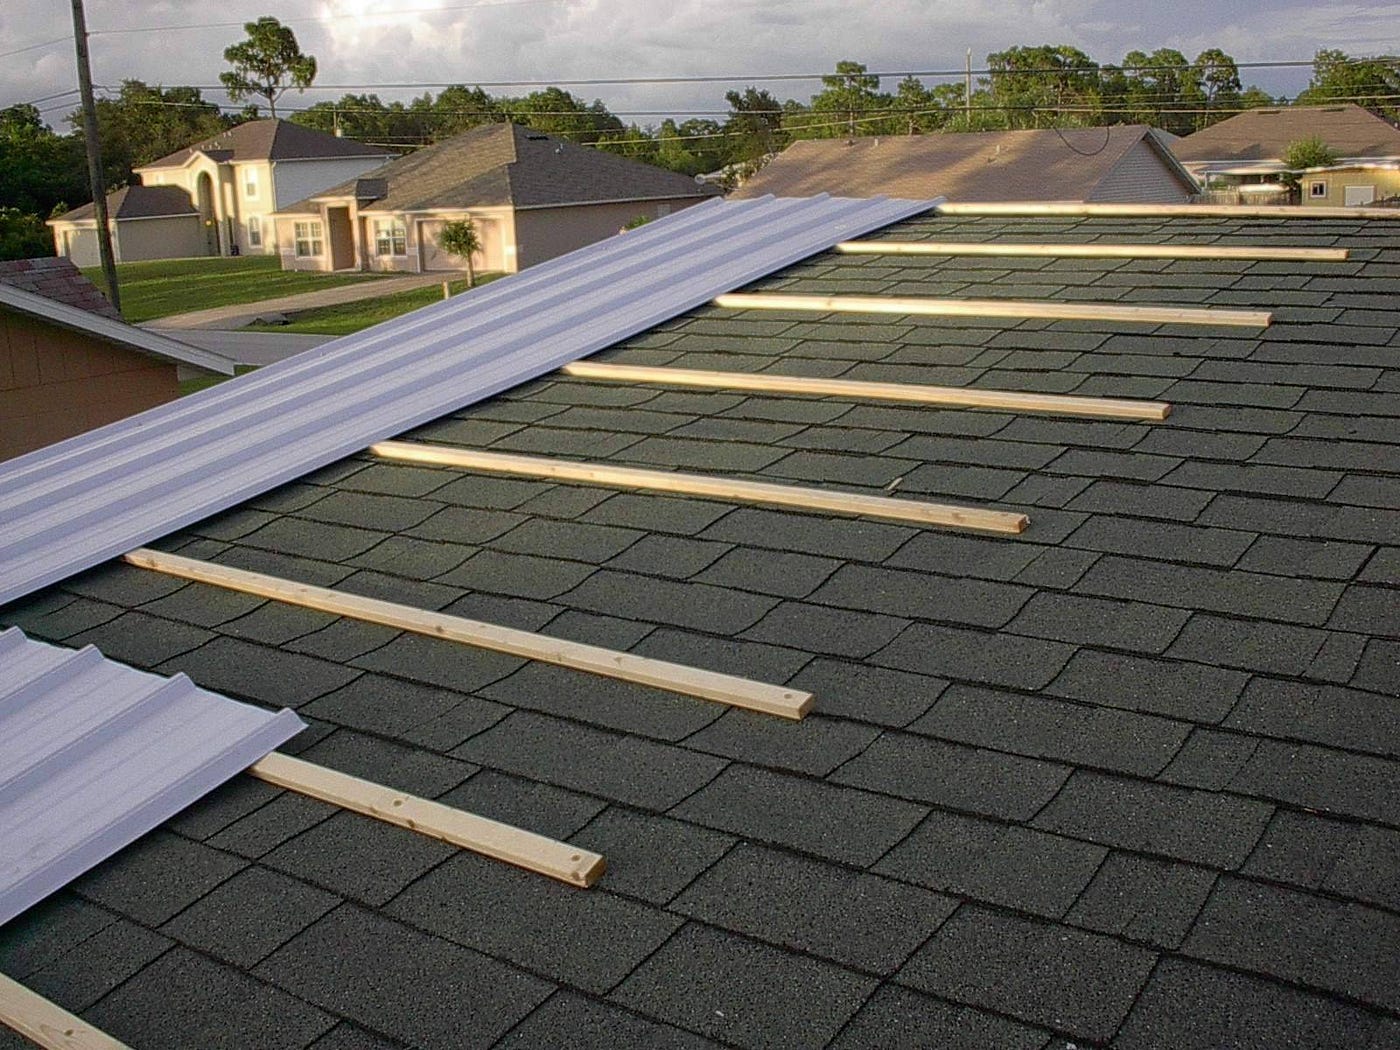
Step 2: Unrolling and Cutting the Roll Roofing
Now that you have prepared the roof surface, it’s time to unroll and cut the roll roofing to fit your roof’s dimensions. Carefully follow these steps to ensure a proper fit:
- Measure the Roof: Use a measuring tape to determine the length and width of your roof. Make note of these measurements, as they will guide you in cutting the roll roofing to the correct size.
- Prepare the Roll Roofing: Unroll the roll roofing material on a clean, flat surface. Allow it to relax and flatten for a while, especially if it is cold outside, as this will make it easier to work with. Take this time to inspect the roll roofing for any tears, defects, or imperfections. Cut off any damaged sections.
- Measure and Mark: Measure the length of the roll roofing required for your roof, accounting for any overhang or edging that may be needed. Use a chalk line or marker to mark the cut line on the underside of the roll roofing.
- Cut: Using a utility knife, cut along the marked line. Apply firm and steady pressure to ensure a clean and accurate cut. Be careful not to cut yourself or damage the remaining roll roofing.
- Repeat for Width: Repeat the measuring, marking, and cutting process for the width of the roll roofing. Ensure that you have enough material to cover the entire width of your roof, accounting for any necessary overhang or edging.
- Trimming: Once you have cut the roll roofing to the appropriate size, trim any excess material. This will prevent overhang and ensure a neat and professional-looking installation.
Remember, it’s essential to measure accurately and cut carefully to ensure the roll roofing fits the roof surface properly. Take your time during this step to avoid costly mistakes or the need for additional materials. Once you have cut the roll roofing to size, you can proceed to the next step: applying adhesive to the roof surface.
Step 3: Applying Adhesive to the Roof Surface
Now that you have the roll roofing cut to size, it’s time to apply adhesive to the roof surface. This is a crucial step as it ensures proper adhesion and creates a waterproof seal. Follow these steps to apply the adhesive:
- Choose the Right Adhesive: Select an adhesive that is recommended by the manufacturer of your roll roofing system. Read the instructions carefully and ensure that the adhesive is suitable for the specific type of roll roofing you are installing.
- Prepare the Adhesive: Depending on the adhesive you are using, you may need to mix or prepare it according to the manufacturer’s instructions. Follow these instructions closely to ensure a proper adhesive consistency.
- Start in a Corner: Begin applying the adhesive in one corner of the roof surface. Use a roofing brush or roller to spread the adhesive evenly. Start at the corner and work your way across the roof, covering an area slightly wider than the width of the roll roofing.
- Maintain a Smooth and Even Coat: Apply the adhesive in a smooth and even layer, ensuring that there are no gaps or missed spots. Pay extra attention to the edges and corners, as these areas are prone to leaks and water infiltration.
- Work in Sections: Depending on the size of your roof, you may need to work in sections. Apply the adhesive to one section at a time, ensuring that each section is thoroughly coated before moving on to the next.
- Overlap Joints: If you have multiple sections of roll roofing, make sure to overlap the joints appropriately. Apply adhesive to the overlapping area to create a secure and watertight seal. Follow the manufacturer’s guidelines for the recommended overlap distance.
- Allow the Adhesive to Dry: After applying the adhesive, allow it to dry according to the manufacturer’s instructions. The drying time will vary depending on the type of adhesive used and the weather conditions. Avoid walking or placing any weight on the adhesive until it is fully dry.
By properly applying an adhesive to the roof surface, you ensure that the roll roofing adheres securely and creates a waterproof barrier. Take your time during this step to ensure that the adhesive is evenly spread and covers the entire roof surface. Once the adhesive has dried, you are ready to move on to the next step: installing the roll roofing.
When installing roll roofing, make sure to properly prepare the surface by removing any debris and ensuring it is clean and dry. This will help the roofing material adhere properly and provide a longer-lasting result.
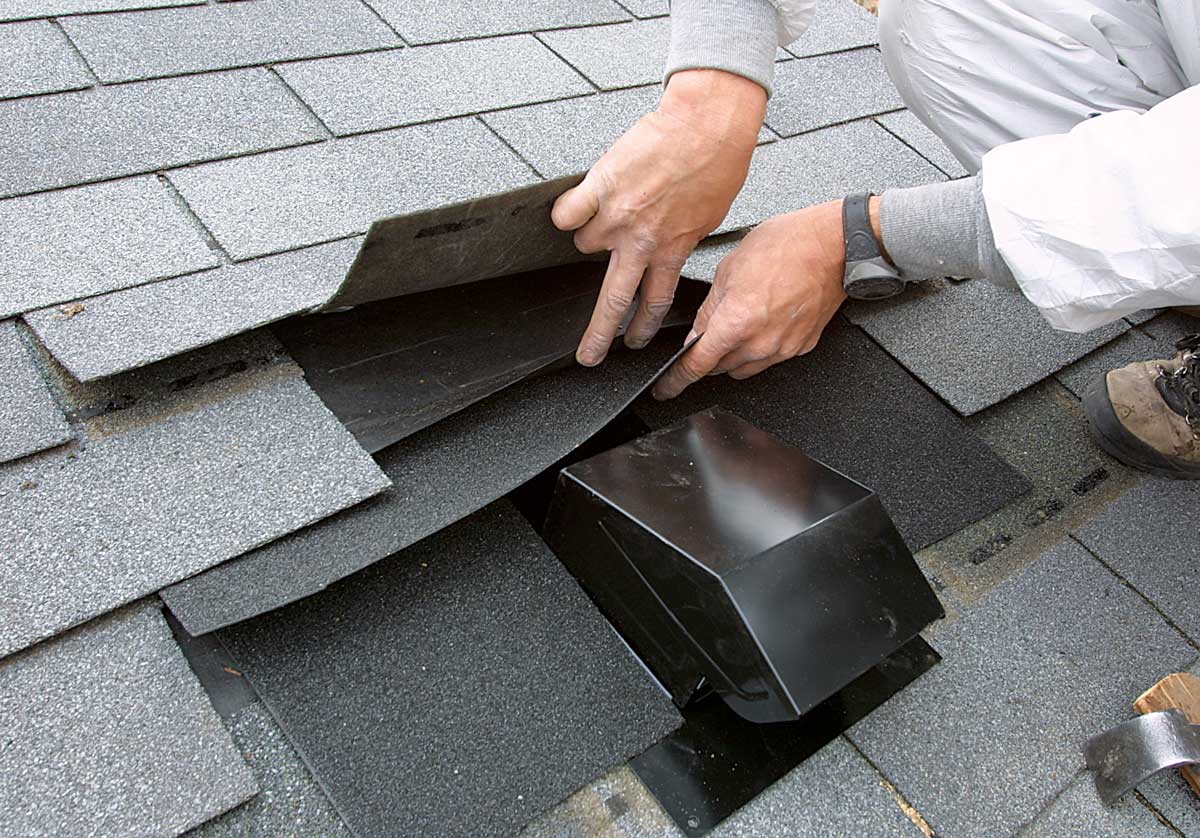
Read more: How To Install A Roof Vent
Step 4: Installing the Roll Roofing
With the adhesive applied and dried, you are now ready to install the roll roofing onto the roof surface. Follow these steps to ensure a proper installation:
- Start at the Bottom: Begin by positioning the roll roofing at the bottom edge of the roof surface. Make sure it overhangs the edge by the appropriate amount as specified by the manufacturer or local building codes.
- Align the Roll: Align the roll roofing parallel to the eave or bottom edge of the roof. Make sure it is straight and evenly aligned across the entire width of the roof.
- Press and Smooth: Once the roll roofing is properly aligned, press it down onto the adhesive, starting at one end and working your way to the other. Use a roofing brush or roller to firmly press the roll roofing onto the adhesive, ensuring good adhesion and preventing any air bubbles or wrinkles.
- Overlap Sheets or Sections: If you have multiple sheets or sections of roll roofing, make sure to overlap them appropriately. Follow the manufacturer’s guidelines for the recommended overlap distance and apply adhesive to the overlapping area to create a secure and watertight seal.
- Cut Around Protrusions: As you lay the roll roofing, you may encounter protrusions such as vents, chimneys, or skylights. Use a utility knife to cut around these protrusions, ensuring a snug and precise fit.
- Continue Installing: Repeat the process of aligning, pressing, and smoothing the roll roofing, section by section, until you have covered the entire roof surface. Take your time to ensure that each section is properly installed and securely bonded to the adhesive.
During the installation process, it’s important to maintain clean and precise lines, ensuring that the roll roofing is straight and smooth. Take care when cutting around protrusions to create accurate fits. Proper installation is essential for a long-lasting and effective roof. Once you have installed the roll roofing, you can proceed to the next step: securing the edges.
Step 5: Securing the Edges
After installing the roll roofing on the roof surface, it’s important to secure the edges to further ensure a secure and weather-tight installation. Follow these steps to properly secure the edges of the roll roofing:
- Trim Excess Material: Start by trimming any excess roll roofing material that may be hanging over the edges of the roof. Use a utility knife to achieve a neat and clean edge.
- Apply Adhesive: Apply roofing cement or adhesive along the edges of the roll roofing. Ensure that the adhesive extends beyond the edge of the roll roofing to create a watertight seal.
- Secure with Roofing Nails or Staples: As an added measure of security, use roofing nails or staples to secure the edges of the roll roofing. Drive the nails or insert the staples at regular intervals along the edges, ensuring that they penetrate the roll roofing and reach the roof deck.
- Overlap Sections: If you have multiple sections of roll roofing, make sure that the edges overlap appropriately. Apply adhesive to the overlapping area and secure it with nails or staples to create a secure and watertight seal.
- Inspect and Adjust: Once you have secured the edges, carefully inspect the entire installation for any loose areas or gaps. If you find any, reapply adhesive or use additional nails or staples to secure them properly.
Securing the edges of the roll roofing is essential to prevent water infiltration and ensure the longevity of your installation. Taking the time to properly secure the edges will provide added protection against wind, rain, and other weather elements. Once the edges are secure, you can proceed to the next step: inspecting and cleaning up.
Step 6: Inspecting and Cleaning Up
After completing the installation and securing the edges of the roll roofing, it’s important to thoroughly inspect the roof and clean up any debris. Follow these steps to ensure a proper inspection and clean up:
- Inspect the Installation: Carefully examine the entire roll roofing installation. Look for any signs of damage, loose areas, or gaps. Check the edges, corners, and joints to ensure they are securely bonded and watertight. If you notice any issues, make the necessary repairs or adjustments before proceeding.
- Clean the Roof: Use a broom or roofing brush to remove any loose debris, dirt, or roofing materials from the roof surface. Pay attention to gutters and downspouts, ensuring they are clear of any clogs or obstructions.
- Clear the Surrounding Area: Remove any tools, equipment, or debris from the immediate area surrounding the roof. Ensure that there are no trip hazards or obstacles that could impede safe access to the roof.
- Dispose of Waste Properly: Dispose of any unused roll roofing material, packaging, or other waste materials in accordance with local regulations. Check with your local waste management authority for guidelines on proper disposal methods.
- Inspect the Interior: If accessible, inspect the interior of your home or building for any signs of water leaks or damage. Look for any water stains, dampness, or mold growth on ceilings or walls. If you notice any issues, address them promptly to prevent further damage.
- Maintain Regular Roof Maintenance: After completing the roll roofing installation, it’s important to establish a regular maintenance routine. Inspect the roof periodically for any signs of damage, wear, or aging. Keep gutters clear of debris and address any issues promptly to extend the lifespan of your roll roofing system.
By conducting a thorough inspection and cleaning up after the roll roofing installation, you ensure that your roof is in good condition and ready to withstand the elements. Regular maintenance and timely repairs are key to maintaining the integrity of your roofing system.
With the completion of the final step, you have successfully installed roll roofing, providing your roof with reliable protection. Taking the time to properly prepare, apply adhesive, install, secure edges, and inspect the installation ensures a professional and durable result. Remember to follow safety precautions throughout the process and consult with professionals or manufacturer’s guidelines when needed. With proper installation and ongoing maintenance, your roll roofing will offer long-lasting durability and functionality.
Remember to regularly inspect and maintain your roll roofing to prolong its lifespan and prevent costly repairs. By following these steps, you can complete the roll roofing installation process with confidence and enjoy the benefits of a well-protected roof.
Conclusion
Installing roll roofing is a practical and cost-effective solution for protecting your roof from the elements. By following the step-by-step guide outlined in this article, you can successfully install roll roofing and ensure a secure and long-lasting roofing system.
Throughout the installation process, it’s important to carefully prepare the roof surface, unroll and cut the roll roofing to size, apply adhesive, secure the edges, and inspect the installation. These steps, when executed with precision, will result in a professionally installed roll roofing system that provides optimal protection against weather conditions.
Remember to gather all the necessary materials before starting the installation, including roll roofing, roofing nails or staples, roofing adhesive, roofing cement, roofing felt or underlayment, a utility knife, hammer or roofing nail gun, measuring tape, chalk line, and a roofing brush or roller. Having these materials on hand will ensure a smooth and efficient installation process.
Additionally, be sure to adhere to safety guidelines during the installation process and consult with professionals or the manufacturer’s instructions as needed. Safety should always be a top priority when working on your roof.
Regular maintenance is essential to extend the lifespan of your roll roofing system. Inspect the roof periodically for any signs of damage or wear, and address any issues promptly to prevent further damage and maintain the integrity of your roof.
By following these guidelines and taking the necessary precautions, you can confidently install roll roofing and enjoy the benefits of a weather-resistant and durable roofing system. Whether you’re embarking on a DIY project or hiring a professional, having an understanding of the installation process is invaluable.
Now that you have the knowledge and information required, you can proceed with installing roll roofing and protect your roof for years to come.
Frequently Asked Questions about How To Install Roll Roofing
Was this page helpful?
At Storables.com, we guarantee accurate and reliable information. Our content, validated by Expert Board Contributors, is crafted following stringent Editorial Policies. We're committed to providing you with well-researched, expert-backed insights for all your informational needs.


0 thoughts on “How To Install Roll Roofing”