Home>Home Appliances>Bathroom Appliances>How To Take Apart A Waterpik Water Flosser
Bathroom Appliances
How To Take Apart A Waterpik Water Flosser
Published: February 12, 2024
Learn how to disassemble a Waterpik Water Flosser with our step-by-step guide. Keep your bathroom appliances in top condition with our expert tips.
(Many of the links in this article redirect to a specific reviewed product. Your purchase of these products through affiliate links helps to generate commission for Storables.com, at no extra cost. Learn more)
Introduction
Taking apart a Waterpik Water Flosser may seem like a daunting task, but with the right guidance and tools, it can be a straightforward process. Whether you're looking to clean hard-to-reach areas, troubleshoot an issue, or simply gain a better understanding of how your Waterpik works, disassembling the device can be a valuable endeavor. By following the step-by-step instructions provided in this guide, you'll be equipped with the knowledge to confidently disassemble and reassemble your Waterpik Water Flosser.
Understanding the inner workings of your Waterpik Water Flosser can provide insights into its maintenance and help ensure its optimal performance. Additionally, disassembling the device allows for thorough cleaning, which is essential for maintaining proper hygiene and preventing potential issues caused by mineral buildup or debris accumulation.
In the following sections, we will delve into the process of disassembling a Waterpik Water Flosser, providing detailed instructions on removing the reservoir, taking apart the handle, disassembling the water flosser tip, and cleaning and reassembling the device. By the end of this guide, you will have the knowledge and confidence to navigate the disassembly process with ease, empowering you to keep your Waterpik Water Flosser in top condition.
Now, let's gather the necessary tools and embark on the journey of uncovering the inner mechanisms of your Waterpik Water Flosser.
Key Takeaways:
- Dive into the inner workings of your Waterpik Water Flosser by following simple steps to disassemble and clean it, ensuring optimal performance and hygiene benefits.
- By carefully disassembling, cleaning, and reassembling your Waterpik Water Flosser, you gain valuable insights into its functionality and maintain its effectiveness for long-term oral care.
Read more: What Is A Waterpik Water Flosser
Tools Needed
Before embarking on the disassembly of your Waterpik Water Flosser, it's essential to gather the necessary tools to ensure a smooth and efficient process. Here's a comprehensive list of the tools you'll need:
-
Screwdriver: A small Phillips or flathead screwdriver will be required to remove any screws securing the components of the Waterpik Water Flosser.
-
Clean Cloth or Towel: Having a clean cloth or towel on hand is crucial for wiping down the disassembled parts and ensuring they are free from any debris or residue.
-
Soft Bristle Brush: This tool will aid in the meticulous cleaning of hard-to-reach areas within the Waterpik Water Flosser, such as the reservoir and handle.
-
Mild Soap or Vinegar: Utilizing a mild soap or vinegar solution is recommended for cleaning the disassembled components, effectively removing any buildup or impurities.
-
Warm Water: Access to warm water is essential for rinsing and cleaning the disassembled parts thoroughly.
-
Container for Parts: Having a small container or bowl to hold the disassembled components will help keep them organized and prevent any pieces from getting misplaced.
-
Patience and Care: While not tangible tools, patience and care are vital throughout the disassembly process. Taking your time and handling the components with care will ensure a successful and damage-free disassembly.
By ensuring you have these tools at your disposal, you'll be well-prepared to tackle the disassembly of your Waterpik Water Flosser. With the tools in hand, you're ready to proceed to the next steps of removing the reservoir and taking apart the handle.
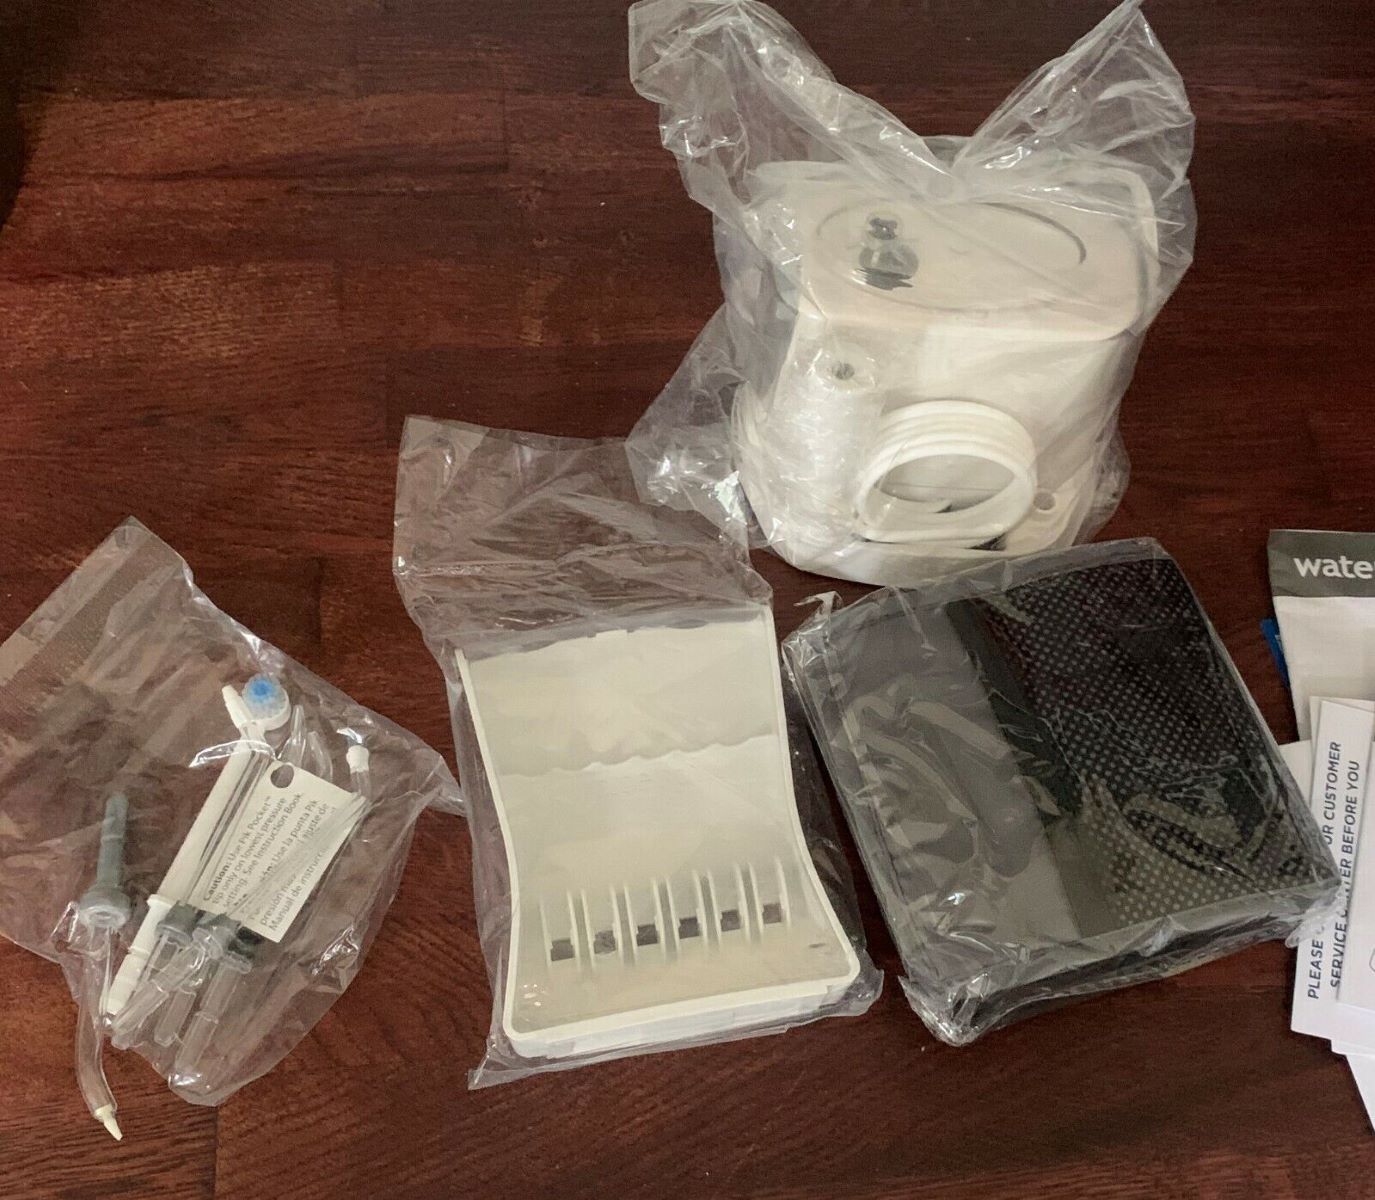
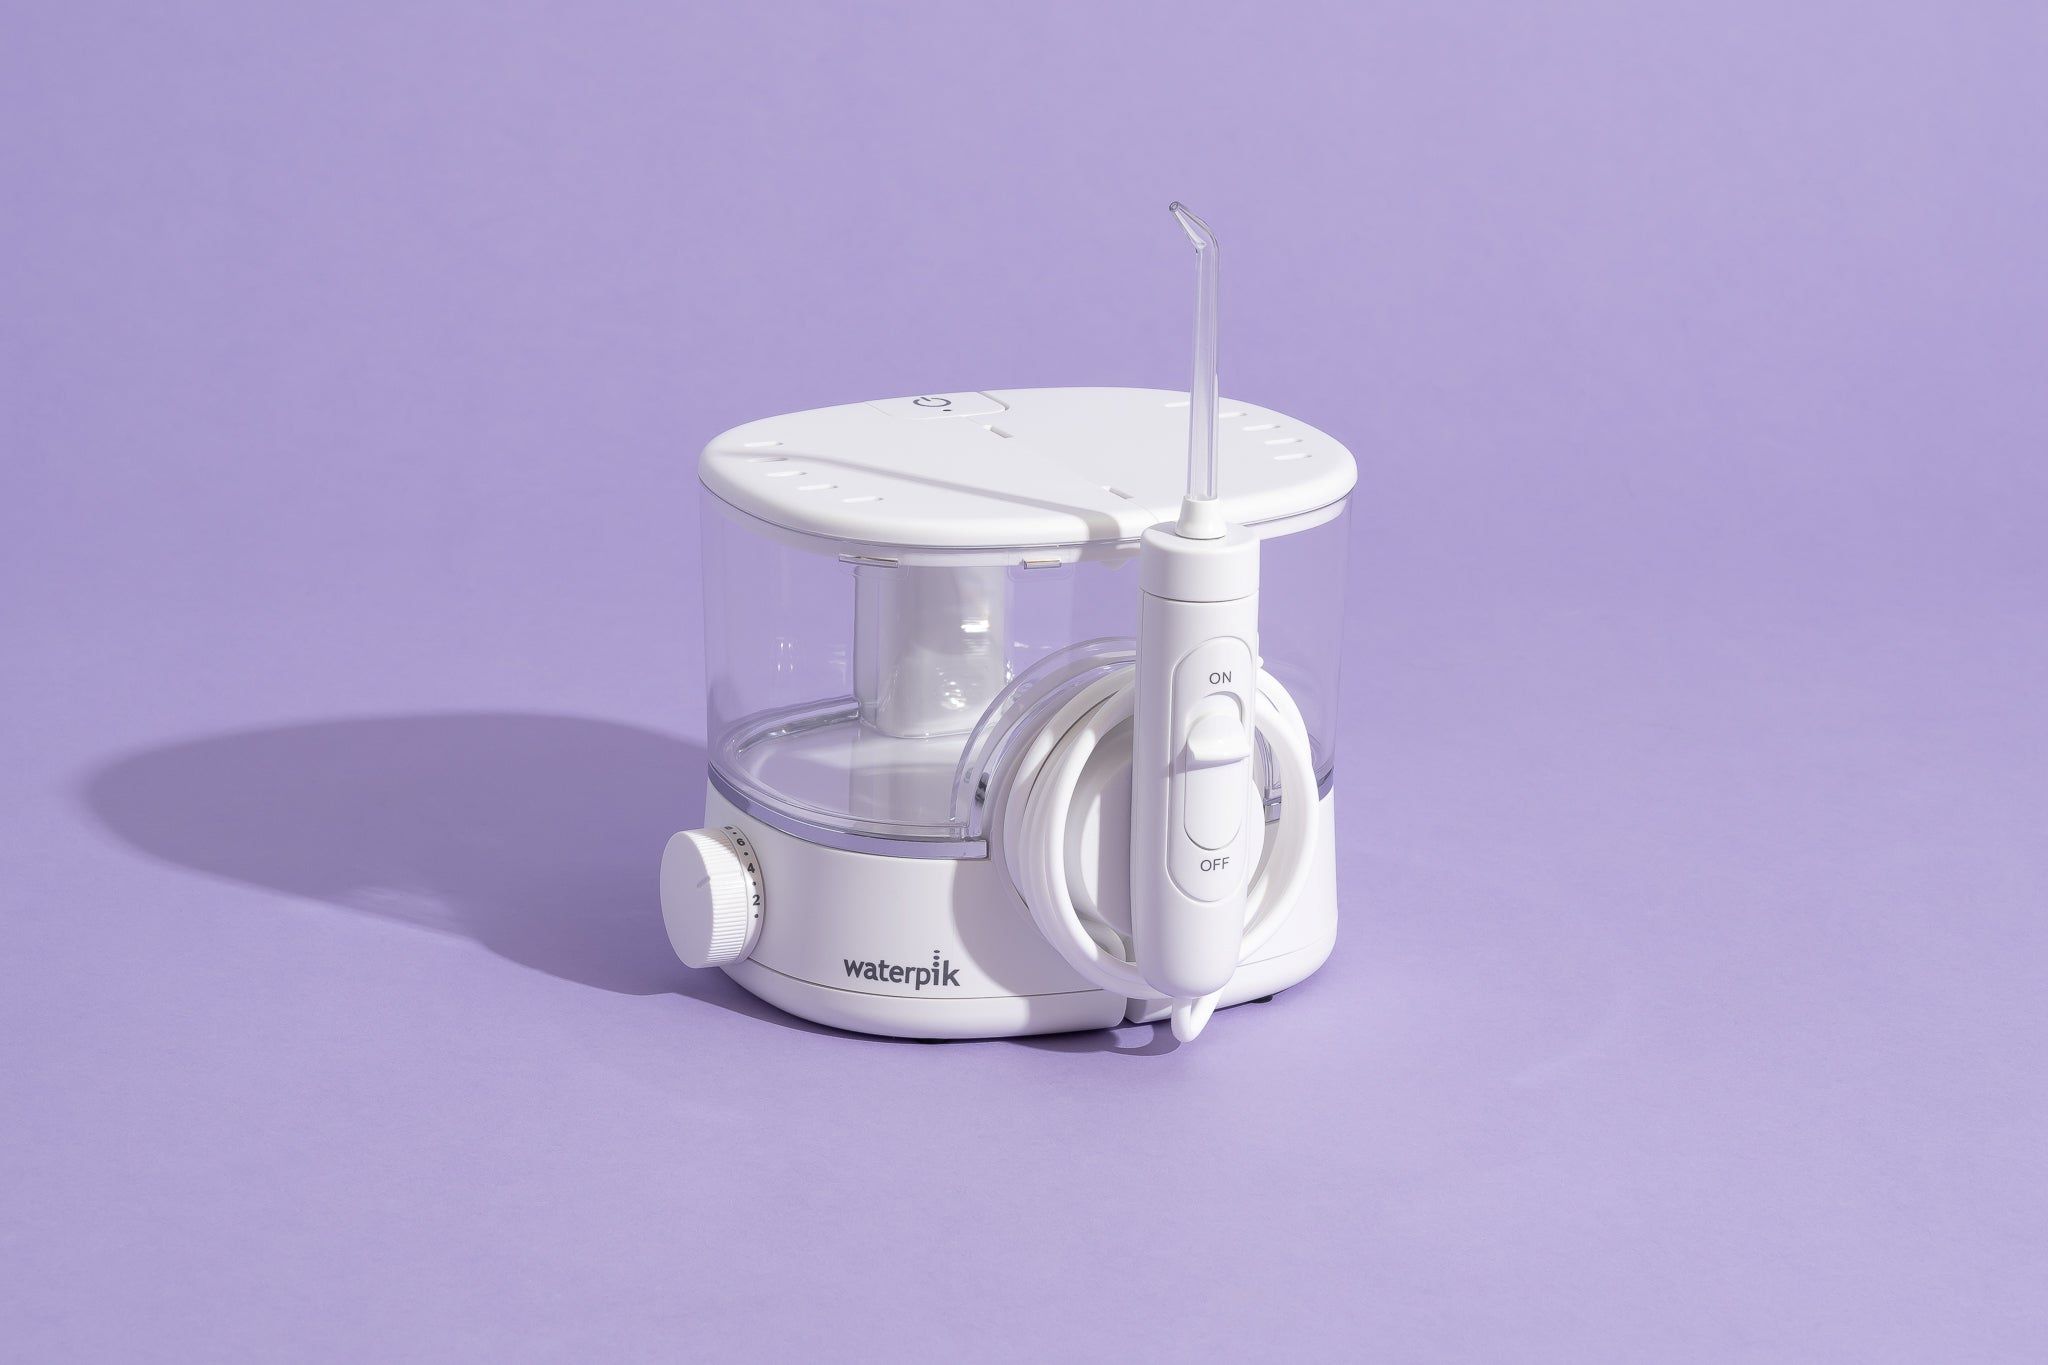
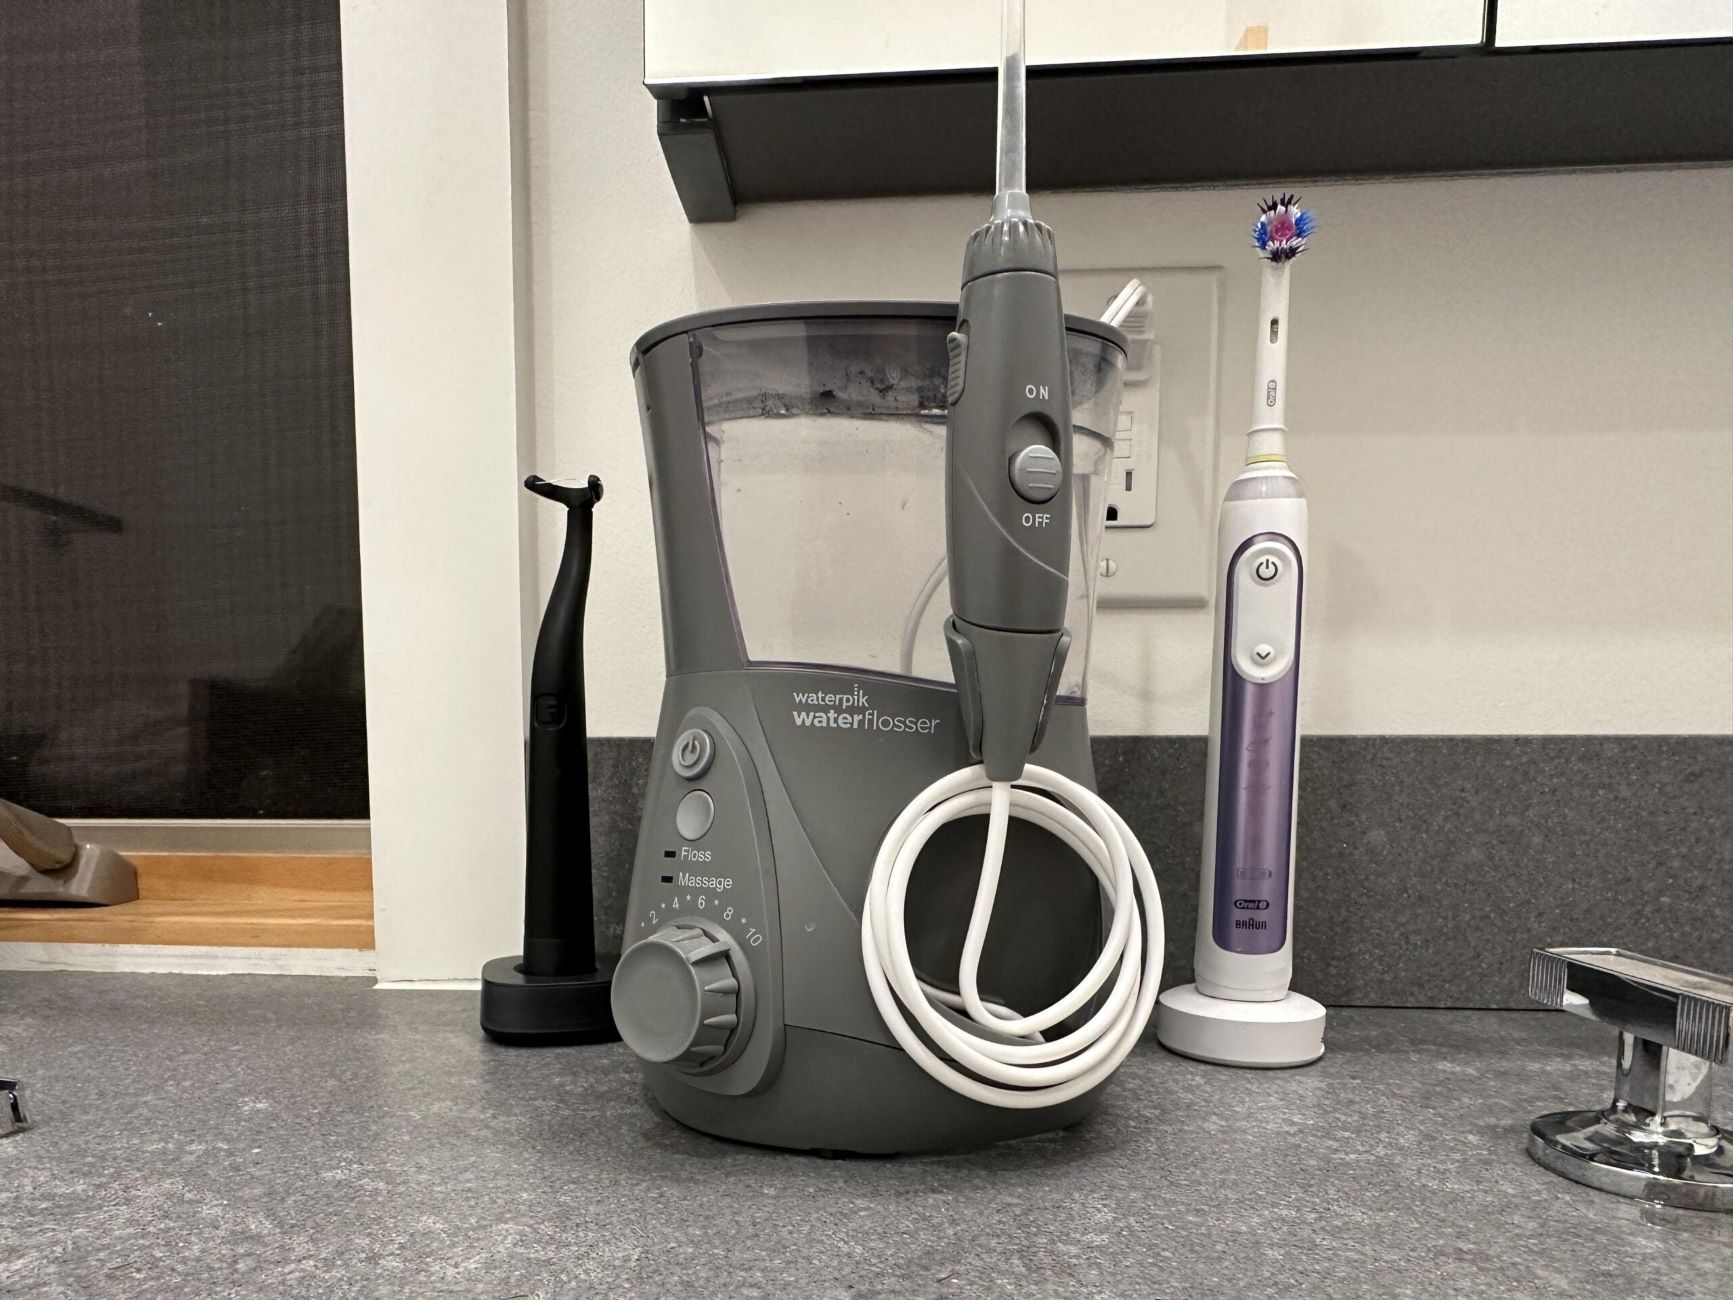
Removing the Reservoir
Removing the reservoir of your Waterpik Water Flosser is the initial step in the disassembly process. This part of the device holds the water or mouthwash used during flossing and is essential to access for thorough cleaning and maintenance. To begin, ensure that the Waterpik is unplugged from the power source to prevent any accidents during the disassembly process.
-
Empty the Reservoir: Start by removing the reservoir from the main unit of the Waterpik. Ensure that the reservoir is empty by dispensing any remaining water or mouthwash into a sink. This step prevents spillage and makes the reservoir easier to handle during the disassembly process.
-
Inspect for Latches or Locks: Examine the reservoir for any latches, locks, or release buttons that may be securing it to the main unit. Depending on the model of your Waterpik, there may be specific mechanisms holding the reservoir in place.
-
Follow Manufacturer's Instructions: Refer to the user manual for your specific Waterpik model to identify any model-specific instructions for removing the reservoir. Manufacturers often provide detailed guidance on disassembly and maintenance procedures, ensuring that you can proceed with confidence.
-
Gently Detach the Reservoir: Once you have identified how the reservoir is secured, gently detach it from the main unit. Take care to avoid using excessive force, as this can cause damage to the reservoir or the main unit of the Waterpik.
-
Set Aside the Reservoir: After successfully removing the reservoir, set it aside in a safe and clean area. This will prevent any contamination or damage to the reservoir while you proceed with the disassembly of other components.
By carefully following these steps, you can effectively remove the reservoir from your Waterpik Water Flosser, setting the stage for further disassembly and thorough cleaning. With the reservoir successfully detached, you can proceed to the next steps of disassembling the handle, gaining a deeper understanding of the inner workings of your Waterpik, and ensuring its optimal performance.
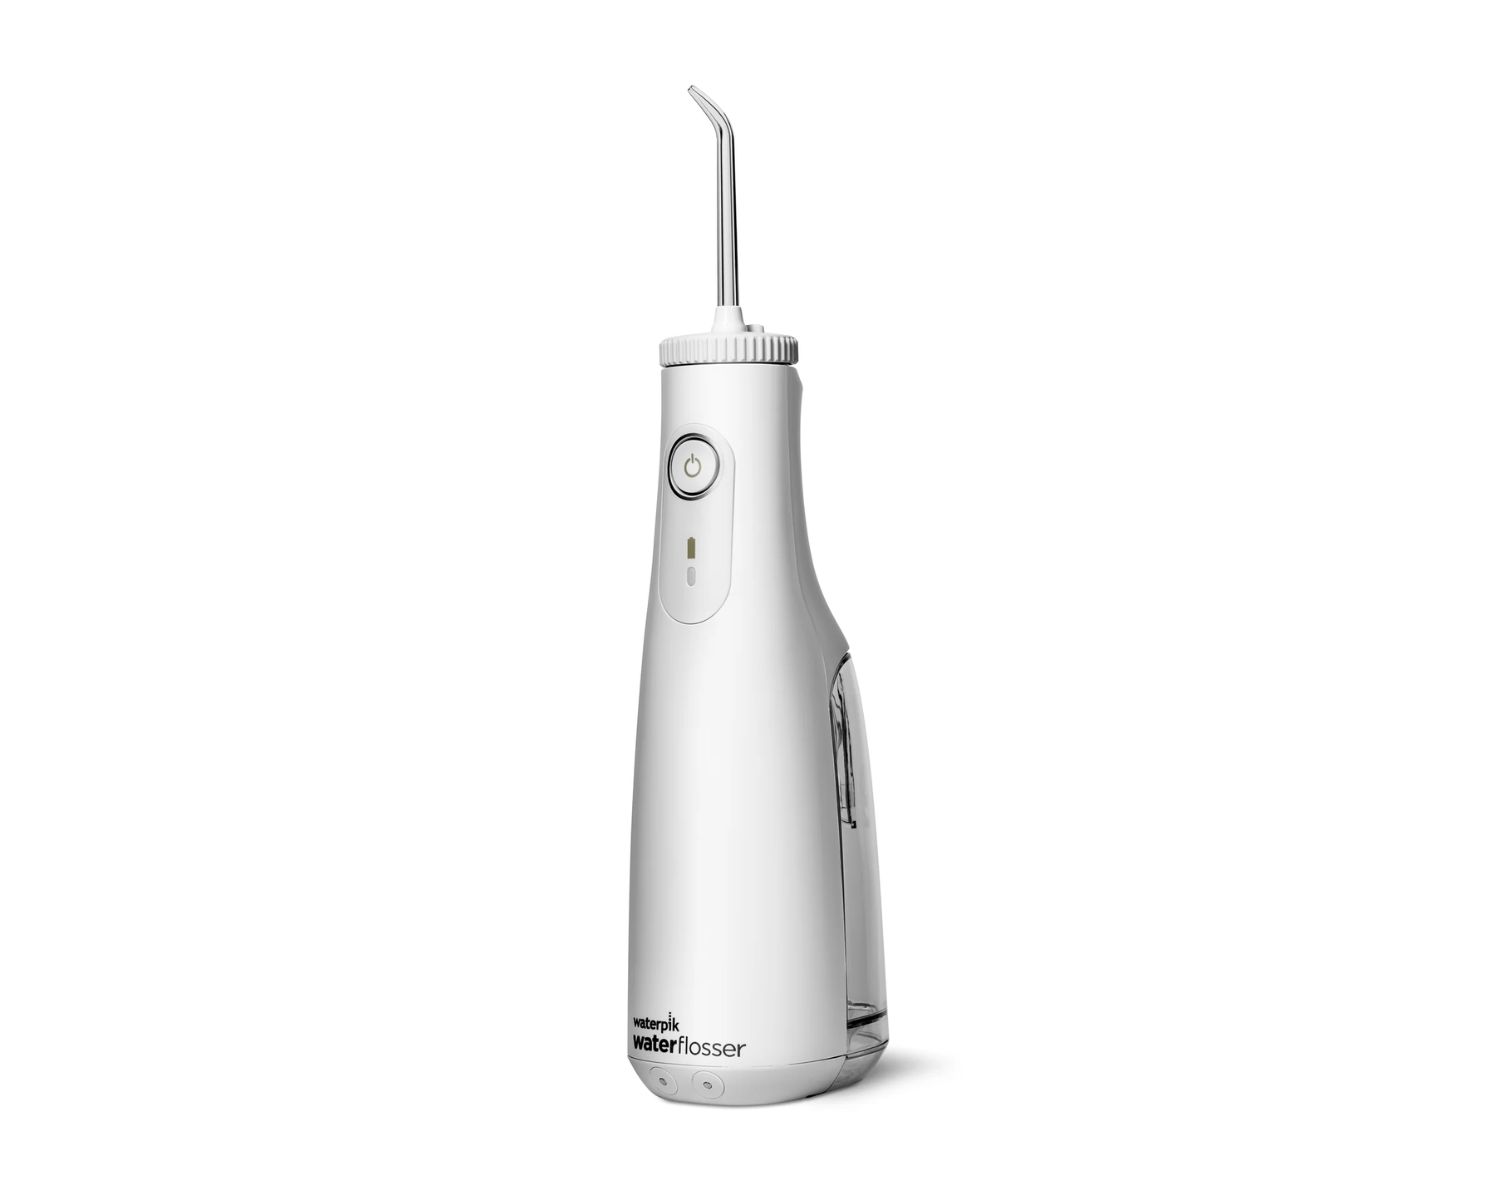
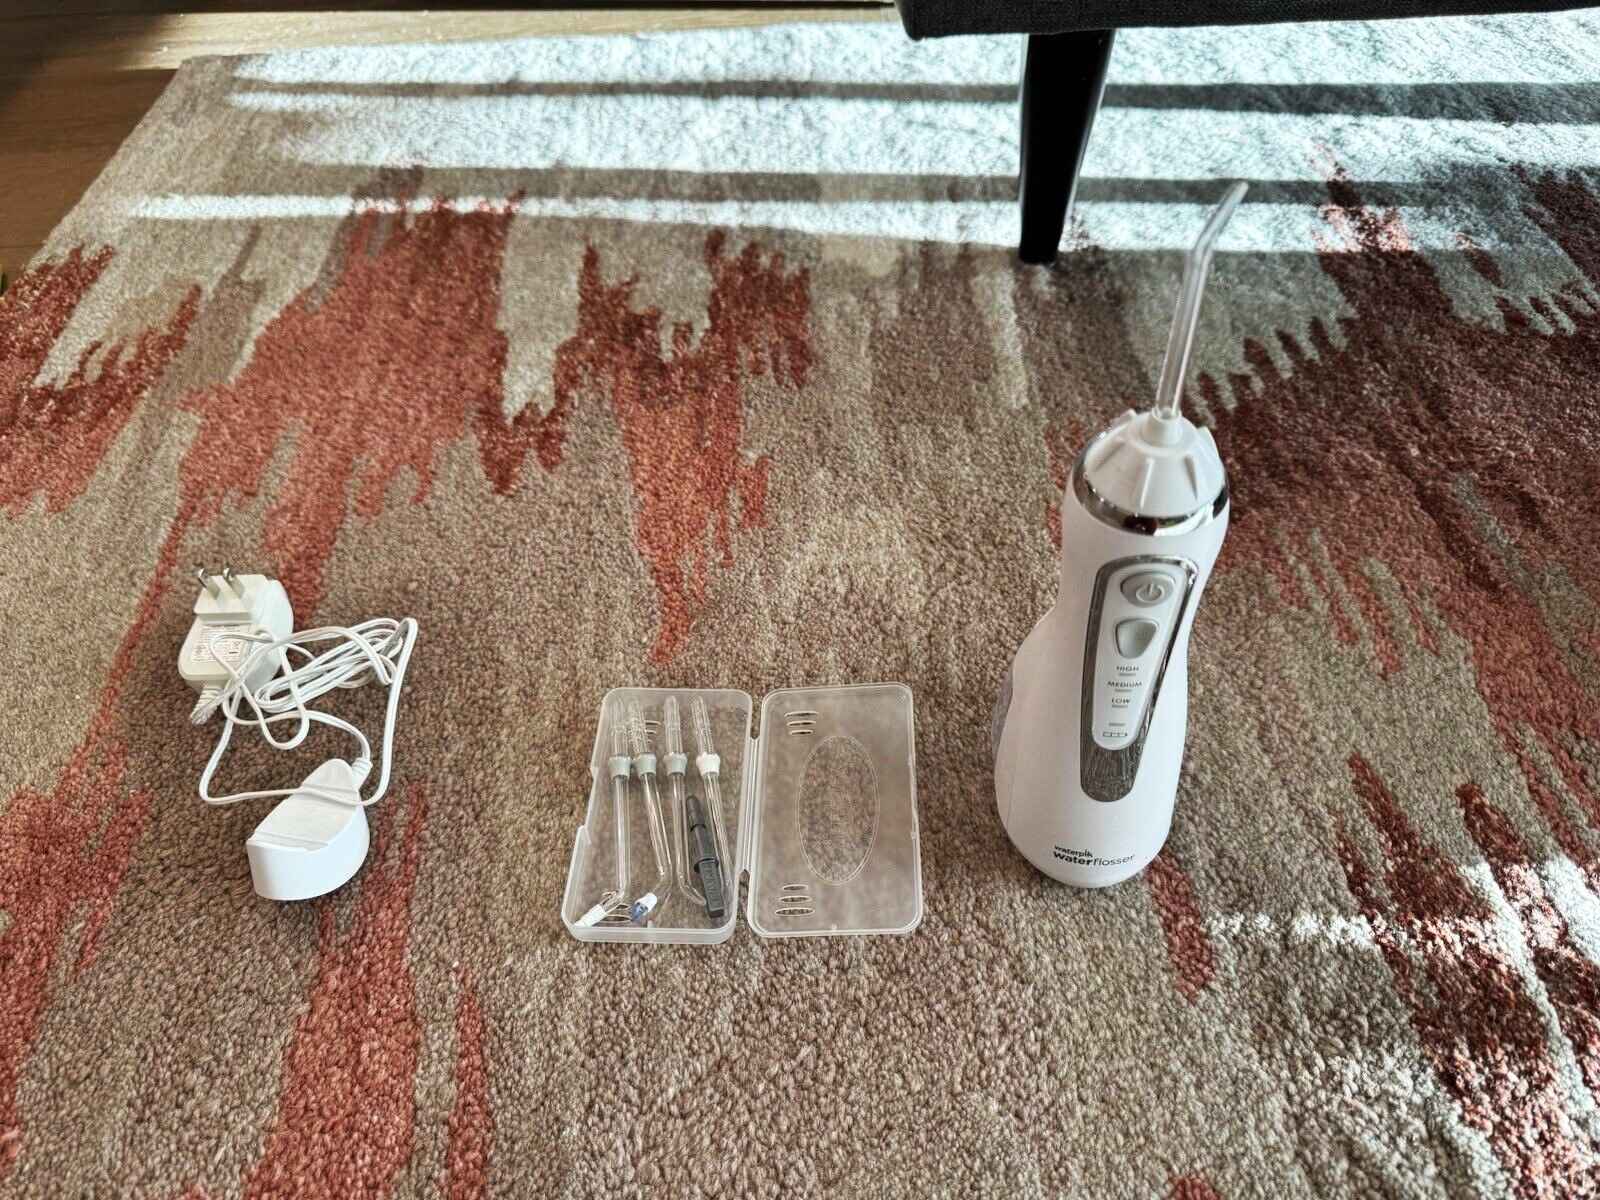
Taking Apart the Handle
Disassembling the handle of your Waterpik Water Flosser is a crucial step in gaining insight into its internal components and ensuring thorough cleaning. The handle houses essential elements, including the motor and wiring, making it essential to disassemble for maintenance and troubleshooting purposes.
To begin, ensure that the Waterpik is unplugged from the power source to prevent any electrical hazards during the disassembly process. Once safety measures are in place, follow these steps to effectively take apart the handle:
-
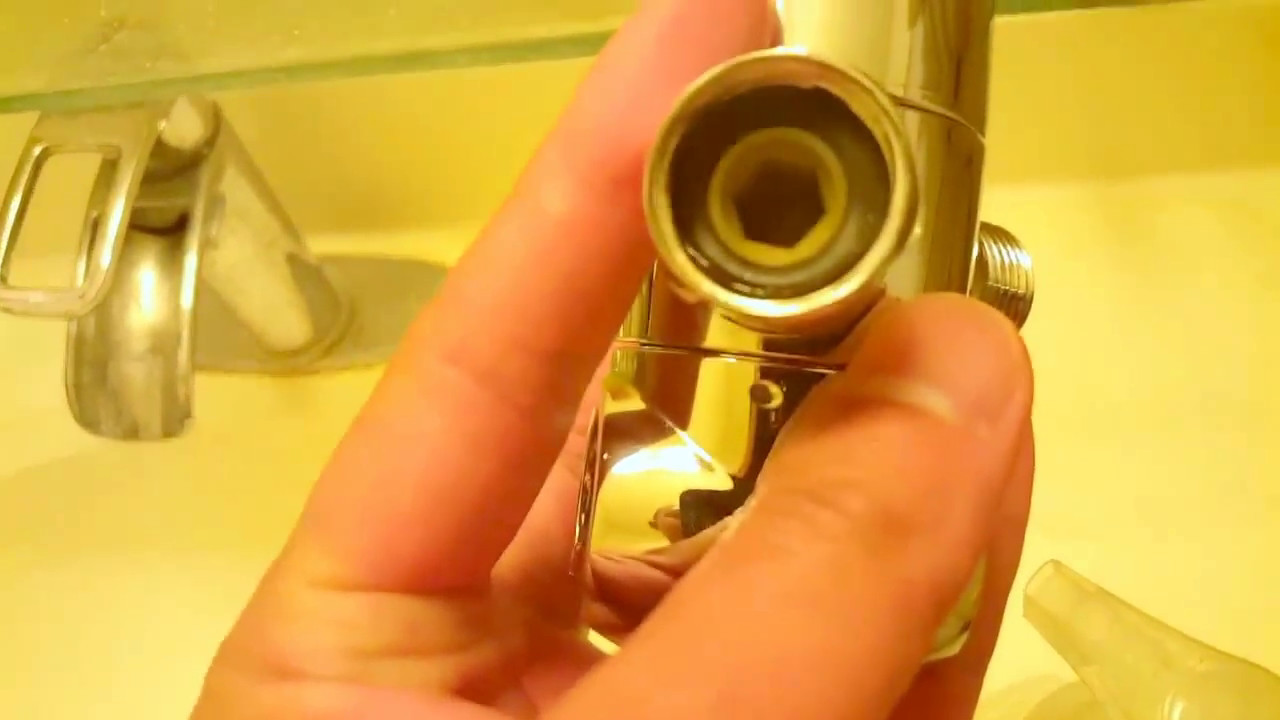
Identify Screws or Fasteners: Inspect the handle for any screws or fasteners that secure its outer casing. Depending on the model of your Waterpik, these screws may be located on the bottom or concealed beneath a removable panel. Use a suitable screwdriver to carefully remove the screws, taking care to keep them in a secure location for reassembly.
-
Separate the Casing: Once the screws are removed, gently separate the outer casing of the handle. Take note of any clips or additional fastening mechanisms that may require attention. By exercising caution and patience, you can avoid damaging the casing or internal components during this process.
-
Handle the Internal Components: With the outer casing removed, you will gain access to the internal components of the handle, including the motor, wiring, and any additional elements specific to your Waterpik model. Take care to handle these components delicately, as they are integral to the functionality of the device.
-
Inspect and Clean: Upon accessing the internal components, take the opportunity to inspect for any debris, mineral buildup, or signs of wear. Utilize a soft bristle brush and a clean cloth to gently remove any impurities, ensuring that the components are free from obstructions that may affect the performance of your Waterpik.
-
Reassembly Preparation: As you complete the cleaning process, keep the disassembled components organized and in a safe, clean area. This preparation will facilitate the reassembly of the handle once the cleaning and maintenance tasks are completed.
By following these steps, you can effectively disassemble the handle of your Waterpik Water Flosser, gaining valuable insights into its internal mechanisms and ensuring thorough cleaning. With the handle successfully taken apart, you are one step closer to maintaining the optimal performance of your Waterpik and gaining a deeper understanding of its functionality.
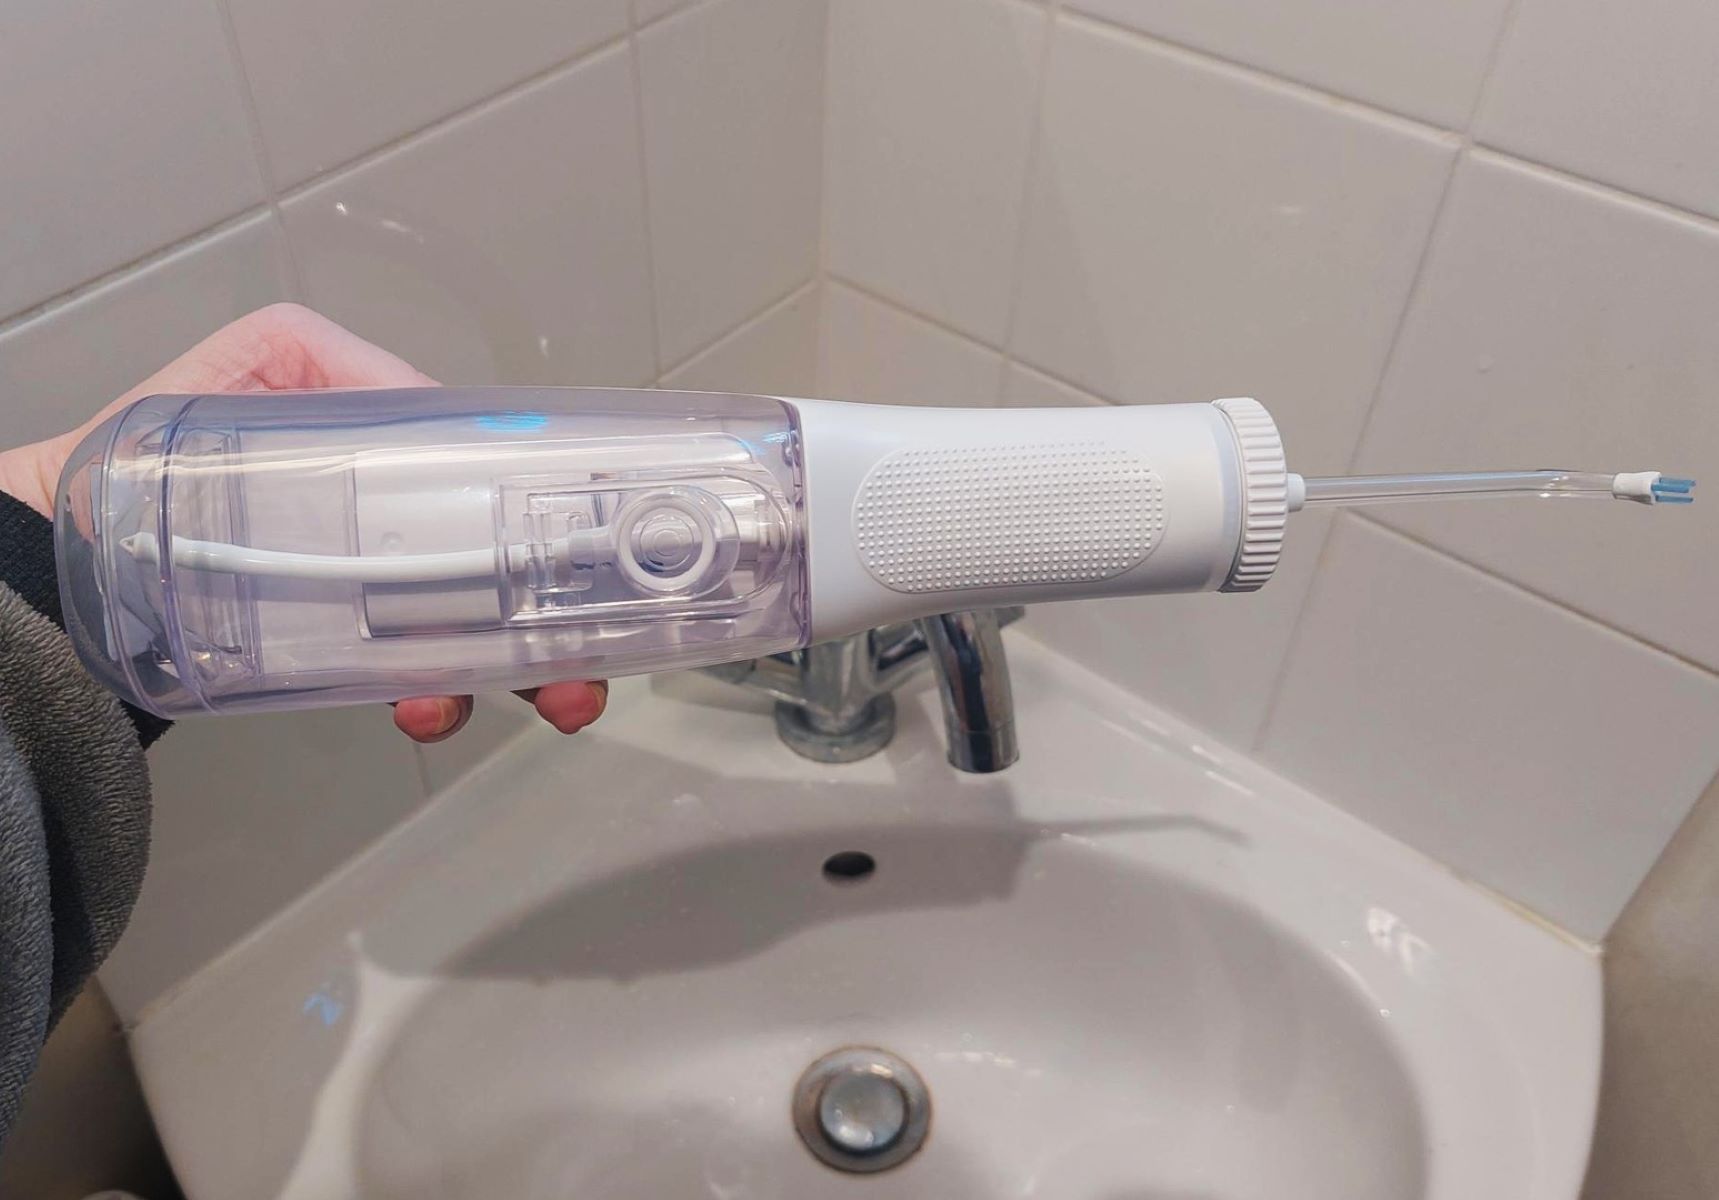
Disassembling the Water Flosser Tip
Disassembling the water flosser tip is a pivotal step in the maintenance and cleaning process of your Waterpik Water Flosser. The flosser tip, also known as the nozzle or jet tip, is the component responsible for directing the water or mouthwash to effectively clean between teeth and along the gumline. By disassembling the flosser tip, you can access and clean its intricate components, ensuring optimal performance and hygiene.
To begin the disassembly process, follow these detailed steps:
-
Remove the Flosser Tip: Start by gently removing the flosser tip from the handle of your Waterpik. Depending on the model, the flosser tip may either twist off or require a button to be pressed for release. Carefully detach the flosser tip, taking note of its intricate design and components.
-
Inspect the Components: Once the flosser tip is removed, take a moment to inspect its components. You will likely observe the nozzle, which directs the water flow, and any additional elements specific to your flosser tip model. Understanding the arrangement of these components will aid in the reassembly process.
-
Clean the Flosser Tip: Utilize a mild soap or vinegar solution to clean the flosser tip thoroughly. Pay close attention to the nozzle and any crevices where debris or buildup may accumulate. A soft bristle brush can be used to gently dislodge any impurities, ensuring that the flosser tip is free from obstructions.
-
Rinse and Dry: After cleaning the flosser tip, rinse it with warm water to remove any residual cleaning solution. Once rinsed, allow the flosser tip to air dry completely before reassembly. Ensuring that the components are dry will prevent any potential issues related to moisture during operation.
-
Reassembly Preparation: As the flosser tip dries, prepare the handle for reassembly by ensuring that all components are clean and free from debris. This preparation will streamline the reassembly process and contribute to the optimal functioning of your Waterpik Water Flosser.
By meticulously following these steps, you can effectively disassemble the water flosser tip, clean its components, and prepare for reassembly. This process not only contributes to the maintenance of your Waterpik but also provides valuable insights into the intricate design of the flosser tip. With the flosser tip successfully disassembled and cleaned, you are well-equipped to proceed with the reassembly of your Waterpik Water Flosser, ensuring its continued performance and hygiene benefits.
Before taking apart a Waterpik Water Flosser, make sure to unplug it from the power source. Use a screwdriver to remove the screws and gently separate the parts to avoid damaging the device.
Read more: How To Use The Waterpik Water Flosser
Cleaning and Reassembling the Water Flosser
After successfully disassembling the key components of your Waterpik Water Flosser, the next crucial phase involves thorough cleaning and reassembly. This pivotal step ensures that the device operates optimally and maintains its hygiene benefits. By following the detailed instructions provided below, you can effectively clean and reassemble your Waterpik Water Flosser, setting the stage for its continued performance and functionality.
Cleaning the Components
-
Reservoir: Begin by cleaning the reservoir with a mild soap or vinegar solution, ensuring that any mineral buildup or residue is effectively removed. Use a soft bristle brush to gently scrub hard-to-reach areas, followed by thorough rinsing with warm water.
-
Handle: Clean the internal and external surfaces of the handle, ensuring that any debris or impurities are meticulously removed. Pay close attention to the motor and wiring components, using a clean cloth and brush to maintain their cleanliness.
-
Flosser Tip: After the flosser tip has dried, inspect it for any remaining impurities and ensure that the nozzle and components are free from debris. A final rinse with warm water can be performed to guarantee its cleanliness.
Reassembling the Water Flosser
-
Handle: Carefully reassemble the handle, ensuring that all internal components are securely positioned. Align the outer casing with precision and reattach any screws or fasteners, taking care not to overtighten them.
-
Flosser Tip: Reattach the cleaned flosser tip to the handle, following the specific reattachment method for your Waterpik model. Ensure a secure fit to prevent any water leakage during operation.
-
Reservoir: Once the handle and flosser tip are reassembled, carefully attach the cleaned reservoir to the main unit of the Waterpik. Ensure that any latches or locks are engaged to secure the reservoir in place.
-
Final Checks: Before using the Waterpik, perform a visual inspection of all reassembled components to confirm that they are securely in place. Additionally, ensure that the device is plugged into a suitable power source before operation.
By meticulously following these cleaning and reassembly steps, you can effectively maintain and prepare your Waterpik Water Flosser for continued use. The thorough cleaning process ensures that the device remains free from impurities, while the reassembly phase guarantees its proper functionality. With your Waterpik Water Flosser successfully cleaned and reassembled, you can look forward to enjoying its optimal performance and hygiene benefits.
Conclusion
In conclusion, the process of disassembling and reassembling a Waterpik Water Flosser is a valuable endeavor that offers insights into the inner workings of the device and ensures its optimal performance. By following the step-by-step instructions outlined in this guide, you have gained the knowledge and confidence to navigate the disassembly process with ease, empowering you to maintain the hygiene benefits of your Waterpik.
Through the meticulous removal of the reservoir, handle disassembly, and flosser tip cleaning, you have delved into the intricate components of your Waterpik, gaining a deeper understanding of its functionality. This understanding not only contributes to the maintenance of the device but also provides valuable insights into its operation, enhancing your overall experience with the Waterpik Water Flosser.
The thorough cleaning and reassembly process further solidify the maintenance efforts, ensuring that the device remains free from impurities and operates at its best. By utilizing the recommended tools and following the detailed steps, you have effectively prepared your Waterpik for continued use, safeguarding its hygiene benefits and performance.
As you embark on the journey of disassembling and reassembling your Waterpik Water Flosser, remember the importance of patience and care. Taking your time to handle the components delicately and ensuring thorough cleaning will contribute to the longevity and effectiveness of your device.
In the end, the knowledge and skills acquired through this process empower you to maintain the optimal performance and hygiene benefits of your Waterpik Water Flosser. By incorporating these maintenance practices into your routine, you can ensure that your device continues to provide effective oral care, contributing to your overall well-being.
With the completion of the disassembly, cleaning, and reassembly process, you have not only maintained the functionality of your Waterpik but also gained a deeper appreciation for its inner mechanisms. Armed with this knowledge, you are well-prepared to enjoy the continued benefits of your Waterpik Water Flosser, knowing that it is maintained at its best.
In essence, the journey of disassembling and reassembling your Waterpik Water Flosser is a testament to your commitment to oral hygiene and device maintenance. By embracing these practices, you are actively contributing to the longevity and effectiveness of your Waterpik, ensuring that it remains a reliable companion in your oral care routine.
Frequently Asked Questions about How To Take Apart A Waterpik Water Flosser
Was this page helpful?
At Storables.com, we guarantee accurate and reliable information. Our content, validated by Expert Board Contributors, is crafted following stringent Editorial Policies. We're committed to providing you with well-researched, expert-backed insights for all your informational needs.


0 thoughts on “How To Take Apart A Waterpik Water Flosser”