Home>Articles>How To Take Apart Alsons Brass Watering Can Showerhead
Articles
How To Take Apart Alsons Brass Watering Can Showerhead
Modified: August 16, 2024
Learn how to take apart and maintain your Alsons Brass Watering Can Showerhead with our helpful articles.
(Many of the links in this article redirect to a specific reviewed product. Your purchase of these products through affiliate links helps to generate commission for Storables.com, at no extra cost. Learn more)
Introduction
Welcome to our guide on how to take apart and clean the Alsons Brass Watering Can Showerhead. If you have noticed a decrease in water flow or a buildup of mineral deposits on your showerhead, it may be time to give it a thorough cleaning. By disassembling the showerhead and cleaning its various components, you can restore its functionality and improve your showering experience.
Before we begin, please note that safety should always come first. Make sure to read and follow any manufacturer instructions or warnings specific to your showerhead model. Additionally, it’s a good idea to turn off the water supply before attempting any disassembly or cleaning.
In this guide, we will walk you through each step of the process to safely take apart the Alsons Brass Watering Can Showerhead, clean its components, and reassemble it for optimal performance. So, let’s gather the necessary tools and get started!
Key Takeaways:
- Regular cleaning and maintenance of the Alsons Brass Watering Can Showerhead is essential to restore optimal water flow and prevent mineral buildup, ensuring a refreshing shower experience.
- Prioritizing safety, using the right tools, and following step-by-step disassembly and cleaning instructions can help effectively restore and maintain the functionality of the showerhead.
Read more: How To Take Apart My Moen Showerhead
Safety Precautions
Before you begin disassembling and cleaning the Alsons Brass Watering Can Showerhead, it’s important to take some safety precautions to avoid any potential accidents or damage. Here are some key safety tips to keep in mind:
- Turn off the water supply: Before starting any work on the showerhead, locate the water shut-off valve for your shower and turn off the water supply. This will prevent any accidental water spraying or leaks during the disassembly process.
- Protect your hands and eyes: When handling the showerhead components, it’s a good idea to wear a pair of protective gloves to avoid any injuries. Additionally, use safety glasses or goggles to protect your eyes from any debris or splashing water.
- Be cautious with tools: Use tools carefully and follow proper handling techniques. Avoid exerting excessive force that could damage the showerhead or injure yourself. If a component is difficult to remove, try using a lubricant or seeking professional help.
- Keep track of small parts: As you disassemble the showerhead, some components may be small and easily misplaced. Make sure to organize and keep track of all the parts, so you can easily reassemble the showerhead later.
- Maintain a clean working area: Clear your work area of any obstructions or potential hazards. By working in a clean and organized space, you can reduce the risk of accidents or damage to the showerhead.
- Follow manufacturer guidelines: Every showerhead may have specific instructions provided by the manufacturer. Make sure to read and follow these guidelines to ensure a safe and proper disassembly process.
By following these safety precautions, you can minimize the risk of injuries and ensure a smooth disassembly and cleaning process for your Alsons Brass Watering Can Showerhead.
Tools Required
Before you begin disassembling and cleaning the Alsons Brass Watering Can Showerhead, gather the following tools to make the process easier:
- Adjustable wrench: This tool will come in handy for removing the showerhead from the shower hose. Make sure to choose an adjustable wrench that fits the size of the showerhead connector.
- Phillips head screwdriver: You may need a screwdriver to detach the handle or spray head of the showerhead.
- Pliers: Pliers can be useful for gripping and twisting parts that are difficult to remove by hand.
- Old toothbrush or small brush: This will be used to clean the showerhead nozzles and remove any mineral buildup or debris.
- Vinegar or mild cleaning solution: Prepare a solution of vinegar and water or use a mild cleaning solution recommended by the manufacturer to effectively clean the showerhead components.
- Clean cloth or sponge: For wiping down and drying the cleaned parts.
- Bucket or basin: To collect water or any cleaning solution that may drip during the disassembly and cleaning process.
These tools are commonly found in most households, but if any of them are not readily available, you can often find them at a local hardware store or online. Having these tools on hand will ensure that you are well-prepared to disassemble and clean your Alsons Brass Watering Can Showerhead.
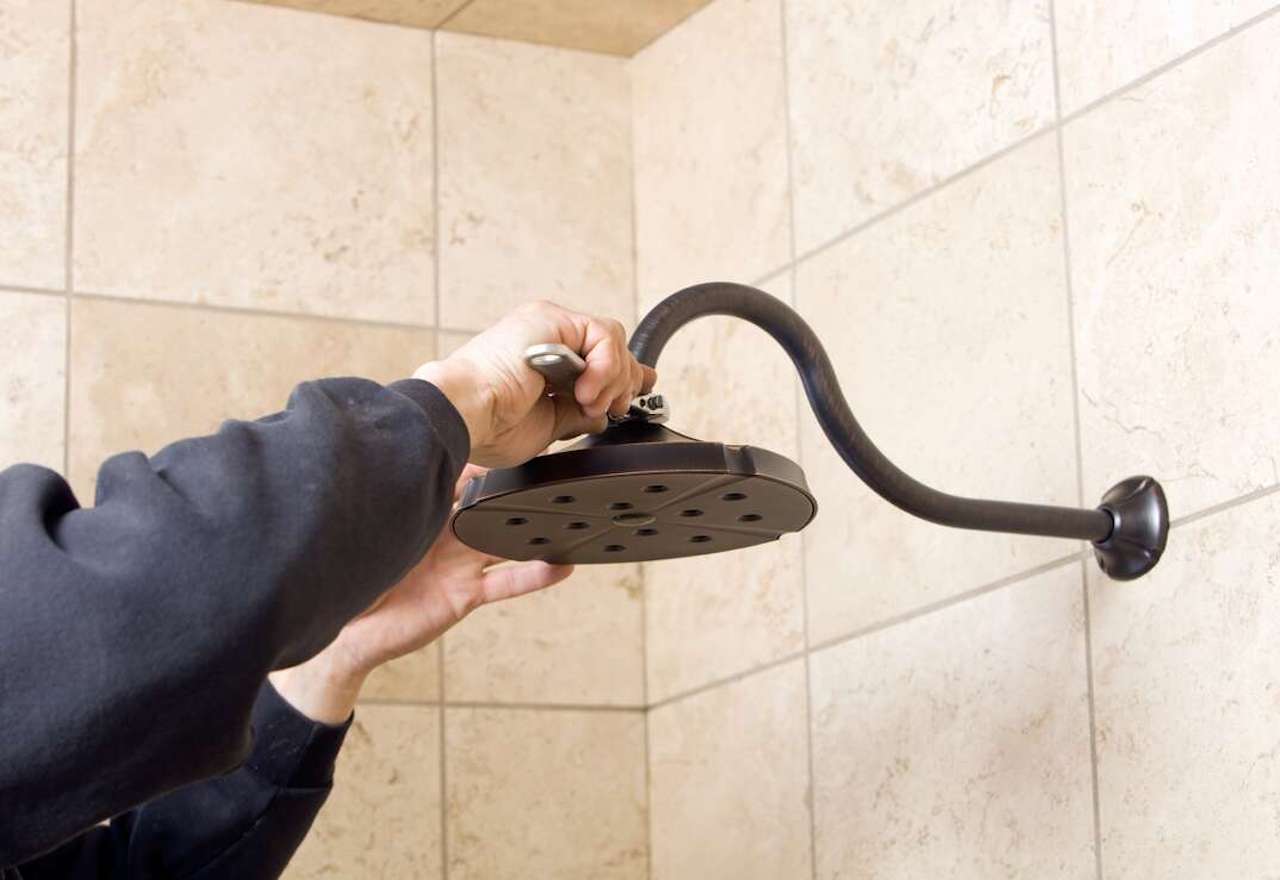
Step 1: Removing the Showerhead from the Hose
To begin disassembling the Alsons Brass Watering Can Showerhead, you will first need to remove it from the shower hose. Follow these steps:
- Locate the connection point: Identify where the showerhead connects to the hose. This is usually where the water flows out of the showerhead.
- Protect the showerhead: Before using any tools, wrap a soft cloth or towel around the showerhead to prevent any scratches or damage.
- Use an adjustable wrench: Grip the nut where the showerhead connects to the hose with an adjustable wrench. Turn the wrench counterclockwise to loosen the connection.
- Continue loosening by hand: Once the nut is loose, you can usually unscrew it by hand. If it’s still tightly attached, use the adjustable wrench to fully remove it.
- Detach the showerhead: Once the nut is removed, you can gently pull the showerhead out of the hose connection. Be careful not to damage any other parts or hoses in the process.
By following these steps, you should be able to successfully remove the Alsons Brass Watering Can Showerhead from the hose. Set the showerhead aside as we move on to the next step of disassembling and cleaning the handle and spray head.
Step 2: Detaching the Handle and Spray Head
After removing the Alsons Brass Watering Can Showerhead from the hose, the next step is to detach the handle and spray head. Follow these steps:
- Locate the connection point: Look for the area where the handle attaches to the main body of the showerhead. This is usually a visible joint or collar.
- Inspect for screws or clips: Check if there are any screws or clips holding the handle and spray head in place. If so, use a Phillips head screwdriver to remove the screws or gently unclip the parts.
- Twist and separate: If there are no visible screws or clips, grip the handle and twist it counterclockwise to separate it from the main body of the showerhead. This may require some force, so be careful not to exert too much pressure or damage any components.
- Continue twisting if necessary: If the handle doesn’t come off easily, try twisting it a few more times. Some showerheads have multiple threads that need to be removed before the handle completely separates from the spray head.
- Separate the spray head: Once the handle is detached, you can often unscrew or twist off the spray head from the main body of the showerhead. Again, be cautious not to apply excessive force or damage any parts.
By following these steps, you should be able to safely detach the handle and spray head from the Alsons Brass Watering Can Showerhead. Set these components aside as we move on to the next step of disassembling the spray head for thorough cleaning.
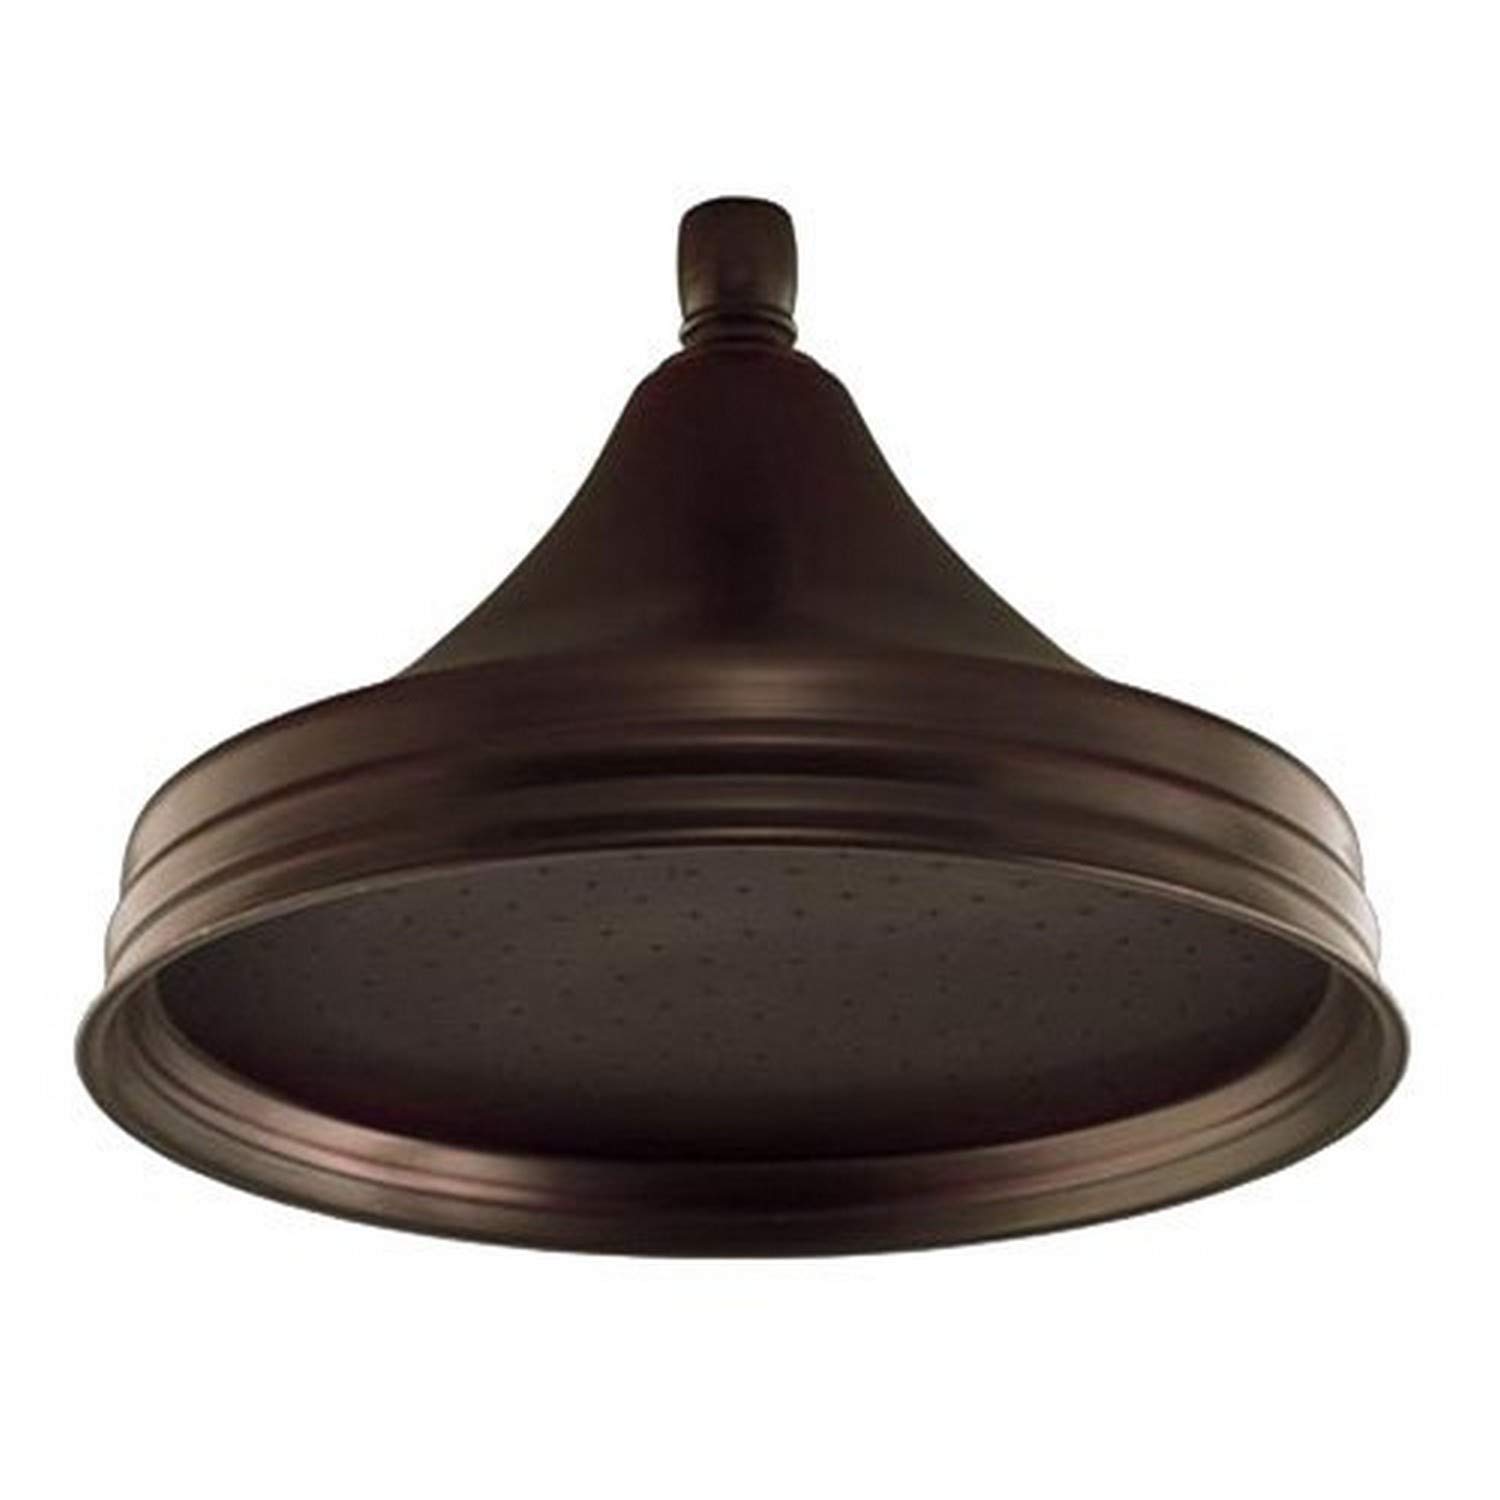
To take apart an Alsons Brass Watering Can Showerhead, start by removing the showerhead from the arm. Use a wrench to unscrew the collar nut, then carefully disassemble the parts for cleaning or maintenance.
Step 3: Disassembling the Spray Head
Now that the handle and spray head of the Alsons Brass Watering Can Showerhead are detached, it’s time to disassemble the spray head for a thorough cleaning. Follow these steps:
- Inspect the spray head: Take a close look at the spray head and locate any visible seams or connections. These are usually where the different parts of the spray head can be separated.
- Unscrew or twist off the faceplate: Many spray heads have a removable faceplate that covers the shower nozzles. Use your hands or a pair of pliers to unscrew or twist off the faceplate. Set it aside.
- Remove the nozzles: Underneath the faceplate, you will find the individual shower nozzles. Depending on the design, they may be screwed or clipped into place. Gently remove each nozzle from the spray head.
- Inspect for additional parts: Some spray heads may have additional components, such as filters or flow restrictors. Take note of any such parts and remove them if necessary.
As you disassemble the spray head, be mindful of the parts and their arrangement. Take care not to lose any small components or damage the delicate nozzles. Place all the disassembled parts in a safe and organized manner.
With the spray head now disassembled, you are ready to move on to the next step, which involves cleaning the various components to remove any buildup or debris.
Step 4: Cleaning the Parts
Now that you have disassembled the Alsons Brass Watering Can Showerhead and its components, it’s time to thoroughly clean each part to remove any buildup or debris. Follow these steps:
- Soak the parts: Fill a bucket or basin with equal parts vinegar and water, or use a mild cleaning solution recommended by the manufacturer. Submerge the disassembled parts, such as the faceplate, nozzles, and any additional components, into the solution. Allow them to soak for about 30 minutes. This will help dissolve and loosen any mineral deposits or grime.
- Scrub with a brush: After soaking, take an old toothbrush or small brush and gently scrub each part. Pay special attention to the nozzles, removing any buildup or debris that may be obstructing the water flow. Scrub the faceplate and other components to remove any residue.
- Rinse thoroughly: Once you have thoroughly scrubbed each part, rinse them under running water to remove any remaining cleaning solution. Ensure that all traces of vinegar or cleaning solution are rinsed off.
- Dry the parts: Use a clean cloth or sponge to dry the cleaned parts. Make sure to dry them thoroughly to prevent any moisture-related issues, such as mold or mildew.
- Inspect for additional cleaning: Take a close look at each part to ensure that they are clean and free of any remaining buildup. If needed, repeat the cleaning process or use a soft brush to remove any stubborn residue.
By following these steps, you can effectively clean the disassembled parts of the Alsons Brass Watering Can Showerhead. Once the parts are cleaned and completely dry, you are ready to move on to the final step of reassembling the showerhead.
Step 5: Reassembling the Showerhead
Now that you have cleaned all the individual components of the Alsons Brass Watering Can Showerhead, it’s time to reassemble them to restore the showerhead to its original functionality. Follow these steps:
- Attach the spray head: Take the cleaned spray head and screw or twist it back onto the main body of the showerhead. Make sure it is securely attached but be careful not to overtighten.
- Insert the nozzles: Take the cleaned shower nozzles and carefully insert them back into their respective holes in the spray head. Ensure that they fit snugly and are properly aligned.
- Attach the faceplate: Place the cleaned faceplate over the shower nozzles and screw it or twist it back into place on the spray head. Again, be cautious not to overtighten.
- Reattach the handle: If you detached the handle from the main body of the showerhead, align the threads and twist it clockwise until it is securely attached. Use your hands or a towel to avoid scratching the surface.
- Secure the showerhead to the hose: Take the showerhead and screw it back onto the shower hose, making sure it is tightly connected. Use an adjustable wrench if needed, but be careful not to damage the threads.
Once you have reassembled the Alsons Brass Watering Can Showerhead, do a quick inspection to ensure that all the parts are securely attached and tightly sealed. Turn on the water supply to test the showerhead and check for any leaks or issues with water flow.
If everything looks and functions properly, congratulations! You have successfully reassembled the showerhead and completed the cleaning process.
By regularly cleaning and maintaining your Alsons Brass Watering Can Showerhead, you can enjoy optimal performance and a refreshing shower experience. Remember to refer to the manufacturer’s instructions or consult a professional if you encounter any difficulties or have specific concerns about your showerhead.
Conclusion
Congratulations! You have now completed the process of taking apart, cleaning, and reassembling the Alsons Brass Watering Can Showerhead. By following the steps outlined in this guide, you were able to restore your showerhead’s functionality and improve your showering experience.
Regular maintenance and cleaning of your showerhead is essential to ensure optimal water flow and to prevent the buildup of mineral deposits or debris. By disassembling the showerhead and cleaning its various components, you were able to eliminate any blockages or obstructions that were causing a decrease in water flow.
Remember to always prioritize safety when working with any plumbing fixtures. Follow the recommended safety precautions, such as turning off the water supply, wearing protective gloves and eyewear, and using tools carefully to avoid any accidents or injuries.
Having the right tools on hand, such as an adjustable wrench, Phillips head screwdriver, pliers, and a toothbrush, made the disassembly and cleaning process much easier and more efficient. These tools helped you remove and clean each component thoroughly, ensuring a complete and effective cleaning process.
After cleaning the spray head, faceplate, nozzles, and other parts, you reassembled the showerhead, making sure that everything was securely attached and properly aligned. This ensured that the showerhead would function optimally and provide a refreshing shower experience.
Regular cleaning and maintenance of your showerhead will help prolong its lifespan and prevent any potential issues caused by mineral buildup or debris. Remember to consult the manufacturer’s instructions or seek professional assistance if you have any specific concerns or difficulties with your showerhead.
Thank you for following this guide on how to take apart and clean the Alsons Brass Watering Can Showerhead. We hope that this information has been helpful and that you can now enjoy a rejuvenating and refreshing shower experience!
Frequently Asked Questions about How To Take Apart Alsons Brass Watering Can Showerhead
Was this page helpful?
At Storables.com, we guarantee accurate and reliable information. Our content, validated by Expert Board Contributors, is crafted following stringent Editorial Policies. We're committed to providing you with well-researched, expert-backed insights for all your informational needs.


0 thoughts on “How To Take Apart Alsons Brass Watering Can Showerhead”