Home>Home Maintenance>How To Connect To An Oval Dryer Vent
Home Maintenance
How To Connect To An Oval Dryer Vent
Modified: August 26, 2024
Learn how to connect to an oval dryer vent with our comprehensive guide! Ensure proper home maintenance and ventilation for optimum dryer performance.
(Many of the links in this article redirect to a specific reviewed product. Your purchase of these products through affiliate links helps to generate commission for Storables.com, at no extra cost. Learn more)
Introduction
Welcome to our guide on how to connect to an oval dryer vent. A properly functioning dryer vent is crucial for ensuring the safe and efficient operation of your dryer. The dryer vent allows hot air and moisture to escape, preventing potential hazards such as fire and mold growth. In some cases, you may find that your dryer has an oval vent opening rather than the traditional circular one. Connecting to an oval dryer vent requires a slightly different approach, but with the right tools and materials, it can still be a straightforward process.
Before we dive into the step-by-step instructions, it is essential to highlight the importance of safety. Whenever you are working with your dryer or any electrical appliance, always take the necessary precautions to protect yourself and avoid accidents. Make sure to turn off the power supply to the dryer and unplug it before starting any work. Additionally, wear appropriate safety gear such as gloves and safety glasses.
In this guide, we will walk you through the process of connecting to an oval dryer vent. We will cover the tools and materials you will need, as well as the step-by-step instructions to ensure a successful installation. Let’s get started!
Key Takeaways:
- Safety First!
When connecting to an oval dryer vent, always prioritize safety. Turn off the power, wear protective gear, and ensure proper vent size to prevent accidents and create a safe working environment. - Test for Functionality
After installation, test the oval dryer vent for proper functionality. Check for leaks, monitor airflow, and inspect for moisture to ensure a safe and efficient venting system for your dryer.
Read more: How To Connect A Dryer Vent
Safety Precautions
When working with your dryer and connecting to an oval dryer vent, it is essential to prioritize safety. By taking the necessary precautions, you can prevent accidents and ensure a safe working environment. Here are some important safety measures to keep in mind:
- Turn off the power: Before starting any work, make sure to turn off the power supply to the dryer. This will prevent any accidental electrical shocks or short circuits.
- Unplug the dryer: Once you have turned off the power, unplug the dryer from the electrical outlet. This will further minimize the risk of electrical accidents during the installation process.
- Wear protective gear: When working with your dryer, wear appropriate protective gear such as gloves and safety glasses. This will protect your hands from sharp edges or debris and prevent any eye injuries.
- Use a stable work surface: Make sure you are working on a stable surface when installing the oval dryer vent. This will prevent any accidents or injuries caused by an unstable work area.
- Follow manufacturer’s instructions: Always refer to the manufacturer’s instructions for your specific dryer model. They will provide important guidelines and safety precautions that are specific to your appliance.
- Inspect the vent pathway: Before connecting the oval dryer vent, inspect the vent pathway to ensure it is clear of lint and debris. A clogged vent can restrict airflow and pose a fire hazard. Clean out any obstructions before proceeding with the installation.
- Ensure proper vent size: It is important to ensure that the oval adapter and vent hose you are using are the correct size for your dryer. Using the wrong size can affect the performance of your dryer and increase the risk of lint buildup.
- Test the installation: Once you have connected the oval dryer vent, test it for proper functionality. Run a cycle with the dryer and check for any leaks or issues. If you notice any problems, address them immediately to ensure the safe operation of your appliance.
By following these safety precautions, you can minimize the risk of accidents and create a safe working environment when connecting to an oval dryer vent. Remember, safety should always be your top priority when working with electrical appliances.
Tools and Materials Needed
Before you begin connecting to an oval dryer vent, it is essential to gather all the necessary tools and materials. Having everything prepared in advance will make the installation process smoother and more efficient. Here are the tools and materials you will need:
Tools:
- Measuring tape
- Pencil
- Hacksaw or tin snips
- Screwdriver
- Adjustable wrench
- Drill with a metal bit (if needed)
Materials:
- Oval dryer vent adapter
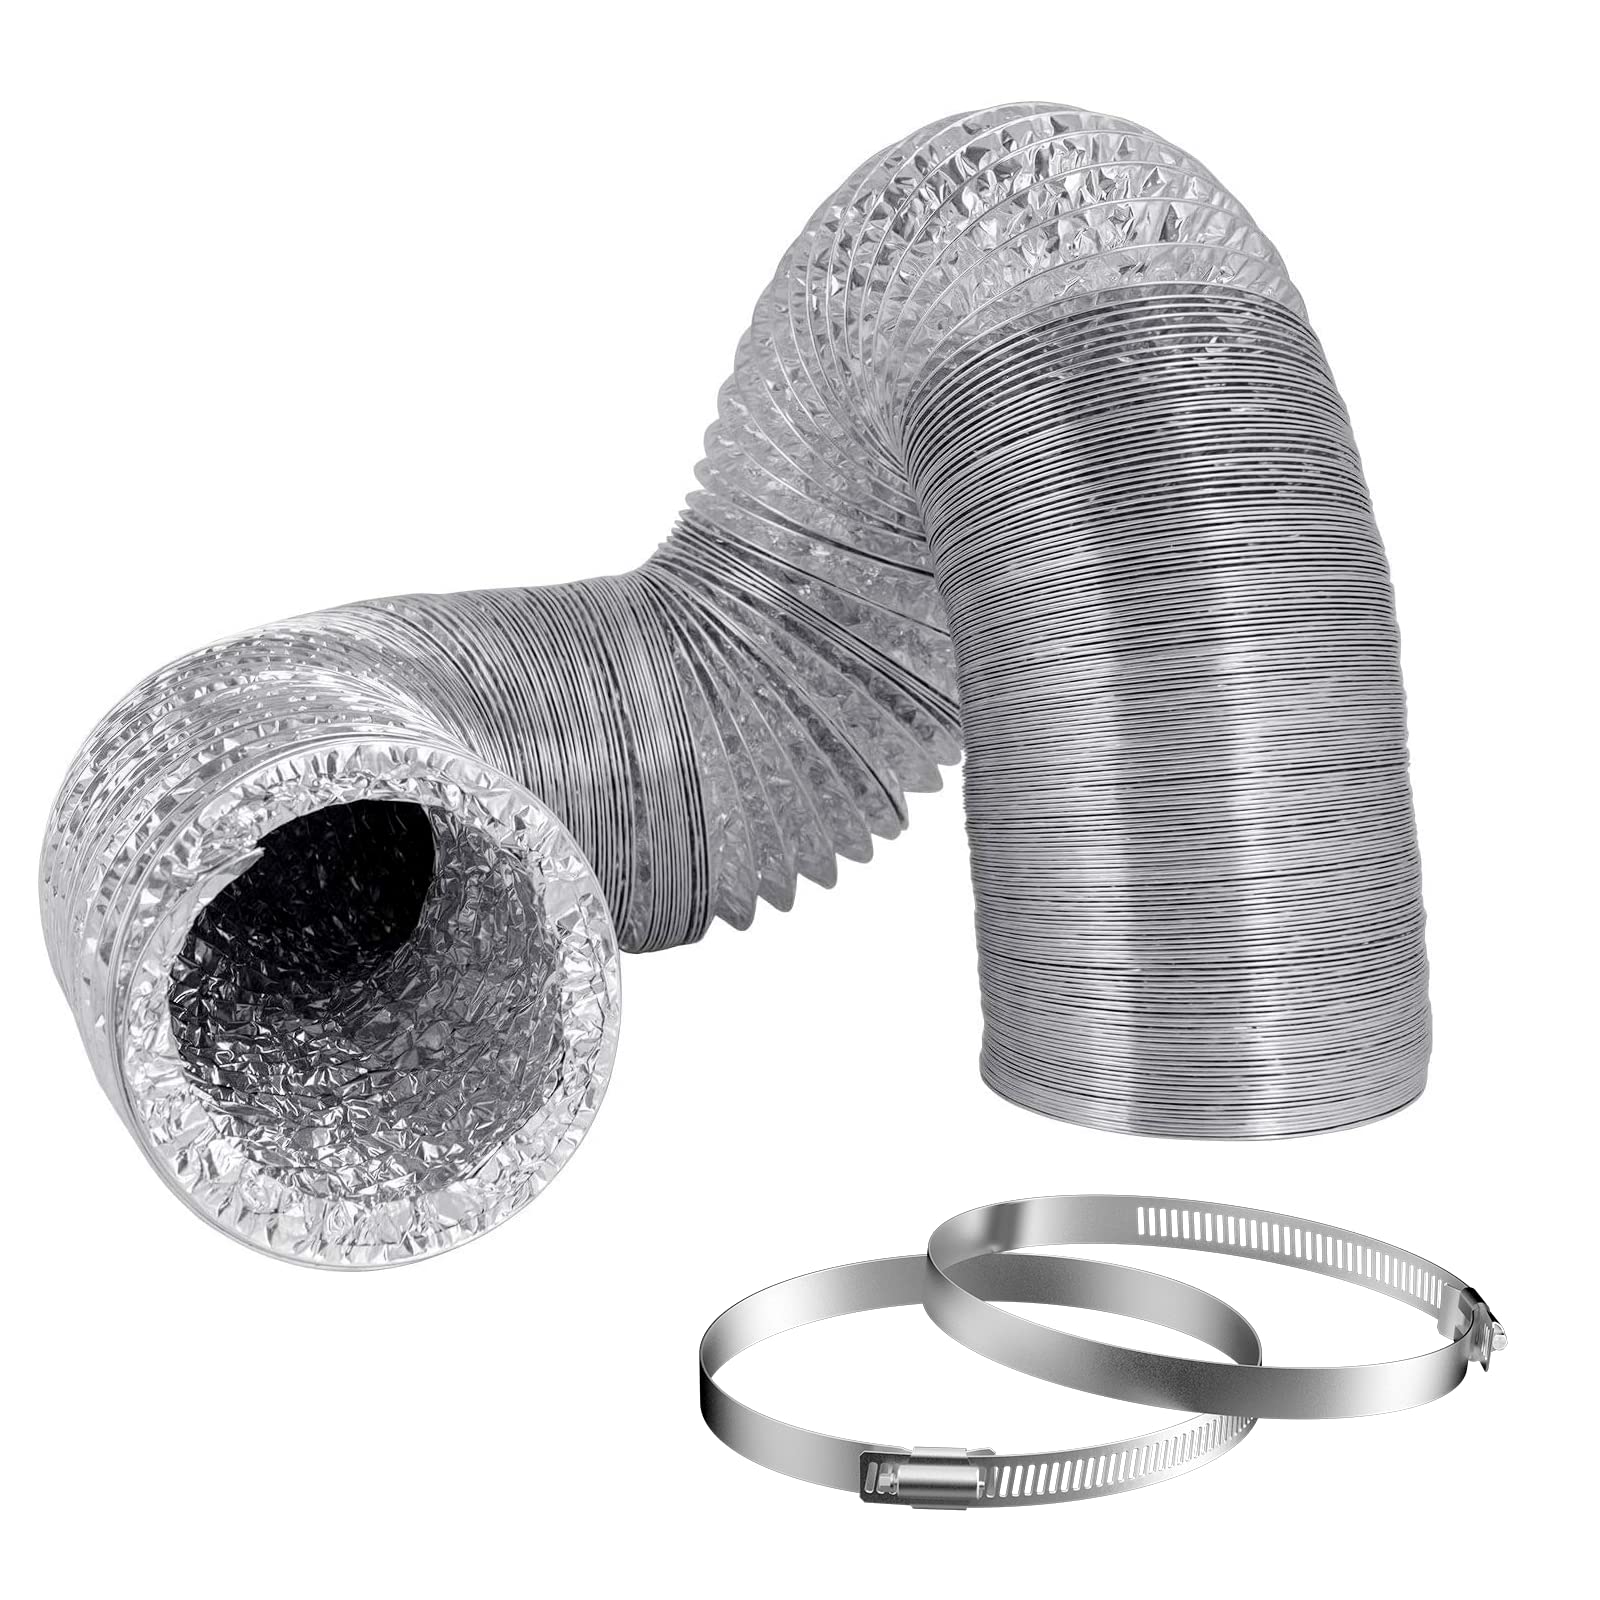
- Oval dryer vent hose
- Clamps
- Screws
- Duct tape (optional)
When selecting the oval dryer vent adapter and hose, ensure that they are the correct size and compatible with your dryer model. The adapter should be designed to fit the oval vent opening of your dryer, while the hose should have the appropriate dimensions to connect to the adapter.
It is important to note that some installations may require additional materials depending on the specific configuration of your dryer and vent system. In some cases, you may need to use foil tape or duct tape to secure the connections and ensure a proper seal. Consult the manufacturer’s instructions and your local building codes for any specific requirements or recommendations.
Once you have gathered all the necessary tools and materials, you are ready to move on to the step-by-step process of connecting to an oval dryer vent.
Step 1: Measure the Vent Opening
The first step in connecting to an oval dryer vent is to measure the vent opening on your dryer. This measurement will help you determine the correct size of the oval adapter and vent hose you will need for the installation. Here’s how to measure the vent opening:
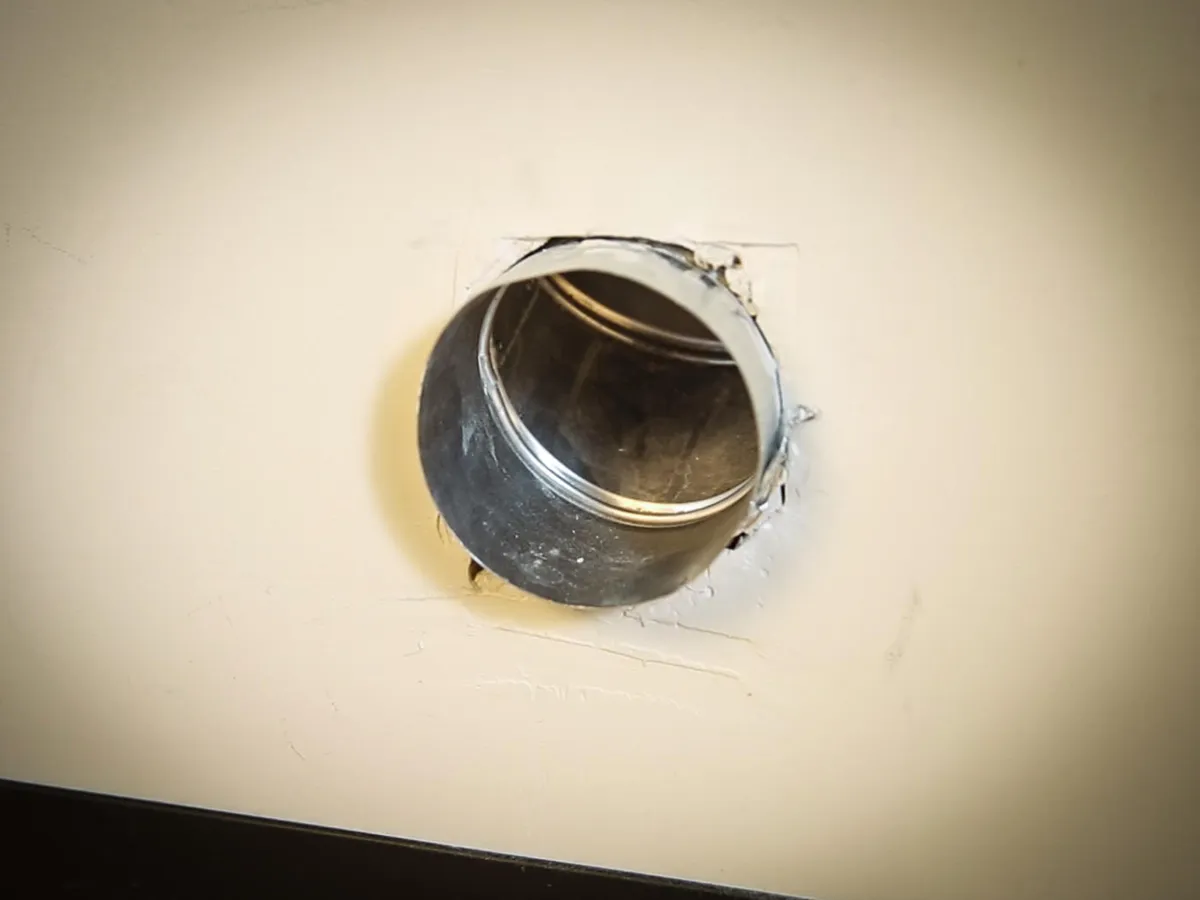
- Locate the vent opening on the back of your dryer. This is typically located near the bottom of the unit.
- Using a measuring tape, measure the width and height of the oval vent opening. Take accurate measurements to ensure a proper fit.
- Record the measurements on a piece of paper for reference when purchasing the oval adapter and vent hose.
Keep in mind that oval vent openings come in various sizes, so it is crucial to measure yours accurately. This will ensure that the oval adapter and vent hose you purchase will fit properly, creating a secure connection between the dryer and the vent system.
Once you have measured the vent opening, you can move on to the next step, which is purchasing the correct oval adapter. Remember to double-check your measurements before making a purchase to avoid any sizing issues.
Step 2: Purchase the Correct Oval Adapter
After measuring the vent opening on your dryer, the next step is to purchase the correct oval adapter. The oval adapter serves as a connection between the oval vent opening on your dryer and the circular vent hose.
When purchasing the oval adapter, keep the following considerations in mind:
- Size: Ensure that the oval adapter you choose matches the measurements of your vent opening. The adapter should have the same width and height as the vent opening to create a proper fit.
- Compatibility: Verify that the oval adapter is compatible with your specific dryer model. Check the manufacturer’s recommendations or consult a professional if you are unsure.
- Material: Look for an oval adapter made of durable materials such as metal or high-quality plastic. This will ensure the longevity and reliability of the connection.
- Quality: Consider purchasing a reputable brand or a well-reviewed oval adapter to ensure a reliable and secure connection.
You can find oval adapters at home improvement stores, appliance stores, or online retailers. Be sure to take your measurements with you or have them handy when making the purchase to ensure a proper fit.
Once you have purchased the correct oval adapter, you are ready to move on to the next step, which involves removing the old vent connection from your dryer.
Step 3: Remove the Old Vent Connection
In order to connect to an oval dryer vent, you will need to remove the old vent connection from your dryer. This step ensures a clean and secure installation. Follow these steps to remove the old vent connection:
- Start by unplugging the dryer from the electrical outlet and turning off the power supply.
- Locate the existing vent connection on the back of your dryer. It may be secured with screws or clamps.
- Using a screwdriver or adjustable wrench, carefully remove any screws or loosen any clamps that are securing the existing vent connection.
- Gently separate the existing vent connection from the dryer. Be cautious not to damage any wires or components.
- Inspect the area around the vent opening for any debris or lint buildup. Clean the area thoroughly before proceeding with the installation.
- Once the old vent connection is fully removed and the area is clean, you are ready to move on to the next step.
It’s important to note that some dryers may have additional components or mechanisms securing the vent connection. Consult your dryer’s manual or refer to the manufacturer’s instructions for specific guidance on removing the vent connection.
By removing the old vent connection, you create a clean slate for the installation of the oval dryer vent. This ensures that the new connection will be secure and free from any potential obstructions.
In the next step, we will prepare the oval dryer vent hose for installation.
When connecting to an oval dryer vent, use a metal clamp to secure the vent hose to the vent opening. Make sure the connection is tight to prevent any air leaks.
Step 4: Prepare the Oval Dryer Vent Hose
In order to connect to an oval dryer vent, you will need to prepare the oval dryer vent hose for installation. The oval vent hose serves as the conduit for hot air and moisture to exit the dryer and should be properly prepared to ensure a secure and efficient connection. Follow these steps to prepare the oval dryer vent hose:
- Take the oval dryer vent hose and measure the length needed to reach from the oval vent opening on the dryer to the exhaust vent or the designated vent outlet.
- Using a pencil or marker, mark the measurement on the vent hose.
- Double-check the measurement to ensure accuracy and make sure to add a few extra inches for flexibility and easy maneuverability during installation.
- Once you have marked the measurement, use a hacksaw or tin snips to cut the vent hose to the desired length.
- After cutting the vent hose, inspect the edges for any sharp or jagged edges. Use sandpaper or a file to smooth out any rough edges to prevent any potential damage or injury when connecting the hose.
- Using a measuring tape or your hand, gently shape the oval vent hose to match the oval shape of the adapter and vent opening on the dryer. This will ensure a snug and secure fit.
It is crucial to properly prepare the oval dryer vent hose to ensure an airtight connection. A secure connection will prevent any air leaks or moisture buildup, which can impact the performance and efficiency of your dryer.
Once you have prepared the oval dryer vent hose, you are ready to move on to the next step, which is installing the oval adapter.
Step 5: Install the Oval Adapter
Now that you have prepared the oval dryer vent hose, it’s time to install the oval adapter. The oval adapter serves as a connection between the dryer vent opening and the vent hose. Follow these steps to install the oval adapter:
- Take the oval adapter and position it over the vent opening on the back of your dryer. Ensure that the adapter aligns with the oval shape of the vent opening.
- Using a screwdriver or drill with a metal bit, secure the oval adapter to the dryer by inserting screws through the attachment holes or brackets provided with the adapter. Be careful not to overtighten the screws, as it may damage the dryer or the adapter.
- Make sure the adapter is firmly attached and doesn’t move or wiggle. This will ensure a stable connection between the dryer and the vent hose.
- Once the oval adapter is securely installed, you’re ready to move on to the next step, which is connecting the oval dryer vent hose.
It’s important to note that different oval adapters may have slightly different installation methods. Refer to the manufacturer’s instructions provided with the adapter for any specific guidance or requirements.
By correctly installing the oval adapter, you create a solid connection point for the vent hose to attach to the dryer. This connection is essential for maintaining proper airflow and preventing any leaks or obstructions.
In the next step, we will guide you on how to connect the oval dryer vent hose to the installed adapter.
Step 6: Connect the Oval Dryer Vent Hose
Now that the oval adapter is securely installed, it’s time to connect the oval dryer vent hose. This step involves attaching the vent hose to the oval adapter, creating a direct pathway for hot air and moisture to escape from the dryer. Follow these steps to connect the oval dryer vent hose:
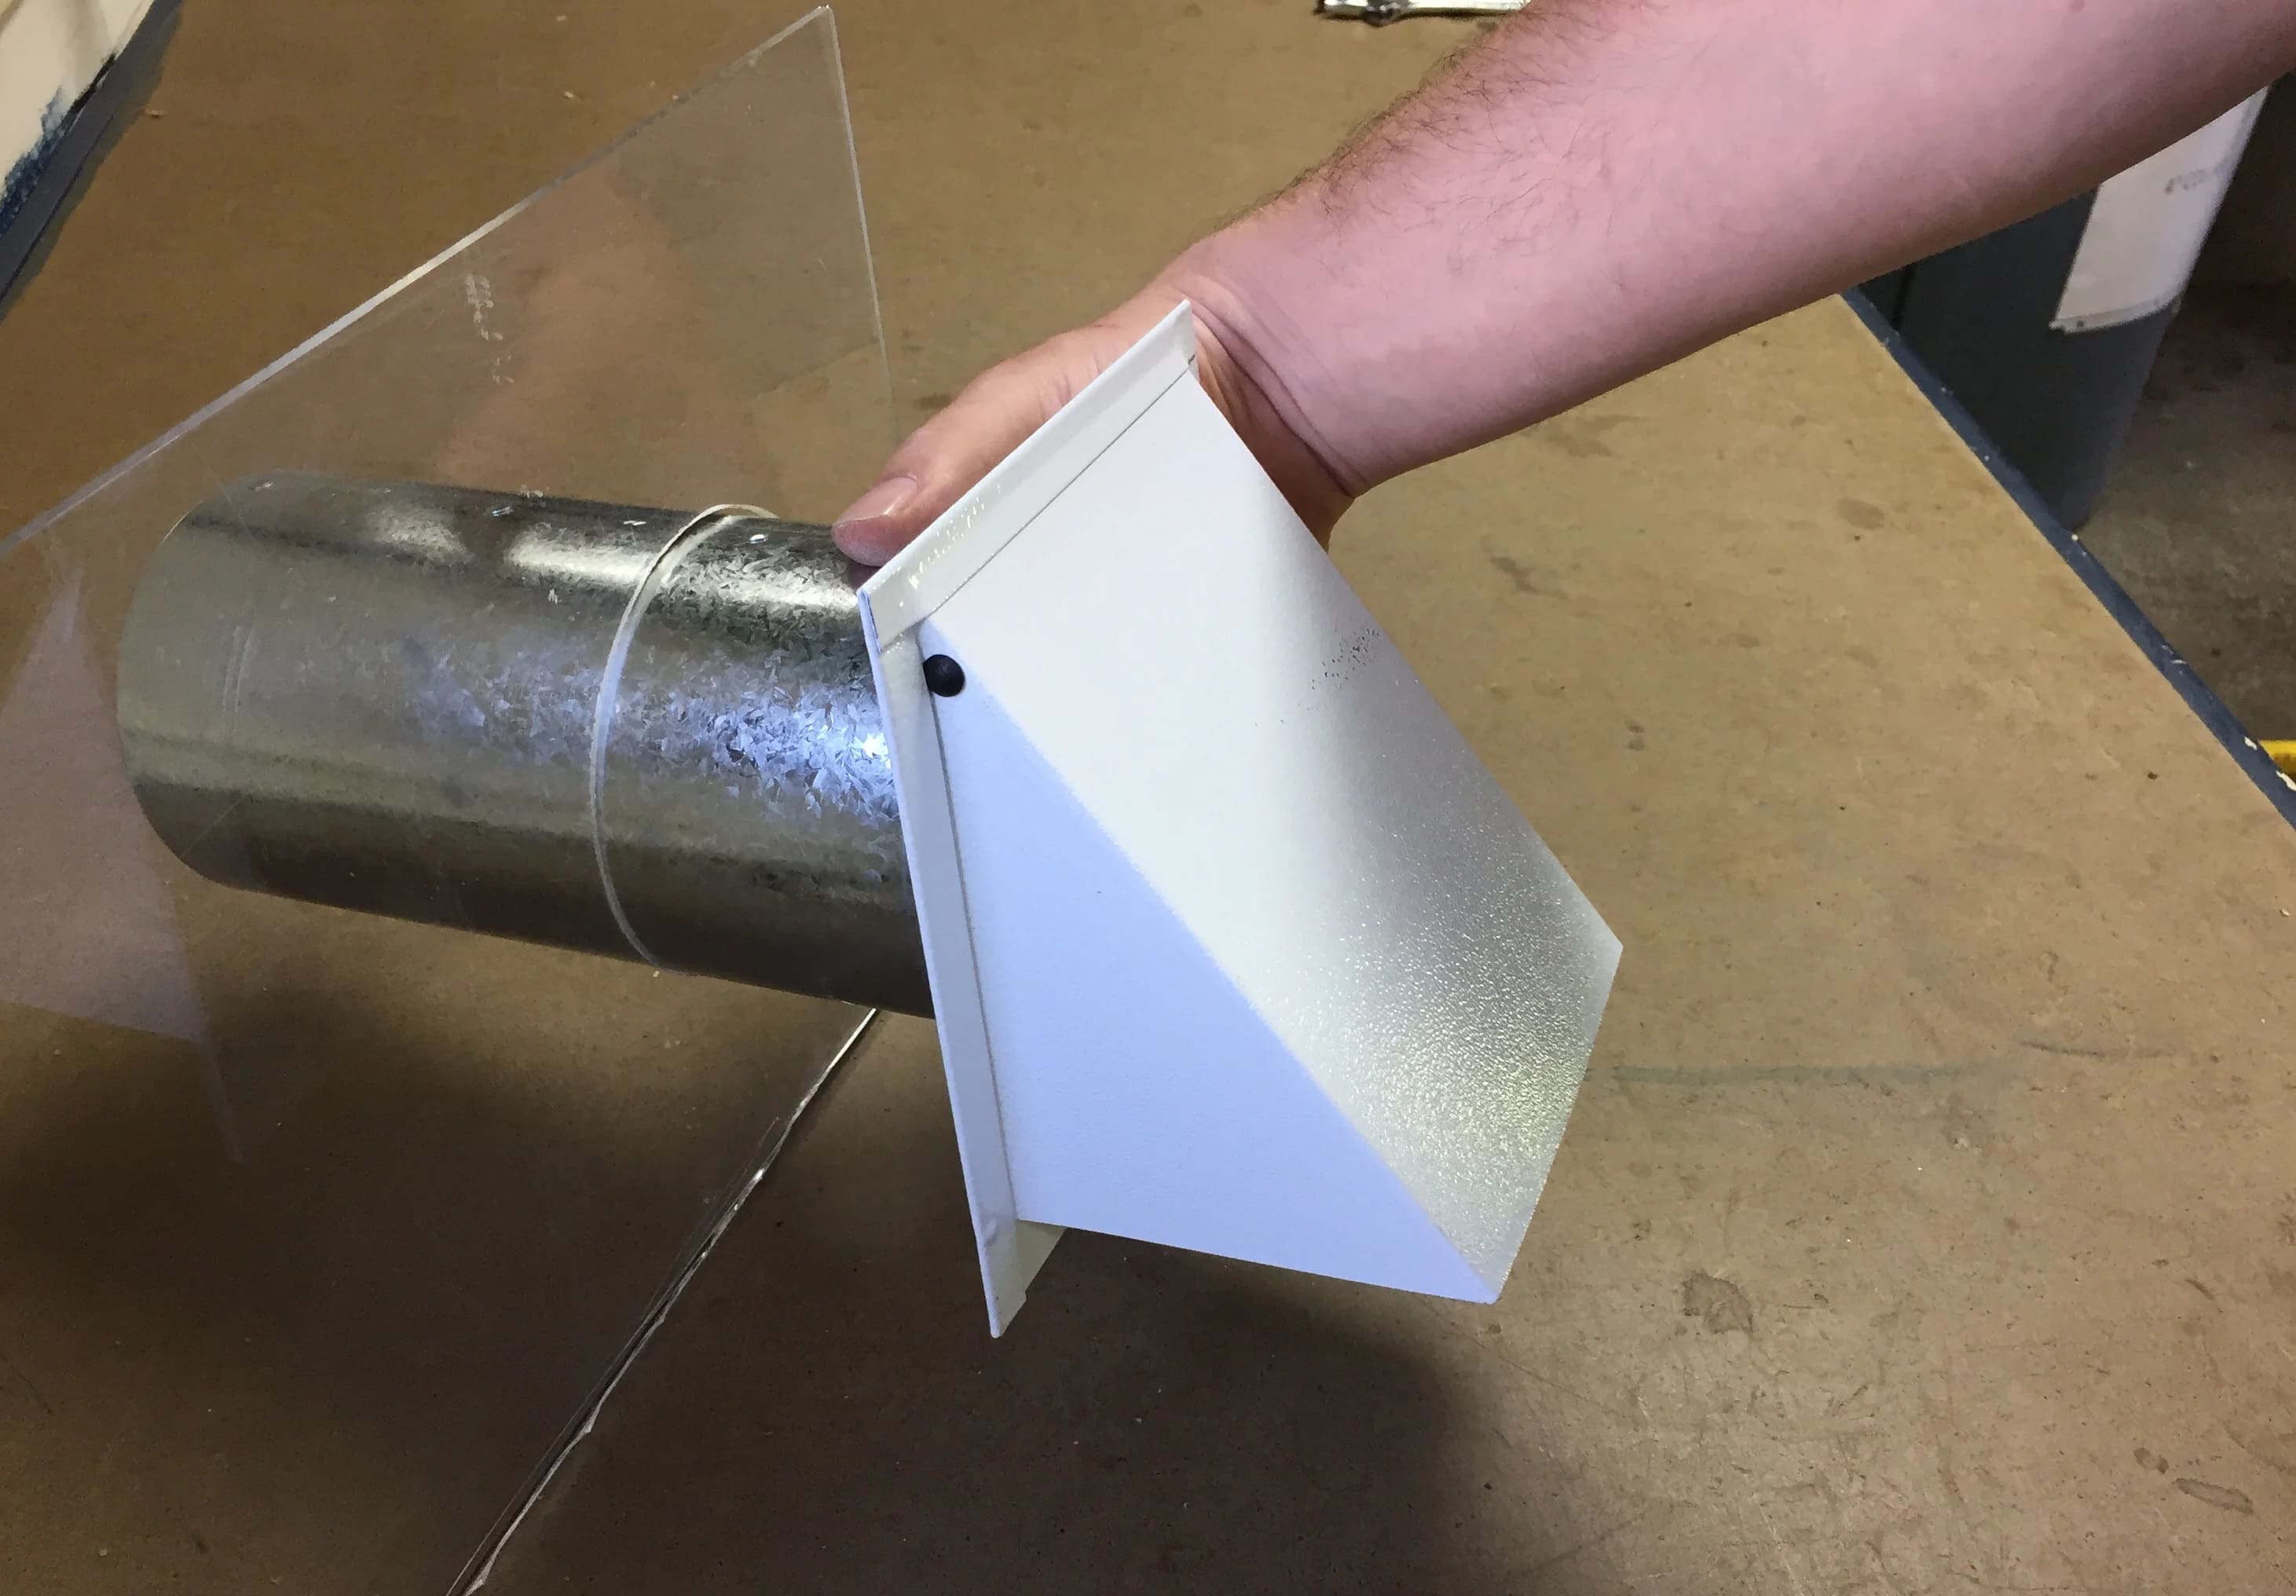
- Take one end of the oval dryer vent hose and position it over the opening of the oval adapter on the dryer.
- Ensure that the vent hose completely covers the opening of the adapter and aligns with the oval shape.
- If necessary, use clamps to secure the vent hose to the adapter. Place the clamp around the vent hose and tighten it with a screwdriver or adjustable wrench. This will create a tight and secure connection.
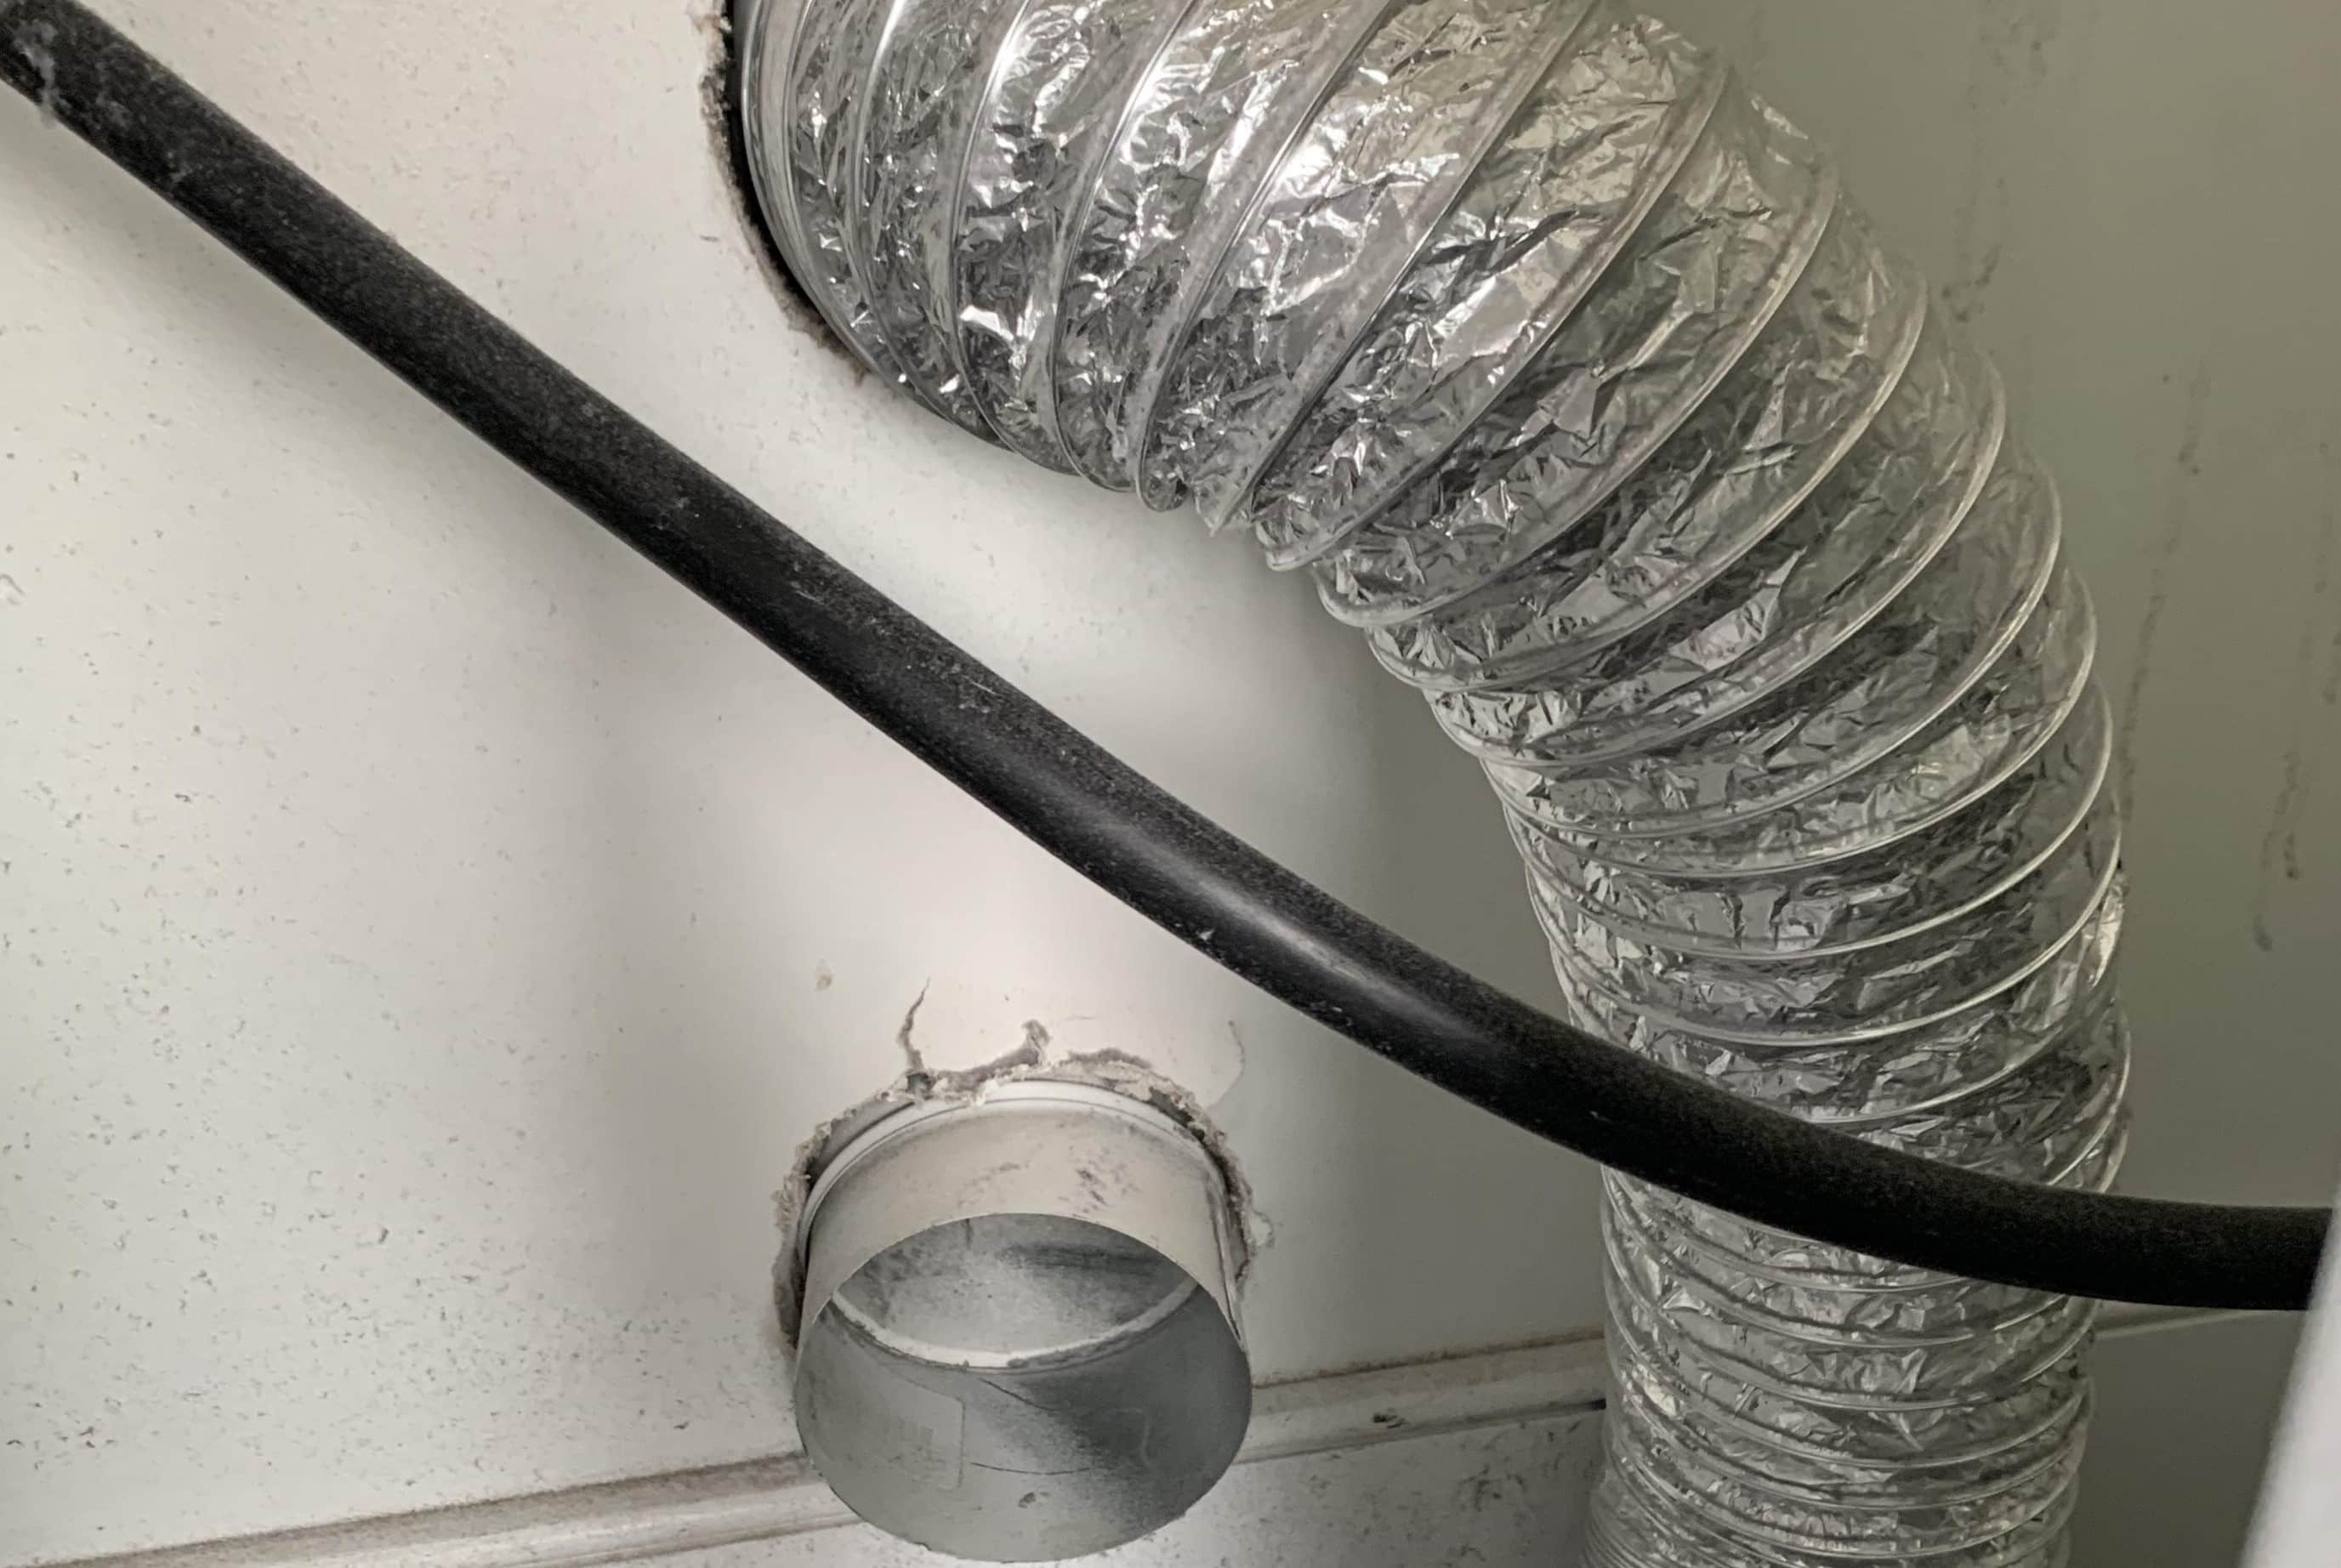
- Repeat this process for the other end of the vent hose, attaching it to the exhaust vent or designated vent outlet. Use clamps to secure the hose in place if needed.
- Ensure that both ends of the vent hose are securely attached, and there are no gaps or leaks in the connections.
- If desired, you can use duct tape or foil tape to further secure the connections and create a tighter seal. Wrap the tape around the connections, covering any gaps or seams.
It is crucial to have a proper and secure connection between the oval dryer vent hose and the oval adapter. This ensures that there are no air leaks or moisture buildup, allowing your dryer to operate efficiently and safely.
Once the oval dryer vent hose is securely connected, you can move on to the next step, which involves securing the connections.
Read more: How To Connect A Dryer Vent Hose
Step 7: Secure the Connections
After connecting the oval dryer vent hose to the oval adapter, it is important to secure the connections to ensure they remain tight and sturdy. This step helps prevent any accidental disconnections or leaks during the operation of your dryer. Follow these steps to secure the connections:
- Inspect the connections between the oval dryer vent hose and the oval adapter, as well as the hose and the exhaust vent or vent outlet. Ensure that they are properly aligned and tightly sealed.
- If you used clamps to secure the connections, double-check that they are tightened properly. Use a screwdriver or adjustable wrench to tighten the clamps further if necessary.
- If you opted to use duct tape or foil tape, make sure it is wrapped securely around the connections. Smooth out any wrinkles or folds in the tape to create a tight seal.
- Gently tug on the connected sections of the vent hose to ensure they are firmly attached. They should not easily detach or wiggle.
- If you notice any gaps or leaks in the connections, reposition and tighten the clamps or add more tape as needed. It is crucial to have a tight and secure seal to prevent any airflow or moisture issues.
By properly securing the connections, you minimize the risk of air leaks, which can reduce the efficiency of your dryer and potentially pose a safety hazard. A secure connection also helps maintain proper airflow, allowing your dryer to vent hot air and moisture effectively.
In the next step, we will guide you on how to test for proper functionality after completing the installation.
Step 8: Test for Proper Functionality
After completing the installation of the oval dryer vent, it is crucial to test for proper functionality before using your dryer. Testing ensures that there are no issues with the connections, and that the vent is allowing hot air and moisture to escape efficiently. Follow these steps to test for proper functionality:
- Plug the dryer back into the electrical outlet and turn on the power supply.
- Run a test cycle on your dryer, following the manufacturer’s instructions. Make sure the dryer is set to the appropriate temperature and drying time.
- While the dryer is running, closely monitor the vent connections for any signs of leaks, gaps, or loose fittings. Pay attention to any unusual noises or vibrations.
- Check for proper airflow by placing your hand near the vent outlet outside your home. You should feel a steady stream of warm air coming out.
- Inspect the area around the vent openings for any signs of moisture or condensation. Excessive moisture or water droplets may indicate a problem with the venting system.
- If you notice any issues during the test, immediately turn off the dryer and unplug it from the electrical outlet. Inspect the connections and make any necessary adjustments or repairs before using the dryer again.
- If there are no issues detected and the dryer is functioning properly, you can continue to use it for your laundry needs.
Testing for proper functionality is essential to ensure the safe and efficient operation of your dryer. It allows you to identify any potential problems early on and take appropriate measures to address them. Regularly checking the vent system and performing maintenance will help prevent lint build-up and maintain optimal drying performance.
Congratulations! You have successfully connected to an oval dryer vent and tested its functionality. By following these steps, you have created a safe and efficient venting system for your dryer, allowing it to perform at its best.
Remember to keep your dryer and vent system clean by regularly removing lint and debris to prevent potential fire hazards. If you ever have any concerns or questions about your dryer or the venting system, don’t hesitate to consult a professional for assistance.
Thank you for following our guide, and we hope it has been helpful in connecting to an oval dryer vent!
Conclusion
Connecting to an oval dryer vent may seem like a daunting task, but with the right tools, materials, and step-by-step instructions, it can be a manageable project. By following the proper procedures and safety precautions, you can ensure a safe and efficient venting system for your dryer.
In this guide, we covered the necessary steps to connect to an oval dryer vent. We started by measuring the vent opening and purchasing the correct oval adapter. We then moved on to removing the old vent connection and preparing the oval dryer vent hose. After that, we installed the oval adapter, connected the oval dryer vent hose, and secured the connections. Finally, we tested the venting system for proper functionality.
It is important to prioritize safety throughout the process. Remember to turn off the power supply, wear protective gear, and properly secure the connections to prevent any accidents or issues.
By connecting to an oval dryer vent, you ensure that hot air and moisture are properly expelled from your dryer, reducing the risk of fire and preventing mold growth. Additionally, a well-functioning venting system allows your dryer to operate efficiently, saving energy and extending its lifespan.
We hope that this guide has provided you with the information you need to successfully connect to an oval dryer vent. However, if you are unsure about any steps or encounter any difficulties, it is always recommended to seek professional assistance.
Thank you for following our guide, and enjoy the peace of mind that comes with a properly installed and functioning dryer vent!
Frequently Asked Questions about How To Connect To An Oval Dryer Vent
Was this page helpful?
At Storables.com, we guarantee accurate and reliable information. Our content, validated by Expert Board Contributors, is crafted following stringent Editorial Policies. We're committed to providing you with well-researched, expert-backed insights for all your informational needs.