Home>Home Maintenance>How To Replace A Dryer Vent Pipe
Home Maintenance
How To Replace A Dryer Vent Pipe
Modified: April 24, 2024
Looking to replace your dryer vent pipe? Our guide on home maintenance will show you step-by-step how to do it easily and effectively.
(Many of the links in this article redirect to a specific reviewed product. Your purchase of these products through affiliate links helps to generate commission for Storables.com, at no extra cost. Learn more)
Introduction
Welcome to our comprehensive guide on how to replace a dryer vent pipe. Over time, dryer vent pipes can become damaged or worn out, leading to reduced airflow, potential safety hazards, and inefficient drying. Replacing the vent pipe is a crucial maintenance task that helps ensure proper ventilation and prevents lint buildup. In this article, we will walk you through the step-by-step process of replacing a dryer vent pipe, from assessing the situation to reconnecting the dryer. Let’s get started!
Before we dive into the details, it’s important to emphasize the significance of this task. A properly functioning dryer vent pipe is vital for the efficient operation of your dryer and the prevention of potential fire hazards. Clogged or damaged vent pipes can cause lint buildup, which not only hampers the dryer’s performance but also poses a significant risk of fire. It’s recommended to inspect and clean your dryer vent pipe regularly, and if necessary, replace it if any signs of damage or deterioration are found.
In this guide, we’ll provide you with the knowledge and steps required to successfully replace your dryer vent pipe. We’ll cover the necessary safety precautions you should take, the tools and materials you’ll need, and guide you through each step of the process. Whether you’re a seasoned DIY enthusiast or a homeowner looking to tackle a new project, we’ve got you covered.
It’s essential to prioritize safety throughout the entire process. Before diving into the project, make sure you understand and follow all the safety precautions. Maintain a cautious approach, and if you’re unsure about any steps, it’s better to consult a professional.
Now that we’ve covered the basics, let’s jump into the first section, where we’ll discuss the necessary safety precautions to ensure a smooth and hazard-free replacement process.
Key Takeaways:
- Safety First!
When replacing a dryer vent pipe, always prioritize safety by turning off the dryer, wearing protective gear, and working in a well-ventilated area. Taking precautions ensures a hazard-free replacement process. - Proper Installation Matters
Properly measuring, cutting, and securing the new vent pipe is crucial for efficient airflow and preventing potential hazards. Attention to detail during installation ensures a smoothly functioning ventilation system.
Read more: How To Cut A Dryer Vent Pipe
Safety Precautions
When it comes to any home maintenance project, safety should always be the top priority. This holds true for replacing a dryer vent pipe as well. By following these essential safety precautions, you can minimize the risk of accidents and ensure a secure and successful replacement process:
- Turn off the dryer and unplug it: Before starting any work on the dryer vent pipe, make sure the dryer is turned off and unplugged from its power source. This will eliminate the risk of electric shock during the replacement process.
- Wear protective gear: Always wear safety goggles and work gloves to protect your eyes and hands from debris, sharp edges, and potential injuries. Additionally, consider wearing a dust mask to avoid inhaling any dust or insulation particles.
- Work in a well-ventilated area: Proper ventilation is vital when working with any materials that release dust or fumes. Open windows and doors to promote air circulation, or consider using a fan or ventilation system to keep the area well-ventilated.
- Use sturdy and stable ladders: If you need to access the dryer vent located high on a wall or ceiling, be sure to use a sturdy and stable ladder. Place it on a flat surface and secure it properly to prevent any accidents or falls.
- Be cautious with power tools: If you need to use power tools for cutting or securing the vent pipe, always read the manufacturer’s instructions and follow safety guidelines. Use the appropriate safety guards and ensure the tools are in good working condition.
- Keep children and pets away: During the replacement process, it’s crucial to keep children and pets at a safe distance. This will prevent any accidental injuries and ensure a focused and uninterrupted working environment.
- Take necessary precautions for working at heights: If you need to work on the roof or at heights to install the vent pipe, consider using fall protection gear, such as harnesses and safety ropes. Always work with a partner for added safety and assistance.
- Check for gas leaks (if applicable): If your dryer operates on natural gas, it’s essential to check for gas leaks before and after the vent pipe replacement. If you detect a gas odor or suspect a leak, immediately turn off the gas supply and contact a qualified professional.
Remember, these safety precautions are general guidelines, and it’s crucial to evaluate your specific situation and take appropriate measures to ensure a safe working environment. By prioritizing safety, you can confidently proceed with replacing your dryer vent pipe without any unnecessary risks or accidents.
Tools and Materials Needed
Before embarking on the replacement of your dryer vent pipe, it’s important to gather all the necessary tools and materials. Having everything ready beforehand will save you time and ensure a smooth and efficient replacement process. Here’s a list of the essential tools and materials you’ll need:
Tools:
- Flathead screwdriver: This will be handy for disconnecting the dryer from the vent pipe and removing any screws or fasteners.
- Adjustable wrench: You’ll need this tool to loosen and tighten clamps or connectors.
- Tin snips or a hacksaw: These tools are necessary for cutting the old vent pipe or adjusting the size of the new one.
- Power drill with metal drill bits: If you need to install screws or anchors, a power drill with suitable drill bits will make the task easier.
- Caulk gun: You’ll need this tool to apply caulk or sealant to secure the vent pipe connections.
- Tape measure: A tape measure is essential for accurately measuring the length and diameter of the new vent pipe.
- Pencil or marker: You’ll need this to mark reference points or measurements on the vent pipe or wall.
- Level: A level will help ensure the vent pipe is properly aligned and installed at the right angle.
- Safety goggles and work gloves: These items are crucial for protecting your eyes and hands from debris and potential injuries.
- Dust mask: Wearing a dust mask will prevent you from inhaling any dust or insulation particles.
Materials:
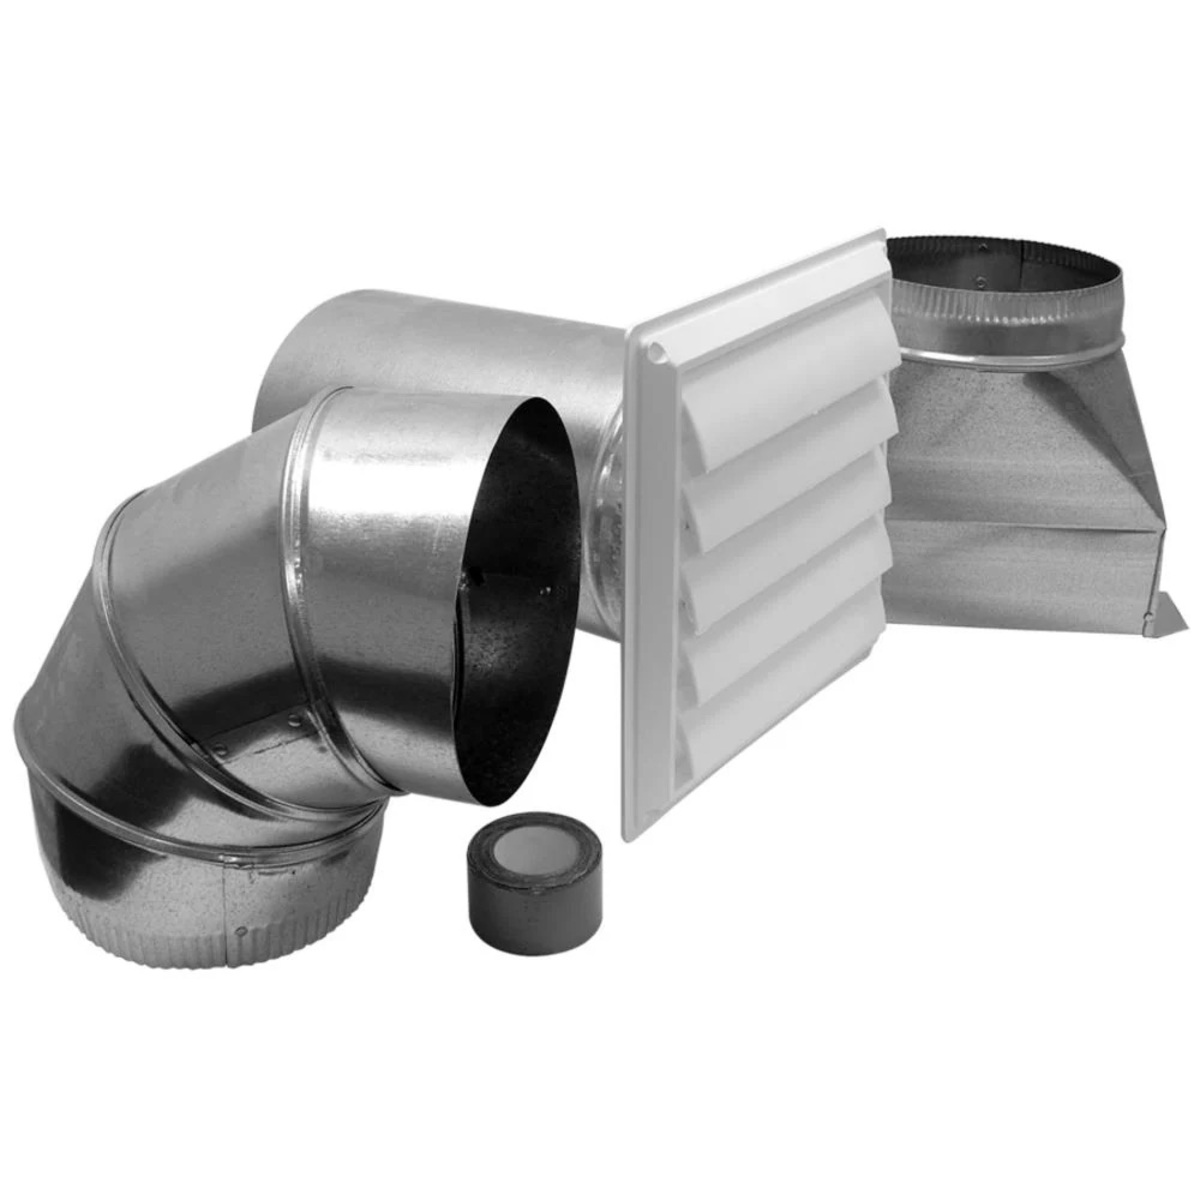
- New dryer vent pipe: Measure the length and diameter of the old vent pipe to ensure you purchase the correct size and type of replacement pipe. Choose a pipe made of durable materials, such as aluminum or rigid metal, to ensure proper airflow and longevity.
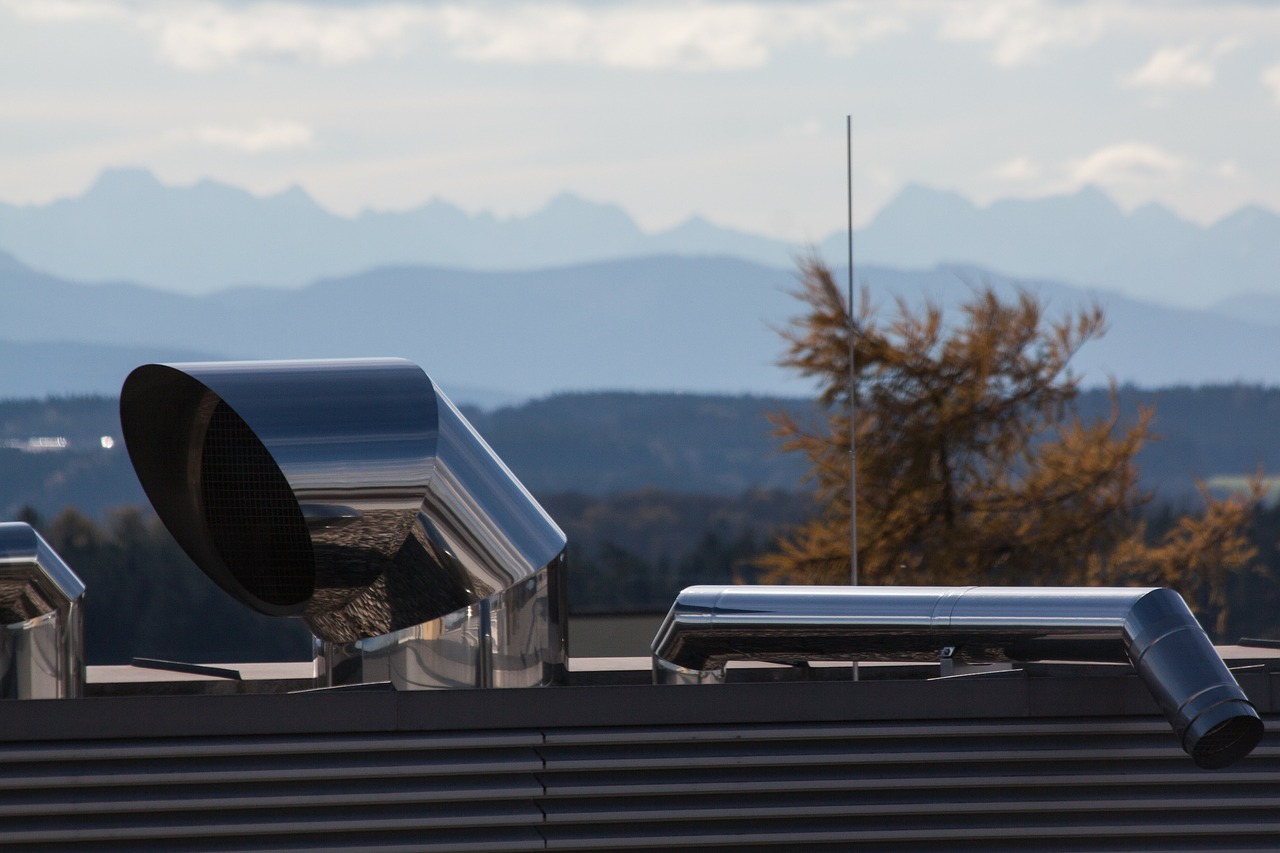
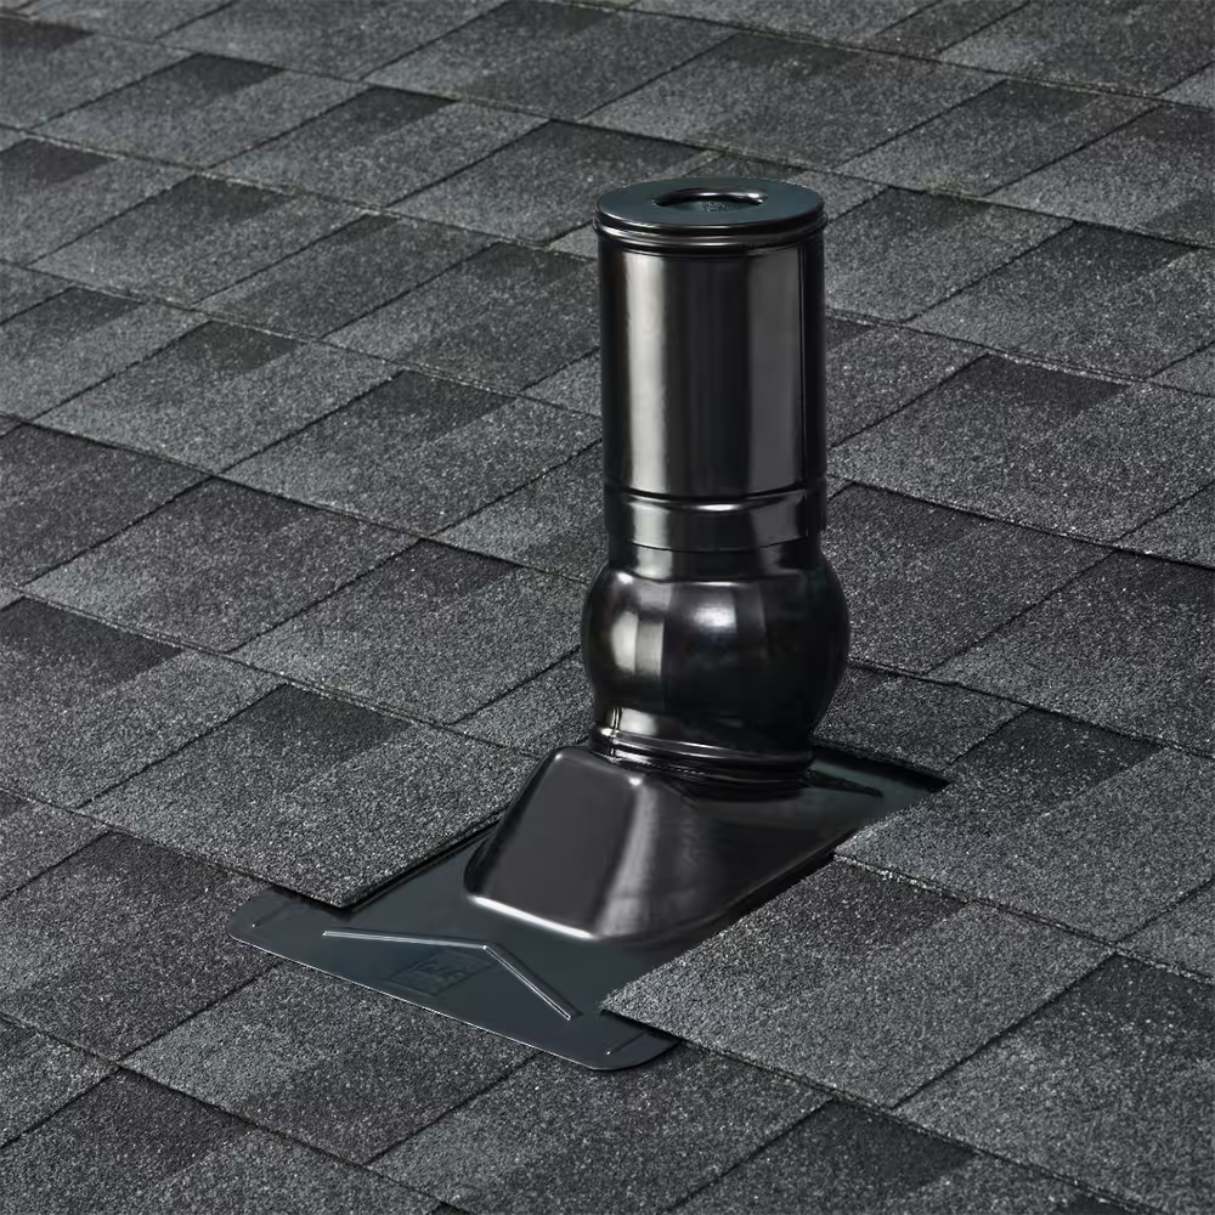
- Vent hood: This is the exterior cover for the vent pipe, designed to prevent pests, debris, and weather elements from entering the vent system. Select a vent hood suitable for your specific installation, considering factors such as the location of the vent and the climate conditions in your area.
- Screws and anchors: If necessary, you may need screws and anchors to secure the vent pipe and vent hood to the wall or ceiling.
- Caulk or sealant: Use a high-quality caulk or sealant to create a tight seal between the vent pipe and the wall or vent hood.
- Duct tape: Duct tape can be used as a temporary or additional measure for securing connections, but it should not be the primary means of attachment.
Make sure you have all the tools and materials ready before starting the replacement process. This will save you time and ensure that you have everything you need to complete the task smoothly.
Read more: How To Insulate A Dryer Vent Pipe
Step 1: Assess the Situation
Before diving into the replacement of your dryer vent pipe, it’s important to assess the situation and determine the extent of the damage or wear on the existing vent pipe. This step will help you understand what needs to be replaced and whether any additional repairs or adjustments are necessary. Follow these steps to assess the situation:
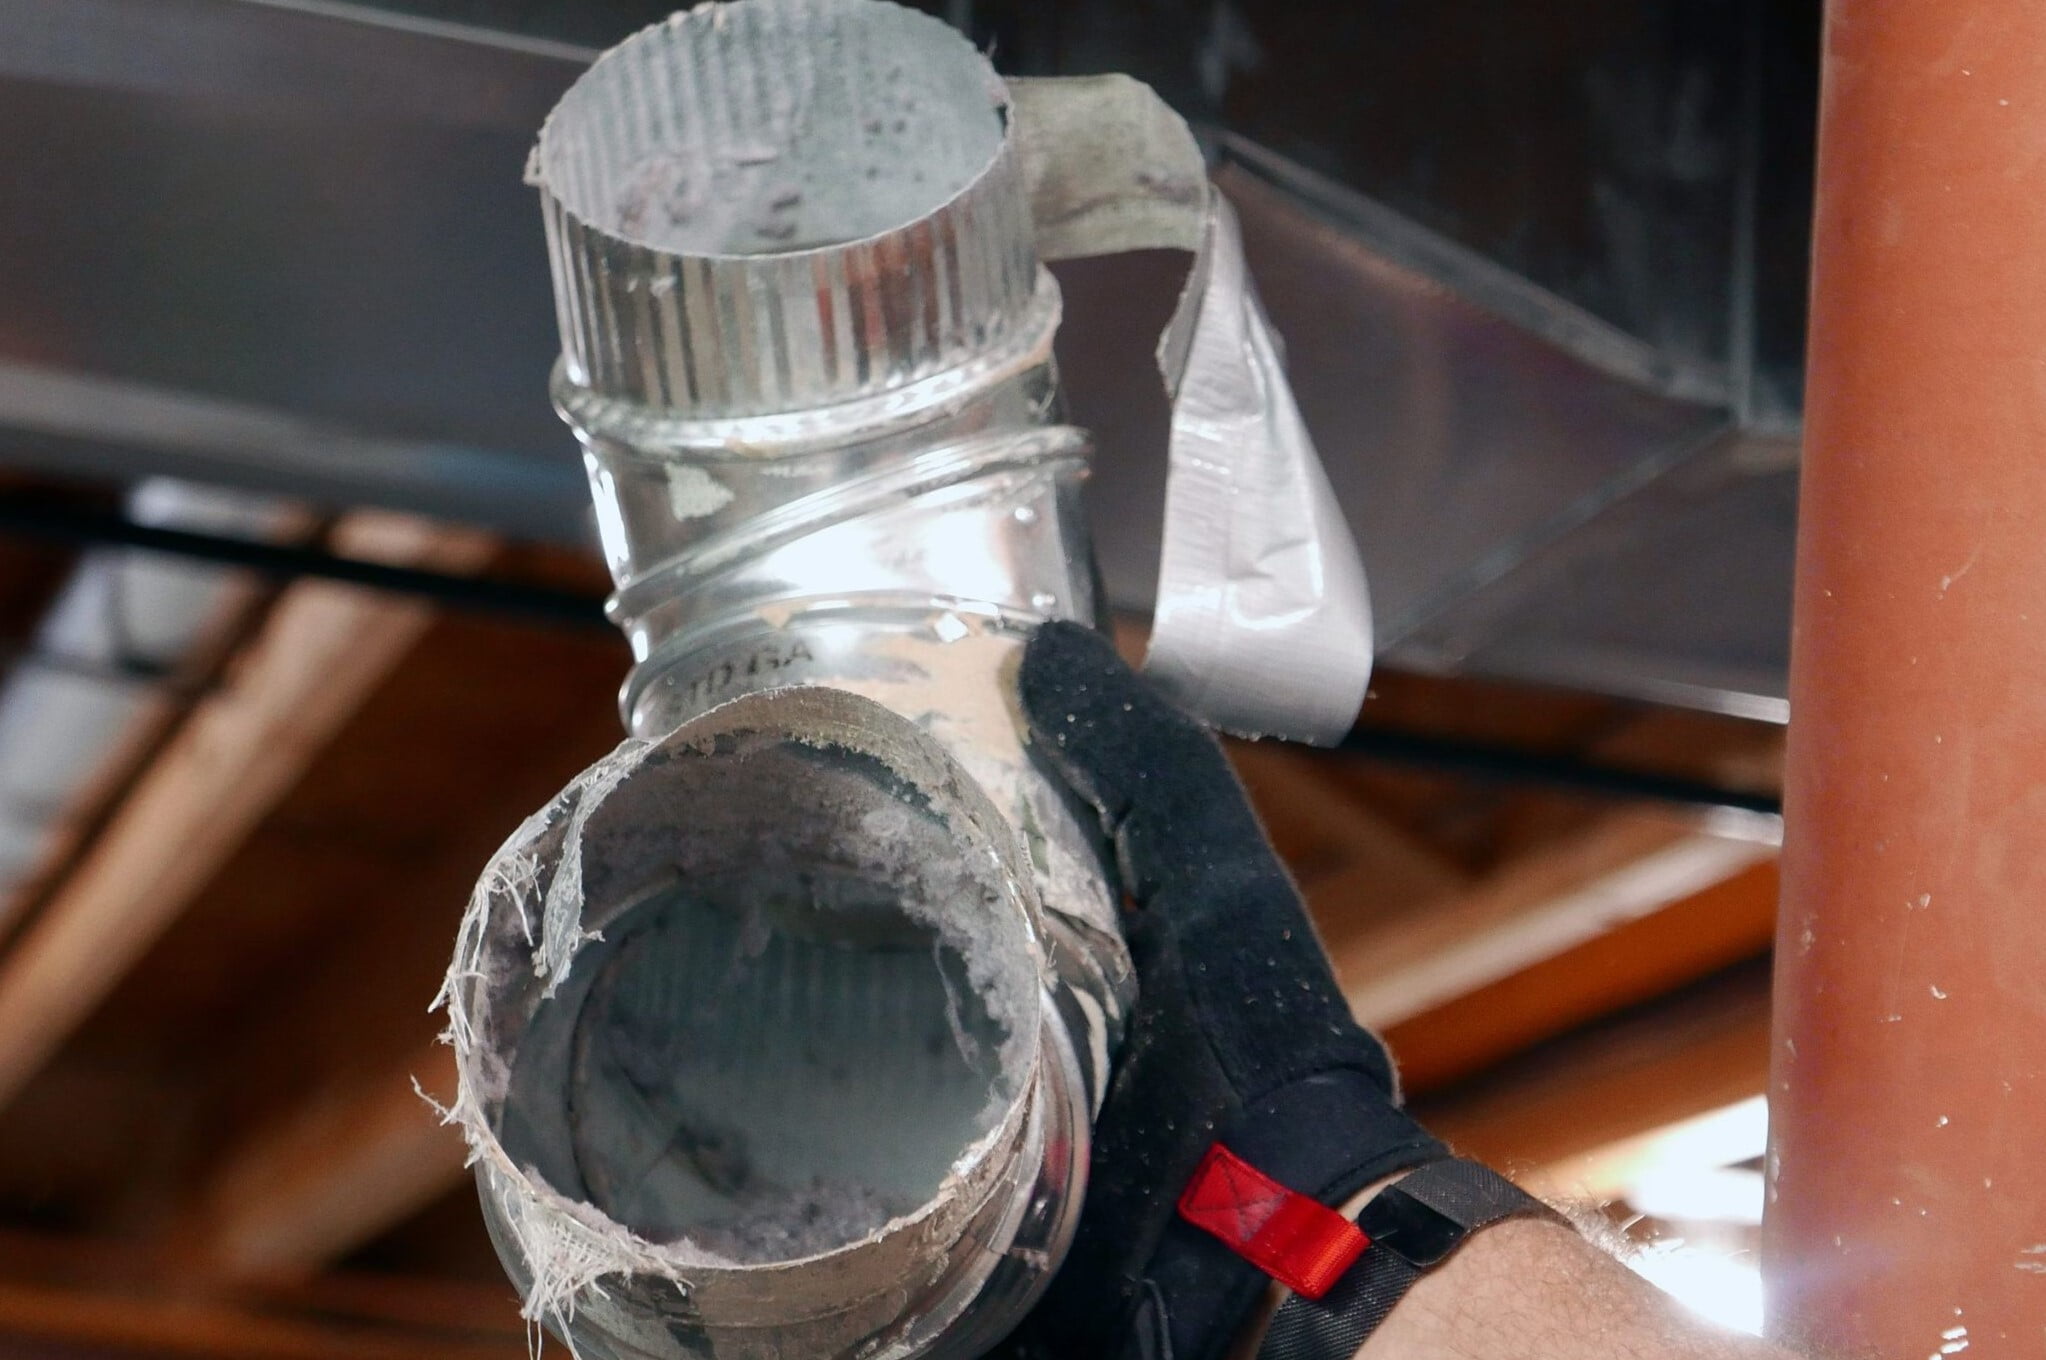
- Inspect the vent pipe: Carefully examine the existing vent pipe for any signs of damage, such as cracks, holes, or disconnections. Check if there is any lint buildup or blockage that may be hindering airflow. If you notice any visible issues, it’s a clear indication that the vent pipe needs replacement.
- Check the vent hood: Inspect the vent hood from the outside of your home. Look for any signs of damage or deterioration, such as rust or debris accumulation. A damaged or malfunctioning vent hood can cause problems with proper ventilation and should be replaced along with the vent pipe.
- Assess the dryer performance: Pay attention to how well your dryer is functioning. If you notice that it is taking longer than usual to dry your clothes or if the clothes are not drying evenly, it could be a sign of a clogged or restricted vent pipe. This indicates the need for a replacement.
- Consider the age of the vent pipe: Take into account the age of the existing vent pipe. If it’s several years old or shows signs of wear and tear, it’s a good idea to replace it with a new vent pipe. Newer vent pipes are often more efficient and durable.
- Evaluate the vent pipe material: Determine the type of material used for the existing vent pipe. Plastic or flexible foil vent pipes are prone to damage and lint buildup, which can pose a fire hazard. It’s recommended to replace these types of vent pipes with rigid metal or aluminum pipes for improved safety and airflow.
By thoroughly assessing the situation, you’ll have a better understanding of what needs to be replaced and any additional measures required. This evaluation will guide you in selecting the right materials and ensure that you tackle the necessary repairs and replacements to restore proper ventilation for your dryer.
Step 2: Gather Necessary Supplies
Now that you have assessed the situation and determined that the dryer vent pipe needs to be replaced, it’s time to gather all the necessary supplies. Having the right tools and materials on hand will ensure a seamless and successful replacement process. Follow these steps to gather the necessary supplies:
- Measure the existing vent pipe: Use a tape measure to measure the length and diameter of the existing vent pipe. This will help you determine the exact size of the replacement vent pipe you’ll need.
- Purchase a new vent pipe: Visit your local home improvement store or browse online to find a replacement vent pipe that matches the measurements taken. Select a vent pipe made of sturdy materials like aluminum or rigid metal for maximum durability and airflow.
- Select a vent hood: Choose a vent hood that complements the design of your home while ensuring proper ventilation and protection against pests and weather elements. Consider factors like the location of the vent and the climate conditions in your area when making your selection.
- Collect necessary tools: Refer to the list of tools mentioned earlier in this guide and gather all the required tools. Make sure they are in good working condition and easily accessible during the replacement process.
- Acquire additional materials: Depending on your specific situation, you may need additional materials such as screws, anchors, caulk, or duct tape. Determine if any of these materials are necessary and add them to your supply list.
- Organize your supplies: Once you have gathered all the necessary supplies, organize them in a convenient and accessible location. This will save you time during the replacement process and ensure that you have everything you need at hand.
By following these steps and gathering all the necessary supplies beforehand, you’ll be well-prepared to replace your dryer vent pipe without any unexpected interruptions. Remember to double-check your measurements and ensure that you have the right materials and tools for the job.
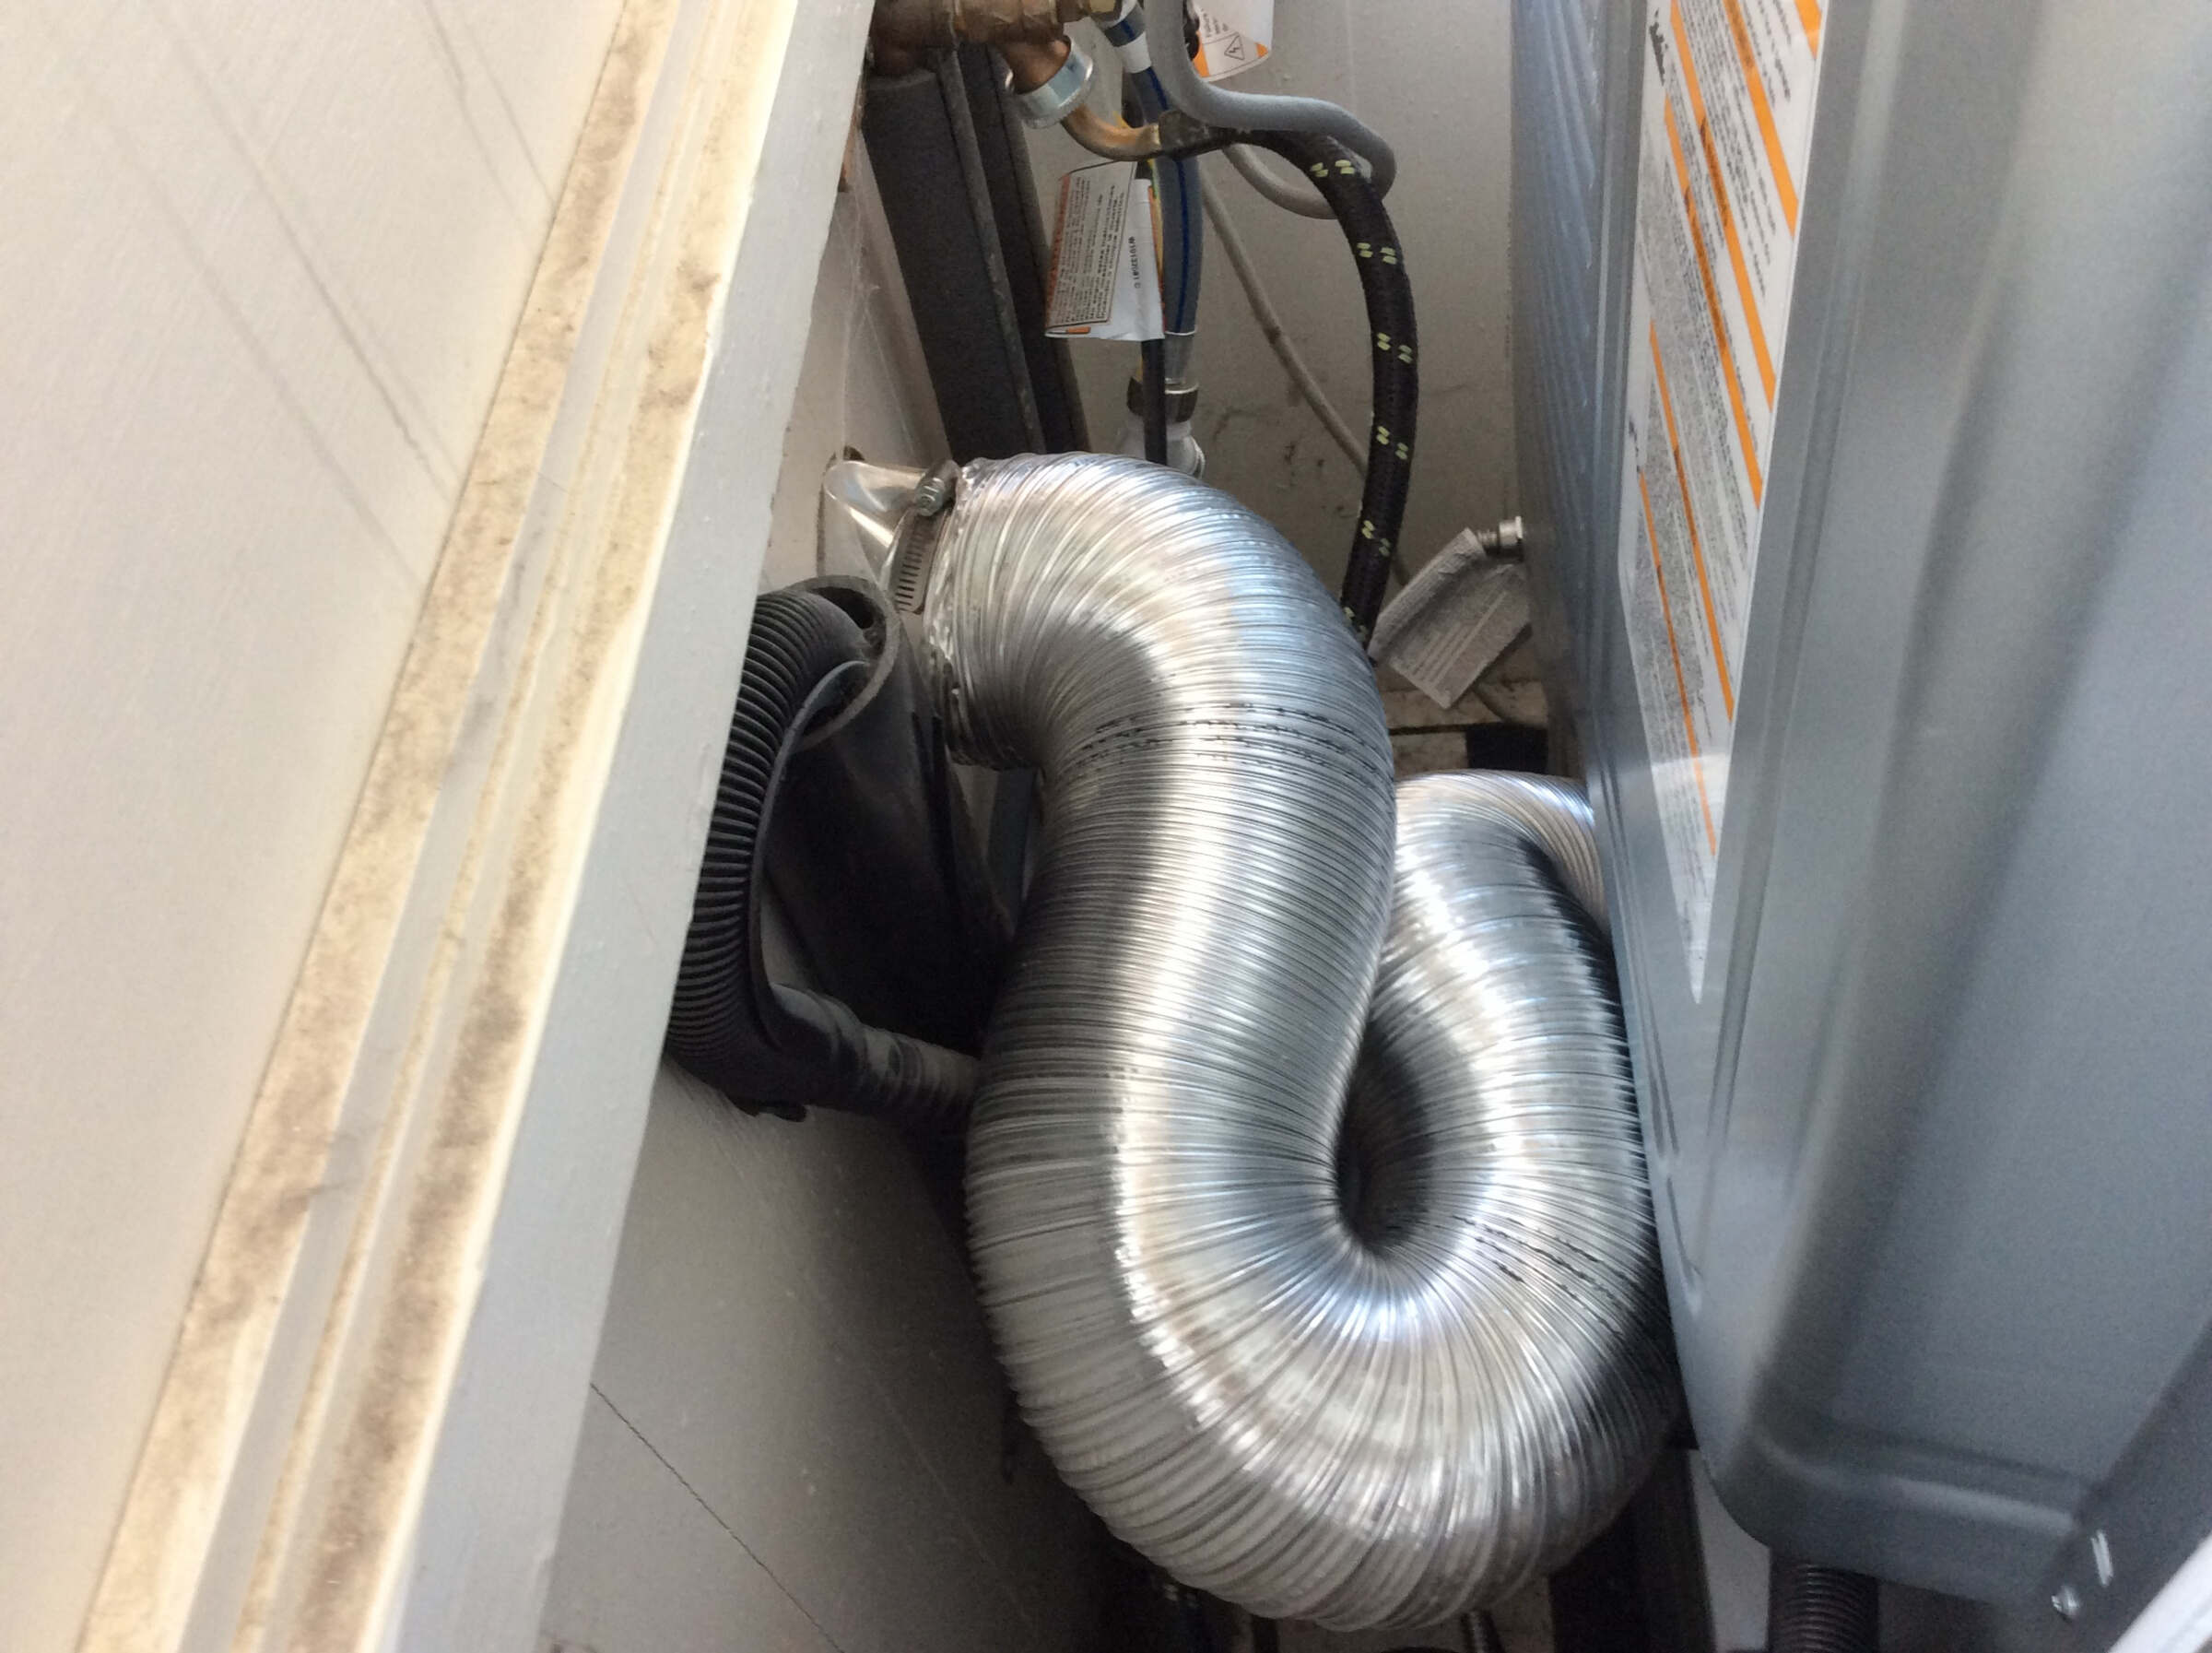
Step 3: Disconnect the Dryer
Before you can remove the old vent pipe, it’s important to disconnect the dryer from the power source and detach it from the existing vent pipe. Follow these steps to safely disconnect the dryer:
- Turn off the dryer: Ensure that the dryer is turned off and unplugged from the power outlet. This will prevent any accidental injuries or electrical hazards during the disconnection process.
- Move the dryer away from the wall: Gently pull the dryer away from the wall, creating enough space to access the back of the machine. Be cautious not to damage the flooring or the dryer itself during this process.
- Loosen the clamp or connector: Locate the clamp or connector that connects the vent pipe to the dryer’s exhaust outlet. It is typically secured with a screw or clamp mechanism. Use an adjustable wrench or screwdriver to loosen the clamp or unscrew the fasteners, allowing the vent pipe to disconnect from the dryer.
- Clean the dryer’s exhaust outlet: Once the vent pipe is detached, take a moment to inspect and clean the dryer’s exhaust outlet. Remove any built-up lint or debris using a brush or vacuum attachment. This step will help ensure proper ventilation and prevent future clogs.
By carefully following these steps, you can safely disconnect the dryer from the existing vent pipe. Remember to handle the dryer with care and keep a steady grip to avoid any accidents or damage. With the dryer detached, you can now proceed to the next step of removing the old vent pipe.
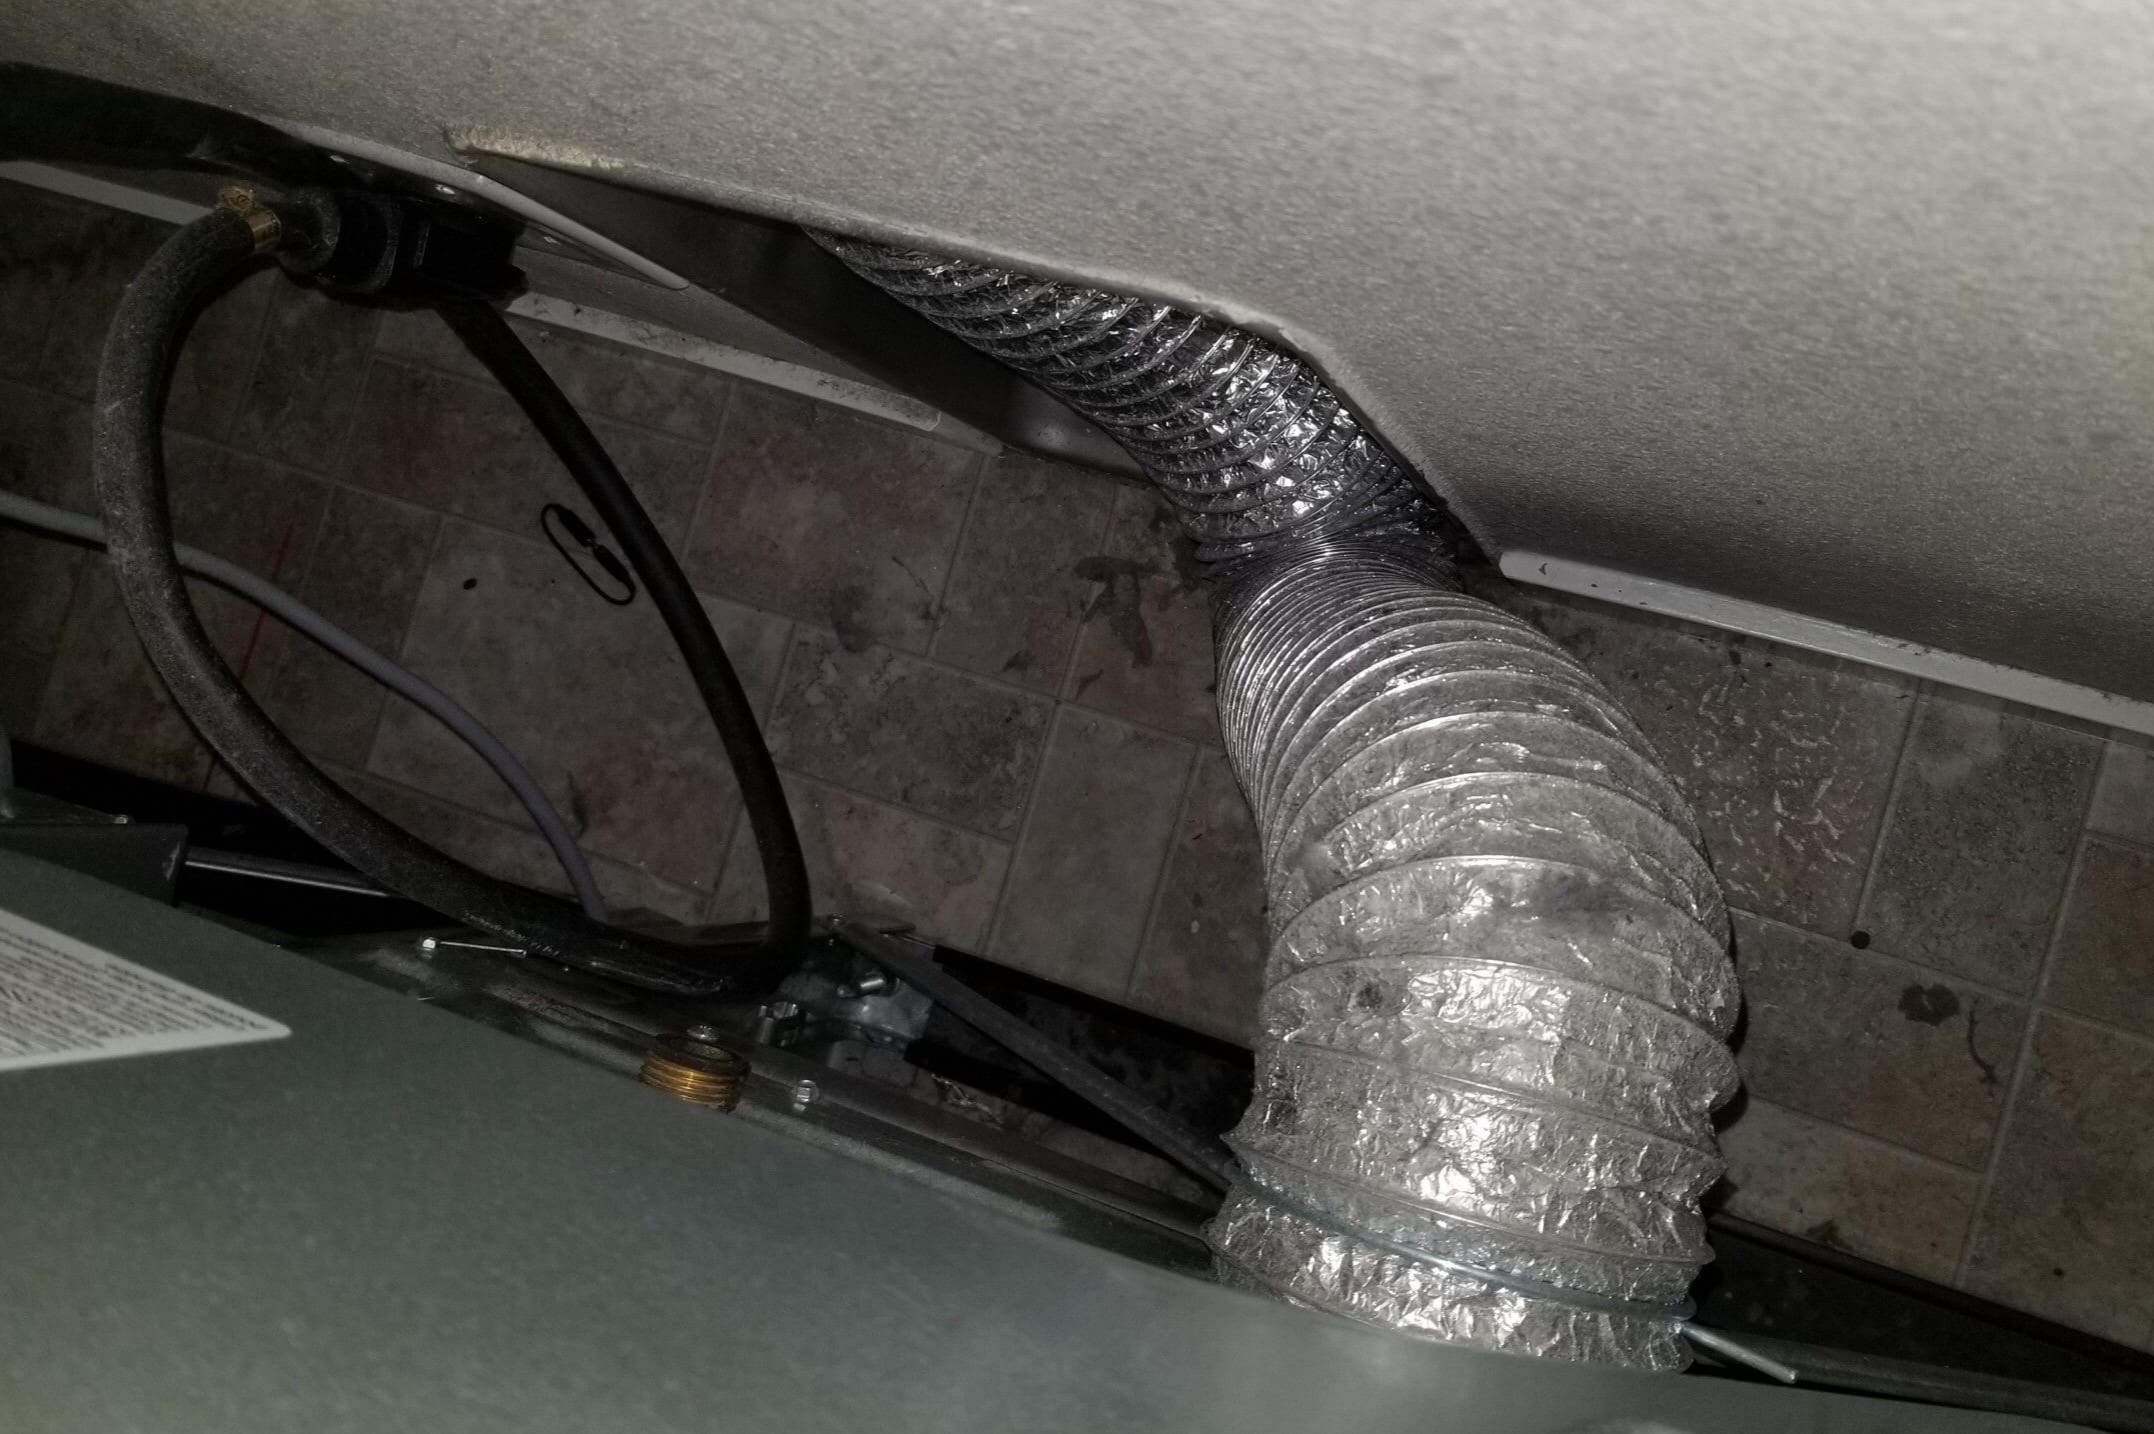
Step 4: Remove the Old Vent Pipe
With the dryer disconnected, it’s time to remove the old vent pipe. Follow these steps to safely remove the old pipe:
- Inspect the old vent pipe: Take a close look at the old vent pipe and assess its condition. Identify any screws, clamps, or fasteners that are securing it to the wall or ceiling.
- Unscrew or loosen fasteners: Use a screwdriver or adjustable wrench to unscrew or loosen any screws or clamps that are holding the vent pipe in place. Be careful not to damage the wall or ceiling during this process.
- Gently pull the vent pipe out: Once the fasteners are loosened, gently pull the old vent pipe out of the wall or ceiling. If the pipe is stuck or difficult to remove, consider using a twisting motion while pulling it out.
- Inspect the vent opening: After removing the old pipe, inspect the vent opening in the wall or ceiling. Ensure there is no debris or blockage that could hinder the installation of the new vent pipe.
- Clean the surrounding area: Take a moment to clean the area around the vent opening. Remove any dust, lint, or debris using a vacuum or a brush. This will ensure a clean and smooth surface for the installation of the new vent pipe.
It’s important to handle the old vent pipe with care and avoid any sudden movements that could cause damage or injury. By following these steps, you can safely and effectively remove the old vent pipe, making way for the installation of the new pipe in the next steps. With the old pipe removed, you’re one step closer to improving the ventilation and efficiency of your dryer.
Read more: How To Clean A Dryer Vent Pipe
Step 5: Measure and Cut the New Vent Pipe
Now that you have removed the old vent pipe, it’s time to measure and cut the new vent pipe to the appropriate size. Follow these steps to ensure a proper fit:
- Measure the distance: Use a tape measure to measure the distance from the dryer’s exhaust outlet to the vent opening in the wall or ceiling. Ensure you have accurate measurements to avoid any issues with the fit of the new vent pipe.
- Transfer measurements to the new vent pipe: Using a pencil or marker, transfer the measurements you’ve taken onto the new vent pipe. Mark the length that needs to be cut, ensuring it matches the distance you measured in the previous step.
- Double-check measurements: Before cutting the new vent pipe, double-check your measurements to ensure accuracy. It’s better to be cautious and measure twice than to make a mistake and have to start over.
- Cut the vent pipe: After confirming your measurements, use a pair of tin snips or a hacksaw to cut the new vent pipe to the desired length. Make straight, clean cuts to ensure a proper and secure fit.
- Smooth the edges: After cutting the vent pipe, use sandpaper or a file to smooth any rough edges. This will prevent any snagging or damage to the dryer or the vent connections.
Take your time during this step to ensure precise measurements and accurate cuts. It’s crucial to have a properly sized vent pipe to guarantee efficient airflow and an airtight seal. By measuring and cutting the new vent pipe correctly, you’ll be ready to move on to the next step of attaching it to the dryer.
When replacing a dryer vent pipe, make sure to use the correct size and material for your specific dryer. Use aluminum or rigid metal piping for best results, and ensure the pipe is properly secured to prevent leaks and improve airflow.
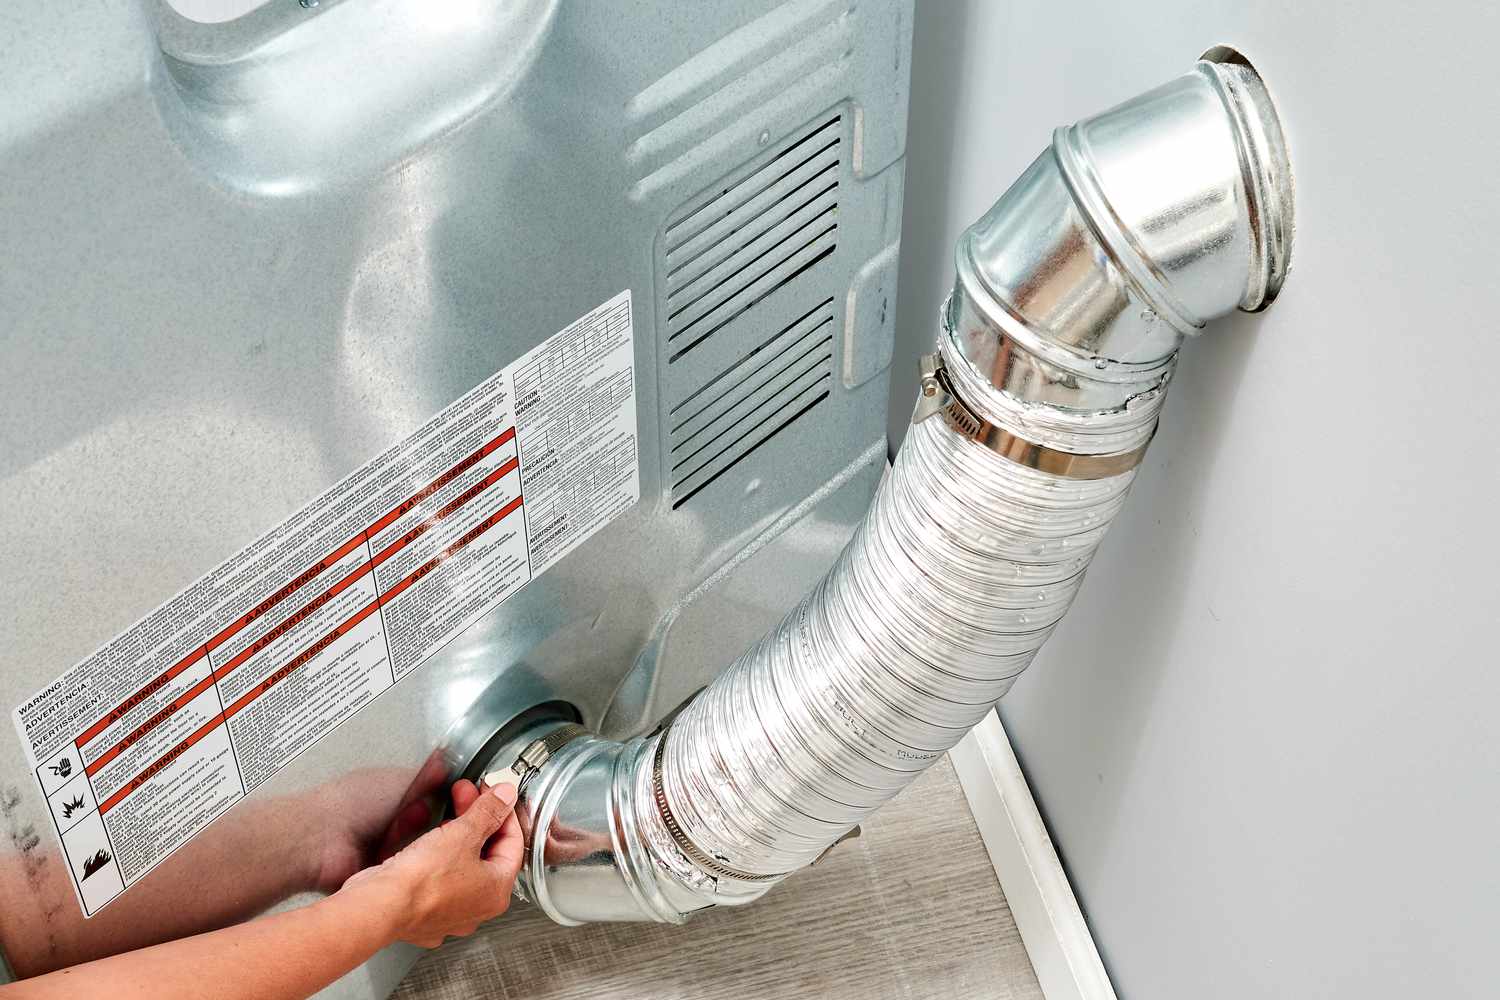
Step 6: Attach the New Vent Pipe to the Dryer
With the new vent pipe cut to the correct size, it’s time to attach it to the dryer’s exhaust outlet. Follow these steps to securely connect the new vent pipe:
- Position the new vent pipe: Position one end of the new vent pipe over the dryer’s exhaust outlet. Ensure a snug fit, with the pipe fully inserted and aligned with the outlet.
- Secure with a clamp or connector: Slide a clamp or connector over the connection point where the vent pipe meets the dryer’s exhaust outlet. Tighten the clamp or connector securely with a screwdriver or adjustable wrench to hold the vent pipe in place.
- Check for proper alignment: Double-check that the vent pipe is properly aligned and straight, without any kinks or bends. This will ensure optimal airflow and prevent any obstruction.
- Tighten any additional connections: If your new vent pipe has additional connections, such as sections that need to be connected, make sure to secure them with clamps or connectors following the manufacturer’s instructions.
- Ensure a tight and secure connection: Give the vent pipe a gentle tug to ensure it is securely attached to the dryer. There should be no movement or looseness in the connection.
Properly attaching the new vent pipe to the dryer’s exhaust outlet is crucial for efficient and safe ventilation. Ensure a secure connection to prevent any air leakage or problems with lint buildup. By following these steps, you can have confidence that the new vent pipe is securely attached and ready for the next step of connecting it to the exterior wall.
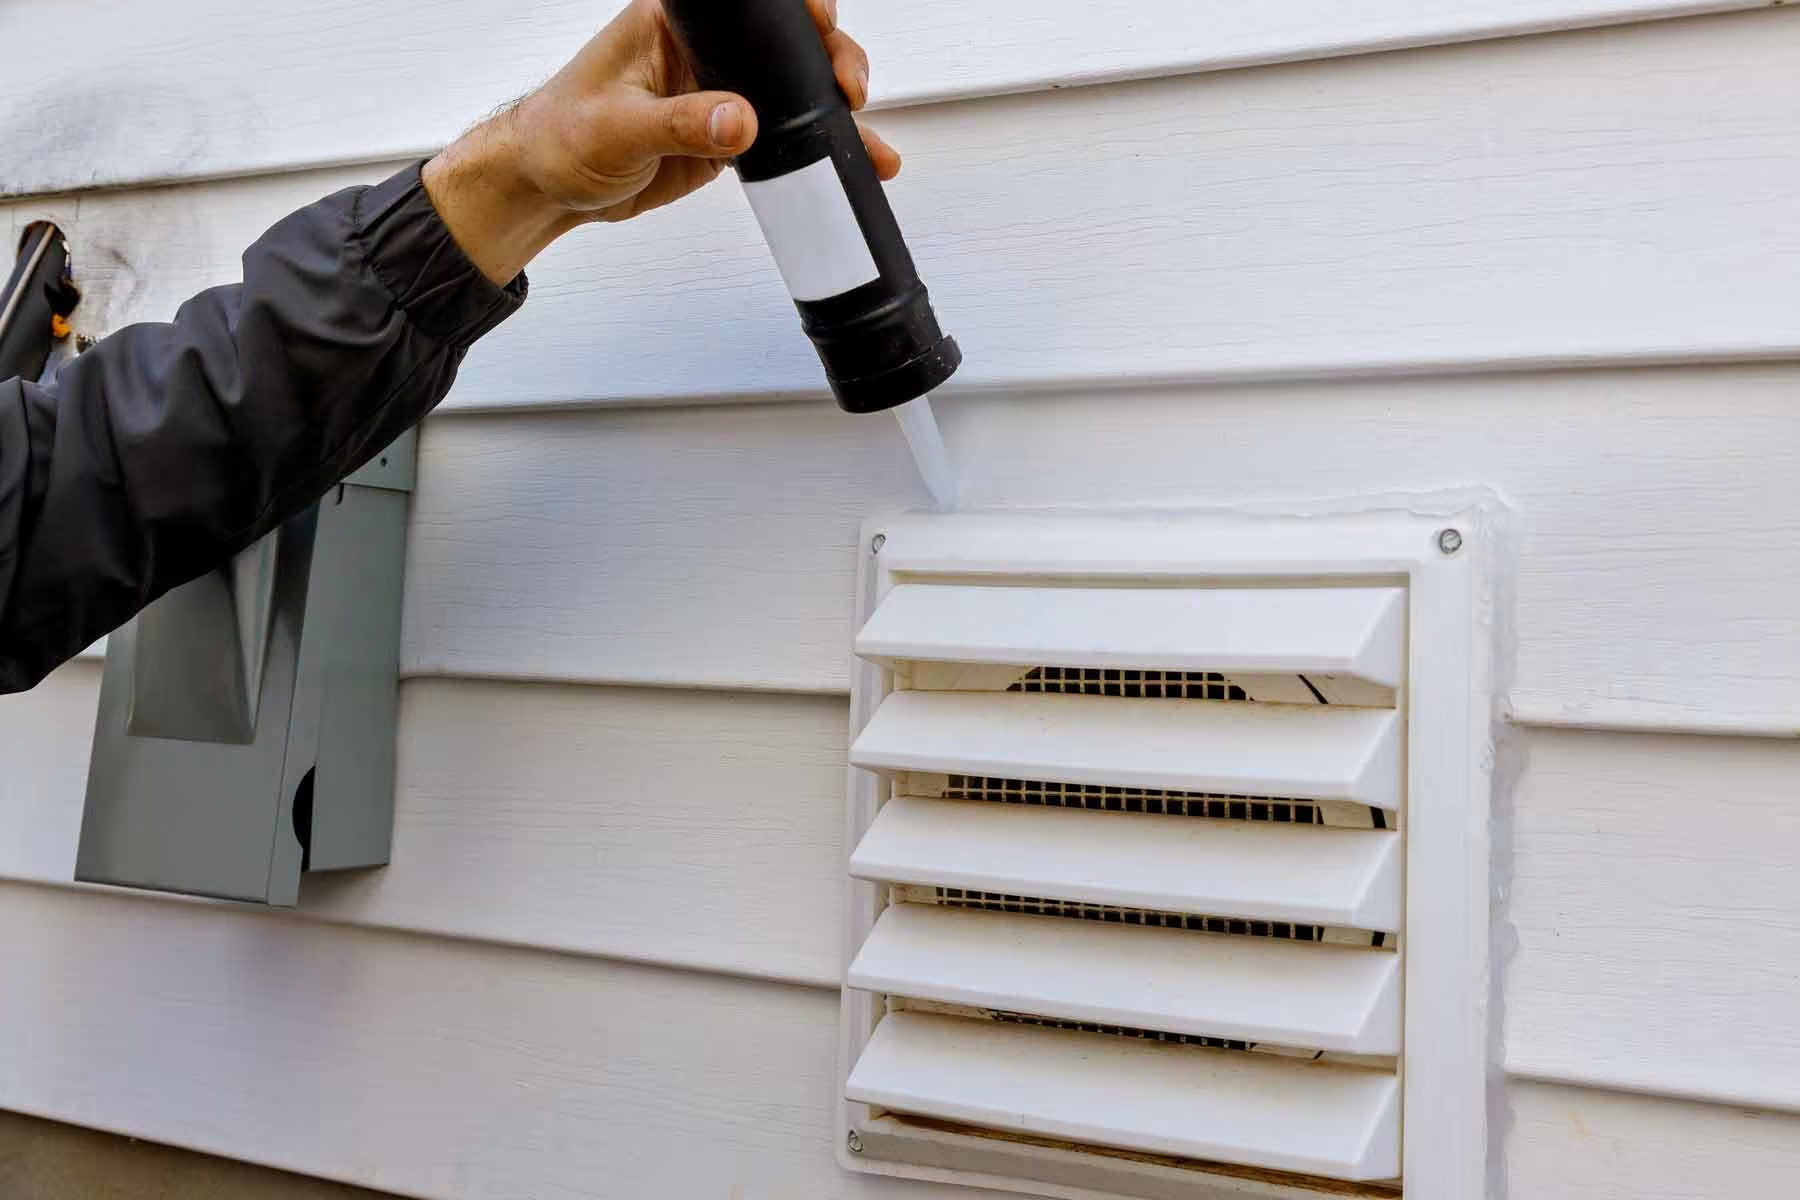
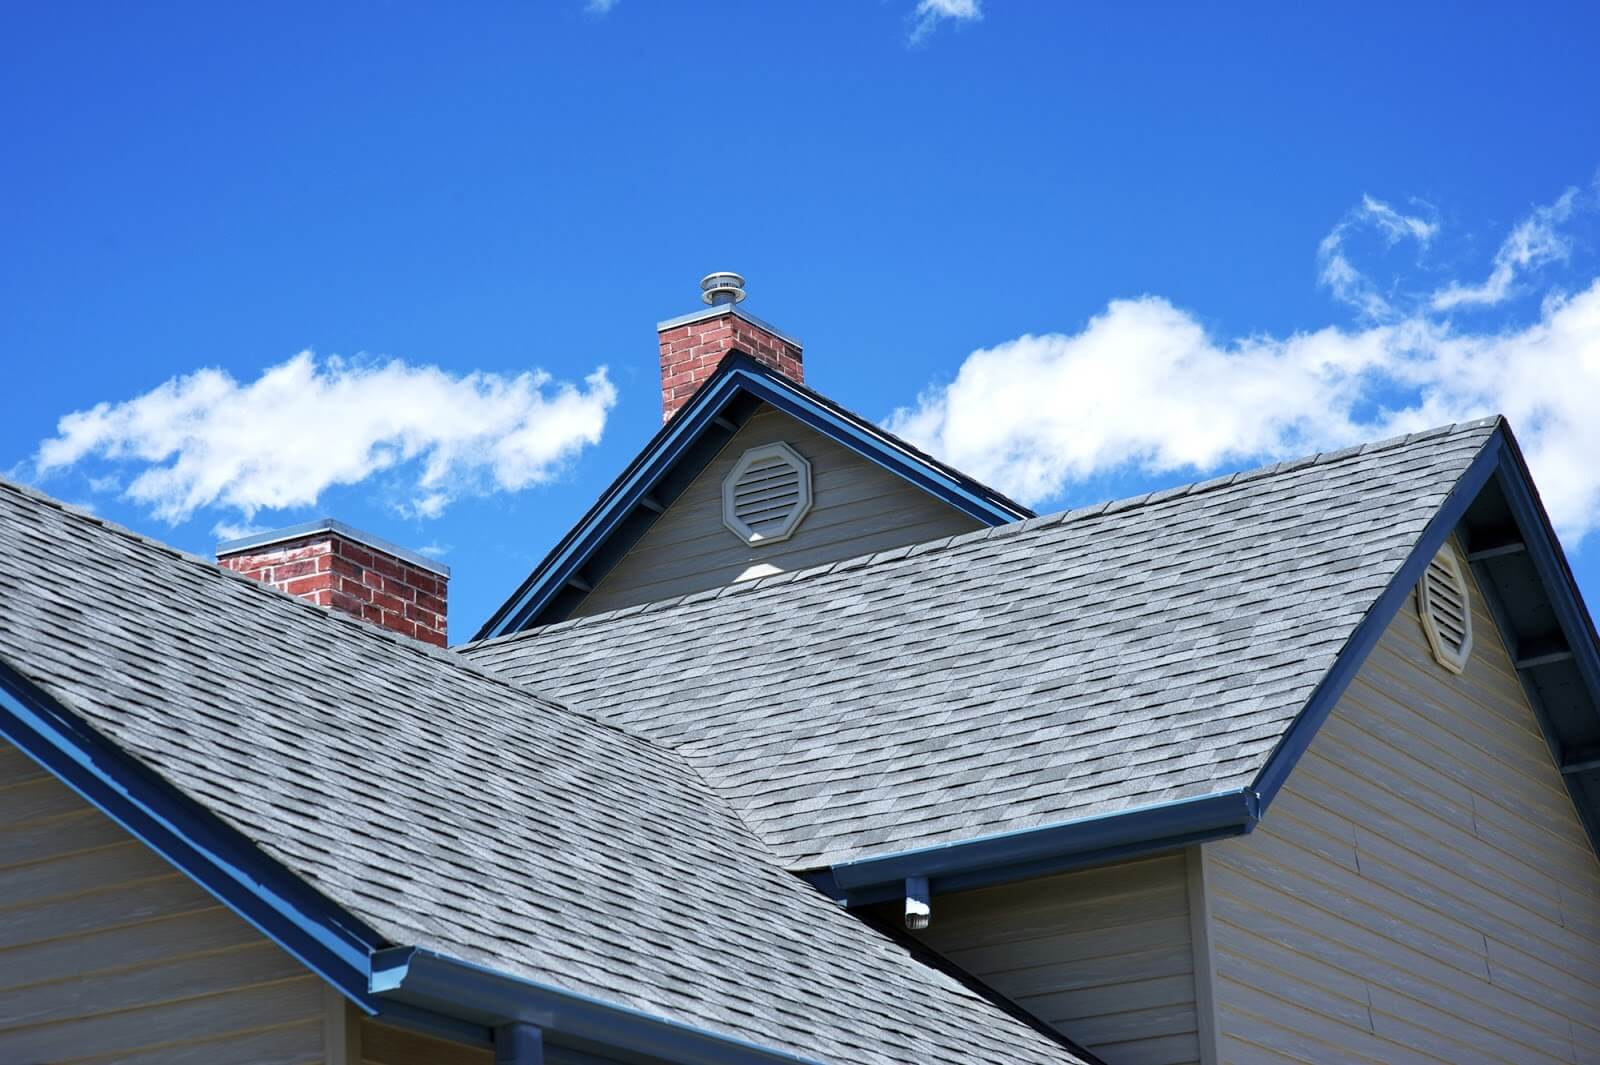
Step 7: Connect the Vent Pipe to the Exterior Wall
After securely attaching the new vent pipe to the dryer, it’s time to connect it to the exterior wall for proper ventilation. Follow these steps to ensure a secure connection:
- Locate the vent opening: Locate the vent opening on the exterior wall where the vent pipe will be connected. Clean any debris or blockage around the opening to ensure a clear pathway for the vent pipe.
- Position the vent hood: Align the vent hood with the vent opening on the exterior wall. Ensure that it is positioned correctly and level with the wall surface.
- Mark the vent hood placement: Use a pencil or marker to mark the location of the screw holes or mounting brackets for the vent hood. These markings will guide you during the installation process.
- Attach the vent hood: Depending on the type of vent hood, use a power drill and appropriate screws or mounting brackets to secure it to the exterior wall. Make sure the vent hood is firmly attached and properly aligned.
- Connect the vent pipe: Slide the other end of the new vent pipe into the vent opening on the exterior wall. Ensure a secure fit and that the pipe is fully inserted into the opening.
- Secure with a clamp: Use a clamp or connector to secure the connection between the vent pipe and the vent opening on the exterior wall. Tighten the clamp or connector appropriately to prevent any air leakage.
- Check for a tight seal: Inspect the connection between the vent pipe and the vent hood on the exterior wall. Ensure that there is a tight seal and no gaps or openings where air can escape.
By following these steps, you can successfully connect the new vent pipe to the exterior wall, completing the ventilation pathway for your dryer. It’s crucial to maintain a secure and airtight connection to prevent any airflow issues or lint buildup. Once the vent pipe is securely connected to the exterior wall, you’re ready to move on to the next step of securing it in place.
Step 8: Secure the Vent Pipe in Place
With the vent pipe successfully connected to the exterior wall, it’s important to secure it in place to ensure stability and prevent any movement. Follow these steps to securely fasten the vent pipe:
- Determine the mounting method: Assess the area surrounding the vent pipe to determine the appropriate method for securing it. Depending on the setup, you may need screws, anchors, or straps to fasten the vent pipe.
- Mark the mounting points: Use a pencil or marker to mark the locations where the vent pipe will be secured. Ensure the markings align with the mounting brackets, straps, or other fastening mechanisms you plan to use.
- Install mounting brackets or straps: If using mounting brackets or straps, position them at the marked locations and secure them to the wall or ceiling using screws. Ensure they are solidly anchored and provide ample support for the vent pipe.
- Attach the vent pipe to the mounting brackets or straps: Once the mounting brackets or straps are securely in place, attach the vent pipe to them. Use screws or other fasteners provided by the mounting hardware to secure the pipe to the brackets or straps.
- Ensure a stable and secure connection: Double-check that the vent pipe is securely fastened and does not wobble or move. Give it a gentle tug to ensure it is firmly held in place.
By following these steps, you can effectively secure the vent pipe in place, providing stability and assurance that it will remain fixed during regular use. A secure vent pipe ensures proper airflow and prevents any potential hazards or damage. Completing this step brings you one step closer to completing the dryer vent pipe replacement process.
Read more: How To Replace Dryer Vent
Step 9: Reconnect the Dryer
Now that the new vent pipe is securely installed, it’s time to reconnect the dryer to complete the replacement process. Follow these steps to safely reconnect the dryer:
- Position the dryer: Move the dryer back into its original position, aligning it with the vent pipe and ensuring there is sufficient space for proper airflow.
- Attach the vent pipe to the dryer: Slide the open end of the vent pipe onto the dryer’s exhaust outlet, ensuring a secure and tight fit. Use a clamp or connector to fasten the vent pipe to the dryer, tightening it with a screwdriver or adjustable wrench.
- Verify the alignment: Double-check that the vent pipe is straight and aligned properly with the dryer’s exhaust outlet. There should be no kinks or bends that could restrict airflow.
- Reconnect the power: Plug the dryer back into the power outlet and ensure it is properly connected.
- Check for proper ventilation: Turn on the dryer and run it briefly to confirm that there is proper airflow through the new vent pipe. Feel for any air leakage or abnormalities that may require adjustment.
It’s important to ensure a secure and tight connection between the dryer and the new vent pipe. This will promote efficient airflow and prevent any potential safety hazards. By following these steps, you can confidently reconnect the dryer and complete the dryer vent pipe replacement process.
Step 10: Test the Ventilation System
After completing the dryer vent pipe replacement, it’s crucial to test the ventilation system to ensure it is functioning properly. Follow these steps to test the ventilation system:
- Turn on the dryer: Start by turning on the dryer and selecting a heat setting.
- Observe the airflow: Stand near the exterior vent opening and observe the airflow. You should feel a steady flow of warm air being expelled from the vent.
- Check for obstructions: While the dryer is running, check for any signs of lint or debris coming out of the vent. If you notice any blockages or excessive lint, it may indicate an issue with the vent pipe or the vent hood.
- Monitor dryer performance: Pay attention to the dryer’s performance during a regular drying cycle. If clothes are drying in a timely manner and without any issues, it indicates that the new vent pipe is functioning properly.
- Inspect the vent pipe periodically: Keep an eye on the vent pipe over time. Regularly check for any signs of lint buildup, damage, or loose connections. Promptly address any issues to maintain the efficiency and safety of the ventilation system.
By testing the ventilation system, you can ensure that the new vent pipe is working effectively and providing proper airflow. A well-functioning ventilation system not only improves dryer performance but also reduces the risk of lint buildup and potential fire hazards. Remember to periodically inspect and clean the vent pipe to maintain optimal efficiency.
Congratulations! You have successfully replaced your dryer vent pipe and taken important steps to improve the efficiency and safety of your dryer. Regular maintenance and inspection of the vent pipe will go a long way in ensuring the longevity of your dryer and preventing any potential issues. Now you can enjoy the peace of mind that comes with a properly functioning dryer ventilation system.
Conclusion
Replacing a dryer vent pipe is an important maintenance task that ensures efficient dryer operation and reduces the risk of fire hazards. By following the step-by-step process outlined in this guide, you can successfully replace your dryer vent pipe and improve the ventilation system in your home. Here’s a summary of the key steps:
- Assess the situation and determine if a vent pipe replacement is necessary.
- Gather all the necessary tools and materials for the project.
- Safely disconnect the dryer from the power source and detach it from the old vent pipe.
- Remove the old vent pipe, inspecting it for any signs of damage or wear.
- Measure and cut the new vent pipe to the appropriate size.
- Attach the new vent pipe to the dryer, ensuring a secure connection.
- Connect the vent pipe to the exterior wall, using a vent hood to protect against weather elements and pests.
- Secure the vent pipe in place using the appropriate mounting method.
- Reconnect the dryer to the new vent pipe.
- Finally, test the ventilation system to ensure it is functioning properly.
Properly maintaining your dryer vent pipe is vital for optimal dryer performance and the safety of your home. Regularly inspect the vent pipe for any signs of damage or obstruction, and clean it as needed to prevent lint buildup. If you notice any issues or concerns, consult a professional to ensure the vent pipe is in good working condition.
Remember, safety should always be a top priority when working with any home maintenance projects. Take the necessary precautions, use the appropriate tools and materials, and if you’re uncertain about any steps, seek the assistance of a professional.
By replacing your dryer vent pipe, you’re taking an important step towards maintaining a safe and efficient dryer system in your home. Regular maintenance and inspection of the vent pipe will contribute to the longevity of your dryer and provide peace of mind. So, get started on replacing your dryer vent pipe and enjoy a properly functioning dryer for years to come!
Frequently Asked Questions about How To Replace A Dryer Vent Pipe
Was this page helpful?
At Storables.com, we guarantee accurate and reliable information. Our content, validated by Expert Board Contributors, is crafted following stringent Editorial Policies. We're committed to providing you with well-researched, expert-backed insights for all your informational needs.