Home>Home Security and Surveillance>How Clean An Outdoor Camera
Home Security and Surveillance
How Clean An Outdoor Camera
Modified: March 6, 2024
Ensure the safety of your home with our outdoor camera cleaning guide. Discover effective tips for maintaining your home security and surveillance equipment with ease.
(Many of the links in this article redirect to a specific reviewed product. Your purchase of these products through affiliate links helps to generate commission for Storables.com, at no extra cost. Learn more)
How to Clean an Outdoor Camera
Outdoor security cameras play a crucial role in protecting our homes and properties. However, over time, they can accumulate dirt, dust, and grime, which can affect their performance and image quality. Regular cleaning is essential to ensure that your outdoor camera continues to function optimally. In this article, we will discuss how to effectively clean an outdoor camera and keep it in excellent condition.
Read more: How To Hide An Outdoor Camera
Tools and Materials Needed
- Soft microfiber cloth
- Mild detergent or lens cleaning solution
- Lens cleaning brush or blower
- Distilled water (optional)
- Compressed air canister (optional)
Precautions to Take
Before starting the cleaning process, it’s important to take a few precautions:
- Switch off the camera and disconnect the power source to prevent any accidents.
- Protect sensitive parts, such as the lens and ports, from water or cleaning solution by covering them with a piece of cloth or paper towel.
- Avoid using harsh or abrasive cleaning materials that can scratch or damage the camera.
Cleaning the Camera Body
Begin by gently wiping the camera body with a soft microfiber cloth to remove any dust or debris. If there are stubborn stains, lightly dampen the cloth with a mild detergent or lens cleaning solution and wipe the affected areas. If necessary, you can rinse the cloth with distilled water and repeat the process. Finally, ensure the camera body is thoroughly dried before reconnecting the power.
Cleaning the Camera Lens
When cleaning the camera lens, it’s important to be gentle and cautious to avoid scratching the surface. Start by using a lens brush or blower to remove any loose dust particles. Apply a small amount of lens cleaning solution to a microfiber cloth and gently wipe the lens surface in a circular motion. Check for any smudges or fingerprints and repeat the cleaning process if needed.
Read more: How To Mount An Outdoor Camera
Cleaning the Camera Housing
If your outdoor camera has a housing, it’s essential to clean it as well. Remove the housing, if possible, and wipe it with a damp cloth or sponge. For tough stains, you can use a mild detergent or cleaning solution. Rinse the housing with water and dry it thoroughly before reattaching it to the camera.
Tips for Maintenance and Longevity
Regular maintenance is key to ensuring the longevity and optimal performance of your outdoor camera:
- Regularly inspect the camera for any signs of dirt, debris, or damage.
- Clean the camera at least once every three months, or more frequently if your area is prone to dust or harsh weather conditions.
- Consider using protective covers or cases for added protection against the elements.
- Follow the manufacturer’s instructions and guidelines for specific cleaning and maintenance recommendations for your camera model.
By following these cleaning and maintenance tips, you can keep your outdoor camera in top-notch condition, ensuring reliable surveillance and peace of mind for your home security needs.
Note: Before performing any cleaning or maintenance on your outdoor camera, please refer to the manufacturer’s guidelines and instructions specific to your camera model to ensure proper care and avoid any potential damage.
Key Takeaways:
- Regularly cleaning your outdoor camera is essential for maintaining optimal performance, clear image quality, and longevity. Follow manufacturer’s guidelines and take precautions to ensure safe and effective cleaning.
- By keeping your outdoor camera clean and well-maintained, you can enjoy enhanced security, peace of mind, and reliable surveillance for your home and property. Regular maintenance ensures effective monitoring and protection against potential security threats.
Introduction: Importance of Cleaning an Outdoor Camera – Benefits of Regular Cleaning
When it comes to home security, outdoor cameras are a vital component in safeguarding our homes and properties. These cameras constantly monitor our surroundings, deterring potential intruders and providing valuable evidence in the event of a security breach. However, to ensure the effectiveness and longevity of your outdoor camera, regular cleaning is crucial.
Here are a few reasons why cleaning your outdoor camera is of utmost importance:
1. Maintaining Optimal Performance
Outdoor cameras are exposed to various weather conditions such as rain, dust, wind, and extreme temperatures. Over time, these elements can cause dirt, debris, and grime to accumulate on the camera body and lens, affecting its performance. Regular cleaning ensures that the camera functions optimally, providing clear and accurate monitoring of your property.
Read more: How To Install A Vivint Outdoor Camera
2. Enhancing Image and Video Quality
A clean lens is essential for capturing sharp and clear images. Dust or smudges on the camera lens can result in distorted or blurry footage. By regularly cleaning the lens, you can maintain excellent image and video quality, ensuring that your camera effectively captures important details and faces for identification purposes.
3. Preventing Damage
Outdoor cameras are exposed to various environmental factors that can lead to long-term damage if not addressed. Dust and debris can accumulate inside the camera housing, affecting the internal components and reducing its lifespan. Regular cleaning helps prevent potential damage, prolonging the camera’s functionality and saving you from costly repairs or replacements.
4. Preserving Night Vision Capabilities
Many outdoor cameras are equipped with night vision technology, allowing them to capture clear footage even in low-light or dark conditions. However, dust or dirt on the infrared sensors can obstruct the camera’s night vision capabilities, resulting in poor-quality footage during nighttime surveillance. Regular cleaning ensures that the night vision functionality is preserved, providing reliable monitoring around the clock.
5. Maintaining a Professional Appearance
Clean and well-maintained outdoor cameras not only perform better but also contribute to the overall appearance of your property. A dirty and neglected camera can give the impression that your home lacks proper security measures, potentially making it a target for intruders. Regular cleaning helps maintain a professional look, signaling to potential wrongdoers that your property is well-protected.
Read more: How To Hide An Outdoor Security Camera
6. Peace of Mind
Knowing that your outdoor camera is clean and functioning optimally gives you peace of mind. You can be confident that your home is being properly monitored, and any security threats will be detected and recorded effectively. Regular cleaning ensures that your camera is ready to perform its crucial role in keeping your property safe.
By incorporating regular cleaning into your home security maintenance routine, you can reap numerous benefits, including optimal performance, enhanced image quality, prevention of damage, preserved night vision capabilities, and a professional appearance for your property. So, make sure to give your outdoor camera the attention it deserves and enjoy the peace of mind that comes with a clean and well-maintained surveillance system.
Tools and Materials Needed
When it comes to cleaning your outdoor camera, having the right tools and materials can make the process much easier and more effective. Here are the essential items you’ll need:
1. Soft Microfiber Cloth
A soft microfiber cloth is a must-have tool for cleaning your outdoor camera. This type of cloth is gentle on the camera’s surface and lenses, preventing any scratches or damage. It is highly effective in removing dust, smudges, and fingerprints, leaving your camera clean and spotless.
2. Mild Detergent or Lens Cleaning Solution
For stubborn stains or dirt on the camera body or lens, a mild detergent or lens cleaning solution can be used. Dilute a small amount of mild detergent in water or use a specialized lens cleaning solution. Avoid using harsh or abrasive cleaning agents that can damage the camera’s delicate parts.
Read more: How To Protect Your Outdoor Camera
3. Lens Cleaning Brush or Blower
A lens cleaning brush or blower is essential for removing loose dust particles from the camera lens. These tools provide a gentle and effective way to remove debris without touching or scratching the lens surface. Use the brush to sweep away any loose dust, and then use the blower to blow away any remaining particles.
4. Distilled Water (Optional)
Distilled water can be used to rinse the camera body or cloth after using detergent or cleaning solution. It helps remove any residue or soap film, ensuring a clean and residue-free surface. However, this step is optional and should be done sparingly to avoid excessive moisture on the camera.
5. Compressed Air Canister (Optional)
A compressed air canister can be useful for blowing away dust and debris from hard-to-reach areas of the camera. This tool provides a burst of clean, dry air that helps dislodge particles without any physical contact. However, exercise caution when using compressed air to avoid applying too much pressure on delicate camera components.
Having these tools and materials readily available will make the cleaning process efficient and effective. Remember to exercise caution when handling your outdoor camera and follow the manufacturer’s guidelines for any specific cleaning instructions or restrictions. With the right tools and a little bit of care, you can keep your outdoor camera clean and functioning at its best, ensuring optimal performance and longevity.
Precautions to Take
Cleaning an outdoor camera requires taking certain precautions to ensure that you don’t damage the camera or compromise its functionality. Here are some important precautions to keep in mind:
Read more: How To Place Arlo Outdoor Camera
1. Switch off the Camera and Disconnect Power Source
Before you start cleaning your outdoor camera, it’s essential to switch it off and disconnect the power source. This prevents any accidental damage or electrical shock during the cleaning process. Turn off the camera using the designated power switch or by unplugging it from the power outlet.
2. Protect Sensitive Parts from Water or Cleaning Solution
Outdoor cameras have sensitive components, such as the lens and ports, that can be damaged by water or cleaning solution. To protect these parts, cover them with a piece of cloth or paper towel before using any liquid cleaning products. This will help prevent moisture from seeping into the camera and causing potential damage.
3. Avoid Using Harsh or Abrasive Cleaning Materials
Using harsh or abrasive cleaning materials can scratch the camera body or lens and affect their performance. Avoid using rough cloths, paper towels, or abrasive cleaning pads. Instead, opt for a soft microfiber cloth that is gentle on the camera’s surface. Similarly, avoid using strong chemicals or solvents that can strip away coatings or damage the camera’s protective layers.
By taking these precautions, you can clean your outdoor camera safely and effectively. It’s important to remember that different cameras may have specific cleaning instructions or recommendations provided by the manufacturer. Always refer to the camera’s user manual or website for any specific cleaning guidelines to ensure that you clean the camera properly without voiding any warranties.
Regularly cleaning your outdoor camera not only helps maintain its performance and longevity but also ensures that it continues to provide reliable security for your property. By following the recommended precautions and using gentle cleaning methods, you can keep your outdoor camera in excellent condition and enjoy enhanced home security.
Cleaning the Camera Body
The camera body of your outdoor camera can accumulate dirt, dust, and grime over time, affecting its appearance and performance. Cleaning the camera body is essential to maintain its functionality and ensure optimal surveillance. Here’s a step-by-step guide to clean the camera body:
Read more: How To Reset Amcrest Outdoor Camera
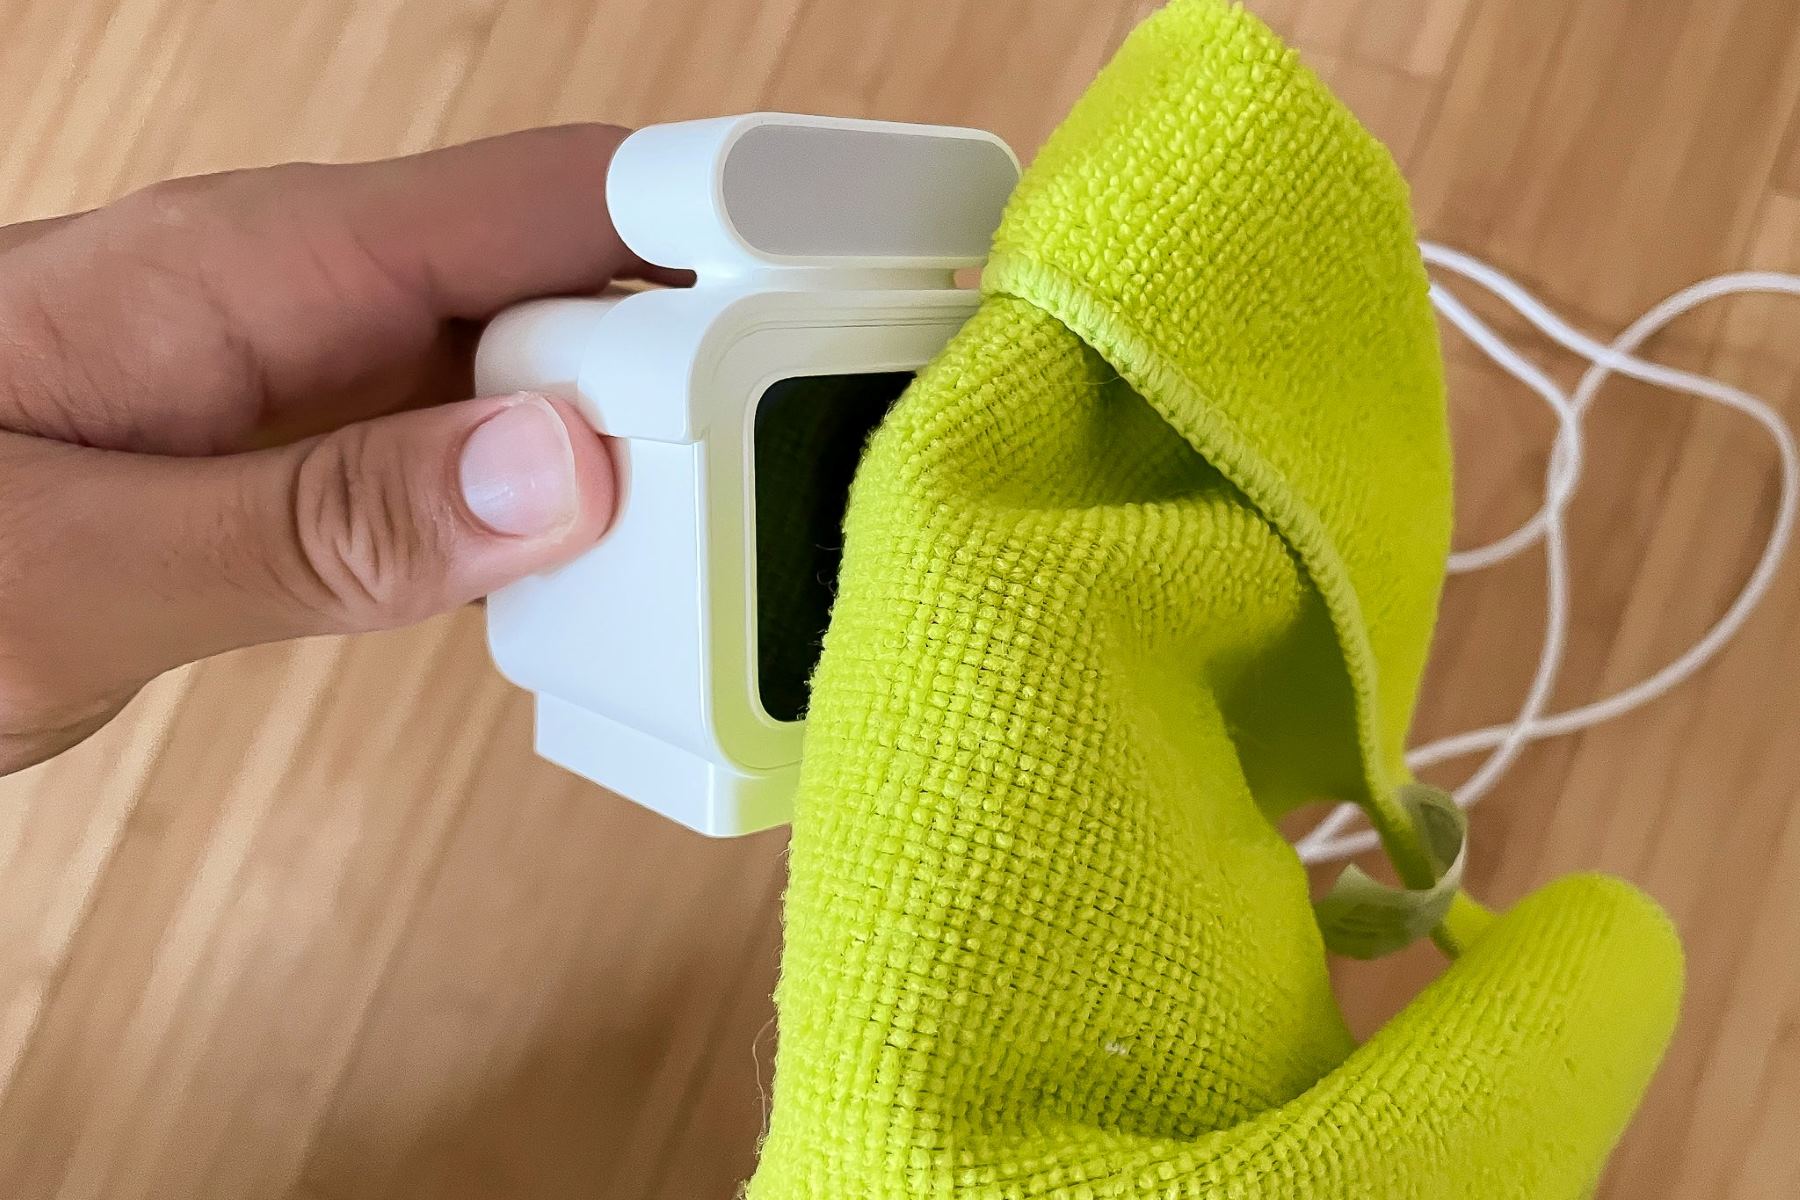
1. Gently Wipe the Camera Body with a Soft Microfiber Cloth
Start by gently wiping the camera body with a soft microfiber cloth. This will help remove any loose particles and surface dust. Make sure to cover the entire camera body, paying attention to the crevices and corners where dirt tends to accumulate.
2. Remove any Debris or Dust from the Surface
Inspect the camera body closely and remove any debris or dust that may have collected on the surface. You can use the microfiber cloth to wipe away stubborn dirt or gently blow it away using a lens cleaning brush or blower. Taking the time to clean all visible particles will ensure a thorough cleaning result.
3. Use Mild Detergent or Lens Cleaning Solution for Stubborn Stains
If there are stubborn stains or marks on the camera body that cannot be removed by wiping alone, you may need to use a mild detergent or lens cleaning solution. Apply a small amount of the solution to the microfiber cloth and gently wipe the affected area. Be cautious not to saturate the cloth or apply excessive pressure that could damage the camera’s surface.
4. Rinse with Distilled Water (if necessary)
If you have used a cleaning solution, it’s important to rinse the camera body to remove any residue. You can optionally rinse with distilled water to ensure a thorough cleanse. Dampen a clean portion of the microfiber cloth or use a separate damp cloth to gently wipe the camera body, removing any leftover cleaning solution.
Read more: How To Mount Wyze Outdoor Camera
5. Dry the Camera Body Thoroughly
After cleaning and rinsing, it’s crucial to dry the camera body thoroughly. Use a dry portion of the microfiber cloth to gently pat the surfaces and absorb any excess moisture. Pay attention to the crevices and corners to ensure that no water remains trapped, as prolonged moisture can potentially damage the camera.
By following these steps, you can keep the camera body of your outdoor camera clean and free from dirt and stains. Regularly cleaning the camera body will not only improve its appearance but also contribute to its overall functionality and longevity.
Cleaning the Camera Lens
The lens of your outdoor camera is crucial for capturing clear and detailed footage. Over time, the lens can collect dust, smudges, and fingerprints, which can affect the image quality. Cleaning the camera lens regularly is essential to ensure optimal performance and clear surveillance. Follow these steps to clean the camera lens:
1. Use a Lens Brush or Blower to Remove Loose Dust Particles
Start by using a lens brush or blower to remove any loose dust particles from the camera lens. Gently brush the lens surface or use the blower to blow away the debris without making direct contact with the lens. This step helps prevent scratches or damage that could be caused by rubbing debris against the lens.
2. Apply a Small Amount of Lens Cleaning Solution to the Cloth
Apply a small amount of lens cleaning solution to a soft microfiber cloth. Avoid using excessive cleaning solution as it may leave residue on the lens. Ensure the cleaning solution is specifically designed for camera lenses to prevent any potential damage. Alternatively, you can use lens cleaning wipes that are pre-moistened with a mild solution.
Read more: How To Use Zeetopin Outdoor Camera
3. Gently Wipe the Lens Surface in a Circular Motion
Gently wipe the lens surface with the dampened cloth in a circular motion. Start from the center of the lens and gradually move outward to ensure thorough cleaning. Be gentle and avoid applying excessive pressure, as this can potentially damage the lens. If necessary, you can fold the cloth to a clean area to avoid spreading any dirt or smudges.
4. Inspect for Any Smudges or Fingerprints
After cleaning, inspect the lens for any remaining smudges or fingerprints. If you notice any stubborn marks, repeat the cleaning process using a fresh portion of the microfiber cloth and a small amount of cleaning solution. Take your time to ensure that the lens is clean and free from any imperfections that can impact the image quality.
5. Repeat the Cleaning Process if Necessary
Depending on the condition of the lens, you may need to repeat the cleaning process until the lens is completely clean. It’s better to be thorough and ensure the lens surface is pristine rather than settle for a partially cleaned lens that can affect the image quality or cause distortions.
By following these steps, you can effectively clean the lens of your outdoor camera and maintain clear and sharp image quality. Regularly cleaning the lens will ensure optimal performance and accurate surveillance, allowing you to capture important details and identify any potential security threats with ease.
Cleaning the Camera Housing
In addition to cleaning the camera body and lens, it is also important to clean the camera housing, especially if it accumulates dirt, dust, or stains. The camera housing not only protects the internal components but also plays a role in the overall appearance of your outdoor camera. Here’s how you can clean the camera housing:
Read more: How Is The Geeni Outdoor Camera Wired In
1. Remove the Camera Housing (if applicable)
Some outdoor cameras have removable camera housings for added protection. If your camera has a removable housing, carefully detach it from the camera body according to the manufacturer’s instructions. This will allow for easier and more comprehensive cleaning.
2. Wipe the Housing with a Damp Cloth or Sponge
Once the camera housing is removed, use a damp cloth or sponge to wipe the exterior surfaces. Make sure the cloth or sponge is only slightly damp to avoid excessive moisture. Wipe all areas of the housing, including the front, back, sides, and any crevices, to remove dirt, dust, or grime that may have accumulated over time.
3. Use Mild Detergent or Cleaning Solution for Tough Stains
If there are stubborn stains or marks on the camera housing that cannot be removed with a damp cloth alone, you may need to use a mild detergent or cleaning solution. Apply a small amount of the solution to the cloth or sponge and gently scrub the affected areas. Avoid using abrasive materials or excessive force, as this can scratch or damage the housing surface.
4. Rinse with Water and Dry Thoroughly Before Reattaching
After cleaning the camera housing, rinse it with water to remove any residue from the cleaning solution. Ensure that all cleaning products are completely rinsed off. Once rinsed, dry the housing thoroughly using a clean cloth or allow it to air dry naturally. Make sure the housing is completely dry before reattaching it to the camera body to prevent moisture from affecting the internal components.
If you encounter any difficulties during the cleaning process or are unsure about removing the camera housing, it is recommended to consult the manufacturer’s instructions or contact their customer support for guidance. They can provide specific recommendations to ensure that you clean your camera housing correctly without causing any damage.
By cleaning the camera housing, you not only enhance the appearance of your outdoor camera but also ensure that it remains in good condition and continues to protect the internal components effectively. Regular cleaning of the camera housing will contribute to the longevity and performance of your outdoor camera.
Read more: How To Wire Outdoor Security Cameras
Tips for Maintenance and Longevity
Maintaining your outdoor camera properly is essential to ensure its longevity, optimal performance, and reliable surveillance. Here are some valuable tips to help you keep your camera in top-notch condition:
1. Regularly Inspect the Camera for Dirt, Debris, or Damage
Perform regular visual inspections of your outdoor camera to check for any signs of dirt, debris, or damage. Dust, leaves, and spider webs can accumulate on the camera, obstructing the lens or affecting its performance. Regularly remove any visible dirt or debris to ensure clear and uninterrupted surveillance.
2. Clean the Camera at Least Once Every Three Months
Make a habit of cleaning your outdoor camera at least once every three months. Regular cleaning helps prevent dirt buildup, maintains image quality, and ensures optimal performance. Adjust the cleaning frequency if you live in an area with more dust or if your camera is exposed to harsh weather conditions frequently.
3. Consider Using Protective Covers or Cases for Added Protection
To provide additional protection for your camera, consider using protective covers or cases. These accessories can shield your camera from dust, rain, UV rays, and other environmental factors that may cause damage over time. They also help to minimize the accumulation of dirt and debris on the camera’s surfaces.
Read more: How To Find Hidden Outdoor Cameras
4. Follow Manufacturer’s Instructions for Specific Cleaning Guidelines
Every outdoor camera may have specific cleaning guidelines recommended by the manufacturer. It is important to refer to and follow these instructions to ensure appropriate care and cleaning methods. Manufacturer guidelines may provide information on specific cleaning solutions to use or avoid, as well as any recommended tools or techniques for cleaning different parts of the camera.
By following these maintenance tips, you can ensure that your outdoor camera remains in optimal condition, performs reliably, and provides clear and accurate surveillance. Regular inspections, cleanings, and using protective covers all contribute to the longevity and efficient operation of your camera. Additionally, adhering to the manufacturer’s instructions guarantees that you are utilizing the proper cleaning techniques to maintain your specific camera model.
Remember, the health of your outdoor camera and the quality of its performance are directly impacted by how well you care for it. By implementing these tips, you can prolong the lifespan of your outdoor camera and enjoy consistent and reliable home security surveillance.
Conclusion: Importance of Keeping Outdoor Cameras Clean – Regular Maintenance for Optimal Performance and Longevity
Keeping your outdoor cameras clean and properly maintained is paramount to ensuring effective home security and surveillance. Regular cleaning and maintenance not only enhance the functionality and longevity of your cameras but also provide clear and accurate monitoring of your property. Here’s a recap of why it’s important to keep your outdoor cameras clean and the benefits of regular maintenance:
Importance of Keeping Outdoor Cameras Clean
Maintaining cleanliness is crucial for outdoor cameras due to their exposure to various environmental elements. Dust, dirt, and debris can accumulate on the camera body and lens, obstructing the view, affecting image quality, and potentially damaging internal components. By keeping your cameras clean, you can ensure optimum performance, reliable surveillance, and timely detection of potential security threats.
Regular Maintenance for Optimal Performance
Regular maintenance is key to maximizing the performance of your outdoor cameras. By inspecting and cleaning them regularly, you can identify and address issues such as loose connections, damaged cables, or lens obstructions. This helps to ensure that your cameras function at their best, providing clear images, accurate motion detection, and seamless operation, so you can have peace of mind knowing your property is well-protected.
Read more: How To Reset An Insteon Outdoor Camera
Longevity of your Outdoor Cameras
Cleaning and maintaining your outdoor cameras significantly extend their lifespan. Dust, moisture, and other contaminants can accumulate over time, leading to corrosion, deterioration, or malfunctions. Regular maintenance helps prevent such issues and allows you to identify potential problems before they escalate. By taking care of your cameras, you can avoid costly repairs or replacements and enjoy optimal performance for years to come.
Enhanced Security and Peace of Mind
Through regular cleaning and maintenance, you can ensure that your outdoor cameras effectively fulfill their critical role in securing your home. Clear and unobstructed lenses guarantee accurate footage, essential for identifying intruders and monitoring any suspicious activities. With properly maintained cameras, you can experience enhanced security and enjoy the peace of mind that comes with knowing your property is well-monitored.
In conclusion, the importance of keeping outdoor cameras clean cannot be overstated. Regular maintenance, including cleaning the camera body, lens, and housing, plays a vital role in maintaining optimal performance, image quality, and overall longevity. By following the manufacturer’s guidelines for cleaning and care, you can ensure that your cameras are in top condition, providing reliable surveillance and protection for your home and property.
So, make it a habit to regularly clean and maintain your outdoor cameras, and you’ll reap the benefits of enhanced security, clear surveillance, and peace of mind – making your home a safer and more secure place.
Frequently Asked Questions about How Clean An Outdoor Camera
Was this page helpful?
At Storables.com, we guarantee accurate and reliable information. Our content, validated by Expert Board Contributors, is crafted following stringent Editorial Policies. We're committed to providing you with well-researched, expert-backed insights for all your informational needs.