Home>Home Security and Surveillance>How To Bring Security Camera Wires Into House
Home Security and Surveillance
How To Bring Security Camera Wires Into House
Modified: October 20, 2024
Learn how to bring security camera wires into your house with this comprehensive guide. Improve your home security and surveillance with expert tips and step-by-step instructions.
(Many of the links in this article redirect to a specific reviewed product. Your purchase of these products through affiliate links helps to generate commission for Storables.com, at no extra cost. Learn more)
Introduction
Welcome to our comprehensive guide on how to bring security camera wires into your house. A home security and surveillance system is an essential investment, providing peace of mind and protection for your property and loved ones. While wireless security cameras are gaining popularity, many still prefer wired systems for their reliability and consistent signal. However, the challenge lies in bringing the wires into your house without compromising aesthetics or functionality.
In this article, we will walk you through the step-by-step process, offering valuable insights and tips to successfully bring security camera wires into your house. Whether you are installing a new system or upgrading an existing one, this guide will help you make informed decisions and ensure a professional and neat installation.
Before we delve into the details, it’s important to note that this guide assumes you have already chosen and purchased a security camera system, and you are now ready to connect the wires to your house. If you haven’t selected a system yet, it’s crucial to consider factors such as the number of cameras needed, the desired video quality, and any specific features you require.
Now, let’s gather our tools and materials and get started on this exciting and empowering project.
Key Takeaways:
- Bringing security camera wires into your house requires careful planning, proper tools, and attention to detail. Choosing the right entry point and securing the wires are crucial for a successful installation.
- Testing and finalizing the installation ensures that your security camera system is fully operational. Thorough testing, cable management, and documentation are essential for peace of mind.
Read more: How To Wire Outdoor Security Cameras
Tools and Materials Needed
Before you begin the process of bringing security camera wires into your house, it’s essential to gather the necessary tools and materials. Having everything on hand will streamline the installation process and prevent delays. Here’s a list of what you’ll need:
- Power drill – for creating holes and running wires through walls
- Hole saw – for drilling larger holes to accommodate connectors and cables
- Fish tape or wire pulling tools – for guiding wires through walls or tight spaces
- Cat5e or Cat6 Ethernet cables – for connecting the cameras to the recorder or network
- Power cables – to supply power to the cameras
- Junction box or electrical box – for housing connections and providing a clean finish
- Electrical tape – for securing and insulating connections
- Cable clips or staples – for securing wires along their path
- Wall plates with brush openings – for a professional-looking cable entry point
- Screwdriver – for securing the wall plates and other components
- Cable tester – to ensure the connectivity of the wires
- Measuring tape – for accurate measurements and alignment
- Painter’s tape – for marking drill holes and cable paths
- Stud finder – to locate wall studs and ensure a secure installation
- Safety goggles and gloves – for personal protection during the installation process
It’s essential to use high-quality materials and tools to ensure a reliable and durable installation. This will help prevent signal loss, interference, and damage to the wires over time. Taking the time to gather the right tools and materials will result in a professional and hassle-free installation experience.
Planning and Preparation
Before diving into the installation process, it’s crucial to take the time to plan and prepare. Proper planning will ensure a smooth installation and help you avoid any potential setbacks down the line. Here are some key steps to follow:
1. Determine the camera locations
Decide on the optimal locations for your security cameras. Consider areas that require surveillance, such as the front and back entrances, garage, driveway, and other vulnerable spots around your property. Take into account factors like lighting conditions and potential blind spots.
2. Measure and map out the cable paths
Take accurate measurements of the distances between the camera locations and the place where you’ll bring the wires into your house. This will help you determine the length of the cables needed. Use painter’s tape to mark the cable paths on the wall or ceiling, ensuring a clear visual guide during the installation process.
Read more: How To Hack Into A Wired Security Camera
3. Identify potential obstacles
Inspect the areas where you plan to route the wires and identify any potential obstacles such as electrical conduits, water pipes, or other hidden barriers behind the walls. This step will help you avoid damaging existing infrastructure and ensure a safe installation.
4. Check for access points
Look for existing access points, such as exterior outlets or holes from previous installations, that you can use to bring the wires into your house. Utilizing these access points can save you time and effort in creating new openings.
5. Consider the aesthetics
Think about how you want the final installation to look. Consider using wall plates with brush openings or other cable management solutions to create a clean and professional appearance. Planning for aesthetics will help maintain the visual integrity of your home while keeping the wires hidden and organized.
6. Ensure power availability
Confirm that there is an available power source near each camera location. If not, plan for the installation of additional electrical outlets or consider using Power over Ethernet (PoE) technology, which allows the transmission of power and data through a single Ethernet cable.
By following these planning and preparation steps, you can save time and avoid unnecessary complications during the installation process. Remember, a well-executed plan is the foundation for a successful security camera wire installation.
Choosing the Entry Point
One of the critical decisions in bringing security camera wires into your house is selecting the entry point. The entry point is the location where the wires will enter the interior space, allowing you to connect them to the camera system. Here are some factors to consider when choosing the entry point:
Accessibility
Choose an entry point that provides easy access to the area where you’ll be installing the security camera system. It should be a location that allows for convenient routing of the wires and ensures a smooth installation process.
Distance to the cameras
Consider the distance between the entry point and the camera locations. Ideally, you should select a spot that allows for efficient cable management while minimizing the length of the wires. Shorter distances reduce signal loss and potential interference, resulting in optimal camera performance.
Aesthetics
Take into account the visual impact of the entry point. You want to choose a location that preserves the aesthetics of your home and minimizes the visibility of the wires. Look for areas such as inconspicuous corners or areas adjacent to existing electrical outlets to maintain a clean and uncluttered look.
Read more: What Is The Best Wired Security Camera
Structural considerations
Examine the structural elements of your house, such as walls, ceilings, or floors, when choosing the entry point. It’s important to find a location that allows for running the wires through the most structurally sound areas, avoiding any potential damage to the building’s integrity.
Power availability
Ensure that there is a power source near the chosen entry point. It’s convenient to have an electrical outlet nearby to power the security camera system. If there isn’t a power source, you may need to consider installing an outlet or using PoE technology.
By carefully considering these factors, you can choose the most optimal and practical entry point for bringing the security camera wires into your house. This decision will set the stage for a successful and efficient installation process.
Drilling and Securing the Wires
Once you have selected the entry point, it’s time to drill and secure the wires. This step involves creating holes for the wires to pass through the wall and ensuring their stability and protection. Here’s a step-by-step guide:
1. Use a stud finder
Start by using a stud finder to locate the wall studs near your chosen entry point. This will help you avoid drilling into them, ensuring a secure installation. Mark the stud locations with painter’s tape.
Read more: How To Repair A Security Camera Wire
2. Prepare the drill
Next, attach an appropriate drill bit to your power drill. The size of the bit will depend on the diameter of the cables you are using. It’s recommended to leave a bit of extra room to make it easier to feed the wires through the holes.
3. Drill the holes
Position the drill bit against the marked spots on the wall and start drilling. Take your time and apply gentle pressure to avoid damaging the wall. If you encounter a stud, slightly adjust the drilling position to avoid it while still remaining within the desired cable path.
4. Secure the wires
Once the holes are drilled, use cable clips or staples to secure the wires along their path. This will prevent them from dangling or becoming loose. Be mindful of not crushing or damaging the wires when securing them.
5. Protect the wires
If the wires are passing through exterior walls or areas prone to moisture, it’s essential to protect them using conduit or weatherproof coverings. This will safeguard the wires from the elements and extend their lifespan.
Read more: How To Wire A Home Security Camera
6. Anchor the cables
To ensure the stability of the cables, use junction boxes or electrical boxes near the entry point. These boxes provide a secure housing for the cables and allow for a clean and organized connection area. Attach the boxes to the wall using screws or other suitable fasteners.
By following these steps, you can drill and secure the security camera wires properly. Doing so will ensure their stability and protection, leading to a reliable and long-lasting installation.
Running the Wires Through the Wall
Now that you have drilled the necessary holes and secured the wires, it’s time to run them through the wall. This step involves carefully feeding the cables from the entry point to the camera locations. Follow these steps for a successful wire run:
1. Attach the fish tape
Begin by attaching the fish tape or wire pulling tool to one end of the cables. Make sure it is securely fastened to prevent it from detaching during the process.
2. Feed the fish tape through the entry hole
Gently insert the fish tape into the entry hole and begin pushing it through the wall cavity. Use a twisting motion if needed to navigate bends or obstacles within the wall.
3. Guide the fish tape to the camera locations
As you push the fish tape further, carefully guide it towards the desired camera locations. Refer to your earlier measurements and markings to ensure accuracy.
4. Retrieve the fish tape from the camera locations
Once you have reached the camera locations, secure the cables to the end of the fish tape and slowly retract it back towards the entry point. Be patient and gentle to avoid any damage to the cables or the walls.
5. Disconnect the cables from the fish tape
Once the fish tape and cables are back at the entry point, disconnect the cables from the fish tape. Take care not to apply excessive force or pull on the cables, as this could cause damage.
6. Verify proper cable placement
Double-check the placement and alignment of the cables at both the entry point and camera locations. Ensure that they are secure and properly positioned, ready to be connected to the security camera system.
Running the wires through the wall can be a time-consuming and delicate process, but with patience and attention to detail, you’ll achieve a seamless and professional installation. Take your time to avoid any unnecessary damage or complications, and always prioritize the safety and integrity of the cables.
Read more: How To Hide Outdoor Security Camera Wires
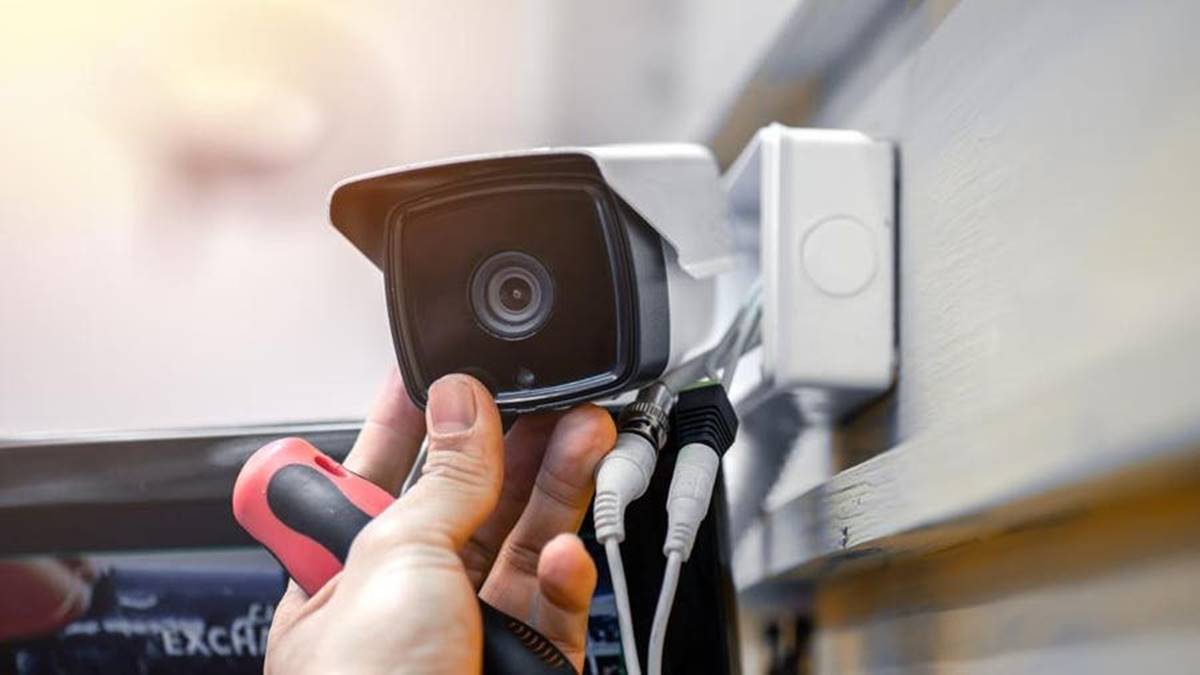
Connecting the Wires to the Security Camera System
With the wires now properly running through the walls, it’s time to connect them to the security camera system. This step involves establishing the necessary connections to ensure reliable transmission of power and video signals. Here’s how to connect the wires:
1. Prepare the cables
Start by stripping the protective casings from the ends of the cables, exposing the individual wires. Use a wire stripper or a utility knife, being careful not to damage the wires themselves. Inspect the exposed wires to ensure they are clean and undamaged.
2. Identify the appropriate connectors
Determine the type of connectors you need to use based on your specific security camera system. Common connectors include BNC connectors for video signals and power connectors for powering the cameras. Make sure you have the necessary connectors and follow the manufacturer’s instructions for their proper installation.
3. Connect the wires to the connectors
Follow the wiring diagrams provided by the security camera system manufacturer to connect the appropriate wires to their respective connectors. Typically, BNC connectors require twisting the wire strands together and securing them with a connector cap, while power connectors may involve using screws or push-in terminals.
4. Double-check the connections
After making the connections, double-check the tightness and integrity of each wire and connector. Ensure that there is no exposed wire or loose connection, as this can affect the performance of the security camera system.
5. Secure the connections
Using electrical tape, wrap the connections to provide insulation and secure them from accidental disconnection. This step ensures that the connections remain intact and protected from any external factors that may cause them to loosen or disconnect over time.
6. Repeat for each camera
Repeat the process for each security camera in your system, ensuring that each wire is correctly connected and secured. Keep track of which wires correspond to each camera, as this will be important during the setup and configuration process.
By connecting the wires correctly and securely to the security camera system, you are one step closer to enjoying the benefits of a fully functional and reliable surveillance setup. Take your time and pay attention to detail to ensure a successful connection process.
Testing and Finalizing the Installation
With the wires connected to the security camera system, it’s time to test the installation and finalize the setup. Proper testing ensures that the cameras are functioning correctly and that you can effectively monitor your property. Follow these steps to test and finalize the installation:
Read more: How To Wire Home Security Camera System
1. Power on the system
Turn on the power to the security camera system, including any recorders, monitors, or NVRs. Allow the system to boot up and initialize all connected cameras.
2. Check camera feeds
Using the provided software or app, access the camera feeds to ensure they are displaying properly. Confirm that the camera angles, focus, and image quality meet your expectations.
3. Test camera functions
Verify that all camera functions are working correctly. This includes panning, tilting, zooming (if applicable), and any other features your cameras may have. Test the camera’s motion detection capabilities and make any necessary adjustments to sensitivity settings.
4. Check video footage playback
Review stored video footage to ensure that the recordings are clear and accurate. Playback recordings from different cameras and at different times of the day to assess the performance under various lighting conditions.
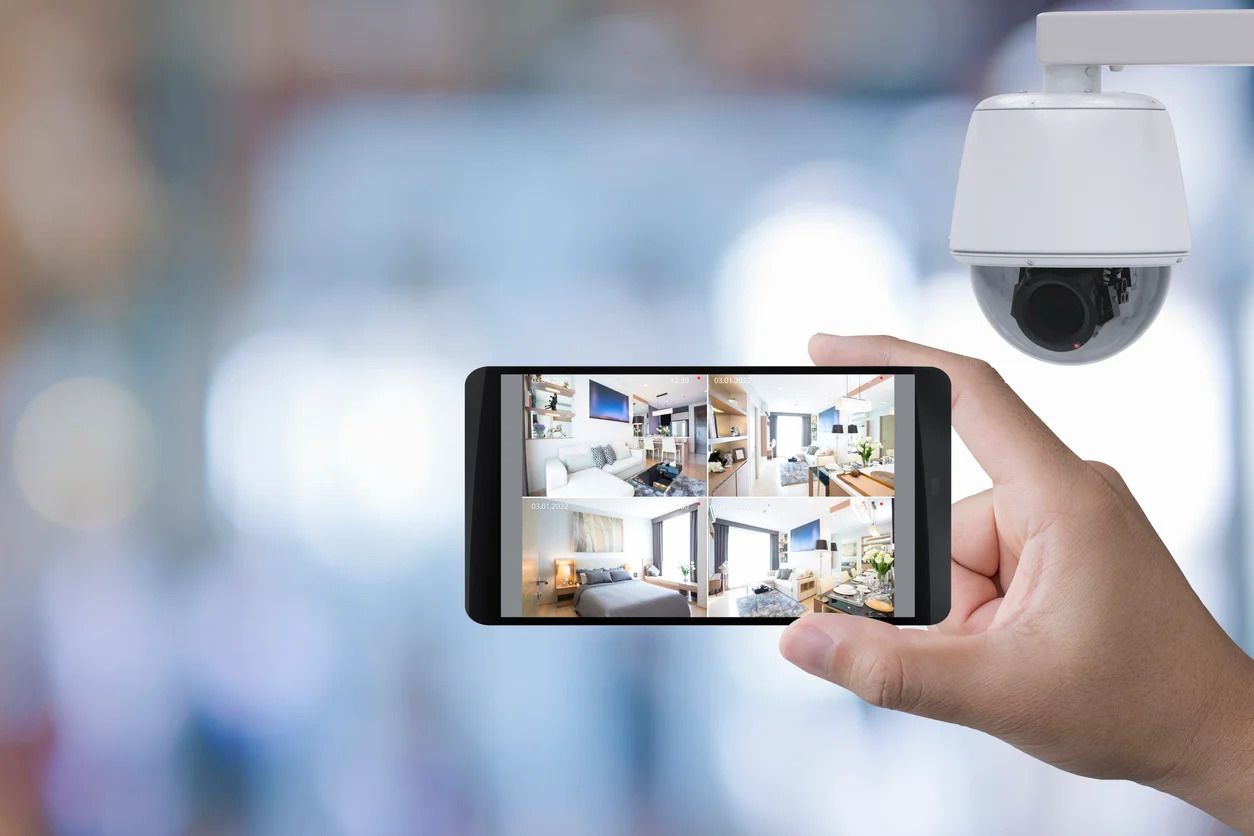
5. Test remote access
If your security camera system allows for remote access, test this functionality. Connect to the system using a smartphone, tablet, or computer to ensure that you can view the camera feeds and manage the system from outside your home network.
6. Make any necessary adjustments
If you encounter any issues or inconsistencies during testing, make the necessary adjustments. This might involve repositioning cameras, adjusting angles or settings, or checking connections and cables for any faults.
7. Finalize the cable management
Once the testing is complete, take the time to finalize the cable management for a clean and professional-looking installation. Use cable clips, zip ties, or other appropriate methods to tidy up any loose cables and ensure they are hidden or secured along their path.
8. Document the setup
Take photographs or create a diagram documenting the camera locations, cable paths, and any important configuration settings. This documentation will be valuable for future reference or if you need to make changes or expand the system later.
By thoroughly testing the installation and finalizing cable management, you can ensure that your security camera system is fully operational and ready to provide the protection and peace of mind you desire. Take the time to make any necessary adjustments and document the setup for future reference.
Read also: 12 Amazing Wired Security Cameras For 2025
Conclusion
Congratulations on successfully bringing the security camera wires into your house! By following the steps outlined in this comprehensive guide, you have taken a significant step towards enhancing the security and surveillance of your property. We hope that this information has been helpful and empowering, allowing you to confidently tackle the installation process.
Installing a security camera system requires careful planning, preparation, and attention to detail. From choosing the entry point to drilling, securing, and running the wires through the walls, each step plays a crucial role in ensuring a professional and effective installation. Connecting the wires to the security camera system and performing thorough testing adds the final touches, allowing you to monitor and protect your property with confidence.
Remember, while it may be tempting to take shortcuts or rush through the installation, it’s important to prioritize safety, reliability, and aesthetics. By using the right tools, materials, and techniques, you can achieve a seamless integration of your security camera system into your home, maintaining its visual integrity while maximizing its functionality.
As technology continues to advance, wireless security camera systems are becoming increasingly popular. However, wired systems still carry significant advantages in terms of reliability, signal strength, and longevity. By mastering the installation of wired security camera systems, you have equipped yourself with a valuable skill that can be applied to various scenarios and future-proof your home’s security needs.
Remember, it’s always a good idea to consult the manufacturer’s instructions and guidelines for your specific security camera system. Additionally, if you feel unsure or uncomfortable with any aspect of the installation process, consider reaching out to a professional for assistance.
With your security camera system installed and operational, you can enjoy the peace of mind that comes with knowing your property is protected. Whether you’re at home or away, you can keep a watchful eye on your surroundings, deterring potential intruders and ensuring the safety of your loved ones.
Thank you for joining us on this journey towards a secure home. May your newly installed security camera system bring you the confidence and peace of mind you deserve.
Frequently Asked Questions about How To Bring Security Camera Wires Into House
Was this page helpful?
At Storables.com, we guarantee accurate and reliable information. Our content, validated by Expert Board Contributors, is crafted following stringent Editorial Policies. We're committed to providing you with well-researched, expert-backed insights for all your informational needs.