Articles
How To Sew Curtains Step By Step
Modified: January 22, 2024
Learn how to sew curtains step by step with our helpful articles. Get expert tips and tricks for creating beautiful curtains for your home.
(Many of the links in this article redirect to a specific reviewed product. Your purchase of these products through affiliate links helps to generate commission for Storables.com, at no extra cost. Learn more)
Introduction
Are you tired of staring at bare windows or outdated curtains? Sewing your own curtains can be a rewarding and cost-effective way to update your home decor. Not only does it give you the freedom to choose the perfect fabric and design, but it also allows you to customize the size and style to suit your specific needs. By following a few simple steps, you can create beautiful curtains that will enhance the ambiance of any room.
In this step-by-step guide, we will walk you through the process of sewing curtains from scratch. You don’t have to be a seasoned seamstress to accomplish this project. With basic sewing skills and some patience, you will be able to create curtains that look professional and stylish.
Before you get started, it’s important to gather all the necessary materials and supplies. This will ensure a smooth sewing process without any interruptions. You will need the following:
- Fabric of your choice
- Matching thread
- Sewing machine or needle and thread
- Measuring tape
- Straight pins
- Iron
- Scissors
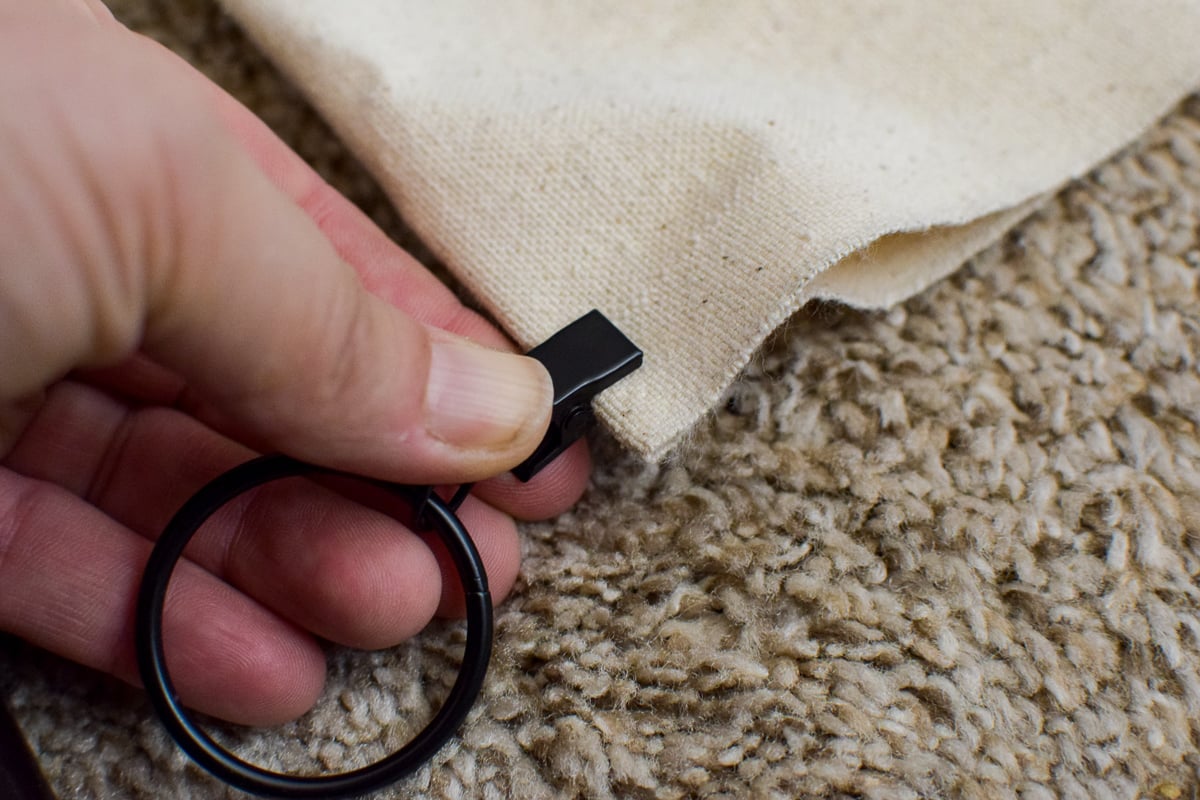
- Optional: curtain liner, header tape, curtain rings, or other embellishments
Now that you have everything you need let’s get started with measuring and estimating the fabric required for your curtains. With accurate measurements, you can ensure your curtains fit perfectly and have the desired fullness. Stay tuned for the next step!
Key Takeaways:
- Sewing your own curtains allows for creativity, customization, and cost-effectiveness. With basic sewing skills and attention to detail, you can create professional-looking curtains that enhance your home decor.
- From measuring and cutting fabric to adding embellishments and hanging the curtains, this guide provides a comprehensive and rewarding journey to creating personalized, stylish, and functional curtains for your home.
Read more: How To Sew Curtains With Lining
Gathering Materials and Supplies
Before you dive into sewing your curtains, it’s essential to gather all the materials and supplies you’ll need. This will help ensure a smooth and hassle-free sewing process. Here’s a handy checklist of the items you’ll need:
- Fabric: Choose a fabric that complements your room decor and meets your functional needs. Consider factors like light filtration, privacy, and ease of maintenance.
- Matching Thread: Use thread that matches the color of your fabric to achieve a seamless finish.
- Sewing Machine or Needle and Thread: If you have access to a sewing machine, it will make the process faster and more efficient. However, if you prefer sewing by hand, make sure you have the necessary needles and thread.
- Measuring Tape: Accurate measurements are crucial for well-fitting curtains. Invest in a good-quality measuring tape to ensure precision.
- Straight Pins: These will be used to secure the fabric together before sewing, ensuring that it stays in place.
- Iron: A hot iron is essential for pressing seams and creating crisp edges. It will give your curtains a professional, finished look.
- Scissors: Invest in a pair of sharp fabric scissors for precise cutting. Avoid using them for anything other than fabric to keep them sharp.
- Optional: Depending on your curtain design, you may need additional supplies such as curtain liner, header tape, curtain rings, or other embellishments. Consider these extras if you want to add functionality or decorative elements to your curtains.
Make sure to gather all these materials before you start sewing. Having everything at hand will save you time and prevent any unnecessary interruptions during the process.
Once you have your materials ready, you can move on to the next step: measuring and estimating the fabric required for your curtains. Stay tuned for detailed instructions on how to measure your windows and calculate the fabric needed for a perfect fit.
Measuring and Estimating Fabric
Accurate measurements are crucial to ensure that your curtains fit perfectly on your windows. Improper measurements can lead to curtains that are either too short or too long, which can significantly affect the overall appearance of your curtains. Here’s a step-by-step guide on how to measure and estimate fabric for your curtains:
- Measure the Width: Start by measuring the width of your window or the area you want to cover with curtains. For a standard window, measure the width of the window frame from one end to the other.
- Decide on Fullness: Determine how full you want your curtains to be. Fullness refers to the amount of fabric used relative to the window width. For a more gathered or luxurious look, opt for extra fabric. Typically, curtains are 1.5 to 3 times wider than the window they cover.
- Calculate the Fabric Width: Multiply the measured window width by the desired fullness factor. This will give you the total fabric width required for your curtains.
- Measure the Length: Next, measure the length of your curtains. Decide whether you want your curtains to hang just below the window sill or all the way to the floor. Measure from the desired starting point to the floor or desired length.
- Add Extra Length: Add additional length to account for hems and headers. Generally, adding around 4-6 inches to the measured length is sufficient. This extra fabric will be used for creating hems and adding headers or rod pockets.
- Calculate the Fabric Length: The total fabric length needed is the measured length plus the additional length for hems and headers.
Make sure to double-check your measurements for accuracy before moving on to the next step. It’s always better to measure twice to ensure your curtains fit perfectly.
Using these measurements, you can estimate the amount of fabric you’ll need. Most fabric stores provide the fabric width on the bolt label, usually around 45 or 54 inches. If your required fabric width is wider than the bolt width, you’ll need to sew together multiple panels to achieve the desired width.
Now that you have your measurements and estimated fabric requirements, it’s time to move on to the next step: cutting the fabric panels. Stay tuned for detailed instructions on how to cut the fabric precisely for your curtains.
Cutting the Fabric Panels
Now that you have your measurements and estimated fabric requirements, it’s time to cut the fabric panels for your curtains. Follow these step-by-step instructions to ensure accurate and precise cuts:
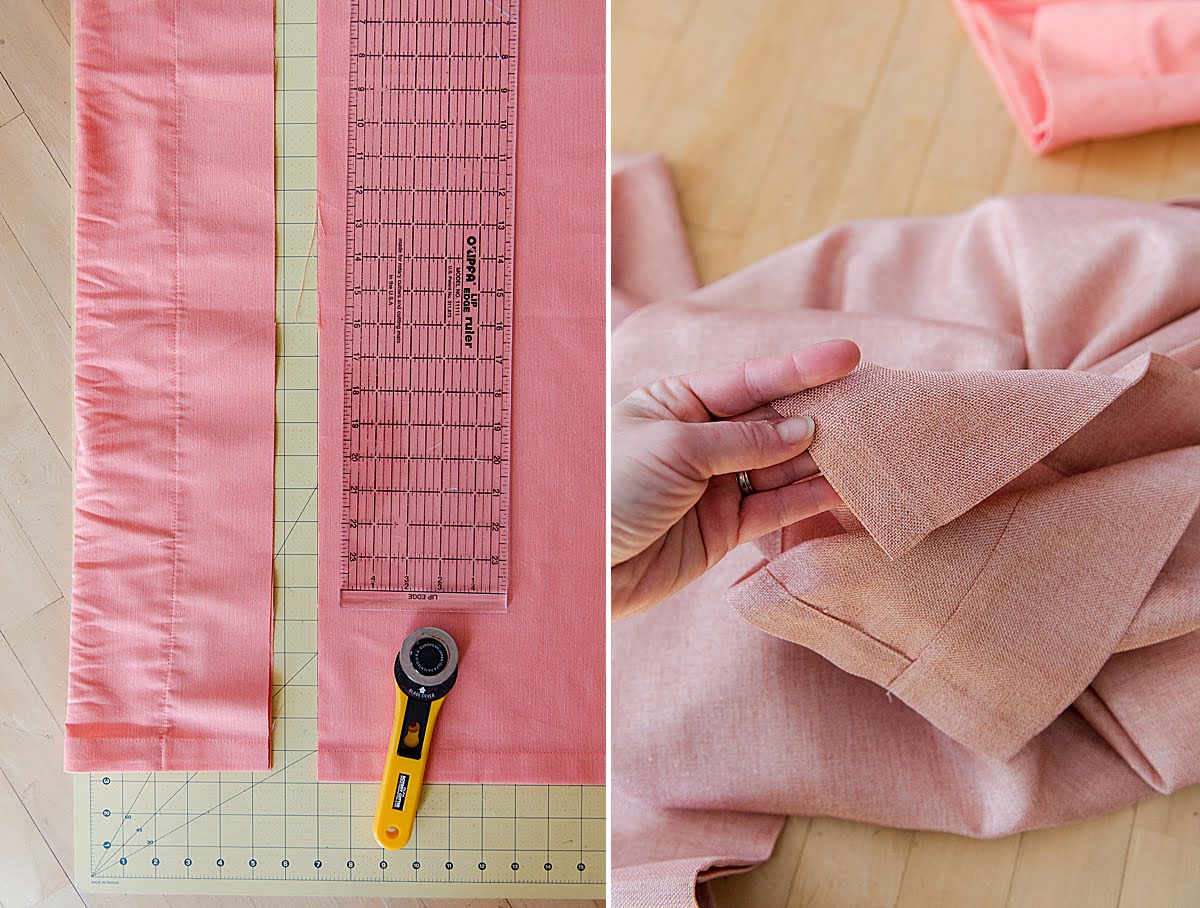
- Prepare the Fabric: Lay your fabric on a clean, flat surface. If necessary, iron out any wrinkles or creases to ensure the fabric is smooth and taut.
- Measure and Mark: Use your measurements to determine the width and length of each fabric panel. With a measuring tape and fabric marker or chalk, measure and mark the required dimensions on the fabric.
- Account for Seams and Hems: Remember to include the necessary seam allowances and hems when marking your fabric. Add a couple of inches to the width and length measurements to account for these allowances.
- Cut the Fabric: Using sharp fabric scissors, carefully cut along the marked lines. Take your time and make precise cuts to ensure clean and straight edges.
- Repeat if Necessary: If your required fabric width is wider than the width of the fabric bolt, you’ll need to cut multiple panels and sew them together later. Repeat the measuring, marking, and cutting process for each additional panel needed.
It’s important to be patient and accurate when cutting the fabric. Double-check your measurements and take your time to ensure that all panels are cut to the correct size. If you’re unsure or nervous about cutting the fabric, it’s always a good idea to practice on a scrap piece first.
Once you have all the fabric panels cut to size, you’re ready to move on to the next step: hemming the sides and bottom. Stay tuned for detailed instructions on how to create neat and tidy hems for your curtains.
Hemming the Sides and Bottom
After cutting the fabric panels for your curtains, the next step is to hem the sides and bottom. Hemming will give your curtains a polished and finished look. Follow these step-by-step instructions to achieve neat and professional hems:
- Prepare the Fabric: Lay your fabric panel flat with the wrong side facing up.
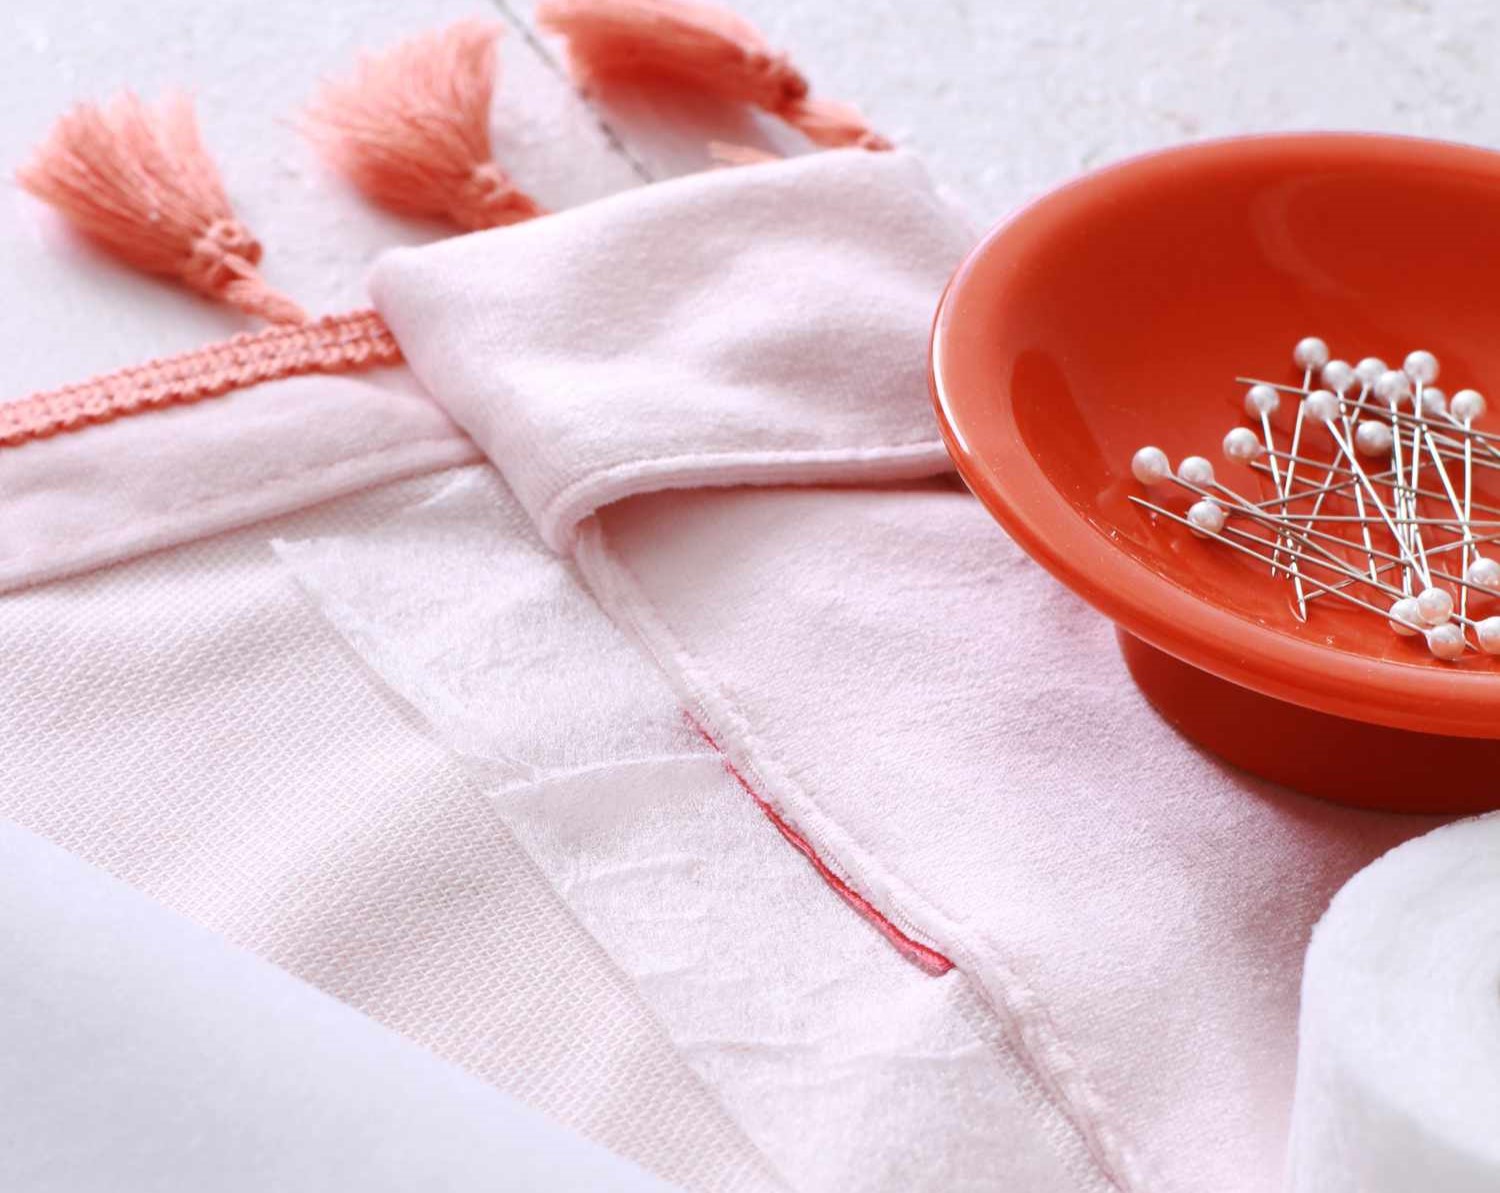
- Measure and Mark: Measure the desired hem width on the sides and bottom of the fabric panel. Common hem widths are around 1-2 inches, but you can adjust according to your preference. Use a fabric marker or pins to mark the measurements.
- Fold and Press: Fold the fabric along the marked lines, bringing the wrong side of the fabric to meet the right side. Use an iron to press the folded hem in place. This will help create crisp and even hems.
- Secure with Pins or Clips: Use straight pins or fabric clips to secure the folded hem in place. Place the pins or clips at regular intervals along the hem to prevent it from shifting while sewing.
- Repeat for Sides and Bottom: Repeat the folding, pressing, and securing process for both side hems and the bottom hem of the fabric panel.
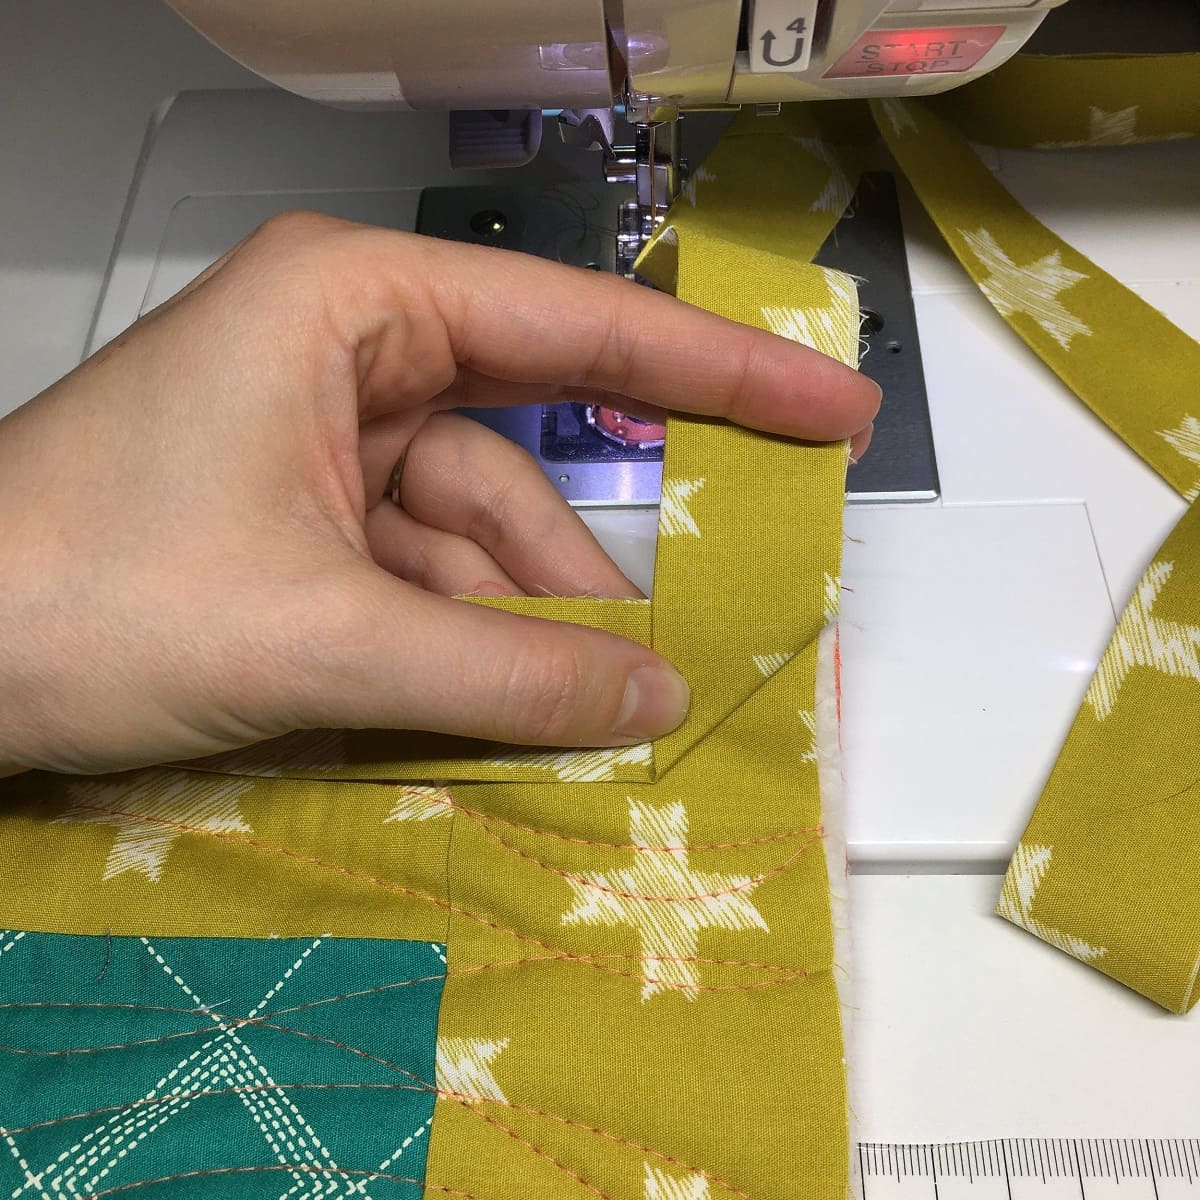
- Sew the Hems: Using a sewing machine or needle and thread, stitch along the folded edge of each side and the bottom hem. Use a straight stitch or a zigzag stitch for added durability. Sew as close to the edge of the fabric as possible for a clean and professional finish.
- Trim Excess Thread: After sewing the hems, trim any excess thread for a neat appearance.
Take care to ensure that your hems are straight and even. The pressed lines will serve as a guide, but attention to detail is crucial when sewing. If you prefer a more decorative touch, you can also consider using a decorative stitch or adding lace trim or bias binding to the edges of your hems.
Once you have hemmed the sides and bottom, you’re ready to move on to the next step: adding a header or rod pocket. Stay tuned for detailed instructions on how to create these essential features for your curtains.
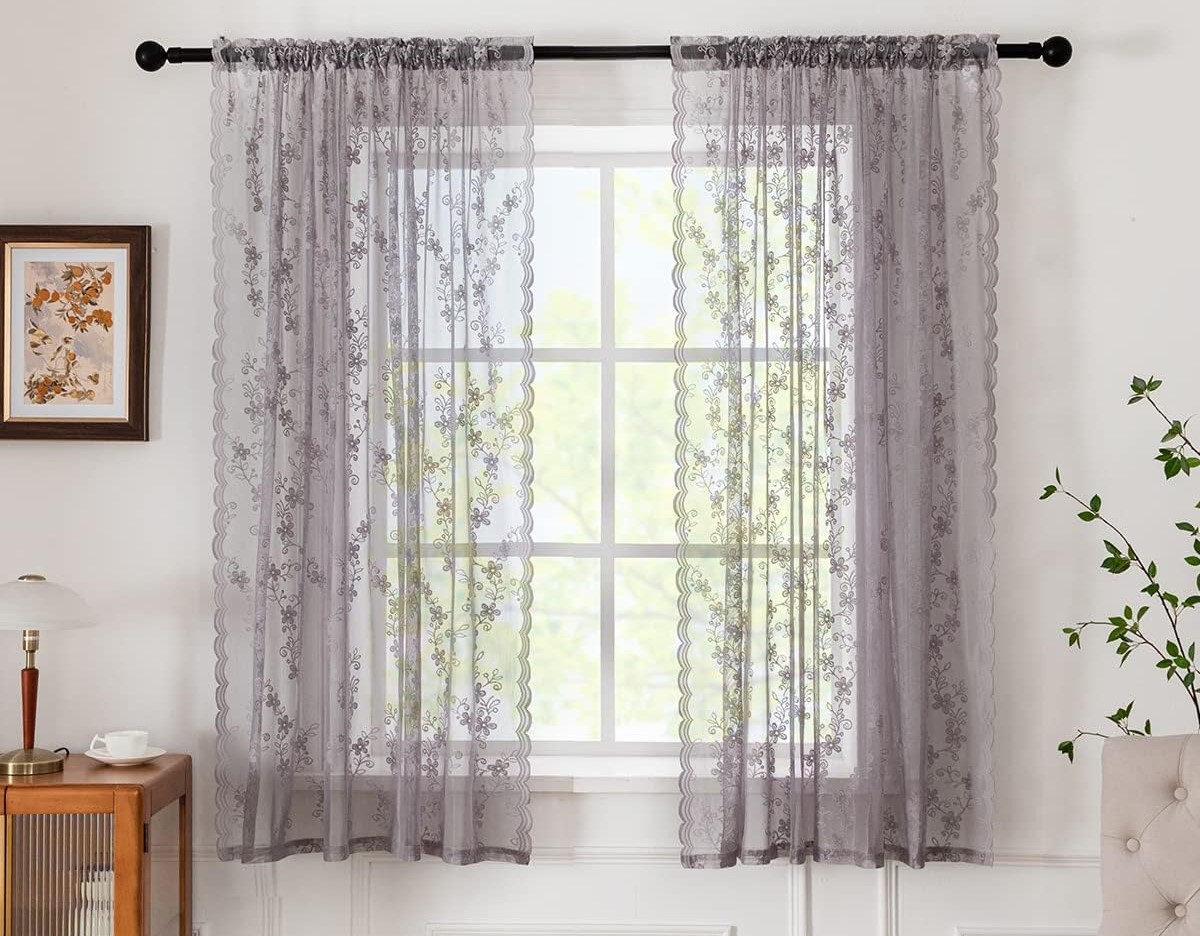
Read more: How To Sew Sheer Curtains
Adding a Header or Rod Pocket
Now that you have hemmed the sides and bottom of your fabric panel, it’s time to add a header or rod pocket. A header or rod pocket serves as a casing to slide a curtain rod through, allowing you to hang your curtains with ease. Follow these step-by-step instructions to add a header or rod pocket to your curtains:
- Measure and Mark: Determine the height of your header or rod pocket. Typically, headers are around 2-4 inches in height. Use a measuring tape and fabric marker or pins to mark the desired height on the top of your fabric panel.
- Fold and Press: Fold the fabric along the marked line, bringing the wrong side of the fabric to meet the right side. Use an iron to press the folded header in place. This will help create a clean and straight edge.
- Secure with Pins or Clips: Use straight pins or fabric clips to secure the folded header in place. Place the pins or clips at regular intervals along the width of the header to prevent shifting while sewing.
- Sew the Header: Using a sewing machine or needle and thread, stitch along the bottom edge of the folded header. For added strength, sew a second row of stitches parallel to the first row, about 1/4 inch above it. This will create a sturdy casing for your curtain rod.
Alternatively, if you prefer a rod pocket instead of a header, follow these additional steps:
- Measure and Mark: Determine the desired height of your rod pocket. This is typically around 1-2 inches shorter than the curtain rod’s circumference. Use a measuring tape and fabric marker or pins to mark the appropriate height on the top of your fabric panel.
- Fold and Press: Fold the fabric along the marked line, bringing the wrong side of the fabric to meet the right side. Use an iron to press the folded rod pocket in place.
- Secure with Pins or Clips: Use straight pins or fabric clips to secure the folded rod pocket in place. Place the pins or clips at regular intervals along the width of the pocket to prevent shifting while sewing.
- Sew the Rod Pocket: Using a sewing machine or needle and thread, stitch along the top edge of the folded rod pocket. Again, for added strength, sew a second row of stitches parallel to the first row, about 1/4 inch below it. This will create a secure pocket for your curtain rod.
Adding a header or rod pocket not only adds functionality to your curtains but also gives them a clean and finished look. Choose the option that suits your curtain rod and desired style.
Once you have added the header or rod pocket, you’re ready to move on to the next step: sewing the final seams. Stay tuned for detailed instructions on how to finish off your curtains and make them ready for hanging.
When sewing curtains, be sure to pre-wash and iron your fabric before cutting and sewing to prevent shrinkage and ensure a smooth finish.
Attaching the Header or Rod Pocket
Now that you have added a header or rod pocket to your fabric panel, it’s time to attach it securely. Attaching the header or rod pocket correctly will ensure that your curtains hang smoothly and securely. Follow these step-by-step instructions to attach the header or rod pocket to your curtains:
- Prepare the Fabric: Lay your fabric panel flat with the wrong side facing up.
- Position the Header or Rod Pocket: Place the folded header or rod pocket on top of the fabric panel, aligning the raw edges with the top edge of the panel.
- Secure with Pins or Clips: Use straight pins or fabric clips to secure the header or rod pocket to the fabric panel. Make sure to place the pins or clips close to the raw edge of the fabric to prevent the header or rod pocket from shifting while sewing.
- Sew the Attachment Seam: Using a sewing machine or needle and thread, stitch along the bottom edge of the header or rod pocket, attaching it to the fabric panel. Sew as close to the raw edge as possible for a secure attachment.
- Secure the Ends: After sewing the attachment seam, backstitch or reinforce the ends to ensure the header or rod pocket is tightly secured.
Take care to stitch in a straight line and keep your seam even. This will ensure that the header or rod pocket is securely attached and will be able to support the weight of the curtains.
Once you have attached the header or rod pocket, your fabric panel is almost complete. The next step is to sew the final seams. Stay tuned for detailed instructions on how to sew the final seams and give your curtains a polished and professional finish.
Sewing the Final Seams
After attaching the header or rod pocket to your fabric panel, it’s time to sew the final seams. Sewing the final seams will ensure that your curtains are neatly finished and ready for hanging. Follow these step-by-step instructions to sew the final seams:
- Prepare the Fabric: Lay your fabric panel flat with the right side facing up.
- Fold and Press the Fabric: Fold the fabric panel in half lengthwise, bringing the top edge with the header or rod pocket down to meet the bottom edge.
- Secure with Pins or Clips: Use straight pins or fabric clips to secure the sides of the fabric panel together. Place the pins or clips along the sides, leaving a small seam allowance, usually around 1/2 inch.
- Align the Raw Edges: Make sure the raw edges of the fabric panel are aligned perfectly from top to bottom.
- Sew the Side Seams: Using a sewing machine or needle and thread, stitch along the pinned or clipped sides of the fabric panel. Sew from the top edge, starting just below the header or rod pocket, all the way down to the bottom edge. Sew as close to the raw edges as possible.
- Secure the Ends: After sewing the side seams, backstitch or reinforce the ends to ensure the seams are tightly secured.
Take your time when sewing the final seams, ensuring that your stitches are even and straight. This will give your curtains a professional and polished look.
Once you have sewn the final seams, your fabric panel is now transformed into a complete curtain. The next step is to add any additional embellishments or decorative elements if desired. Stay tuned for instructions on how to enhance your curtains with some extra flair.
Adding any Additional Embellishments
Now that you have sewn the final seams of your curtains, it’s time to add some extra flair with additional embellishments. Adding embellishments can elevate the look of your curtains and make them truly unique. Here are some popular ways to enhance your curtains:
- Curtain Liner: If you want to improve insulation or privacy, consider adding a curtain liner. A liner can also help protect your curtains from sun damage, adding longevity to their lifespan. Attach the curtain liner to the back of your fabric panel, following the same sewing steps as the main curtain.
- Trims and Borders: Adding trims or borders can add visual interest and complement your room’s decor. Choose trims that coordinate with your fabric and attach them along the edges or hems of your curtains using a sewing machine or hand stitching.
- Tiebacks: Create a stylish look by adding tiebacks to hold your curtains in place when they are open. You can use matching or contrasting fabric, ribbons, or decorative ropes to make the tiebacks. Attach them to the sides of your curtains at the desired height.
- Embellished Headers: Embellish the header of your curtains by adding decorative elements such as ruffles, pleats, or bows. This can create a custom and eye-catching detail.
- Embroidery or Appliqué: Personalize your curtains by adding embroidery or appliqué designs. You can sew intricate patterns, monograms, or motifs onto the fabric panels to make your curtains truly one-of-a-kind.
When adding embellishments, be mindful of the overall design and aesthetic of your curtains and the room they will be displayed in. Choose embellishments that enhance the style and ambiance you want to create.
Once you have added your desired embellishments, your curtains are complete and ready for hanging. The final step is to give your curtains some final touches and learn how to properly hang them. Stay tuned for instructions on these final steps.
Read more: How To Sew Kitchen Curtains
Final Touches and Hanging the Curtains
After completing all the sewing and embellishments, your curtains are almost ready to be displayed and admired in your home. Follow these final steps to add some finishing touches and ensure a proper hanging:
- Press Your Curtains: Use an iron to carefully press your finished curtains. This will help remove any wrinkles and creases and give them a crisp, polished look. Pay extra attention to the hems, headers, and any added embellishments.
- Install Curtain Hardware: Before hanging your curtains, make sure you have the necessary hardware in place. Install your curtain rod or track according to the manufacturer’s instructions. Ensure that it is securely attached to the wall or window frame.
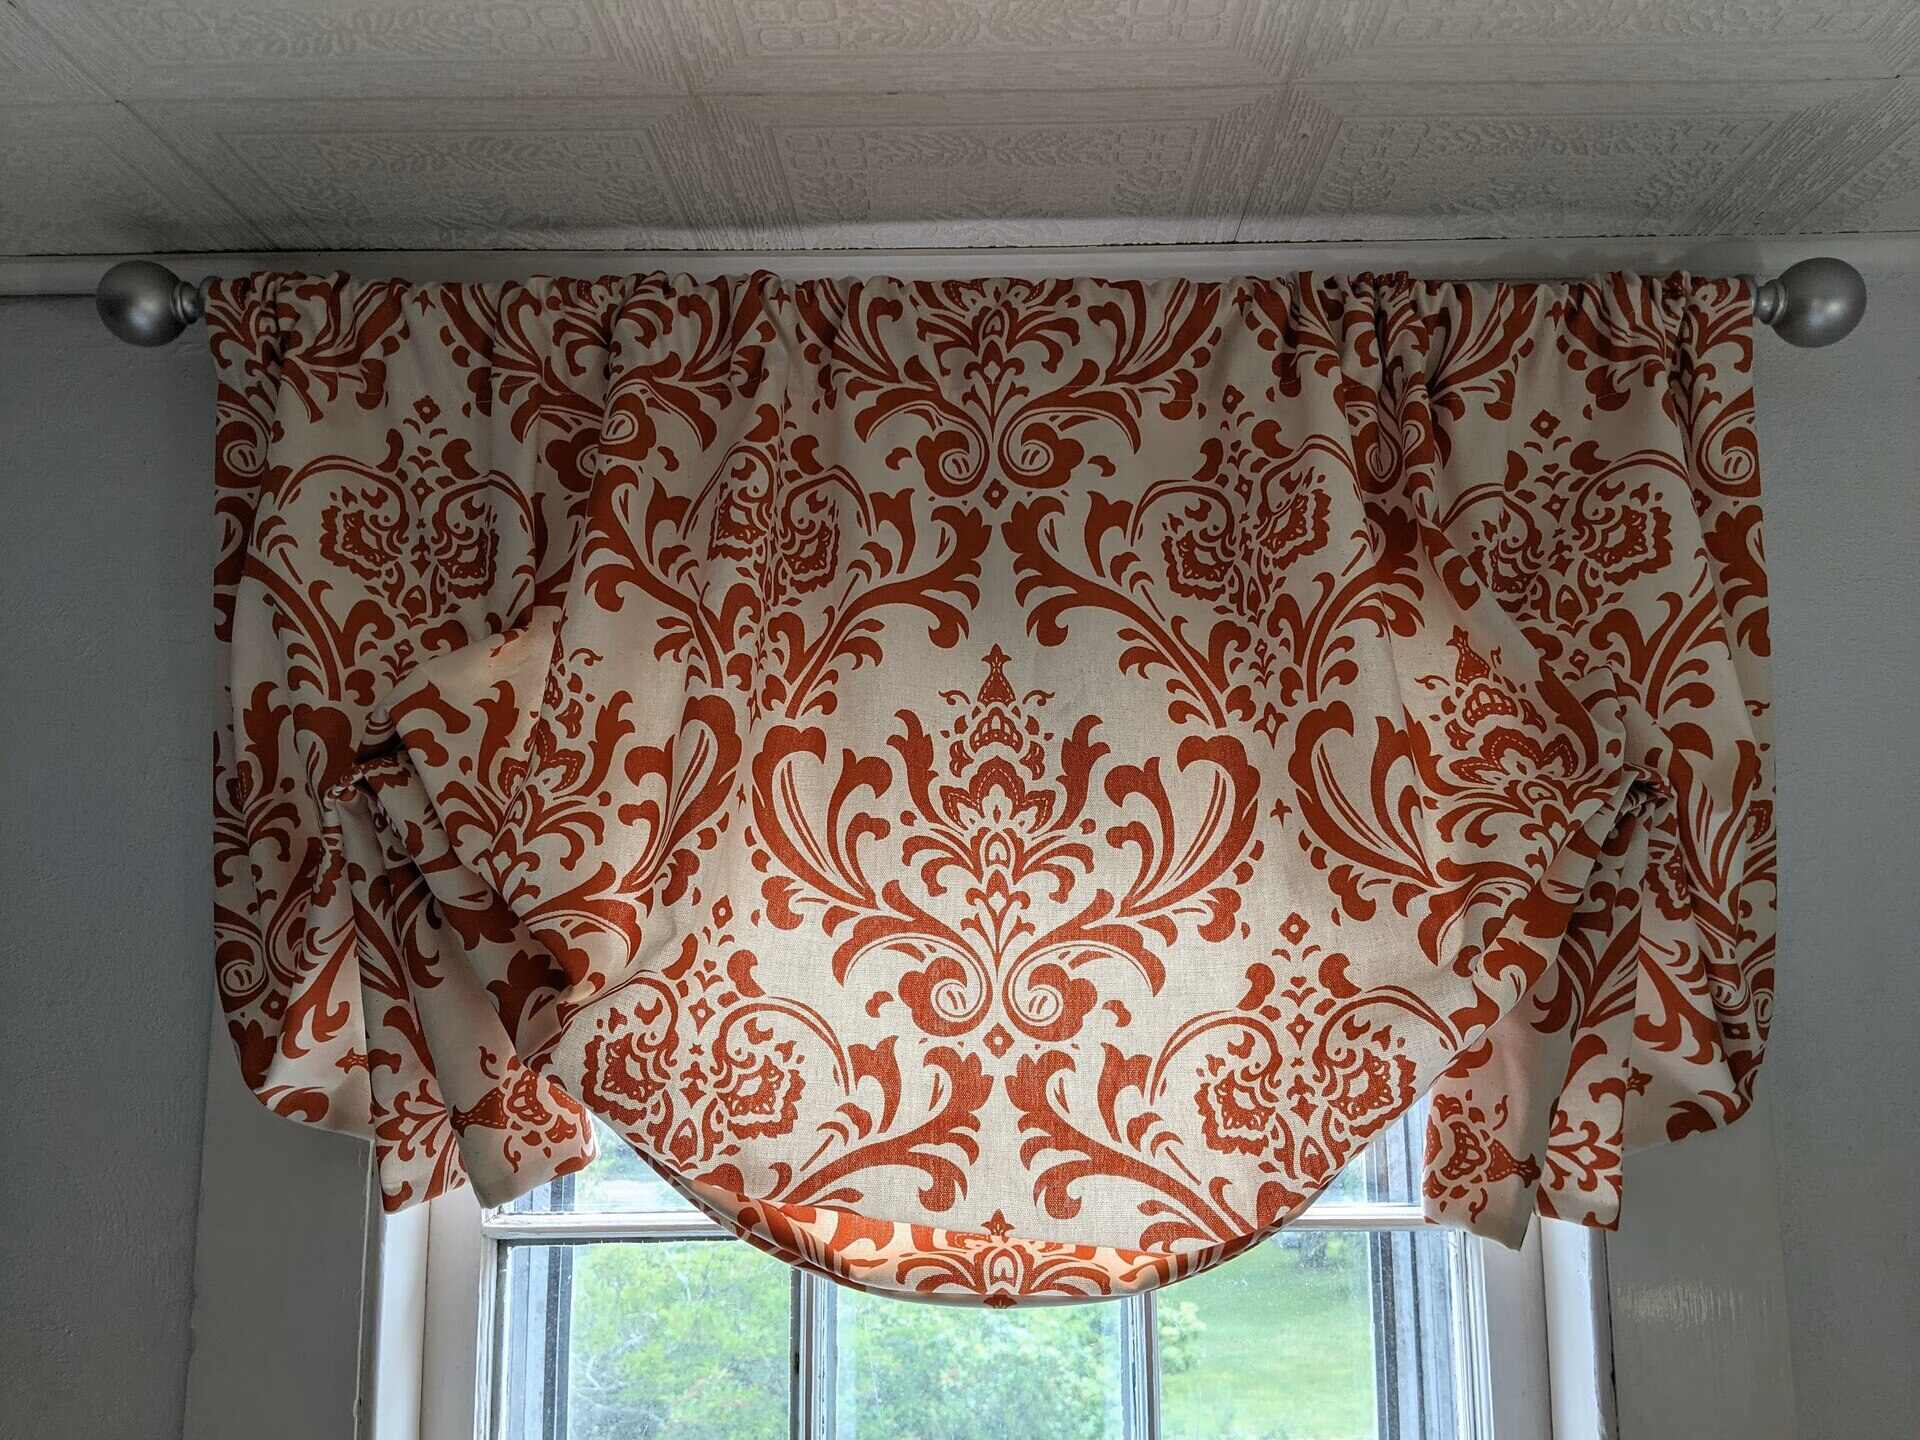
- Hanging the Curtains: Slide the curtain rod through the header or rod pocket of your curtains. Adjust the gathers or folds evenly along the rod to achieve the desired fullness and drape. If you have tiebacks, use them to hold the curtains open, or let them hang naturally for a relaxed appearance.
- Adjust the Length: If your curtains are too long and need to be shortened, measure and mark the desired length with a fabric marker or pins. Remove the curtains from the rod and adjust the length accordingly. Hem the bottom as you did with the sides, and your curtains will be the perfect length.
Once your curtains are hung and adjusted to the desired length, step back and admire your handiwork. Take a moment to adjust the folds and fullness of the curtains for the best visual effect.
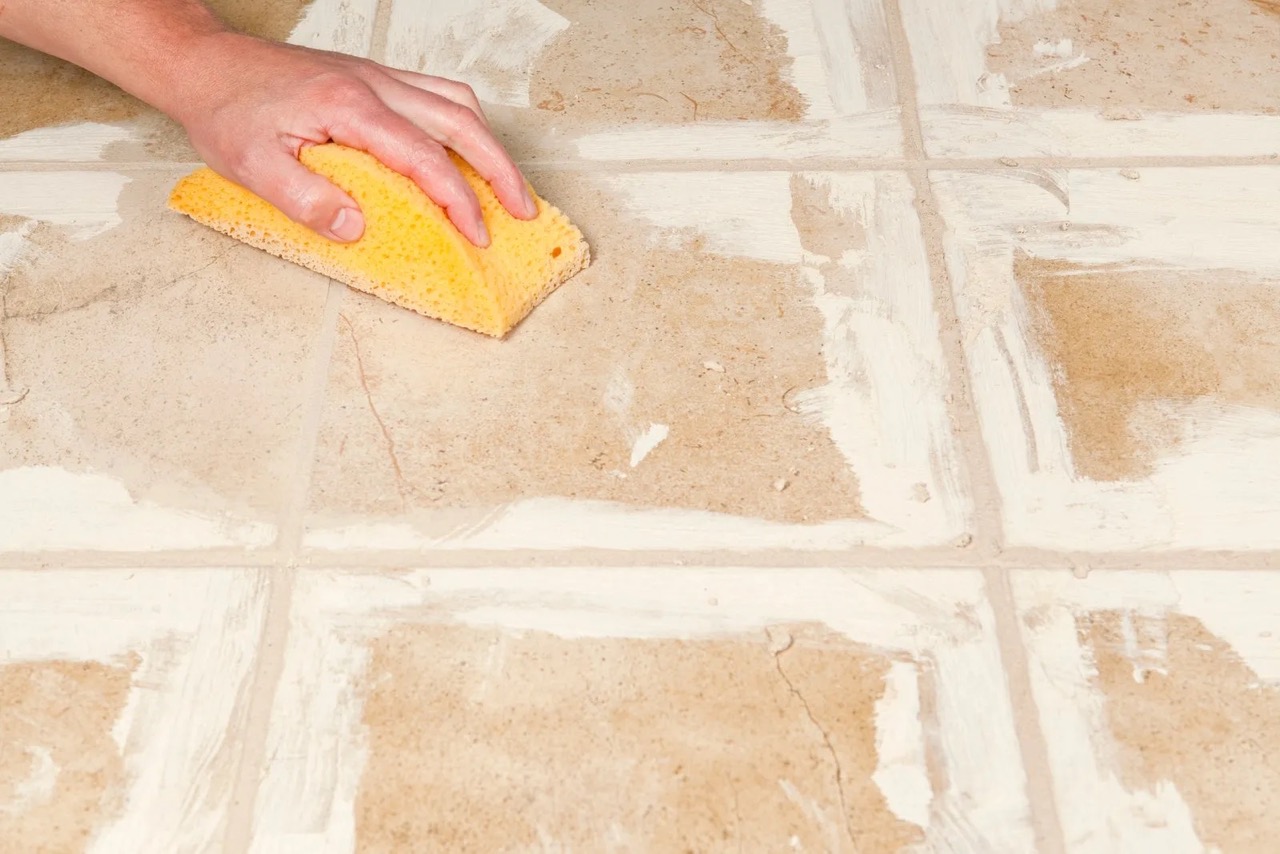
Remember to periodically clean your curtains according to the fabric care instructions to keep them looking fresh and vibrant. Vacuuming or shaking them outside can help remove dust and allergens, and spot cleaning may be required for stains or spills.
With these final touches and proper hanging, your curtains will transform your space and add a touch of elegance and personality to your home decor. Enjoy the beauty and functionality of your handmade curtains for years to come!
Conclusion
Congratulations! You have successfully learned how to sew your own curtains from start to finish. By following the step-by-step instructions provided in this guide, you have acquired the skills to create beautiful and customized curtains for your home. Not only is sewing your own curtains a cost-effective option, but it also allows you to unleash your creativity and add a personal touch to your living space.
Throughout this journey, you have learned how to gather the necessary materials and supplies, measure and estimate fabric accurately, cut the fabric panels to size, hem the sides and bottom, add a header or rod pocket, sew the final seams, and even explore additional embellishments to make your curtains truly unique.
Remember to pay attention to detail, take your time, and enjoy the process of creating something beautiful with your own hands. The measurements and techniques provided in this guide will help you achieve professional-looking curtains that fit perfectly and enhance the overall ambiance of your room.
Now that your curtains are complete, take a step back and admire your hard work. Hang them with care, making sure they are properly adjusted and the length is suitable for your windows. Don’t forget to add any final touches, such as tiebacks or decorative elements, to showcase your personal style.
As time goes on, you may want to change the look of your curtains or update them to match your evolving tastes. With the sewing skills you’ve acquired, you can easily modify or create new curtains whenever you desire. This newfound ability gives you the flexibility to refresh your home decor whenever inspiration strikes.
Whether you sew curtains for a single room or your entire home, the sense of accomplishment and satisfaction you’ll feel is truly rewarding. Your handmade curtains will not only serve a practical purpose but also become a conversation piece that reflects your creativity and individuality in your living space.
Now, it’s time to sit back, relax, and enjoy the beauty and functionality of your handmade curtains. Let them transform your home into a cozy and stylish haven that you can be proud of. Happy sewing!
Frequently Asked Questions about How To Sew Curtains Step By Step
Was this page helpful?
At Storables.com, we guarantee accurate and reliable information. Our content, validated by Expert Board Contributors, is crafted following stringent Editorial Policies. We're committed to providing you with well-researched, expert-backed insights for all your informational needs.


0 thoughts on “How To Sew Curtains Step By Step”