
Articles
How To Change Plumbing To Add A Second Sink
Modified: October 28, 2024
Learn how to change your plumbing setup from one sink to two with our informative articles. Enhance your plumbing knowledge and tackle your home improvement projects like a pro!
(Many of the links in this article redirect to a specific reviewed product. Your purchase of these products through affiliate links helps to generate commission for Storables.com, at no extra cost. Learn more)
Introduction
Are you tired of fighting for bathroom counter space in the morning rush? Adding a second sink to your bathroom can be the solution to your problem. Whether you’re sharing a bathroom with a spouse or have a larger family, having two sinks can save you time and arguments over personal space. But the thought of changing plumbing from one sink to two may seem daunting at first.
In this article, we will walk you through the process of changing plumbing from one sink to two step by step. By following these instructions, you can successfully install a second sink and enjoy the benefits of an upgraded bathroom setup.
Before we dive into the installation process, it is important to assess the existing plumbing in your bathroom. The complexity of this project will depend on your current setup. If your bathroom already has a double sink vanity, the process may be simpler as the plumbing will already be in place. However, if you currently have a single sink and need to make significant changes to accommodate the additional sink, extra steps will be required.
Additionally, it’s crucial to gather the necessary tools and materials before starting this project. Having everything on hand will help streamline the installation process and prevent unnecessary delays. We will provide a comprehensive list of tools and materials required for this project ahead.
Keep in mind that working with plumbing involves shutting off the water supply and handling drain pipes and water supply lines, so it’s important to exercise caution and follow the instructions carefully. This project may require some basic plumbing skills, but with our detailed guide, you can confidently tackle the task.
Let’s now move on to the first step, which involves assessing the existing plumbing in your bathroom.
Key Takeaways:
- Upgrading to two sinks in your bathroom can save time and reduce arguments over personal space. Thoroughly assess existing plumbing, gather necessary tools, and follow step-by-step instructions for a successful installation.
- Changing plumbing from one sink to two requires careful attention to detail and thorough testing. Enjoy the convenience and efficiency of a two-sink setup while maintaining the plumbing system for long-term reliability.
Read more: How To Change A Sink
Step 1: Assessing the Existing Plumbing
Before you begin the process of changing plumbing from one sink to two, it’s important to assess the existing plumbing setup in your bathroom. This will help you determine the complexity of the project and any modifications that need to be made.
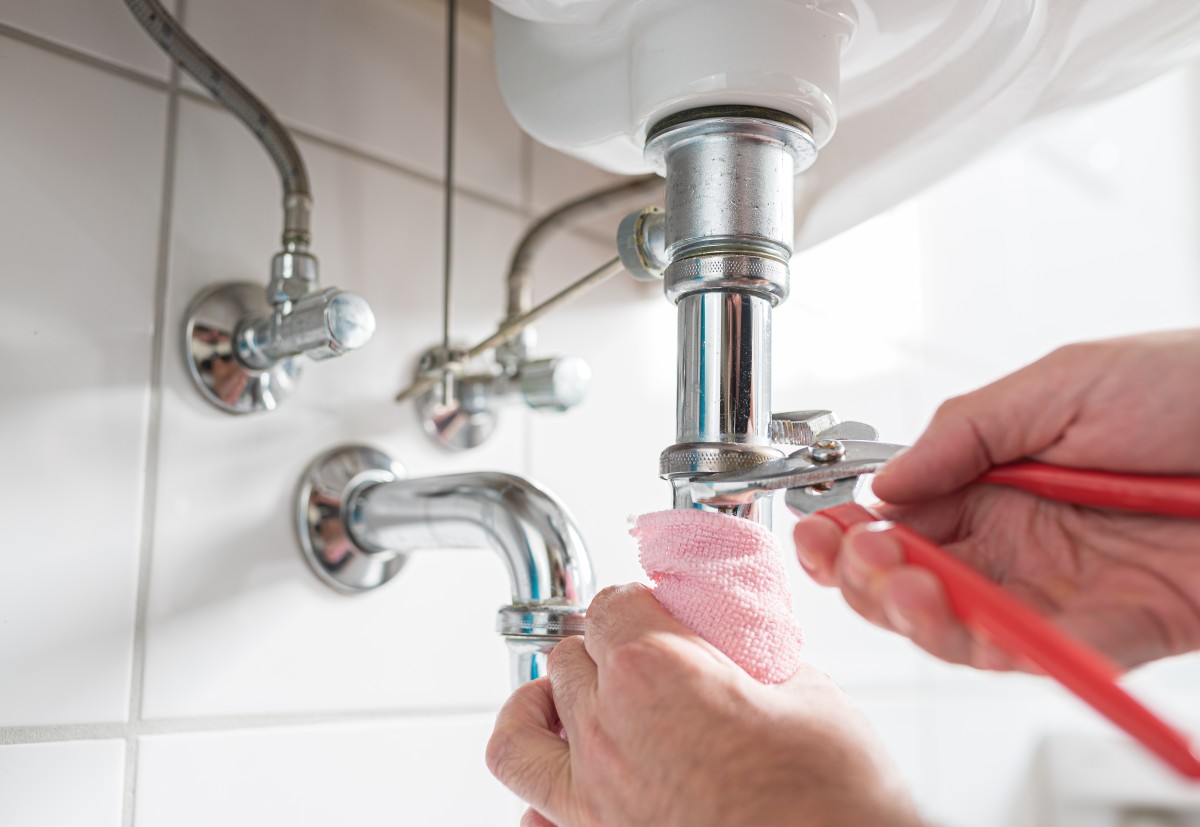
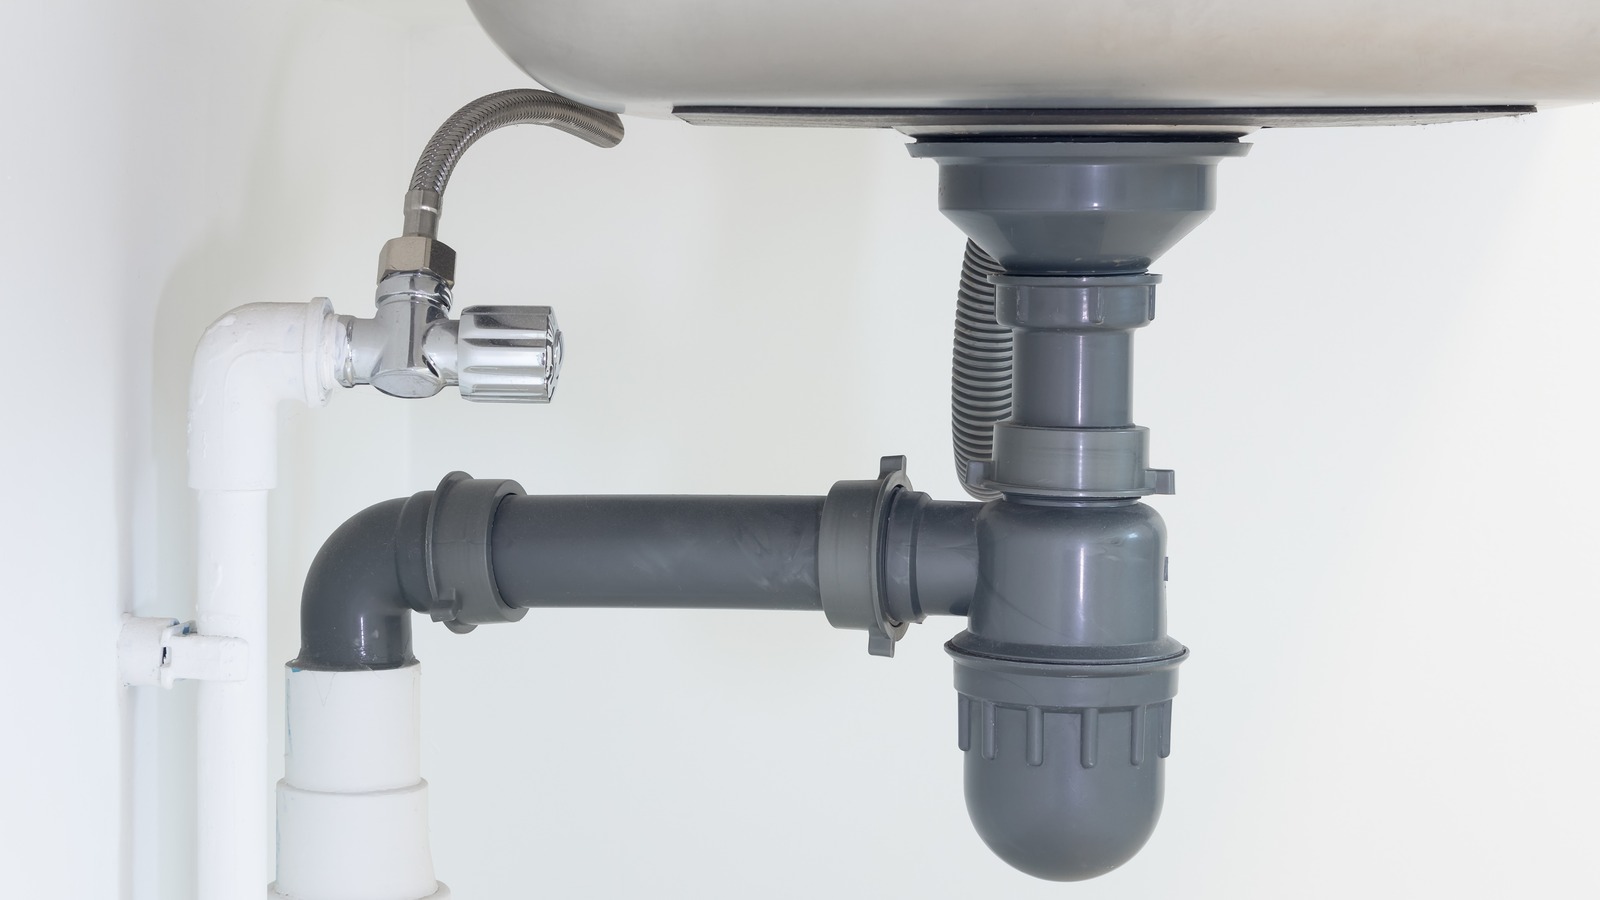
Start by examining the current sink and plumbing arrangement. Take note of how the drain pipe is connected to the sink and whether it goes into the wall or the floor. Additionally, observe how the water supply lines are connected to the faucet.
If your bathroom already has a double sink vanity, you’re in luck! The plumbing for the second sink is likely already in place. In this case, you will need to ensure that the existing plumbing can accommodate the extra sink and make any necessary adjustments.
However, if you currently have a single sink and need to make significant changes to the plumbing, it’s important to consider your skill level and comfort with plumbing work. If you are not familiar with plumbing or uncertain about making major alterations, it may be wise to consult a professional plumber to ensure the job is done correctly and safely.
Furthermore, take into account the location of the new sink. If you plan to install the second sink next to the existing one, it’s crucial to ensure there is enough space and that the plumbing can connect easily. If you need to move the second sink to a different area of the bathroom, additional plumbing work will be required.
When assessing the existing plumbing, keep in mind the aesthetic aspects as well. Consider how the new sink will complement the overall design of the bathroom. You may also need to make adjustments to the countertop or vanity to accommodate the new sink.
By thoroughly assessing the existing plumbing, you will have a clearer understanding of the scope of the project and any modifications that need to be made. This will help you plan accordingly and ensure a successful installation of the second sink. Once you have assessed the plumbing, it’s time to gather the necessary tools and materials for the job, which we will discuss in the next step.
Step 2: Gathering the Necessary Tools and Materials
Now that you have assessed the existing plumbing and determined the modifications required for installing a second sink, it’s time to gather the necessary tools and materials. Having everything you need on hand will help streamline the process and ensure a smooth installation.
Here is a list of tools and materials you will need:
- Adjustable wrench
- Screwdriver (both flat-head and Phillips)
- Hacksaw
- Teflon tape
- Plumber’s putty
- Pipe cutter or PVC cutter
- PVC pipes and fittings
- Water supply lines
- Drain pipe and trap (if necessary)
- Sink clips or brackets
- Silicone caulk
It’s essential to use the right tools and quality materials to ensure a professional and long-lasting installation. These items can be easily found at a local hardware store or home improvement center.
Before you make a trip to the store, take accurate measurements of the existing sink, the space available for the second sink, and the plumbing connections. This information will help you select the appropriate-sized pipes and fittings.
When purchasing PVC pipes and fittings, make sure they are suitable for drainage and meet local building codes. Similarly, when selecting water supply lines, check the specifications to ensure they are the correct size and compatible with your plumbing system.
Additionally, keep in mind the aesthetic aspect when choosing the second sink. Consider the style, color, and size of the sink to ensure it matches or complements the existing sink and the overall design of the bathroom.
By gathering all the necessary tools and materials beforehand, you can save time and avoid interruptions during the installation process. With everything on hand, you will be ready to move on to the next step, which involves shutting off the water supply.
Step 3: Shutting off the Water Supply
Before you begin working on the plumbing for the second sink, it is essential to shut off the water supply to ensure your safety and prevent any potential water damage.
The water shut-off valves are usually located underneath the sink or in the basement/crawlspace if you have one. If you can’t locate the shut-off valves for the specific sink you’re working on, you may need to shut off the main water supply line for the entire house.
To shut off the water supply for an individual sink:
- Locate the shut-off valves under the sink. There are typically two valves – one for hot water and one for cold water.
- Turn the valve handles clockwise (to the right) until they are fully closed. You may need to use an adjustable wrench if the valves are stiff or difficult to turn.
If you are unable to locate shut-off valves for the specific sink or if they are faulty, you may need to shut off the main water supply line:
- Locate the main water shut-off valve. This can typically be found near the water meter or where the main water line enters your home.
- Turn the valve clockwise (to the right) until it is fully closed. Depending on your home’s plumbing system, you may need to use a wrench to turn off the valve.
Once the water supply is shut off, test it by turning on the faucet of the sink you are working on. If no water comes out, then you have successfully shut off the water supply.
Remember, shutting off the water supply is crucial to avoid any accidents or water damage during the installation process. Take the time to locate the shut-off valves and ensure they are functioning properly. With the water supply shut off, you are ready to move on to the next step – removing the existing sink.
Step 4: Removing the Existing Sink
With the water supply shut off, it’s time to remove the existing sink in order to make way for the installation of the second sink.
Follow these steps to remove the existing sink:
- Clear out the area around the sink. Remove any items or clutter that may obstruct your workspace.
- Disconnect the water supply lines. Use an adjustable wrench to loosen the nuts connecting the water supply lines to the faucet. Place a bucket or towel underneath to catch any water that may spill.
- Disconnect the drain pipe. Loosen the nut that connects the drain pipe to the sink’s drain assembly. Again, have a bucket ready to collect any water that may be trapped in the pipe.
- If the sink is secured to the countertop, remove any brackets, clips, or screws holding it in place. These can usually be found underneath the sink or on the sides.
- Carefully lift the sink out of its position. It may be helpful to have an extra set of hands to assist with this step, as sinks can be heavy.
Take note of the condition of the existing drain pipe and water supply lines. Inspect them for any signs of damage or corrosion. If they appear worn or damaged, it is recommended to replace them to avoid future issues.
Once the existing sink is removed, clean the area thoroughly to prepare for the installation of the second sink. Remove any old caulk, adhesive, or debris that may be left behind.
Removing the existing sink can be a straightforward process as long as you follow these steps carefully. With the sink out of the way, you’re ready to move on to the next step – installing new drain pipes and water supply lines for the second sink.
Read more: How Do I Add Alexa To A Second Home
Step 5: Installing New Drain Pipes and Water Supply Lines
Now that you have removed the existing sink, it’s time to install new drain pipes and water supply lines for the second sink. This step is crucial for proper functionality and to ensure a leak-free plumbing system.
Follow these steps to install the new drain pipes and water supply lines:
- Measure and cut the new drain pipes. Using a pipe cutter or PVC cutter, cut the pipes to the desired lengths to connect the second sink to the main drain pipe. Be sure to account for the space needed for any angled connections or traps.
- If necessary, install a new drain trap. The trap is an essential component of the plumbing system that prevents sewer gases from entering the bathroom. Connect the new trap to the drain pipe using the appropriate fittings and tighten them securely.
- Attach the new drain pipes to the existing drain assembly or main drain pipe. Use PVC cement or appropriate adhesive/sealant to securely connect the pipes together. Follow the instructions on the adhesive/sealant for the best results.
- Measure and cut the new water supply lines. Using the appropriate sized water supply lines, cut them to the desired lengths to connect the second sink to the existing plumbing. Consider leaving a little extra length for flexibility during installation.
- Attach the water supply lines to the shut-off valves. Use an adjustable wrench to tighten the nuts securely. Ensure that the hot water supply line is connected to the hot water shut-off valve and the cold water supply line is connected to the cold water shut-off valve.
- Install any necessary valves or adapters. Depending on your plumbing system, you may need to install additional valves or adapters to ensure proper water flow and shut-off capabilities.
Throughout the installation process, ensure that all connections are tight and secure, but avoid over-tightening to prevent damage to the pipes or fittings. Additionally, use Teflon tape on threaded connections to create a watertight seal.
Once the new drain pipes and water supply lines are installed, it’s important to check for any leaks. Turn on the water supply and carefully inspect all connections and joints for any signs of water drips or leaks. If any are found, tighten the connections or make any necessary adjustments.
Installing new drain pipes and water supply lines may require some basic plumbing skills, but with careful attention to detail and following the steps outlined, you can successfully complete this crucial step. With the plumbing connections in place, it’s time to move on to the next step – attaching the second sink.
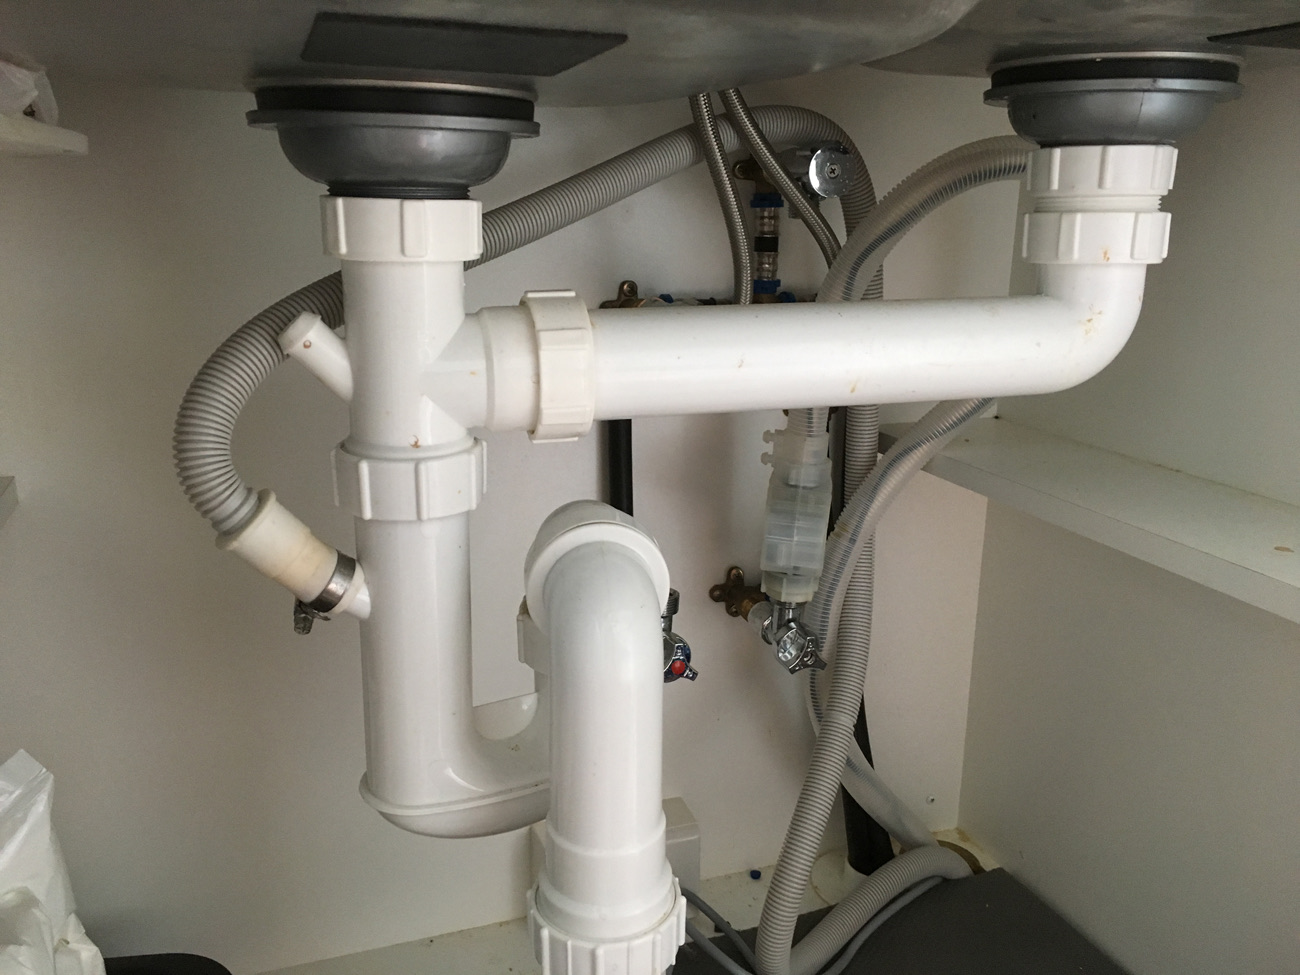
When changing plumbing from one sink to two, make sure to install a T-fitting in the existing drain line to accommodate the second sink. This will allow both sinks to drain properly without causing any backups.
Step 6: Attaching the Second Sink
Now that the new drain pipes and water supply lines are installed, it’s time to attach the second sink to the plumbing system. This step involves securing the sink to the countertop or vanity and connecting the drain assembly and water supply lines.
Follow these steps to attach the second sink:
- Place the sink in its designated position on the countertop or vanity. Ensure it is aligned correctly and centered.
- If necessary, use sink clips or brackets to secure the sink to the countertop. These are typically installed underneath the sink and fastened using screws or bolts.
- Connect the drain assembly to the sink. This typically involves attaching a tailpiece to the bottom of the sink and connecting it to the drain pipe using a slip nut and washer. Ensure the connections are tightened securely.
- Connect the water supply lines to the faucet. Use an adjustable wrench to tighten the nuts securely. Be cautious not to overtighten, as it may damage the connections.
- Check all connections for any potential leaks. Turn on the water supply and inspect all the joints and connections for any signs of water leaks. If any leaks are detected, tighten the connections or make adjustments as needed.
It’s important to follow the manufacturer’s instructions for specific sink installation guidelines. Different sink models may have slight variations in the installation process, so it’s always good practice to reference the provided instructions.
Once the sink is securely attached and all connections are checked for leaks, take a moment to clean the sink and surrounding area. Remove any debris, adhesive, or caulk that may be present to give your new sink a polished and finished look.
With the second sink successfully attached, you are one step closer to completing the project. The next step involves checking for any leaks and making the necessary adjustments. Keep reading to learn more.
Step 7: Checking for Leaks
After attaching the second sink and connecting all the necessary plumbing components, it’s important to check for any leaks before finalizing the installation. Checking for leaks ensures that your plumbing system is functioning properly and prevents any potential water damage or issues in the future.
Follow these steps to check for leaks:
- Turn on the water supply to the second sink.
- Inspect all the connections, joints, and fittings for any signs of water drips or leaks. Pay close attention to areas where two pipes or components are connected, such as under the sink and at the shut-off valves.
- If any leaks are found, shut off the water supply and make the necessary adjustments to the affected connections. This may involve tightening loose nuts or applying Teflon tape to create a watertight seal.
- Repeat the process of turning on the water supply and checking for leaks until all connections are secure and leak-free.
It’s important to take your time during this step and be thorough in checking for leaks. Even the smallest drip can lead to water damage over time, so it’s best to address any leaks immediately.
Remember to also check the connections under the sink and ensure that the drain assembly is properly aligned and securely connected to the drain pipe. A proper seal is crucial to prevent any leaks or unpleasant odors from the drain.
Once you have confirmed that there are no leaks, you can move on to the next step, which involves reconnecting the water supply.
By taking the time to check for any leaks and making the necessary adjustments, you are ensuring the longevity and functionality of your newly installed plumbing system with two sinks.
Step 8: Reconnecting the Water Supply
With the plumbing connections checked for leaks and any necessary adjustments made, it’s time to reconnect the water supply to both sinks. This step involves re-establishing the water flow and completing the final connections.
Follow these steps to reconnect the water supply:
- Ensure that the water supply valves are still in the closed position.
- Connect the water supply lines to the shut-off valves. Use an adjustable wrench to tighten the nuts securely, but be cautious not to overtighten to avoid damage.
- Verify that the hot water supply line is connected to the hot water shut-off valve and the cold water supply line is connected to the cold water shut-off valve.
- Double-check all the connections to ensure they are tight and secure.
- Slowly open the shut-off valves by turning the handles counterclockwise (to the left) until they are fully open.
As you open the shut-off valves, listen and observe for any potential leaks or unusual sounds. If you notice any leaks, immediately shut off the water supply and make the necessary adjustments to the connections.
After the water supply is reconnected, turn on the faucets of both sinks and let the water flow for a few minutes. This will help flush out any debris or air that may be trapped in the pipes.
Check all the connections once more for any potential leaks. Monitor the pipes, joints, and fittings for any signs of water drips or leaks. If any leaks are detected, tighten the connections or make necessary adjustments to eliminate the issue.
Once you are confident that the water supply is restored and all connections are secure and leak-free, you can move on to the final step – testing the plumbing system.
By reconnecting the water supply carefully and diligently checking for leaks, you are ensuring the functionality and reliability of your newly installed plumbing system with two sinks.
Read more: How To Add Plumbing To A Garage
Step 9: Testing the Plumbing
After completing all the necessary installation steps and reconnecting the water supply, it’s time to test the plumbing system to ensure everything is working properly. Testing the plumbing will help you identify any issues or concerns before fully utilizing the newly installed sinks.
Follow these steps to test the plumbing:
- Turn on the faucets of both sinks and let the water run for a few minutes. Observe the flow of water to ensure it is consistent and without any unusual sounds.
- Check for proper drainage by filling the sinks with water and then simultaneously releasing the stoppers. Pay close attention to the speed and efficiency at which the water drains.
- Inspect the area around the sinks and the plumbing connections for any signs of water leaks or drips. This includes checking under the sinks, around the drain pipes, and near the shut-off valves.
- If any leaks, drainage issues, or abnormalities are detected during the testing process, immediately shut off the water supply and make the necessary adjustments. Tighten any loose connections or seek professional assistance if needed.
- Once you are satisfied with the performance and functionality of the plumbing system, clean the sinks and surrounding area to remove any debris or residue.
Testing the plumbing is a crucial step to ensure that everything is functioning as intended. By being thorough in your testing process, you can address any potential issues before they become larger problems.
Remember that it is normal to encounter some minor adjustments or fine-tuning during the testing process. Plumbing systems can be complex, and ensuring optimal performance may require some trial and error.
By testing the plumbing and making any necessary adjustments, you can be confident in the reliability and functionality of your newly installed two-sink system.
With the plumbing successfully tested, you can now enjoy the convenience and efficiency of having two sinks in your bathroom. Congratulations on completing the project!
If you are satisfied with the functionality and appearance of your new two-sink setup, take a moment to admire your hard work and relish in the improved bathroom experience.
Conclusion
Changing plumbing from one sink to two may initially seem like a daunting task, but with the right knowledge and guidance, it can be successfully accomplished. Installing a second sink in your bathroom can greatly improve functionality, save time in busy mornings, and provide a more harmonious environment for multiple users.
In this comprehensive guide, we have walked through the step-by-step process of changing plumbing from one sink to two. We started by assessing the existing plumbing and gathering the necessary tools and materials. We then shut off the water supply and removed the existing sink, followed by installing new drain pipes and water supply lines for the second sink.
Next, we attached the second sink, checked for leaks, and reconnected the water supply. Finally, we tested the plumbing system to ensure its proper functionality. Each step was crucial in achieving a successful installation and ensuring a reliable two-sink setup.
By following this guide and taking your time with each step, you can confidently change plumbing from one sink to two and enjoy the benefits of an upgraded bathroom space.
However, it is important to note that plumbing work can vary depending on your specific setup and skill level. If you are unsure about any aspect of the installation process or feel uncomfortable with handling plumbing tasks, it is always advisable to consult a professional plumber for assistance.
With the installation complete, take a moment to enjoy your newly upgraded bathroom and appreciate the hard work and effort put into the project. Having two sinks in your bathroom will not only enhance functionality but also add aesthetic appeal to the space.
Remember to regularly maintain the plumbing system by checking for leaks, addressing any issues promptly, and practicing good plumbing habits such as avoiding the disposal of inappropriate materials down the drains.
We hope that this guide has provided you with the necessary information and confidence to successfully change plumbing from one sink to two. Embrace the convenience and efficiency of having two sinks in your bathroom, and enjoy the improved functionality it brings to your daily routine.
Happy plumbing!
Frequently Asked Questions about How To Change Plumbing To Add A Second Sink
Was this page helpful?
At Storables.com, we guarantee accurate and reliable information. Our content, validated by Expert Board Contributors, is crafted following stringent Editorial Policies. We're committed to providing you with well-researched, expert-backed insights for all your informational needs.


0 thoughts on “How To Change Plumbing To Add A Second Sink”