Home>Technology>Home Entertainment Systems>How To Calibrate Projector
Home Entertainment Systems
How To Calibrate Projector
Published: December 30, 2023
Learn how to calibrate your projector for optimal home entertainment system performance. Get expert tips and tricks for a better viewing experience.
(Many of the links in this article redirect to a specific reviewed product. Your purchase of these products through affiliate links helps to generate commission for Storables.com, at no extra cost. Learn more)
Introduction
Welcome to the world of home entertainment systems, where the immersive experience of a movie theater can be brought right into the comfort of your living room. One of the key components of a top-notch home entertainment system is a high-quality projector. Whether you're a movie enthusiast, a gaming aficionado, or a sports fanatic, a well-calibrated projector can elevate your viewing experience to new heights.
In this comprehensive guide, we'll delve into the art of projector calibration, demystifying the process and equipping you with the knowledge and skills to optimize your projector's performance. From understanding the fundamentals of projector calibration to fine-tuning the image settings, we'll cover it all. By the end of this journey, you'll be empowered to create a stunning visual display that rivals the picture quality of professional cinemas.
So, grab your popcorn, dim the lights, and let's embark on this illuminating adventure into the realm of projector calibration. Whether you're a seasoned home entertainment enthusiast or a newcomer to the world of projectors, this guide is designed to cater to all levels of expertise. Let's unlock the full potential of your projector and immerse ourselves in the captivating world of calibrated visuals.
Key Takeaways:
- Elevate your home entertainment experience by calibrating your projector for optimal image quality. Fine-tune settings for vibrant colors, sharp details, and immersive visuals that rival professional cinemas.
- Projector calibration empowers you to create a visually captivating oasis in your home. From setup to fine-tuning, unlock the full potential of your projector for cinematic indulgences, gaming adventures, and professional presentations.
Read more: How To Calibrate Digital Calipers
Understanding Projector Calibration
Projector calibration is the process of optimizing various visual settings to achieve the best possible image quality. It involves adjusting parameters such as brightness, contrast, color saturation, sharpness, and color temperature to ensure that the projected image accurately reflects the content being displayed. Proper calibration is essential for achieving lifelike colors, sharp details, and optimal brightness levels, resulting in a visually stunning viewing experience.
When a projector is first installed, its default settings may not be optimized for your specific viewing environment. Factors such as ambient light, screen type, and room layout can significantly impact the projected image. Calibration allows you to tailor the projector's settings to suit your unique setup, ensuring that the visuals are tailored to your preferences and environment.
Furthermore, calibration is crucial for maintaining the longevity of your projector and preserving the integrity of the displayed content. By fine-tuning the settings, you can prevent issues such as image burn-in, color distortion, and uneven brightness distribution, thus prolonging the lifespan of your projector while safeguarding the quality of the projected images.
Understanding the intricacies of projector calibration empowers you to take full control of your viewing experience. Whether you prioritize vibrant colors for cinematic content, precise color accuracy for professional presentations, or optimized brightness for gaming, calibration allows you to customize the projector settings to meet your specific requirements.
As we venture deeper into the realm of projector calibration, we'll explore the step-by-step process of setting up and fine-tuning a projector to achieve unparalleled image quality. By mastering the art of calibration, you'll unlock the full potential of your projector, transforming your viewing space into a captivating visual oasis.
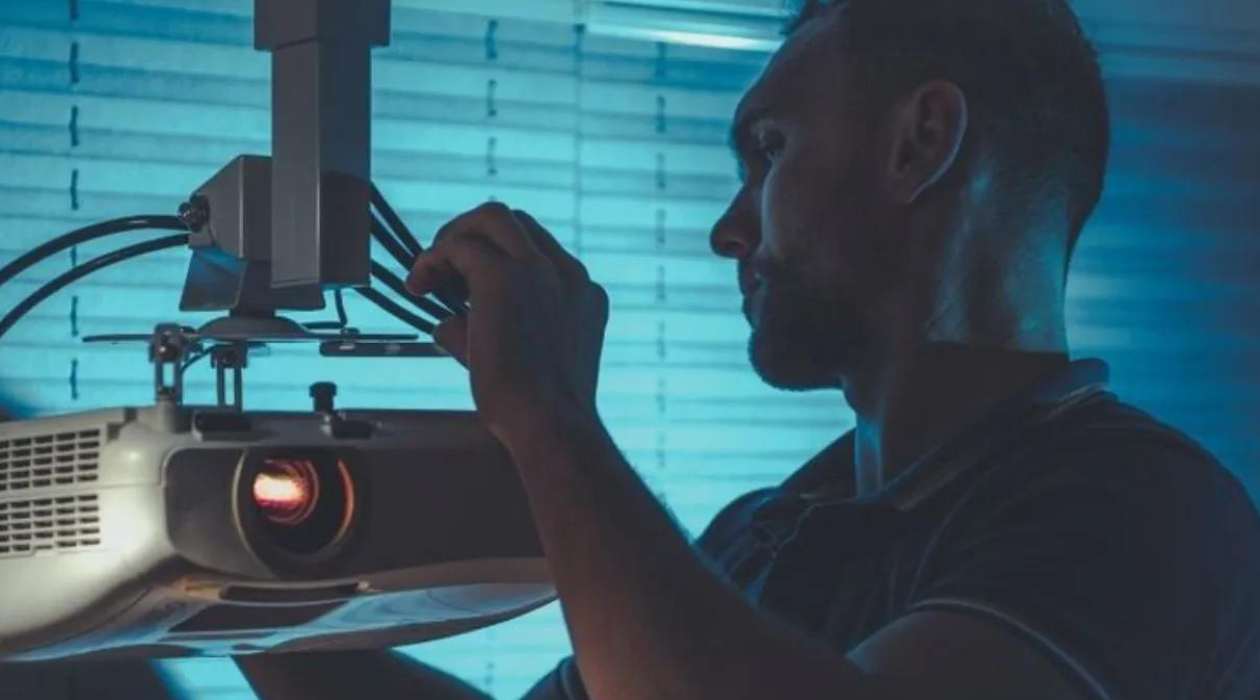
Setting Up the Projector
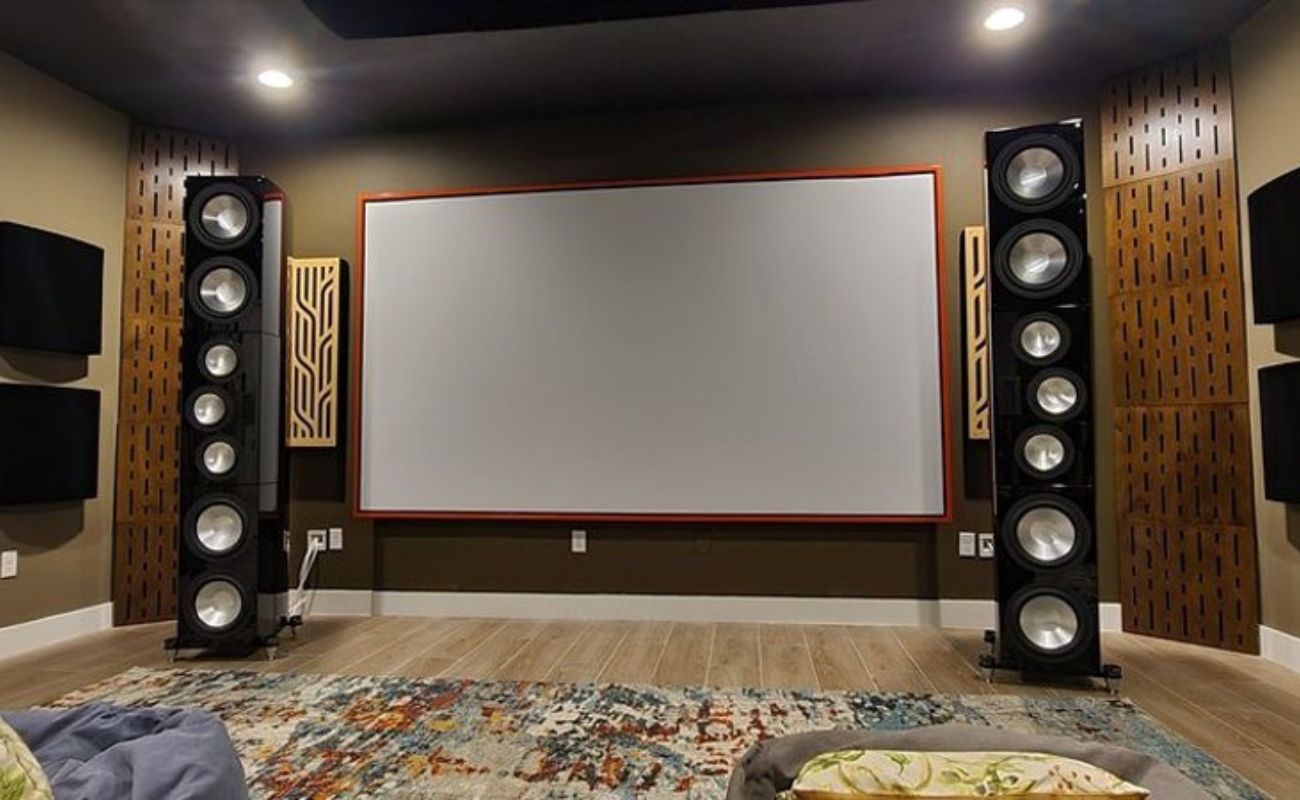
Before delving into the intricacies of calibration, it’s crucial to ensure that your projector is properly set up in your viewing space. The placement of the projector, the type of screen used, and the ambient lighting all play pivotal roles in achieving optimal visual performance.
Begin by positioning the projector at an appropriate distance from the screen, taking into account the throw ratio of the projector to determine the ideal placement for the desired screen size. Ensure that the projector is level and securely mounted or placed on a stable surface to prevent vibrations or misalignment, which can impact the projected image.
Next, consider the ambient lighting in the room. While complete darkness is ideal for a cinematic experience, it’s essential to assess the lighting conditions in your viewing space. If ambient light is present, consider implementing light control measures such as blackout curtains or adjustable lighting to minimize glare and optimize the viewing environment.
Additionally, the type of screen used can significantly impact the projected image. Factors such as screen material, gain, and color neutrality can influence the overall visual performance. Selecting a high-quality screen that complements the projector’s capabilities can enhance the viewing experience and contribute to the effectiveness of the calibration process.
Once the projector is securely positioned and the viewing environment is optimized, it’s time to connect the necessary audiovisual sources and ensure that the projector is properly aligned with the screen. This step is crucial for laying the foundation for the calibration process, as it sets the stage for fine-tuning the projector’s settings to deliver exceptional visual performance.
By meticulously setting up the projector and optimizing the viewing environment, you pave the way for a seamless calibration process, setting the stage for an immersive and visually captivating home entertainment experience. With the groundwork in place, we can now proceed to the next crucial phase: adjusting the image settings to achieve optimal visual performance.
Adjusting the Image Settings
With the projector properly set up in your viewing space, it’s time to delve into the process of adjusting the image settings to lay the groundwork for calibration. This phase involves fine-tuning the projector’s visual parameters to achieve an optimal starting point for the calibration process.
Begin by accessing the projector’s menu system, where you’ll find a range of image adjustment options. The specific menu layout and terminology may vary depending on the projector model, but common settings include brightness, contrast, color temperature, sharpness, and color saturation. Familiarize yourself with the menu navigation to access these essential image adjustments.
Start by adjusting the brightness and contrast settings to achieve a balanced and visually pleasing image. The goal is to maintain adequate brightness without sacrificing contrast, ensuring that dark scenes retain depth and detail while bright scenes appear vibrant and well-defined. Fine-tune these settings to achieve a harmonious balance that suits your viewing preferences and the ambient lighting conditions in your space.
Next, focus on the color temperature and color saturation settings to ensure accurate and vibrant color reproduction. Adjust the color temperature to achieve a natural and neutral color balance, avoiding overly warm or cool tones. Fine-tune the color saturation to enhance the richness and vibrancy of colors without veering into oversaturation, aiming for lifelike and nuanced color representation.
Sharpness is another critical parameter to consider. While it may be tempting to maximize sharpness for a perceived increase in image clarity, excessive sharpness can lead to unnatural artifacts and visual fatigue. Aim for a balanced sharpness setting that enhances detail without introducing visual artifacts or harsh edges, contributing to a refined and immersive viewing experience.
Throughout this process, it’s essential to periodically assess the visual adjustments by referencing high-quality content that represents the type of material you typically enjoy, whether it’s movies, games, or professional presentations. This allows you to evaluate the impact of the image settings on real-world content and make informed adjustments based on the visual outcomes.
By meticulously adjusting the image settings, you lay the foundation for the subsequent phase of fine-tuning the calibration parameters. This initial optimization sets the stage for a tailored and visually striking viewing experience, paving the way for the next crucial step: fine-tuning the calibration to achieve unparalleled image quality.
Make sure to use a calibration disc or software to adjust the brightness, contrast, color, and sharpness of your projector. This will ensure accurate and high-quality image projection.
Fine-Tuning the Calibration
As we transition into the fine-tuning phase of projector calibration, we embark on a meticulous journey to optimize the projector’s settings and achieve unparalleled image quality. This phase involves precise adjustments aimed at refining the visual parameters to elevate the viewing experience to new heights.
One of the key elements of fine-tuning the calibration is achieving optimal grayscale performance. This involves calibrating the projector to accurately reproduce shades of gray, ensuring that subtle tonal variations are faithfully represented. By adjusting the grayscale tracking and gamma settings, you can achieve a balanced and natural rendition of grayscale tones, laying the groundwork for lifelike and nuanced image reproduction.
Color accuracy is another pivotal aspect of calibration. Fine-tune the color settings to achieve precise and faithful color reproduction, ensuring that hues are rendered with accuracy and vibrancy. This involves adjusting the primary and secondary color parameters to align with industry-standard color spaces, resulting in rich and true-to-life color representation across a diverse range of content.
Furthermore, fine-tuning the calibration involves addressing issues such as uniformity and convergence. Evaluate the projected image for uniform brightness distribution and consistent color rendition across the entire screen. Additionally, ensure that the convergence of the projector’s imaging elements is optimized, minimizing any potential color fringing or misalignment that may detract from the overall visual coherence.
Throughout this phase, it’s essential to leverage calibration tools such as test patterns, color filters, and calibration software to aid in the precise adjustment of the projector’s settings. These tools provide objective metrics and visual references to guide the calibration process, empowering you to make informed and meticulous adjustments that result in exceptional image quality.
As you fine-tune the calibration, take the time to evaluate the visual outcomes using high-quality reference material. This allows you to assess the impact of the calibration adjustments on real-world content, ensuring that the refined settings result in a visually captivating and immersive viewing experience across a diverse range of media.
By meticulously fine-tuning the calibration, you pave the way for a visually stunning and immersive viewing experience that surpasses the standard factory settings. This meticulous optimization sets the stage for the final phase of the calibration process, where we consolidate the refined settings and bring the calibration to its culmination.
Read more: How To Calibrate A Zebra Printer
Finalizing the Calibration
As we approach the culmination of the projector calibration process, the finalization phase represents the harmonious convergence of meticulous adjustments and refined settings. This pivotal stage involves consolidating the calibrated parameters and ensuring that the projector’s visual performance is optimized across a diverse range of content.
Begin by revisiting the key calibration parameters, such as brightness, contrast, color temperature, and grayscale performance. Verify that the adjustments made during the fine-tuning phase have resulted in a visually balanced and cohesive image. This involves conducting visual assessments using high-quality reference material to confirm that the calibrated settings yield exceptional image quality.
Furthermore, consider the impact of the calibration on real-world content that represents your typical viewing preferences. Whether it’s cinematic movies, vibrant gaming visuals, or professional presentations, evaluate the projector’s performance across diverse media to ensure that the refined settings deliver a captivating and immersive viewing experience.
Once the visual performance has been thoroughly evaluated, consider saving the calibrated settings as a custom preset within the projector’s menu system. This allows you to conveniently access the refined calibration parameters in the future, ensuring that the optimized settings are readily available for consistent and exceptional visual performance.
Additionally, document the calibrated settings, including the adjustments made to parameters such as brightness, contrast, color temperature, grayscale tracking, and color accuracy. Creating a record of the calibrated settings serves as a valuable reference for future adjustments and provides a comprehensive overview of the optimized parameters that deliver exceptional image quality.
Finally, conduct a comprehensive review of the calibration process, reflecting on the journey from the initial image adjustments to the meticulous fine-tuning of the projector’s settings. Consider the impact of the calibration on the overall viewing experience and celebrate the transformation of your viewing space into a visually captivating oasis.
With the calibration finalized and the optimized settings in place, revel in the immersive visual experience that your meticulously calibrated projector delivers. Whether you’re indulging in cinematic masterpieces, engaging in thrilling gaming adventures, or delivering impactful presentations, the culmination of the calibration process sets the stage for an unparalleled visual journey.
By finalizing the calibration, you’ve unlocked the full potential of your projector, creating a visually stunning and immersive viewing environment that elevates the art of home entertainment to new heights.
Conclusion
Congratulations on embarking on the enlightening journey of projector calibration, where the art of fine-tuning visual parameters transforms your viewing space into a captivating oasis of immersive entertainment. Throughout this comprehensive guide, we’ve navigated the intricacies of projector calibration, empowering you to optimize your projector’s performance and elevate your viewing experience to new heights.
Projector calibration is a meticulous process that involves adjusting a myriad of visual parameters, from brightness and contrast to color accuracy and grayscale performance. By delving into the nuances of calibration, you’ve gained the knowledge and skills to tailor your projector’s settings to suit your unique viewing environment and personal preferences.
From the initial setup of the projector to the meticulous fine-tuning of its visual parameters, you’ve embarked on a transformative journey that culminates in a visually striking and immersive viewing experience. The art of calibration empowers you to create a tailored visual environment that complements your cinematic indulgences, gaming escapades, and professional presentations.
As you finalize the calibration and document the optimized settings, you’ve laid the foundation for consistent and exceptional visual performance, ensuring that your projector delivers unparalleled image quality across a diverse range of content. The culmination of the calibration process represents the harmonious convergence of meticulous adjustments and refined settings, setting the stage for an immersive and visually captivating viewing experience.
With your projector finely calibrated, you’re poised to indulge in the artistry of cinema, the excitement of gaming, and the impact of professional presentations, all within the comfort of your own home. The immersive visual experience that awaits is a testament to the transformative power of projector calibration, where meticulous adjustments yield exceptional image quality and elevate the art of home entertainment.
So, dim the lights, cue your favorite content, and immerse yourself in the visually captivating oasis that your finely calibrated projector creates. The journey of calibration has unlocked the full potential of your projector, ushering in a new era of captivating visuals and immersive entertainment within your home.
As you revel in the captivating visuals that adorn your screen, remember that the art of calibration is a dynamic and evolving process. As technology advances and your viewing environment evolves, revisiting the calibration process allows you to refine and optimize the visual performance of your projector, ensuring that your home entertainment experience continues to dazzle and captivate.
With the knowledge and skills acquired on this enlightening journey, you’re equipped to embark on future calibration endeavors and continue to elevate the art of home entertainment through the transformative power of projector calibration.
Frequently Asked Questions about How To Calibrate Projector
Was this page helpful?
At Storables.com, we guarantee accurate and reliable information. Our content, validated by Expert Board Contributors, is crafted following stringent Editorial Policies. We're committed to providing you with well-researched, expert-backed insights for all your informational needs.


0 thoughts on “How To Calibrate Projector”