Home>Technology>Security & Surveillance>How To Install Door Lock Rod Clip
Security & Surveillance
How To Install Door Lock Rod Clip
Modified: January 5, 2024
Learn how to install a door lock rod clip for added security and surveillance. Follow our step-by-step guide to ensure proper installation and peace of mind.
(Many of the links in this article redirect to a specific reviewed product. Your purchase of these products through affiliate links helps to generate commission for Storables.com, at no extra cost. Learn more)
Introduction
Installing a door lock rod clip is a crucial aspect of maintaining the security and functionality of your door lock mechanism. Whether you are replacing a damaged clip or upgrading to a more secure option, this process is essential for ensuring that your door lock operates smoothly and securely. By following the step-by-step guide outlined in this article, you can successfully install a door lock rod clip with ease.
This comprehensive tutorial will walk you through the necessary tools and materials, preparation steps, and the actual process of removing the door panel, installing the door lock rod clip, and reassembling the door panel. With careful attention to detail and a systematic approach, you can complete this task efficiently and effectively.
By understanding the intricacies of installing a door lock rod clip, you can enhance your knowledge of security and surveillance systems while gaining practical skills that can be applied to various home maintenance projects. Let's dive into the essential steps and techniques required to install a door lock rod clip, ensuring the optimal functionality and security of your door lock.
Key Takeaways:
- Installing a door lock rod clip is essential for maintaining door security. By following the step-by-step guide, you’ll gain valuable skills and ensure smooth and reliable door lock operation.
- Prioritizing safety and attention to detail during the installation process enhances door lock functionality. With these skills, you can confidently tackle home maintenance projects.
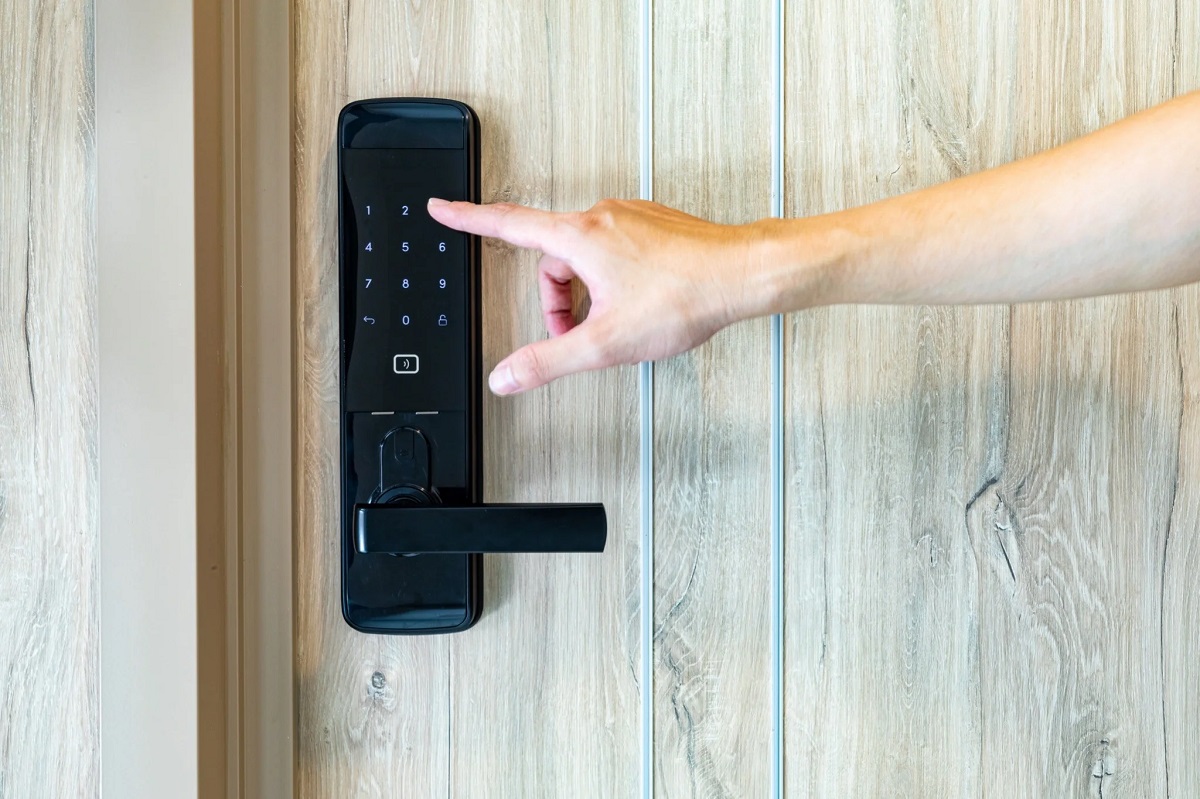
Read more: How To Install A Smart Door Lock
Tools and Materials Needed
Before you begin the process of installing a door lock rod clip, it’s essential to gather the necessary tools and materials. Having the right equipment at your disposal will streamline the installation process and ensure that you can complete the task efficiently. Here’s a comprehensive list of the tools and materials you’ll need:
- Flathead screwdriver
- Phillips head screwdriver
- Needle-nose pliers
- Replacement door lock rod clip
- Protective gloves
- Protective eyewear
- Clean cloth or rag
- Trim removal tool (optional)
These tools and materials are essential for removing the door panel, accessing the door lock rod clip, and completing the installation process. The flathead and Phillips head screwdrivers are necessary for removing screws and fasteners, while the needle-nose pliers are useful for manipulating small components. Additionally, having a replacement door lock rod clip on hand is crucial for the installation.
It’s important to prioritize safety during this process, so wearing protective gloves and eyewear can prevent any potential injuries. The clean cloth or rag will come in handy for wiping down surfaces and keeping the work area tidy. While not mandatory, a trim removal tool can make the task of prying off the door panel more convenient, especially if you plan to work on car doors with delicate trim pieces.
By ensuring that you have all the necessary tools and materials prepared, you can approach the installation of the door lock rod clip with confidence and efficiency. With these items at your disposal, you’ll be ready to proceed to the next steps of the installation process.
Preparation
Before diving into the installation of a door lock rod clip, it’s crucial to prepare both yourself and the work area. By taking the time to prepare adequately, you can ensure a smooth and efficient installation process while minimizing the risk of accidents or errors. Here are the essential steps to prepare for installing a door lock rod clip:
- Choose a Well-Lit and Ventilated Workspace: Select a location with ample lighting and ventilation to carry out the installation. This will make it easier to see and manipulate small components while ensuring a comfortable working environment.
- Gather the Necessary Tools and Materials: Refer to the list of tools and materials needed for the installation and ensure that they are readily available. Organize them within reach to streamline the process and avoid unnecessary interruptions.
- Put on Protective Gear: Prioritize safety by wearing protective gloves and eyewear before commencing the installation. This will safeguard your hands and eyes from potential hazards during the process.
- Inspect the Door Panel: Take a close look at the door panel to identify any existing damage or areas that require attention. Addressing any issues beforehand will contribute to a successful installation and ensure the door panel’s integrity.
- Review the Vehicle Manual (If Applicable): If you are working on a car door, referring to the vehicle’s manual can provide specific instructions for removing the door panel and accessing the door lock mechanism. This step is particularly important for first-time installers.
- Clear the Work Area: Remove any clutter or obstacles from the work area to create a clean and organized space for the installation. This will prevent distractions and potential accidents while allowing you to focus on the task at hand.
By following these preparation steps, you can set the stage for a successful installation of the door lock rod clip. Taking the time to prepare adequately will contribute to a seamless and efficient process, ultimately leading to a secure and fully functional door lock mechanism.
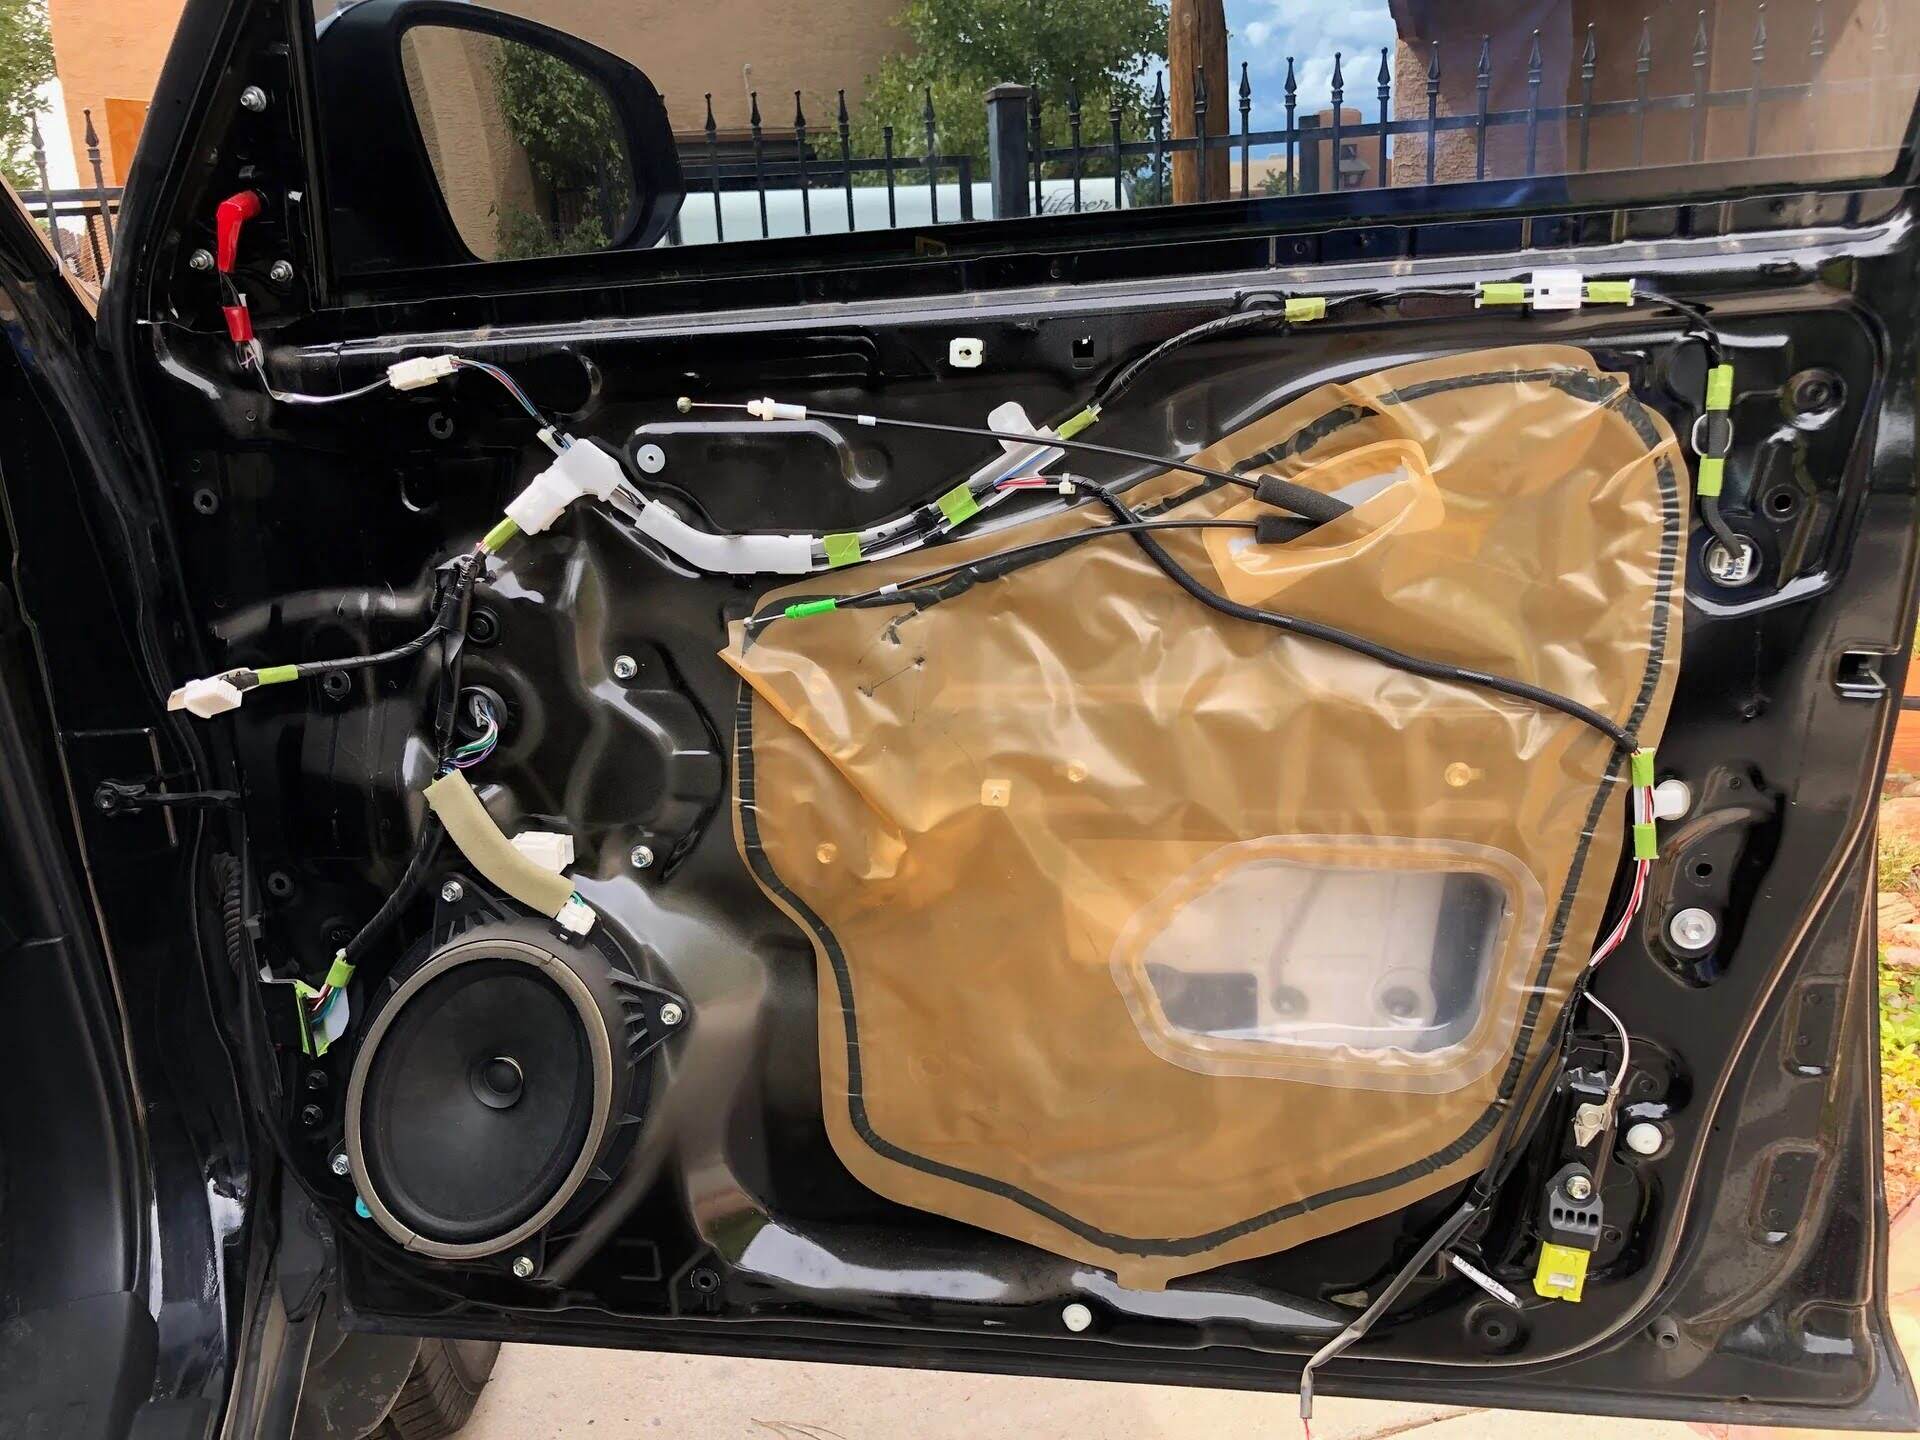
Removing the Door Panel
Removing the door panel is a crucial preliminary step in accessing the door lock rod clip for installation or replacement. This process may vary slightly depending on whether you are working on a car door or a standard interior door. Here’s a comprehensive guide to removing the door panel:
For Car Doors:
1. Locate and Remove Screws and Fasteners: Using a flathead or Phillips head screwdriver, carefully remove any visible screws and fasteners securing the door panel to the door frame. These are typically located along the edges and near the door handle.
2. Utilize a Trim Removal Tool (If Necessary): In some cases, car door panels may have hidden fasteners or clips behind the trim. A trim removal tool can be used to gently pry off the trim and access these hidden components without causing damage.
3. Detach Electrical Connections (If Applicable): If the door panel houses electrical components such as power window switches or door locks, carefully disconnect the wiring harnesses to free the panel completely. Take note of the connections to facilitate reassembly later.
Read more: How To Install Sliding Door Lock
For Interior Doors:
1. Identify and Remove Screws: Using a suitable screwdriver, locate and remove the screws securing the door panel to the door frame. These screws are typically positioned along the edges and near the corners of the panel.
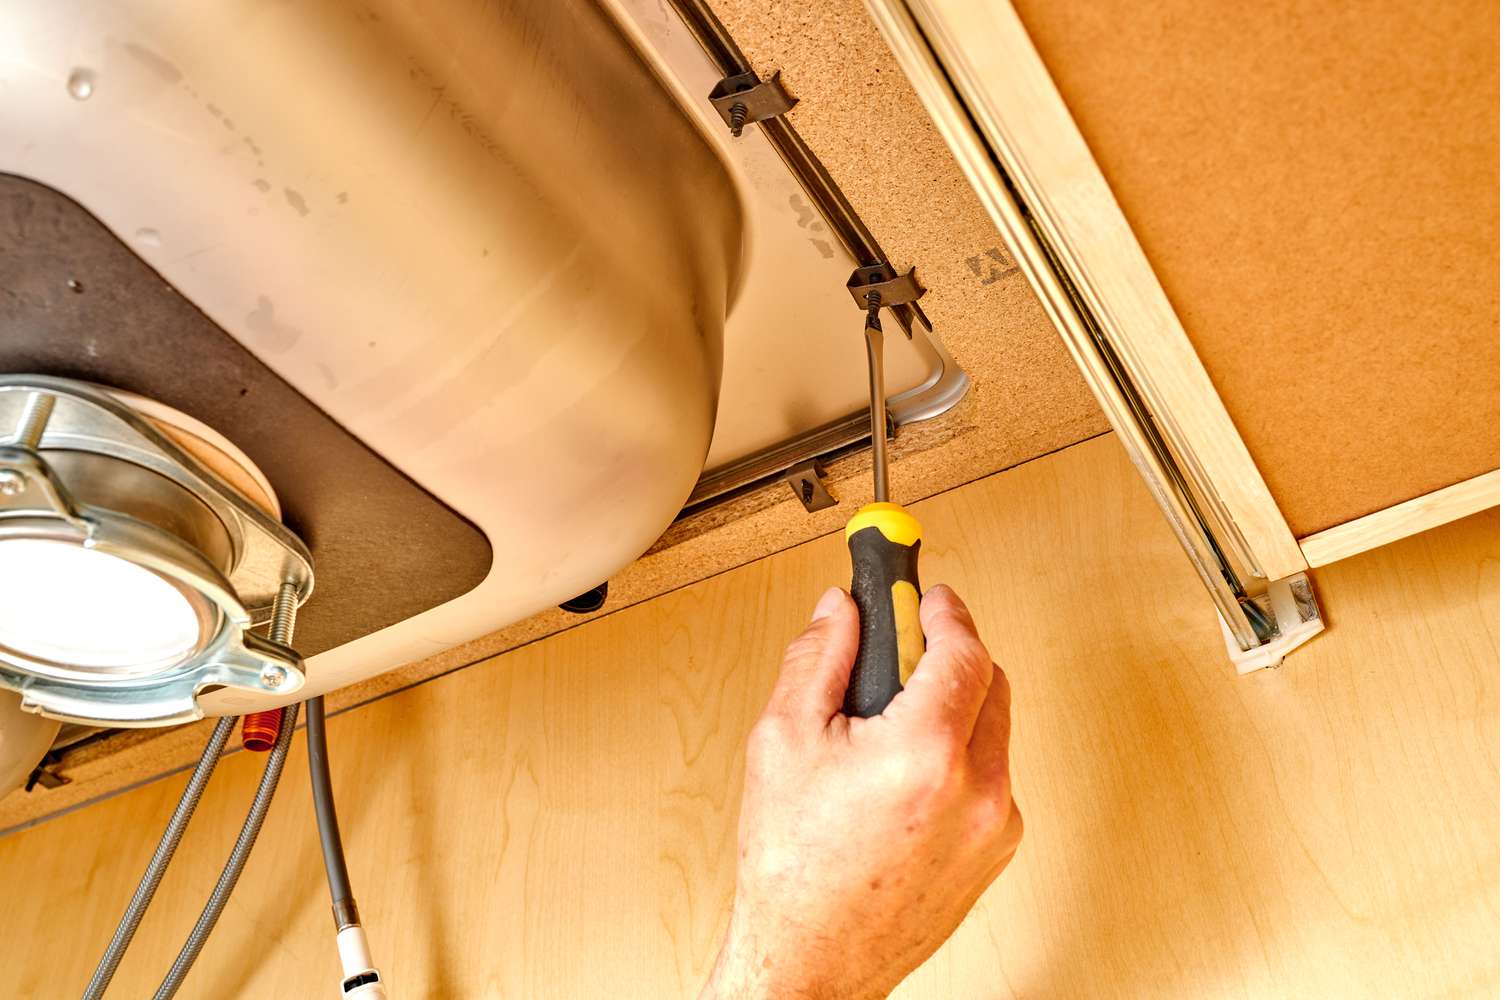
2. Release Panel Clips: Once the screws are removed, gently pry the edges of the door panel to release the panel clips that hold it in place. Take care to apply even pressure to avoid damaging the panel or the clips.
3. Handle the Panel with Care: Once the panel clips are released, lift the door panel off the door frame carefully. Be mindful of any wiring or components attached to the panel, ensuring that they are disconnected before fully removing the panel.
Regardless of the type of door, removing the door panel requires patience and attention to detail. By following these steps, you can successfully access the interior of the door and proceed to the next phase of installing the door lock rod clip.
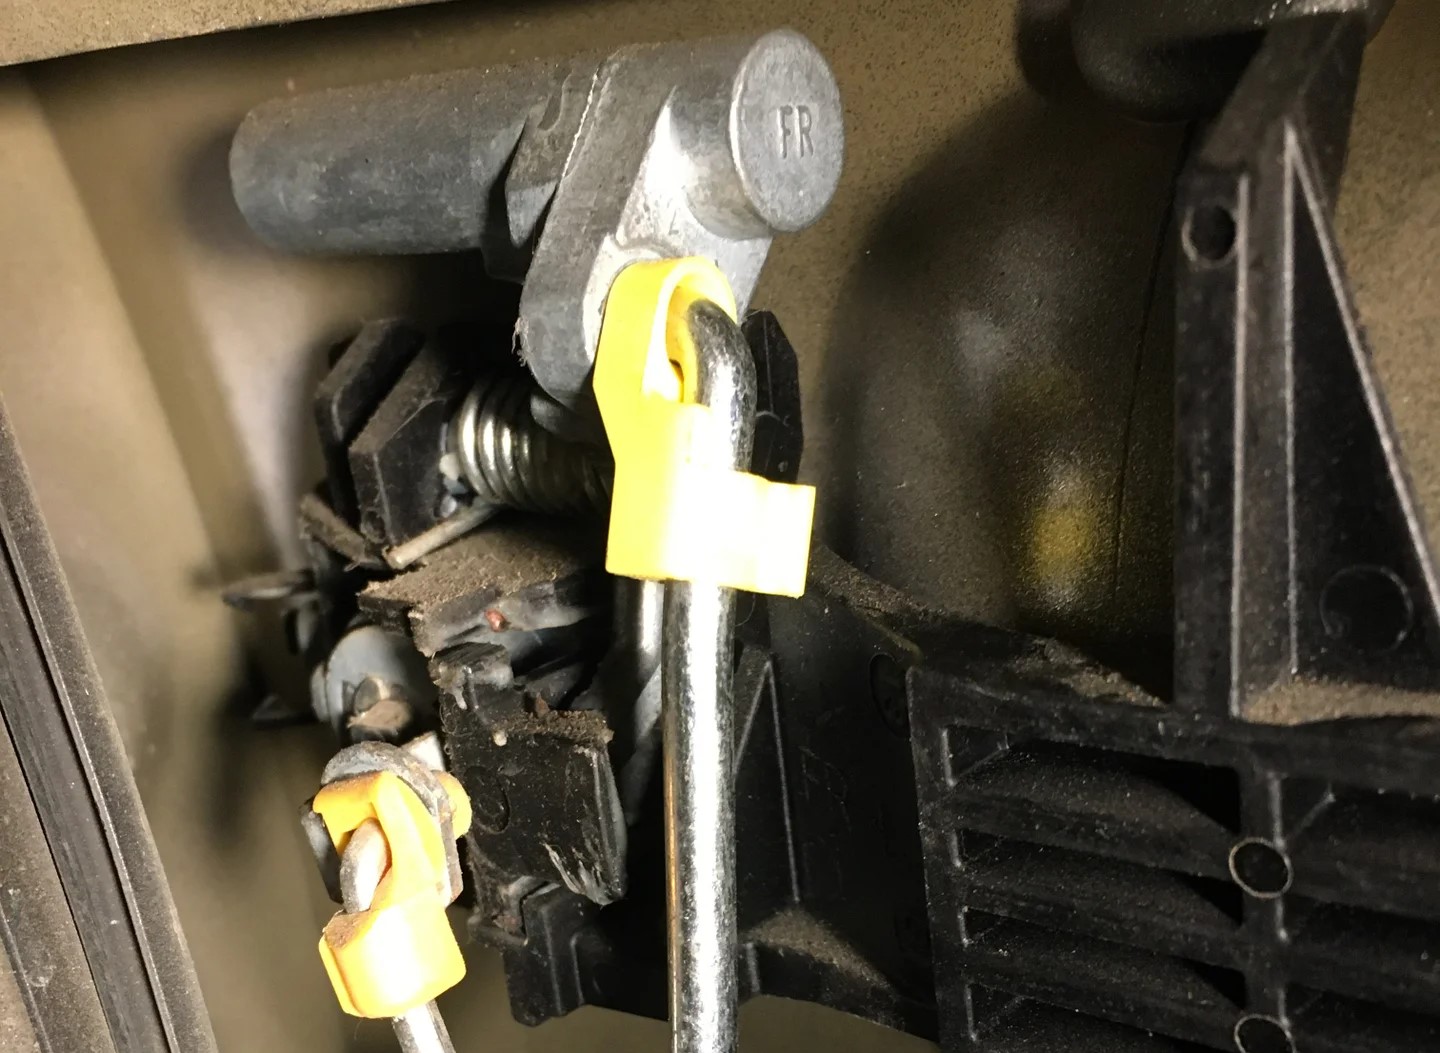
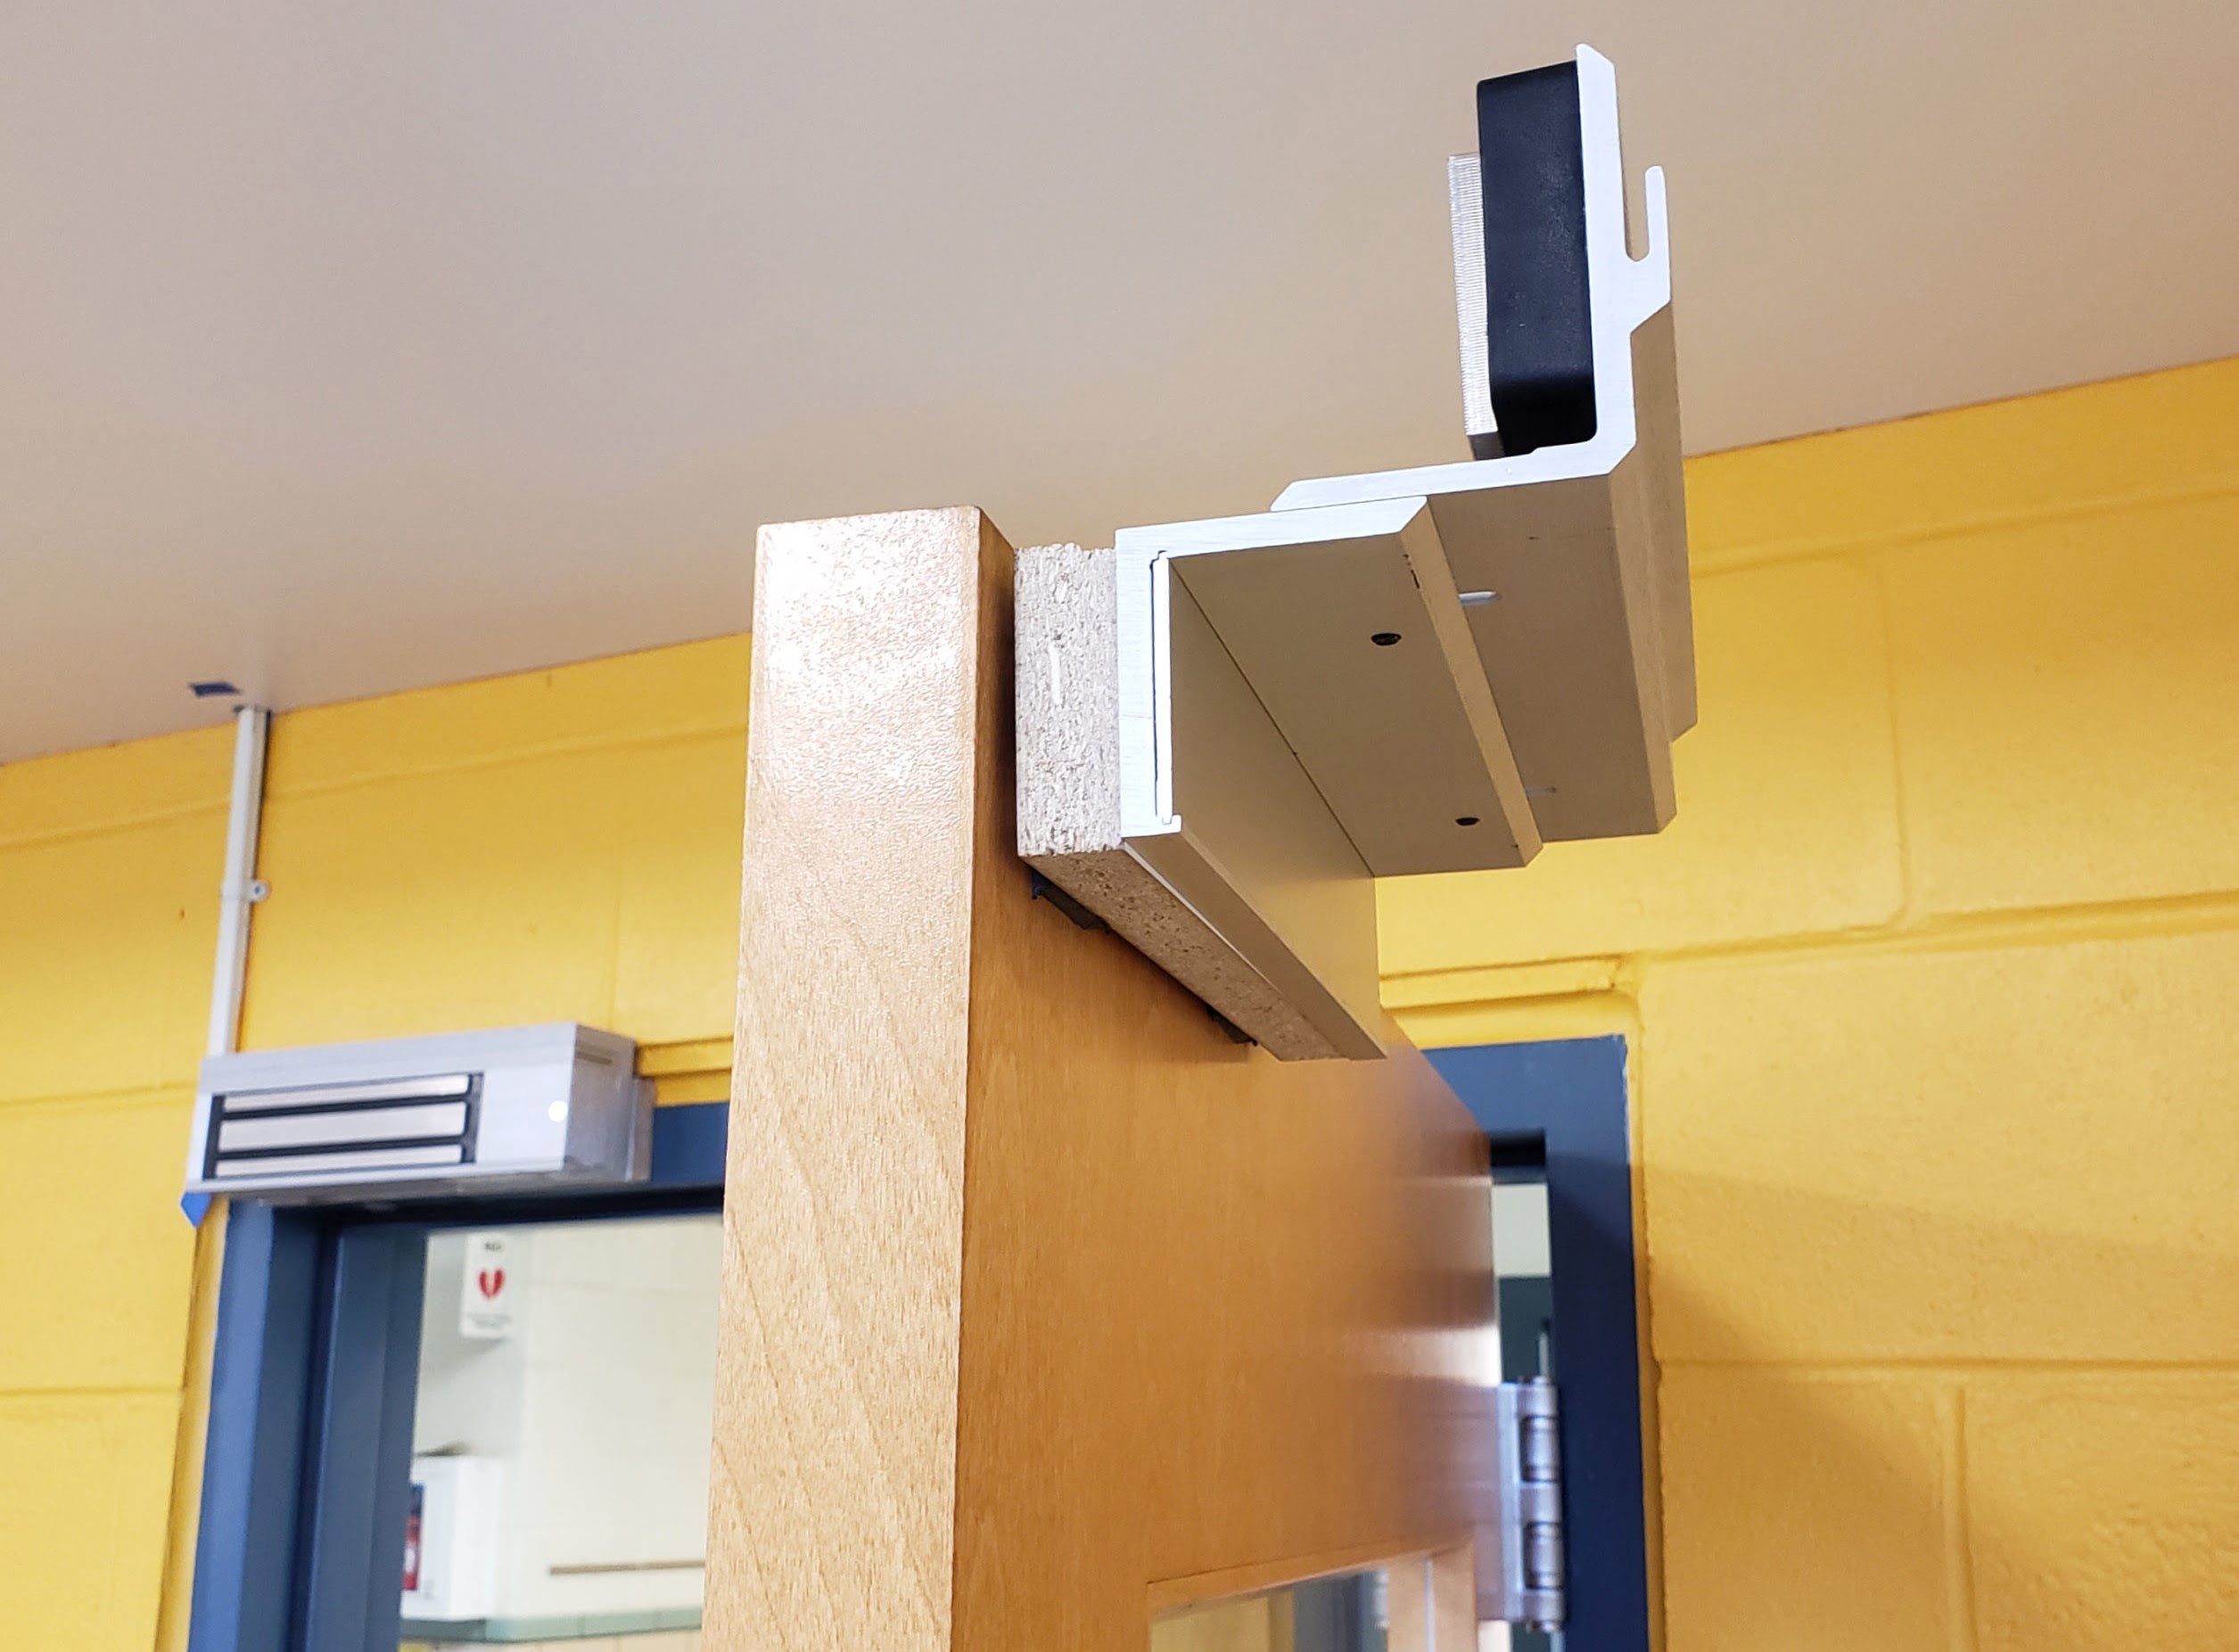
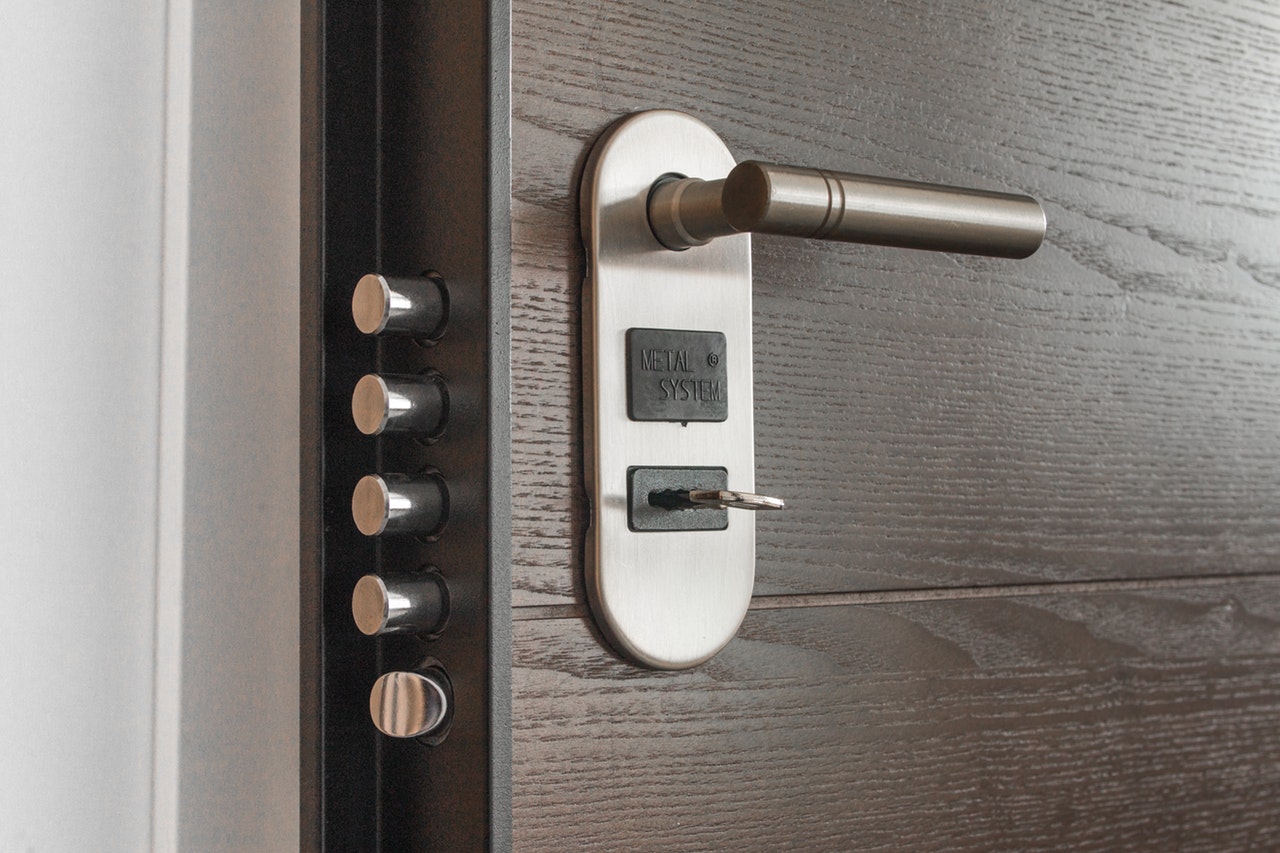
Installing the Door Lock Rod Clip
Once the door panel has been removed, you can proceed with the crucial step of installing the door lock rod clip. This component plays a vital role in the proper functioning of the door lock mechanism, and its correct installation is essential for optimal security and performance. Follow these steps to install the door lock rod clip:
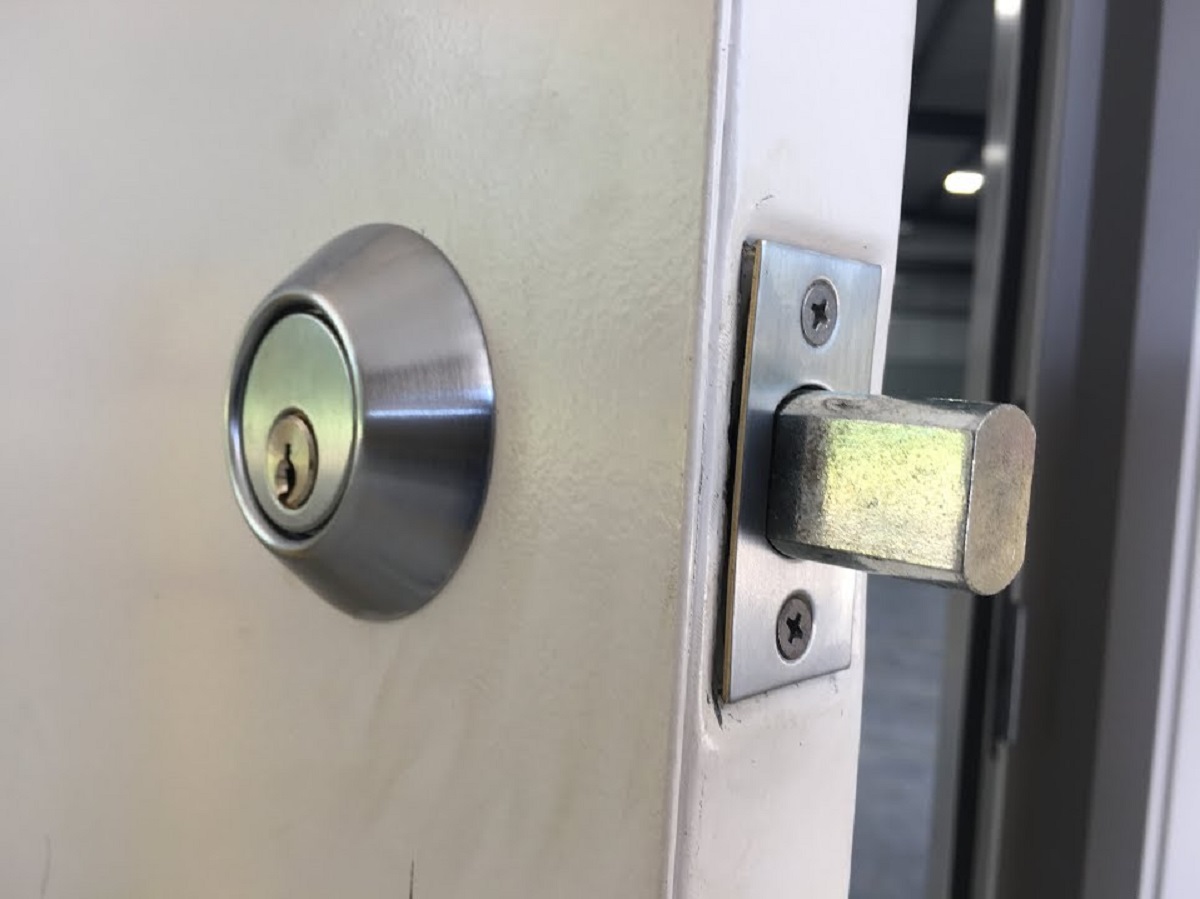
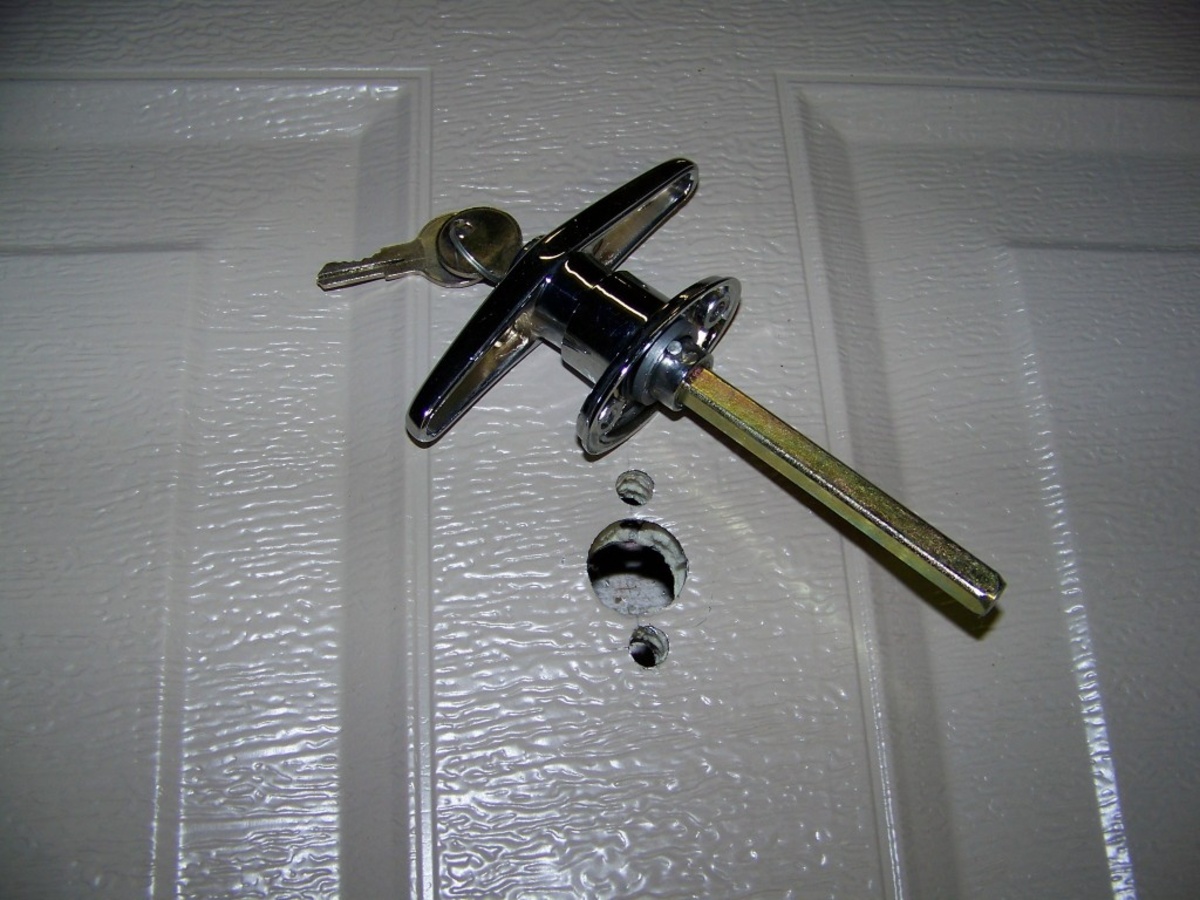
- Locate the Door Lock Rod and Clip: Identify the door lock rod, which is a slender metal rod connected to the door lock mechanism. The door lock rod clip secures this rod in place, allowing it to actuate the locking mechanism.
- Inspect the Door Lock Rod Clip: Before installation, ensure that the replacement door lock rod clip matches the specifications of the original clip. Verify that it is the correct size and design to guarantee a proper fit and functionality.
- Position the Door Lock Rod Clip: Align the door lock rod clip with the door lock rod, ensuring that it fits securely and does not obstruct the rod’s movement. The clip should snap into place, holding the rod firmly while allowing smooth operation.
- Test the Door Lock Mechanism: After installing the door lock rod clip, test the door lock mechanism to ensure that the rod moves freely and engages the locking mechanism without any obstructions or irregularities. This step confirms the successful installation of the clip.
- Make Adjustments as Needed: If the door lock rod clip does not function as expected, or if there is any resistance or misalignment, carefully readjust the clip to ensure proper alignment and functionality. Attention to detail during this step is crucial for the smooth operation of the door lock mechanism.
By following these steps, you can effectively install the door lock rod clip, ensuring that the door lock mechanism operates securely and reliably. Attention to detail and precision during this process will contribute to the optimal functionality and security of your door lock.
When installing a door lock rod clip, make sure to align the clip with the rod and the door handle mechanism before securing it in place. This will ensure that the door lock operates smoothly and effectively.
Reassembling the Door Panel
With the door lock rod clip successfully installed, the final phase of the process involves reassembling the door panel. This step is essential for restoring the door’s aesthetic appeal and structural integrity while ensuring that all components are securely in place. Follow these steps to reassemble the door panel:
- Reconnect Electrical Components (If Applicable): If the door panel houses electrical components such as power window switches or door locks, carefully reconnect the wiring harnesses to their respective components. Ensure that the connections are secure and properly aligned.
- Position the Door Panel: Align the door panel with the door frame, ensuring that any protruding components, such as the door lock rod, fit through their respective openings in the panel. Take care to position the panel evenly and securely against the door frame.
- Secure Panel Clips: Gently press along the edges of the door panel to engage the panel clips, securing the panel in place. Apply even pressure to ensure that all clips are properly fastened, holding the panel securely to the door frame.
- Replace Screws and Fasteners: Using the appropriate screws and fasteners, reattach the door panel to the door frame. Ensure that each screw is tightened securely but avoid over-tightening, as this may cause damage to the panel or the door frame.
- Test Panel Stability: After reassembly, perform a gentle tug on the door panel to confirm that it is securely attached to the door frame. Any movement or instability may indicate that the panel clips are not fully engaged, requiring further attention.
- Operate Electrical Components (If Applicable): Test the functionality of any electrical components on the door panel, such as power windows and door locks, to ensure that they operate smoothly and without any issues after reassembly.
By following these steps, you can effectively reassemble the door panel, completing the installation of the door lock rod clip while restoring the door’s functionality and appearance. Attention to detail and precision during this process will contribute to a secure and fully functional door lock mechanism, ensuring the optimal performance of your door.
Conclusion
Installing a door lock rod clip is a fundamental aspect of maintaining the security and functionality of your door lock mechanism. By following the step-by-step guide outlined in this article, you have gained valuable insights into the process of installing a door lock rod clip, equipping you with the knowledge and skills to carry out this essential task effectively.
Throughout the installation process, you learned the importance of preparation, the necessary tools and materials, and the meticulous steps involved in removing the door panel, installing the door lock rod clip, and reassembling the door panel. These foundational skills not only contribute to the security and surveillance aspects of your home but also empower you to undertake various home maintenance projects with confidence.
By prioritizing safety, attention to detail, and precision during the installation, you have successfully enhanced the functionality and security of your door lock mechanism. The successful installation of the door lock rod clip ensures smooth and reliable operation, contributing to the overall safety and peace of mind within your living space.
As you reflect on this process, you can take pride in your newfound expertise and the practical application of security and surveillance knowledge. Whether you are maintaining your home’s security features or exploring new DIY projects, the skills acquired through installing a door lock rod clip will serve you well in various home maintenance endeavors.
With a secure and fully functional door lock mechanism in place, you can approach future projects and maintenance tasks with confidence, knowing that you have the knowledge and skills to uphold the security and functionality of your living environment.
By mastering the installation of a door lock rod clip, you have taken a proactive step in safeguarding your home, enhancing your understanding of security systems, and acquiring valuable hands-on experience in home maintenance. Your commitment to maintaining a secure and functional living space is a testament to your dedication to safety and well-being.
Frequently Asked Questions about How To Install Door Lock Rod Clip
Was this page helpful?
At Storables.com, we guarantee accurate and reliable information. Our content, validated by Expert Board Contributors, is crafted following stringent Editorial Policies. We're committed to providing you with well-researched, expert-backed insights for all your informational needs.
0 thoughts on “How To Install Door Lock Rod Clip”