Home>Technology>Smart Home Devices>How To Level A Printer Bed
Smart Home Devices
How To Level A Printer Bed
Published: January 18, 2024
Learn how to easily level a printer bed for optimal printing results with our step-by-step guide. Get the best tips for smart home devices and improve your printing experience today.
(Many of the links in this article redirect to a specific reviewed product. Your purchase of these products through affiliate links helps to generate commission for Storables.com, at no extra cost. Learn more)
Introduction
Welcome to the world of 3D printing! Whether you are a seasoned enthusiast or a newcomer to the fascinating realm of additive manufacturing, one of the essential skills you must master is leveling the printer bed. Achieving proper bed leveling is crucial for ensuring that your 3D prints adhere securely to the build surface, resulting in precise and flawless creations.
Proper bed leveling is akin to laying a solid foundation for a building. It sets the stage for successful 3D printing by ensuring that the first layer of filament adheres evenly to the print surface. This fundamental process significantly impacts the overall print quality, preventing issues such as warping, uneven layers, and adhesion problems. By mastering the art of bed leveling, you can embark on a seamless 3D printing journey, yielding consistent and high-quality results.
In this comprehensive guide, we will delve into the intricacies of leveling a 3D printer bed, providing step-by-step instructions and insightful tips to help you achieve optimal print bed alignment. So, gather your tools, prepare your printer, and let's embark on this enlightening journey to master the art of bed leveling in the realm of 3D printing.
Key Takeaways:
- Mastering the art of leveling a 3D printer bed is crucial for flawless 3D prints. With patience and precision, adjusting the bed leveling screws and conducting thorough testing are key to achieving impeccable print quality.
- Properly leveling the printer bed is like laying a solid foundation for successful 3D printing. By gathering the right tools, preparing the printer, and conducting meticulous testing, you can ensure consistent and high-quality 3D prints.
Read more: How To Level The Ground For A Garden Bed
Gather the Necessary Tools
Before embarking on the bed leveling process, it is essential to gather the requisite tools to ensure a smooth and efficient experience. Here are the essential tools you will need:
- 1. Printer Manual: The printer manual is a valuable resource that provides specific instructions for bed leveling, tailored to your printer model. It serves as a comprehensive guide, offering insights into the unique features and nuances of your 3D printer.
- 2. Leveling Paper or Feeler Gauge: A thin sheet of leveling paper or a precise feeler gauge is indispensable for accurately gauging the distance between the print nozzle and the bed surface. This tool enables you to achieve the optimal gap required for seamless bed adhesion.
- 3. Adjustment Tools: Depending on your printer model, you may require specific tools such as a screwdriver or wrench to adjust the bed leveling screws. It is essential to have the appropriate tools on hand to facilitate precise adjustments.
- 4. Marker or Notepad: Keeping track of the adjustments made during the leveling process is crucial for maintaining consistency. A marker or notepad can be used to record the adjustments, ensuring a systematic approach to bed leveling.
- 5. Patience and Attention to Detail: While not tangible tools, patience and attention to detail are invaluable attributes during the bed leveling process. Taking the time to meticulously adjust the bed and observe the changes is essential for achieving optimal results.
By ensuring that you have these tools at your disposal, you can approach the bed leveling process with confidence and precision, setting the stage for successful 3D printing endeavors.
Prepare the Printer
Before initiating the bed leveling process, it is crucial to prepare the 3D printer to ensure an optimal environment for achieving precise bed alignment. Follow these essential steps to prepare your printer for the bed leveling procedure:
- Power On the Printer: Start by powering on the 3D printer and allowing it to reach the appropriate operating temperature. This ensures that the printer components, including the heated bed and print nozzle, are at the required settings for the leveling process.
- Home the Printer: Utilize the printer’s control interface to home the print head and bed. This action establishes the initial reference position for the print head, ensuring that it is aligned with the bed’s starting point.
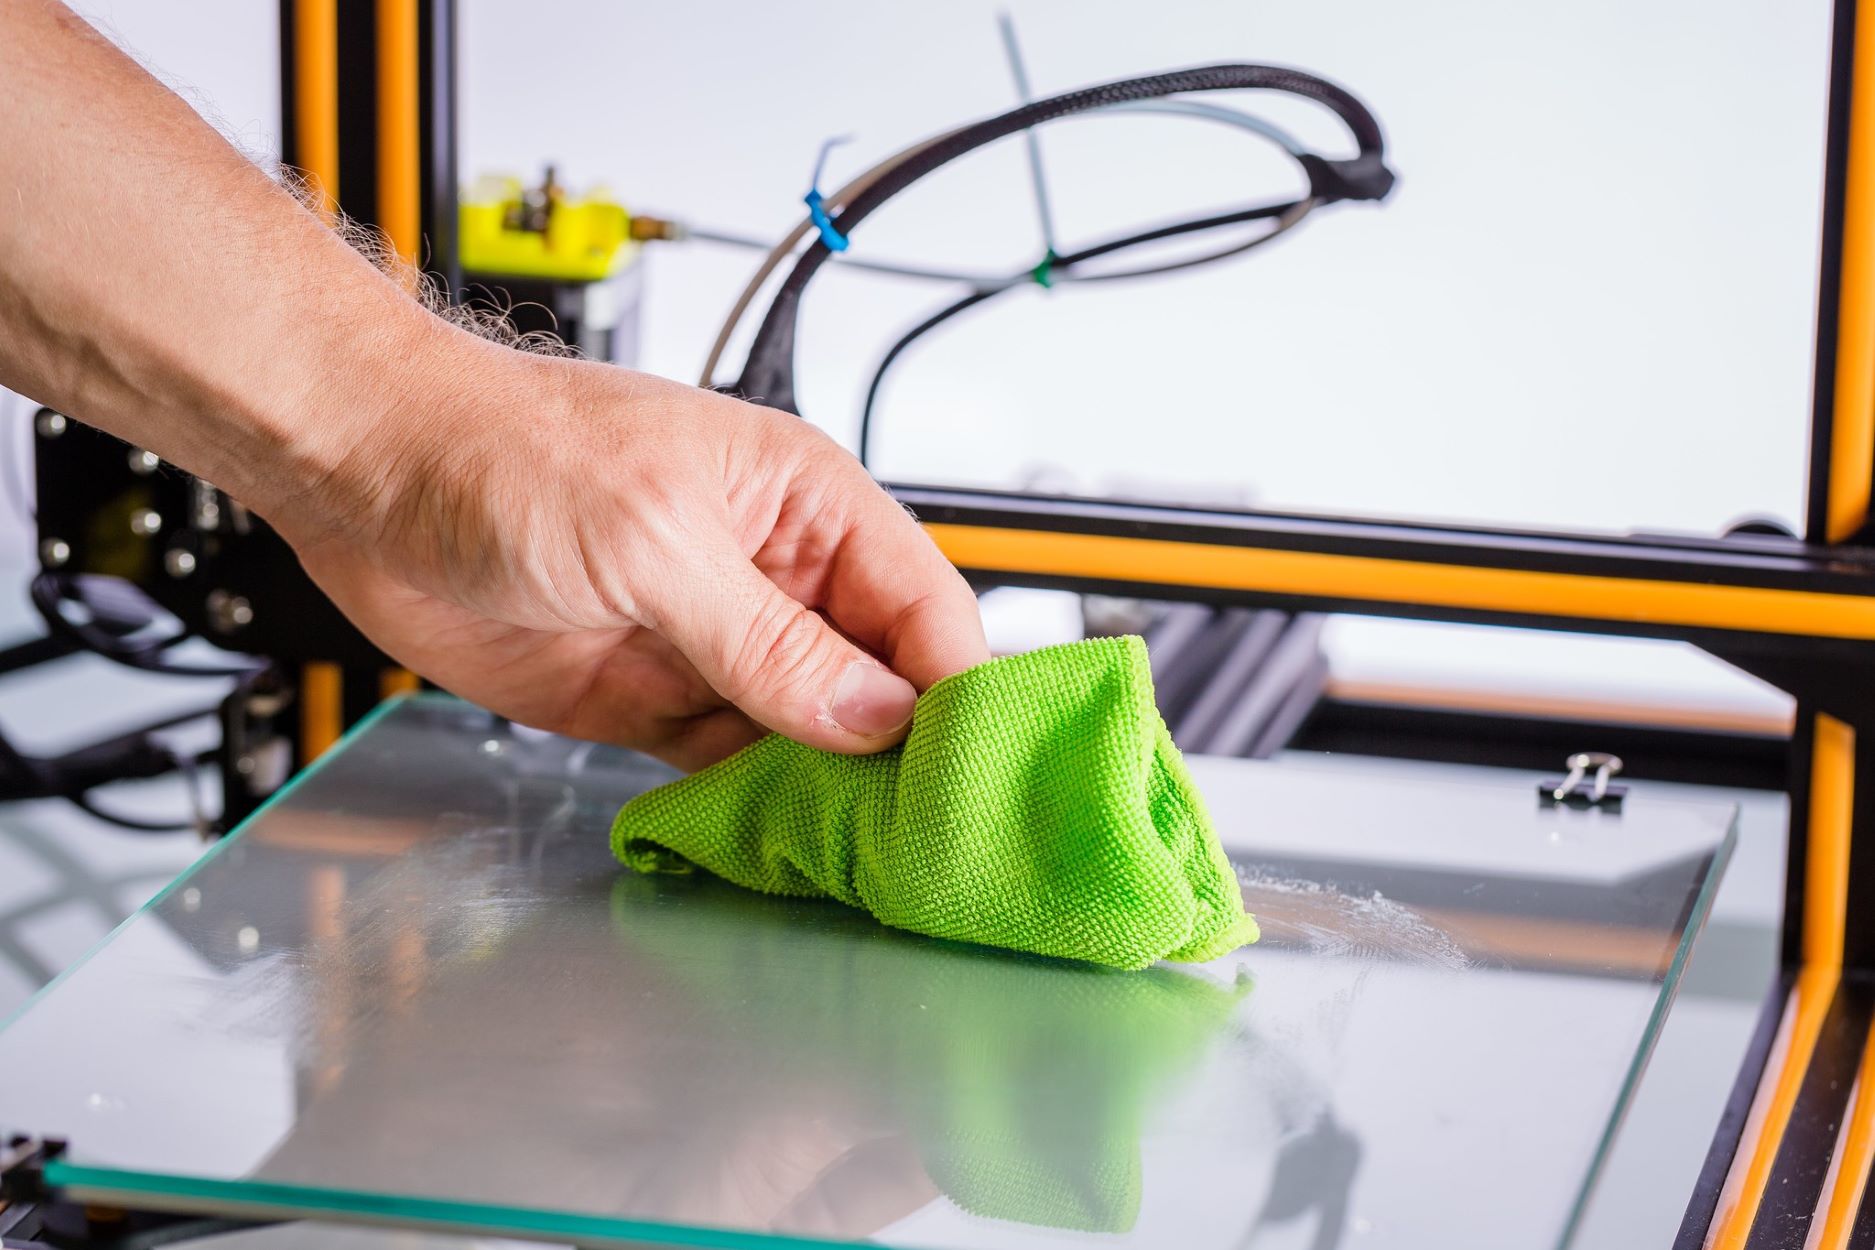
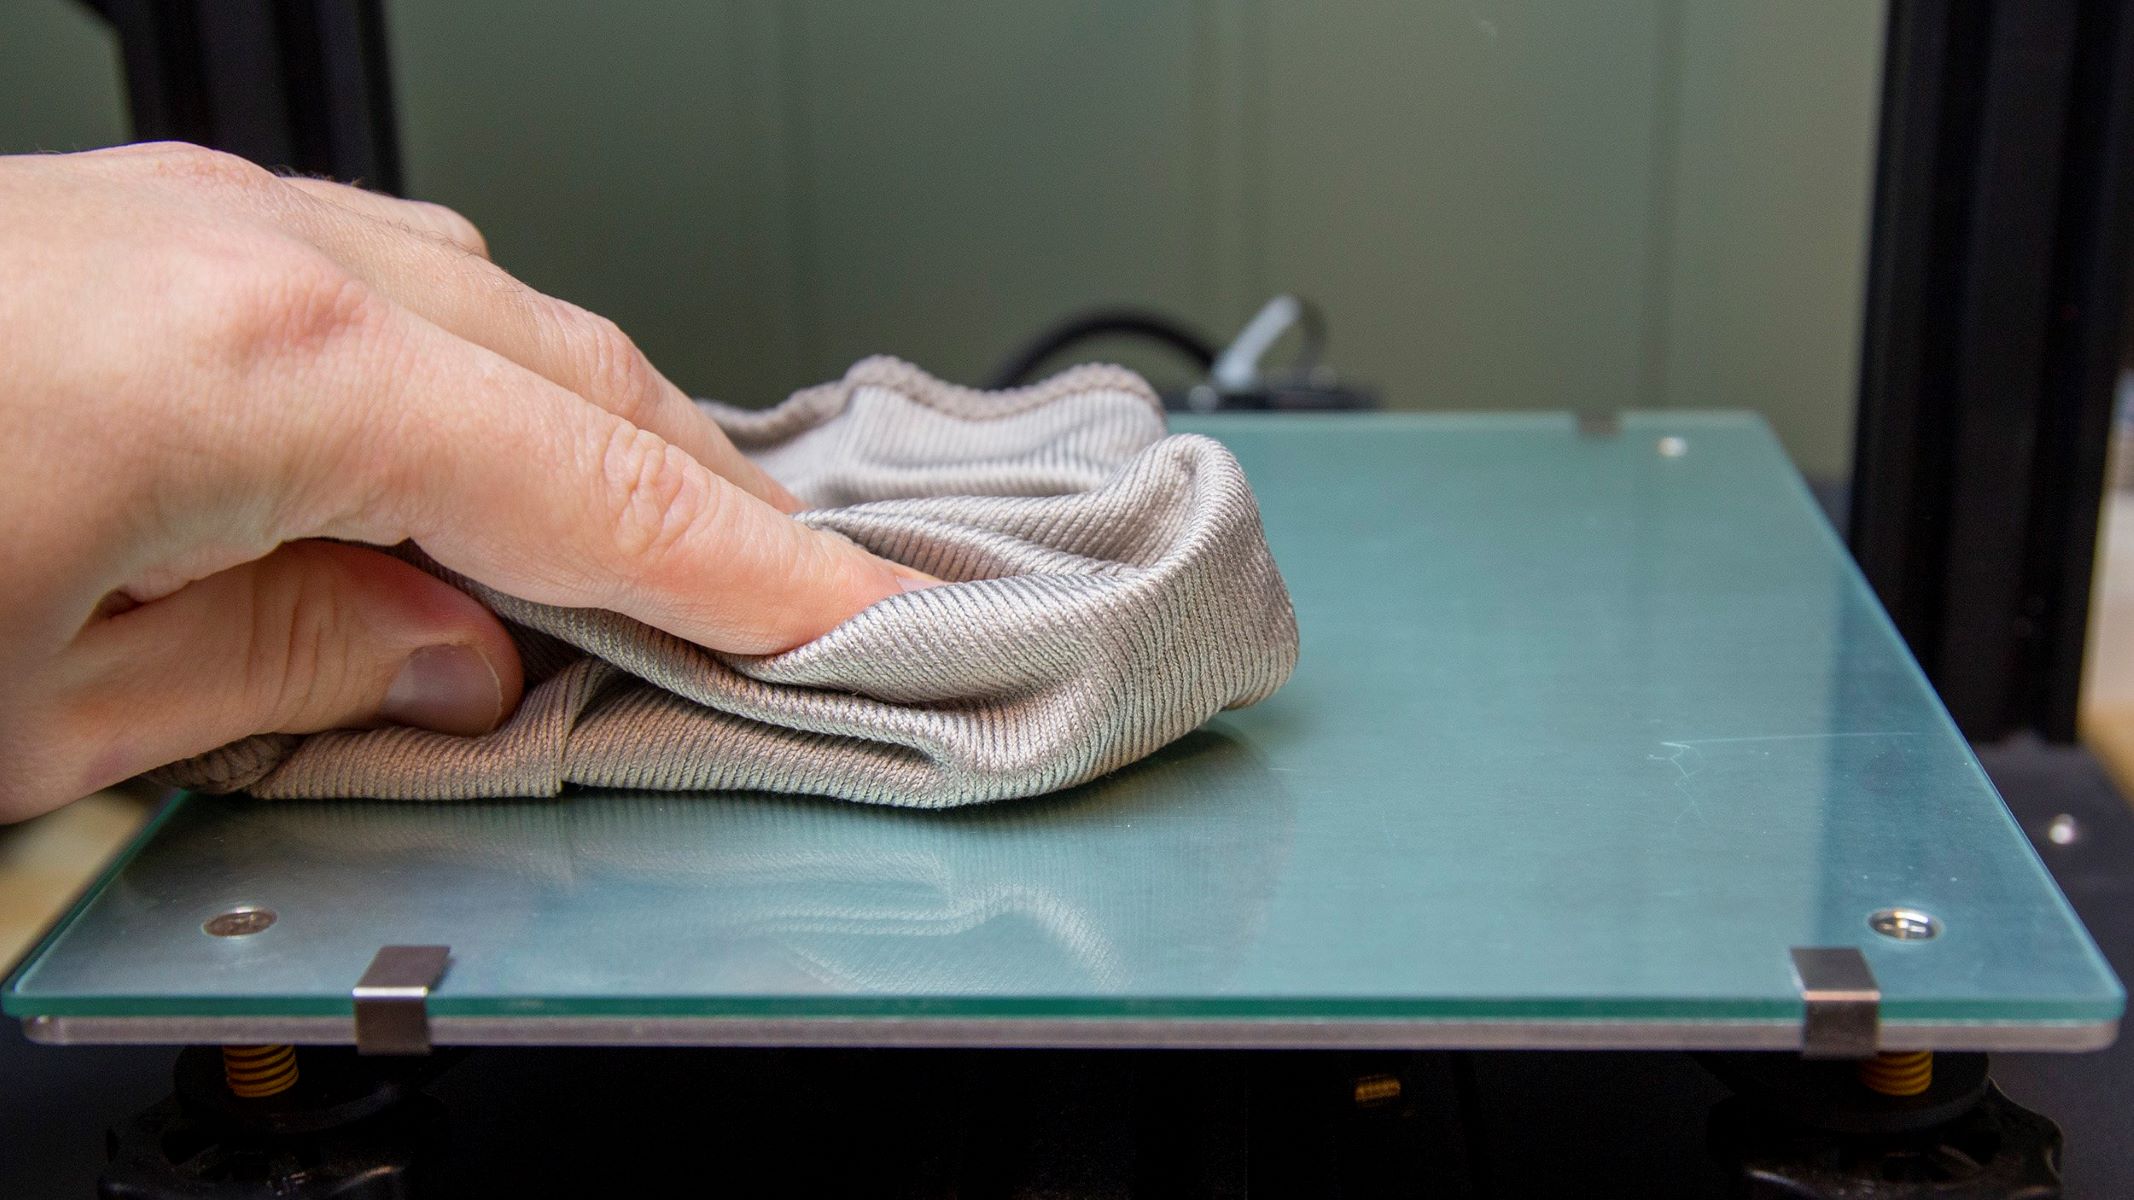
- Ensure a Clean Print Surface: Thoroughly clean the print bed surface to remove any debris, residue, or previous filament remnants. A clean and debris-free surface is essential for promoting proper adhesion during the leveling process.
- Disable Auto-Leveling Features: If your printer is equipped with auto-leveling features, it is advisable to disable them temporarily during the manual bed leveling process. This ensures that you have full control over the adjustments and can fine-tune the bed alignment according to your specific requirements.
By meticulously preparing your 3D printer for the bed leveling process, you set the stage for a seamless and effective experience. These preparatory steps create an optimal environment for achieving precise bed alignment, laying the groundwork for successful 3D printing endeavors.
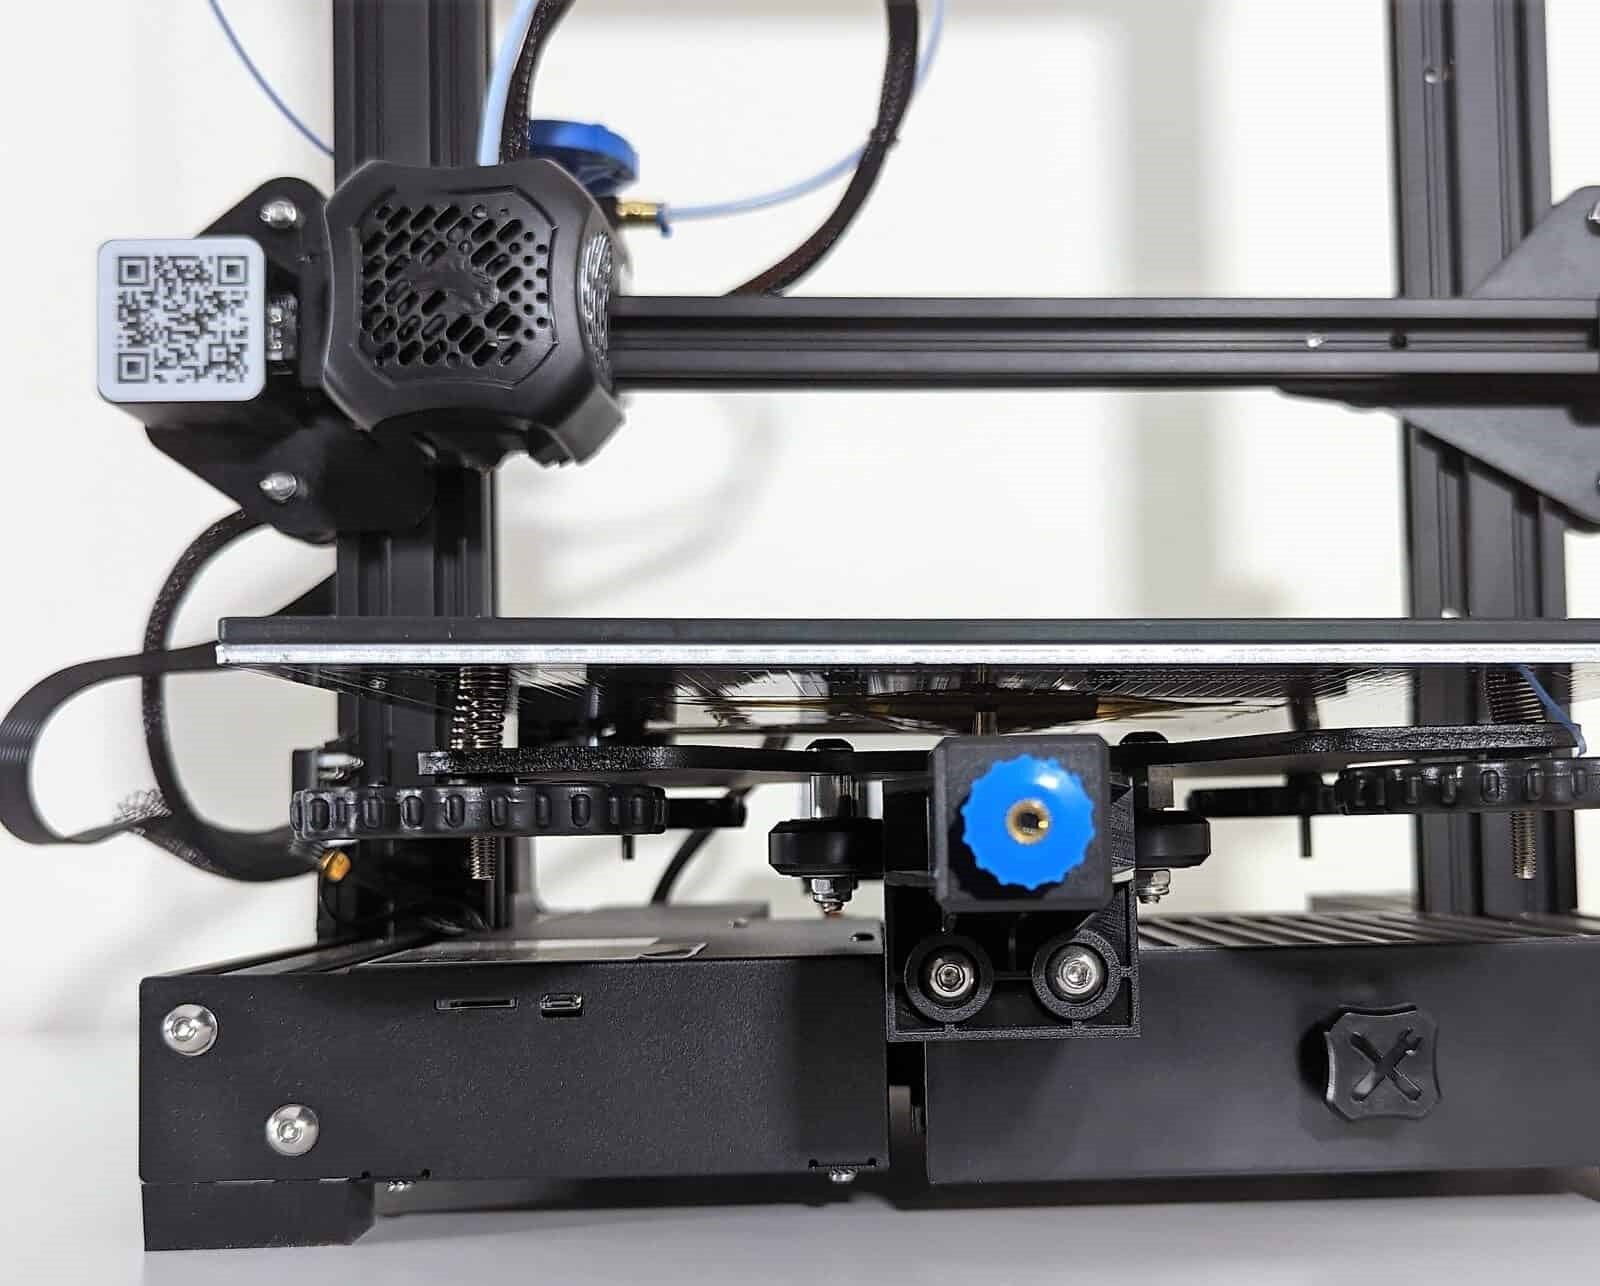
Before leveling your printer bed, make sure the bed and nozzle are at printing temperature. Use a piece of paper to check the distance between the bed and nozzle at different points, adjusting the bed screws until the paper can move with slight resistance.
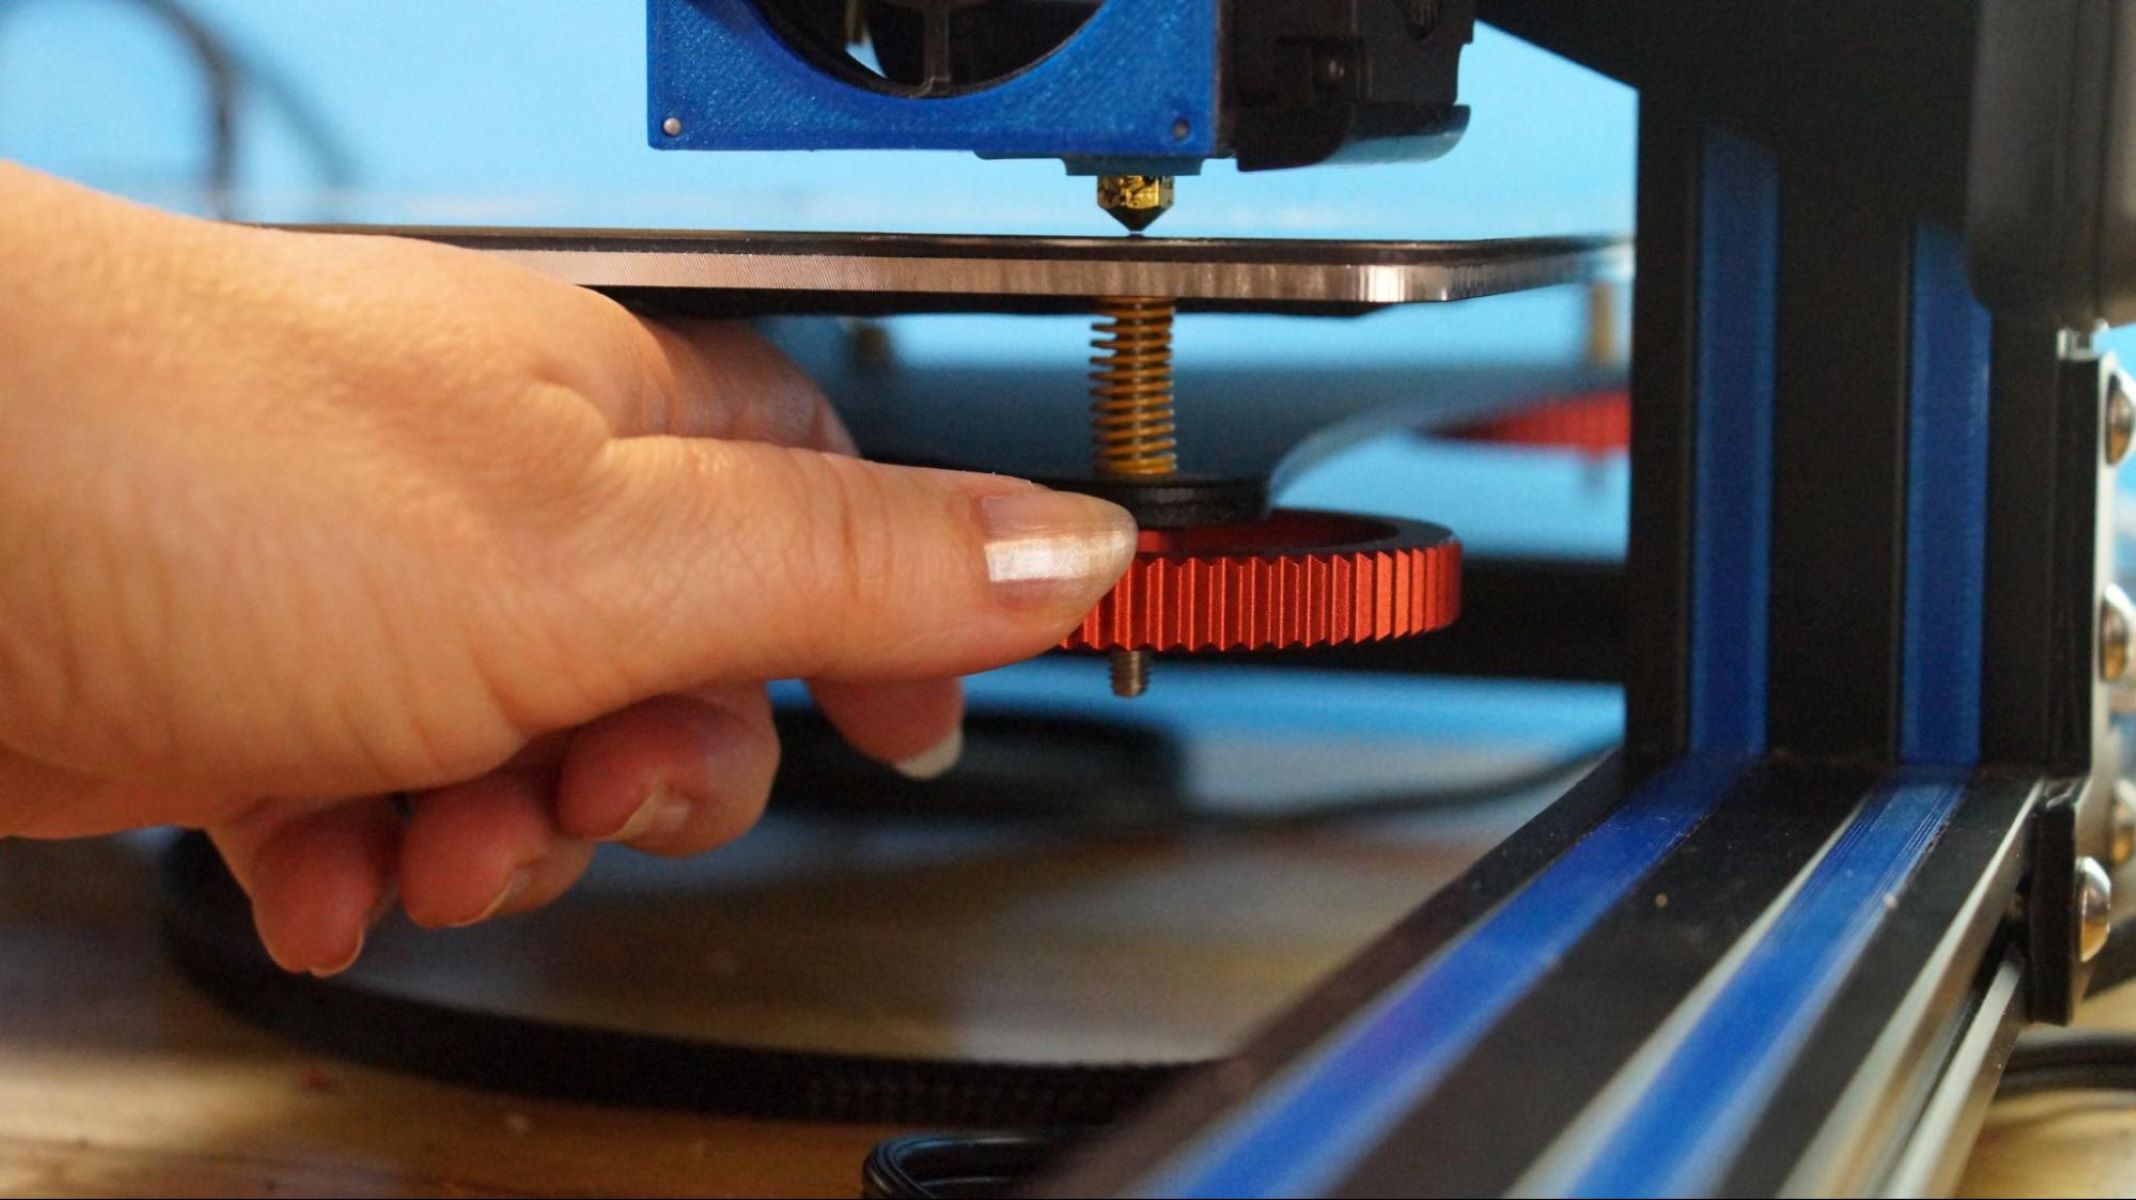
Adjust the Bed Leveling Screws
With the printer prepared and the necessary tools at hand, it’s time to delve into the intricate process of adjusting the bed leveling screws. This step is pivotal in achieving the ideal gap between the print nozzle and the bed surface, facilitating optimal adhesion and print quality. Follow these detailed steps to expertly adjust the bed leveling screws:
- Identify the Bed Leveling Screws: Locate the bed leveling screws, typically positioned at the corners or strategic points beneath the print bed. These screws enable precise adjustments to the bed’s orientation, ensuring uniform spacing between the print nozzle and the bed surface.
- Utilize Leveling Paper or Feeler Gauge: Place a sheet of leveling paper or a precise feeler gauge between the print nozzle and the bed surface. This step is crucial for gauging the initial gap and determining the required adjustments.
- Adjust the Screws Incrementally: Using the appropriate adjustment tool, such as a screwdriver or wrench, begin the incremental adjustment of the bed leveling screws. Make precise rotations, observing the changes in the gap between the print nozzle and the bed surface. Aim for a consistent and uniform gap across the entire bed surface.
- Observe and Fine-Tune: As you make adjustments, carefully observe the changes in the gap and the overall alignment of the print bed. Fine-tune the adjustments to achieve a uniform and optimal gap, ensuring that the print nozzle maintains a consistent distance from the bed surface.
- Record the Adjustments: It is advisable to record the adjustments made to each bed leveling screw, maintaining a systematic approach to the process. This documentation allows for precise replication of adjustments and facilitates consistency in bed alignment.
By methodically adjusting the bed leveling screws with precision and attention to detail, you can achieve the ideal gap required for seamless bed adhesion and impeccable print quality. This meticulous process sets the stage for successful 3D printing endeavors, laying the foundation for precise and flawless creations.
Test the Bed Leveling
After meticulously adjusting the bed leveling screws, it is essential to conduct a thorough test to validate the effectiveness of the alignment and ensure optimal bed adhesion. The testing phase serves as a critical evaluation, allowing you to gauge the success of the bed leveling process and make any necessary refinements. Follow these essential steps to conduct a comprehensive bed leveling test:
- Initiate a Test Print: Select a small test print or utilize a calibration pattern specifically designed for bed adhesion testing. Initiate the print job, ensuring that the first layer adheres uniformly to the bed surface.
- Observe the Initial Layer: As the test print progresses, carefully observe the application of the first layer. Pay close attention to the consistency of adhesion, the uniformity of filament deposition, and the overall quality of the initial layer.
- Evaluate Bed Adhesion: Upon completion of the test print’s first layer, assess the adhesion quality by examining the uniformity and solidity of the filament deposition. A well-leveled bed will exhibit consistent adhesion across the entire print surface, devoid of any irregularities or adhesion issues.
- Make Fine Adjustments if Necessary: If any inconsistencies or adhesion issues are observed during the test print, consider making fine adjustments to the bed leveling screws. Incremental refinements can address minor discrepancies and further optimize the bed alignment for enhanced print quality.
- Repeat the Testing Process: Conduct additional test prints as needed to validate the effectiveness of the bed leveling adjustments. Iterative testing allows for continuous refinement, ensuring that the bed alignment meets the stringent requirements for flawless 3D printing.
Through meticulous testing and observation, you can ascertain the success of the bed leveling process and fine-tune the alignment to perfection. The testing phase serves as a crucial validation step, ensuring that the bed adhesion is optimal and conducive to achieving impeccable print quality.
Read more: How To Check Ink Levels On HP Printer
Conclusion
Congratulations on mastering the art of leveling a 3D printer bed! By diligently following the steps outlined in this comprehensive guide, you have acquired a fundamental skill that is indispensable for achieving impeccable 3D prints. Proper bed leveling is the cornerstone of successful 3D printing, laying the groundwork for consistent and high-quality creations.
Throughout this enlightening journey, you have gathered the necessary tools, meticulously prepared the printer, expertly adjusted the bed leveling screws, and conducted thorough testing to validate the alignment. Your dedication to precision and attention to detail have culminated in a well-leveled printer bed, poised to facilitate flawless 3D printing endeavors.
As you embark on your 3D printing ventures, remember that bed leveling is an iterative process that may require periodic adjustments to accommodate varying print materials, environmental factors, and printer maintenance. Continuously honing your bed leveling skills will empower you to adapt to diverse printing scenarios and consistently achieve outstanding results.
With a well-leveled printer bed and a deep understanding of the bed leveling process, you are poised to unleash your creativity and bring your 3D printing projects to life with precision and finesse. Embrace the art of bed leveling as a foundational skill that empowers you to embark on a captivating journey of innovation and craftsmanship in the realm of additive manufacturing.
Now, armed with the knowledge and expertise gained from this guide, venture forth with confidence and let your 3D printing endeavors flourish, propelled by the mastery of bed leveling and the boundless potential of additive manufacturing.
Frequently Asked Questions about How To Level A Printer Bed
Was this page helpful?
At Storables.com, we guarantee accurate and reliable information. Our content, validated by Expert Board Contributors, is crafted following stringent Editorial Policies. We're committed to providing you with well-researched, expert-backed insights for all your informational needs.


0 thoughts on “How To Level A Printer Bed”