Articles
How To Adjust Toilet Flapper
Modified: October 19, 2024
Learn how to adjust the toilet flapper with our informative articles. Fix leaks and ensure your toilet is working efficiently with our expert tips.
(Many of the links in this article redirect to a specific reviewed product. Your purchase of these products through affiliate links helps to generate commission for Storables.com, at no extra cost. Learn more)
Introduction
The toilet flapper is an essential component of your toilet’s flushing mechanism. It is a small, rubber stopper that opens and closes to allow water to flow from the tank into the bowl, and then seals the tank to prevent continuous water flow. Over time, the toilet flapper may become misaligned or worn out, leading to issues such as constant running water or incomplete flushes.
Fortunately, adjusting the toilet flapper is a relatively simple task that can be done without the need for professional assistance. By following a few steps and using basic tools, you can ensure that your toilet flapper is properly adjusted, allowing for optimal flushing performance and water conservation.
Key Takeaways:
- Adjusting the toilet flapper is a simple DIY task that can fix issues like water leaks and weak flushing. By understanding the signs and following the steps, you can restore your toilet’s optimal functionality and conserve water.
- Testing the flapper’s performance after adjustments is crucial. By turning on the water supply and monitoring for leaks, you can ensure a well-adjusted flapper, leading to a more efficient and sustainable bathroom experience.
Understanding the Toilet Flapper
Before you can adjust the toilet flapper, it’s important to have a clear understanding of what it is and how it works. The toilet flapper is a rubber valve that sits at the bottom of the toilet tank. It is attached to a chain or rod and is responsible for regulating the flow of water from the tank into the bowl.
When you flush the toilet, the flapper lifts up, allowing water to rush into the bowl, creating the necessary pressure to remove waste. Once the tank is emptied, the flapper falls back down, sealing the tank to prevent water from continuously flowing into the bowl.
There are different types of toilet flappers, including the traditional flapper, the flapperless flush valve, and the dual-flush flapper. Each type has its own unique design and mechanism, but the principle remains the same – to control the flow of water.
Understanding how the toilet flapper works is essential because it helps you identify when adjustments are needed. If the flapper is not working properly, it can result in issues such as water leaks, incomplete flushes, or constant running water. By being aware of the signs, you can take action to adjust the flapper and restore proper functionality to your toilet.
Signs Your Toilet Flapper Needs Adjustment
There are a few telltale signs that indicate your toilet flapper may need adjustment:
- Continuous Water Running: If you hear the sound of water running in the toilet even when it’s not being used, it could be a sign that the flapper is not sealing properly. This is often caused by a misaligned or worn-out flapper that needs adjustment.
- Weak Flushing Power: If you notice that your toilet doesn’t flush as effectively as it used to, it could be due to a flapper that isn’t opening fully. This can result in insufficient water flow, leading to weak flushing power.
- Incomplete Flush: If you flush the toilet and the water drains partially or doesn’t drain at all, it’s a clear indication that the flapper is not working correctly. This can be due to an improper seal or a flapper that doesn’t lift up enough to allow proper water flow.
- Water Leaks: If you notice water pooling around the base of your toilet or detect a constant small stream of water running into the bowl, it could be a sign of a faulty flapper. A flapper that is not sealing properly can result in water leaks, leading to wasted water and potential damage to your bathroom floor.
If you experience any of these signs, it’s crucial to take action and adjust your toilet flapper as soon as possible. Not only will it prevent water wastage, but it will also help restore the proper functionality of your toilet.
Tools and Materials Needed
Before starting the process of adjusting your toilet flapper, gather the necessary tools and materials. Here’s what you’ll need:
- Adjustable Wrench: An adjustable wrench will be used to loosen and tighten any nuts or bolts that need adjustment during the process.
- Pliers: Pliers may be required to manipulate the chain or rod connected to the flapper.
- Bucket or Towel: Have a bucket or towel handy to catch any excess water that may spill when removing the tank lid or making adjustments.
- Replacement Flapper (if necessary): If you notice that your current flapper is damaged or worn out beyond repair, having a replacement flapper on hand will be helpful.
It’s important to note that the specific tools and materials required may vary depending on the type of toilet and flapper you have. Consult your toilet’s manual or do some research to determine if any additional tools or materials are needed for your specific situation.
Once you have gathered all the necessary tools and materials, you’re ready to proceed with adjusting your toilet flapper and restoring its proper functionality.
Step 1: Turn Off the Water Supply
Before you begin adjusting the toilet flapper, it’s crucial to turn off the water supply to the toilet. This will prevent any accidental water flow and ensure a smooth and safe adjustment process. Follow these steps to turn off the water supply:
- Locate the shut-off valve, which is usually located behind or near the toilet.
- Turn the shut-off valve clockwise until it is fully closed. This will stop the flow of water into the toilet tank.
- Once the water supply is turned off, flush the toilet to drain any remaining water in the tank. This will make it easier to access and adjust the flapper.
- After the tank is emptied, place a bucket or towel near the base of the toilet to catch any water that may spill during the adjustment process.
It’s important to ensure that the water supply is completely turned off before proceeding to the next step. This will prevent any potential water damage or accidents while adjusting the flapper.
Once you have successfully turned off the water supply and prepared the area, you’re ready to move on to the next step of adjusting the toilet flapper.
Read more: How To Adjust Amount Of Water In Toilet Bowl
Step 2: Remove the Toilet Tank Lid
Now that you have turned off the water supply, it’s time to remove the toilet tank lid. Follow these steps to safely remove the lid:
- Locate the tank lid, which is the top part of the toilet.
- Inspect the lid for any screws or clips that are holding it in place. These can vary depending on the make and model of your toilet.
- Once you have identified the fasteners, use a screwdriver or your hands to loosen and remove them.
- Set the lid aside in a safe place where it won’t get damaged.
Removing the toilet tank lid will give you access to the internal components, including the flapper. Be careful when handling the lid, as it may be heavy or fragile. Place it on a flat surface or cushioned area to prevent any accidental breakage.
With the toilet tank lid removed, you’re now ready to proceed with identifying the type of flapper and making the necessary adjustments for optimal performance.
When adjusting a toilet flapper, make sure it creates a tight seal over the flush valve. If it’s not sealing properly, adjust the chain length or replace the flapper if it’s worn out.
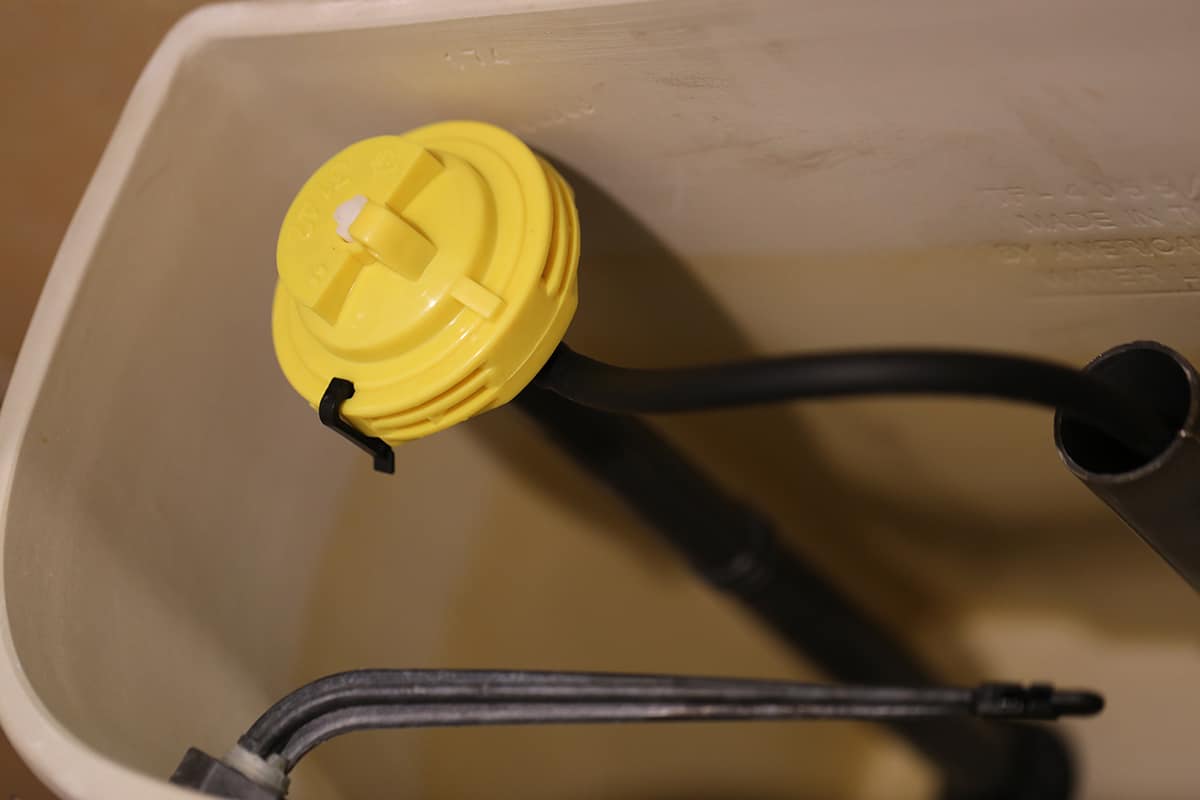
Step 3: Identify the Type of Flapper
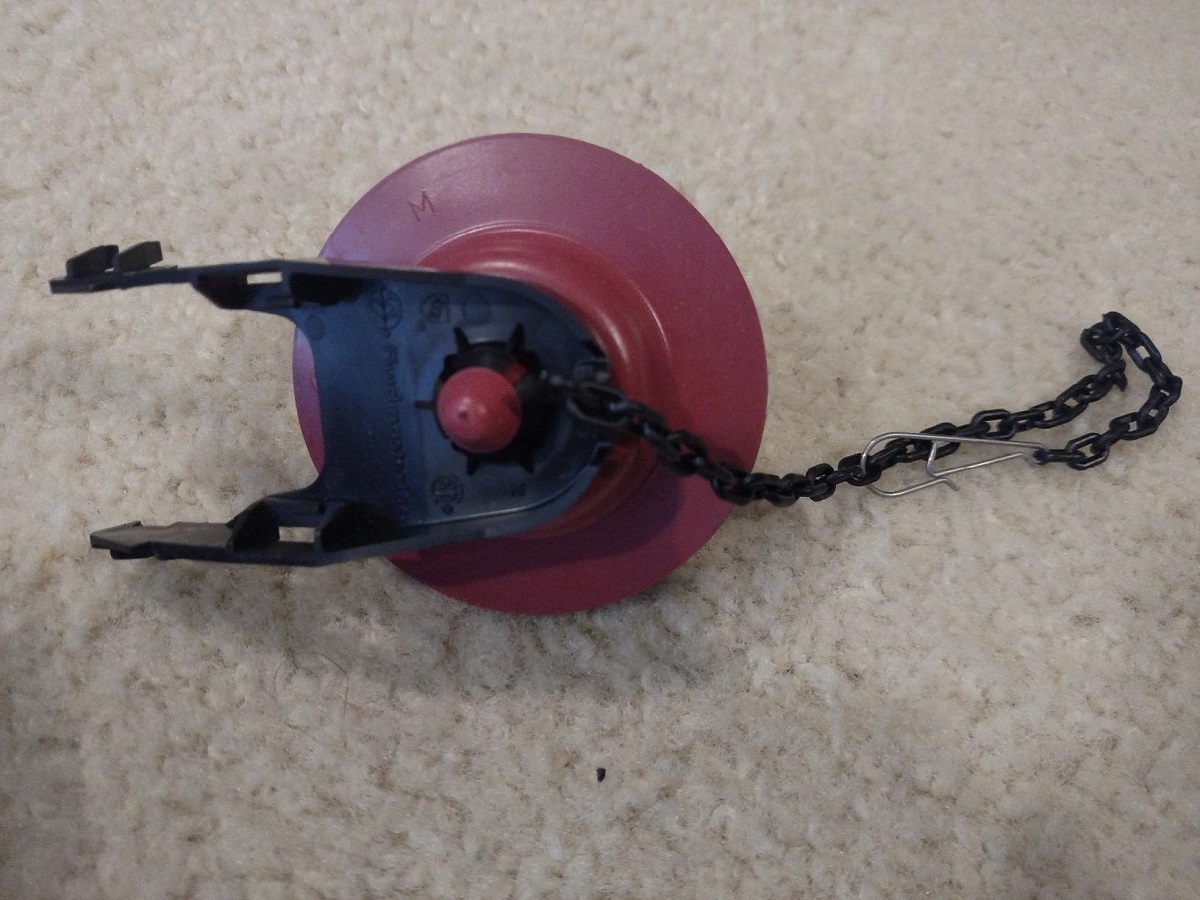
Before you can effectively adjust your toilet flapper, it’s important to identify the specific type of flapper you have. Different toilets may have different flapper designs, and understanding your specific flapper type will help you make the correct adjustments. Here are a few common types of flappers:
- Traditional Flapper: This is the most common type of flapper, characterized by a round rubber valve that attaches to the flush valve opening at the bottom of the tank.
- Flapperless Flush Valve: Some toilets feature a flapperless flush valve, which uses a canister or tower to regulate water flow. This type of system does not have a traditional flapper and may require a different adjustment approach.
- Dual-Flush Flapper: Dual-flush toilets have two flapper valves to control different flush volumes. The adjustment process for dual-flush flappers may vary depending on the specific model.
To identify the type of flapper you have, open the toilet tank and inspect the flushing mechanism. Look for the rubber valve or any other components that resemble a flapper. Take note of any unique features or connections that may affect the adjustment process.
If you’re unsure about the type of flapper in your toilet or need specific instructions for your model, refer to the toilet’s manual or contact the manufacturer for guidance.
Once you have successfully identified the type of flapper, you can proceed with making the necessary adjustments to ensure optimal performance and water conservation.
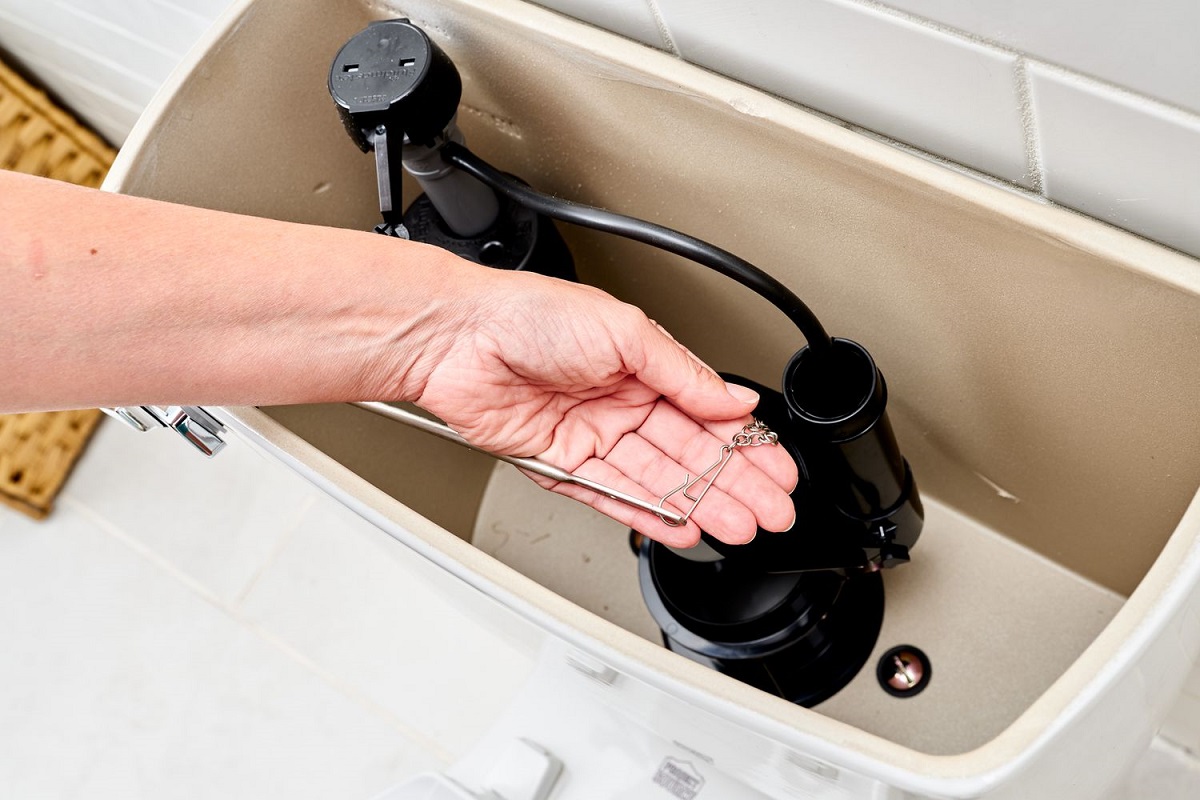
Step 4: Adjusting the Chain Length
One of the most common adjustments needed for a toilet flapper is the length of the chain that connects the flapper to the toilet handle. Follow these steps to adjust the chain length:
- Locate the chain connected to the flapper valve. The chain should be attached to the flush lever or bar that is connected to the toilet handle.
- Observe the length of the chain. Ideally, it should have a slight slack, allowing the flapper to close completely after flushing.
- If the chain is too long, it may result in an incomplete flush or a flapper that doesn’t close properly. If the chain is too short, it can prevent the flapper from opening fully during a flush.
- To adjust the chain length, use pliers or your fingers to detach it from the flush lever or bar. Move the clip or hook to a different link in the chain to either lengthen or shorten it.
- Once you have made the adjustment, reattach the chain to the flush lever or bar. Ensure that there is still a slight slack in the chain.
- Test the flush by pressing the toilet handle. The flapper should lift up and allow water to flow into the bowl. After the flush, the flapper should close completely, sealing the tank.
Make minor adjustments to the chain length as needed until you achieve the desired flush performance. It’s important to find the right balance where the chain has enough slack to allow the flapper to close tightly but isn’t too loose to interfere with the flushing process.
By adjusting the chain length, you can ensure that the flapper opens and closes with each flush, allowing for proper water flow and a complete seal to prevent leaks.
Step 5: Adjusting Flapper Position
In addition to adjusting the chain length, you may also need to adjust the position of the flapper itself. A misaligned or improperly positioned flapper can cause issues such as water leaks or insufficient flushing power. Follow these steps to adjust the flapper position:
- Inspect the flapper valve and its seating on the flush valve opening. Ensure that the flapper is properly aligned and centered.
- If the flapper appears to be misaligned or off-center, gently adjust its position by moving it left or right until it is centered over the flush valve opening.
- Check the rubber seal around the flapper. Make sure it is intact and not damaged. A damaged seal can cause leaks and affect the flapper’s performance.
- If necessary, clean the flapper and the flush valve opening to remove any dirt or debris that may be affecting its operation or seal.
- Once you have adjusted the flapper’s position and ensured a proper seal, test the flush by pressing the toilet handle. Observe if the flapper opens fully and allows sufficient water flow into the bowl.
- After the flush, check if the flapper closes tightly and completely, sealing the tank and preventing any water leaks.
By adjusting the position of the flapper, you can ensure optimal performance and water conservation. A properly aligned and sealed flapper will allow for efficient flushing while preventing any unnecessary water leaks.
If you notice any issues with the flapper’s position or seal that cannot be rectified through adjustment, it may be necessary to consider replacing the flapper with a new one.
Read more: How To Adjust Toilet Float
Step 6: Testing the Flapper
After making adjustments to the chain length and the position of the flapper, it’s important to test the flapper’s performance to ensure that it is functioning properly. Follow these steps to test the flapper:
- Slowly turn on the water supply to the toilet by turning the shut-off valve counterclockwise. Allow the tank to fill with water.
- Once the tank is filled, observe if the flapper is in the closed position, completely sealing the tank.
- Press the toilet handle to initiate a flush. Observe if the flapper lifts up fully, allowing water to flow into the bowl.
- After the flush, observe if the flapper closes tightly, creating a complete seal over the flush valve.
- Listen for any sounds of running water after the flush. If you hear continuous water running, it could be an indication that the flapper is not properly adjusted or that there is a leak.
- Repeat the flush test a few times to ensure consistent performance.
If the flapper opens and closes properly during the flush, maintains a tight seal when closed, and there are no signs of water leaks, you can consider the adjustment process successful. Your toilet should now be functioning efficiently with minimal or no water wastage.
However, if you still experience issues such as water leaks or incomplete flushes, you may need to revisit the previous steps and make additional adjustments to the chain length or flapper position. It may also be necessary to consider replacing the flapper with a new one if the existing one is worn out or damaged.
By thoroughly testing the flapper’s performance, you can ensure that your toilet is in proper working condition and effectively conserving water.
Step 7: Turn On the Water Supply
After you have successfully adjusted and tested the flapper, it’s time to turn on the water supply to your toilet. Follow these steps to safely turn on the water supply:
- Locate the shut-off valve for the toilet, which is usually located near or behind the toilet.
- Slowly turn the shut-off valve counterclockwise to open it. This will allow water to flow into the toilet tank.
- Listen for the sound of water filling the tank. Observe if the flapper remains closed while the tank is filling.
- Once the tank is filled, check for any signs of water leaks around the base of the toilet or within the tank.
- Flush the toilet multiple times to ensure that the flapper opens and closes properly and that there are no issues with water flow or leaks.
- Monitor the toilet over the next few days to ensure that it continues to function properly without any water leaks or running water issues.
By turning on the water supply and confirming that the flapper is adjusted correctly, you can enjoy a properly functioning toilet that conserves water and avoids any wastage or potential damage.
If you notice any issues such as ongoing water leaks, running water, or incomplete flushes after turning on the water supply, it may indicate that further adjustments or repairs are required. In such cases, consider reviewing the previous steps or seeking assistance from a professional plumber.
With the water supply turned on and the toilet functioning properly, you can now enjoy a well-adjusted flapper and a more efficient and water-conscious bathroom experience.
Conclusion
Adjusting the toilet flapper is a relatively simple and straightforward process that can greatly improve the performance and efficiency of your toilet. By following the steps outlined in this guide, you can address common issues such as water leaks, incomplete flushes, and running water.
Understanding the flapper and its role in the flushing mechanism is crucial in identifying when adjustments are needed. Signs such as continuous water running, weak flushing power, incomplete flushes, and water leaks indicate that your toilet flapper may need adjustment.
With the right tools and materials on hand, you can quickly and easily make the necessary adjustments. By adjusting the chain length and ensuring the proper position and seal of the flapper, you can restore optimal functionality to your toilet.
Testing the flapper’s performance after making adjustments is essential to confirm that everything is working correctly. By listening for any sounds of running water, observing the opening and closing of the flapper, and checking for water leaks, you can be confident that your adjustments have been successful.
Finally, by turning on the water supply and monitoring the toilet over the next few days, you can ensure that the flapper continues to function properly without any issues. If you encounter ongoing problems, it may be necessary to revisit the adjustment process or seek professional assistance.
Adjusting the toilet flapper not only improves the efficiency of your toilet but also helps conserve water and reduce your environmental impact. By taking the time to properly adjust and maintain your toilet flapper, you can ensure a more sustainable and cost-effective bathroom experience.
Remember, if you ever feel unsure or uncomfortable making adjustments yourself, it’s always a good idea to consult a professional plumber who can assist you in properly adjusting your toilet flapper.
Now that you've mastered adjusting your toilet flapper, why stop there? If you're spotting unusual signs from your pipes or faucets, maybe plumbing repair is next on your list. Leaks can be a headache, so learning to fix leaking toilet might save your day before trouble flushes peace away. Or perhaps it's time for a complete upgrade with the toilet flapper replacement options available for next year. Each guide provides practical steps and essential tips to keep your home running smoothly.
Frequently Asked Questions about How To Adjust Toilet Flapper
Was this page helpful?
At Storables.com, we guarantee accurate and reliable information. Our content, validated by Expert Board Contributors, is crafted following stringent Editorial Policies. We're committed to providing you with well-researched, expert-backed insights for all your informational needs.


0 thoughts on “How To Adjust Toilet Flapper”