
Articles
How To Build Floor To Ceiling Bookshelves
Modified: October 20, 2024
Learn how to build beautiful floor-to-ceiling bookshelves with our informative articles. Discover tips, techniques, and step-by-step instructions to create your own impressive library.
(Many of the links in this article redirect to a specific reviewed product. Your purchase of these products through affiliate links helps to generate commission for Storables.com, at no extra cost. Learn more)
Introduction
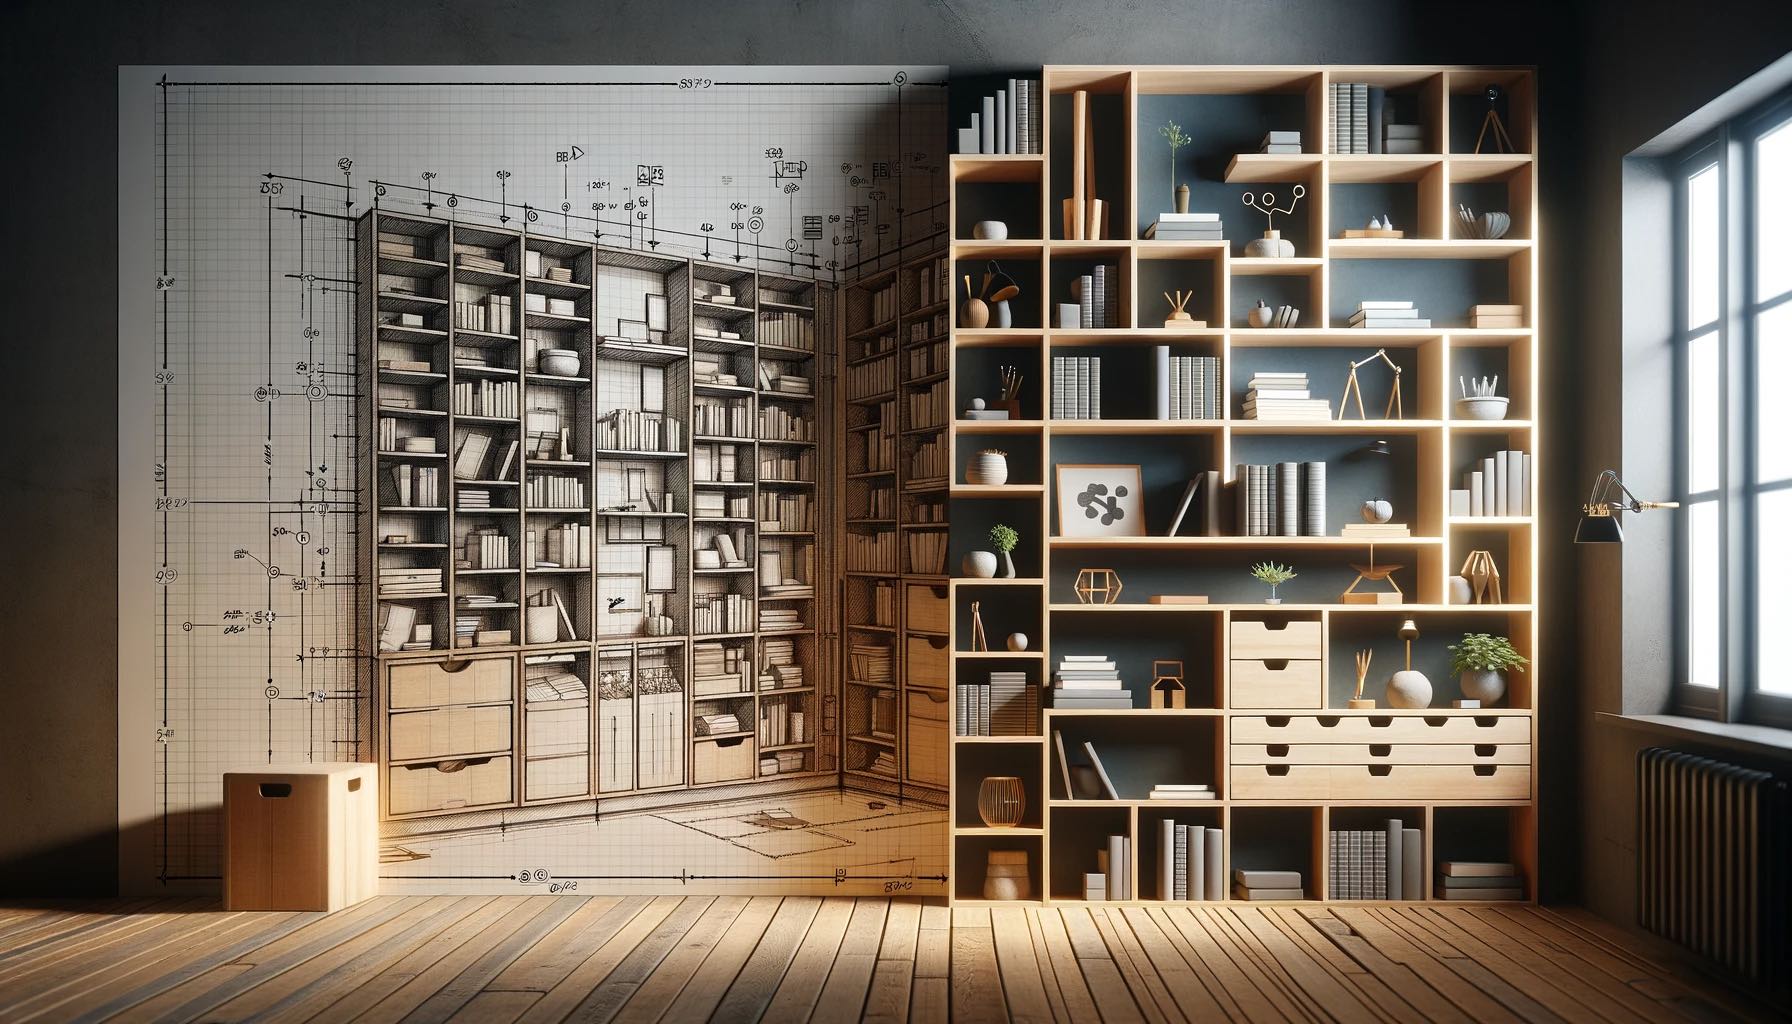
When it comes to storage solutions in your home, bookshelves are a timeless and practical option. Offering both functionality and aesthetic appeal, floor-to-ceiling bookshelves can transform any room into a stylish and organized space. Whether you’re an avid bookworm or simply looking to display your favorite collectibles, building your own floor-to-ceiling bookshelves can be a rewarding and cost-effective project.
In this article, we will guide you step-by-step on how to build floor-to-ceiling bookshelves. From planning and measurements to installation and finishing touches, we will cover everything you need to know to create a beautiful and functional shelving system.
Before you begin, it’s important to assess the available space in your room and determine the desired dimensions of your bookshelves. Take into consideration the height, width, and depth of the shelves, as well as any specific features you might want, such as adjustable shelving or integrated lighting.
Once you have a clear plan in mind, it’s time to gather the necessary materials and tools. Common materials for bookshelves include plywood or MDF for the shelves, solid wood for the framework, and screws or nails for assembly. You will also need basic tools such as a tape measure, circular saw, drill, level, and sandpaper. If you’re not experienced with power tools, consider enlisting the help of a friend or hiring a professional for assistance.
Before you start building, prepare the area where the bookshelves will be installed. Remove any existing furniture or decor that may obstruct the construction process. Clean the space thoroughly and ensure the walls are free from any obstacles or protrusions. This will provide a clean canvas for your bookshelves and make the installation process much smoother.
In the next step, you will construct the framework of the bookshelves. This will include vertical supports and horizontal shelves, which will provide the foundation for the entire structure. Measure and cut the wood according to your predetermined dimensions, and assemble the pieces securely using screws or nails. Use a level to ensure the framework is straight and sturdy.
Once the framework is in place, it’s time to attach the vertical supports to the walls. These supports will provide additional stability and prevent the bookshelves from tipping over. Measure and mark the correct positions on the walls, then use a drill to secure the supports in place. Be sure to use appropriate anchors or screws suitable for your wall type.
With the vertical supports securely attached, it’s time to add the horizontal shelves. Measure and cut the shelves to fit between the vertical supports, and attach them using screws or nails. Ensure that the shelves are level and evenly spaced, allowing for ample storage space.
In order to give your bookshelves a finished look, consider installing backing and side panels. These will not only add visual appeal but will also provide stability and prevent items from falling behind the shelves. Measure and cut plywood or MDF panels to fit the back and sides of your bookshelves, then attach them securely using screws or nails.
Once the construction is complete, it’s essential to sand the surfaces to create a smooth and polished finish. Use sandpaper to remove any rough edges or imperfections, and wipe the surfaces clean of dust and debris. Depending on your personal preference, you can choose to leave the bookshelves with their natural wood finish or apply a stain or paint for added style.
Finally, the last step is to organize and style your newly built bookshelves. Arrange your books, decorative items, and personal belongings in an aesthetically pleasing manner. Consider adding lighting or decorative accents to further enhance the visual appeal of the shelves.
By following these step-by-step instructions, you can create stunning floor-to-ceiling bookshelves that add both functionality and style to your home. Whether you’re a DIY enthusiast or just starting out with woodworking projects, building bookshelves is a rewarding endeavor that will not only provide you with ample storage but also become a focal point in any room.
Key Takeaways:
- Building floor-to-ceiling bookshelves requires careful planning, precise measurements, and skilled craftsmanship. From constructing the framework to organizing and styling, this comprehensive guide provides the knowledge and guidance needed for a successful DIY project.
- By investing time and effort into building floor-to-ceiling bookshelves, you not only create a practical storage solution but also add a touch of elegance and personalization to your home. Enjoy the sense of accomplishment and the joy of showcasing your creativity and skills.
Read more: How To Make Floor To Ceiling Bookshelves
Step 1: Planning and Measurements
The first step in building floor-to-ceiling bookshelves is careful planning and accurate measurements. This stage is crucial as it will determine the dimensions and layout of your bookshelves, ensuring a perfect fit for your space.
Begin by assessing the room where the bookshelves will be installed. Consider the available wall space, ceiling height, and any architectural features that may impact the design. Take note of any doors, windows, or outlets that need to be accommodated.
Next, determine the desired dimensions of your bookshelves. Measure the wall height and width where the bookshelves will be located. Consider the purpose of the bookshelves and the items you plan to store on them. If you have an extensive book collection or want to display larger items, you may need taller or wider shelves.
Once you have determined the overall dimensions, decide on the number of shelves you want and their spacing. Consider the height of the shelves and the distance between them. This will depend on the height of the items you will be storing and their accessibility.
If you plan to have adjustable shelves, take into account the mechanism or brackets needed to support them. Plan the spacing between the holes or notches that will accommodate the brackets.
After deciding on the basic dimensions and layout, create a detailed plan or sketch of the bookshelves. Include measurements for each component, such as the vertical supports, horizontal shelves, and backing panels. This plan will act as a reference guide during the construction process.
Consider any additional features you may want to incorporate, such as integrated lighting, hidden compartments, or decorative elements. Research the necessary materials and tools needed to implement these features.
Once you have finalized the plan, it’s time to gather the materials and tools needed for construction. Purchase the appropriate type and quantity of wood for the framework, shelves, and backing panels. Choose a high-quality plywood or MDF for the shelves that can support the weight of your items.
Additionally, make sure you have all the necessary tools on hand, such as a tape measure, circular saw, drill, level, screws, and nails. If you don’t already own these tools, consider renting or purchasing them to ensure smooth progress throughout the project.
By dedicating time to careful planning and accurate measurements, you will lay the foundation for a successful bookshelf construction project. Taking these steps will ensure that your bookshelves fit perfectly in your space and meet your storage needs. So grab your measuring tape and get ready to create a stunning storage solution for your home.
Step 2: Gathering Materials and Tools
Now that you have a detailed plan for your floor-to-ceiling bookshelves, it’s time to gather all the necessary materials and tools. Having everything you need on hand before you start the construction process will ensure smoother progress and minimize delays.
The materials you will need for building your bookshelves may include:
- Plywood or MDF: This will be used for the shelves. Choose a high-quality and sturdy material that can withstand the weight of your books and items.
- Solid wood: This will be used for the framework and supporting components of the bookshelves. Opt for a strong and durable wood, such as pine or oak.
- Screws or nails: These will be used for assembling the bookshelves. Select screws or nails that are appropriate for the thickness of the wood you are working with.
- Backing panels: These panels will provide stability and prevent items from falling behind the shelves. Plywood or MDF can be used for this purpose.
- Side panels (optional): If you want a more finished look, you can add side panels to your bookshelves. These can be made from the same material as the backing panels.
- Wood glue: This can be used in combination with screws or nails to reinforce the joints and ensure extra stability.
- Sanding materials: Sandpaper or a sanding block will be needed to smooth the surfaces of the wood and prepare it for finishing.
- Finishing materials (optional): Depending on your desired aesthetic, you may choose to stain or paint the bookshelves. Select the appropriate finishes and brushes or rollers for the job.
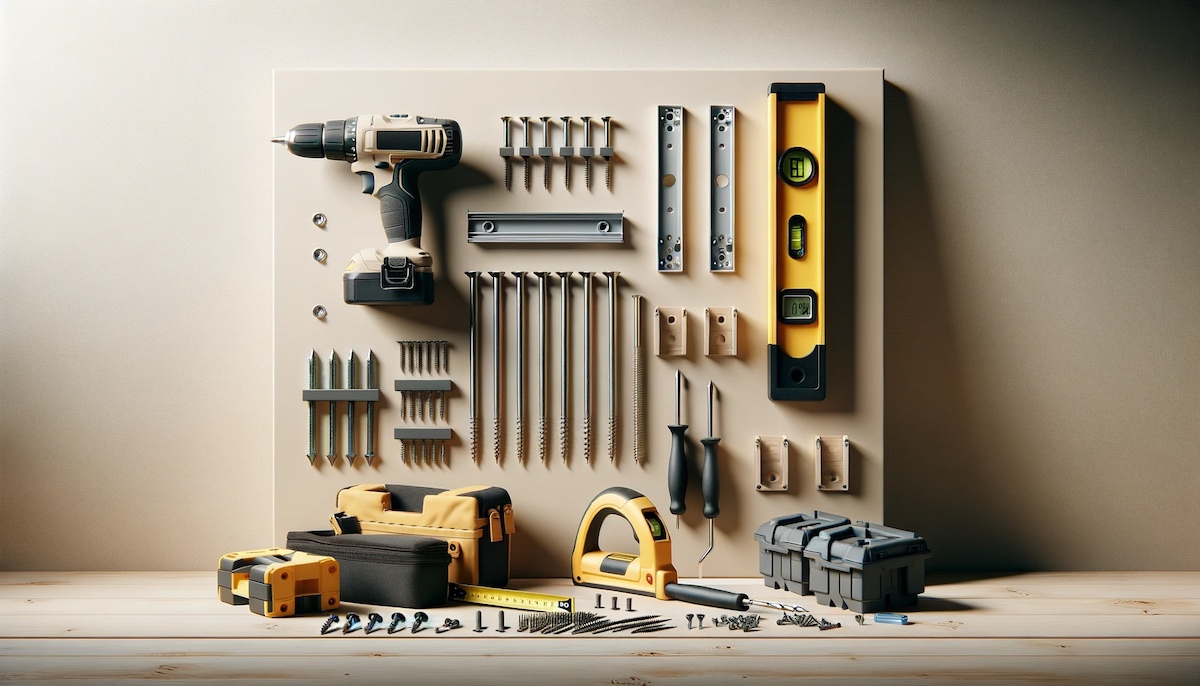
In addition to materials, it’s important to have the right tools for the construction process. Here are some essential tools you will need:
- Tape measure: Used for taking accurate measurements of the walls, shelves, and components.
- Circular saw or table saw: This tool will be used for cutting the wood to the desired dimensions.
- Drill: Necessary for making pilot holes and attaching the screws or nails.
- Level: Ensures that your bookshelves are straight and level, preventing any tilting or instability.
- Screwdriver or nail gun: These tools are used for fastening the screws or nails securely.
- Sanding block or electric sander: Helps in smoothing the surfaces of the wood and removing any rough edges.
Make sure to check your inventory and purchase any missing items or replace any tools that are worn or damaged. Having all the necessary materials and tools readily available will save you time and frustration during the construction process.
Once you have gathered all the materials and tools, you’re now ready to move on to the next step: preparing the area where the bookshelves will be installed.
Step 3: Preparing the Area
Before you start building your floor-to-ceiling bookshelves, it’s important to properly prepare the area where they will be installed. Clearing and prepping the space will help ensure a smooth construction process and a professional-looking final result.
Here are the key steps to follow when preparing the area:
- Clear the space: Remove any furniture, decor, or obstructions that may be in the way. Make sure the walls and floor are clear of any items that could hinder the construction process.
- Clean the area: Thoroughly clean the walls, floor, and surrounding surfaces. Use a broom or vacuum to remove dust and debris. Wipe down the walls with a damp cloth to remove any dirt or grease, as this will ensure better adhesion of the bookshelves.
- Inspect the walls: Take a close look at the walls where the bookshelves will be installed. Check for any structural issues, cracks, or inconsistencies that may affect the installation process. If you notice any problems, consult a professional or address them before proceeding.
- Fill and repair: If necessary, fill any holes or cracks in the walls with spackle or putty. Smooth down the surface and allow it to dry completely before moving forward. This step will create a clean and even canvas for the bookshelves.
- Address electrical outlets or switches: If there are electrical outlets or switches on the wall where the bookshelves will be placed, consider how they will impact the design. Plan the positioning of the shelves accordingly, allowing enough space for easy access to these outlets and switches. Consult an electrician if any wiring modifications need to be made.
- Measure and mark: Use a tape measure and a pencil to mark the precise placement of the bookshelves on the walls. Double-check your measurements to ensure accuracy. This step will serve as a guide during the construction process.
By taking the time to properly prepare the area, you will create a clean and organized workspace for building your bookshelves. This will not only make the construction process more efficient but also ensure a professional-looking and seamless installation.
Once the area is prepped and ready, you can move on to the next step: building the framework for your bookshelves.
Step 4: Building the Framework
Now that you have prepared the area for your floor-to-ceiling bookshelves, it’s time to start building the framework. The framework serves as the foundation of your bookshelves, providing stability and support for the shelves and other components.
Here are the steps to follow when building the framework:
- Measure and cut the vertical supports: Begin by measuring the height of the bookshelves from floor to ceiling. Cut the solid wood pieces according to this measurement, ensuring they are all the same length. These vertical supports will be attached to the wall, providing stability for the bookshelves.
- Mark the positions on the wall: Use a pencil and a level to mark the positions where the vertical supports will be attached to the wall. Start by measuring and marking the height of the first support, ensuring it is plumb. Then, measure and mark the positions of the remaining vertical supports, ensuring they are evenly spaced.
- Attach the vertical supports: Using a drill and appropriate screws or wall anchors, secure the vertical supports to the wall at the marked positions. Make sure they are level and securely fastened. It’s recommended to have a helper hold the supports in place while you attach them to the wall for added stability.
- Measure and cut the horizontal shelves: Next, measure and cut the plywood or MDF pieces for the horizontal shelves. Take into account the desired width and depth of the shelves. Ensure they are all the same length and properly fit between the vertical supports.
- Attach the horizontal shelves: Place the cut shelves on top of the vertical supports, ensuring they are level. Secure them with screws or nails, attaching them to the vertical supports from the sides. Use a level to ensure the shelves are straight and evenly spaced.
- Optional reinforcement: For added stability, you can reinforce the joints between the vertical supports and the horizontal shelves with wood glue. Apply a thin layer of glue along the joints before fastening them together. This will create a stronger bond and minimize any potential wobbling.
By building a sturdy framework, you are laying the foundation for a stable and long-lasting set of bookshelves. Taking the time and care to ensure the framework is level and properly secured will greatly impact the overall quality and durability of your bookshelves.
With the framework complete, you can now move on to the next step: attaching the vertical supports to the wall.
Read more: How To Build Bookshelves Around A Fireplace
Step 5: Attaching the Vertical Supports
With the framework of your floor-to-ceiling bookshelves built, it’s time to move on to the next step: attaching the vertical supports to the wall. This step is crucial for ensuring the stability and security of your bookshelves.
Follow these steps to properly attach the vertical supports:
- Measure and mark the positions: Use a tape measure and a pencil to measure and mark the precise positions where the vertical supports will be attached to the wall. Start with the first support and make sure it is plumb, meaning it is perfectly vertical. Mark the height on the wall.
- Level and align: Before securing the support to the wall, use a level to make sure it is perfectly straight. Adjust if needed by tapping the bottom or top with a mallet or hammer. Once the support is level, align it with the marked position on the wall.
- Attach the first vertical support: Use a drill and appropriate screws or wall anchors to attach the vertical support to the wall at the marked position. Make sure the screws or anchors are securely fastened, ensuring stability and strength.
- Measure and mark the positions for the additional vertical supports: Measure and mark the positions for the remaining vertical supports, ensuring they are evenly spaced along the wall. Use a level to ensure they are all plumb and align with the first support.
- Attach the remaining vertical supports: Repeat the process of attaching the vertical supports to the wall using a drill and screws or anchors. Make sure each support is level, aligned, and securely fastened. It’s recommended to have a helper hold the supports in place while you attach them for added stability.
Attaching the vertical supports securely to the wall is crucial to ensure that your bookshelves can support the weight of books and other items without tipping or leaning. It’s important to use the appropriate screws or anchors based on the type of wall material you have, whether it’s drywall, concrete, or another material.
Take your time with this step to ensure that all the vertical supports are level, straight, and securely attached. This will provide the structural integrity needed for a sturdy set of floor-to-ceiling bookshelves.
Once the vertical supports are in place, you can move on to the next step: adding the horizontal shelves.
When building floor to ceiling bookshelves, make sure to secure the shelves to the wall for stability and safety. Use wall anchors or brackets to prevent tipping.
Step 6: Adding Horizontal Shelves
Now that the vertical supports are securely attached to the wall, it’s time to add the horizontal shelves to your floor-to-ceiling bookshelves. These horizontal shelves will provide the storage space for your books and other items, making your bookshelves functional and organized.
Follow these steps to add the horizontal shelves:
- Measure and mark the positions: Measure the width between the vertical supports and mark the positions on each support where the shelves will be placed. These marks will serve as a guide to ensure the shelves are centered and evenly spaced.
- Cut the shelves: Using a circular saw or table saw, cut the plywood or MDF pieces to the desired length according to your measurements. Ensure that the shelves are all the same length and fit correctly between the vertical supports.
- Place the first shelf: Start with the bottom shelf and place it on top of the vertical supports at the marked position. Ensure that it is level and centered. Adjust if necessary by tapping gently with a mallet or hammer.
- Secure the first shelf: Once the first shelf is in the correct position, attach it to the vertical supports. You can use screws or nails to secure it from the sides, attaching it to the supports. Make sure the screws or nails are long enough to provide a secure connection.
- Repeat for the remaining shelves: Measure and mark the positions for the remaining shelves, ensuring they are evenly spaced. Place each shelf on top of the vertical supports and check for levelness and alignment. Secure each shelf with screws or nails as you did with the first shelf.
It’s important to take your time with this step to ensure that the shelves are level and evenly spaced. Using a level and making precise measurements will help create a professional and visually appealing result.
Consider the height between the shelves based on the items you plan to store. Leave enough space to accommodate taller books or decorative objects. If desired, you can also add adjustable shelves by using shelf pins or brackets.
With the horizontal shelves in place, the structural framework of your bookshelves is complete. The next step will involve installing backing and side panels to provide stability and a finished look.
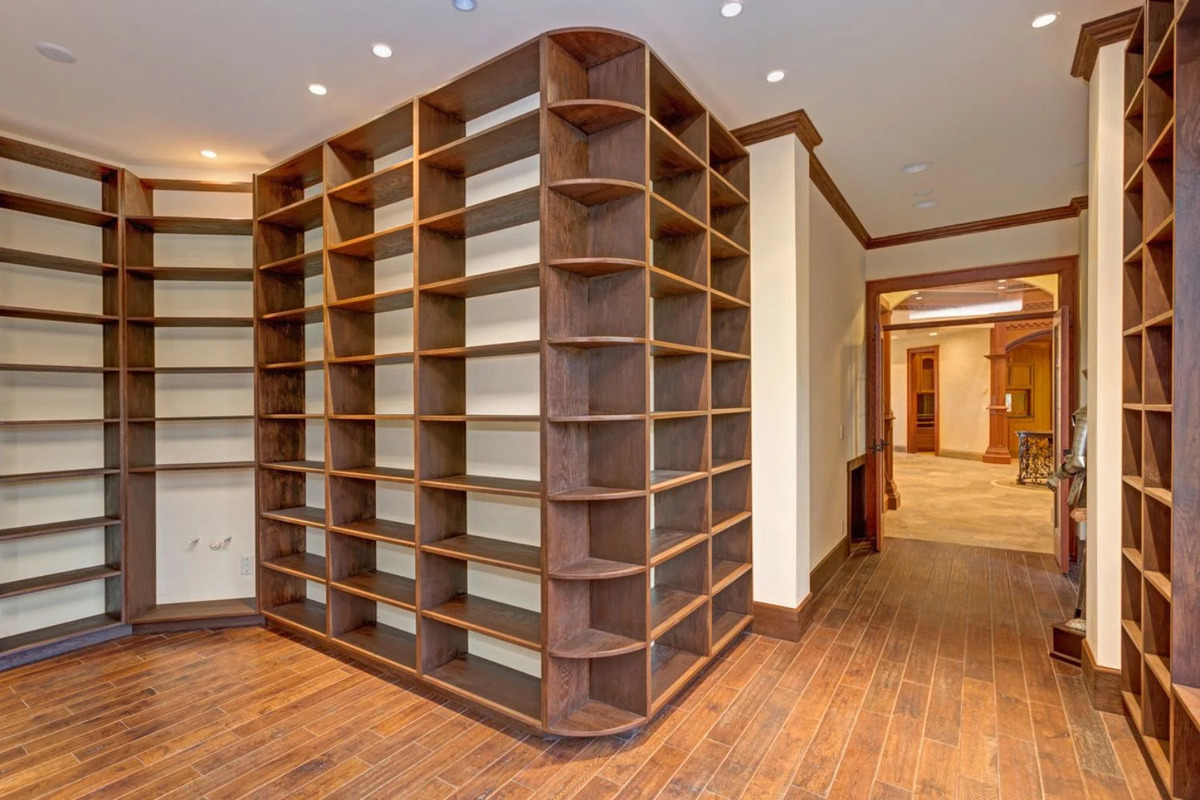
Step 7: Installing Backing and Side Panels
As you near the completion of your floor-to-ceiling bookshelves, it’s time to install the backing and side panels. These panels serve multiple purposes: providing stability to the structure, preventing items from falling behind the shelves, and giving your bookshelves a polished and finished appearance.
Follow these steps to install the backing and side panels:
- Measure and cut the backing panels: Measure the height and width between the vertical supports, and cut the plywood or MDF panels accordingly. These panels will cover the back of your bookshelves, providing support and stability.
- Attach the backing panels: Place the cut backing panels against the back of the bookshelves, ensuring they align with the edges of the vertical supports. Secure the panels by screwing or nailing them to the shelves and vertical supports. Use multiple screws or nails to ensure a secure attachment.
- Measure and cut the side panels (if desired): If you want to add side panels for a more finished look, measure the height between the shelves and cut the plywood or MDF panels to fit. Side panels are optional but can enhance the aesthetics of your bookshelves.
- Attach the side panels: Place the cut side panels against the sides of the bookshelves, ensuring they align with the edges of the shelves and backing panels. Secure the panels by screwing or nailing them to the shelves and backing panels. Take care to align the panels properly and ensure a flush fit.
- Reinforce the panels (optional): For added stability, you can reinforce the backing and side panels by applying a thin layer of wood glue along the edges before attaching them. This will create a stronger bond and prevent any wobbling or shifting of the panels over time.
By installing the backing and side panels, you not only provide stability to your bookshelves but also create a neater and more polished appearance. The backing panels ensure that items don’t fall behind the shelves, while side panels give your bookshelves a more cohesive and finished look.
Remember to take accurate measurements and double-check the alignment of the panels before attaching them. Having a helper hold the panels in place while you secure them can also be beneficial.
With the backing and side panels installed, you are nearing the completion of your floor-to-ceiling bookshelves. The next step will involve sanding and finishing the surfaces to achieve a smooth and polished appearance.
Step 8: Sanding and Finishing
As you approach the final stages of building your floor-to-ceiling bookshelves, it’s time to focus on sanding and finishing the surfaces. This step will not only give your bookshelves a smooth and polished appearance but also help protect the wood and enhance its longevity.
Follow these steps to sand and finish your bookshelves:
- Prep the work area: Set up a clean and well-ventilated area for sanding and finishing. Lay down a drop cloth or newspaper to protect the surrounding surfaces from any dust or spills.
- Sand the surfaces: Use sandpaper or a sanding block to sand the exposed surfaces of the bookshelves. Start with a medium-grit sandpaper, such as 80 or 120, and gradually move to a finer grit, such as 220. Sand in the direction of the wood grain, applying even pressure to smooth out any rough edges, imperfections, or visible glue lines. Be sure to sand all visible areas, including the shelves, vertical supports, and side panels.
- Remove dust: After sanding, use a clean cloth or a vacuum with a brush attachment to remove any dust or debris from the surfaces of the bookshelves. Make sure the surfaces are clean and free from any particles before proceeding to the finishing step.
- Select the finish: Decide on the type of finish you want for your bookshelves. You can choose from a variety of options, including stain, paint, or a clear protective finish. Consider the aesthetic you desire, as well as the level of protection you want for the wood.
- Apply the finish: If you choose to stain or paint the bookshelves, apply the finish using a brush or a roller, following the manufacturer’s instructions. Ensure even coverage and smooth application, taking care to reach all the crevices and corners. If you prefer a clear protective finish, such as polyurethane, use a brush or a foam applicator to apply thin and even coats. Allow each coat to dry thoroughly before applying the next, following the manufacturer’s recommended drying times.
- Optional additional coats: Depending on the desired intensity of color or level of protection, you may choose to apply multiple coats of stain, paint, or protective finish. Allow each coat to dry and lightly sand the surfaces between coats to achieve a smooth and flawless finish.
Sanding and finishing the surfaces of your bookshelves not only adds a touch of elegance but also protects the wood from wear and tear. Be sure to wear protective gloves, a mask, and safety goggles while sanding and applying the finish to minimize exposure to dust and fumes.
Once the finish is completely dry, you can proceed to the final step: organizing and styling your newly built floor-to-ceiling bookshelves.
Read more: How To Build Floor To Ceiling Cabinets
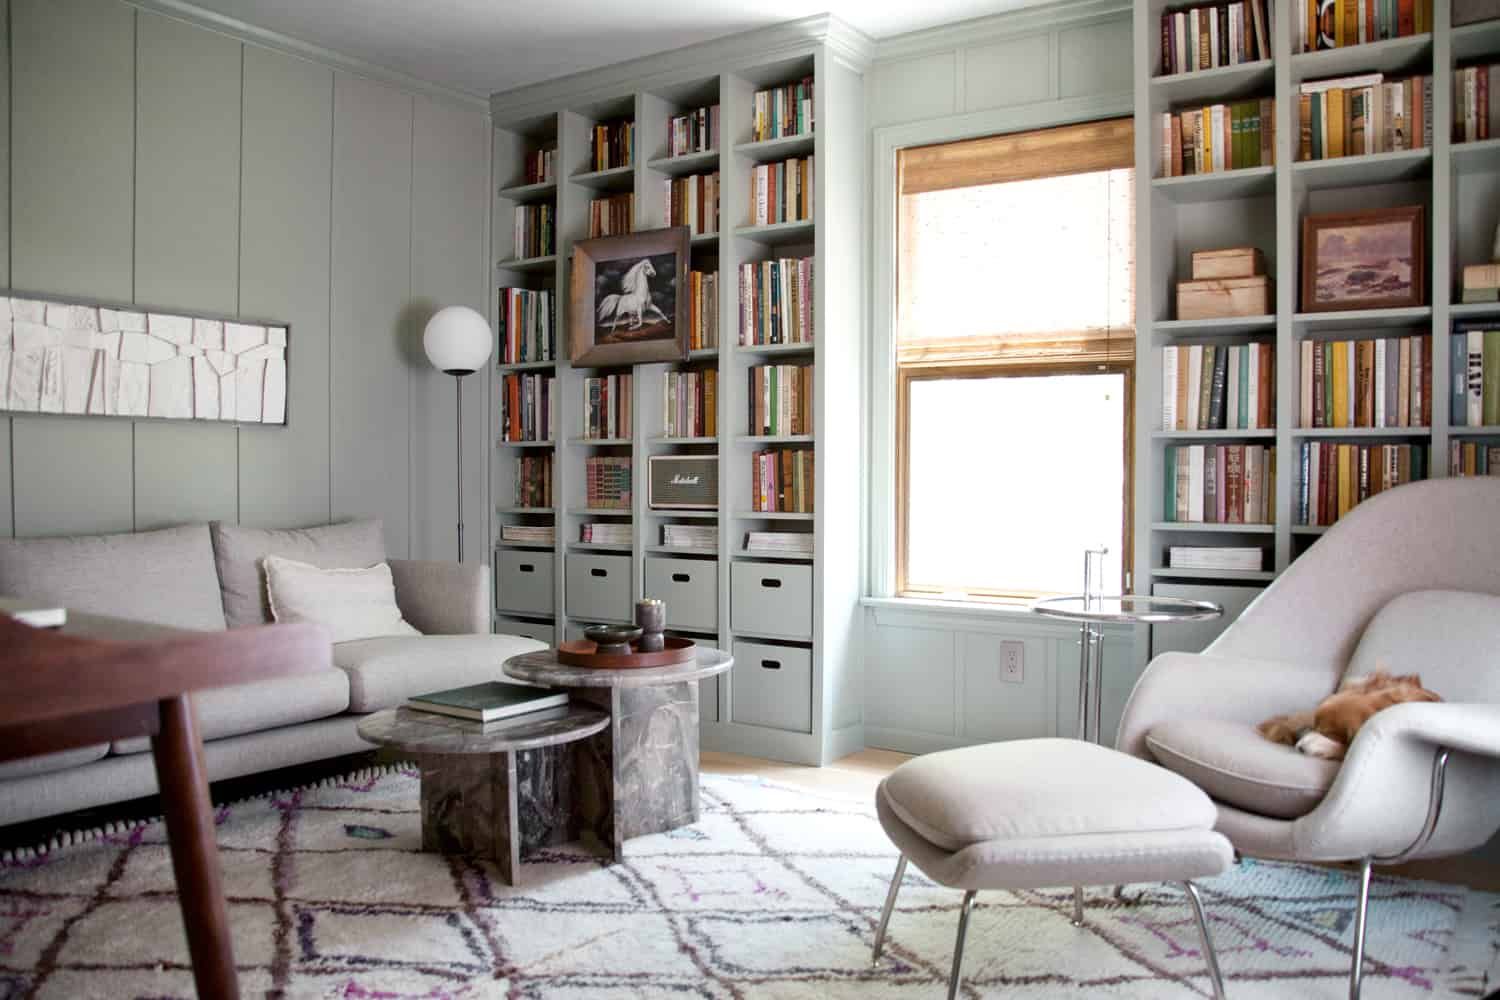
Step 9: Organizing and Styling the Bookshelves
Congratulations on completing the construction and finishing of your floor-to-ceiling bookshelves! Now, it’s time to bring them to life by organizing and styling them to showcase your books, decorative items, and personal touch.
Follow these steps to properly organize and style your bookshelves:
- Plan the placement: Before placing any items on the shelves, consider how you want to arrange them. Think about grouping books by genre or theme, placing decorative items strategically, and leaving breathing space between items for a visually pleasing display. You can also vary the orientation of books for added visual interest.
- Categorize and arrange: Begin by categorizing your books and deciding how you want to organize them on the shelves. You can arrange them alphabetically, by author, or by genre. For a more artistic touch, consider arranging them by color or size to create a visually stunning display. Use bookends or decorative book holders to keep the books upright and add stability.
- Showcase decorative items: Intersperse decorative items such as vases, sculptures, picture frames, or plants among the books. Choose items that reflect your personal style and add visual interest to the shelves. Consider varying the heights and textures of the decorative items to create a sense of balance and harmony.
- Add personal touches: Incorporate personal items that hold sentimental value, such as family photos, trinkets from travels, or cherished mementos. These items will add a personal touch to your bookshelves and make them more meaningful to you and your family.
- Consider lighting: If desired, install lighting fixtures within or above the bookshelves to highlight specific areas or items. LED strip lights or small spotlights can create a warm and inviting ambiance, as well as make the books and decorative items stand out.
- Take care of spacing: Leave enough space between items to avoid a cluttered appearance. This will also allow for easier access to books and prevent items from falling off the shelves. Use bookends or decorative objects to create visual breaks and maintain an organized and balanced look.
- Regularly refresh and clean: Periodically take the opportunity to refresh and update the display on your bookshelves. Rearrange the books, rotate decorative items, and remove anything that no longer fits your vision. Additionally, dust the shelves and items regularly to keep them clean and looking their best.
Remember, organizing and styling your bookshelves is a creative and personal process. Experiment with different arrangements and find what works best for your space and aesthetic preference. Let the bookshelves reflect your personality and create a harmonious balance of functionality and style.
With your floor-to-ceiling bookshelves now organized and styled, step back and admire your handiwork. You have successfully transformed an empty space into a functional and visually captivating storage solution for your books and cherished possessions.
By following these steps, you have not only built bookshelves but also created a statement piece that adds character and sophistication to your home. Enjoy the fruits of your labor and the joy of having your own custom-built floor-to-ceiling bookshelves!
Conclusion
Congratulations on completing the journey of building your floor-to-ceiling bookshelves! Through careful planning, precise measurements, and skilled craftsmanship, you have created a stunning and functional storage solution for your home.
From the initial stage of planning and measurements to the final step of organizing and styling, this comprehensive guide has provided you with the knowledge and guidance needed to build bookshelves that meet your unique needs and enhance your living space.
By investing your time and effort into this project, you have not only created a practical storage solution but also added a touch of elegance and personalization to your home. Your new bookshelves will not only hold your favorite books but will become a focal point in any room, reflecting your style, interests, and personality.
Remember to regularly maintain and care for your bookshelves to keep them in optimal condition. Dusting the shelves, reorganizing them from time to time, and keeping an eye out for any necessary repairs will ensure their longevity and continued functionality.
Whether you’re a seasoned DIY enthusiast or new to the world of woodworking, building your own floor-to-ceiling bookshelves is a rewarding and fulfilling endeavor. It allows you to showcase your creativity, hone your skills, and create a custom piece that perfectly fits your space and style.
Now, as you sit back and admire your beautifully crafted bookshelves, take a moment to appreciate the sense of accomplishment that comes with completing a project of this magnitude. Your dedication and attention to detail have paid off, resulting in a functional and aesthetically pleasing addition to your home.
As your bookshelves become a focal point for gathering and inspiration, may they bring you joy and satisfaction for years to come. Enjoy the process of filling them with your favorite books, displaying treasured items, and creating a space that truly reflects your unique style.
Once again, congratulations on successfully building your floor-to-ceiling bookshelves, and may they inspire countless hours of reading, learning, and enjoyment in your home.
Frequently Asked Questions about How To Build Floor To Ceiling Bookshelves
Was this page helpful?
At Storables.com, we guarantee accurate and reliable information. Our content, validated by Expert Board Contributors, is crafted following stringent Editorial Policies. We're committed to providing you with well-researched, expert-backed insights for all your informational needs.


0 thoughts on “How To Build Floor To Ceiling Bookshelves”