
Articles
How To Build Lattice Fence
Modified: January 6, 2024
Discover articles on how to build a lattice fence and create a beautiful and functional addition to your outdoor space. Step-by-step guides, tips, and ideas await you.
(Many of the links in this article redirect to a specific reviewed product. Your purchase of these products through affiliate links helps to generate commission for Storables.com, at no extra cost. Learn more)
Introduction
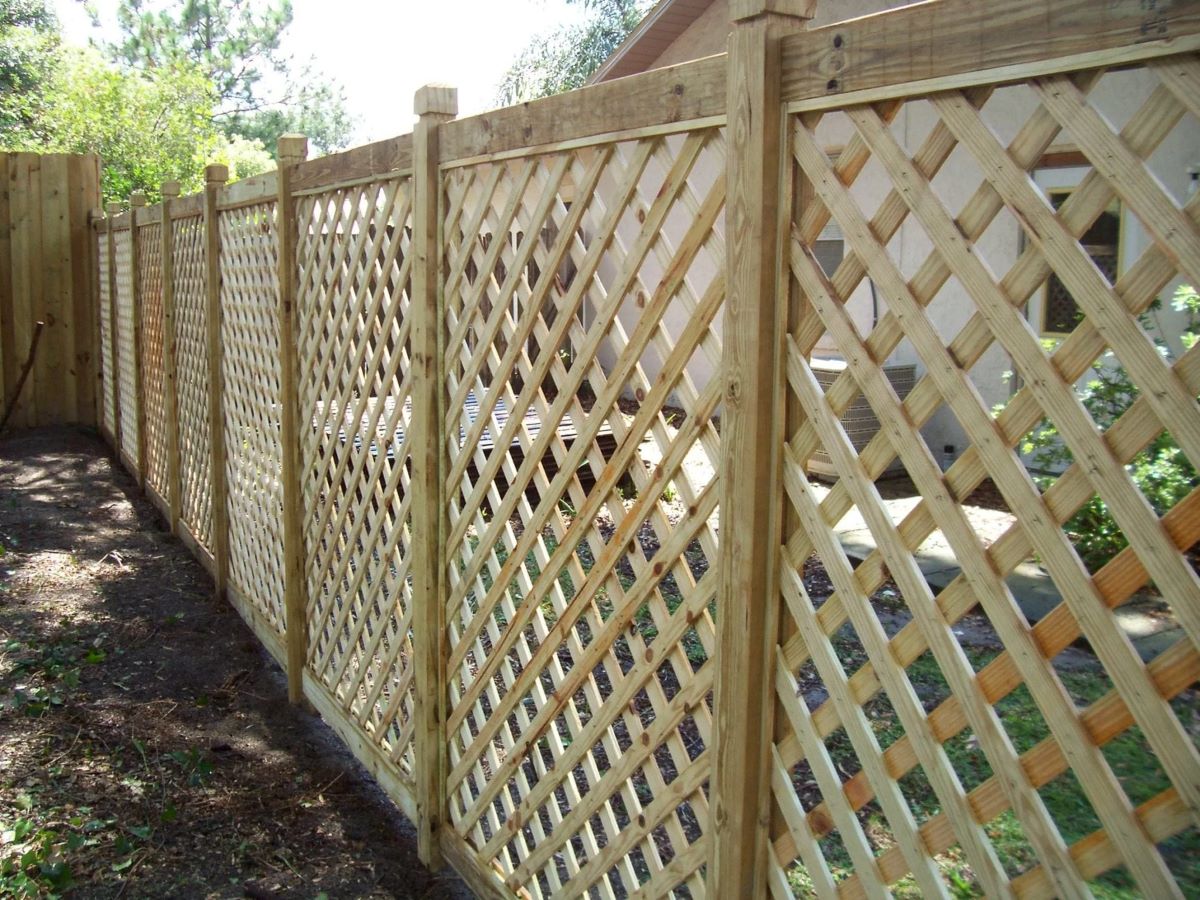
Building a lattice fence can be a great way to add privacy, style, and functionality to your outdoor space. Whether you want to create a border around your garden, create a partition for added privacy, or simply enhance the aesthetic appeal of your home, a lattice fence can provide a beautiful and practical solution.
In this article, we will guide you through the process of building a lattice fence step by step. We will cover everything from planning and measurements to digging post holes, installing the posts, attaching the support beams, cutting and assembling the lattice panels, and finally, installing the panels.
By following this comprehensive guide, even if you have limited experience with DIY projects, you will be able to successfully build your own lattice fence and enjoy the satisfaction of completing a project that will enhance your outdoor space for years to come.
Key Takeaways:
- Building a lattice fence requires careful planning, accurate measurements, and proper installation of posts, support beams, and lattice panels. Prioritize safety, precision, and compliance with local regulations for a successful DIY project.
- Adding finishing touches such as protective finishes, climbing plants, and regular maintenance enhances the appearance and longevity of your lattice fence. Enjoy the privacy, style, and functionality it brings to your outdoor space.
Read more: What Is Lattice Fence
Materials Needed
Before you begin building your lattice fence, it’s important to gather all the necessary materials. Having everything prepared in advance will save you time and ensure a smooth construction process. Here is a list of the materials you will need:
- Fence posts: These will serve as the main support for your lattice fence. Choose sturdy posts made of wood, metal, or vinyl, depending on your preference and budget.
- Lattice panels: These are the decorative elements of your fence that provide privacy and add visual appeal. Lattice panels come in various sizes and designs, so select ones that match your desired style and purpose.
- Support beams: These horizontal beams will provide stability to your fence. They should be made of the same material as your fence posts and cut to the appropriate length.
- Gravel or concrete: This will be used to secure the fence posts in the ground. Choose gravel for temporary or lightweight fences, and concrete for permanent and heavy-duty fencing.
- Fasteners: You will need nails, screws, or brackets to attach the lattice panels, support beams, and fence posts together securely. Make sure to select appropriate fasteners based on the material of your fence.
- Tools: To assemble your lattice fence, you will need a variety of tools, such as a measuring tape, level, hammer, screwdriver or drill, saw, and a post hole digger. Make sure you have these tools on hand before you begin.
- Protective gear: Safety should always be a priority. Equip yourself with safety goggles, gloves, and sturdy footwear to protect yourself from any potential hazards during the construction process.
By gathering all these materials and ensuring you have the necessary tools, you will be well-prepared to start building your lattice fence. Now, let’s move on to the first step: planning and measurements.
Step 1: Planning and Measurements
The first step in building a lattice fence is proper planning and accurate measurements. This will ensure that your fence is sturdy, level, and meets your specific needs. Here’s how to get started:
- Start by deciding where you want your fence to be placed. Consider factors such as privacy, wind exposure, and aesthetics. Mark the boundary lines using stakes or spray paint.
- Measure the total length of the fence to determine the number of lattice panels and support beams you will need. Each panel is typically around 8 feet long, but ensure to measure accurately to account for any variations or customizations.
- Calculate the spacing between each panel. Depending on the level of privacy you desire, you may want to leave a small gap between the panels, or you may prefer them to be tightly positioned.
- Take into account the height of the fence and determine the height of each lattice panel. Standard height ranges from 3 to 6 feet or more, depending on your preference and local regulations.
- If your fence will be located on sloped terrain, make sure to measure the slope and adjust the length of the support beams accordingly. This will ensure a level installation.
- Check with your local building codes and homeowner’s association regulations to ensure you are compliant and obtain any necessary permits before starting the construction process.
Once you have completed the planning and measurements, you will have a clear understanding of the size and placement of your lattice fence. This will serve as a foundation for the next steps. In the next step, we will guide you through digging post holes.
Step 2: Digging Post Holes
After completing the planning and measurements for your lattice fence, you can now move on to digging the post holes. The post holes will provide the foundation and stability for your fence. Follow these steps to dig the post holes:
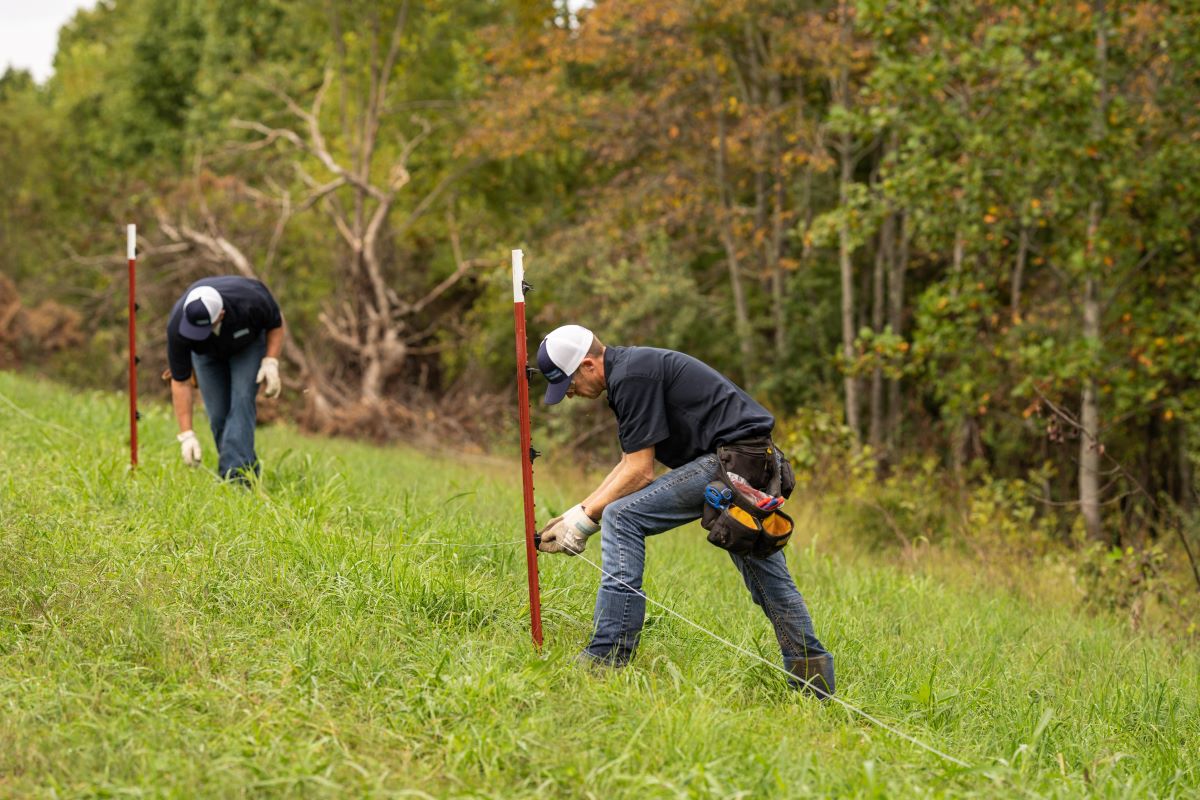
- Using a post hole digger, dig holes at regular intervals along the boundary line where the fence will be installed. The depth of the holes should be approximately one-third the height of the fence post. For example, if your fence post height is 6 feet, dig holes that are around 2 feet deep.
- Make sure the post holes are evenly spaced and align with your planned fence layout. Use a measuring tape or string line to ensure accuracy.
- Remove any debris or loose soil from the holes, ensuring they are clean and ready for the next step.
- Consider adding gravel to the bottom of each post hole for better drainage. This will help prevent water buildup and prolong the lifespan of your fence.
Once you have finished digging the post holes, you are ready to move on to the next step: installing the posts. This step is crucial as it will provide the main support for your lattice fence. Stay tuned to learn how to properly install the posts for a sturdy and durable fence.
Step 3: Installing the Posts
Now that you have dug the post holes, it’s time to install the fence posts. The posts will provide the main support for your lattice fence. Follow these steps to install them securely:
- Place one post in each of the prepared post holes. Make sure the posts are vertically aligned and level. Use a level to ensure accuracy.
- If your fence posts are made of wood, you may want to apply a sealant or preservative to prolong their lifespan and protect them from moisture and rot.
- To ensure stability, consider adding a few inches of gravel or concrete to the bottom of each post hole before inserting the post. This will help anchor the posts in place.
- As you install each post, use a tape measure to check the height and ensure they are all consistent. Adjust the depth of the posts as needed, adding or removing gravel or concrete.
- Secure the posts in the holes by backfilling them with gravel or wet concrete. Ensure the posts are held firmly in place and are straight. Follow the manufacturer’s instructions for mixing and pouring the concrete, if applicable.
- Use a level to double-check that each post is upright and plumb. Make any necessary adjustments before the concrete sets.
- Allow the concrete to dry completely before proceeding to the next step. This may take a few days, so be patient.
Once the fence posts are securely installed and the concrete has fully cured, you are ready to move on to the next step: attaching the support beams. These beams will provide additional stability and strength to your lattice fence. Keep reading to learn how to properly install the support beams.
When building a lattice fence, make sure to use pressure-treated wood for longevity and consider adding a cap to the top of the fence for a finished look and added protection against the elements.
Read more: How To Attach Lattice To Fence
Step 4: Attaching the Support Beams
With the fence posts firmly in place, it’s time to attach the support beams to provide added stability and strength to your lattice fence. Follow these steps to ensure a secure installation:
- Measure the length between two adjacent fence posts where the support beam will be positioned.
- Cut the support beams to the appropriate length, ensuring they fit snugly between the fence posts. Use a saw to make precise cuts.
- Place the first support beam horizontally on top of the fence posts. Make sure it is positioned evenly and aligns with the top of the posts. Use a level to ensure it is level.
- Secure the support beam to the fence posts using screws, nails, or brackets. The method will depend on the material of your fence posts and support beams. Follow the manufacturer’s instructions for the recommended fastening method.
- Repeat this process with the remaining support beams, spacing them evenly along the length of the fence.
- Check that all the support beams are level and securely attached. Make any necessary adjustments before moving on to the next step.
By attaching the support beams to your lattice fence, you are adding structural integrity and ensuring its durability. This step is crucial, especially if you live in an area with strong winds or if your lattice panels are large in size. With the support beams securely in place, you are ready to move on to the next step: cutting and assembling the lattice panels. Continue reading to learn how to complete this step successfully.
Step 5: Cutting and Assembling the Lattice Panels
Now that the fence posts and support beams are installed, it’s time to move on to cutting and assembling the lattice panels. These panels will provide privacy and add visual appeal to your lattice fence. Here’s how to do it:
- Measure the dimensions of the space between two adjacent support beams where the lattice panel will be placed.
- Using a saw, cut the lattice panels to the appropriate size. Make sure to wear safety goggles and gloves when cutting the panels.
- Position the first lattice panel between the support beams. The panel should fit snugly and align with the top and bottom of the support beams. Use a level to ensure it is level.
- Secure the lattice panel to the support beams using screws, nails, or brackets. The method will depend on the material of your lattice panels and support beams. Follow the manufacturer’s instructions for the recommended fastening method.
- Continue this process with the remaining lattice panels, ensuring they are evenly spaced and securely attached.
- If desired, you can paint or stain the lattice panels before installing them to match your desired aesthetic.
Remember to leave a small gap between each lattice panel for expansion and contraction due to temperature changes. This will ensure the longevity of your fence.
Once all the lattice panels are cut and assembled, you are ready to move on to the next step: installing the lattice panels. Stay tuned to learn how to complete this final installation step.
Step 6: Installing the Lattice Panels
With the lattice panels cut and assembled, it’s time to install them onto your fence. The lattice panels will provide the desired privacy and decorative touch to your lattice fence. Follow these steps to ensure a successful installation:
- Starting from one end of the fence, position the first lattice panel against the support beams. Ensure it is flush with the top and bottom of the support beams.
- Secure the lattice panel to the support beams using screws or nails. Make sure to drive the fasteners through the lattice holes to attach it firmly.
- Continue installing the remaining lattice panels in the same manner, ensuring they are evenly spaced and aligned with the support beams.
- Once all the lattice panels are attached, double-check that they are level and securely fastened. Make any necessary adjustments before moving on to the final step.
You can also consider adding caps or trim to the top of the lattice panels for a finished look. This will help protect the lattice from weathering and add a touch of elegance.
Now that the lattice panels are successfully installed, you’re almost done! Let’s move on to the final step: adding finishing touches to your lattice fence.
Step 7: Adding Finishing Touches
Congratulations! You’re in the final step of building your lattice fence. It’s time to add some finishing touches to complete the project and make your fence truly stand out. Follow these steps to give your fence the perfect finishing touches:
- Inspect the entire fence for any loose screws, nails, or brackets. Tighten or replace any fasteners as needed to ensure the fence is secure and sturdy.
- If desired, apply a protective finish to the wood or paint the fence to match your outdoor aesthetics. This will not only enhance the appearance of your fence but also provide additional protection against the elements.
- Consider adding climbing plants, such as vines, to the lattice panels. This will add a touch of greenery and further enhance the privacy of your fence.
- Clean up the construction area and remove any debris or leftover materials.
By adding these finishing touches, you will give your lattice fence a polished and professional look. Take a step back and admire your hard work – you’ve successfully built a beautiful and functional lattice fence!
Remember to perform regular maintenance on your fence to keep it in optimal condition. Inspect the lattice panels, support beams, and fence posts for any signs of wear or damage. Replace or repair any components as needed.
Now that you have completed all the steps, you can enjoy the added privacy, style, and functionality that your lattice fence provides. Sit back, relax, and relish in the satisfaction of a job well done!
Thank you for following this comprehensive guide on how to build a lattice fence. We hope this article has been informative and helpful to you. If you have any questions or need further assistance, don’t hesitate to seek professional advice or reach out to us. Happy fencing!
Read more: How To Build A Lattice Wine Rack
Conclusion
Building a lattice fence can be a rewarding DIY project that adds beauty, privacy, and functionality to your outdoor space. By following the step-by-step guide outlined in this article, you have learned how to plan and measure, dig post holes, install posts, attach support beams, cut and assemble lattice panels, install the panels, and add finishing touches to create a stunning lattice fence.
Throughout the process, it’s important to prioritize safety and precision. Wear protective gear and use the appropriate tools for each step. Double-check your measurements and ensure that the fence posts, support beams, and lattice panels are all securely attached.
With a little bit of patience, attention to detail, and some basic DIY skills, you can successfully build your own lattice fence and transform your outdoor space. Whether you’re looking to add privacy to your backyard, create an aesthetic accent to your garden, or section off different areas of your property, a lattice fence offers a versatile solution.
Don’t forget to consider your local building codes and regulations before starting the construction process. Obtaining any necessary permits will help ensure that your fence meets legal requirements and avoids any potential issues with your neighbors or homeowners’ association.
Remember to conduct regular maintenance on your lattice fence to keep it in top condition. Inspect for any signs of wear, such as loose fasteners or damaged lattice panels, and address them promptly to prolong the lifespan of your fence.
We hope this article has provided you with the guidance and inspiration you need to embark on your lattice fence-building journey. Enjoy the privacy, style, and functionality that your new fence brings, and take pride in your DIY accomplishment. Happy fencing!
Frequently Asked Questions about How To Build Lattice Fence
Was this page helpful?
At Storables.com, we guarantee accurate and reliable information. Our content, validated by Expert Board Contributors, is crafted following stringent Editorial Policies. We're committed to providing you with well-researched, expert-backed insights for all your informational needs.





0 thoughts on “How To Build Lattice Fence”