
Articles
How To Build An Electric Fence
Modified: February 23, 2024
Learn how to build an electric fence with helpful articles. Discover tips, techniques, and step-by-step guides for constructing an effective electric fence.
(Many of the links in this article redirect to a specific reviewed product. Your purchase of these products through affiliate links helps to generate commission for Storables.com, at no extra cost. Learn more)
Introduction
Building an electric fence can be a highly effective way to contain livestock, deter wildlife, or protect your property. Electric fences work by delivering a non-lethal electric shock to anything that comes into contact with them, creating a psychological barrier that discourages animals from trying to breach the fence.
In this article, we will guide you through the process of building your own electric fence. We will cover everything from gathering the necessary materials to testing and troubleshooting the fence. Whether you are a farmer looking to secure your livestock or a homeowner trying to protect your garden from unwanted visitors, this article will provide you with the knowledge and instructions you need to construct a functional electric fence.
Before we begin, it is important to note that safety should be your top priority throughout the entire process. Electric fences carry a current that can cause discomfort or injury, so it is crucial to follow safety guidelines and take necessary precautions. Make sure to consult your local regulations and consult with professionals if needed.
With that said, let’s get started on building your electric fence!
Key Takeaways:
- Building an electric fence requires careful planning, proper installation, and regular maintenance. Prioritize safety, adhere to local regulations, and ensure the fence meets required standards for effective containment and protection.
- Regular testing, troubleshooting, and maintenance are essential for the long-term functionality of an electric fence. Keep the fence clean, monitor voltage output, and address any issues promptly to ensure continued effectiveness.
Read more: How To Build A Wattle Fence
Step 1: Gather the necessary materials
Before you begin building your electric fence, it’s important to gather all the necessary materials. Having everything ready will save you time and ensure a smooth construction process. Here are the essential materials you will need:
- Fence charger: Also known as an energizer or controller, the fence charger is the heart of your electric fence system. It converts electrical energy from a power source into a high-voltage pulse that energizes the fence wires. Make sure to choose a charger that is suited for the size and purpose of your fence.
- Fence wires: These conductive wires carry the electric charge and form the actual physical barrier of the fence. You will need both the main or hot wires and the ground wires.
- Fence posts: These sturdy vertical structures support the fence wires and keep them in place. Fence posts can be made of wood, metal, or fiberglass, depending on your preference and the type of terrain you are working with. Choose posts that are tall enough to accommodate the desired height of your fence.
- Insulators: Insulators are crucial for preventing the electric charge from being grounded. They are attached to the fence posts and hold the wires away from the posts, preventing them from coming into contact and losing electrical current.
- Grounding system: An effective grounding system ensures that the electric charge completes a circuit and flows through the animal or intruder that touches the fence. It typically consists of grounding rods or plates, copper wire, and clamps.
- Wire connectors and tensioners: These components are used to connect the wires together, create splices, and maintain tension in the fence wires.
- Warning signs: It is essential to place warning signs along your electric fence, alerting people to its presence and the potential for an electric shock. This is particularly important if the fence is in a location where unsuspecting individuals might come into contact with it.
- Tools: You will also need a variety of tools including wire cutters, pliers, a hammer or post driver, a shovel for digging post holes, and a multimeter for testing and troubleshooting the electric fence.
Once you have gathered all the necessary materials, you can proceed to the next step, which is planning the layout of your electric fence.
Step 2: Plan the layout of the fence
Before you start installing the electric fence, it’s crucial to plan the layout to ensure maximum effectiveness and efficiency. Consider the following factors when planning the fence layout:
- Perimeter: Determine the perimeter you want to enclose with the electric fence. Measure the area carefully and mark the corners and endpoints. This will help you calculate the amount of materials needed.
- Height and spacing: Decide on the height of your electric fence based on your specific needs. If you’re containing livestock, consider their size and capabilities. For deterring wildlife, a taller fence might be necessary. Also, consider the spacing between the wires or strands. Generally, the lower wire should be closer to the ground while the upper wires should have wider spacing.
- Obstacles: Take note of any obstacles such as trees, gates, or existing structures that might affect the fence line. Plan how to work around or incorporate these obstacles into your design.
- Entrances and access points: Determine where you will have gates or other access points to the fenced area. Make sure to leave enough space for vehicles, livestock, or people to pass through comfortably.
- Power source: Consider the distance of your fence to a reliable power source. Ensure that the power source can sufficiently handle the energizer you’ve chosen.
- Local regulations: Research any local regulations or codes that govern the installation of electric fences in your area. Ensure compliance with these regulations to avoid any legal issues.
Once you have a clear plan for the layout of your electric fence, mark out the fence line using stakes or spray paint. This will serve as a visual guide during the installation process. Take your time to finalize the layout as it will significantly impact the effectiveness and functionality of your electric fence.
Next, we will proceed to step 3, which involves installing the grounding system for your electric fence.
Step 3: Install the grounding system
The grounding system is a critical component of your electric fence. It ensures that the electric charge completes a circuit and flows through any animal or intruder that touches the fence. Here’s how you can install the grounding system:
- Select a suitable location: Choose a location for your grounding system that is away from any underground utilities, water sources, or metal structures. The grounding system should ideally be installed in an area with moist soil, as moist soil is a better conductor of electricity.
- Prepare the grounding rods: Depending on the size of your fence, you may need one or multiple grounding rods. Grounding rods are typically made of copper or galvanized steel and should have a length of at least 6-8 feet. Before installation, remove any paint or coatings from the rod’s end that will be placed in the ground to ensure a good electrical connection.
- Drive the grounding rods: Use a post driver or a hammer to drive the grounding rods into the soil. Insert the rods vertically into the ground, leaving approximately 6-8 inches exposed above the soil surface. Ensure that the rods are securely placed and make good contact with the soil.
- Connect the grounding rods: Once the grounding rods are in place, connect them together using a copper wire. The wire should have a gauge that is appropriate for the size of your fence. Use clamps or connectors to securely attach the wire to the grounding rods.
- Connect to the energizer: Run a separate copper wire from the grounding system to the ground terminal of the fence charger. Ensure that the connection is securely made, without any loose or exposed wires.
- Test the grounding system: Once the grounding system is installed, it’s important to test its effectiveness. Use a multimeter or a dedicated grounding tester to measure the resistance between the grounding system and the earth. The resistance should ideally be below 25 ohms for the system to function properly.
Remember, the grounding system is an essential part of your electric fence. It allows the electric charge to flow and ensures the effectiveness of the fence. Take your time during the installation process and double-check all connections for a reliable grounding system.
Now that you have installed the grounding system, proceed to step 4, where you will set up the electric fence charger.
Step 4: Set up the electric fence charger
The electric fence charger, also known as the energizer or controller, is a crucial component of your electric fence system. It converts electrical energy from a power source into a high-voltage pulse that energizes the fence wires. Here’s how you can set up the electric fence charger:
- Choose a suitable location: Select a location for the electric fence charger near a power source. Ensure that the location is well-protected from the elements, such as rain or direct sunlight, to prevent damage to the charger.
- Connect the charger to the power source: Follow the manufacturer’s instructions to connect the electric fence charger to a power source. This may involve wiring the charger to a mains power supply, a battery, or a solar panel, depending on the type of charger you have chosen.
- Ground the charger: Grounding the charger is crucial for the proper functioning and safety of your electric fence system. Connect the grounding wire from the charger to the grounding system that you installed in step 3. Ensure a secure and properly insulated connection.
- Configure the charger settings: Depending on the specific model and features of your electric fence charger, you may need to configure various settings. This can include adjusting the pulse rate, output voltage, or other parameters. Refer to the manufacturer’s instructions for guidance on the optimal settings for your specific application.
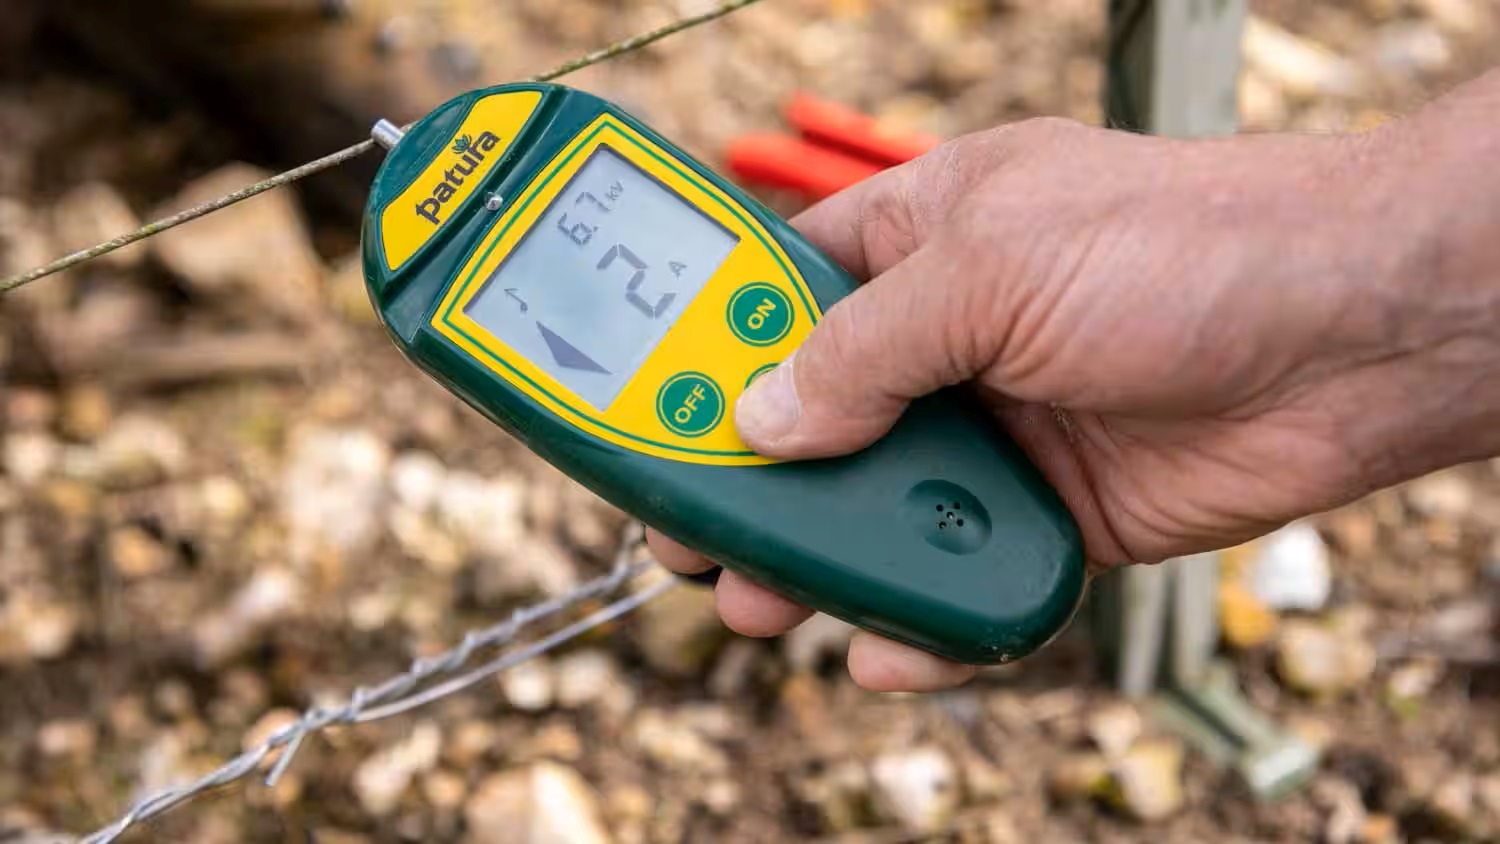
- Test the charger: Before proceeding further, it’s essential to test the electric fence charger to ensure that it is functioning correctly. Use a voltmeter or an electric fence tester to measure the voltage output of the charger. It should correspond to the desired voltage range for your particular fence.
Once you have successfully set up and tested the electric fence charger, you can move on to the next step, which is installing the fence posts for your electric fence.
Stay tuned for step 5, where we will guide you through the process of installing and preparing the fence posts!
Read more: How To Build A Brick Fence
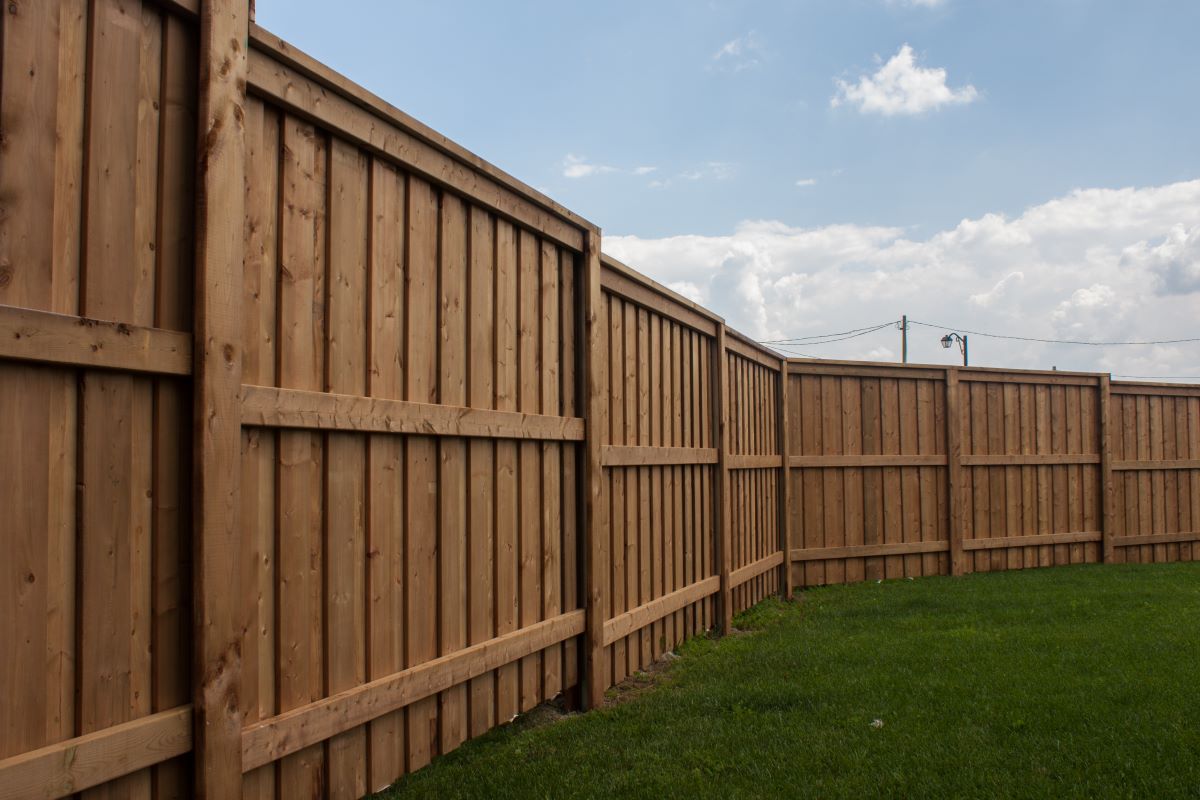
Step 5: Install the fence posts
The fence posts play a crucial role in supporting and securing the electric fence wires. They provide the structural framework for the fence and ensure its stability. Here’s how you can install the fence posts:
- Determine the spacing: Decide on the spacing distance between the fence posts. This will depend on the type of animal you are containing or deterring, as well as the terrain. As a general guideline, posts should be spaced approximately 8 to 12 feet apart.
- Mark the post locations: Use stakes or spray paint to mark the locations where the fence posts will be installed. This will provide a visual guide and help ensure accuracy during the installation process.
- Prepare the holes: Using a post hole digger or a shovel, dig holes at each marked location. The depth of the holes should be approximately one-third the length of the fence post, with a minimum depth of 2 feet. Ensure that the holes are deep enough to provide adequate stability for the fence posts.
- Install the fence posts: Place a fence post in each hole, ensuring it is vertical and aligned with the fence line. Use a level to check the post’s verticality. Fill the hole with soil or concrete mix around the post, tamping it down firmly to provide stability. Repeat this process for all the fence posts.
- Secure the posts: Once all the fence posts are installed, allow the soil or concrete to set and cure if you used concrete. This will provide additional strength and stability to the fence posts. If necessary, use braces or supports to keep the posts in place while the soil or concrete sets.
It is important to ensure that the fence posts are sturdy and secure, as they will bear the tension from the fence wires. Take your time during the installation process to ensure that the posts are properly aligned and firmly anchored in the ground.
Now that the fence posts are installed, we will move on to step 6, which involves attaching the insulators to the posts.
When building an electric fence, make sure to use high-quality insulators to prevent the electric current from grounding out. Insulators should be installed at corners, ends, and changes in direction to maintain the fence’s effectiveness.
Step 6: Attach the insulators on the posts
Insulators play a crucial role in electric fences by preventing the electric current from being grounded and ensuring that the fence wires maintain their electrical charge. Attaching insulators to the fence posts is essential for the proper functioning of your electric fence. Here’s how you can attach the insulators:
- Select the appropriate insulators: There are various types of insulators available, including plastic screw-in insulators, T-post insulators, and corner insulators. Choose insulators that are designed to fit the type of fence posts you have installed.
- Determine the position of the insulators: Decide on the desired height and spacing of your fence wires. Typically, insulators are attached at regular intervals along the fence posts, allowing for proper wire tension and preventing contact between the wires and the posts.
- Attach the insulators: Place the insulators on the fence posts at the predetermined positions. Follow the manufacturer’s instructions for the specific insulator type you are using. In most cases, insulators can be secured to the posts using screws, nails, or other fasteners.
- Ensure proper alignment: Make sure that the insulators are securely attached and aligned correctly. Insulators should hold the fence wires away from the posts, preventing any contact that could cause a short circuit or loss of electrical charge.
- Double-check the connections: Inspect the connections between the insulators and the fence posts, ensuring that they are tight and secure. Loose or faulty connections can affect the electrical conductivity of the fence.
Attaching insulators to the fence posts is a critical step in ensuring the proper functioning of your electric fence. Take your time to carefully align and securely attach the insulators, as they will play a key role in maintaining the electrical charge of the fence wires.
With the insulators in place, we can move on to step 7, which involves connecting the wires to the charger and posts.
Step 7: Connect the wires to the charger and posts
Connecting the wires to the charger and posts is a crucial step in establishing the electrical circuit of your electric fence. It ensures that the electric charge is properly transmitted throughout the fence and enables the effective functioning of your electric fence system. Here’s how you can connect the wires:
- Start with the ground system: Begin by connecting the grounding wire from the charger to the grounding system that you installed in step 3. Ensure a secure and properly insulated connection to complete the grounding circuit.
- Connect the hot wires to the charger: Connect the hot wires from the fence posts to the designated terminals on the electric fence charger. Most chargers have dedicated terminals for the hot wires. Follow the manufacturer’s instructions for proper wire connections.
- Run the hot wires along the fence posts: From the charger terminal, run the hot wires along the fence posts, ensuring they are securely attached to the insulators. Take care to maintain proper tension in the wires for optimal performance.
- Connect the hot wires to the fence posts: At each fence post, connect the hot wires to the insulators using wire connectors or other suitable fasteners. Make sure the connections are tight and secure to maintain good electrical conductivity.
- Test the electrical circuit: Once all the wires are connected, carefully test the electrical circuit of the fence. Use a voltage tester or a multimeter to ensure that the electric charge is flowing correctly throughout the fence wires.
Properly connecting the wires to the charger and posts establishes the electrical circuit required for your electric fence to function effectively. Ensure that all connections are secure, and the wires are properly tensioned for optimal performance.
Now that the wires are connected, proceed to step 8, where we will guide you through the process of testing the electric fence.
Step 8: Test the electric fence
Testing the electric fence is a crucial step in ensuring its functionality and effectiveness. It allows you to verify that the electric charge is flowing through the wires and that the fence is providing the intended psychological barrier. Here’s how you can test your electric fence:
- Ensure safety precautions: Before conducting any tests, make sure to take necessary safety precautions. Wear insulated gloves and keep a safe distance from the electric fence to avoid any accidental shocks.
- Use a voltage tester or an electric fence tester: Obtain a voltage tester or an electric fence tester, specifically designed for testing electric fences. These devices can measure the current and voltage flowing through the fence wires. Follow the manufacturer’s instructions for proper use.
- Test the charger’s output: Start by testing the output voltage of the electric fence charger. Connect the voltage tester to the hot wires or use the electric fence tester as instructed. Verify that the output voltage matches the desired range for your particular fence setup.
- Check the conductivity of the wires: Move along the fence line, testing the conductivity of the wires at various points. Ensure that the voltage measured is consistent along the entire fence, indicating proper wire connection and functioning insulators.
- Inspect for any faults or weaknesses: While testing, be on the lookout for any faults or weaknesses in the fence system. Check for loose wires, damaged insulators, or areas where the voltage seems significantly lower. These issues can impact the fence’s effectiveness, and should be addressed promptly.
Testing your electric fence not only verifies its proper functioning but also allows you to identify and address any potential issues. Regular testing is recommended to ensure that the fence is providing the desired level of deterrence or containment.
Once you have tested and confirmed the functionality of your electric fence, you can proceed to step 9, which involves maintaining and troubleshooting the electric fence.
Read more: How To Build Deer Fence
Step 9: Maintain and troubleshoot the electric fence
Maintaining and troubleshooting your electric fence is essential for its long-term functionality and effectiveness. Regular maintenance ensures that the fence continues to provide the desired level of containment or deterrence. Here are some tips for maintaining and troubleshooting your electric fence:
- Inspect the fence regularly: Conduct routine inspections of the fence to check for any issues or damage. Look for loose wires, damaged insulators, or vegetation that might be touching the fence and causing a short circuit. Address any problems promptly to maintain the integrity of the fence.
- Keep the fence clean and clear: Remove any dirt, debris, or vegetation that accumulates around the fence. Overgrown vegetation can reduce the effectiveness of the fence by providing alternative pathways for the electric current to ground.
- Monitor the voltage regularly: Periodically check the voltage output of the fence charger to ensure that it is within the desired range. Fluctuations in voltage could indicate a problem with the charger or other components of the fence system.
- Check the grounding system: Inspect the grounding system regularly to ensure proper connection and adequate moisture. Dry soil or corrosion can affect the grounding system’s performance. Rehydrate the soil if necessary and clean any corrosion on the grounding rods or wire.
- Address any animal or human interference: If there are instances of animals or humans tampering with the fence, investigate the cause and reinforce any areas that might be vulnerable. Repair any damage to the wires or insulators promptly.
- Consider weather conditions: Extreme weather conditions such as heavy rain, snow, or high winds can affect the functionality of the electric fence. Monitor the fence during challenging weather conditions and make any necessary adjustments or repairs.
- Seek professional assistance if needed: If you encounter persistent issues or are unsure about troubleshooting certain problems, consult an experienced professional for assistance. They can offer valuable insights and guidance in maintaining and troubleshooting your electric fence.
Regular maintenance and proactive troubleshooting will ensure that your electric fence remains in optimal condition and continues to serve its intended purpose effectively.
Congratulations! With these steps, you have successfully learned how to build, maintain, and troubleshoot an electric fence. Remember to follow safety guidelines, adhere to local regulations, and consult professionals if needed.
Now you can relax and enjoy the benefits of your functional and secure electric fence!
Don’t forget to regularly check and update your fence to maintain its effectiveness over time. Happy fencing!
Conclusion
Building an electric fence can provide an effective solution for containing livestock, deterring wildlife, or protecting your property. By following the steps outlined in this guide, you can construct a functional and secure electric fence that meets your specific needs.
Throughout the process, it is important to prioritize safety and adhere to local regulations. Always wear protective gear, consult professionals when needed, and ensure that your fence meets the required standards.
Remember, maintaining and regularly inspecting your electric fence is essential for its continued effectiveness. Keep the fence clean and clear, check the voltage output, and address any issues promptly to ensure proper functioning.
An electric fence can be a valuable asset, providing peace of mind and protection for your animals, property, or garden. It serves as a psychological barrier, deterring intruders and keeping your assets secure.
With proper planning, installation, and maintenance, your electric fence can be a reliable and durable solution. Regular testing and troubleshooting will help identify any issues and allow you to promptly address them.
By following these steps and dedicating time to proper maintenance, you can enjoy the benefits of a well-functioning electric fence for years to come. Remember to stay informed about updates in regulations and best practices to ensure the continued efficacy of your electric fence.
Now that you have the knowledge and guidance, it’s time to put it into practice and build your own electric fence. Good luck, and may your fence provide the security and protection you desire!
Frequently Asked Questions about How To Build An Electric Fence
Was this page helpful?
At Storables.com, we guarantee accurate and reliable information. Our content, validated by Expert Board Contributors, is crafted following stringent Editorial Policies. We're committed to providing you with well-researched, expert-backed insights for all your informational needs.


0 thoughts on “How To Build An Electric Fence”