Home>Articles>How To Install A Pedestal Sink With Wall Plumbing

Articles
How To Install A Pedestal Sink With Wall Plumbing
Modified: October 28, 2024
Learn step-by-step instructions for installing a pedestal sink with wall plumbing in our comprehensive articles. Perfect guide for beginners and DIY enthusiasts.
(Many of the links in this article redirect to a specific reviewed product. Your purchase of these products through affiliate links helps to generate commission for Storables.com, at no extra cost. Learn more)
Introduction
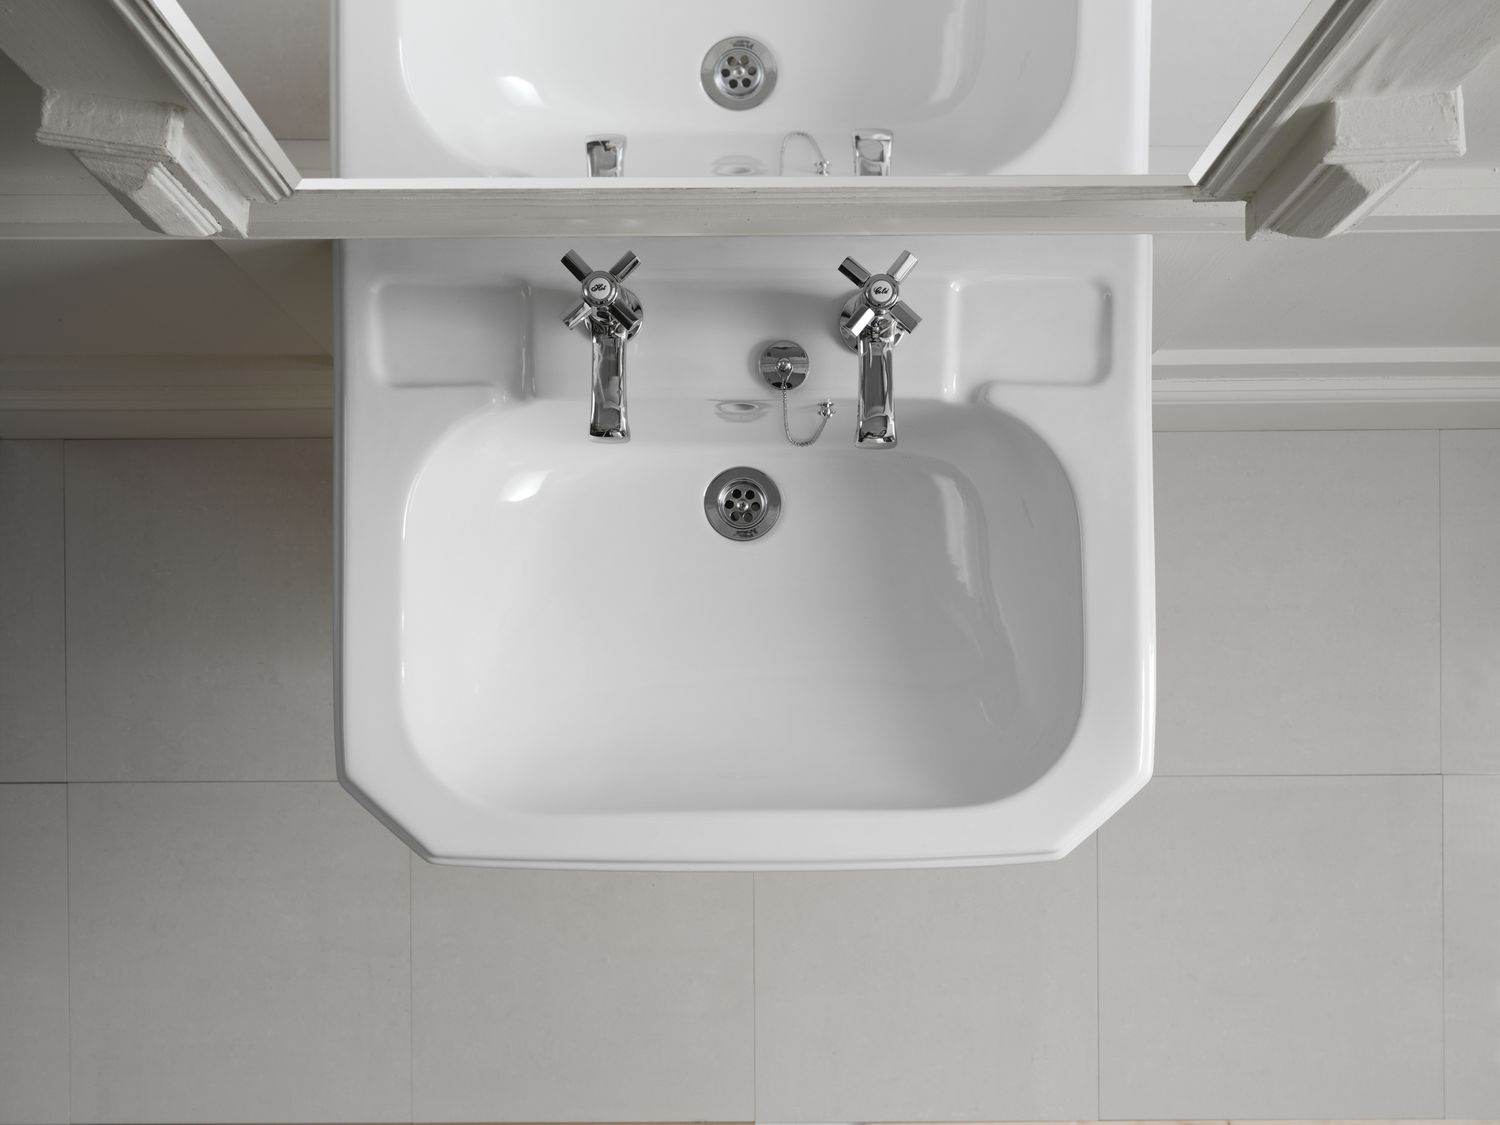
Installing a pedestal sink with wall plumbing can be a great way to add style and functionality to your bathroom. Not only does it create a sleek and elegant look, but it also saves valuable floor space, making it ideal for smaller bathrooms. However, the installation process may seem intimidating if you’re not familiar with plumbing tasks.
But fear not! With the right tools, materials, and a step-by-step guide, you can successfully install a pedestal sink with wall plumbing. In this article, we will walk you through each step of the process, offering helpful tips and important considerations along the way. Whether you’re a seasoned DIY enthusiast or a beginner, you’ll find this guide useful in achieving a professional-looking installation.
Before you begin, it’s important to note that this guide assumes you have some basic knowledge of plumbing and are comfortable working with tools. If you’re uncertain about any steps or feel unsure about your abilities, it’s always best to consult a professional plumber to ensure a safe and accurate installation.
Now that we’ve got the necessary disclaimers out of the way, let’s gather our tools and get started on installing your brand new pedestal sink with wall plumbing!
Key Takeaways:
- Installing a pedestal sink with wall plumbing is a manageable DIY project with the right tools and step-by-step guidance. It adds style, saves space, and enhances bathroom functionality for a professional-looking installation.
- Thorough preparation, careful positioning, and meticulous testing are crucial for a successful pedestal sink installation. Attention to detail ensures a stable, leak-free, and aesthetically pleasing addition to your bathroom.
Read more: How To Hide Plumbing Behind Pedestal Sink
Required Tools and Materials
Before diving into the installation process, it’s essential to gather all the necessary tools and materials. Having everything prepared ahead of time will make the installation smoother and more efficient. Here’s a list of the tools and materials you’ll need:
Tools
- Adjustable wrench
- Plumber’s tape
- Hacksaw
- Screwdriver set
- Measuring tape
- Pipe cutter
- Bucket or bowl
- Pliers
- Level
- Bucket or towel (for catching water)
Materials
- Pedestal sink
- Mounting hardware
- Faucet
- Drain assembly
- Water supply lines
- PVC pipes and fittings (if needed)
- Plumber’s putty or silicone caulk
- Drain trap
- Plumber’s wrench
- Teflon tape
It’s important to ensure that you have all the necessary tools and materials before starting the installation process. This will save you time and allow you to complete the project without interruptions. It’s also a good idea to double-check the manufacturer’s instructions for any additional tools or materials that may be required specific to your particular pedestal sink model.
Now that we have all our tools and materials ready, let’s move on to the step-by-step process of installing a pedestal sink with wall plumbing.
Step 1: Prepare the Work Area
Before you start the installation process, it’s important to prepare the work area to ensure a smooth and efficient installation. Here are the steps to follow:
- Clear the area: Remove any objects or obstructions around the sink area. This includes toiletries, towels, and any other items that may be in the way. Clearing the area will give you ample space to work and prevent any accidental damage.
- Turn off the water supply: Locate the water shut-off valves for the sink and turn them off. These valves are usually located under the sink or in the bathroom. Turn the valves clockwise until they are fully closed. This will prevent any water flow and avoid any potential leaks during the installation process.
- Protect the floor: Place a towel or a bucket underneath the sink area to catch any water that may drip during the removal process. This will protect the floor from any damage or staining.
- Disconnect plumbing connections: If you are replacing an existing sink, you will need to disconnect the plumbing connections. Use an adjustable wrench to loosen the nuts that connect the water supply lines and the drain pipes to the existing sink. Have a bucket or towel ready to catch any residual water that may flow out.
- Remove the vanity cabinet (if applicable): If you have a vanity cabinet underneath the sink, you may need to remove it. This step is not always necessary, but it can provide better access to the plumbing connections and make the installation process easier.
By following these steps, you will create a clean and organized work area, ensuring that the installation process goes smoothly. Once you have completed these preparatory steps, you are ready to move on to the next phase of the installation: shutting off the water supply.
Read more: DIY Guide To Installing A Pedestal Sink
Step 2: Shut Off the Water Supply
Before starting any plumbing project, it’s crucial to shut off the water supply to prevent any leaks or accidental water flow. Follow these steps to properly shut off the water supply:
- Locate the shut-off valves: Underneath your sink, you will find shut-off valves for both hot and cold water. These valves are usually small knobs or levers connected to the water supply lines.
- Turn off the valves: Twist the shut-off valves clockwise until they are fully closed. This will stop the flow of water to the sink and prevent any leaks or water damage during the installation process. Make sure both the hot and cold water shut-off valves are closed.
- Test the water supply: To confirm that the water supply is shut off, turn on the faucet handles to release any remaining water pressure. If water doesn’t come out, you have successfully shut off the water supply. If water still flows, double-check that the shut-off valves are completely closed.
- Cut off the main water supply (if necessary): In some cases, the shut-off valves may not be present or may not completely stop the water flow. In such situations, it may be necessary to shut off the main water supply to your home. Locate the main water shut-off valve and turn it off to stop the water flow throughout the house. This step is only required if the shut-off valves under the sink are not functioning properly.
Shutting off the water supply is important to prevent any water leakage or accidents during the installation process. Once you have successfully shut off the water supply, you can proceed to the next step of removing the old sink (if applicable) before installing the new pedestal sink.
Step 3: Remove the Old Sink (If applicable)
If you are replacing an existing sink with a pedestal sink, you’ll need to remove the old sink first. Follow these steps to remove the old sink:
- Disconnect the plumbing connections: Use an adjustable wrench to loosen and disconnect the nuts that connect the water supply lines to the faucet and the drain pipes to the sink. Place a bucket or a towel underneath to catch any water that may be released.
- Remove the mounting hardware: Look for any clips or brackets that hold the sink in place. Depending on the type of sink, there may be mounting clips, screws, or brackets securing it to the wall or countertop. Use a screwdriver or wrench to remove these fasteners and set them aside for later use or disposal.
- Detach the sink from the wall or countertop: Carefully detach the sink from the wall or countertop by gently rocking it back and forth. If the sink is caulked to the countertop, use a utility knife to cut through the caulk. Be cautious and avoid applying excessive force to prevent any damage to the plumbing or surrounding areas.
- Lift the sink off the vanity or countertop: With the help of an assistant, lift the old sink off the vanity or countertop and set it aside. Be mindful of any sharp edges or fragile parts that may cause injury.
- Inspect the plumbing and repair any damage: Take this opportunity to inspect the plumbing connections and pipes. If you notice any leaks, corrosion, or damage, replace or repair the necessary components. It’s essential to address these issues before proceeding with the installation of the new sink.
By following these steps, you can safely and effectively remove the old sink. Remember to work slowly and carefully to avoid any accidents or damage to the plumbing. Once the old sink has been removed, you’re ready to move on to the next step of installing the mounting bracket for the new pedestal sink.
Step 4: Install the Mounting Bracket
After removing the old sink, it’s time to install the mounting bracket for the new pedestal sink. The mounting bracket provides support and stability by anchoring the sink to the wall. Follow these steps to install the mounting bracket:
- Measure and mark the desired height: Use a measuring tape to determine the desired height of the sink. Mark this height on the wall using a pencil or marker.
- Locate wall studs: Use a stud finder to locate the wall studs within the marked area. Wall studs are vertical wooden beams behind the drywall that provide structural support.
- Position the mounting bracket: Align the mounting bracket with the marked height on the wall and make sure it is level. The top of the bracket should be flush with the marked height.
- Mark the screw hole locations: Use a pencil or marker to mark the screw hole locations on the wall through the holes in the mounting bracket. These holes will be used to secure the bracket to the wall.
- Pre-drill pilot holes: Use a drill with the appropriate drill bit to pre-drill pilot holes at the marked screw hole locations. This will make it easier to insert the screws and prevent the wall from splitting.
- Secure the mounting bracket: Place the mounting bracket back on the wall, aligning the screw holes with the pre-drilled pilot holes. Use a screwdriver or drill to insert the screws into the holes and tighten them until the bracket is securely attached to the wall.
- Double-check the level: Use a level to ensure that the mounting bracket is still level after securing it to the wall. Adjust if necessary.
By following these steps, you will successfully install the mounting bracket for the new pedestal sink. The mounting bracket plays a crucial role in supporting the sink and ensuring its stability. Now that the bracket is securely in place, you can proceed to the next step of positioning the pedestal and sink.
Step 5: Position the Pedestal and Sink
Now that the mounting bracket is securely installed, it’s time to position the pedestal and sink on top of it. Follow these steps to properly position the pedestal and sink:
- Place the pedestal in position: Position the pedestal against the wall, aligning it with the mounting bracket. Ensure that the pedestal is level and centered with the marked height on the wall.
- Set the sink on the pedestal: Carefully place the sink on top of the pedestal, ensuring that it sits securely and evenly. Check that the sink is centered and level on the pedestal.
- Adjust the position if needed: If necessary, make minor adjustments to the position of the pedestal and sink to ensure proper alignment. This may involve slight movements to the left or right, as well as front and back adjustments.
- Check for overhang: Make sure the sink is aligned with the front edge of the pedestal and does not overhang. An overhanging sink can be unbalanced and may cause stability issues.
- Verify the alignment with the wall: Confirm that the sink is aligned with the wall and is centered with any existing plumbing connections, such as the water supply lines and drain opening.
- Double-check the level: Use a level to ensure that the sink is level both from side to side and from front to back. Adjust the position of the pedestal and sink if needed to achieve a level installation.
By following these steps, you will successfully position the pedestal and sink in its proper place. It’s important to ensure that the sink is balanced and secured to prevent any wobbling or instability. Now that the sink is in position, we can move on to the next step: attaching the faucet and drain.
Read more: How To Remove A Pedestal Sink
Step 6: Attach the Faucet and Drain
With the pedestal sink positioned correctly, it’s time to attach the faucet and drain. These components are essential for the proper functioning of the sink. Follow these steps to attach the faucet and drain:
- Assemble the faucet: Follow the manufacturer’s instructions to assemble the faucet. This typically involves connecting the handles, spout, and any other components provided with the faucet. Use an adjustable wrench or appropriate tools, if necessary, to tighten the connections securely.
- Attach the faucet to the sink: Position the faucet on the sink according to the manufacturer’s instructions. Insert the faucet through the pre-drilled holes on the sink and secure it using the provided mounting hardware. Use an adjustable wrench or appropriate tools to tighten the nuts and ensure a secure connection.
- Connect the drain assembly: Install the drain assembly by placing it in the drain opening at the bottom of the sink. Apply plumber’s putty or silicone caulk around the drain assembly to create a watertight seal. Insert the drain flange into the drain opening and tighten it securely using a plumber’s wrench.
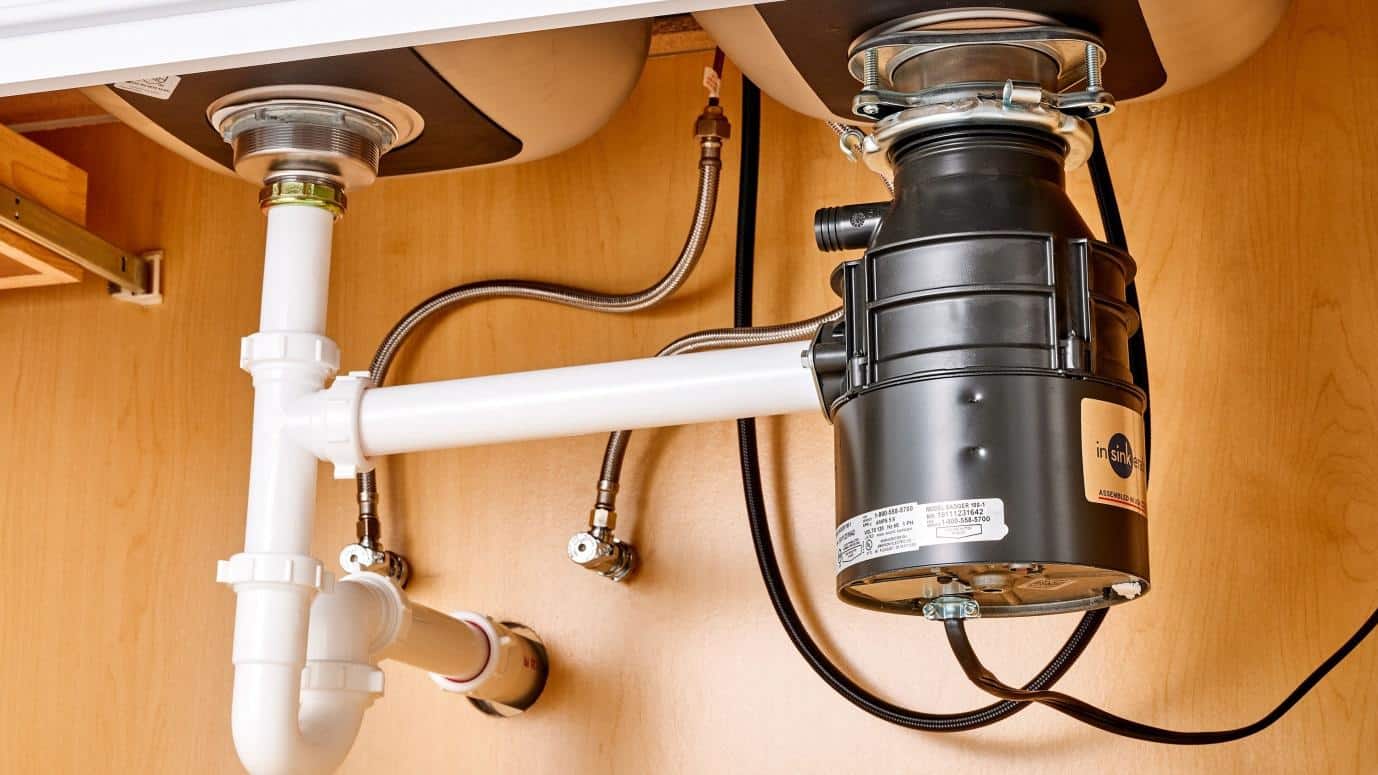
- Connect the P-trap: Connect the P-trap, which is a curved pipe that prevents sewer gases from entering the bathroom, to the drain assembly. Ensure that the P-trap is properly aligned and securely tightened using a wrench or pliers. Pay attention to any instructions provided by the manufacturer for specific connection instructions.
- Check for leaks: Before proceeding to the next step, turn on the water supply temporarily and check for any leaks around the faucet and drain connections. If you notice any leaks, tighten the connections or apply additional plumber’s tape as needed until the leaks are resolved.
By following these steps, you will successfully attach the faucet and drain to the pedestal sink. It’s important to ensure that all connections are secure and watertight to prevent any leaks. Once you have completed this step, you are ready to move on to connecting the water supply lines.
When installing a pedestal sink with wall plumbing, make sure to measure and mark the height for the sink and the location for the plumbing connections before starting the installation. This will ensure proper placement and a smooth installation process.
Step 7: Connect the Water Supply Lines
With the faucet and drain attached, it’s time to connect the water supply lines. The water supply lines will provide the necessary water flow to your pedestal sink. Follow these steps to connect the water supply lines:
- Measure and cut the supply lines: Measure the distance between the shut-off valves and the faucet connections on the sink. Using a pipe cutter, carefully cut the water supply lines to the appropriate length. Ensure that the cuts are clean and straight.
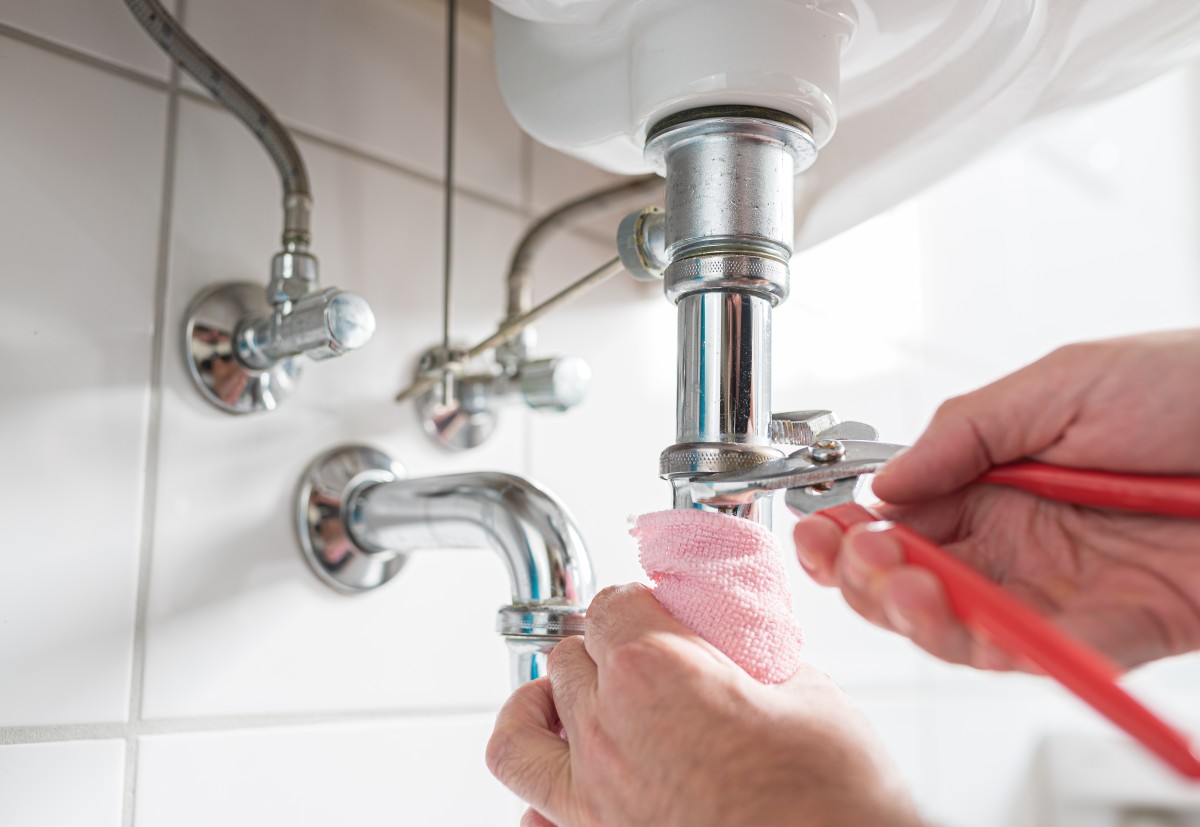
- Attach the supply lines: Connect the supply lines to the shut-off valves and faucet connections. Use an adjustable wrench to tighten the connections securely. Ensure that the hot water supply line is connected to the hot water shut-off valve, and the cold water supply line is connected to the cold water shut-off valve.
- Apply Teflon tape: Before connecting the supply lines, wrap Teflon tape around the threaded ends of the supply line connections. This will help create a tight seal and prevent any leaks. Wrap the tape in a clockwise direction to ensure that it doesn’t unravel when tightening.
- Tighten the connections: Use an adjustable wrench to tighten the supply line connections. Be careful not to overtighten, as this can damage the connections. Make sure the connections are snug and leak-free.
- Turn on the water supply: Slowly turn on the water supply by slightly opening the shut-off valves. Check for any leaks around the supply line connections. If you notice any leaks, tighten the connections further or apply more Teflon tape as needed.
By following these steps, you will successfully connect the water supply lines to your pedestal sink. It’s important to double-check for any leaks and ensure that all connections are secure before proceeding. Once the water supply lines are connected and functioning properly, you can move on to securing the sink to the wall.
Step 8: Secure the Sink to the Wall
Once the faucet, drain, and water supply lines are connected, it’s time to secure the sink to the wall. This step is essential for the stability and support of the pedestal sink. Follow these steps to secure the sink to the wall:
- Locate the mounting holes: On the back of the sink, you will find pre-drilled mounting holes. These holes are intended for securing the sink to the wall.
- Position the sink against the wall: Align the mounting holes on the sink with the mounting bracket that you previously installed on the wall. Carefully set the sink against the wall, ensuring that it is level and centered.
- Insert screws or bolts: Insert screws or bolts through the mounting holes on the sink and thread them into the corresponding holes on the mounting bracket. Use a screwdriver or appropriate tool to tighten the screws or bolts securely.
- Double-check the level: Use a level to ensure that the sink is still level after securing it to the wall. Make any necessary adjustments by loosening or tightening the screws or bolts.
- Verify stability: Gently test the sink to ensure that it is stable and doesn’t wobble. If you notice any instability, adjust the screw or bolt tightness until the sink is secure.
By following these steps, you will successfully secure the sink to the wall. Properly securing the sink not only provides stability but also prevents any movement or damage over time. Now that the sink is securely in place, it’s time to make the final adjustments for a perfect installation.
Step 9: Make Final Adjustments
Now that the sink is secured to the wall, it’s time to make final adjustments to ensure everything is in place and functioning correctly. Follow these steps to make the final adjustments:
- Check the alignment: Take a step back and visually inspect the sink to ensure it is properly aligned with the surrounding elements in your bathroom. Adjust the position if needed to achieve the desired aesthetic look.
- Tighten all connections: Go through all the connections, including the faucet, drain, and supply lines, and make sure they are securely tightened. Check for any leaks or loose connections and address them if necessary.
- Test the faucet and drain: Turn the faucet handles on and off to check for proper water flow and functioning. Check the drain by running water and ensuring it drains properly without any clogs or backups.
- Clean up: Remove any protective coverings or towels from the sink area and give the surrounding area a thorough clean to remove any dust or debris that may have accumulated during the installation process.
- Double-check for leaks: Turn on the water supply and check again for any leaks around the faucet, drain, and supply line connections. If you notice any leaks, tighten the connections further or apply additional plumber’s tape as needed.
By following these steps, you will ensure that all components of your pedestal sink are properly adjusted and functioning as intended. Taking the time to make these final adjustments will help to avoid potential issues and ensure a successful installation. Once you have completed these adjustments, it’s time for the final step.
Read more: How To Install New Sink Plumbing
Step 10: Test the Sink and Check for Leaks
After completing the installation and making all the necessary adjustments, it’s crucial to thoroughly test the sink and check for any leaks. Properly testing the sink will ensure that it is functioning correctly and prevent any potential water damage. Follow these steps to test the sink and check for leaks:
- Turn on the water supply: Fully open the shut-off valves to allow water to flow to the sink.
- Run the water: Turn on the faucet and let the water run for a few minutes. Check for any leaks around the faucet, supply lines, and drain.
- Monitor for leaks: Carefully inspect the area around the faucet, supply lines, and drain for any signs of water leakage. Look for any drips, puddles, or moisture that may indicate a leak.
- Check the drain: Fill the sink with water and then release the stopper to drain the water. Observe the drain to ensure that it is functioning properly and draining efficiently without any clogs or backups.
- Inspect the connections: Check all the connections, including the faucet handles, supply lines, and drain assembly, for any signs of looseness or leakage. Tighten any connections as needed.
- Re-test: Repeat the testing process to ensure that any adjustments made are working effectively and that no new leaks have developed.
It is important to take your time during the testing phase to thoroughly check for any leaks or issues. Addressing any leaks or problems promptly will prevent potential water damage to your bathroom and ensure the long-term functionality of your pedestal sink.
Once you have completed the testing process and are satisfied that everything is working correctly without any leaks, congratulations! You have successfully installed your pedestal sink with wall plumbing. Enjoy your newly installed sink and the enhanced functionality and style it brings to your bathroom!
Conclusion
Congratulations on successfully installing a pedestal sink with wall plumbing! You have transformed your bathroom with a sleek and space-saving fixture that adds both style and functionality. By following the step-by-step guide outlined in this article, you have gained the knowledge and confidence to tackle this project with ease.
Throughout the installation process, you prepared the work area, shut off the water supply, removed the old sink (if applicable), installed the mounting bracket, positioned the pedestal and sink, attached the faucet and drain, connected the water supply lines, securely fastened the sink to the wall, made final adjustments, and thoroughly tested for any leaks.
Completing each step meticulously has resulted in a professionally-installed pedestal sink that not only enhances the overall aesthetic of your bathroom but also improves its functionality. The space-saving design and elegant appearance of a pedestal sink make it an excellent choice for smaller bathrooms or for those who wish to create a statement piece in their space.
Remember, always exercise caution and consult a professional if you are unsure about any step or if you encounter difficulties along the way. Safety and accuracy are of utmost importance when working with plumbing fixtures.
We hope that this comprehensive guide has provided you with the necessary information to successfully install a pedestal sink with wall plumbing. Enjoy the satisfaction of a job well done and the benefits of your newly installed pedestal sink. May it bring you many years of stylish and functional use in your bathroom.
Frequently Asked Questions about How To Install A Pedestal Sink With Wall Plumbing
Was this page helpful?
At Storables.com, we guarantee accurate and reliable information. Our content, validated by Expert Board Contributors, is crafted following stringent Editorial Policies. We're committed to providing you with well-researched, expert-backed insights for all your informational needs.


0 thoughts on “How To Install A Pedestal Sink With Wall Plumbing”